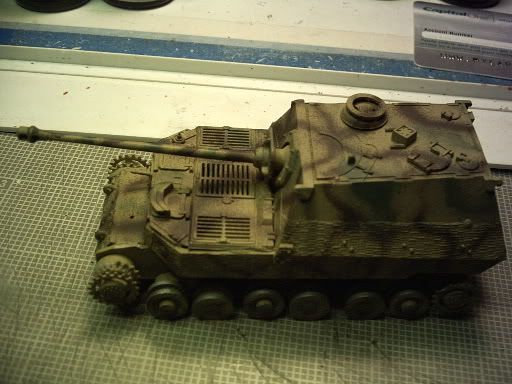
Well, here they are. Pictures of my Elefant with camo applied. I’m not paticularly happy with the way it came out. I wasn’t brave enough to try the giraffe-looking type, nor am I able (yet) to get the small squiggles like in Dragon’s painting guide with my airbrush. I’m just chalking it up to a first timer’s attempt at camoflage. I’m hoping that with a bit of weathering the mistakes won’t be so obvious.
I can only post thumbnails through fotopic. If you click on the link in my sig it will take you to my photo gallery.
BTW thanks for the kind words everyone. I guess I’m just being hard on myself. Well, off for a coat of Future (on the model).
Hey ho, Everybody! Great building this weekend, all of you. All of them are looking great.
I got a bit more done on the 1/72. I used my Pasche VL to paint the rottbrun and grun “squiggle” camo on it and really hate the way it turned out. I got MAJOR spatters from it. I was using a #3 tip, so maybe I’ll reshoot it with dunkelgelb then change to a #1 tip and try again. Otherwise, I’ll just try to clean it up a bit and future it, then decal the beast. I’ll try to get some pics taken at lunch and post them this afternoon.
Happy B-Day Mrs. T!! Thanks for letting Eric play!
I am not sure if this has been brought up yet, but DML calls for 109 total links on each side. the A/B/AB order for the guide horns wil not work out. There should be two links with the guide horns next to one another.
I just received my copy of the Schwere Panzerjager 653 book and looked at all of the pretty pictures and there are a few pictures where you can see the two links next to one another. None of the line drawings show this I was doing very little work on my model until I got this reference book.
I also see pictures of zimmerit applied to fenders, atleast to the front fenders.
There are some pictures on the Berge-elefant and the optional equipment on them, like the wooden wine cask tied next to the drivers view slot.
This unit made some interesting vehicles of their own on the Eastern front, T-34’s with quad 20mm AA guns, Bergepanther Ausf D’s with quad 20mm AA guns and PanzerIV turrerts mounted on them, the only VK4501 Tiger I (Now a DML & Italeri model) and an assortment of captured Russian equipment they modified & used. Also atleast one US ARMY M-32 AVR
Don’t be to hard on yourself Pete! Your Elefant looks pretty darn nice, and for a first time attempt at airbrushing camo, I’d say you’re on the right track. The pattern and colors look great. It looks like you’re still working out the bugs on your distance, and pressure when shooting your pattern, but it all comes with experience. Some weathering, and a little drybrushing will likely help make a difference, but you should give yourself credit for a bold shot at a tough scheme. Semper Fi, mike
Okay, guys. As promised (threatened!!), here are a few shots of the 1/72 Dragon Armor Pro:
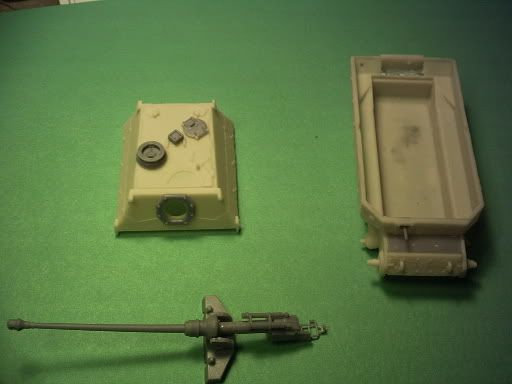
The major parts. The light stuff is the ATAK resin kit, the dark from the DML:
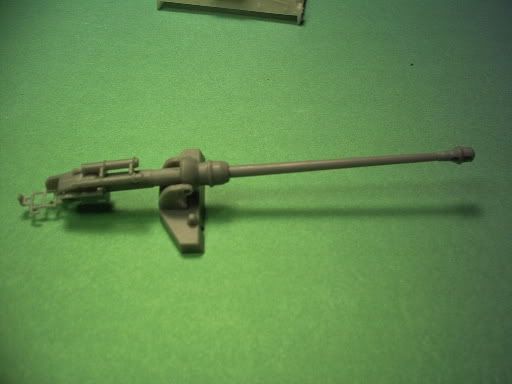
The main gun. It’s really way too bad this gets totally hidden in the build!
My sorry nosed paint job. Notice the terrible splattering. Really bad. Not sure exactly what’s causing that!
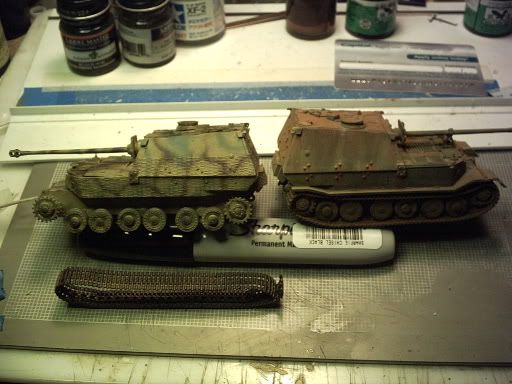
Here are both the ArmorPro (with the ATAK Zinmmed hull) and the DML first version Elefant, with a lot of rust showing. Probably too much, in fact. I’ll have to tone a little of it off.
Nice job on those little guys. I just picked up the Dragon Pro kit with the extra rubberband tracks. I plan on usig them on the Trumpter kits i have. THe trumpter kits track links were completly unworkable. Also if you are interested i could post some pictures on my method of fixing rubberband tracks so they sag appropially. Hint, it requires no drilling or otherwise hard work on the tank., If you can measure, you can do it.
Have to get back to my Tamiya 1/48 scale sherman.
Bill
Check out http://matt24.fotopic.net/c445765.html
Are you talking about part# E5? The above pictures show where I put it. Although I haven’t done the tracks yet. It’s just what the picture on step #6 looked to me [guessing} on the “drivers side” E5 in the instructions.
Bill, great work ! Brail scale kills me.
[?] Question; I’m going to leave the barrel lock down. Part #C1 [step22] will lay down to the front. I assume part#C4 also lays to the front. Does this seem right?
Not only did I lose my wedding ring on Saturday somewhere in the house (with the obvious consequences), but the compression valve for my new airbrush/compressor was taped to the inside of the compressor box… doh! [B)]