Edward Hopper: House by the Railroad in 1:48 (start to finish)

Aw C’mon;

That is Franklin Mint? I didn’t know they made them that small! Gotta tell you a funny. What would call a place where you pay for parking in a lot? There is a place not far from the Museum Building where they have to pay for parking. Many ask " Where do you pay for Parking?" And they are standing right next to the machine Clearly labeled KIOSK! LOL.LOl.

Well now you can pay for parking in my little town since the machine is installed.

And another view…

I also placed the first WM Dumpster behind the appliance store after I gave it a coat of DullCoat to seal the decal.

As precise and finicky building the House, putting on ground cover is the exact opposite. It’s sloppy, crude, rushed and very inprecise. I really see it as a necesary evil and I’m not very good at it. But regardless, it’s very forgiving and things in nature aren’t that precise in the first place.

The rushed part is the way the process works. I did the base under the house first and then did the socket on the layout. When I bring the two together I will add some more cover at the seam so the House will look like it part of the terrain. I used some medium tan house latex paint as the base coat. While it’s really wet I sprinkle the various colors and textures of the ground cover. I used fine turf for the groomed grass and coarse turf elsewhere. When I said “rushed” it’s becasue the latex starts drying quickly and stops being sticky enough to hold the material. I then used “wet water” (water, a few drops of dish detergent and some IPA) with a pippette dropper and then follow up with Woodland Scenics Scenic Cement also applied with a pippette. The problem I had was not matter how smoothly I laid down the ground cover, nor as gently as I added the droplettes, I still pushed the “grass” outwards that left little blank craters. The more you mess with it the worse it gets. So you keep wetting and adding more stuff until all the gaps are sort-of filled.

I have a hairpin fence that’s going on the house boundary and I have some garden goodies (shown further down the page). I started to add undergrowth and bushes, but quickly realized that I had to wait for all the previously applied stuff to fully dry so I could use the heavier viscosity W-S Scenic Glue without messing up the grass. I’ll do that tomorrow.

Here’s another view.

The above was shot when there was still a lot of wet glue around.

I then did the same thing to the socket. I ran the ground cover into the existing terrain and feathered it so it won’t look like it’s just plopped there. I also vacuumed off all the debris and redid the track ballasting that was very disturbed during all this work. I have some more ballast work on the top right corner.

The aisle view shows some bare plaster on the very front edge of the grass. I will have to retouch those areas, leaning far over the layout and working backwards.

Like any construciton site with existing “old” trees, they can get disturbed and the one on the left is just about shot. I will have to cut it down and replace it. I bought some garden stuff from Scenic Express that will go in at the end. I bought roses, forsythia, and some violets. The roses are tall and I’m afraid that I might have to craft some trellises. We’ll see how it goes.

Hi;

You could use Woodland Scenics Trellises or just take some Boxcar roof walks and cut them up and stand vertical in the line behind the garden!

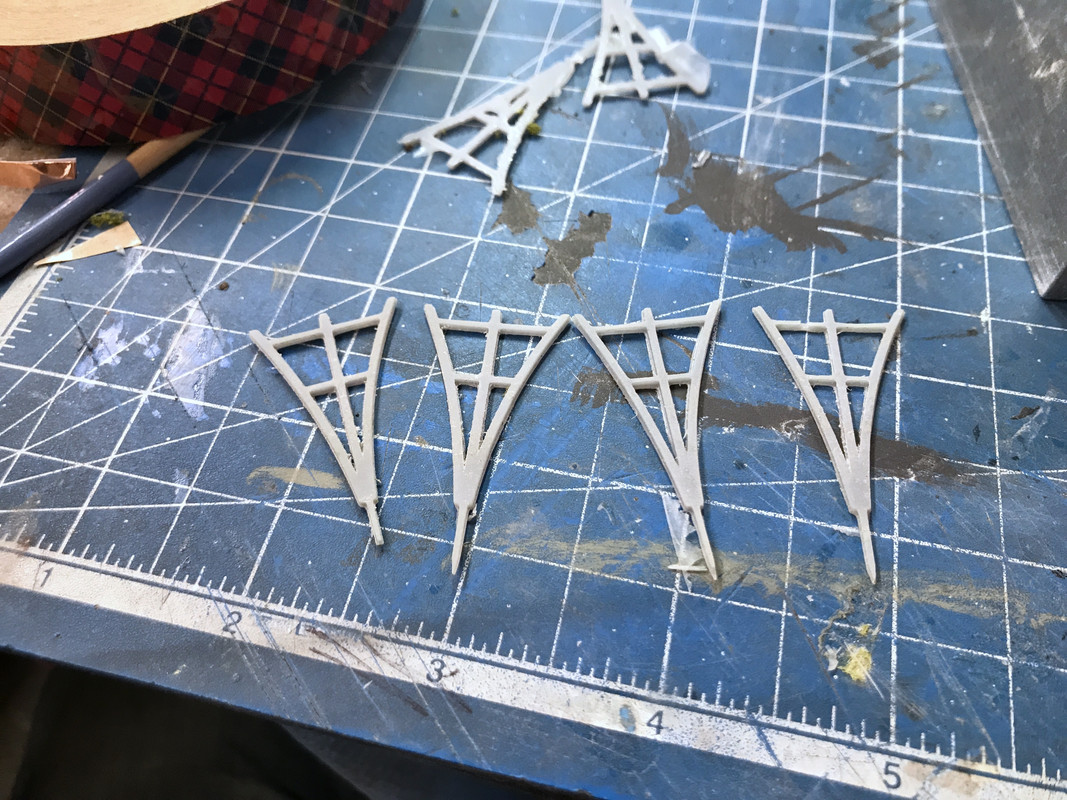
All good thoughts. However, with SketchUp and a 3D printer, I took literally a few minutes, drew a trellis, and printed it. The print took all of 15 minutes. Took longer to clean it up than it did to print them. The design was very simple so drawing time was very quick.

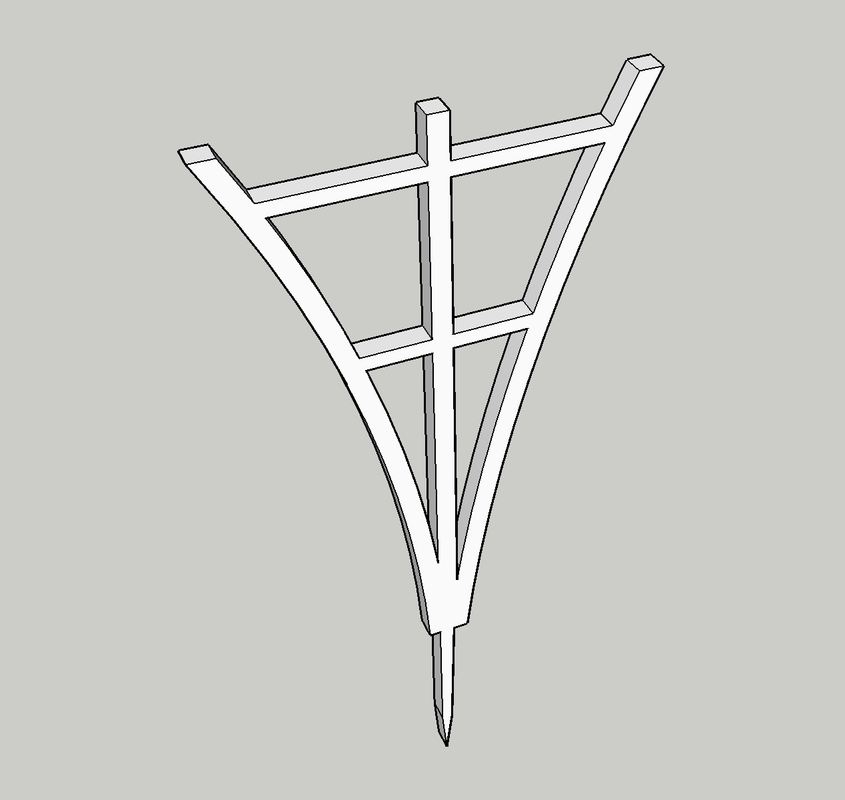
Here are the printed parts during the cleaning process.

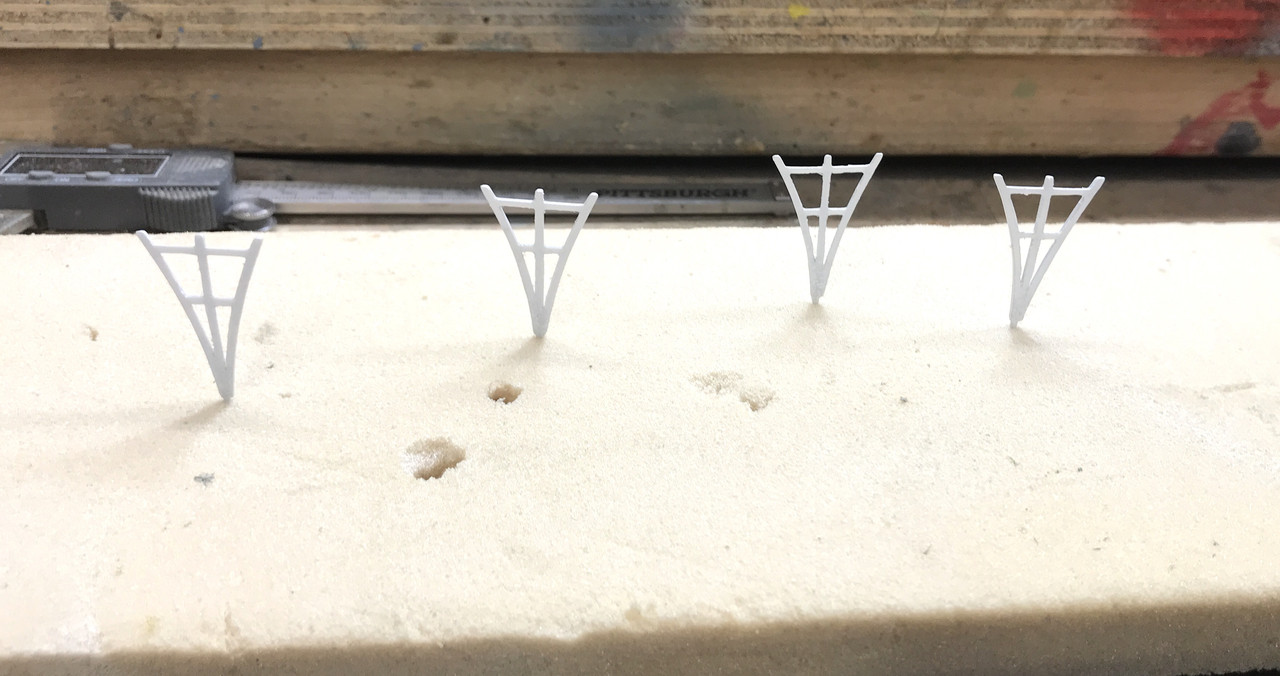
I simply stuck them into some floral foam and shot them with Krylon Gloss White and they were done.

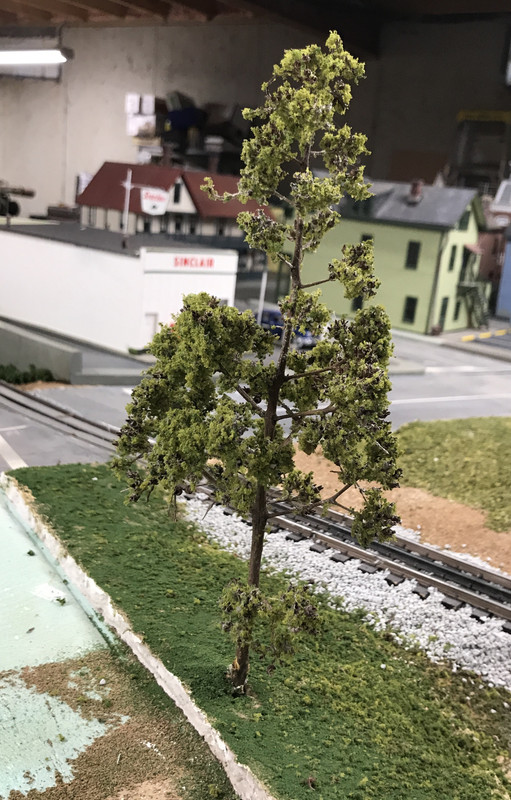
I had trimmed some dried Oak Leaf Hydrangia blossoms a couple of years ago thinking I was going to turn them into trees. They had a pretty good shape and could either be deciduous or evergreen. I was discouraged since I thought I have to remove all the little un-opened blossoms before flocking them, so they just sat on a box on the floor. I was going to throw them out in my cleaning spree, but after looking at their shape again, didn’t toss them. Then today I realized that those un-opened blossoms would serve as more surface area to glue the flocking.

I had to clip the dried actual blossoms, but left all the un-opened ones. I then sprayed them with the 3M-99 and dipped the branch into a pile of medium and dark green coarse turf and the results were pretty decent. Of the pile of branches that I have, most had a pretty severe bend in the top branches, so I didn’t use them. The bush has a bunch more dead blossoms and I’m going to collect them. They have a good branching structure that’s better than the W-S plastic trees, AND THEIR FREE.

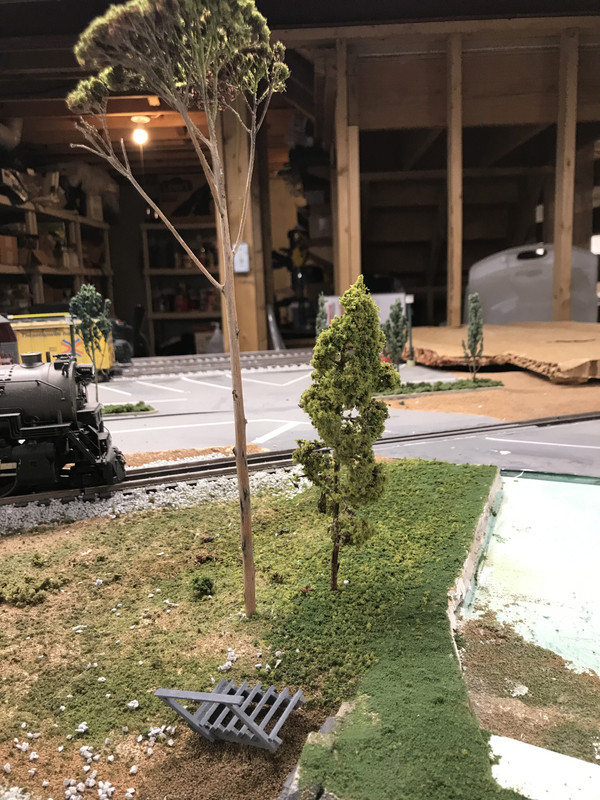
The other one is smaller so I put it near the other existing tree. Incendetally, I simply pulled the old tree out and inserted the new big tree in the same hole.

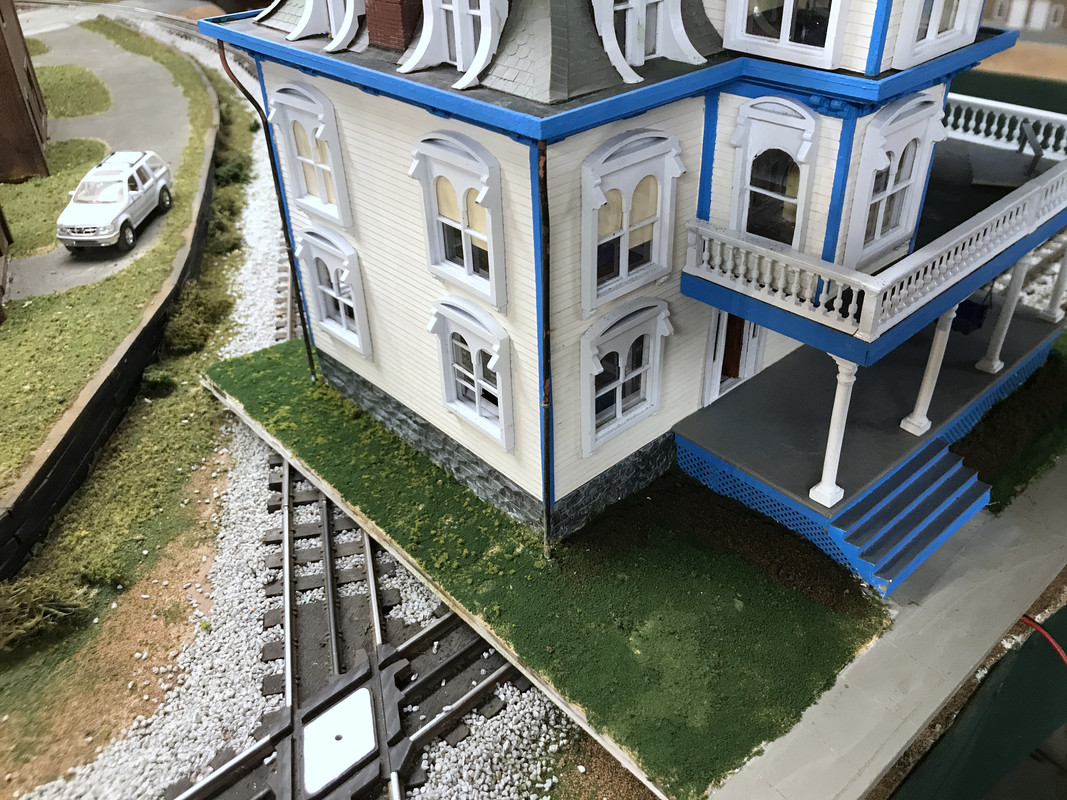
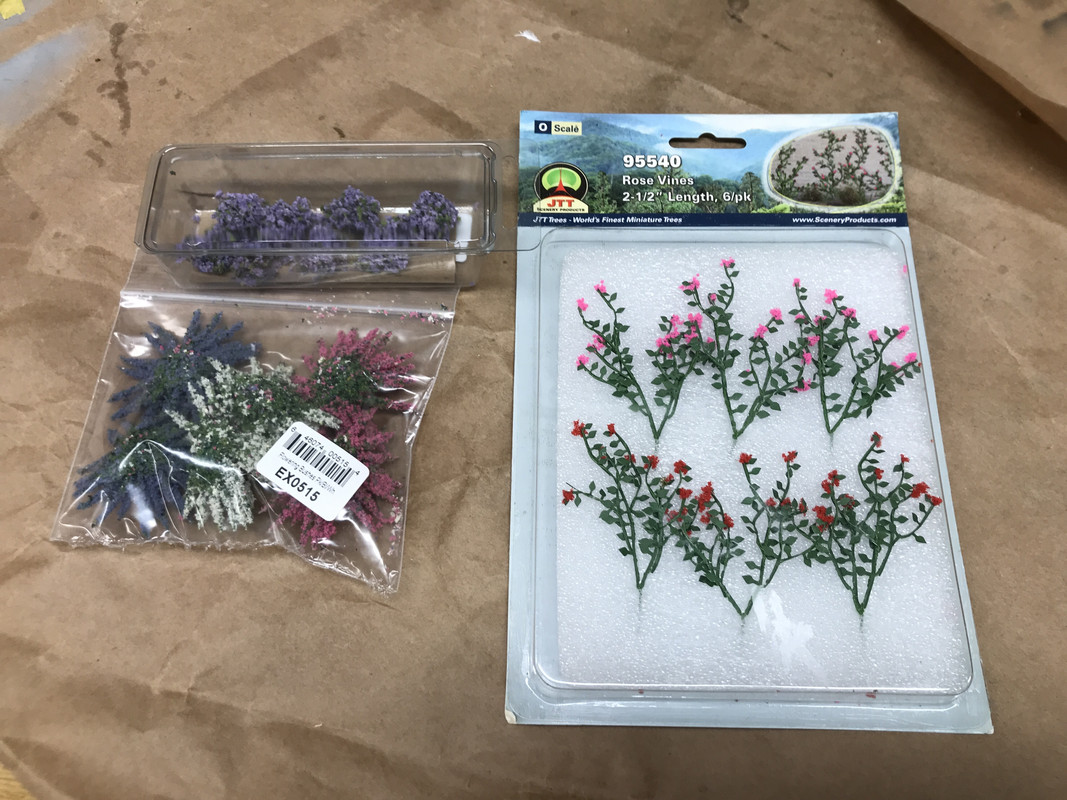
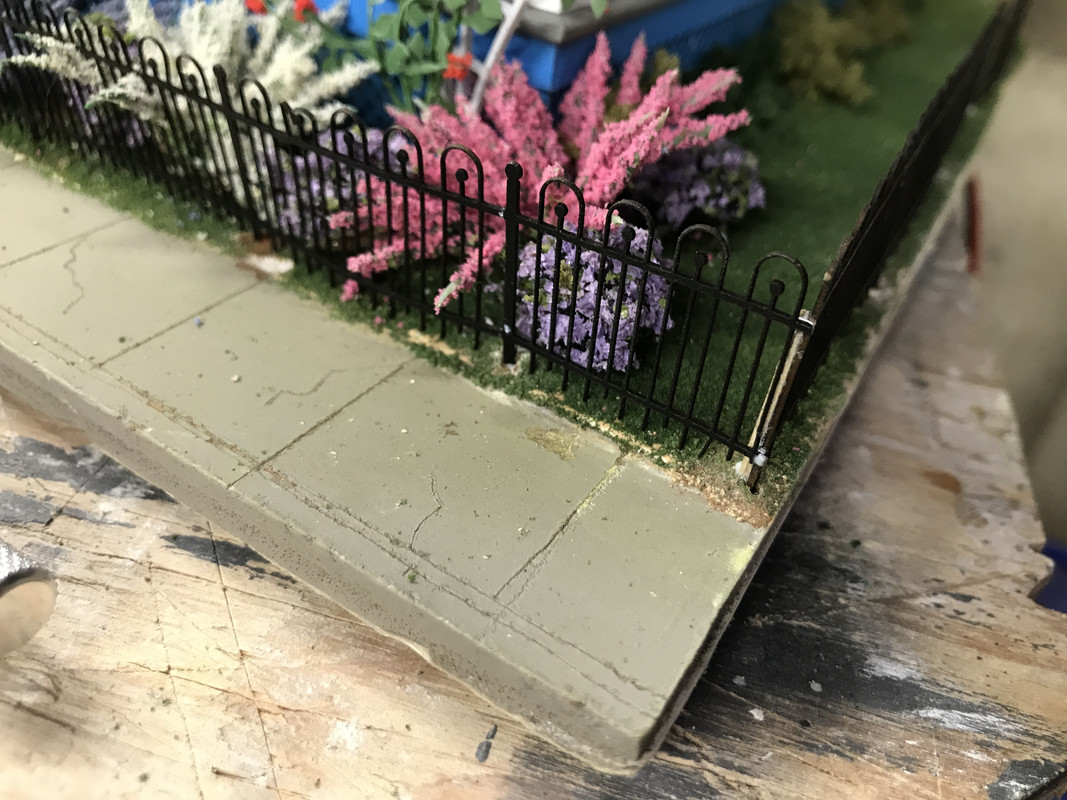
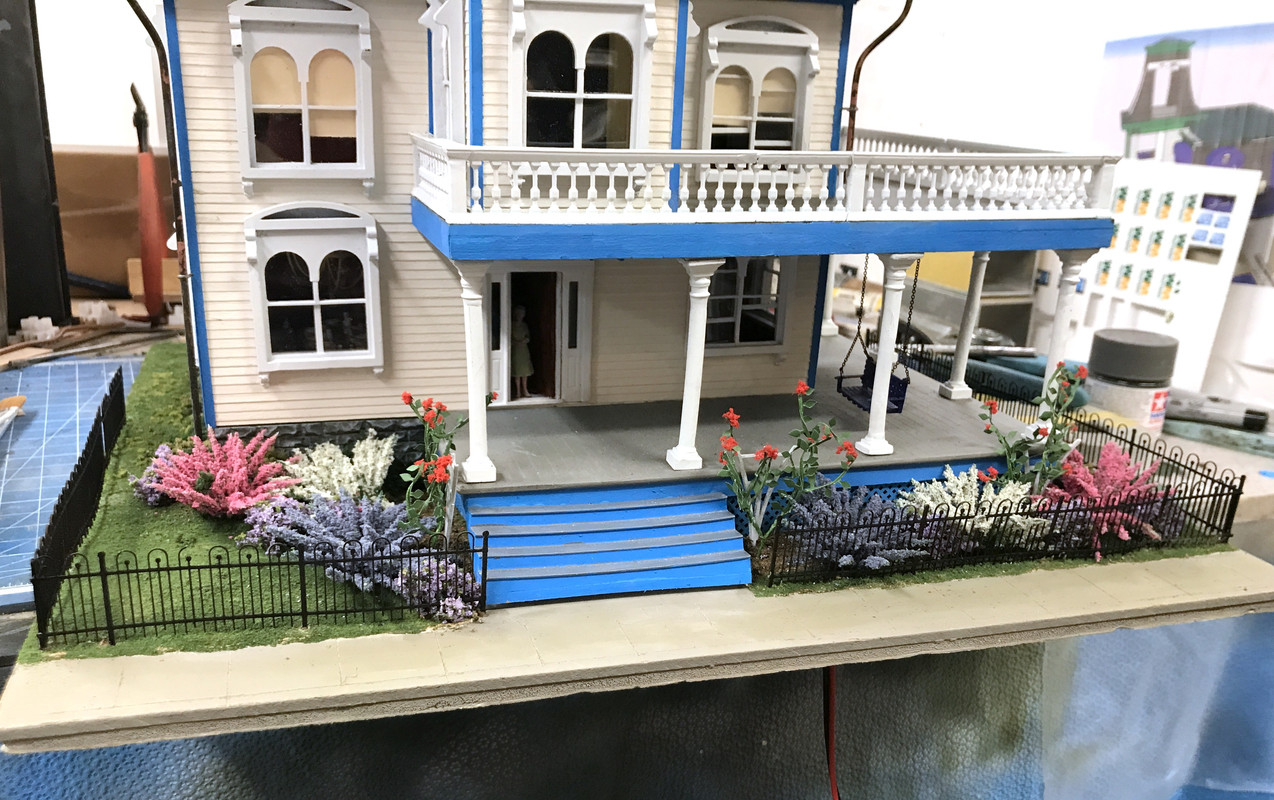
With yesterday’s ground cover nice and dry and I added all the garden flowers. I laid down a glob of W-S Scenic Glue and placed the plants in nice places. Then I went around the two sides and placed W-S undergrowth in alternating colors around the foundation.

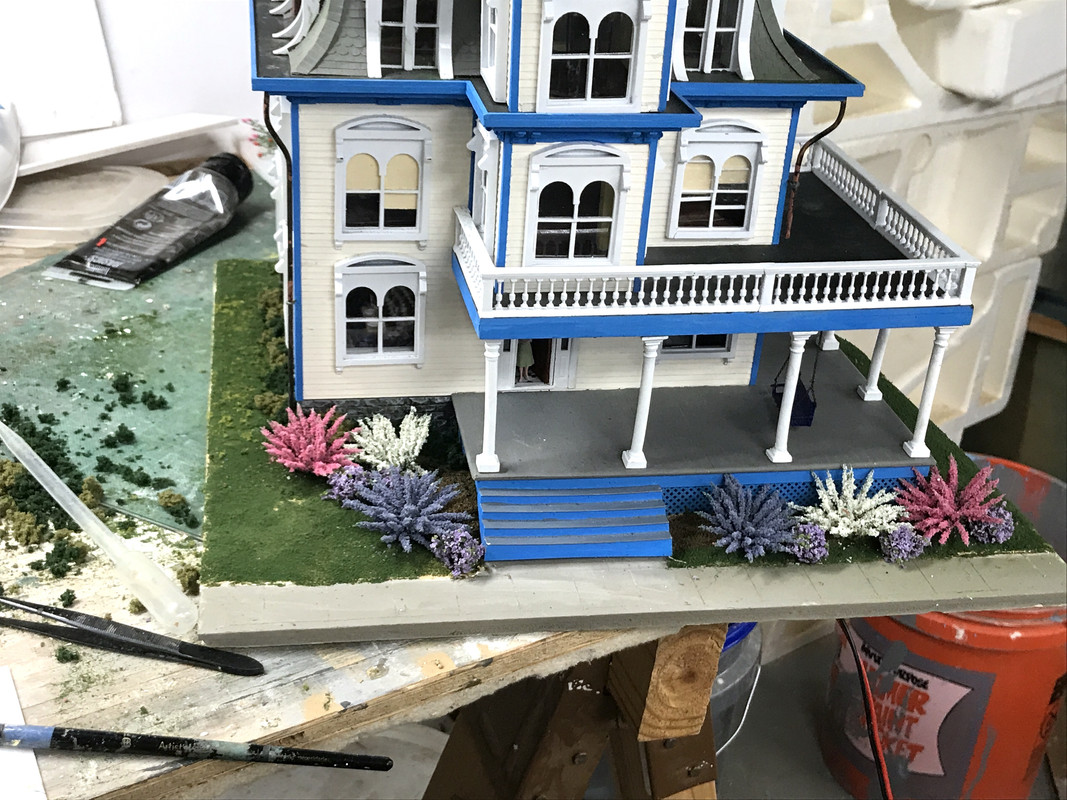
It was time for the roses. I used a #53 drill and pin vise to drill two holes; one for the trellis and ther other for the roses. Another blob of glue and they were in. I needed my phone light to see the holes through the ground cover that wanted to fall back into the holes.

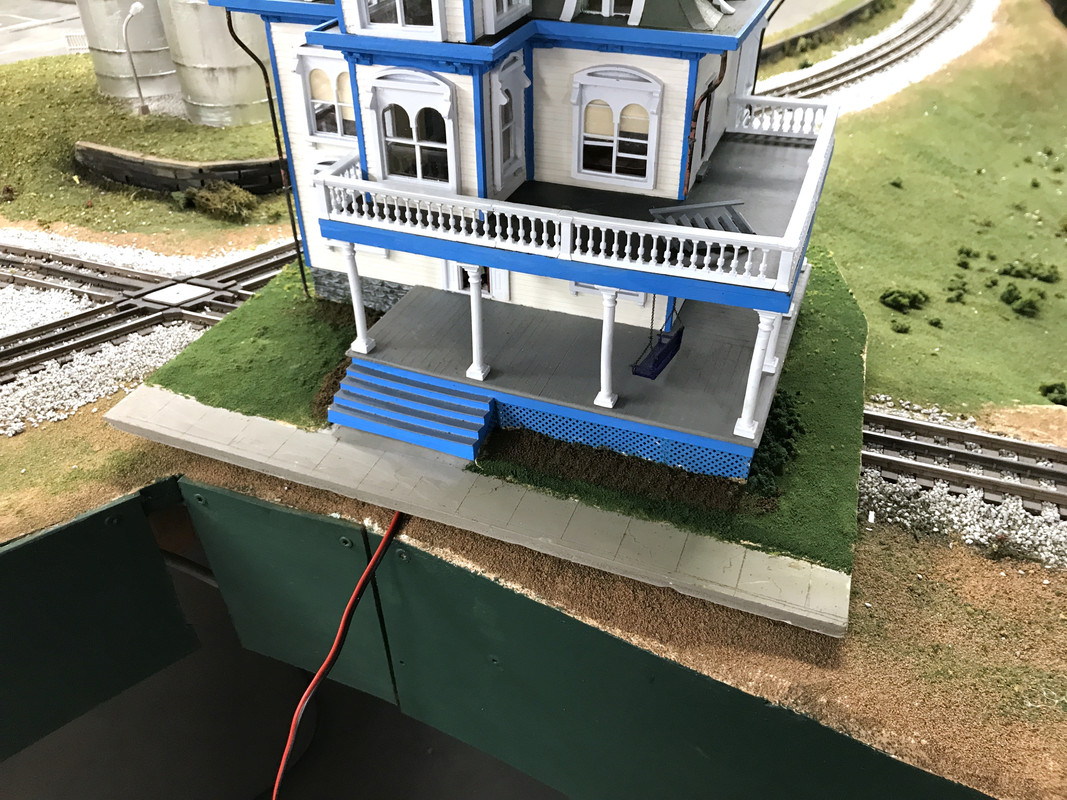
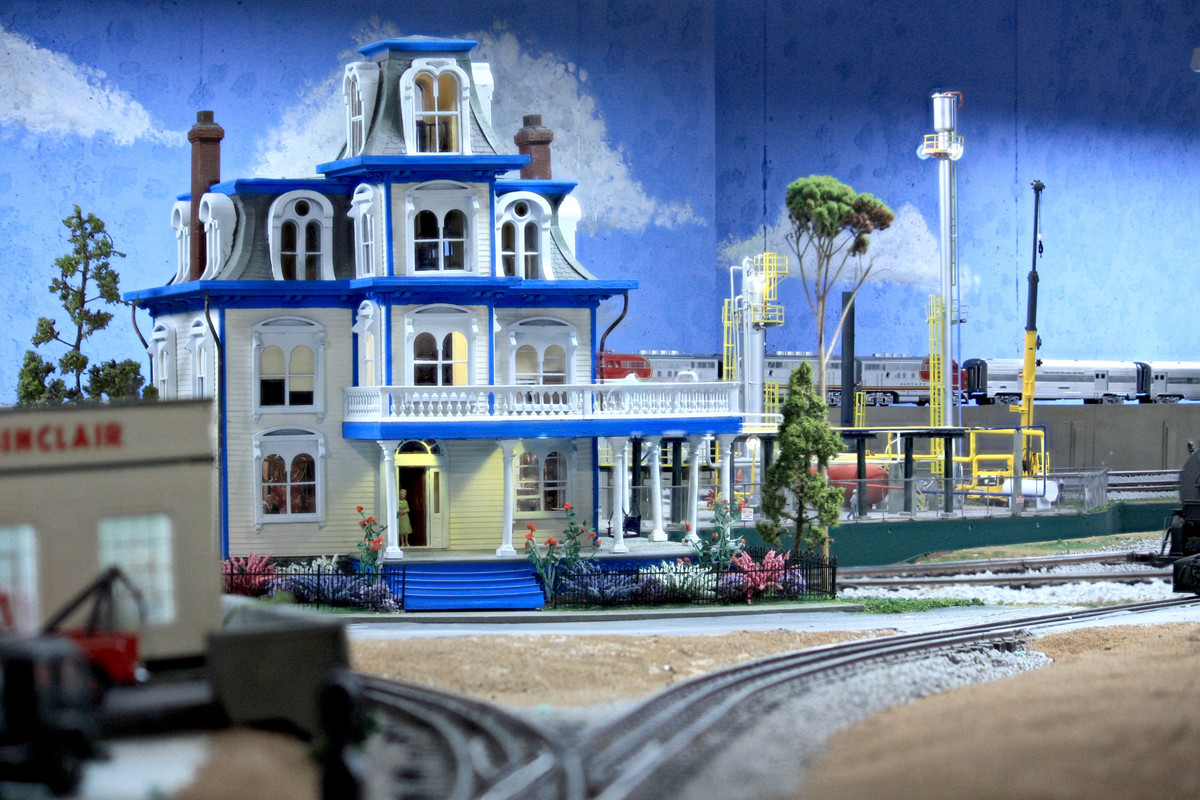
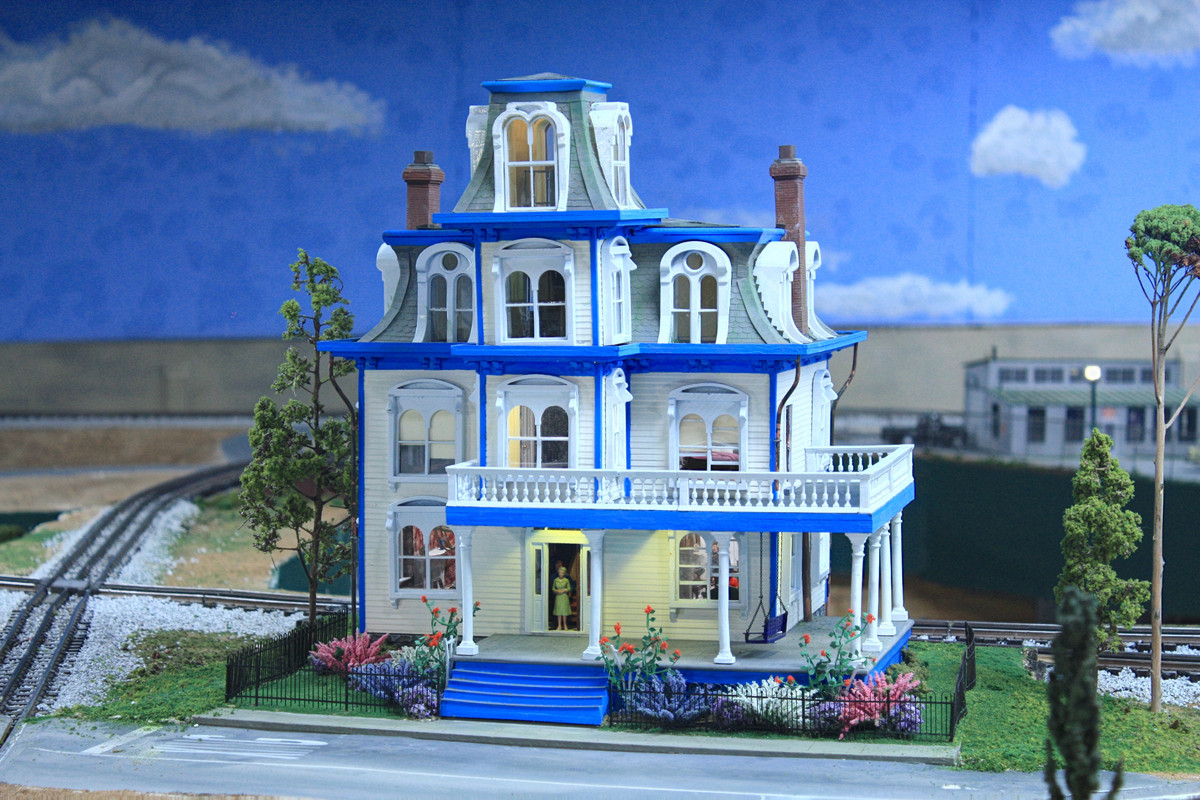
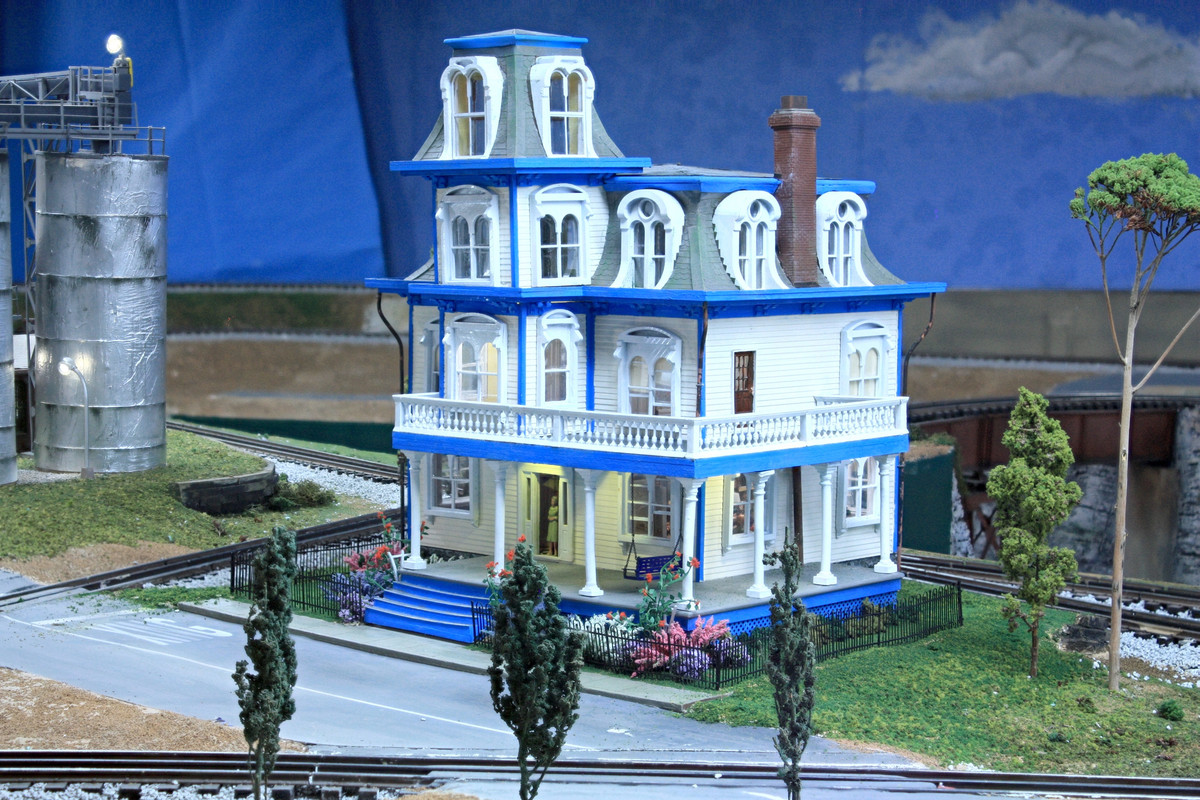
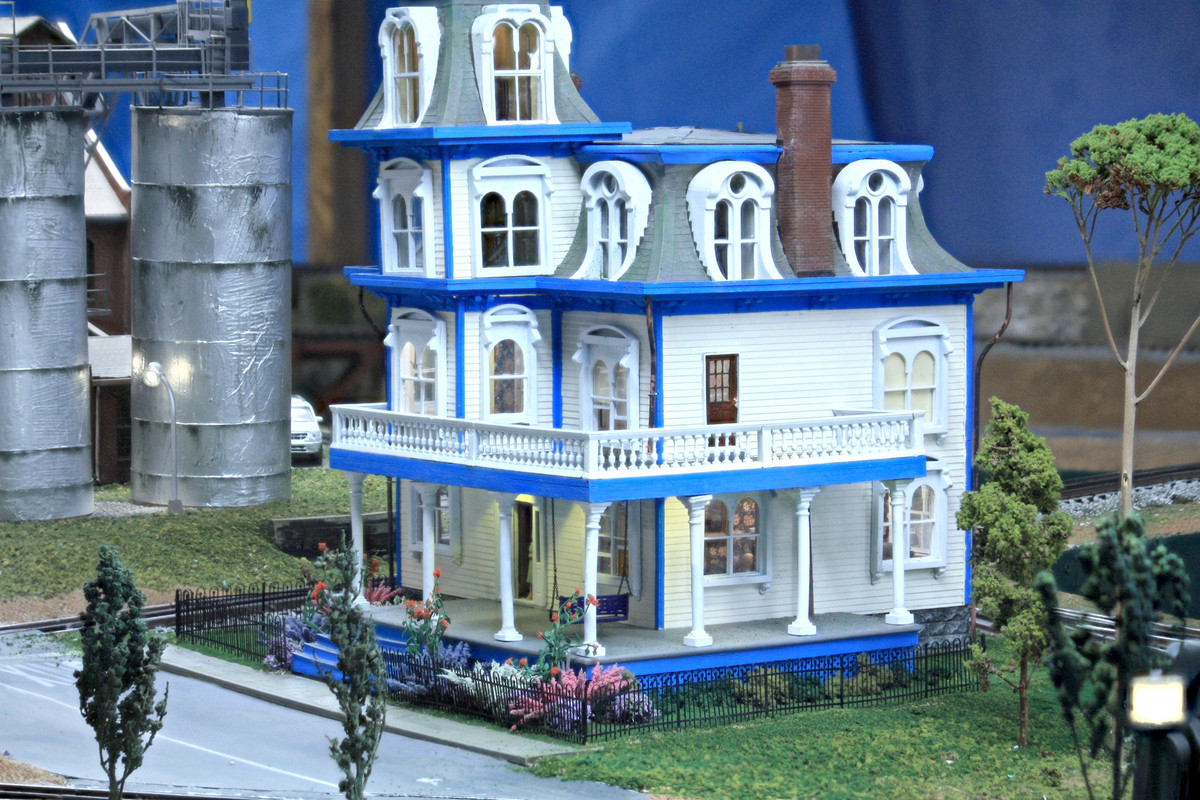
I placed the house back into the socket to take a status shot, but it’s not fitting quite right and I’ll have to remove it tomorrow and do a little more shaving. Some of the spackle found its way into the socket tightening up the fit a tiny bit.

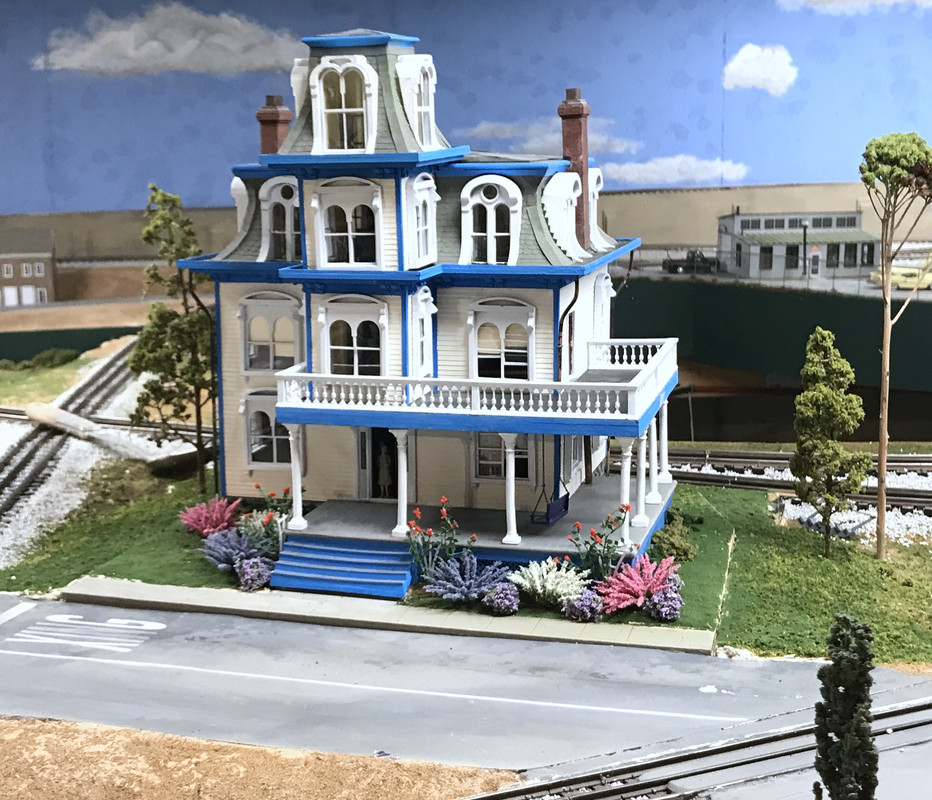
When it’s fully seated it’s going to look really good.

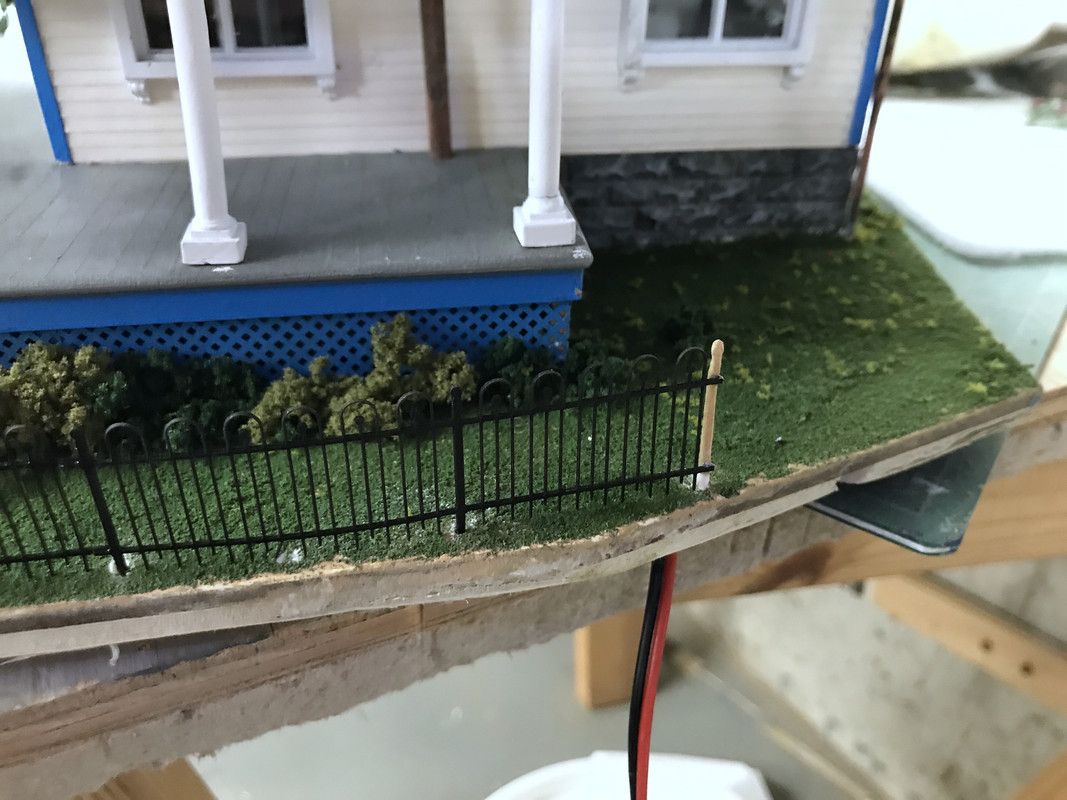
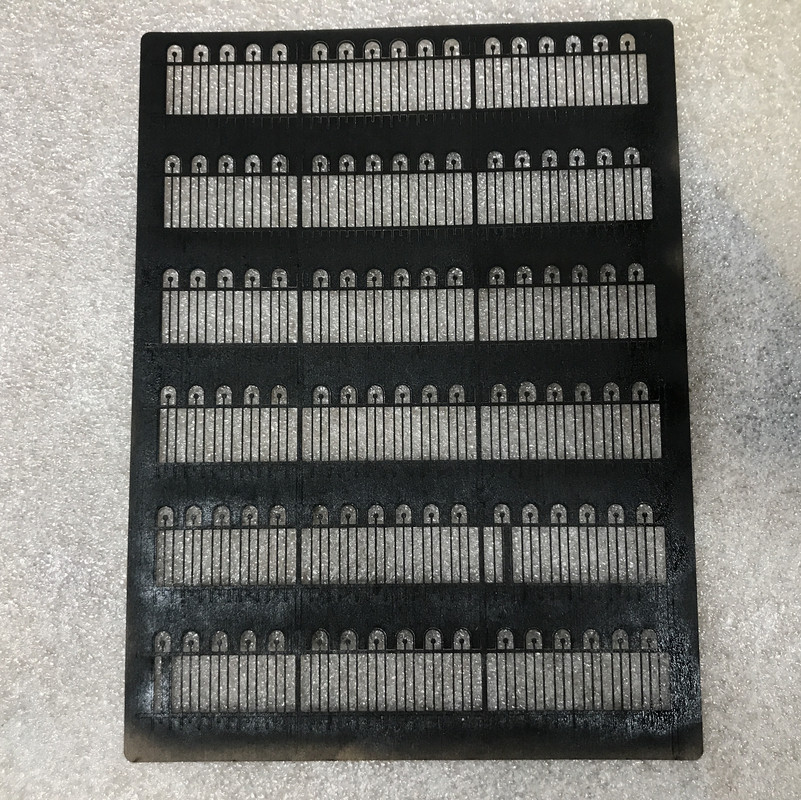
I painted the laser-cut hairpin fencing while still in its fret. I airbrushed it with gloss black.

After clipping them out of the fret, I made a dilling jig to simplify the field work.

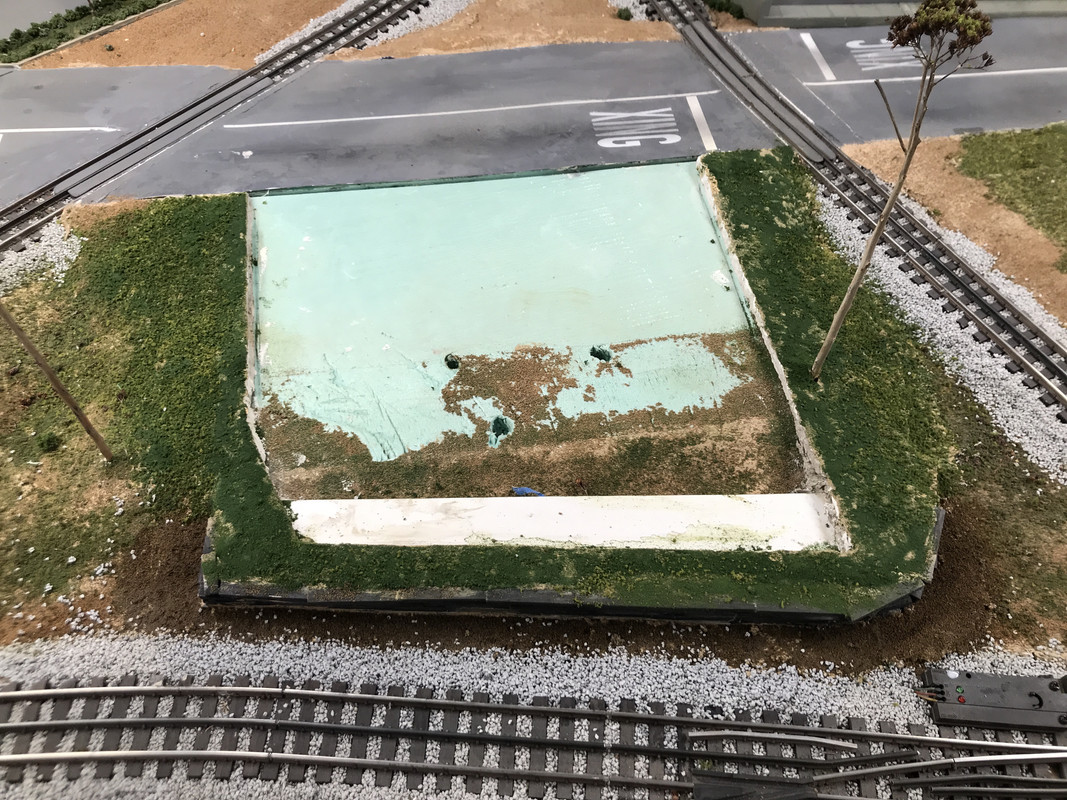
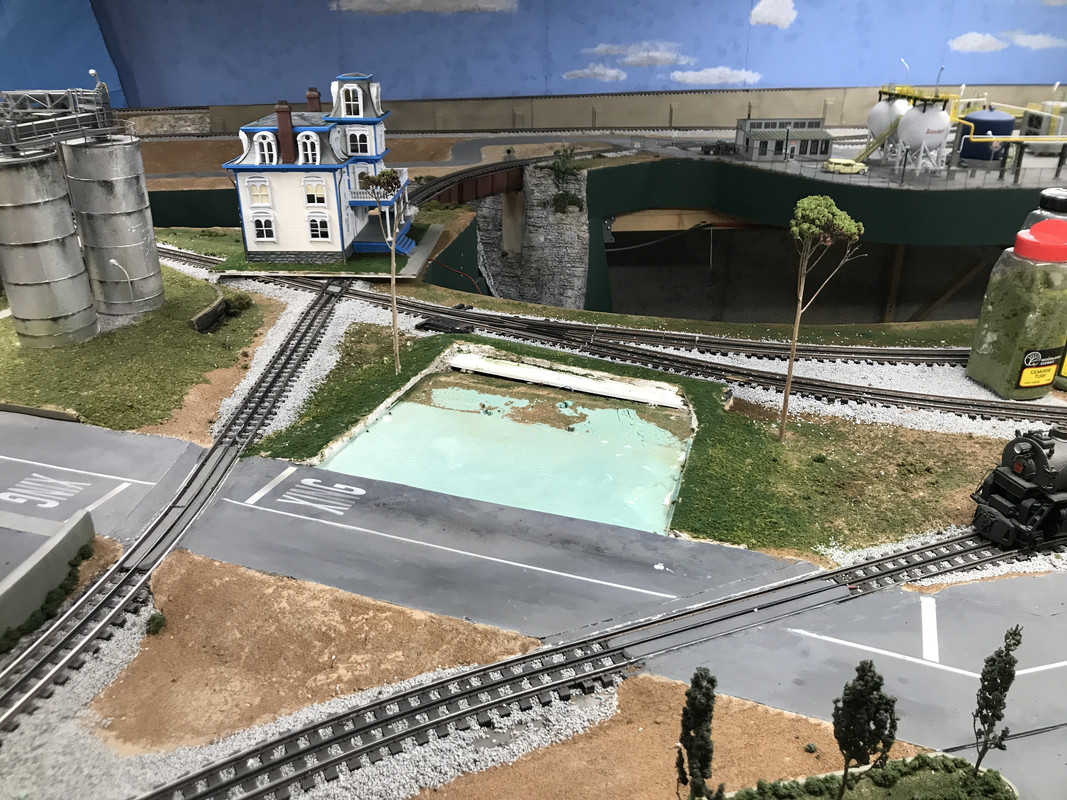
This is why I had the #53 drill in the pin vise. It the clearance hole for the fence posts. Here’s the pile ready to install tomorrow. The distance from the steps to the left edge is exactly two fence sections. I don’t know that the length is going towards the right.

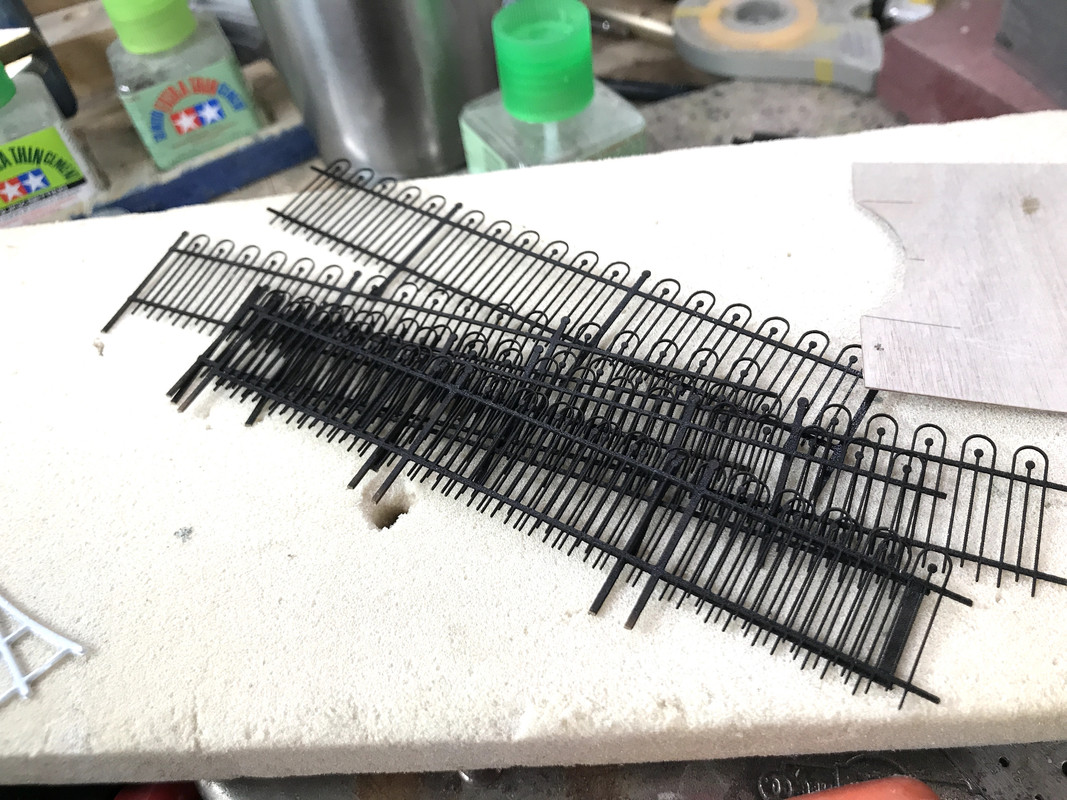
I’ll fit the fence tomorrow when the House is off the layout. I’ll have to be careful putting it back in the socket, which is another reason why I need more slop in the socket. I don’t want to force anything. Once it’s finally in the socket, I clean up the joint gap, hook up the lighting power underneath and the HOUSE PROJECT WILL BE DONE.

Today, the House by the Railroad project is complete. My original project plan had completion on January 6. I’m exactly one week late. The new owners will be gracious and accept their house. The power was turned on today so they got their CofO.

Before the house could be turned over to the owners I had to finish up the fence installation, clean up the landscaping, fit the base into the socket and then landscape the joint. All was completed.

The trickiest part of fence installation was connecting it at the corners. Since this was laser-cut out of laser board it was effectively a two dimensional affair. This left the corners very insubstantial with effectively no gluing surface. I had to thicken the corners and create and end post since the sections had an end-post on one end, but none on the other. I used some thin strip stock which I doubled, used med CA to glue together and then re-shaped the mounting tab so it conformed to my #53 drilled holes. After assembling the fence I re-painted all this gloss black.

This was what the corner post looked like prior to touch up painting. The flowers had to protrude through the fencing, which took some careful manipulation with a tweezers to coax them through the fence bars.

After installing all the fencing which I had (as I noted yesterday, there was enough for the perimeter) I went back and touched up the landscaping at the edges in preparation for reinserting into its socket.

Here’s a shot with all then fencing installed and re-painted. I did this work in the shop on my normal workbench.

I had to shave some spackle out of the socket area and sanded the house base to taper it a bit from the bottom layer upward so it fit more easily. It dropped in! Then I had to fill the gaps. I think I erred here. Some of the scenic cement got into the joint and it will effectively glue the house base into the socket making future removal difficult. I’ll worry about that when I have to worry about that. Since the lights went on perfectly, and none of the furniture or people broke loose in all the manhandling, I won’t have to pull it up for a long time. Probably when I’m gone and my wife or kids want to sell it all off.

So let’s start with the only final rear view I made with the iPhone. I made most of the final pictures with my Canon using Zerene Stacker Depth-of-Field enhancement software. I added the steps which crosses over the socket gap. I also re-touched the RR tie retaining wall. The seam is effectively hidden on this view. I carefully added the scenic cement and sprinkled the ground cover, held with wet water and scenic cement to lock it all in.

Notice that the fence ends 3/4 the way back on the sides. I bought this fencing from River Leaf Models and I don’t think Andre Garcia is currently running that business.

Now for the finished front shots.

I don’t know about you, but it came out looking exactly as I foresaw it in my mind’s eye. I wanted a garden in front, and there’s a garden. I wanted an interior and you can see it from the front, and from the rear you can get really close. You can’t see the dining room from the rear since you’re looking at the kitchen, but you can see it from the front. It was singularly the most complex scratch-build project I’ve ever attempted. It all started being able to draw those Mansard windows. It couldn’t have been donw without 3D capablility… a ton of 3D printing. The interior was a whim that was a load of fun. It’s heavy and miraculously, I didn’t break anything in all the moves I had to make to get it done.

I’m expecting that this will be an upcoming article in Railroad Model Craftsman magazine. No publication date has been given and it could be 2022.

Thank you all for following along. My next project will be the Bradley with BUSK.

Now;

The finished home is gorgeous. Now what are the property taxes set at? After all, I need to be able to move my ever increasing horde of models and trains in there. I must say, following this build, although NOT in a model Rail Magazine is different, it has been a pleasure.

I would love to live next door to you. You need to do a Vessel of Class( A Motoryacht ) of the period in that scale. Boy, could we have fun with that!, I now await the sound of the lonely steam engine whistle in the background! GREAT JOB my friend!!!

Thank you! I asked about where in FSM’s forum would I post it and was told to do it in Dioramas. I think it was a good place to do it. There’s really no difference between making a scale model vignette and building a reasonably scale model railroad.

Model railroading is such a vast hobby encompassing everything from creating a functioning railroad enterprise with timetables, freight bills, etc., all done in replicating a specific railroad in a specific period of time, to a toy train layout running around in circles with a little man popping milk cans out of a freight car. And everything in between.

My railroad is one of those weird hybrids combining scale buildings and scenery with 3-rail track and sort of running around in circles… big circles.

I chose 3-rail becasue it’s just so much easier to wire and run. With a dedicated power rail track cleaning is much less of a big deal. There’s that dedicated spring-loaded roller picking up the power.

With 2-rail, although more scale, power is picked up by a set of wheels on one side of the loco and neutral on the other side. This means that track dirt that normally gets on the wheels can interrupt the power flow. Then there’s the polarity problem. 2-rail is DC so one rail is hot and the other ground. When the track turns back on itself in a reversing loop, the polarity would shift creating a direct short. Therefore; you need to insulate one of the rails as it rejoins the loop. All of this makes 3-rail much more forgiving.

But because I have large curves, I can run big engines. 2-rail curves are always wider than 3-rail, which has it’s lineage back to Lionel O’guage with 31" diameter curves to run around under a Christmas tree. With larger curves available in 3-rail, scale-length engines and cars became available in the 1990s and that’s when I got back into the hobby.

The modern locomotives are all DC. When running on 3-rail AC, they have rectifiers inside to get the DC. And all of them have terrific sampled sound systems with computers equivalent to old IBM 386s. It was those sound systems that got me back in the hobby. I had toy trains as a kid with a permanent layout. I sold all the stuff in 1992 thinking I would never have trains again. In 1995 I got it all started again.

My next plastic job is the Meng Bradley with Busk and full interior. That will be started in a week or so. And I just put this baby on layaway at Scale Reproductions. It intrigued me as it’s rated as the most complete helo kit ever. As I’ve said before, I tend to buy models on uniqueness, complexity, parts count, decal quantity and how big the instruction book is. This one ticks all those boxes. I haven’t built a helo kit since I was a kid in the late 50s. And that’s a long time ago, folks. So stay tuned for a build thread on this one. I’m going to search the FSM Forum to see if any have been posted before me.

I’m partial to kits with interiors and engines and this one has both. I’m going to detail the engine compartment since it’s so much fun. Another reason for this kit was being able to pose it with blades folded. I don’t have room for a 1:35 helo with spread rotors. So stay tuned.

Oh!

You are a modeler like me! I just loved Submarines and other things like Planes where you can take one side and see all the goodies inside. If they don’t have it, I build it! Now I will find out with the TreibFlugel how 1/35 kits other than Armor have come along.

I used to love Bandai’s early 1/48 scale armor. Always a challenge to hide the seam where I opened it up to show the included interiors. Tamiya’s ME-232? I loved thaat it was all clear. You should one .You can see all the greeblies I loaded it with!