EC-121 back on track!

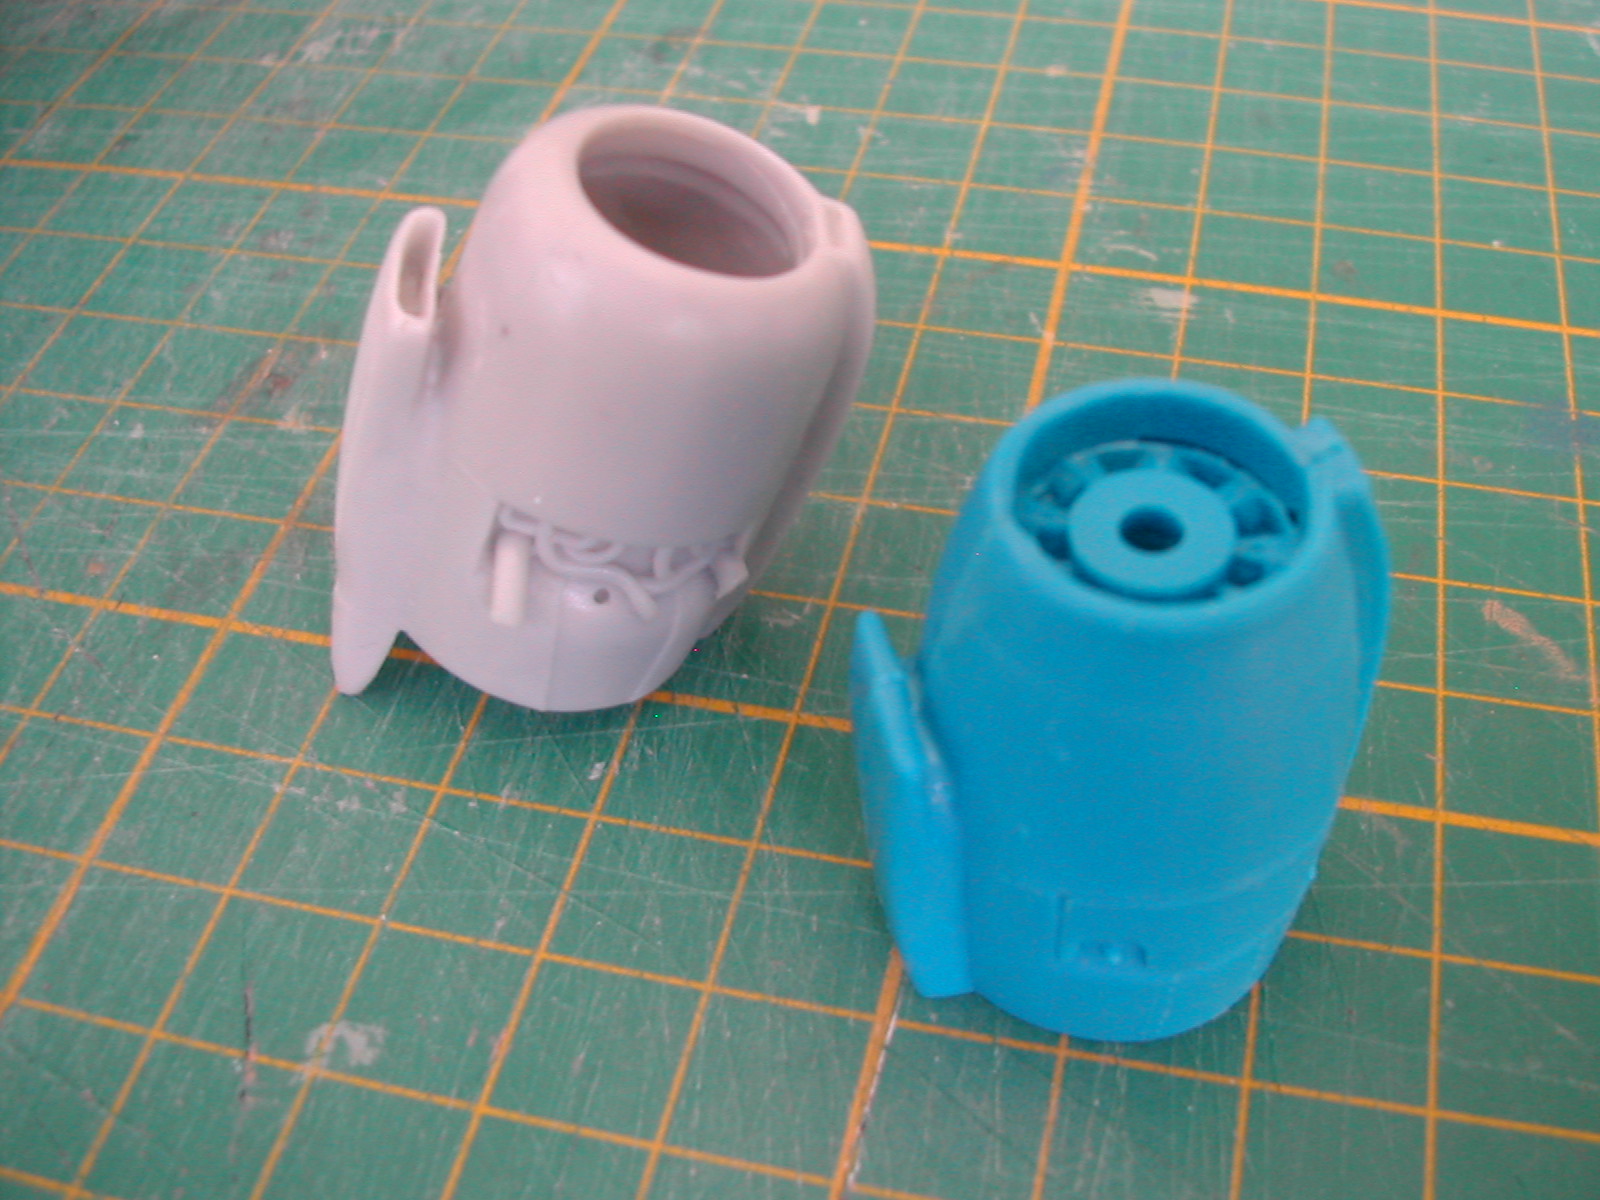
Been waiting a long time for this corrective set from RetroWings! It just arrived from the caster’s, the resin is still warm..! LOL

Can’t wait to get this beast finished now! Decals on their way from Caracal Models.

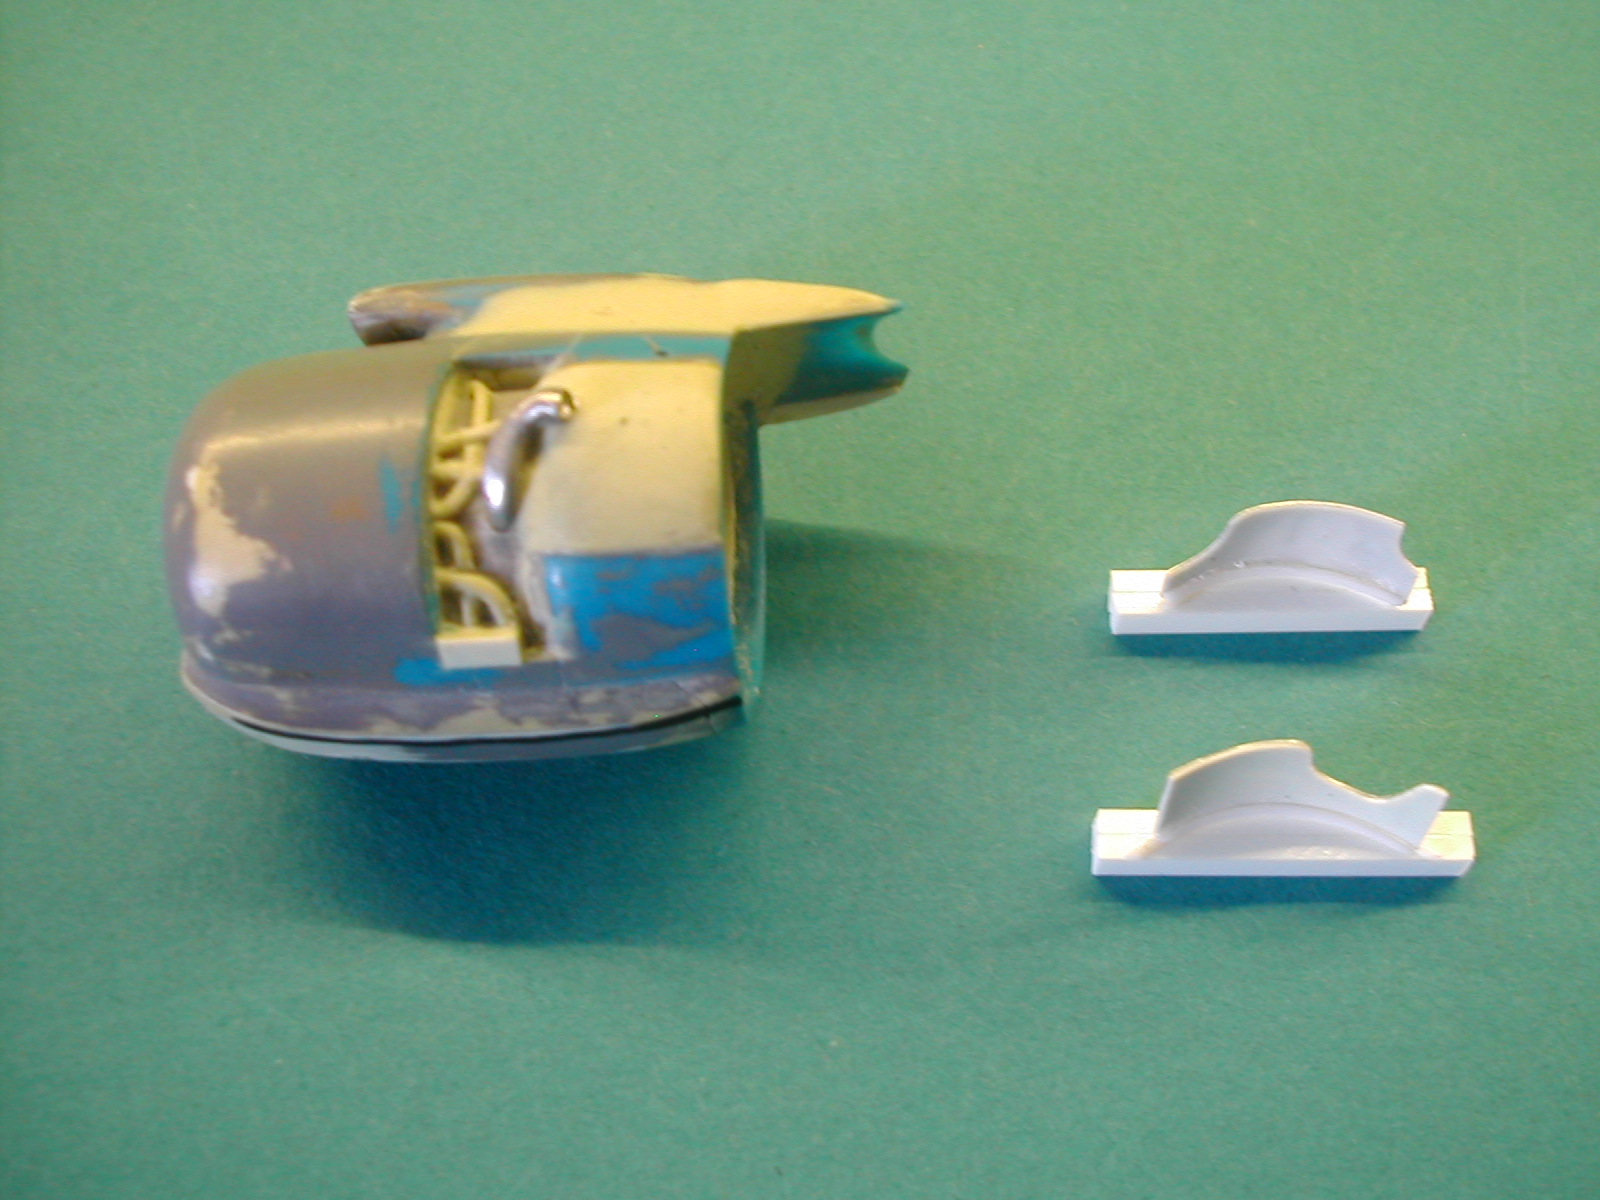
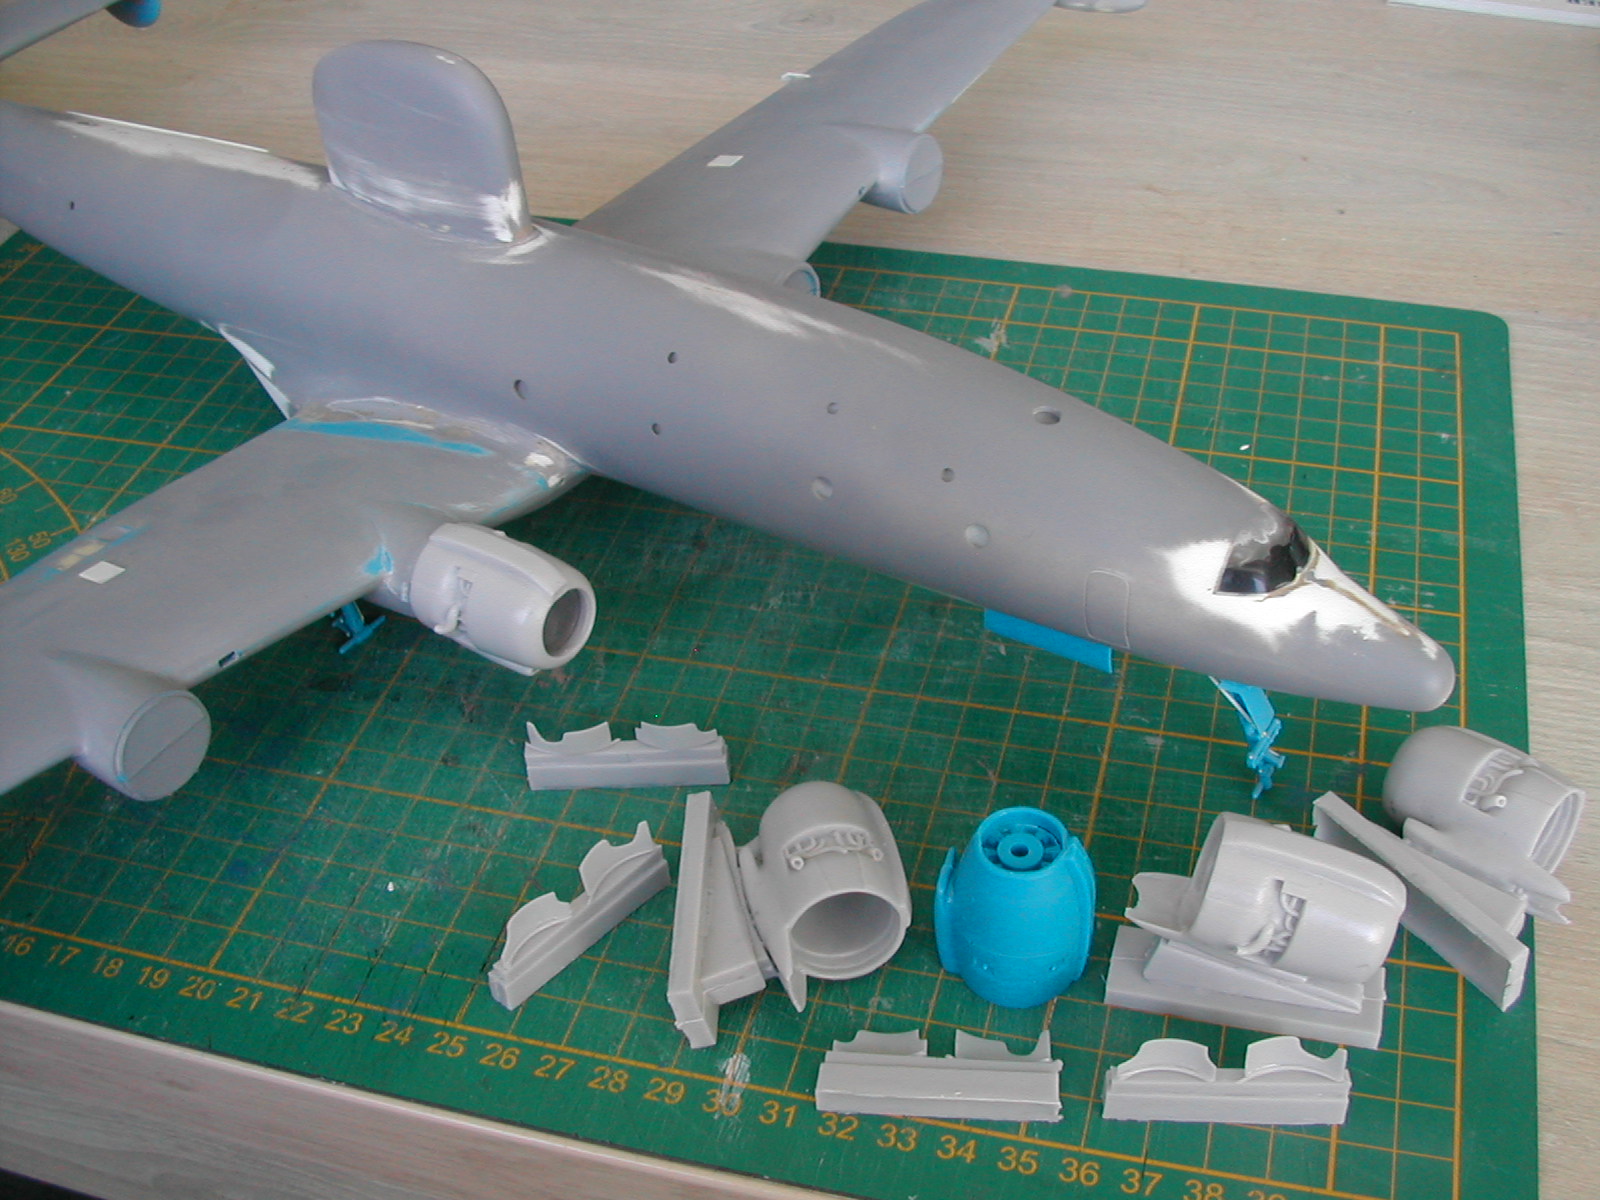
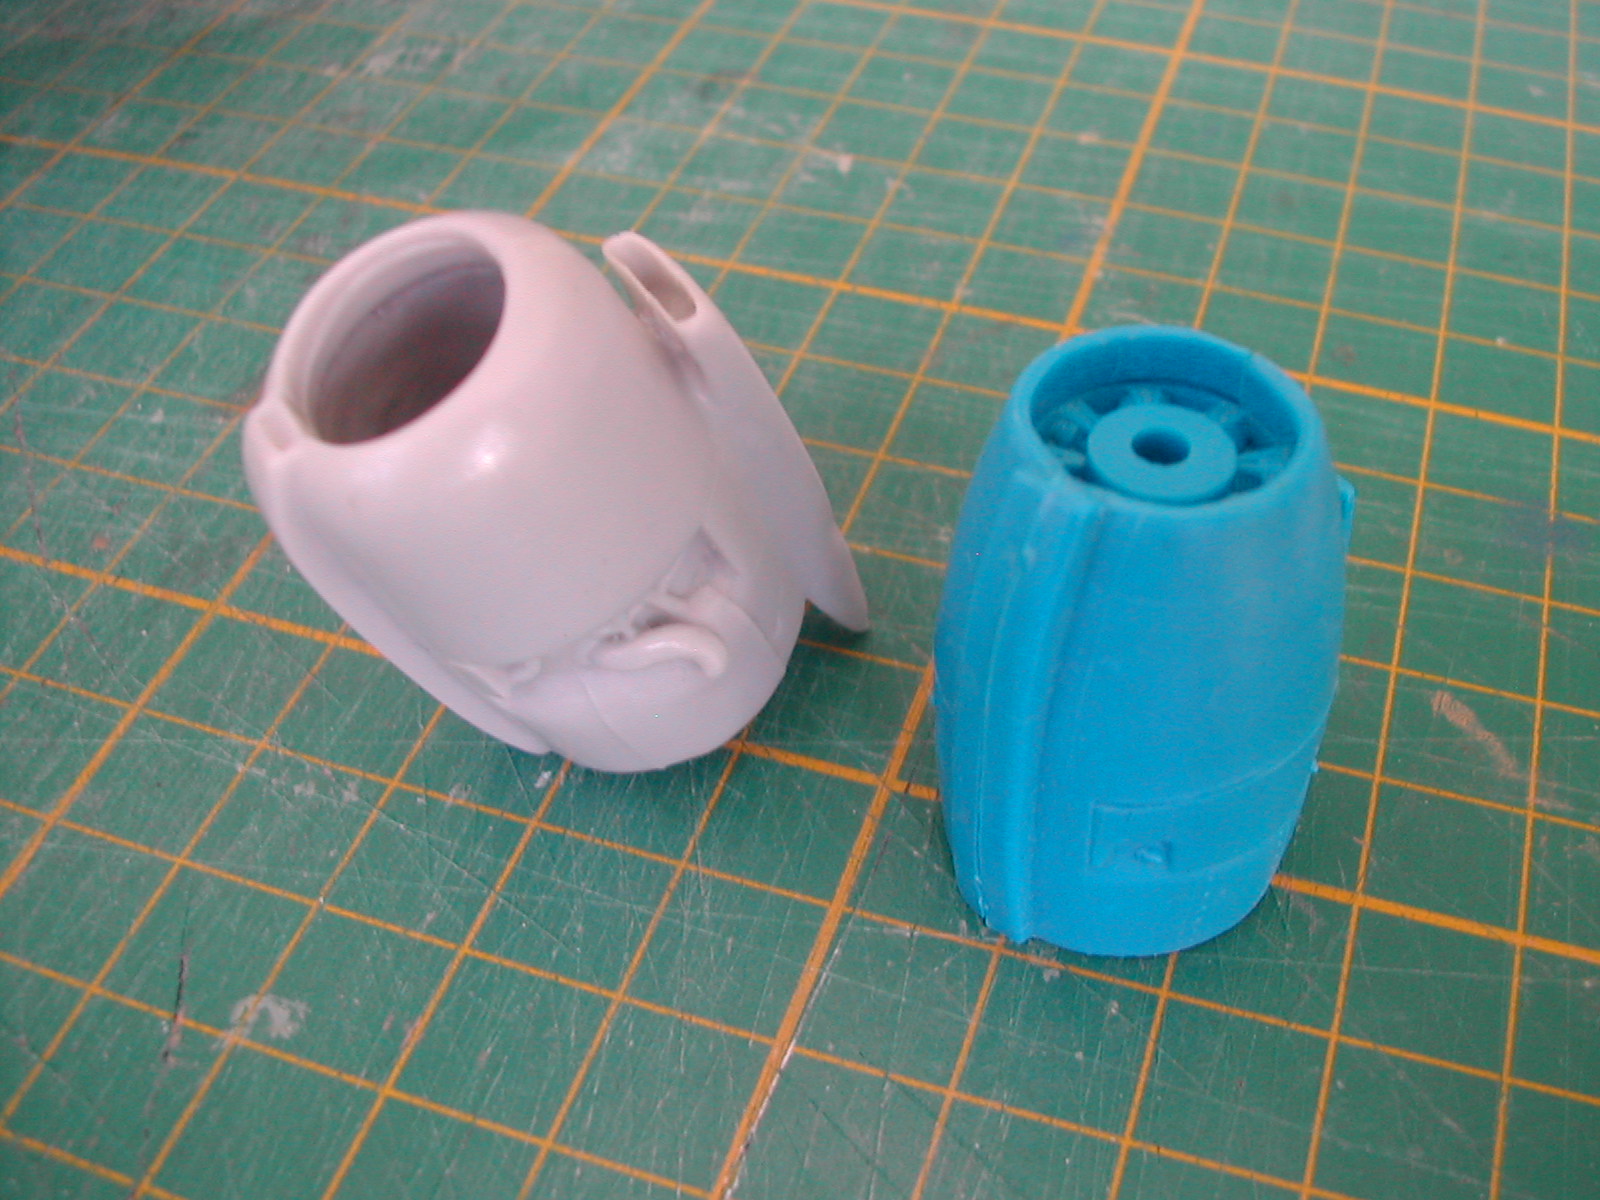
The Heller kit dates back to the early 1980s. It’s a good base, but the kit’s engine nacelles are rather atrocious.. Not much left of the kit’s nacelle (in blue) on the master…


3 Likes

Wow. The replacement cowls are quite an improvement.

1 Like

That’s why the rest stayed untouched for over 6 years..! LOL

Cool! I thought about building the EC-121 myself, but first I would have to build an extra room to display it! Good luck with your build!

1 Like

Oh cool. I did the 1/144 minicraft kit - more shelf friendly :wink:

1 Like

Now that’s a long-term shelf-of-doom rescue. Six years waiting for somebody to fix the part that was keeping you from moving forward! :grin:

Those replacement nacelles look like a huge improvement. I can certainly understand why you weren’t willing to settle for the originals after putting this much work into the rest of the airplane.

I’ve got a B-1B that’s been waiting about 30 years for me to finally have the skills and aftermarket parts to finish what I started, so I completely understand hanging onto a project until the right solution comes along.

I’m looking forward to seeing this one finally come together. The EC-121 is such a cool and unusual aircraft, and you certainly don’t see many of them built.

Now that’s definitely the more sensible scale for an EC-121. :joy:

I’m pretty firmly committed to 1/48 for my aircraft, which occasionally creates some serious real-estate problems. Something like an EC-121 would probably require its own piece of furniture.

I’ve always loved the Connie. It’s just one of those airplanes that’s hard not to like, and the EC-121 is an especially cool version of it.

Yours looks great. The paint job is immaculate, and for such a tiny aircraft, the amount of detail you’ve managed to get into it is spectacular. I’d love to see a couple more pictures of it if you have them.

2 Likes

Build thread is here, though no additional glamour shots.

1 Like

It’s true that this one is big… That’s why I tend to keep to 1/144 and even 1/200 for airliners..! But the Heller box illustration, by Francis Bergese, was impossible to resist to..

Beautiful!! I have the Revell 1/144 kit on the shelf too..

The main issue was getting something that the caster would be able to cast easily, without much rejects. Although I know how to cast resin, I do not do it very often, leaving that to people far more skilled than me at that. I’m a pattern-maker and my ways of designing patterns, with the end user in mind (little assembly, little putty,..) do not always compute with the caster’s way of working.. So, it can take some time before we get to a ‘workable’ design.

1 Like

Wait, you know how to cast resin? Who knows how to do that? :joy: Now your explanation makes a whole lot more sense. You’re not just looking at this from the modeler’s side—you actually know what has to happen to get the part out of the mold in the first place.

I hadn’t really thought about the difference between designing a part to be easy for the modeler to use and designing it so it can actually be cast reliably. I can see how those two goals wouldn’t always line up perfectly.

I’m really enjoying getting a little peek behind the curtain on how this stuff actually gets made. Thanks for explaining it.

I have tried to make resin casting for a few times, but have never learned it properly. Luckily in 2018 I managed to teach myself 3D design and now when I need a part, I draw it up and have it printed as many times as I need. The only problem is paying for it. On the plus side I can easily share it with other people who might need the part, so the time for designing feels better spent.

It’s a great skill to have, Pawel. This technology has already changed our hobby a lot. I’m more confortable the old-fashionned way, I am a bit of a technophobe..! LOL

I’ve been designing masters for 30 years now, but I’m still a modeller at heart and since I do not make moulds nor cast very often, I tend to design stuff the way I, a modeller, would like the final parts to be. I know the casters I use still curse at me time to time.. LOL

The worst was designing masters for metal casting, which requires a lot more resistant moulds and involve a whole lot more pressure to create the original moulds from the master. Any emply space in the master had to be totally filled in, any emply space left by accident would be crushed and the resulting moulds were good for the bin. Very expensive mistake, time-wise and money-wise..

1 Like

Wait, you’ve been designing masters for 30 years? Okay, now you’ve really got me curious. :grin:

I have absolutely no idea how that process even worked before 3D printing. When you say you designed and made masters, what were you actually making them out of? Were you carving them out of resin or plastic, sculpting them out of something like clay, machining them, or some combination of all of that?

The whole process is completely foreign to me. I understand the basic idea that you’re creating the original part that the mold will be made from, but that’s about where my knowledge ends.

I’d love to hear more about how you got into doing this and how an individual actually goes about designing and making masters for model companies. That’s a whole side of the hobby I knew existed but have never really thought about.

Sam,
My main ‘ingredients’ are plastic card, Milliput epoxy putty, superglue, superglue accelerator and good references (scale drawings AND pictures).

By plastic card, I also include evergreen-type of products, though in effect most of what I use from that range is small diameter round sections and small dimension square-ish sections. Plastic card, I buy in sheets of 2 square meters and use anything from 0,10 thou to 0,40 thou.

Milliput, I mostly use to fill in holes to give strength to the master, but this is also my favourite sculpting material for figures and busts.

Superglue (and accelerator) is mostly used to fill in gaps. I do not have a lot of patience and I hate having to wait hours for traditional putty to dry. I tend to use superglue to stick things together too, but usually also dab in some liquid poly glue to achieve a more resistant bond.

Scale drawings are a good source of info, but take any two from different sources and you will find that there are several differences.. that’s where the pictures come in handy, to settle disputes. The pictures other main use to to have a better ‘3D’ understanding, thanks to the shadows cast by, or the light reflected off this or that part or area on the pictures.

I started scratchbuilding quite early, after having first tested my skills at a couple of conversions, then a couple of vacuformed kits; those did require that a lot of their vacuformed components be replaced by spare parts from injection-molded kits, or simply scratchbuilt. Even the main parts of those vacuformed kits also required quite a bit of work (I used to build 1/72 WWI aircraft then) and it did not take long for me to consider a full scratchbuilt given the unavailability of certain subjects and the work still required by vacuformed kits.

I did not start designing patterns until about 10 years later, first for a number of companies then for myself too. My interests had moved on to 1/72 - 1/76 AFVs by then. I worked that way for about 9 years before a break of almost a year when I just could not do it anymore, complete burnt out caused by the need to accept any commission to pay bills rather than enjoying scale modelling.. When I started my own company, I decided to only design stuff I was interested in. That made a huge difference! Nowadays, I still take on a commission time to time, but only on my terms, only things that interest me.

Most of the stuff I design is for the moment still relatively ‘safe’ from CAD and 3D-printing, but the technology is improving all the time, and fast.. That’s why I’m slowly getting involved too.
1 Like

That’s fascinating. I think what impresses me most is that you basically worked your way into scratchbuilding because the subjects you wanted simply weren’t available, and eventually reached the point where making the whole thing yourself wasn’t that much more of a leap.

The part about comparing scale drawings against photographs really caught my attention too. I’m a research nut, and I’ve already discovered how dangerous it can be to assume that a drawing or even a kit instruction sheet is necessarily correct. Using the shadows and reflected light in photographs to understand the actual three-dimensional shape is something I hadn’t really thought about before. That’s a great tip.

I can also understand what drove you in this direction. I’m considering buying a resin 3D printer myself right now, largely because I’m getting frustrated that I can’t find some of the figures and details I want in 1/48 any other way. I’m nowhere near designing an entire airplane from scratch, but I understand the motivation. At some point, if nobody makes what you need, you start figuring out how to make it yourself.

And I completely understand the burnout once something you enjoy turns into something you have to do to pay the bills. It sounds like deciding to only take on subjects that genuinely interest you brought the fun back into it.

Thanks for taking the time to explain all of this. I’m learning quite a bit just following along with this build.