Dual P-39 Build

Ok, here’s the deal… I’ve just cracked open the boxes of these two birds and I’m gonna do a side-by-side build… Of course, it won’t be a normal build as the Cobras are going onto dioramas, and one of them (haven’t decided which) will be on the assembly line, the other, in the Cactus Air Force…

The Eduard kit is quite the part monster, and it’s from the Secret Santa build from last Christmas… My “Santa” also included a number of AM parts, which I don’t know if I’ll be able to use, but I will try… Especially the PE instrument panel and resin seat… I’m a scratch-builder so using PE is kinda out of my comfort zone, lol… What concerns me is the fact that the instrument backs are visible on the back side of the panel, so that means adding the wiring back there as well…

Stay tuned…

HVH, I’ve built that kit and don’t remember being able to see the instrument backs. Are you sure about that?

The Monogram kit has them molded on… I’m thinking that they’ll show, but I haven’t done a test-fit yet…

Just checked mine(eduard)…can’t see em at all. There is just a tiny gap and unless you shine a light in there and have a magnifine glass, it’ll never be seen.

As long as sfcmac doesnt get wind of this project you will be ok. He is the only one who will be checking.

Photobucket

Hans - I have been wanting to aquire one of those eduard kits myself - something about that noseart… Although I would prefer the monogram kit as I am a classic kit builder myself…

I will be looking forward to seeing you work your magic on these [tup]

Hammer, were we separated at birth? [:)] I built the Eduard P-39Q this year for a group build in our club, and I’ve got the Monogram kit ('70s boxing) in the stash, queued up for early 2010.

I just saw a review over at Modeling Madness of the re-issued Monogram kit, and it was noted that the re-issue boxing includes the fret of figures that was included when this kit went through the Pro-Modeler phase. So I think I’ll have to get me a new boxing, too, it’s worth it for the kit, but also for those extra bits, in my opinion.

Regarding the back of the IP, I have the same experience as Fermis does with the Eduard kit, you really can’t see it, once you close up the fuselage halves.

If I may steal some space in your thread, here are a couple of shots of my P-39Q, finished as “Devastating Devil” (maybe not too super-accurately [;)]):

We did this as a seminar build, we worked on the same step each month, and checked our results at our meetings. Then we entered as a group in the Region II show in October (Jerseycon). I don’t care about competing so much, but I learned a lot, and it was a lot of fun.

A tip, if I may offer one-the Eduard kit’s fuselage halves may not match in length, from nose to tail. We trued the halves up at the cockpit, since this supported getting a good, clean seam between the canopy part and the fuselage, and that left just some minor adjustments to make fore and aft. On mine, I just had a little filing on the flat face of the nose, and a little puttying on the trailing edge of the rudder, using that method. But it was a fun kit to build, and I’d build another one.

I’m looking forward to seeing your progress pics, your builds are always enjoyable to follow.

Regards,

Brad

Another tip you might like and one that Marc let me in on, the canopy is to narrow for the fuse. Actually the fuse is to wide and you need to pinch it in behind the car doors and glue it to the rear bulkhead. Then the canopy fits as it should.

The Accurate Miniatures P-400 is the Eduard kit also. The sprues still say Eduard. I’ll second the fuselage fit problem. Mine was bowed out so if you joined the nose the tail would separate. Lots of filling and sanding ahead for you.

As for the PE instrument panel it looks awsome. You won’t be able to see behind it if you did add wires as its is just a milimeter from the front dash and the gunsight is there too. Some of those parts are too tiny to really manipulate with my meaty fingers.

The Monogram 'pit & gunbay so far… I’ve decided not to super-detail the Monogram gunbay (Although it begs for it) since I’m now building it as Bud Anderson’s first “Old Crow” (S/N 42-20746 in the “4 Kills or Less” GB… It won’t be opened since the diorama will be taking place in Nevada (Las Vegas Field perhaps?), the 363rd FS’s home prior to their deployment to England in SEP 43, and the dio is Bud, his crew chief ,and his armorer standing next to the Crow, getting their picture taken… Pretty dull, I know, but I’ve never done a straight-up “Hero-Shot diorama”…

!(http://img.photobucket.com/albums/v233/HansvonHammer/Screenshots/Models/P-39 GB/BudAndersonP39Training-1.jpg?t=1260982204)

I also decided against using the Eduard per-painted PE panel in this one since the fit is way off, and elected to do the ol’ “Paint it white and black Sharpie it” method is usually do. Like the name implies, after I “Sharpie” the whte panel black, I then give it a few swipes with ultra-fine sanding film. This exposes the white paint underneath and then I just give it a touch-up with a white drybrush.

!(http://img.photobucket.com/albums/v233/HansvonHammer/Screenshots/Models/P-39 GB/MonogramP-39001.jpg?t=1260981224)

!(http://img.photobucket.com/albums/v233/HansvonHammer/Screenshots/Models/P-39 GB/MonogramP-39002.jpg?t=1260981247)

I have to call it quits at this point until after the 1st though, which is the datrt-date of the Group Build. But in the meantime, I’m cracking open the Eduard kit today…

Herr, Baron… What’s the top color you used on your 'Cobra? It looks like a nice, sun-faded OD that’ll work well for what I have in mind for the Eduard kit…

!(http://i267.photobucket.com/albums/ii315/theBaron0530/2009 Eduard P-39Q group build/10Finished1.jpg)

Then again, it might be “Desert Pink” and my screen ain’t showing it right… Having trouble telling.

Hans, I’m guess that’s MM enamel in tungsten light. Looks like the white balance is off.

Nice work on the Pit, Hans. Keep on Truckin.

Regards, Rick

Hi, Hammer, it’s actually a dark tan, I think it’s Model Master, but I’ll check tonight when I get home, and post back.

When I chose the subject I wanted to build, and checked the box art, I had the same idea as you did, that it was a really well-faded OD. After all, this bird was in the hot, bright Pacific sun. But the callouts in the instructions actually are for dark tan uppers and light blue lowers-I cheated on the lower surfaces and used light gray.

I can’t remember if this was the unit that painted their P-39s pink, while they were still staging in Hawaii before deploying. I think they thought that the color would camoflage the aircraft well on the crushed coral airfields of the forward airfields in the PTO.

And I’ll had my praise for your cockpit work, too! Nicely done!

By the way, do you know–were the ammo cans in the nose part of a ProModeler upgrade to the Monogram kit? I ask because I picked up one, secondhand. It’s in the white box from the mid- to late 70s, but the weapons bay is completed, and has metal (PE?) ammo cans and belts. I figured they are either some other maker’s aftermarket detail pieces, or maybe they were added to the original kit in the ProModeler program.

Thanks fer the kudos, men… Some one must have left you an Easter Egg… Monogram blue-box, white-box, or CAF 'Cobra kits didn’t contain any PE metal parts… I never had the Pro Modeler version, so I can’t tell about that one. it’s likely a fret of parts came with that one…

Do you know which squadron? My refs all point at N. Africa as the destination for Tan US Army 'Cobras., specifically the 81st FG’s P-39Ls in late '43. They had the tan/azure blue paint with the red-boardered US Insignia.

I got the Accurate Miniatures kit a couple of months ago, and the first thing in the box was a second fuselage sprue and a note aying to replace the defective original gray one with the corrected olive green one, so Eduard knows about the warping and length problem and has corrected it.

The corrected fuselage halves fall together so well you wonder if you even need cement.

Hi, Hammer, sorry for the delay, the spec on the paint that I used is: Model Master 1942 Dark Tan, FS 30219 in the 3 oz rattle can.

As to the markings,they show “Devastating Devil”, assigned to the 46th FS, 15th FG, 7th Air Force, and operating from Makin Island around August 1943. I don’t know if those units were shipped in from North Africa to the Pacific.

Unfortunately, I can’t find the reference now that had the story of the unit painting their mounts pink. I know that I read that, while I was building the kit, but that detail wasn’t in the Squadron “P-39 In Action” booklet. So, I can’t cite that one. But maybe it rings a bell with someone else in the forum.

Regards,

Brad

Looked up the unit on the web and can’t anything either as why the desert camo… Saw plenty of links to that particular aircraft as a die-cast though…

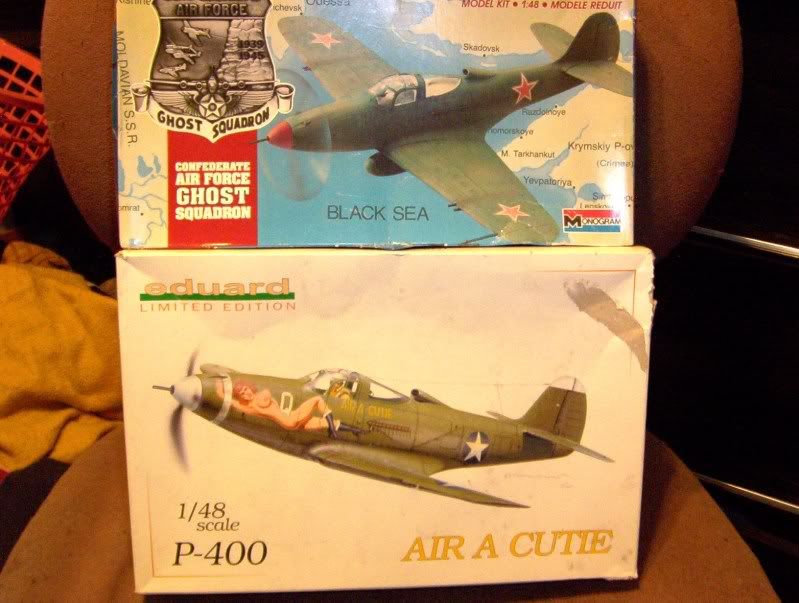
Ok, an update… I got the Eduard kit going for the “Before They Were Aces” GB as Bud Anderson’s 1st “Old Crow” and the Monogram kit as my Uncle John’s Cactus AF P-39 for Stikpusher’s Gudalcanal Campaign GB…

The work started in the cockpit as usual, here’s some pics… I drilled out the holes and added sprue bolts for the IFF box behind the armor since the Stateside birds didn’t have them installed, but left the PE cable for it for visual interest. I also used the PE panel, but ended up redoing the gunsite as I didn’t care for the look of the kit supplied one(Shown here)… The seat-adjustment lever on the right side there is stretched sprue, since the kit part shot out into space on me during installation… The seat is a resin one that was supplied by my Secret Santa last year (who also gave me this kit. I never could have afforded this one)

!(http://img.photobucket.com/albums/v233/HansvonHammer/Screenshots/Models/P-39 GB/AndersonP-39002.jpg?t=1262784467)

!(http://img.photobucket.com/albums/v233/HansvonHammer/Screenshots/Models/P-39 GB/AndersonP-39006.jpg?t=1262784543)

Now, on to the wings…

Adding the interior parts for the intakes, along with the PE screens turned out to be a waste of time as A: You can’t see the screens, and 2: They ( the intakes) cause the upper wing halves to set too high up to close, even with clamps… So, I got out the trusty Dremel and ground off the tops of the intakes (shooting one of the screens into the Hinterlands in the process) which allowed the wing halves to close… Still had to use a skoshi bit of putty though.

There was a pronounced gap in the left wing/fuselage joint, which I filled with a little bead of Testor’s Putty, thinned with alcohol. I later cleaned out the panel lines that got a little putty in 'em and also filled those shrinkage cracks… I also had to fill the joint at the top of the carburator air intake and reshape it a bit due to the fuselage halves being one shorter than the other…

The right wing joined nice & tight, but on the underside, the joint between the trailing edge of the flap and the fuselage was pretty wide, so it got filled as well and I also cleaned out the flap/fuselage joint…

!(http://img.photobucket.com/albums/v233/HansvonHammer/Screenshots/Models/P-39 GB/P-39004.jpg?t=1264118982)

!(http://img.photobucket.com/albums/v233/HansvonHammer/Screenshots/Models/P-39 GB/P-39002.jpg?t=1264119648)

!(http://img.photobucket.com/albums/v233/HansvonHammer/Screenshots/Models/P-39 GB/P-39003.jpg?t=1264119275)

Couple of things about this kit… There’s some alignment issues, namely the fuselage halves… The left one is shorter that the right (about q milimeter), meaning I had to sand the rudder’s trailing edge to match the right, and this is what caused the gap in the flap/fuselage underside joint… Also, the trailing edges of the wings are way too thick and I should really have sanded them thinner… I was just too lazy to do it, heh… As they are, they look about a scale one or two inches thick…

Overall, I’m not all that impressed with the Eduard 'Cobra over the Monogram/Revell version so far, and I’m not saying it because of my well-known bias towards Monogram… BUT… You’d think that with the price of Eduard’s 1/48th kits, it’s gonna be a better fit than the Revellogram, but I’m not seeing it… Sure, there’s a bit more detail in the 'pit, the wheel-wells are nicely done (I screwed up on those, BTW… I’ll write about THAT later, heheh…) and there’s the TON of PE fiddly bits ( I’ll never use 80% of 'em) and pre-painted (WTF?) panels, handles, knobs, levers, harnesses, and decal selection, as well as round and flattened tires (dunno why there’s round ones), but that’s not really enough, IMHO… Glad I didn’t pay for this one, if you get my meaning… I think a higher-end kit like this should fit better and the moldings should be a bit crisper & thinner (especially the wings)… I don’t know if this is a warpage-prevention issue (The Monogram wings are little bit warped due to the thinness,out at the tips, but easily clamped. Could also be due to the kit’s age & how it was stored)

Also, one last BIG gripe… There were NO clear parts in the kit when I opened it (Thankfully, a fellow forum member, who asked to remain anonymous, sent a spare one to me) and I can’t find the left stabilizer… (I don’t know if I lost it or it was just never there, so I’ll not take Eduard to task for that part)… I never heard back from Eduard about the clear parts and it’s been over a year since I wrote them too… The missing left stab will be a pain, but I can cast one in resin, I reckon… (Unless someone out there has a trashed 1/48th Airacobra of any make ? Hint-hint…)

Well, thanks fer readin’ & I’m off to the Monogram kit again…

A good example of mismatched camo is the 404th BS B-24D’s in desert pink getting sent to Alaska and the Aleutians in 1942 where they were known as the “Pink Elephants”.