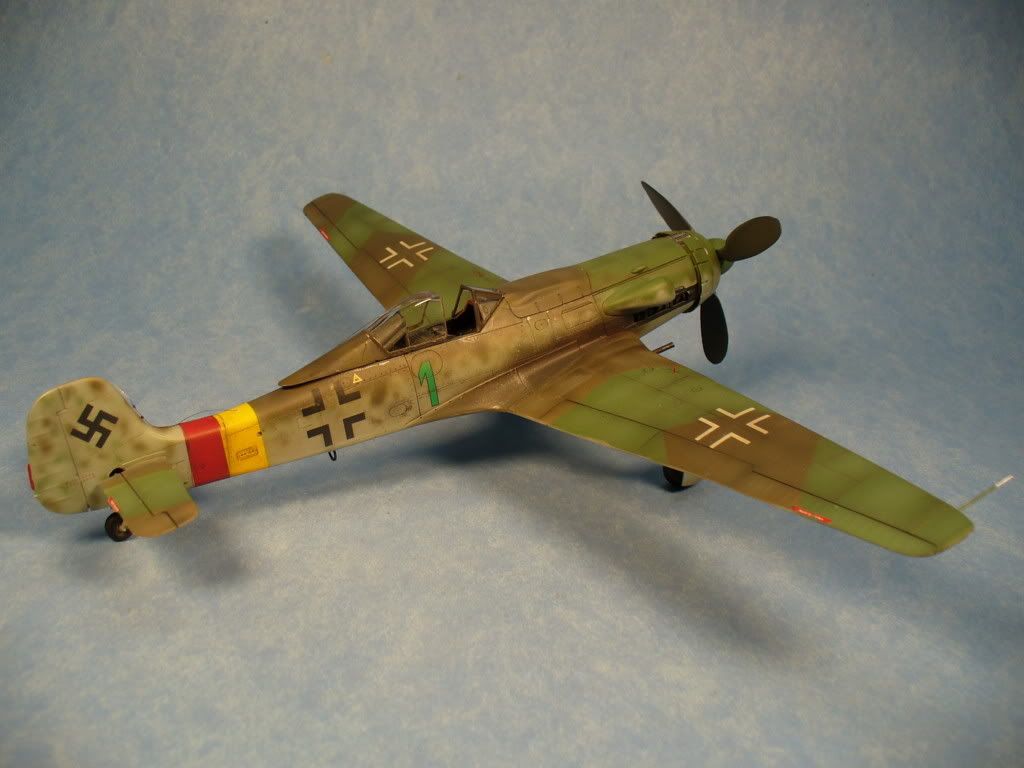
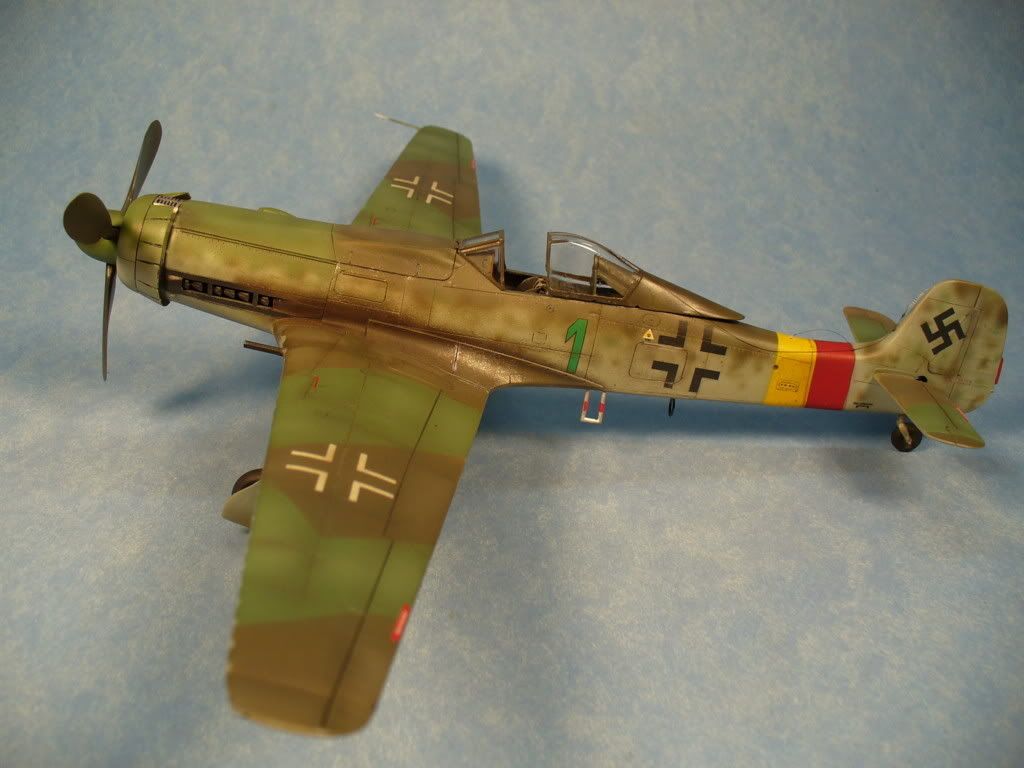
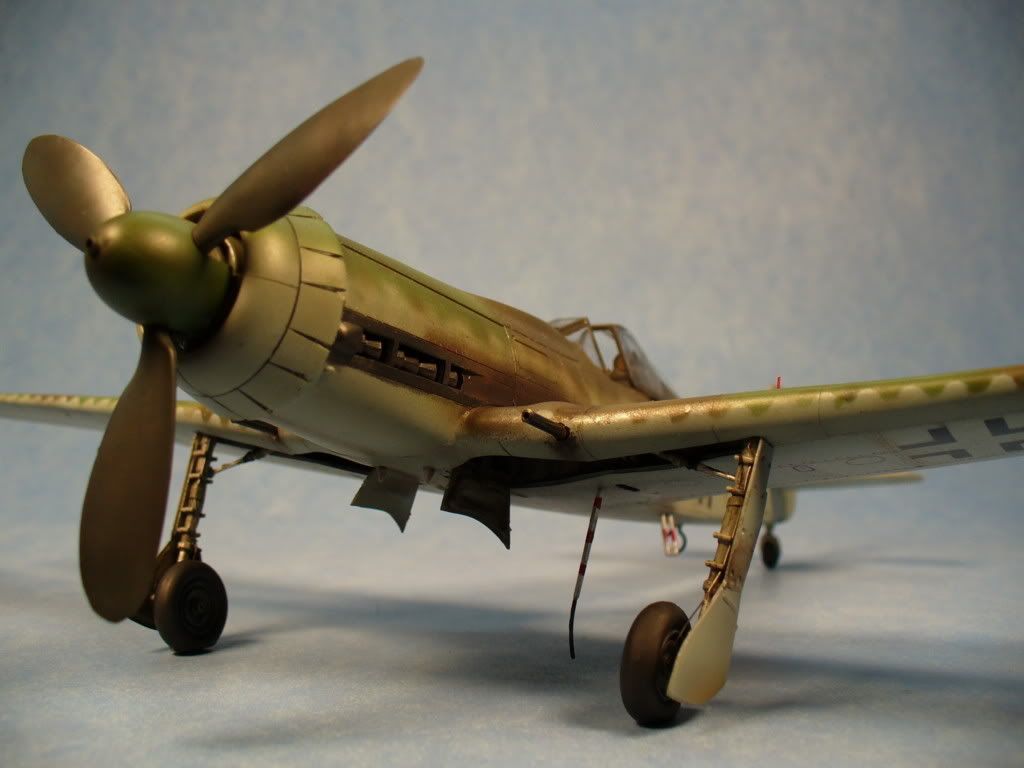
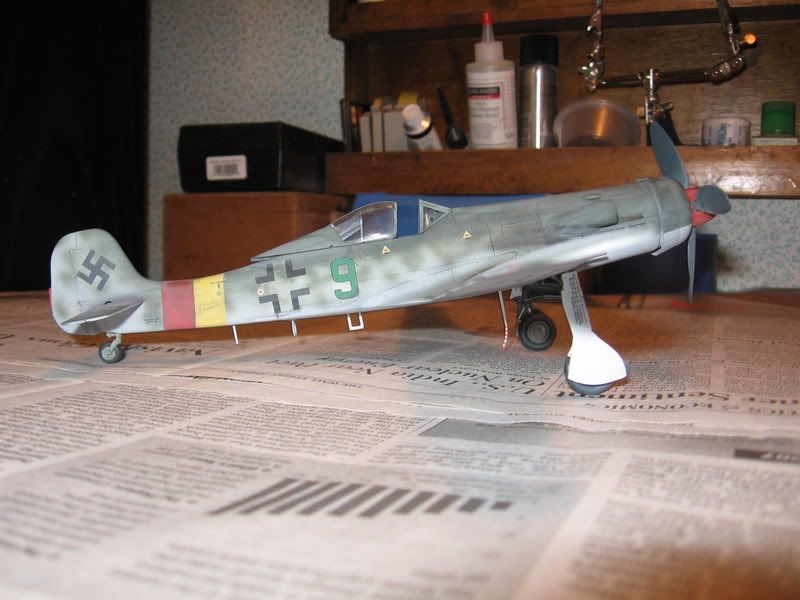
This is dragon’s Ta 152H-1 painted to repersent Green 1 flown by Willi Reschke. I have 2 of these in my stash the other will have far more detail and be done as green 3 flown by Josef Keil the only person to acheve ace status in the Ta 152. There is build review on the net that the builder indcates he had little trouble with his example. I had more problems with this kit then I did the fw190D-11. The canopy was also not molded well and has what appears to small hairs or runs through it. I did not fix this right now but will replace it before I take it to any shows. This is not an easy build by any means. fuselage, wings, and even the landing gears gave me major fit problems. The OOB detail on this kit is excellent as is the accuracy both inside and out. I had a detail set for this and in some cases opted for the kit parts. I would say if you are good at painting insterment panels all you would need is seat belts to achive a very good cockpit. I on the other hand can not paint insterment panels or canopies to save my butt so I use photo etch whenever possible[:I]
To my knowledge this is the only plastic 1/48 scale ta152 to be had. They can be somewhat hard to find from time to time, but if you are a luftwaffe nut you have to have at least one example of the ultimate piston fighter in your display case. The decals are out of box and go down ok. No swastika’s and odd (non RLM) paint call out’s on the instructions. The instructions otherwise are very good and even someone unfimiliar with this aircraft can get all the small detail parts provided in the right places (even has landing gear indcators provided in 48th scale)
This is the 152 Willi flew against O.J. Mitchell in his Hawker Tempest on april 14 1945. For some reason his guns would not fire, but this did not stop willi for getting a victory. Willi got in behind the tempest and kept making tighter and tighter turns until Mitchell stalled his tempest and planted it in the ground. Willi and the Ta 152 literally flew there attacker into the ground. Besides for rate of roll the Ta 152H-1 could match or in most cases out perform all allied fighters of the time. This was a true predator espeically to higher altitudes.
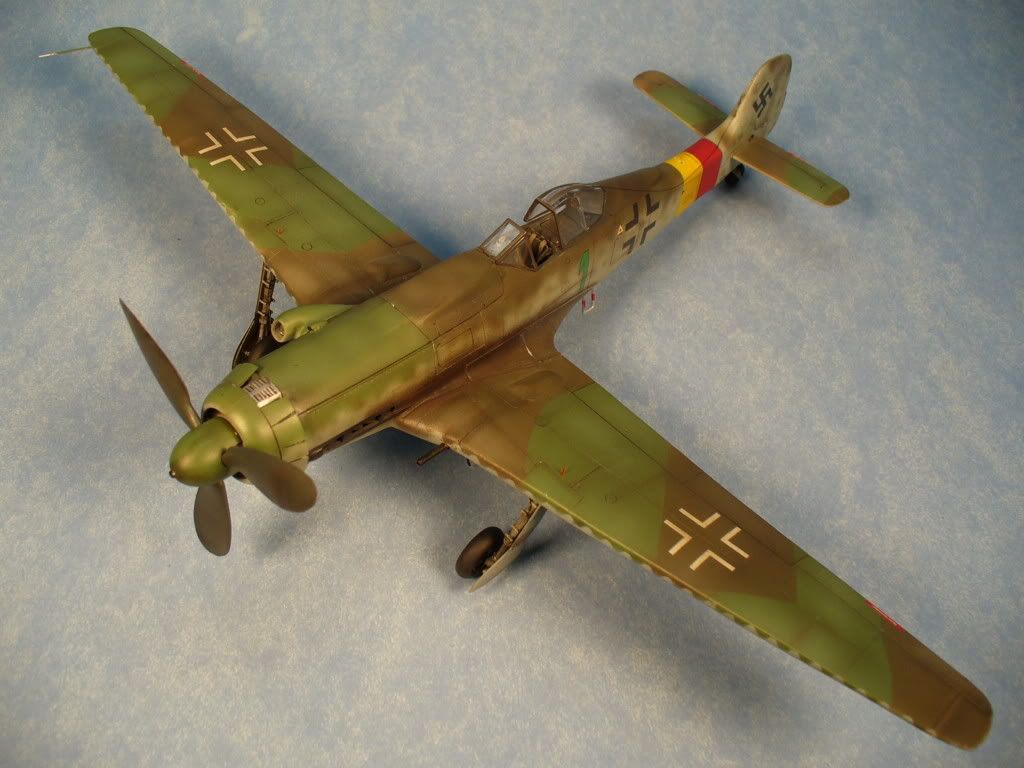
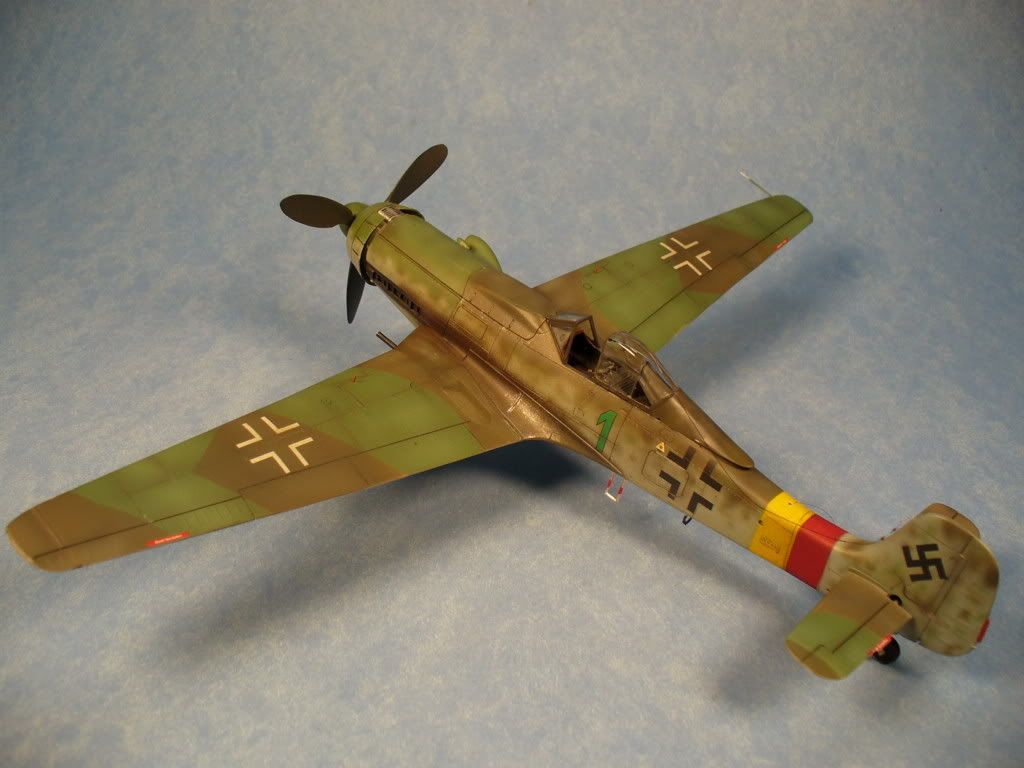
Things I did to this kit were basic for the most part. Like I said I have another which will get the full treatment. I added rivit detail, brake lines, radio antenna, seat belts, wing cannons, and some photo etch in the cockpit. The wheel wells are open but no engine or added plumbing/wiring. Other things are painted on defence stripes, drilled out hub mounted cannon, added screen to intake and flattened the tires. The next one will have lowered control surfaces, full plumbing, and possible hatches opened. Being as this is already a very difficult build and I had not build one yet I kept it simple.
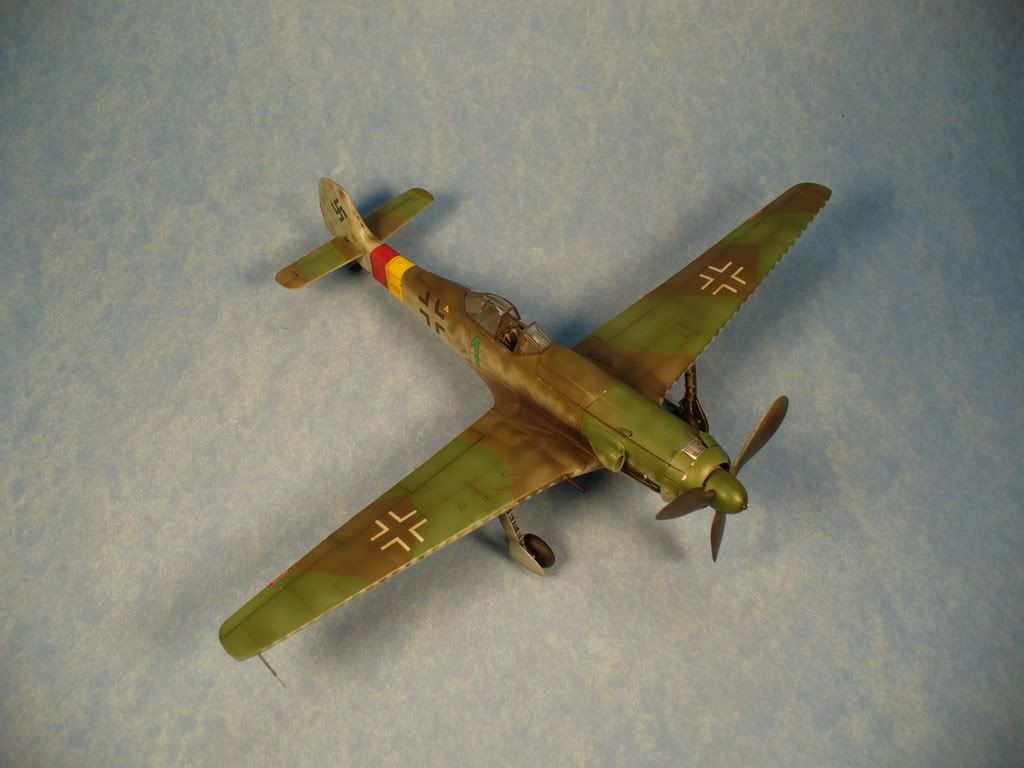
overall I’m very very happy with the out come[:D]. It looks tightly built and I got all the gaping trenches leveled and filled pretty good. I think the paint and weathering finish are my best effort so far this year in 48th scale. I believe captures the look of the Ta152H-1 very well. As always after I take pics I was about to find several small errors most of them correctable. Let me know what you all think. I got to get down for when I build that 1/32 fw190D-11 and D-13
[:O] SWEET!!! I love that plane, especially the scalloped camo on the leading edges. How in the world did you do that? Seriously, awesome job on that one Phoenix! [bow]
actually Phoenix Italieri has a 1/48 scale TA-152. And the Italieri kit and the Dragon kit are both reboxings of the Tri-master (or however that company was called) TA-152.
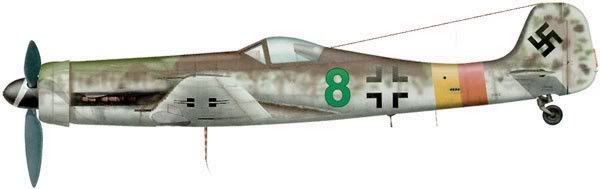
This kit does have it issues. Typical weird kit part breakdown expected from Dragon. I build it OOB and did not try to do to much with it. I finished mine about a month ago. I have another one plus the Trimaster edition of the kit so I build it to kind if get a feel for the kit where the problem areas would be. My canopy was fine but the wing to fuselage on the left side was very tight. Overall the detail was very good and I like the kit. The major complant I had with the kit was the ends of the wings were warped like they were removed from the mold to soon and sagged a bit. I left it alone. It is only noticeable when you look at it straight ahead. Looks like you did it justice. I was amazed at the amount of tiny detail parts. I put it in the display case and I am afraid to touch it because there are so many little pieces to break off. I decided to do green 9. This particular plane had an engine fire and the cowl was repainted and masked of. I stole the decals from the Trimaster kit in my stash. I think the fit problem with the gear covers you ran into is covered in the instructions. You have to remove about 4mm from the gear covers to get them to fit flush. The camo colors are also not very clear and I found conflicting references so I just picked what I liked.
I built mine about 4 years ago, but I can’t really recall any “difficulty”. I used almost no filler and I considered the kit one of the best I have ever constructed. I noticed that you have omitted the overpressure plugs in the canopy, a distinctive feature of this aircraft.?
Nice job, but I would replace the canopy as the current one really is incorrect and as you state, not molded very well.
Well basically the TA-152 is a Uber Focke-Wulf with a basic FW-190 fuselage with a high altitude engine installed and also having a longer than average wing span.
Well also having a pressurised cockpit doesn’t hurt either.[(-D]
Looks fine by me, guy. I dig the leading edges of the wings… a fine job on that. Also, you seem to have taken care of the gear alignment problem satisfactorily. Most folks aren’t aware of that, or don’t bother with it.
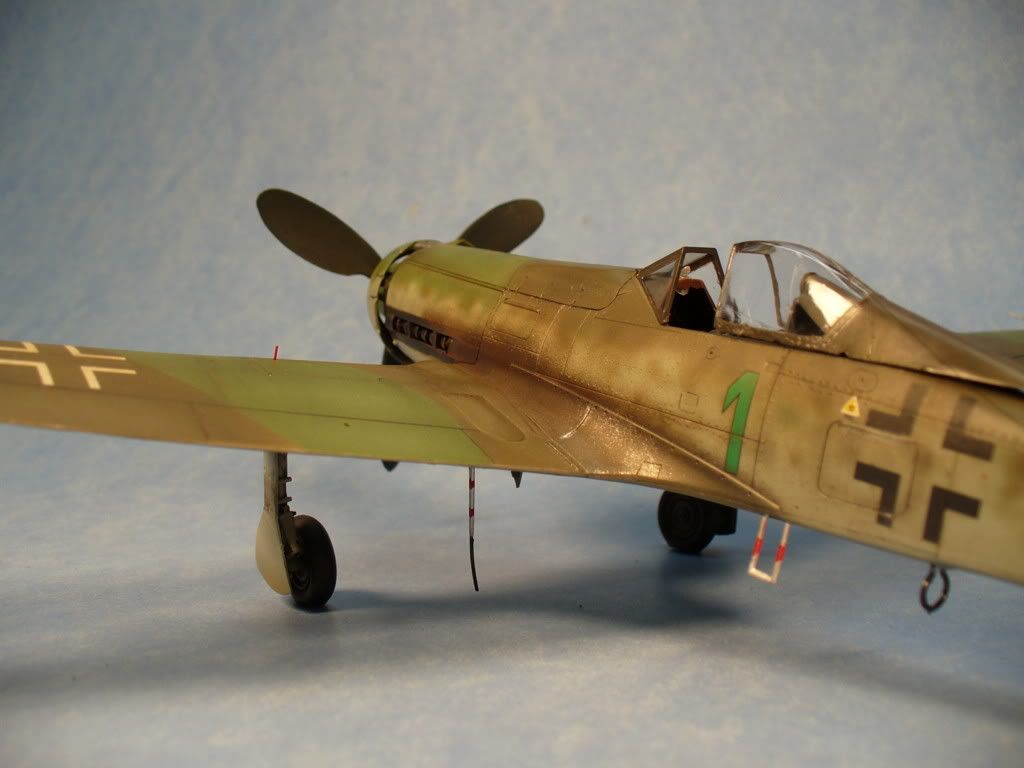
Daywalker, I did the saw tooth pattern on the leading edge by hand, I’m just that good with an airbrush.
Ok since no one will buy that I’ll have to let out a trade secret. I have a pair scissors that cuts that pattern out. You can get them at most craft stores. There a small wave and a large wave. the smaller one is right on for 1/48 scale. They are made my either provo craft or Fiskars. All I do is cut out frisket film and paint the pattern right on. It’s actually very easy, but it does look cool.
Mikeym, I agree the ta152H does look alot like a fw190D but in fact is a ground up new design. They used alot of parts and dies from 190D to speed along construction. Unlike the FW D, and ta 152 B,C,D the H has a new reinforced wing with fuel bladders and a unique air flow about it. The wing is not simpily a lengthened A-8 wing. The fuselage uses the same tail lengthener as the D but other then that is a completely new design in fact the wing doesn’t even mount in the same place on the fusalage as the FW D. without going into great detail In order to accept the 2000 + HP and stress of high alt combat the airframe has alot of refinements, but they still incorperated all the good things about fw190D at the same time.
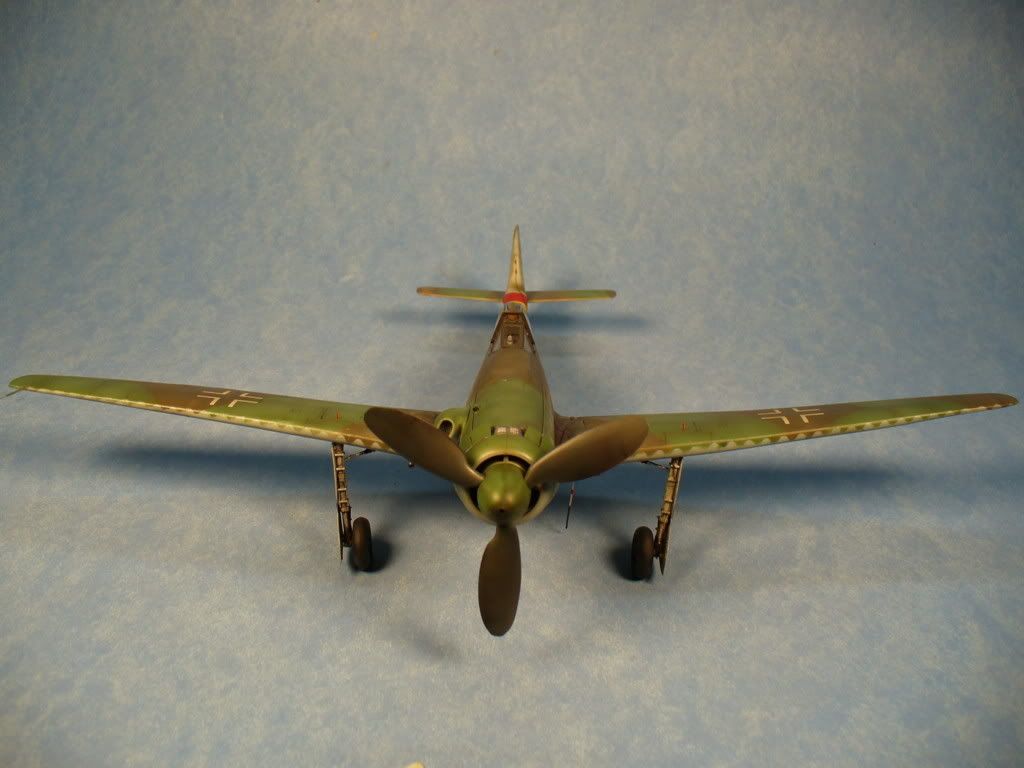
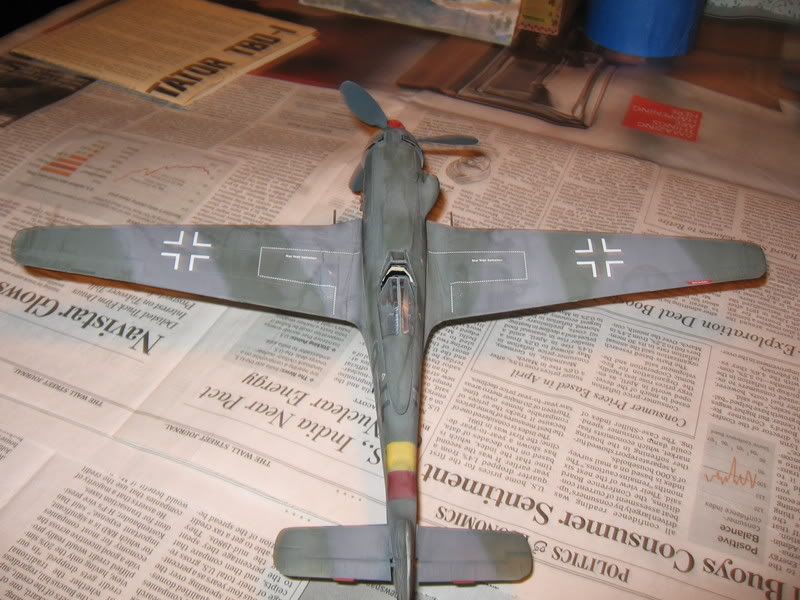
Soulcrusher, I had the same problem my right wing look like it had the droop of a helecopter blade. I fixed it by using a hair drier to heat it up same and move into place carefully. I actualy took that head on pic to see if I got it right. I had several worped parts and I think many of my construction problems were becasue of this. I got this kit off of Ebay and I think it had been stored incorrectly. My other kit (new) doesn’t seem to have this problem. That is one reason I did not comment further about my troubles as it could be just this kit and may not apply to all. I’m glad to hear you also had similer problems. There is not alot of info on the colors used on these mechines and I have found alot of conflicting info myself. Nice job BTW I like the decale weathering and red spinner. It looks great.
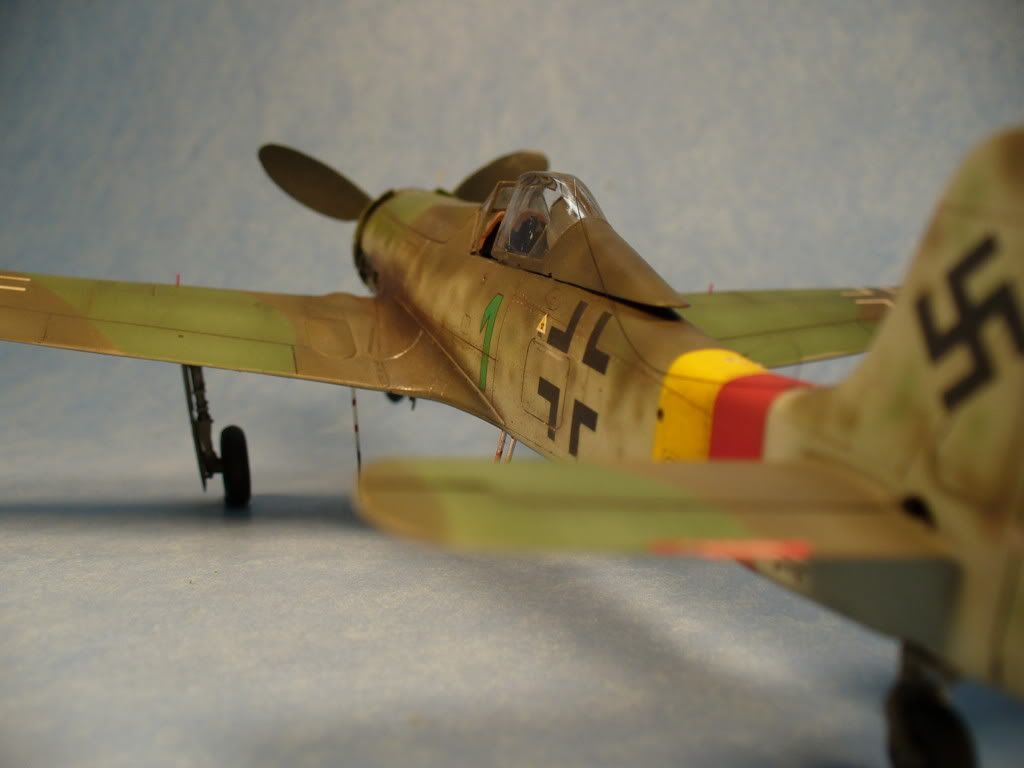
Crockett ,That canopy is cracked as well. I just tacked the headrest in and tacket it to the fuselage. it’s missing and ejection system, pull handle, pressure relief, and the decal. I am judging a 4H craft and model show on thursday and wanted to take it with me so it will be replaced before long and all the goodies put on. Good eye, you know your stuff. I think you were the one who called me out on the cannons on the fw190D-11. Thanks for looking, if it gets the [tup] from you then I did something right. have very little info on yellow 4 Other than it came from the second unit that was to be equipted with ta’s and when they found out the build numbers were there to support 2 units they combined them and JG301 got them. The big problem with tracking them is they did not have tail work numbers applied. I can’t tell real well from the pics but it looks like that’s the 2 tone green camo. I was very cloes to doing that on this one as I have a report from a US foreign equiptment officer who states that Green 4 upper camo was “different shades of green”. Nice clean build on yellow 4. I noticed that you also have little stenciling on your ta, all the pics I have show only fuel info and not much else.
Thanks everyone for your the input, I hope my spitfire turns out as well.
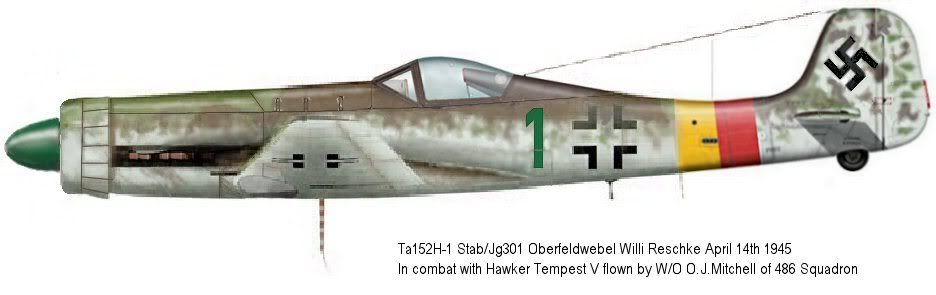
Thanks Phoenix for the kind words. I never really finished this kit. I still need to add the antenna wire and the gear indicators. I had the tail numbers but the decal folded on itself and refused to unfold. I do not recall seeing anything on the instructions about the blow out plugs on the canopy. Was that a scratch build detail or something I missed in the kit? I also never added the spiral that belongs on the spinner. I am sure I have one somewhere in my decal stash. After I finish my 1/32 scale Trumpeter P-38 I might do my Trimaster version now that I know where the tough spots are on this kit. I did not want to screw up a high dollar OOP Trimaster kit. Here is color profile I was trying to build.
Soulcrusher that color plate looks very close to one of them I used as a guide. I also had a few BW photos and another color plate. To the best of my knowledge Green 1 did not have a spiral but did have the light green spinner. I really like the red spinnner with the red and yellow defence bands. I also took notice that you overlayed paint on your fuselage as well. It really gives the paint more depth and a realistic weathered look. I did use some creative leeway as far as what I thought it might have looked based on available info. It seems there is fair info on Green 1, Green 4, Black 3, Slightly less for Green 3 Green 8, and your green 9. It seems that most of the green numbered Ta’s have similar camo with the exception of green 4 most believe may of had 75 on the wings. Black 3 is most likely 2 tone green. All of this is still guess work for the most part.
here are the 2 color plates I used as reference. From photos of EX, test subjects, first hand accounts and what little BW photos exist these seem accurate. The 2 are almost the same and those pics came from 2 different sources. I’ll bet before the engine fire your front camo was close the this as well
I know what you mean by not wanting to mess up a hard to build somewhat expensive (for a 1/48 aircraft) model. I been waiting to build this for about 3 years but put it off. If you decide to build the other let me know I have some interesting pics of 152’s that kinda show the camo that was applied to the wings and such. You may find it helpfull. Although the camo you have done of your example looks like most of pics already. Good luck with the p-38 and post pics when you get her done.
BTW as far as the canopy pressure plugs go I don’t know if the instructions mention this of not. I am aware the H had them but becasue I knew early on in the build my canopy junk I didn’t look at that too close. they are not hard to reproduce I’m sure I have a pic around here some where of that.
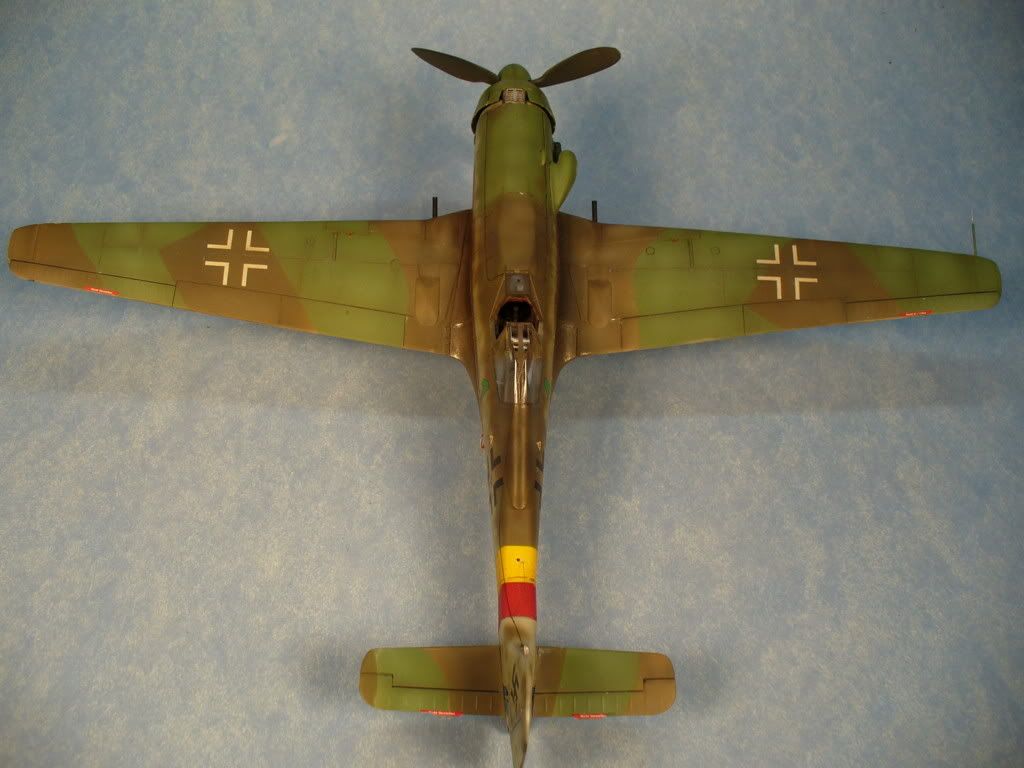
Thanks phoenix. When I get ready to do the Trimaster I will drop you a PM. I could not find any reference for the top of the wings camo patterns. The instructions from the Italeri kit contradict the colors on the Trimaster instructions. Italeri has the fuselage as two different shades of green and the wings and tail surfaces Grauviolett and Green. As you can see I decided to paint it like it was in the line drawing. Solid green fuselage and Grauviolett and Green upper surfaces. I follow the pattern in the Trimaster instructions. I do not know if it is correct or not but it is very hard to find color references for the wings on the Ta 152. From what I read engine fires were common on early models. I guess that is why the engine panels are hard masked instead of mottled like most of the other profiles. I did not try to do the wavy leading edge like you did on yours I just got lazy. I guess masking it like you did would be the way to go because mine just does not look right with out it. Talk to you soon when I get this beast of a P-38 done!