Very nice Jester.
It looks ready for painting.
Good assembly and startup.
Very nice Jester.
It looks ready for painting.
Good assembly and startup.
Very nice! Looking forward to seeing it with paint on. [B]
the engine and interior looks great!
Thanks garzonh, BIll, and modeler#1!!
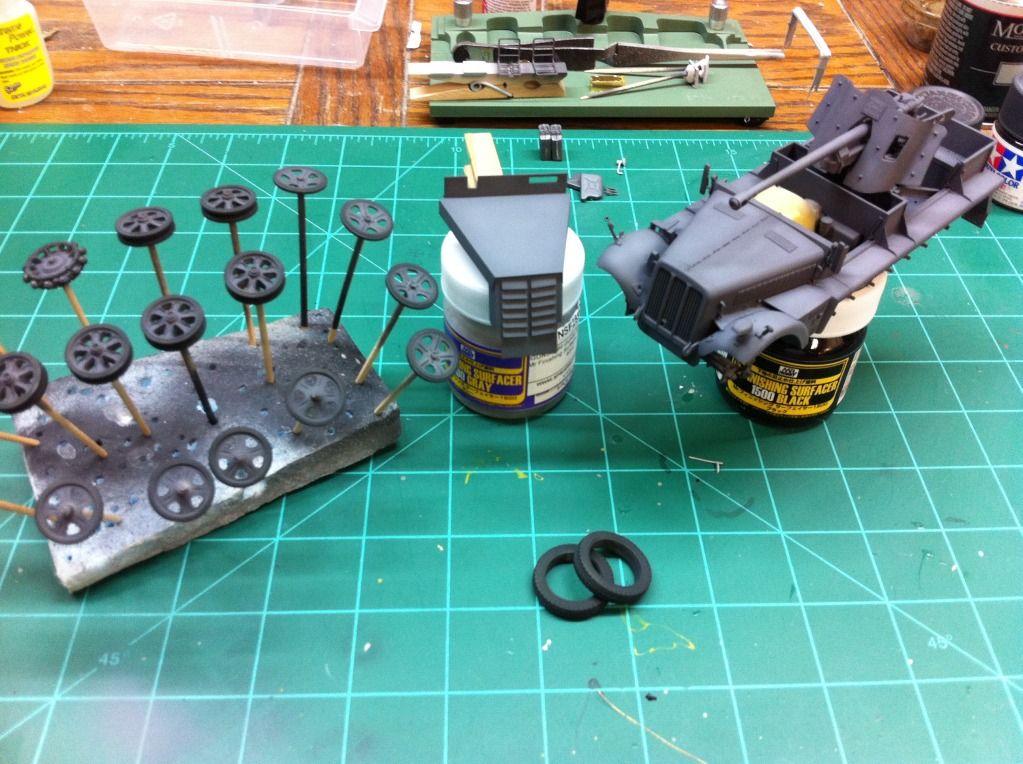
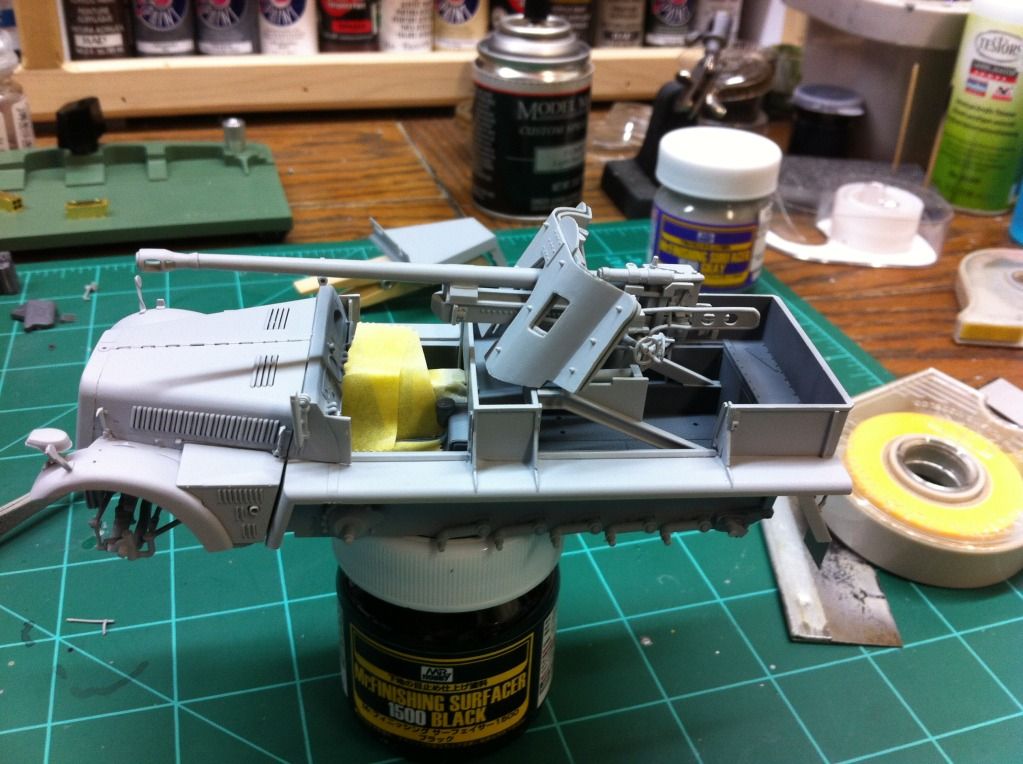
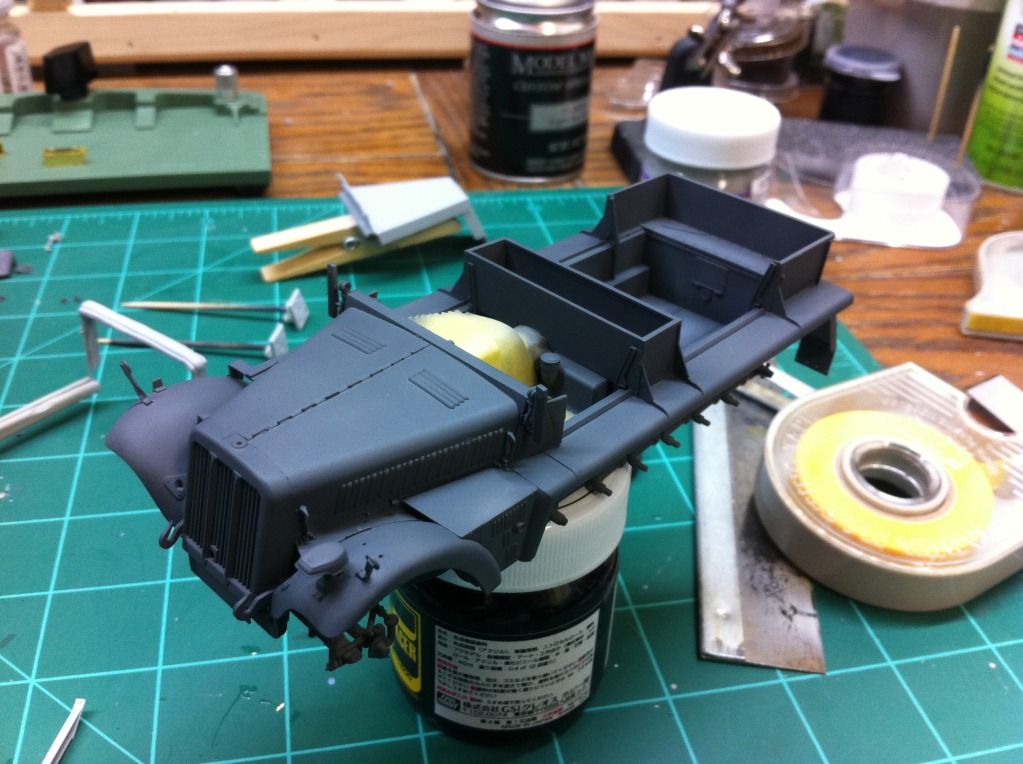
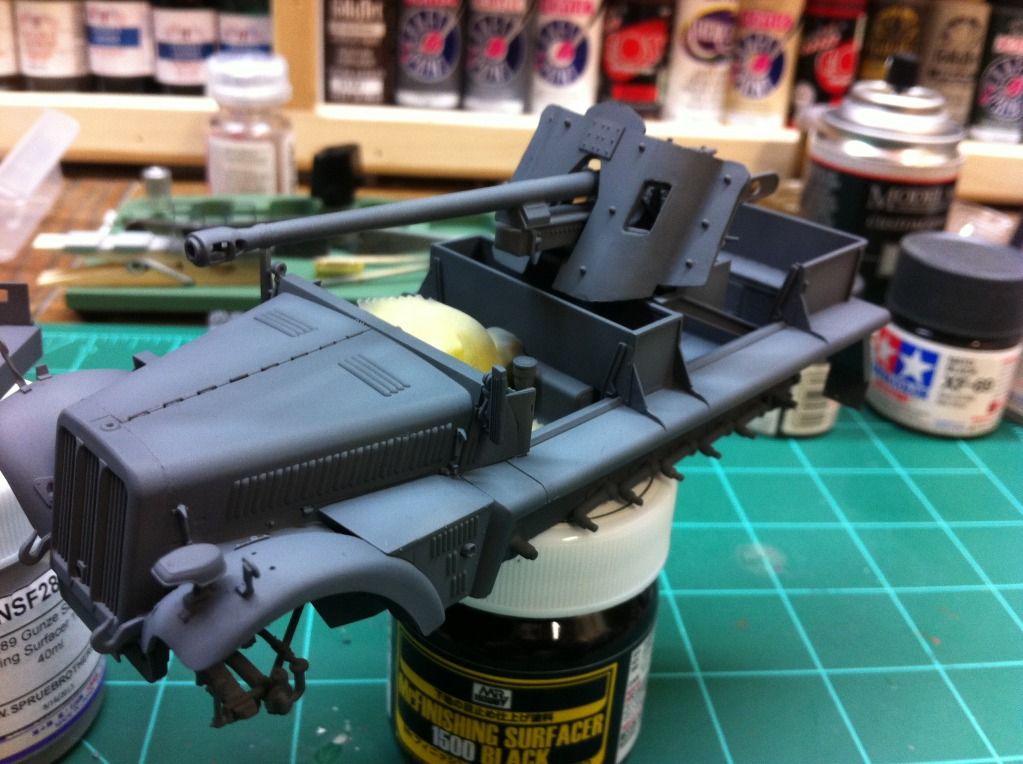
Caught some more bench time finally. Broke out the a/b and thinner and got to work. Primed everything up use Mr. Finishing Surfacer 1500 thinned 1:1 with Mr. Leveling Thinner. Love this stuff and the black version of it finally arrived today!!!
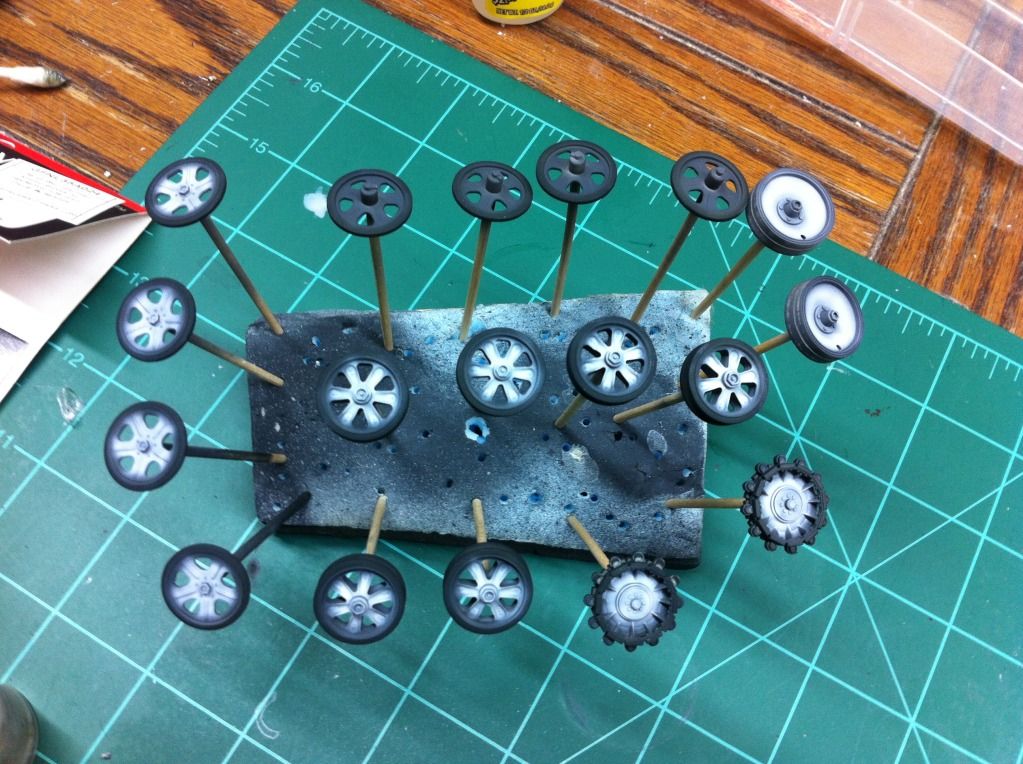
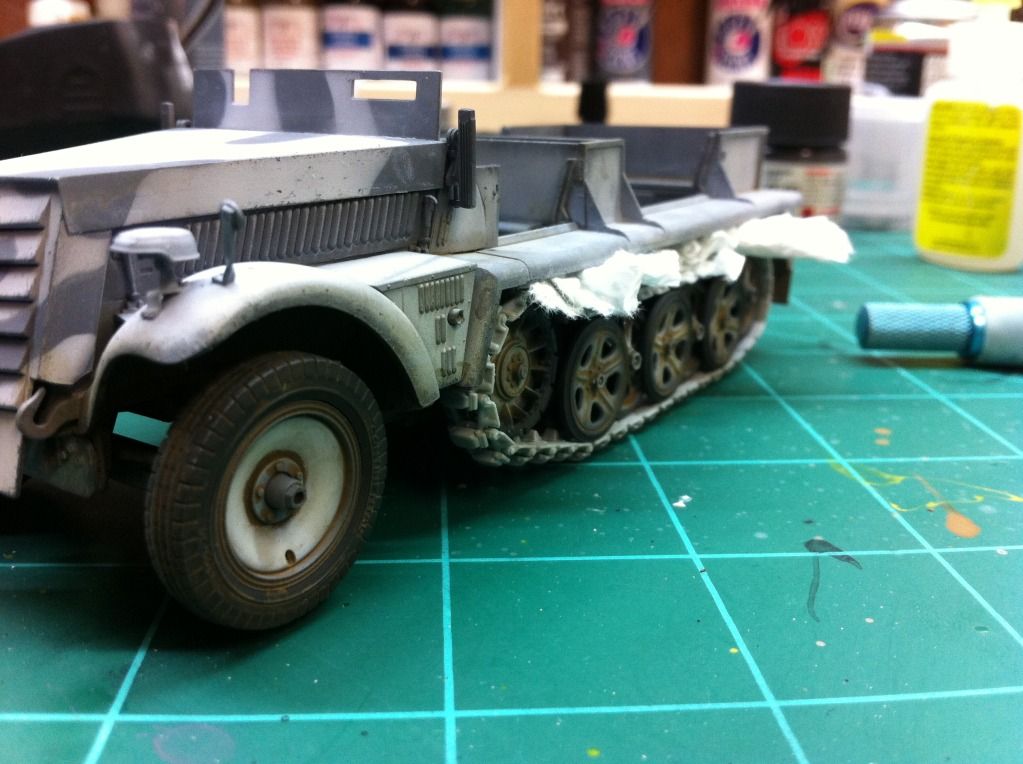
After primer, I sprayed the rubber surfaces on the road wheels, tires, and sprockets using Tamiya’s NATO Gray.
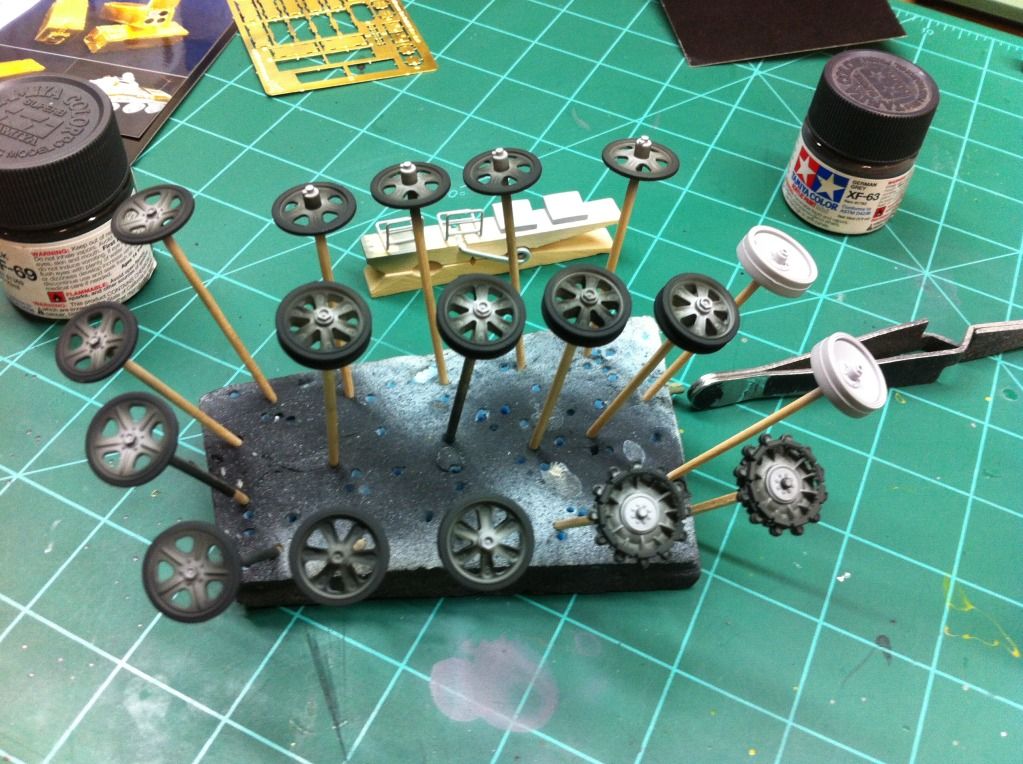
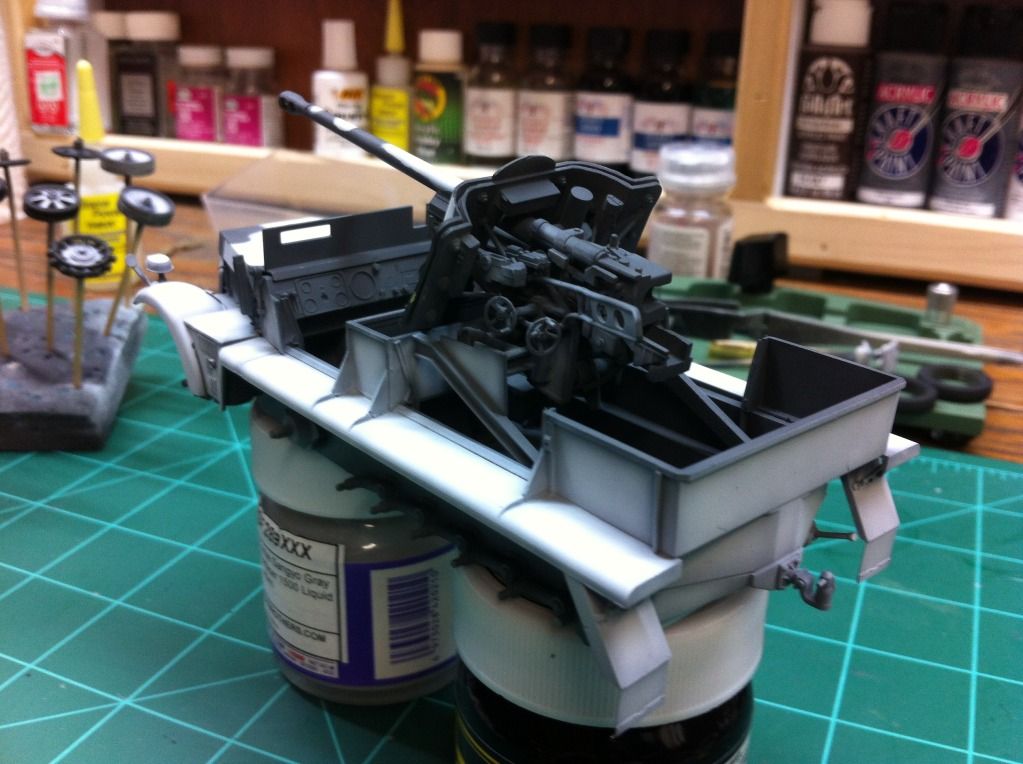
Then on with Tamiya PG straight from the bottle for the base.
Added several drops of white to lighten it up and came back and hit the top areas only with the lightened pg. I left the under surfaces in the darker pg. Broke out the handy circle template and hit all those road wheels as well.
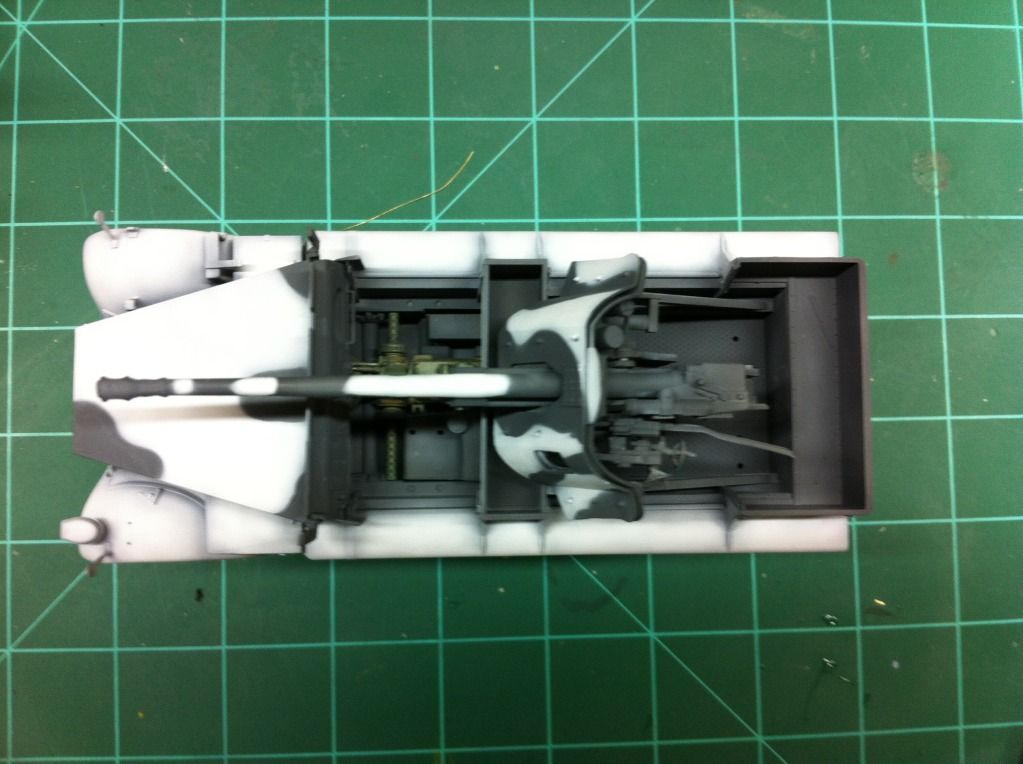
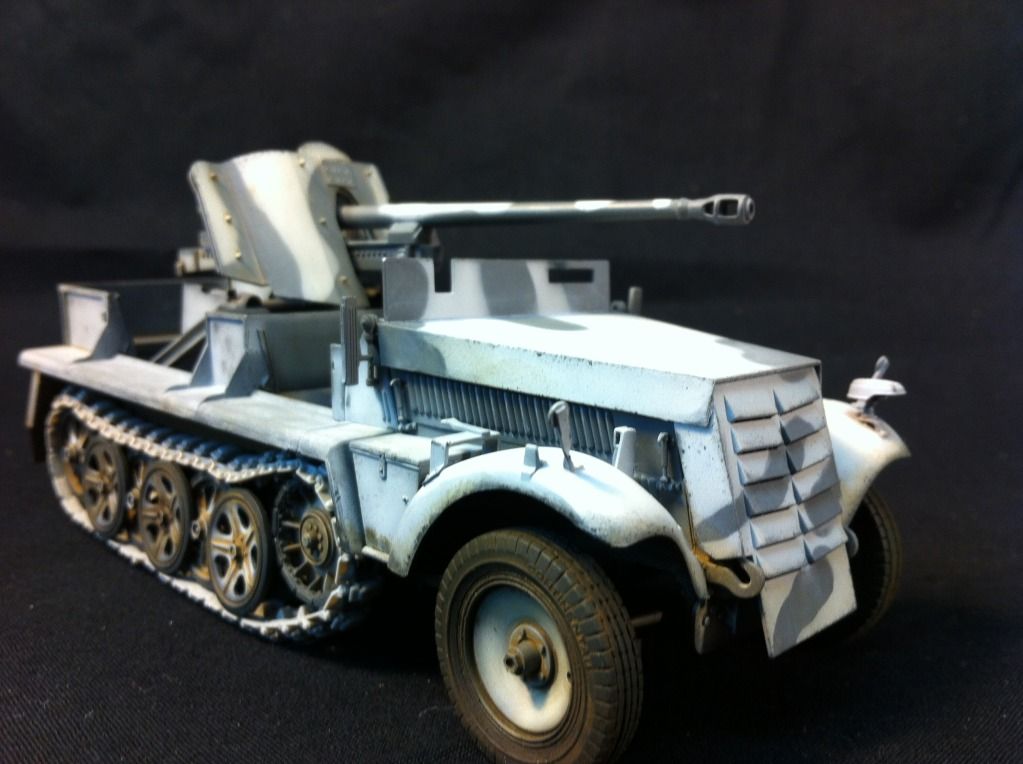
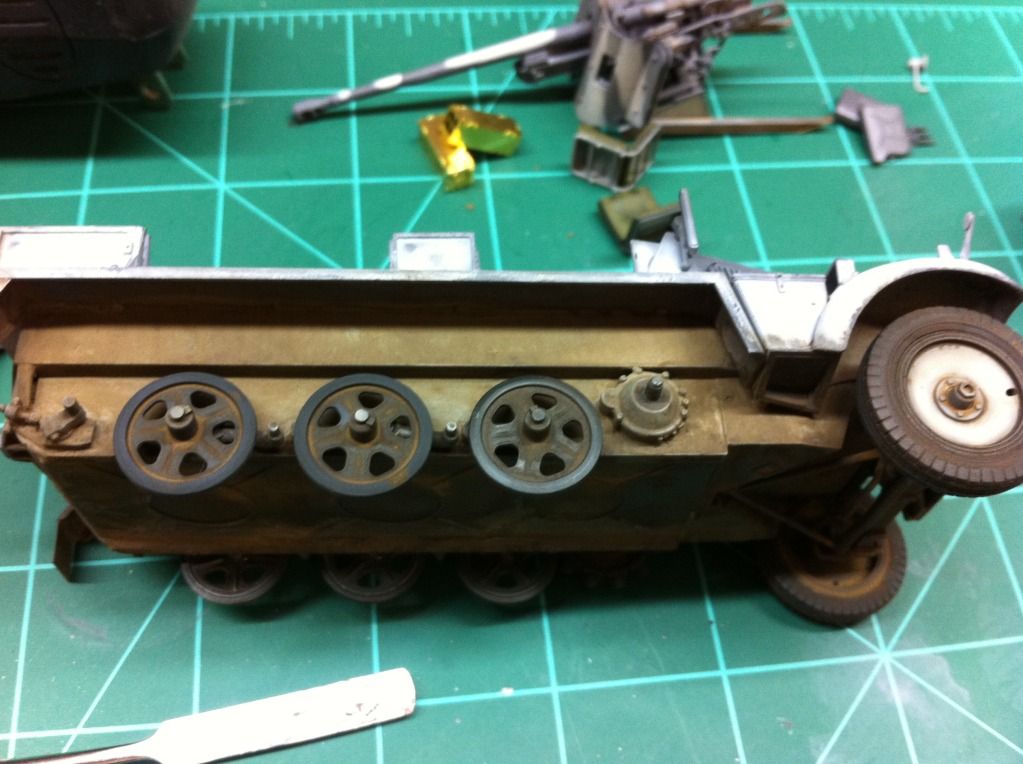
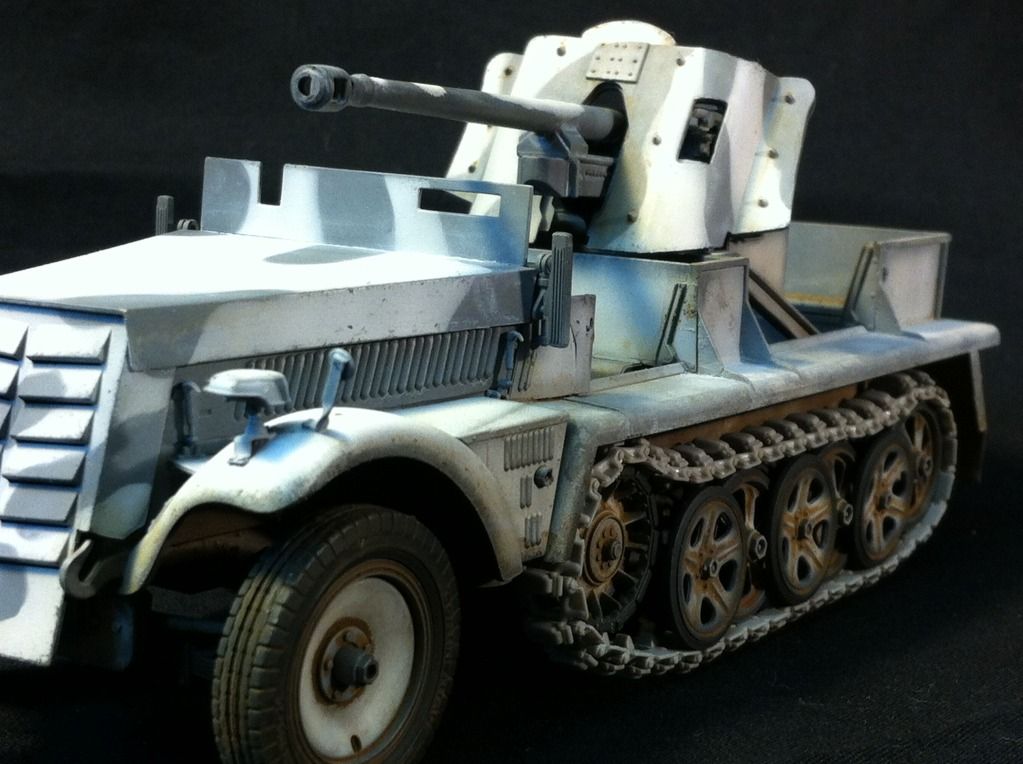
Now, this is the first winter scheme I have ever attempted so I am a bit apprehensive about it. Not sure how its going to turn out. Looking at the paint diagram and box art, there is some hard edge whitewash on the hood armor and the gun shield/barrel. The rest just looks like a worn solid whitewash. I used poster tac for the hard edge. There was some overspray here and there, but no big deal. For the rest of the whitewash, I just varied how much paint I applied in those areas to give it a worn out and beginning to fade look. I think I kinda achieved that look.

And of course the road wheels to match…
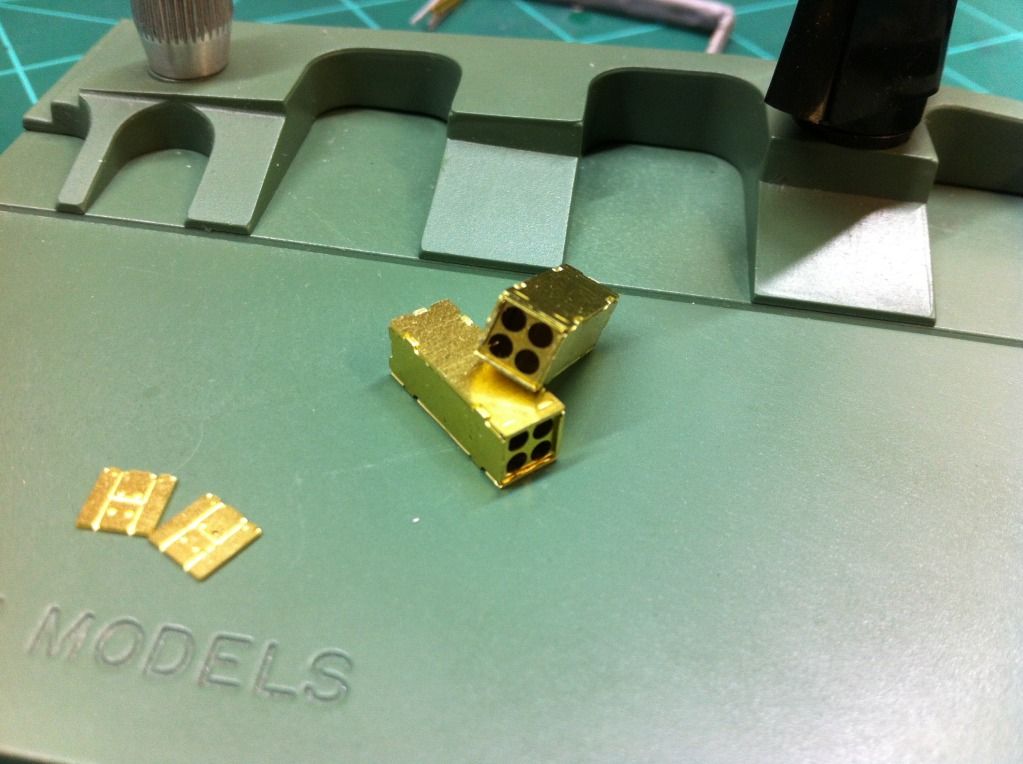
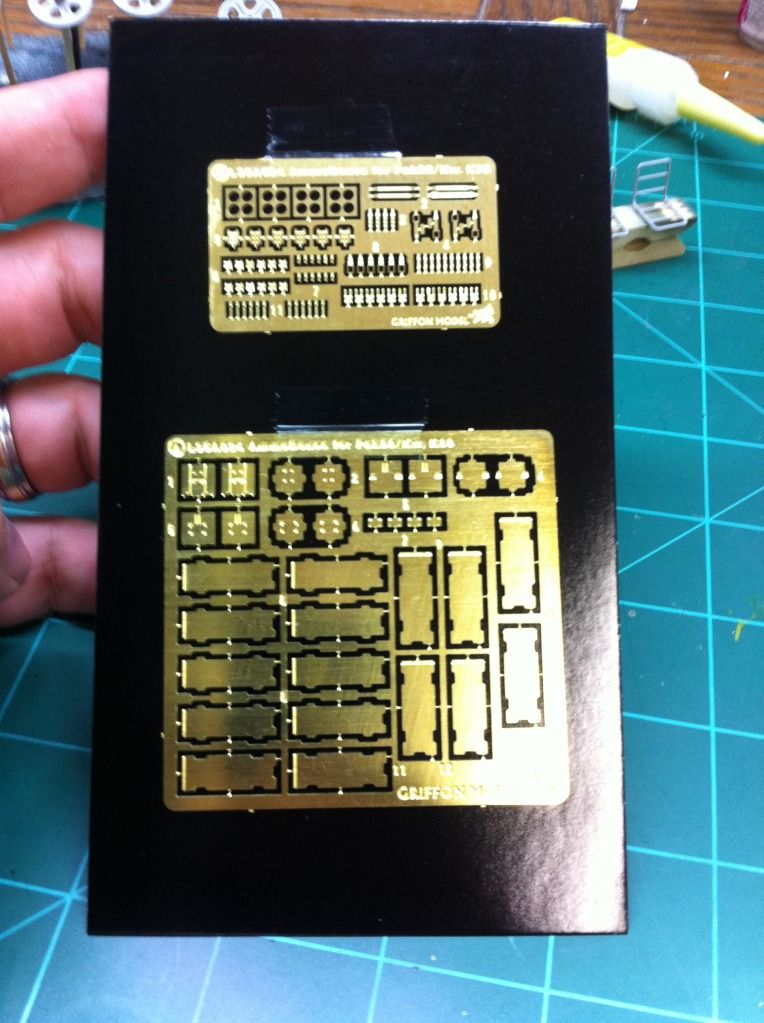
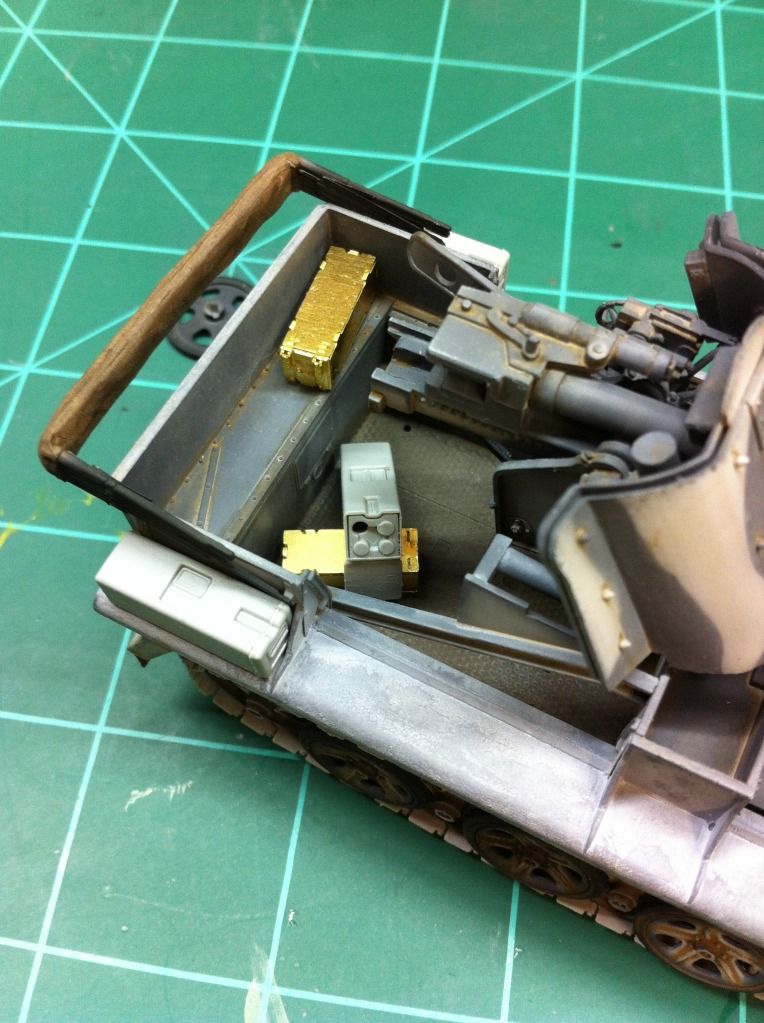
I also received some etch ammo cases. The main parts build up pretty quickly but the hinges and straps and other stuff is quite fiddly!! This is as far as I got with them after attempting to build one set of working hinges. Where those hinges are now is anybodies guess…
Am going to try removing or burnishing some of the whitewash down along some of the edges tomorrow where the crew would have slid on and off the vehicle. So thoughts? Any tips on this winter paintwork are more than welcomed! Thanks for taking a look!!
Looking back at the pics, that white is quite stark in them. It is much less bright and more faded in real life. Will try and get some better pics.
She’s looking really nice, Eric!
I just finished a King Tiger with a whitawash camo:
http://cs.finescale.com/fsm/modeling_subjects/f/29/p/147648/1688499.aspx#1688499
I painted it with Gunze acrylics, sealed the paint with Alclad clear gloss and applied Vallejo Air white on top of it. Then I removed the white paint using Vallejo airbrush thinner.
I’m not sure if this helps you at all, but I thought I’ll just share it with ya…
Thanks Clemens , that is one very sharp kitty!!
love that camo job! how did you create the sharp edges? mine always turn out bad.
Thanks! I used poster tac which is similar to silly putty rolled out into “snakes” and applied to the intended areas. You can spray straight down on top of them and give somewhat of a feathered edge or you can spray into the corner where they meet with the work surface for a more sharp edge.
Nice work on the camo Eric! Lots of ways to tone down a ww finish from filters to washes to dry brushing, etc. depending on what effects/layering you’re after.
Eric, that camo scheme looks freakin’ SOOO-PERB!! Honestly, that’s a great job on that beast!
That’s coming along really nicely, love the paint job.
'preciate it fellas!! Sorry for the long pause in between updates. You know how it goes!!
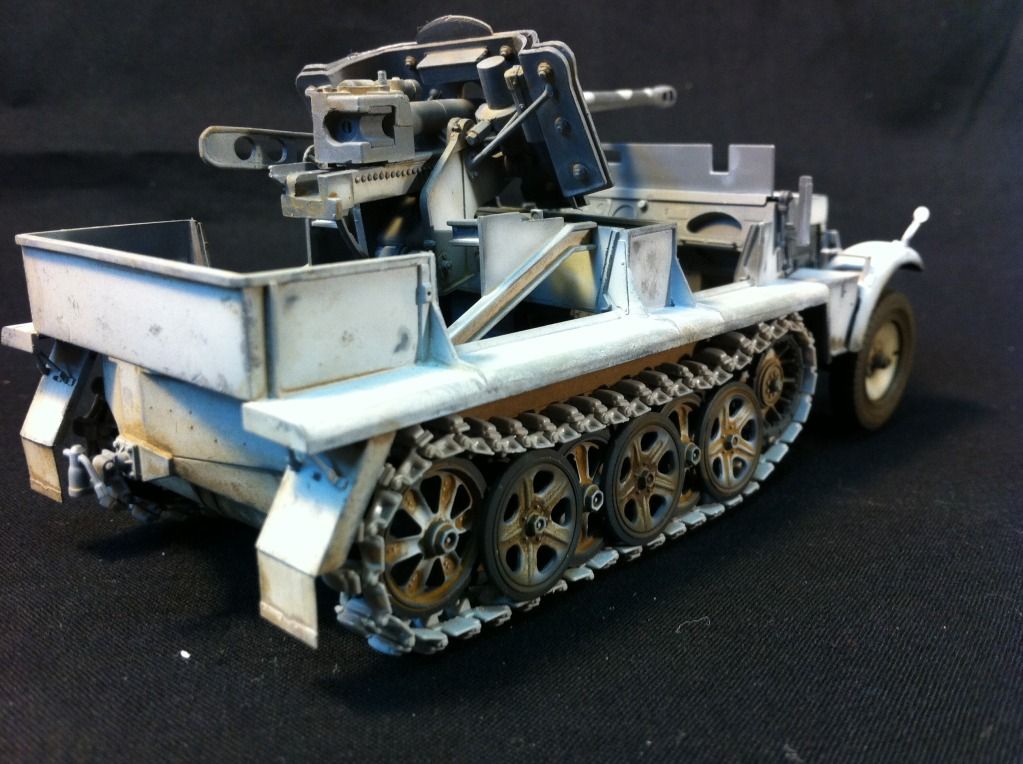
So after I got the camo finished, I moved on to an overall wash. I mixed up some white oil with just a touch of Paynes gray in a highly diluted solution and washed all of the top surfaces to hopefully tone down the whitewash scheme and blend it all in. This was after all the undersides got two heavy applications of a raw umber wash. Sorry for the lack of photos as I forgot to snap pics as I went.
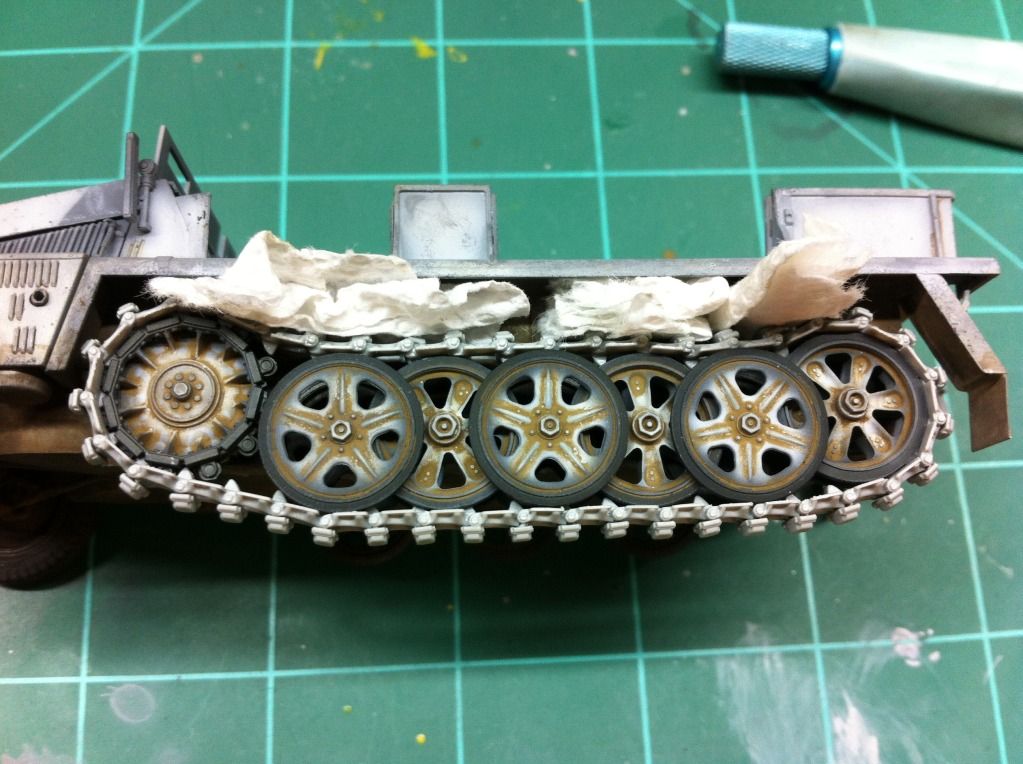
The on to the tracks. Oohhhh the tracks. Talk about tiny!! Each link had 2 ejection pin marks that had to be sanded as weill as a small pip on the"guidehorn part". Needless to say, this took some time to clean up.
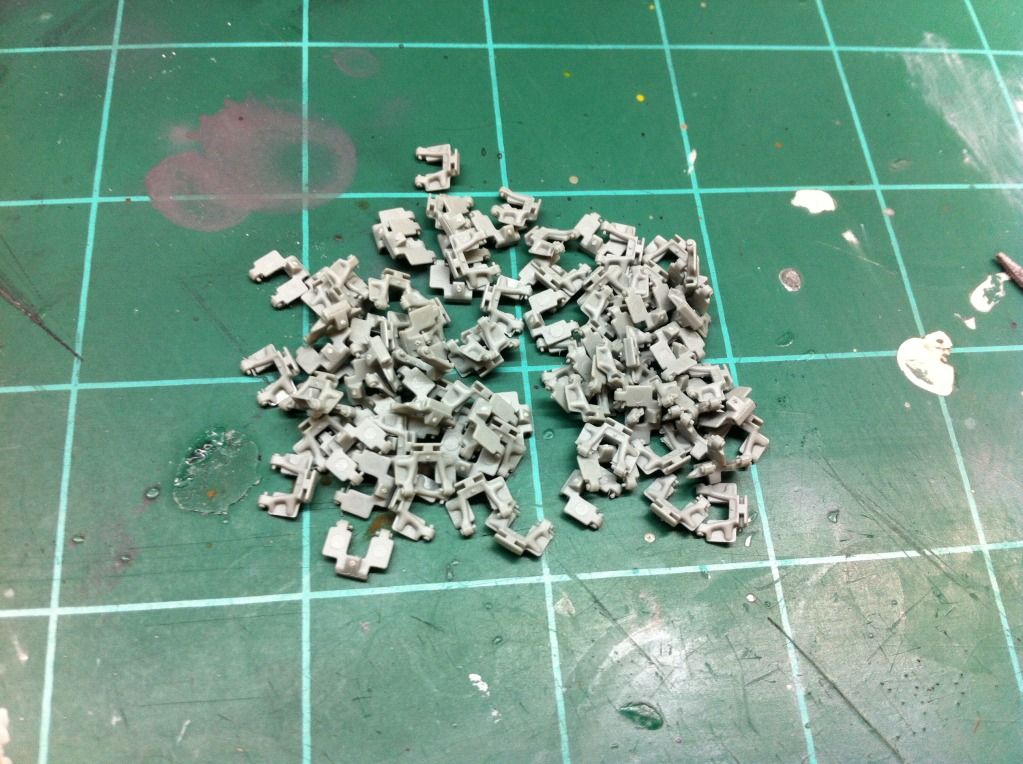
Now as anyone that has built a Dragon half-track knows, it is possible to make these tracks workable as they come with separate pads that if glued carefully hold the pins their slots. I decided to attempt it and it worked pretty well. I applied the glue to the pad first, let it sit for a second and then applied it to its place on a run of tracks. The kit instructions call for 42 links per side but I used 41. As par for the course, I usually find myself 1/2 a link short and this kit has no adjustment on the rear idler.
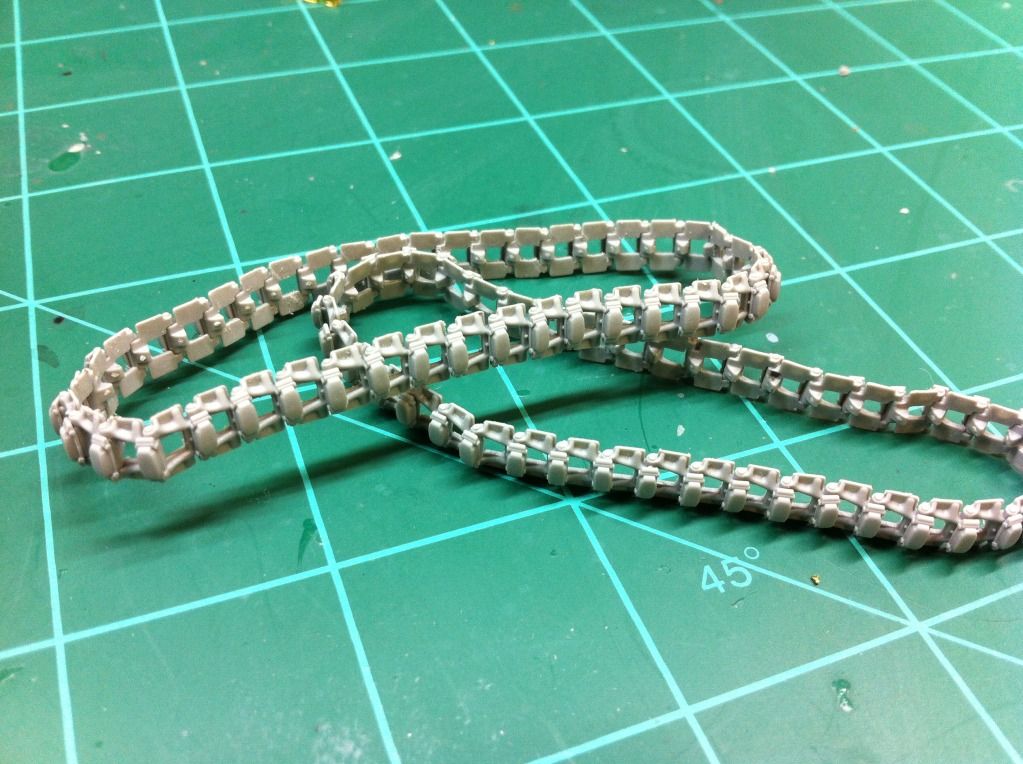
Even being successful at making them workable, I still decided to at least glue together the top run so that appropriate sag would show.
Talk about a test of patience!!![O][|-)]
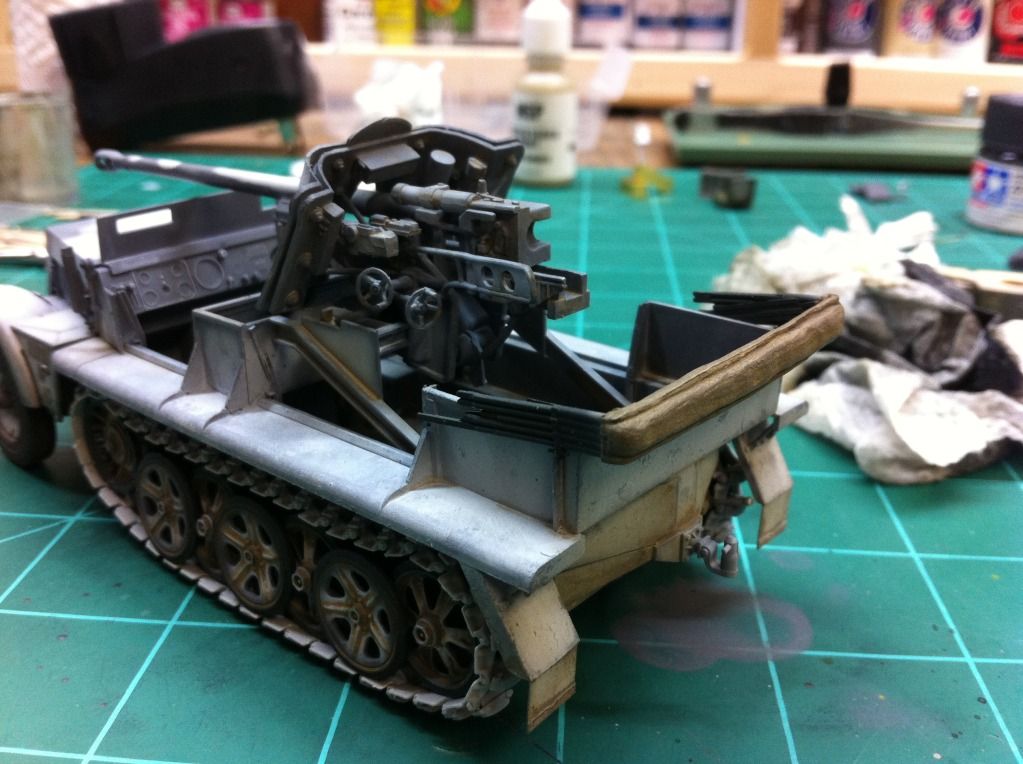
From there, I painted the collapsible cover. I think I got a pretty close approximation of the color. Added some buff dry-brushing with craft store paints.
And this is how she sits as of right now, the running gear is just sitting there and not glued…
I did encounter a very strange problem with my raw umber wash. I was using a mix that I had made up a long time ago using Winsor and Newton oils and Masterpiece spirits and ran out. I was able to apply this mix and using my airbrush accelerate the drying to show that dirty dusty look. So after running out, I mixed up a new batch and for the life of me I could not achieve the same results. Sometimes it would never completely dry and other times even when it dried, it was a darker brown and not the dusty dirt color you can see in some of the pictures. Very frustrating and something I am going to have to solve. I love the dusty dirt look that a raw umber wash has after it dries.
Thanks for posting your work. Exceptional!
She’s looking great! Well worth the wait, my friend!
Very nice!
I liked the dust in the wheels and the camo came out very nice.
I only think that some figures are missing to give it character, did the kit did no had the figures?
Thanks Clemens, sader, and garzonh!
Unfortunately it did not garzonh. I am really hoping that Dragon or somebody will release a figure set that matches the ones on the box art.
Eric, that’s looking pretty good— bummer about your wash. That problem you had is actually the very reason that MG said had had and that caused him to invent his line of washes, so as to be more consistent and predictable. In any case, I couldn’t tell where the old vs the new was!
Man that’s a killer little kit and so is the workmanship.[Y][][][*]
Tony lee
Thanks Tony and Karl!
We have a local show coming up the first of November and I plan on investing in some MiG and AK stuff for sure Karl!