What great results you’re getting, and so quickly! Those figures in particular look excellent.
Maybe the learning curve isn’t as steep as I originally thought. My main hangup is still the hazmat situation. How do you find the fumes/resin handling? And can I ask which printer you’re using?
Well I have tech support in my son to assist with the learning curve. When we hit a snag, he looks up answers online and adjusts the settings on the software for the printer. We’ve gotten most of the kinks smoothed out now. Although I’ve also done a few successful troubleshoots myself.
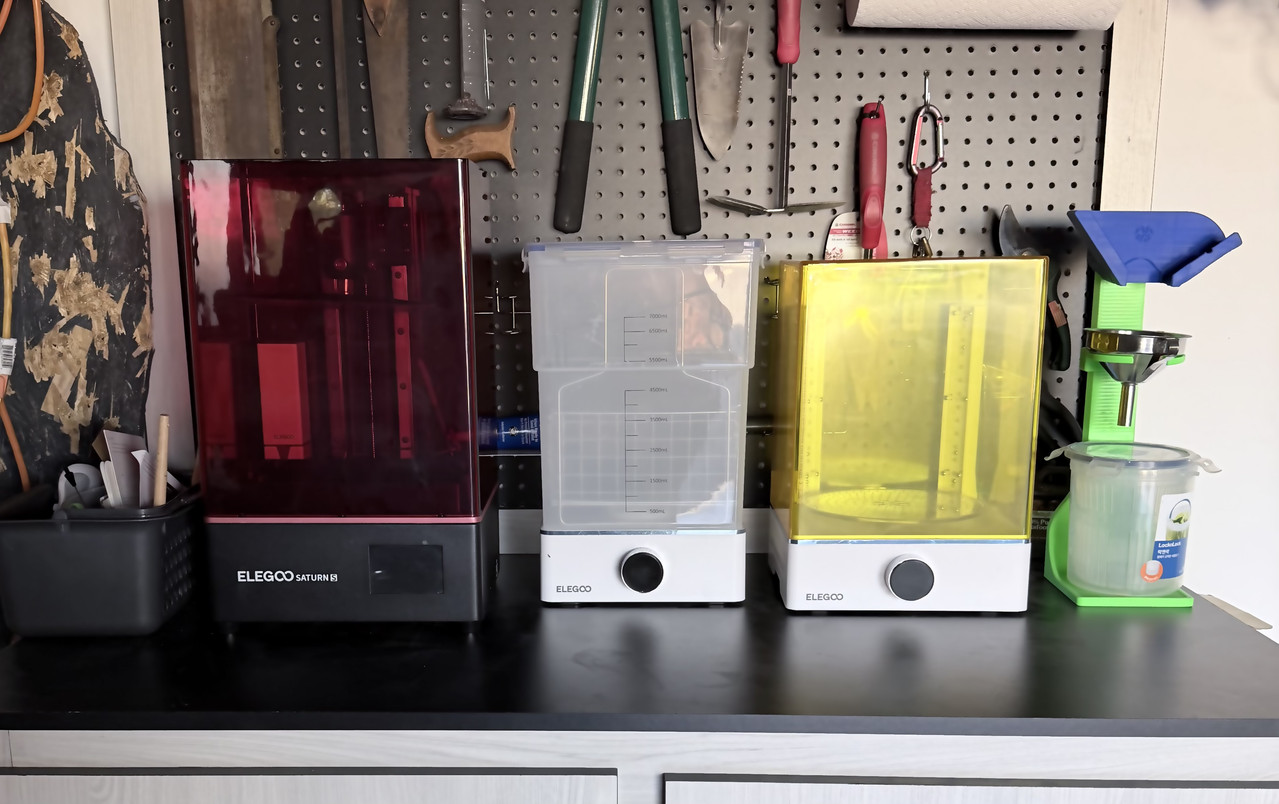
As far as the resin handling goes, we keep an air purifier running right by my printer work area in the garage and that helps immensely. I have a box of disposable gloves for handling the resin until it’s at least made it through the wash stage. I think that my skin must be getting used to any accidental contact with the resin as I don’t get the same sensation/feeling as I originally did. But I still immediately afterwards wash up.
My printer is an Elegoo Saturn S 4K
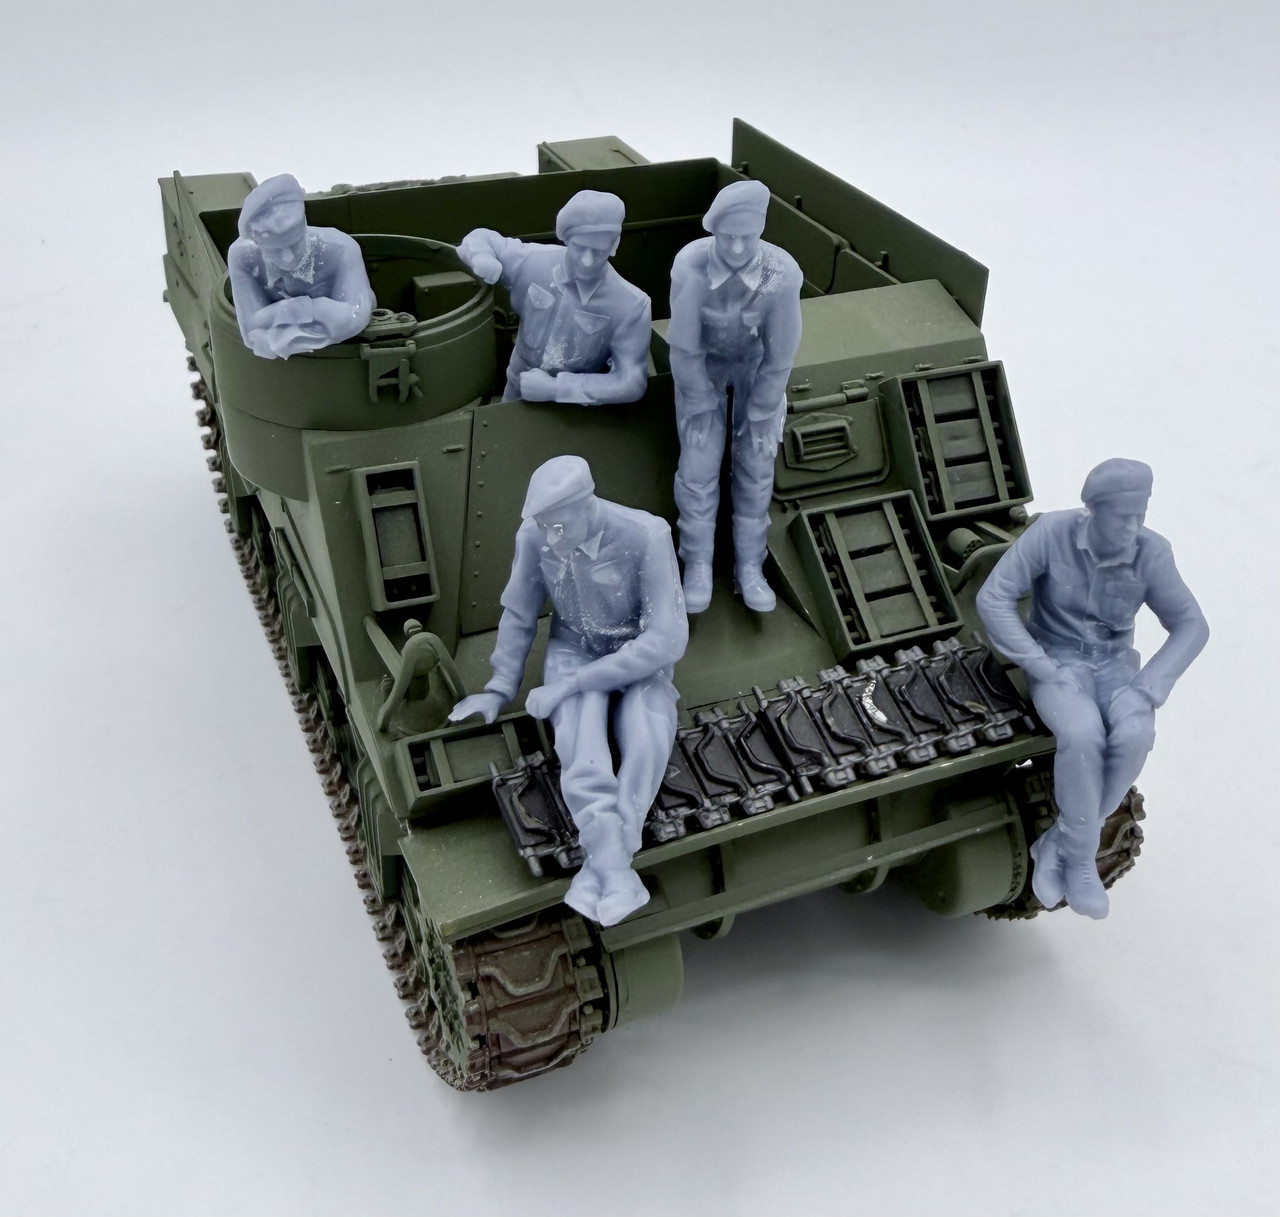
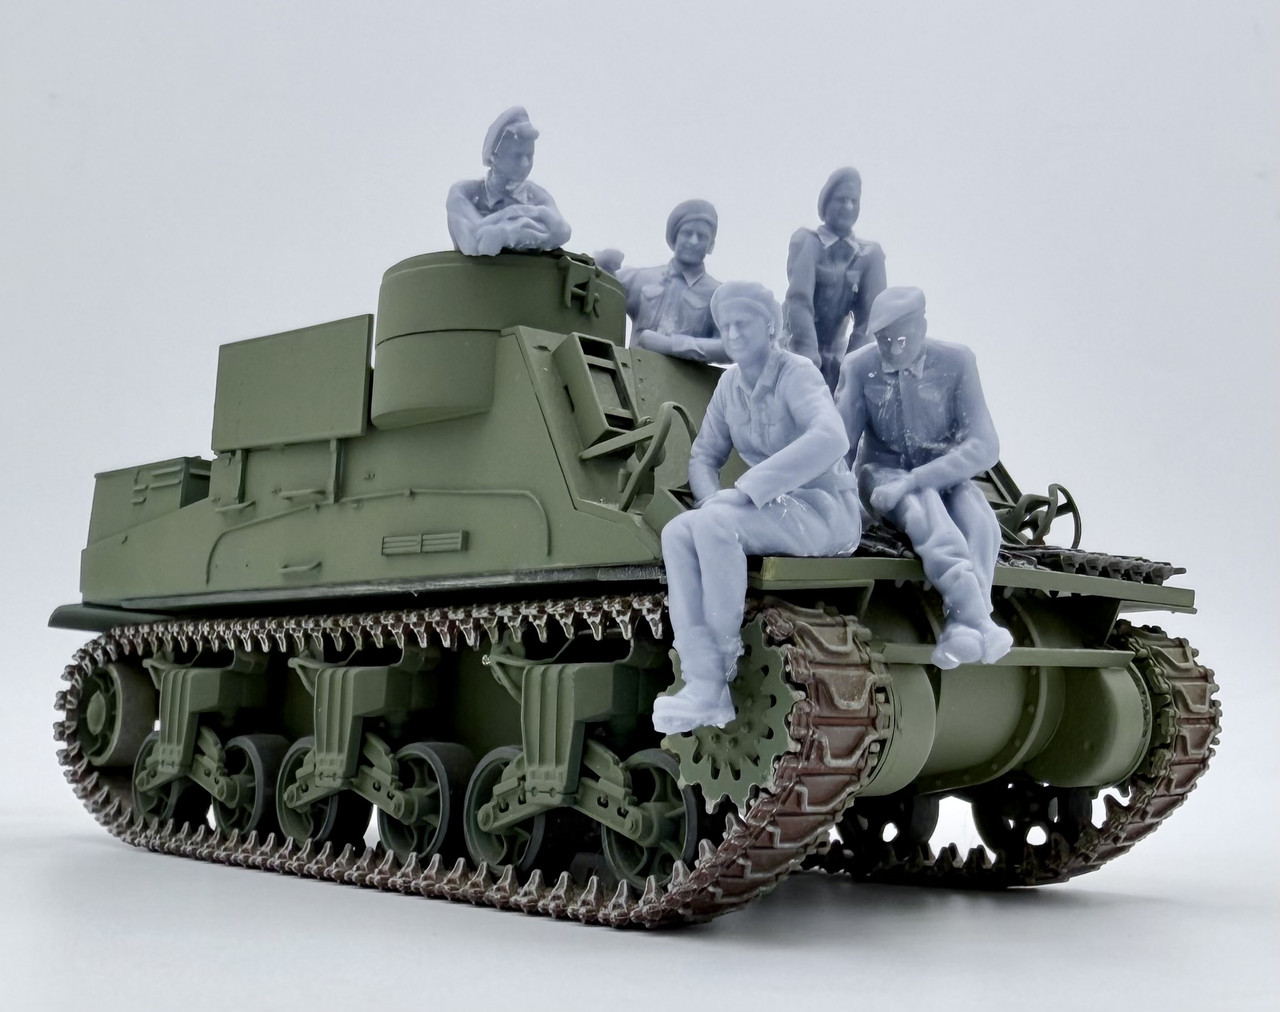
Thanks Tony! The toughest learning part feels like it’s behind me now. The Commonwealth tank crew are 1/35. I suppose I should photograph them by a 1/35 vehicle for some scale reference…
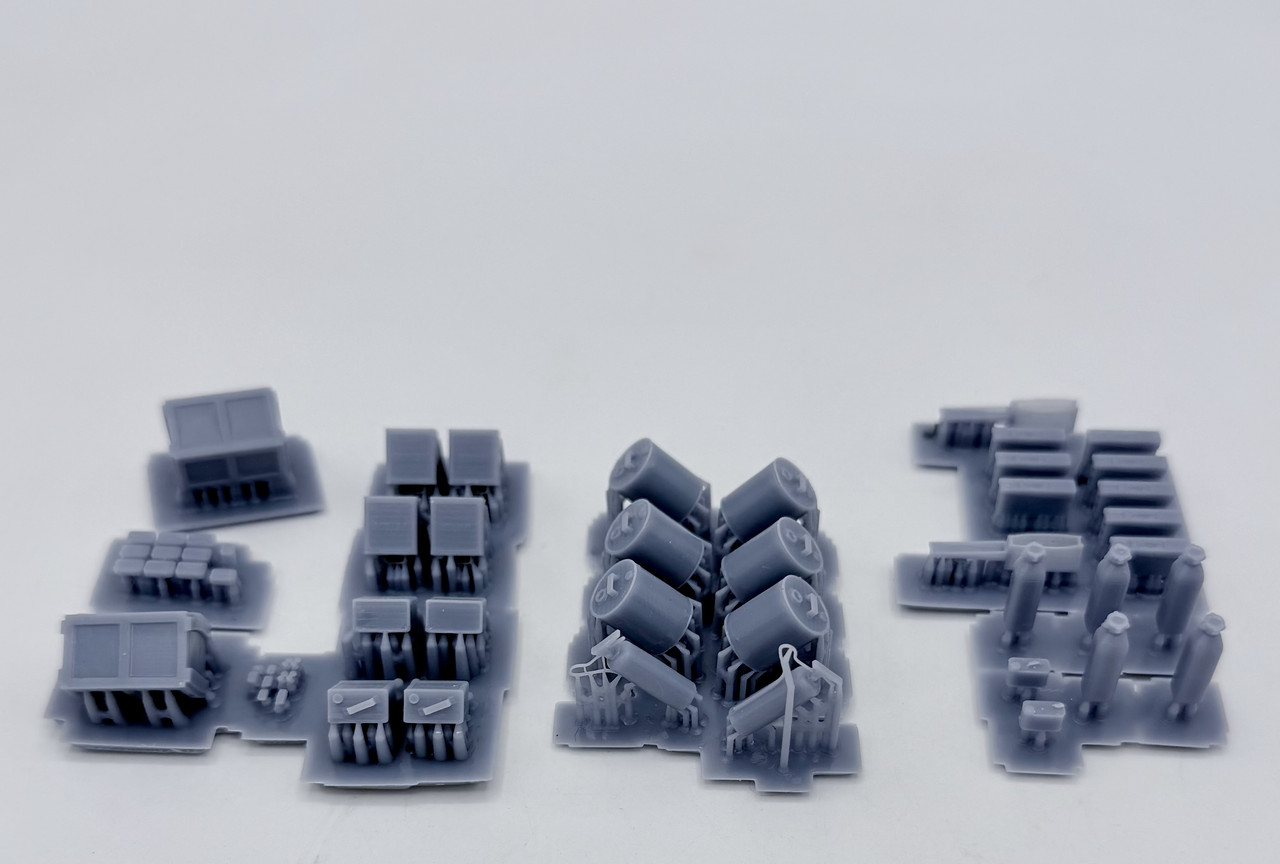
Here ya go Tony. Another weekend and another batch of prints…
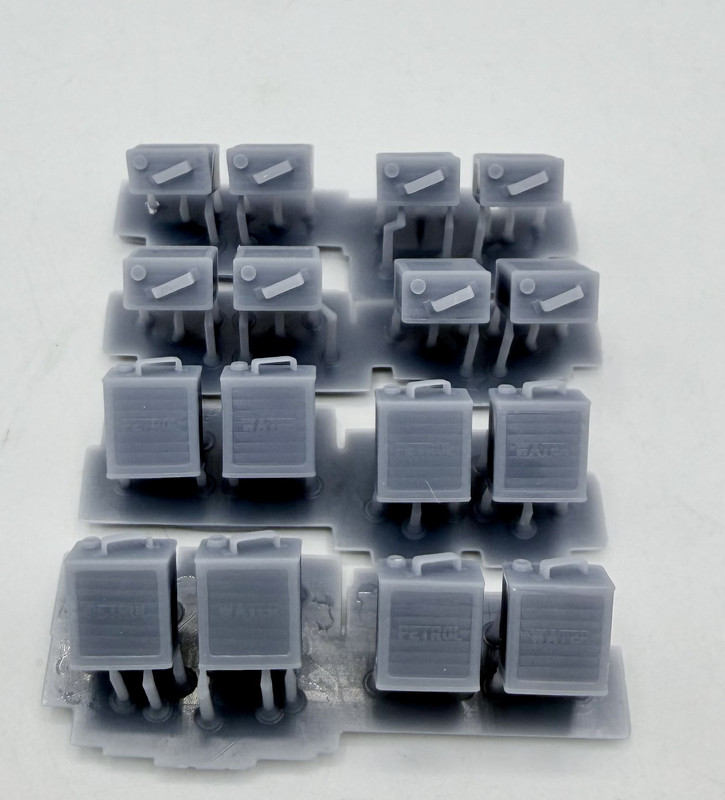
These are, from left to right, British rations and 2 gallon “flimsy” cans for petrol & water, US 6 gallon oil drums, & fire extinguishers, and lastly German MG-34/42 ammo boxes, drinking water canisters, and weapons lube oil cans. Unfortunately, on the flimsies, I did not pay attention to the up/down orientation of the cans, so most of them were set up inverted, with the grab handles/pour spouts at the base where the printing supports attach… not sure how they will do when removed, so i scrubbed that file and set up a new one properly oriented.
Much better!
Then lastly, since I was asked by Tony about the scale of the Commonwealth tank crew, I figured that I’d pose them on a build of mine for some scale reference. Here they are on my old Italeri Kangaroo Priest
You’re welcome. When they came out of the printer, I thought that they looked a bit tall for 1/35 scale. But now seeing them sitting on a 1/35 vehicle, I think they look properly sized. Tamiya’s newer crew figures tend to be a bit undersized, while those from other companies such as Bronco, Dragon, or Miniart tend to look a bit larger by comparison.
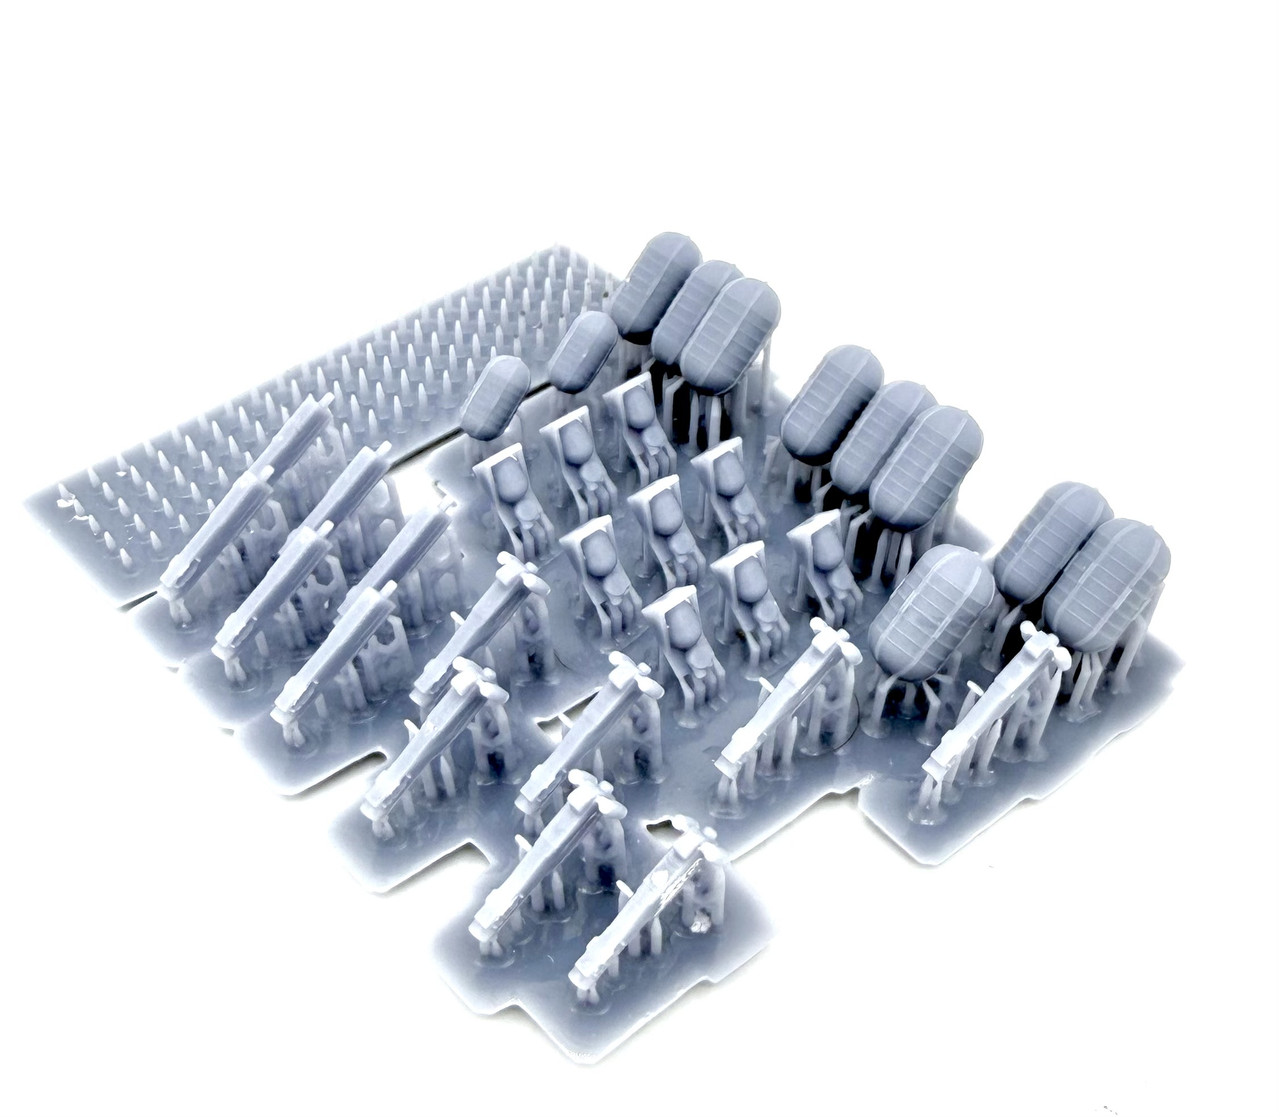
More goodies printed up… yesterday I did this batch of oxygen tanks and .50 cal.s… enough for a B-17. Unfortunately the barrels separated off the print plate for some reason and misprinted instead. But they are an easy one to print, so next batch of items.
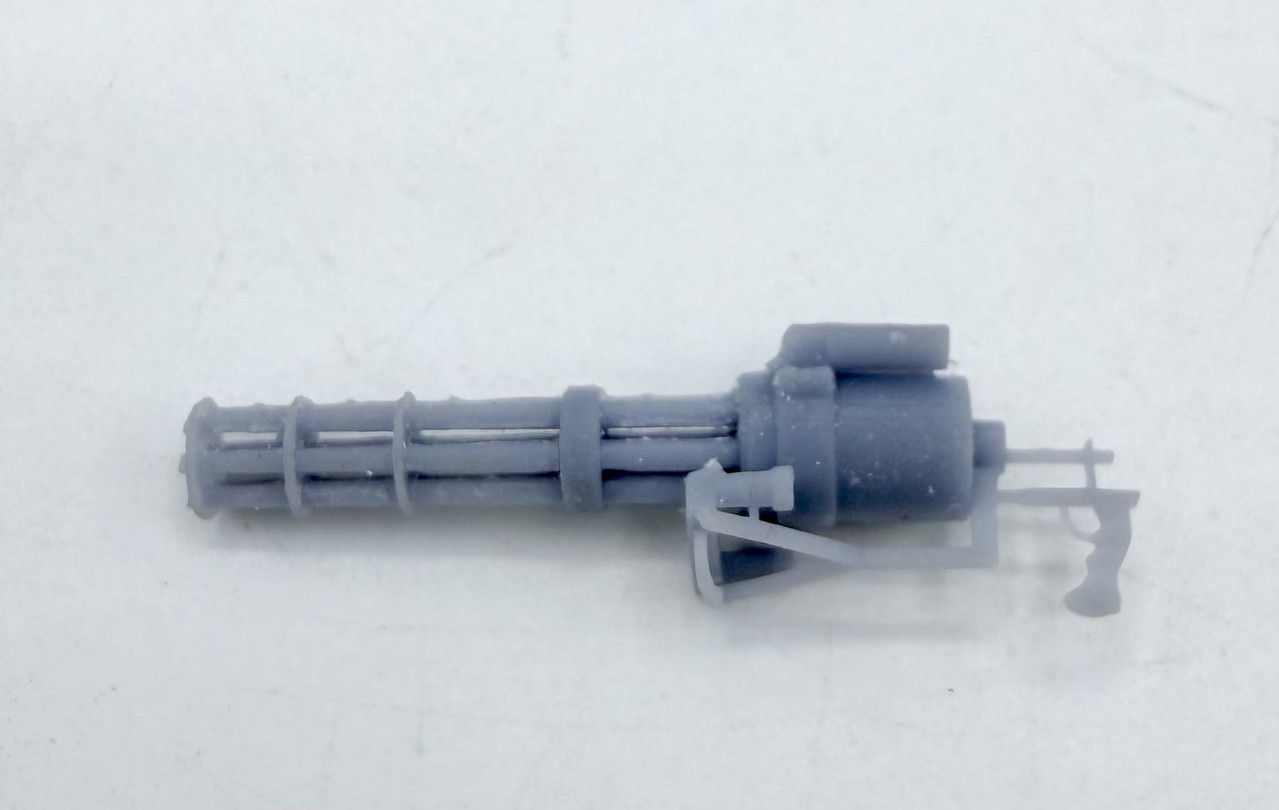
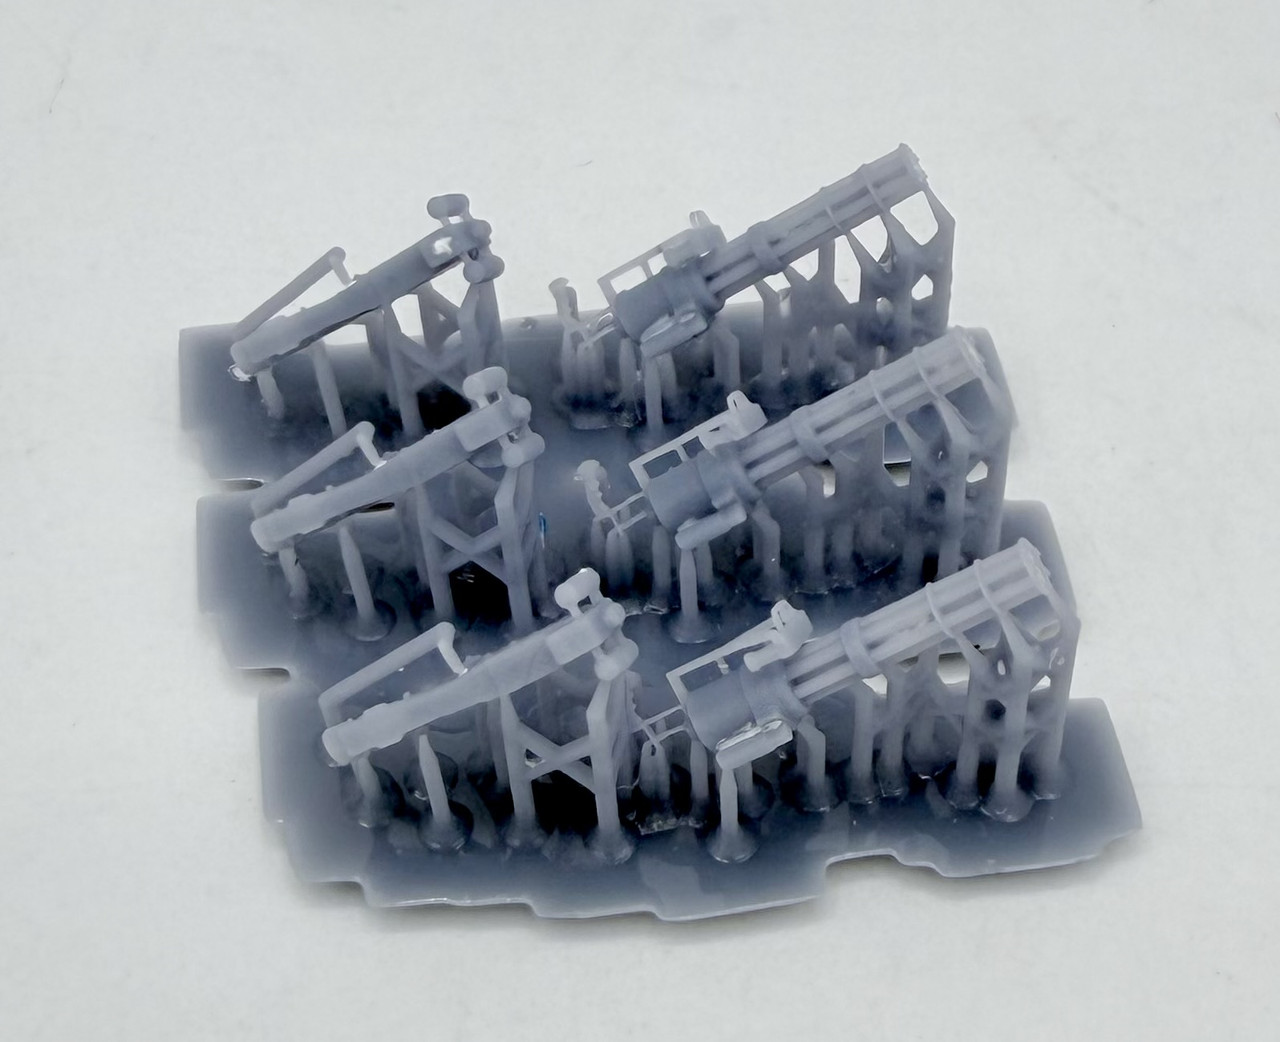
Then today I did up test batch of machine guns, all of which turned out correct. The interesting one was this minigun
The file did not say what size or scale it was, but after printing it up at 100%, taking measurements of the print, getting the actual dimensions from online, and doing some math, it appears that this is scaled out to somewhere between 1/27 and 1/28 scale. Rather odd if you ask me. But I have now done a scale down to 1/48 for my next test print batch.
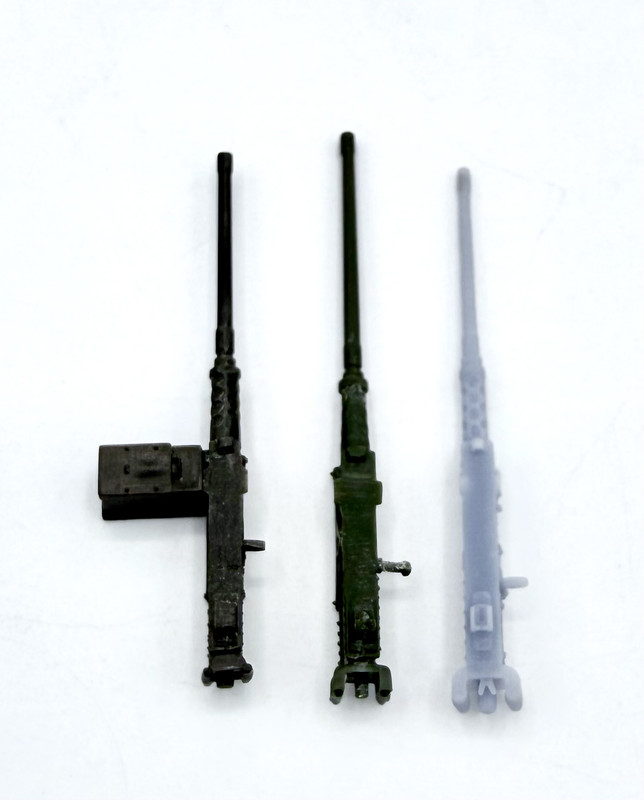
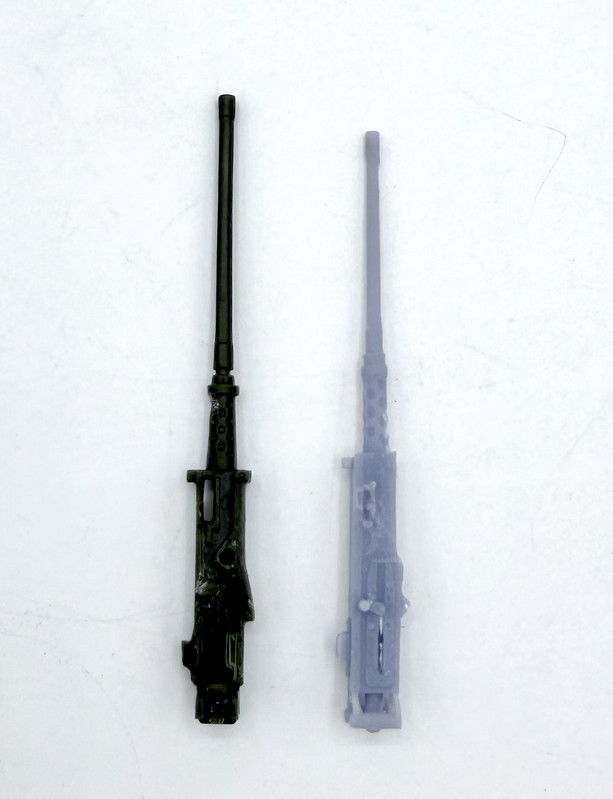
One other bit that I printed up with the original minigun file, I printed up this M2 .50 cal. as part of the same batch. It’s pretty nice, and has some decent detail
Here I have it with an older Tamiya and Academy .50 cal… interesting how each has a different length and width
And a side view with the Academy .50
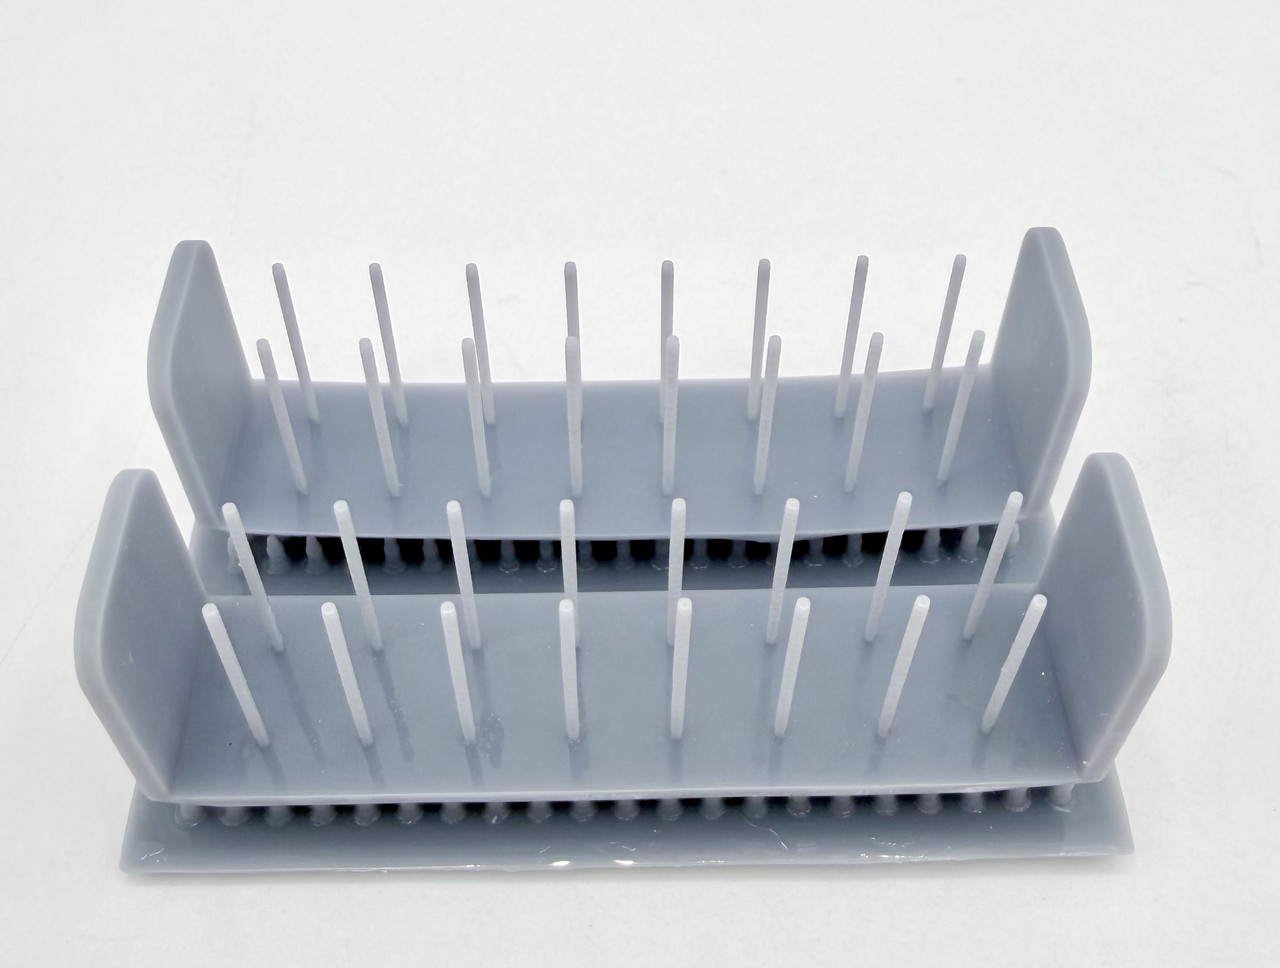
Then today was a test of scaling down the minigun to 1/48. It came out pretty close to 1/48…. and still has the individual battles and hollow bores… far superior to any minigun that I’ve seen in a 1/48 injection molding. I also printed up a few M2 receivers, and a bunch of M2 aircraft barrels
It’s fun to see you going through the same print support learning curve that I did Sacrificial/low detail/easily repaired, side down facing the build plate. Also looks like your starting to place supports by hand a bit. I do that pretty much always now. Almost time to set up my new printer, thinking next week It’ll be warm enough.
I’m learning by trial and error regarding angles and supports. Finding out what works and what makes it harder… setting up the print programs is getting to be easier and easier. It’s just a question afterwards of will this work out right?
Have fun getting your printer going. The weather has been quite warm here lately, so no worries in that respect.
Seeing the fine detail here is really something! I was looking at getting into 3D printing a year ago and wound up with a Bambu Labs P2S (filament) printer, mostly because the boy was supposed to be getting back into printing, and I thought it would be helpful to keep up with what he knew. (The old filament printer died, which wasn’t a surprise considering its history…long story, but it showed up 6 months late in a very damaged box after I’d already received a refund, so…'twas “free”.) I’ve done a decent amount of smaller items with the Bambu, but nothing with the detail that Galaxy is showing!
Not sure if I’ll ever get into the resin printing side of things (if nothing else, I don’t think the odor issue would be easily resolved w/ the missus), but I’m going to spend more time ogling the fine outputs you’re producing!
I found it! It’s the Formlabs Form Studio 1, announced October 14, 2026, with shipping scheduled to begin November 16.
It starts at $699 and uses new low-odor Alpha Resins. With the optional VOC Extractor, the system has earned UL GREENGUARD Gold certification for low chemical emissions. That doesn’t make resin printing completely hazard-free, but it’s a significant development for people concerned about fumes and indoor air quality.
I read gomeral’s comment about his filament printer and his wife’s concerns about resin odor. This seems like exactly the development he’d be interested in.
Suggested forum reply
I’ve been interested in getting into resin printing myself, but the odor, ventilation requirements, and concerns about handling the chemicals have kept me away from it.
There’s a new printer coming out this month that has really caught my attention. It’s called the Formlabs Form Studio 1, and it starts at $699.
What’s particularly interesting is that they’ve developed a new line of low-odor resins, along with an optional filtration system. The combination has actually earned UL GREENGUARD Gold certification for low emissions.
It doesn’t eliminate every concern about resin printing, but it sounds like a pretty significant step in the right direction.
I’m particularly interested in what this could mean for printing highly detailed parts for our models. I’m going to be watching this one closely!
Here’s the manufacturer’s information:
https://formlabs.com/3d-printers/form-studio-1/One thing worth watching is whether its 35-micron pixel resolution produces the fine detail you want for 1/48 aircraft accessories. That’s where I’d want to see some independent examples before spending $699.


 Sacrificial/low detail/easily repaired, side down facing the build plate. Also looks like your starting to place supports by hand a bit. I do that pretty much always now. Almost time to set up my new printer, thinking next week It’ll be warm enough.
