I am almost finished with the Pz.Ia It is time to start on the next project. I have had this kit a while. Picked up some PE, and two mg37t barrels. The PE is a mixed bag I picked up over time off of Ebay. One is actually intended for the Tri-star kit. After comparing parts with plastic kit parts, everything with the exception of the fenders will work. The Tri-star kit is apparently a bit longer in the aft hull between the last two fender supports. I did find a Eduard kit to use though with some fenders. The PE kit from Voyager includes a turned main barrel, and the DML kit includes some PE also.
I have not decided on time period/finish as of yet. This is a top 5 favorite for me as far as German tanks goes. Love the rivets, the Czech’s like the Germans were elegant tank designers.
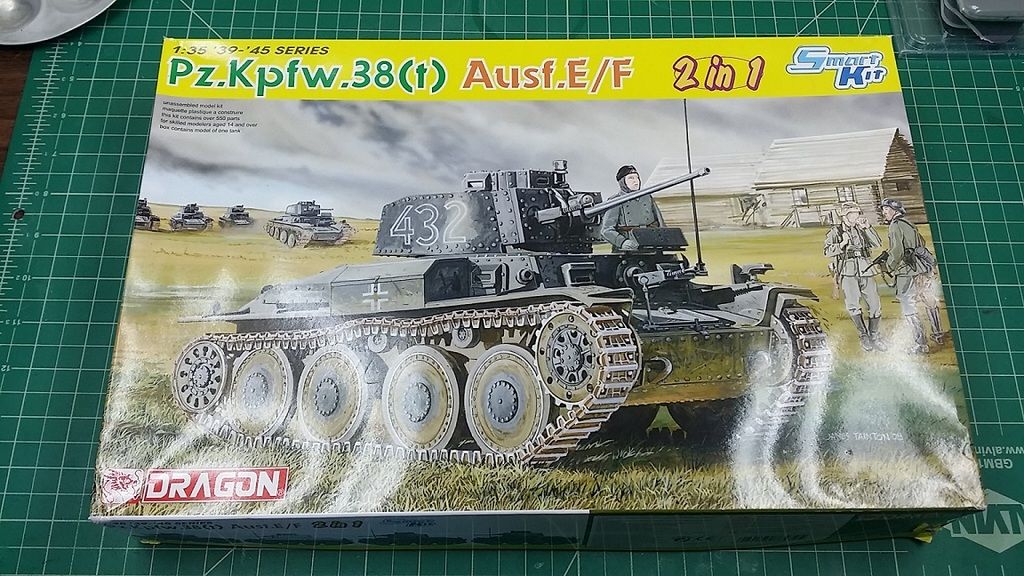
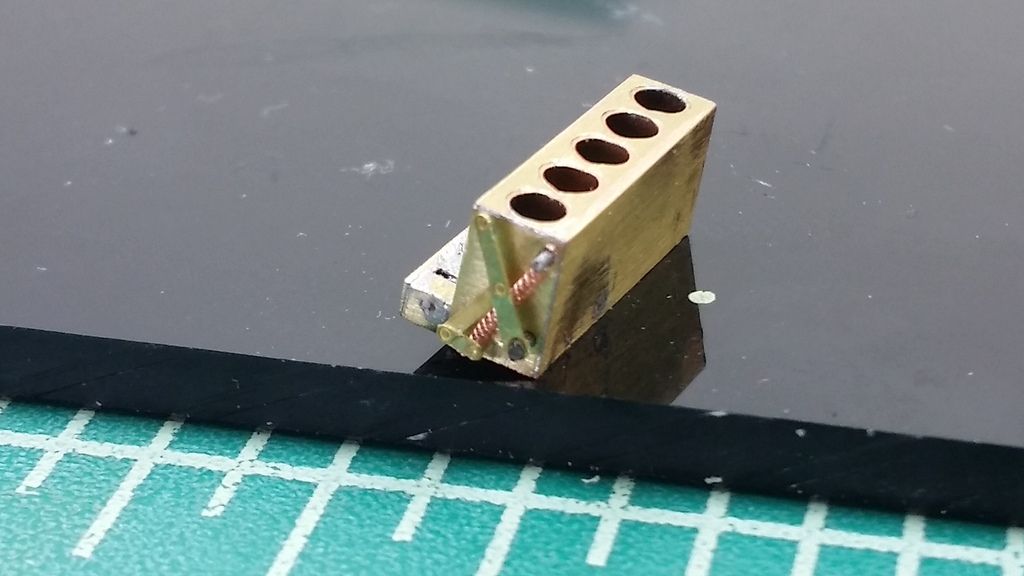
I have been busy with end of semester exams so not a lot of progress. I did clean up the road wheels, they were actually horrid around the seamline, and required a lot of work. Figured I would also start some of the PE assemblies, smoke canister rack seemed a good place to start. I did not go with the full built up actuation arm unit. This whole assembly gets an outer cover, so kept it simple. Interestingly, the PE was etched reversed of what the instructions show. I had to drill new holes in the end of the rack. I should have looked forward in the build farther, because the original holes I copied are in the wrong place as well as the wrong end…arrgh. Well, as I said, it all gets covered. I am going to just move on for now. If it looks bad later, I will need to fix it.
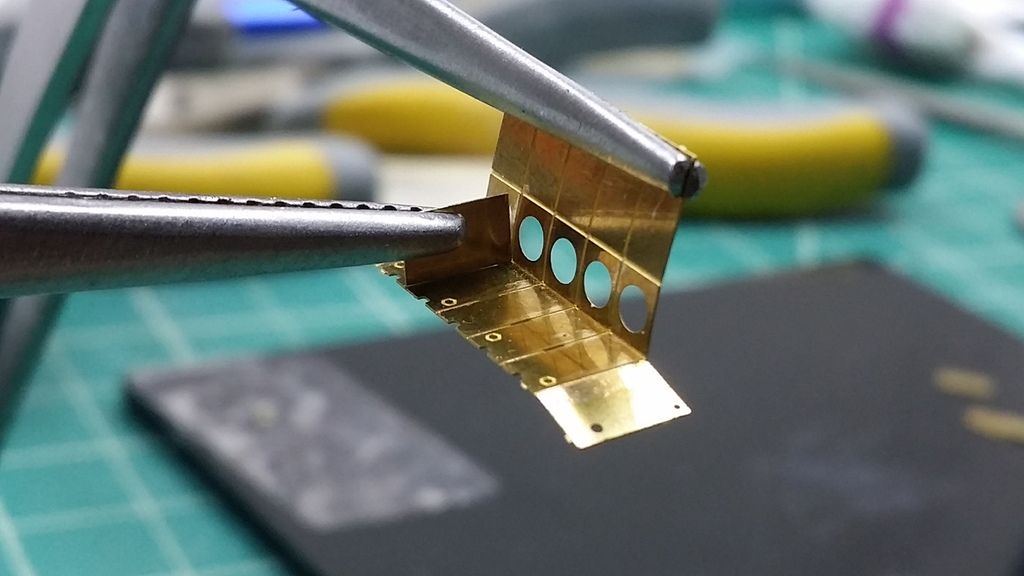
little to much solder, where is the wick!!
Original holes are on the wrong side, and the bottom piviot hole is not realy in the correct location if using the “all in one” actuation arm.
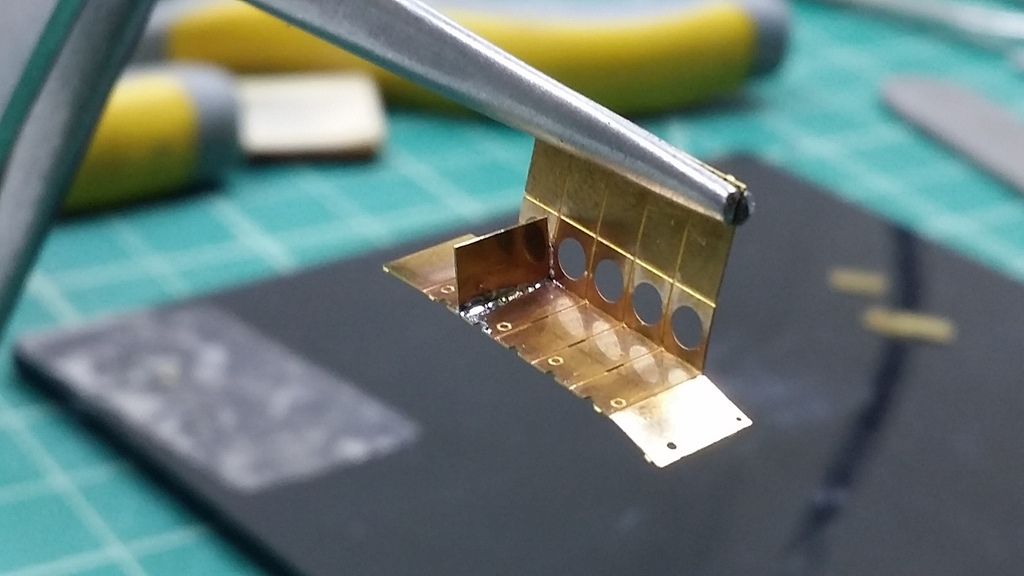
The bottom of the spring and the piviot point next to it should have been over the smaller box that holds the cams…the hash marks on the cutting board are 1/8th inch. Made the spring from copper. The shafts at piviot points are cut-off’s from old micro drills. Ordering some 40 link/inch chain for this, lot of work to do to just use the 2D PE chain.
No pictures to add today [:'(]. School is prohibiting a lot of progress. But though I’d post a link to a surviving Pz38(t) F. I’d like to note though, there are period pictures that disagree with what goes on the fenders. I will be putting boxes on both sides. I think there is enough evidence out there to show that that is fine. The Germans were very capable of field modifications. And why would you not stop and grab up a box off a destroyed tank to put on yours!! Muddy tools vs. clean, not a lot of thinking needed IMO. I want the boxes, and I’m going to have them!! Anyway, take some time to look at the pictures, they speak many words. The texture of the rolled steel is amazing and the damage to the fenders…hmmm, I see some potential to stretch my modeling dollar out.
Oh,I completed and enjoyed this kit a lot earlier this year,no extra PE for me but it came out nice.I was sad that the interior is pretty well hidden,but it was still a hoot to do.Have fun with the Magic Tracks.
I love magic tracks [:D] easier than having to cut them all free and clean them up. Not as nice as a metal track set, but I will not do preformed rubber or vinyl, so just gota suck it up and have fun with it!!
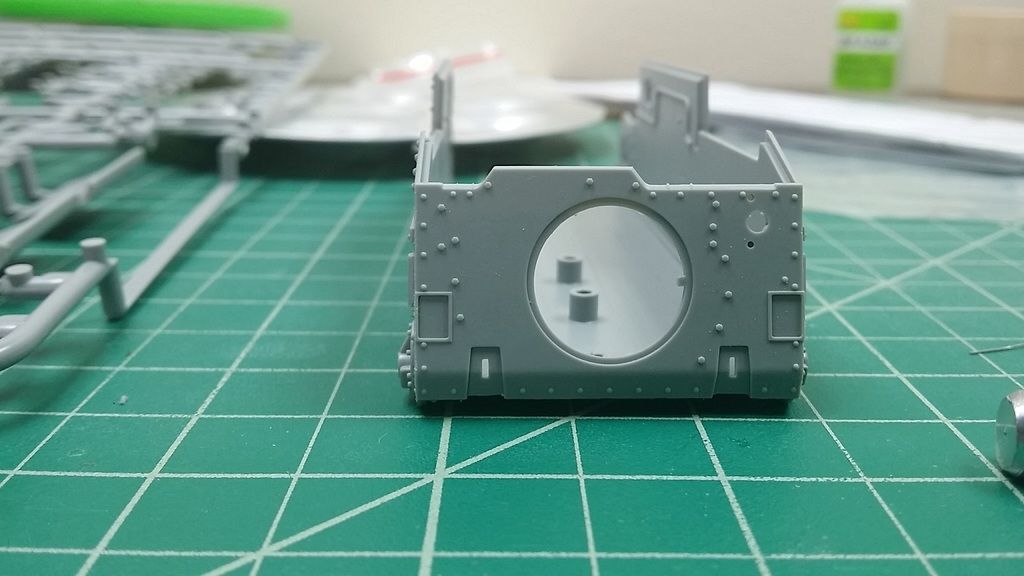
Just finished up some school work, found some “issues” when compairing rear end of the kit with the pictures I linked above. So working on those changes right now, few rivets and nut heads to move around.
Ok, well last couple weeks of the semester for me. Have had little time to make progress on the Pz38(t) F project. Posting a picture of some changes, I made to the rear of the tank. Red squares are the areas worked on. Added some texture that looks rough still, but wanted to post a picture before I move on anyway. The access plate fit was bad and you can see the filler needed (still needs some love). The plate also was almost flush with the rear plate. As you can see in the link, I posted above that is not true. I also tried to mimic the shaft end cover as seen in the pictures linked. This area is actually very different from what is shown in the link…No idea. Added some butterfly nuts to the tensioning mechanism covers. They are to big, but look cool. Added a protruding bolt to the top right side as well as moved some rivets and nuts around on the left. Some other stuff if you look close. The next move should be the fenders, but I have learned the hard way that the PE fenders are easy to damage, so probably skip a step there as far as attaching them to the hull. Will solder them up this weekend though
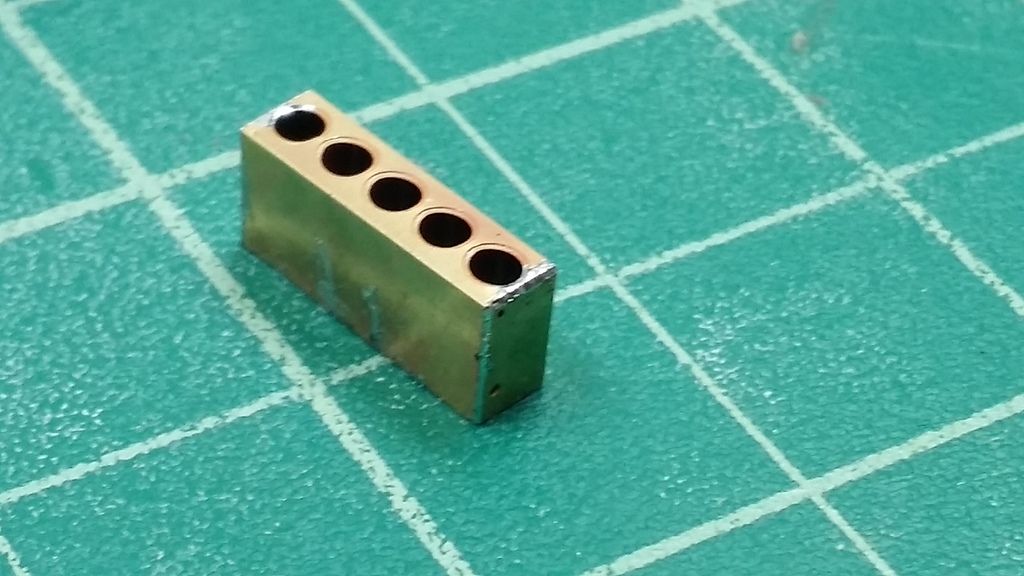
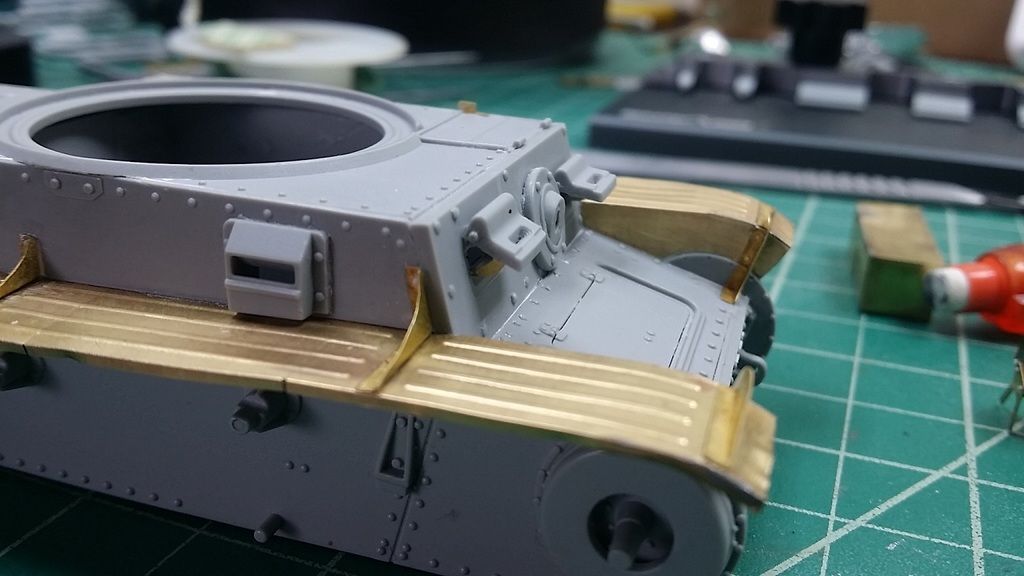
The weld seem around the circular patch is…exagerated. Might need to look at that.
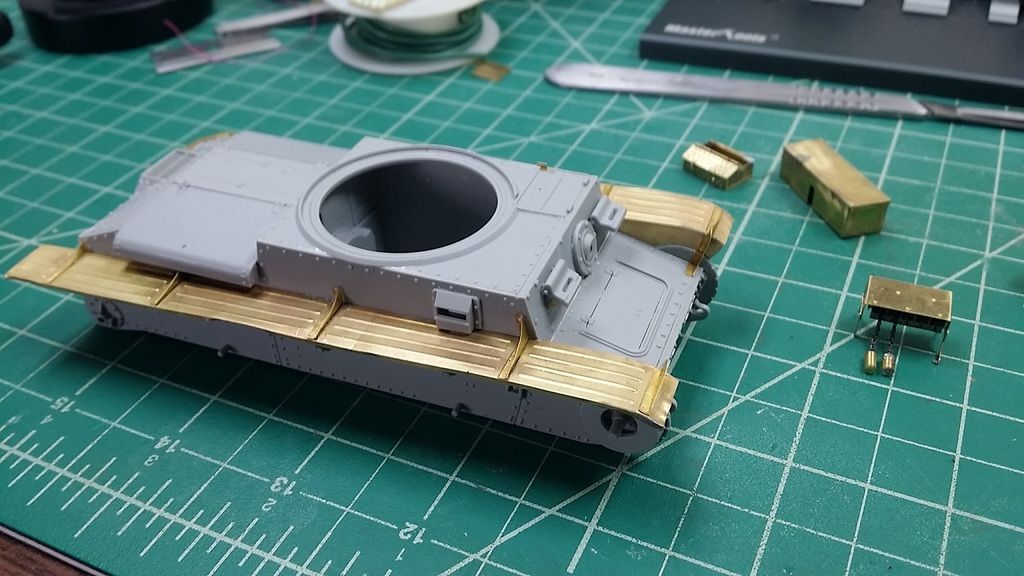
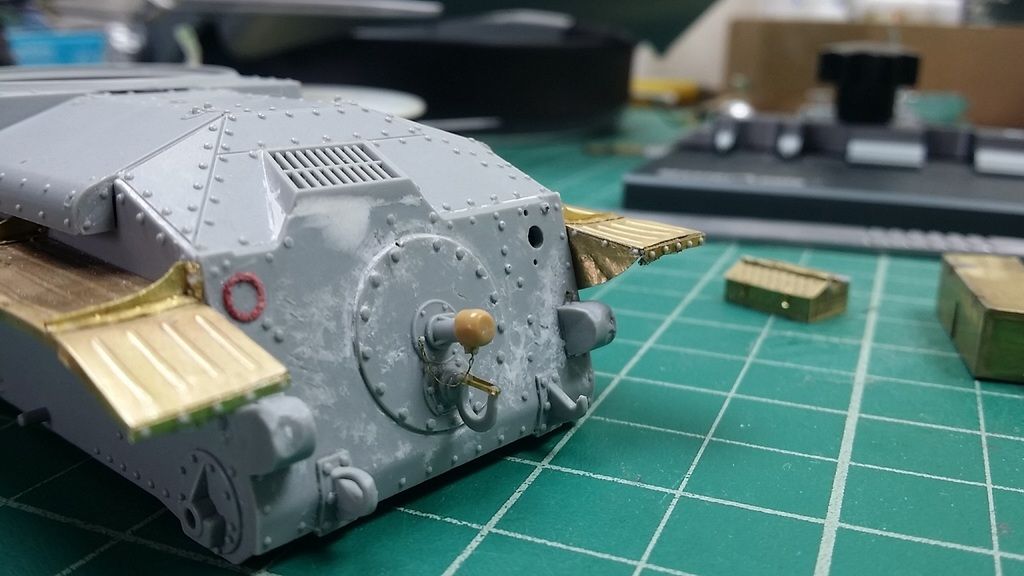
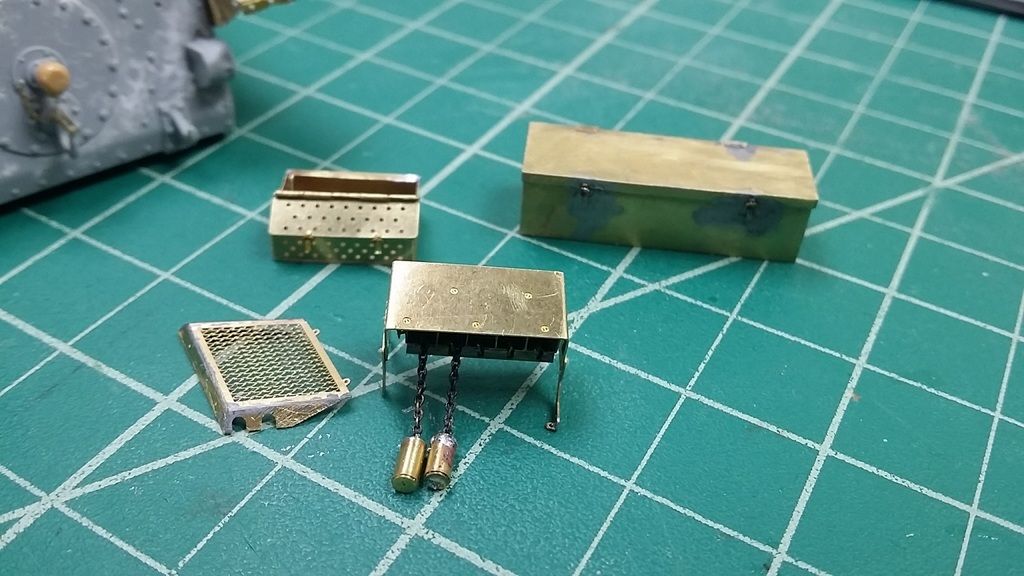
Ok, well it has been a couple month since my last post on this project…lot of things going on, and work on the 38t is usually my quiet time, then back to RL. Anyway, figured I’d update the post. Things are going well :). And should progress a bit faster now that some of the more nit-fickily things are done. Fenders are on!! have not done much as far as trying to model in any damage to them. Need to finish the gas cans, and other stuff before I do that so I don’t kick myself in the butt later. For this post, just going to show you some of the brass stuff. But I have also made custom pieces for the front to hang track pieces off, and built the antenna mount…
Fenders were very fun to do. The fit was not perfect, but some fiddling got things right. Added inner mud flaps to the rear, as well as mud flap brackets with torn off mud flaps to rear of fenders. I’ll spend more time pointing that stuff out in another post.
A recommendation: if you do a lot of PE soldering, check out Adam Wilder’s liquid flux that he has in his Nitroline line of products. You just brush it on in whatever amount you need, like paint, and it makes soldering an absolute breeze. It’s amazing stuff, and works like magic.
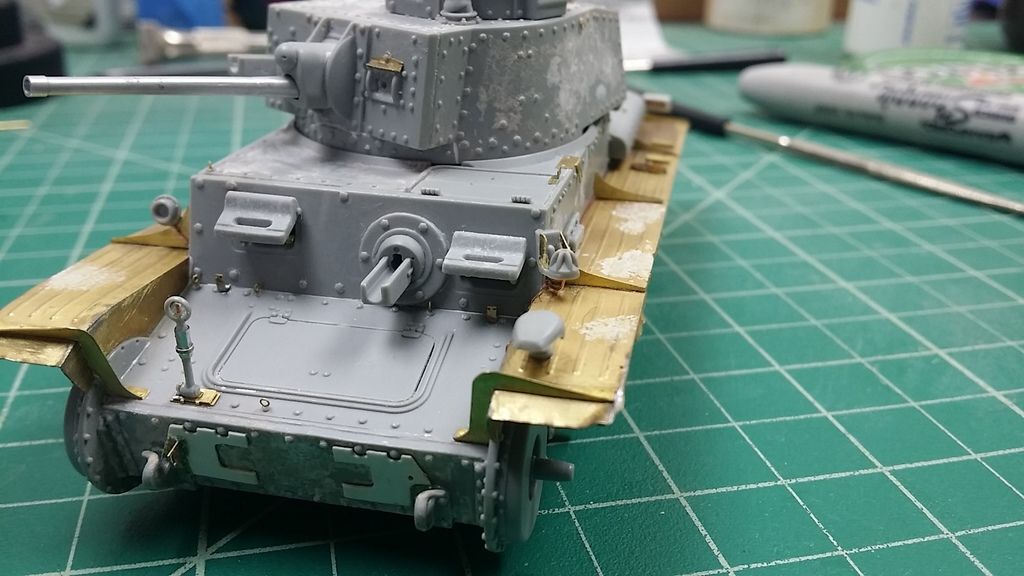
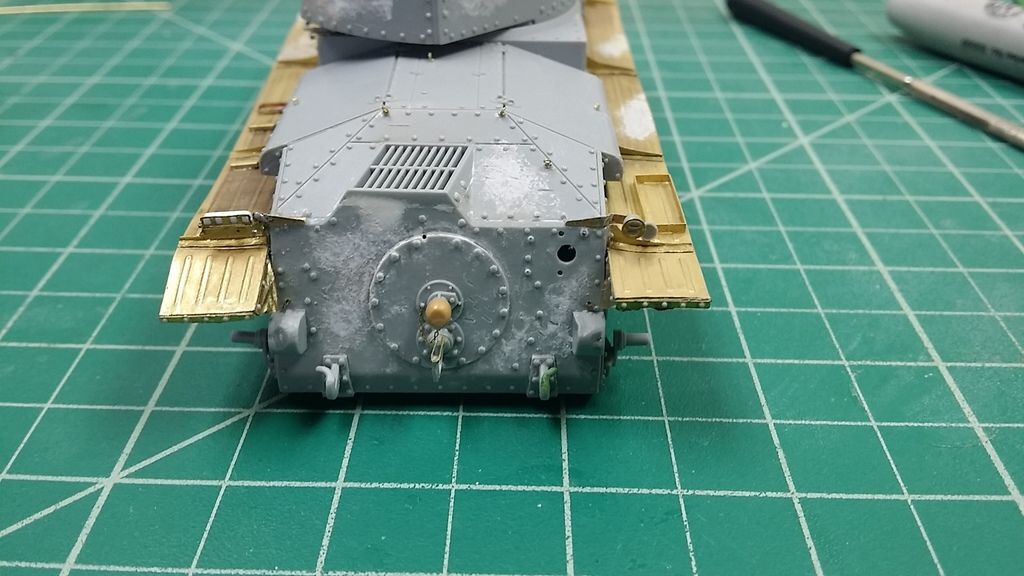
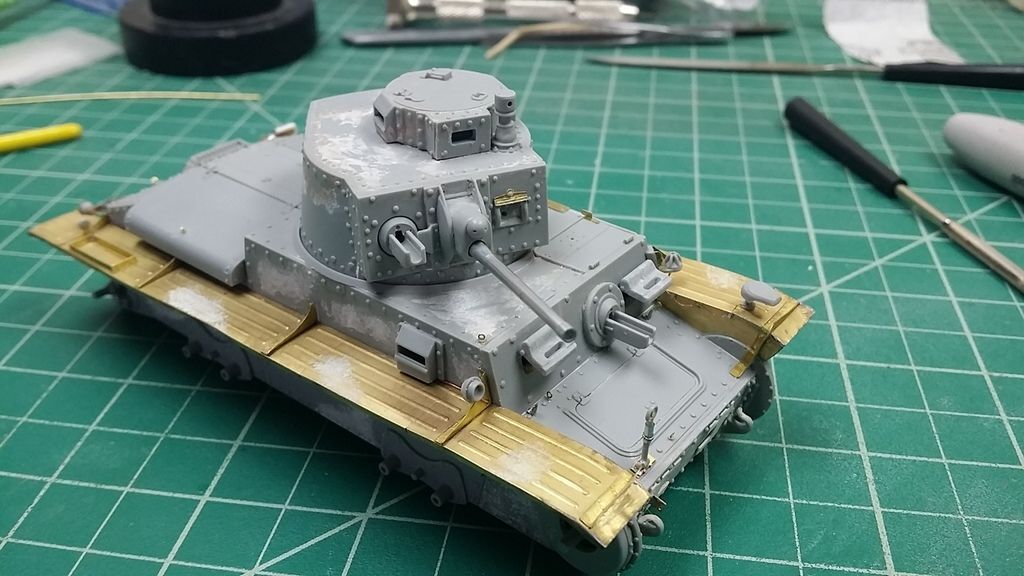
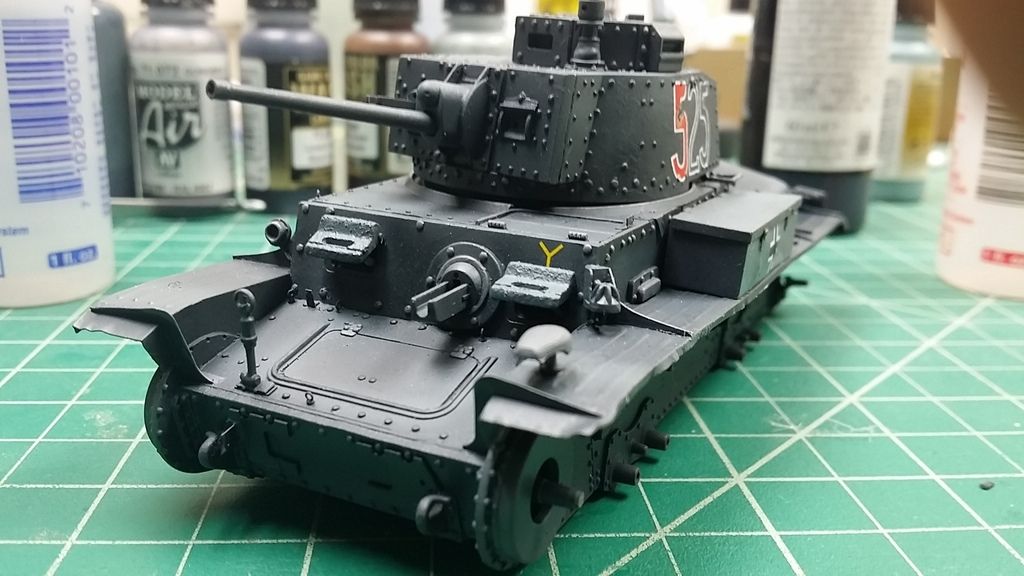
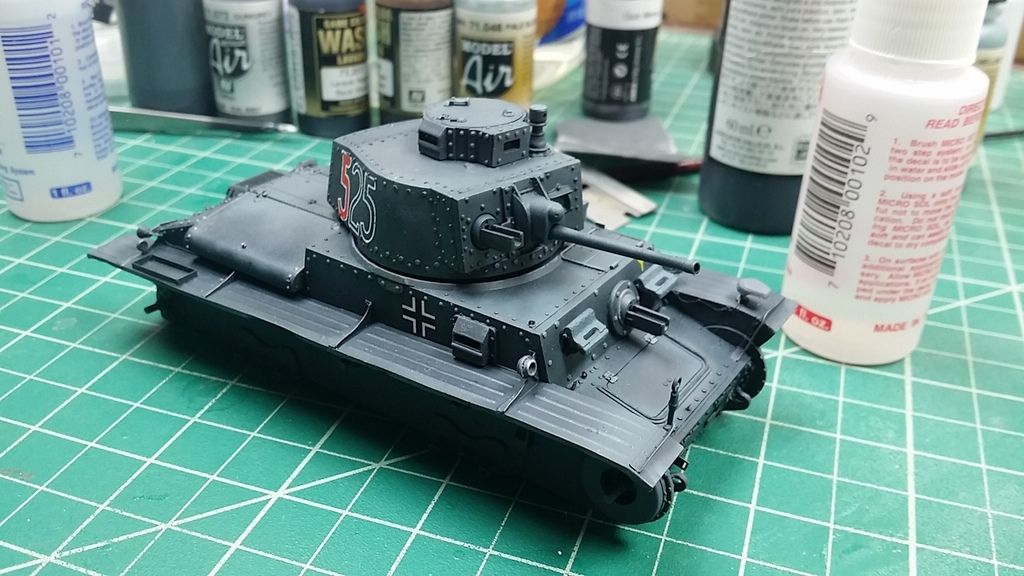
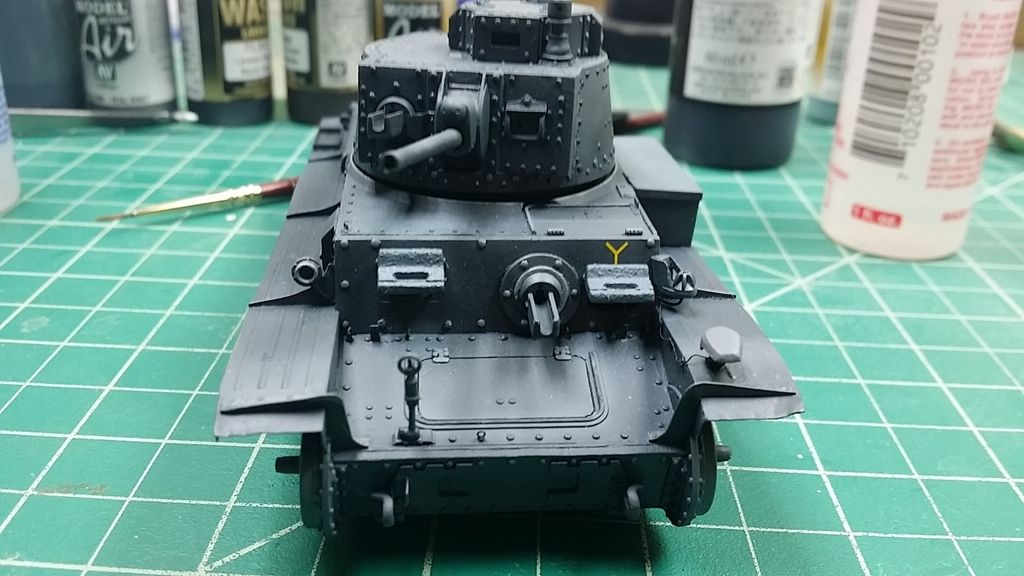
Well it has been a long semester. Little time to post pictures or check out any great projects going on but it is all done, time for the summer. Thought I would post some pictures. Project has been moving forward, just slowly. Finally got all the brass stuff built and what need to be mounted for paint mounted. Spent a week running some external wiring to lights and such. Managed to get some focus on the theme also. Even planning a dio for this one, which will be a first for me. Paint and modulation done to emphasize a dark Russian winter. Colors are a bit darker than my usual “Panzer Grey”. I want it to look like a dark winter day under any light, and I know the white wash will change the tone a bit.
Pictures taken under my full work bench lights, upwards of 9.5k lumen. You can see it still looks dusky. Hope it works. Not as blue tone as usual for me, but new things are good things. Should get the weathering, and wear done over then week. Will post more then.