Looking for some help. I am looking at building a base for my F-16N. I want to show it in flight profile. What I need is some ideas on how to attach it to a base. I have seen acrylic post, and really like this idea for the “clear” effect. I will be adding a flight patch to the base as well.
If you don’t mind drilling holes in the F-16, you could mount it using a pair of brass rods. No, it doesn’t give the complete illusion of floating, but it works, I’ve done it to a few of my “wheels-up” builds.
The acrylic rod method is a bit tricky. When I did it, I used a stainless steel bucket that held one of my wife’s candles. I bought the rod at Michael’s and heated it with a propane torch. I turned the torch down to the smallest flame possible. I wired the end of the rod to the bucket and held the torch about 4"-5" below the rod and slowly bent it against the bucket. While I was assembling the F/A-18, I ran a 10/32 x 1/2" long screw through one of the exhuast nozzles, drilled and tapped the acrylic rod about a 1/4". I attached the rod to a routed block of wood with some 2 part epoxy. It took me about 12" of rod to practice it, until I finally got it right. It’s just the way I did it there might be a better way but it worked okay for me.
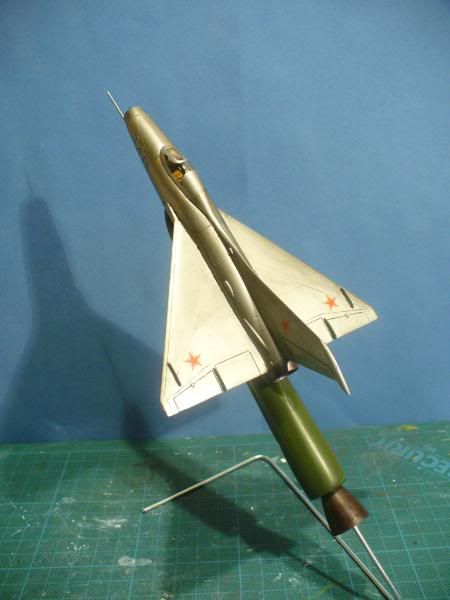
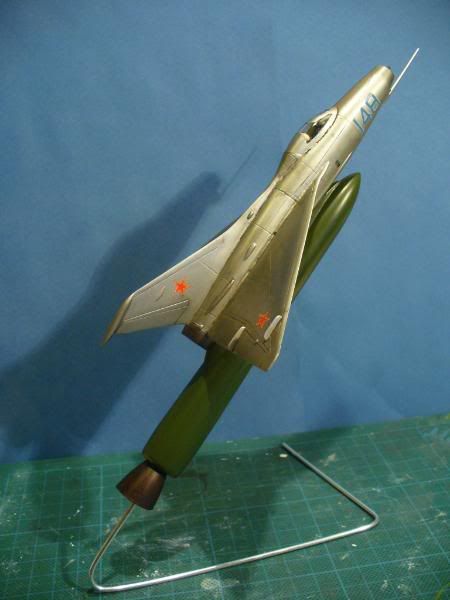
I’m writing from the wife’s computer. I’ll bring you a more self explanatory picture tomorrow. Single engine are the easiest. This is an Italeri 1/48 Viper from Venezuela’s AF. I drilled the exhaust bucket part from the kit with a 1/4’’ flat drill bit. I added a K&S brass tube in which the 1/4 plexi-glass rod fits like a glove. Pinch slightly with pliers the other end of the brass pipe so the acrylic rod doesn’t go thru. As a result, the plexi-glass rod will fit snug, you can rotate the plane and the plexi-glass rod to model is not permanent. On single engine models this is a piece of cake. I’ll be back soon.
I have yet to build a plane with its wheels down… but I’ve only done WW2 stuff thus far. I use stainless steel wire, it’s easy to shape and can easily support the aircraft I build. You could try a spoke from a bike wheel, it might be strong enough to support a modern jet. That is if you have a bum bike wheel lying around.
I’m simply assuming you’re going 1/48, which might not be the case. I like the steel because it tends to vanish when you look at the kit, at least to my eye. Those plastic rods always jump out to me.
So I went into Michaels the other and could not find acrylic rods. Any ideas where to find one? I was even thinking of using a wire clothes hanger part. [:^)].
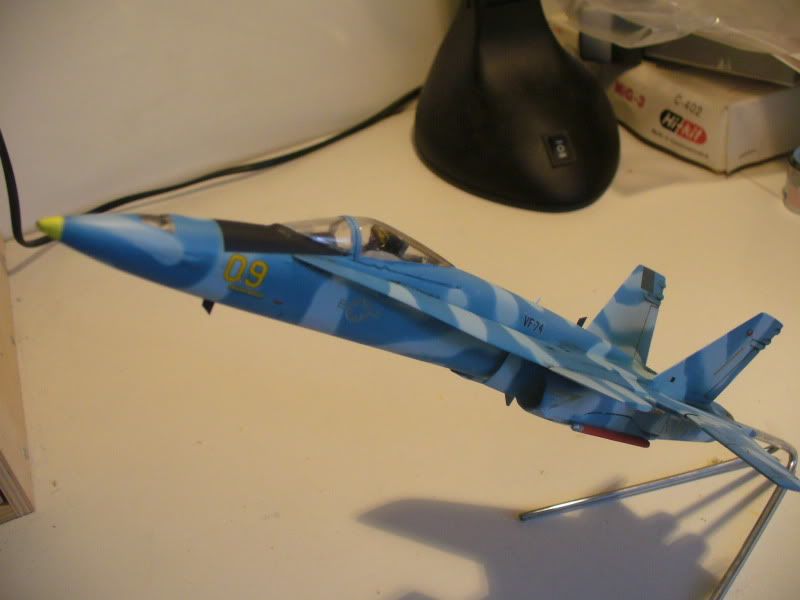
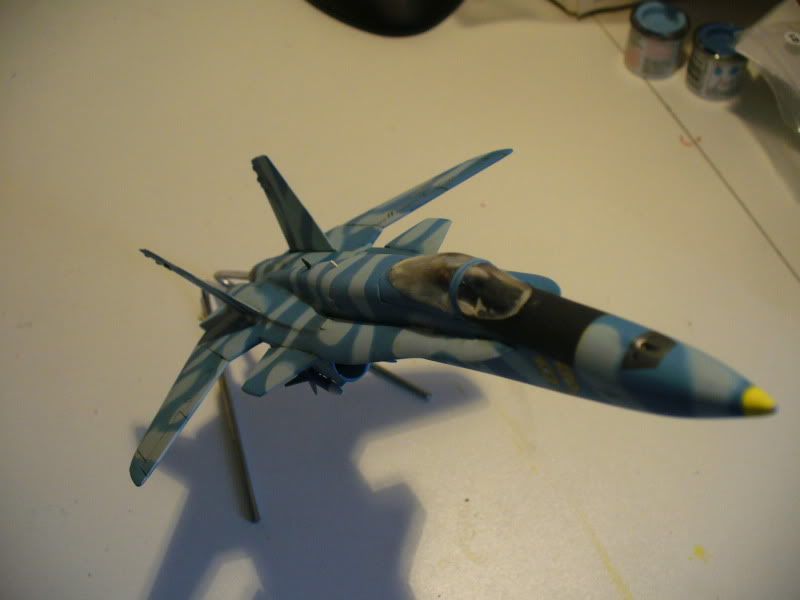
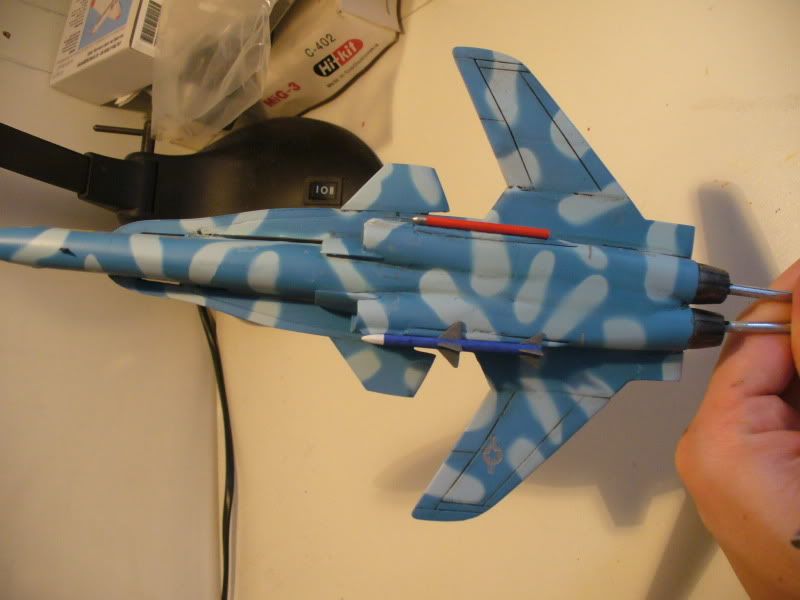
Thanks for your comments: Here is the picture I promised and sorry for the delay.
What you see on the picture is the actual part used on the Venezuela Viper. The brass rod is from K&S 9/32 x .015 (7.14mm x .355mm) stock # 132. The tolerance between the acrylic rod and brass tube is so tight, that if you use a hacksaw to cut the brass tube, you will need to deburr it.
The idea of pinching the other end of the brass tube, is to keep the acrylic rod from going thru and inside your model. It also locks your model into any position you want to display it. Between the brass tube and the model canister I used 5 minutes epoxy as you can see on the picture. Because the canister will be a strees point, I use regular model glue and secure it with a bit of CA.
As for the acrylic rod, my local hobby shop has available these rods from Plastruct. I don’t like them because they are not 100% clear. I get the acrylic rods from a seller on eBay. It is so clear that it looks like glass. My Viper has a 1/4’’ acrylic rod.
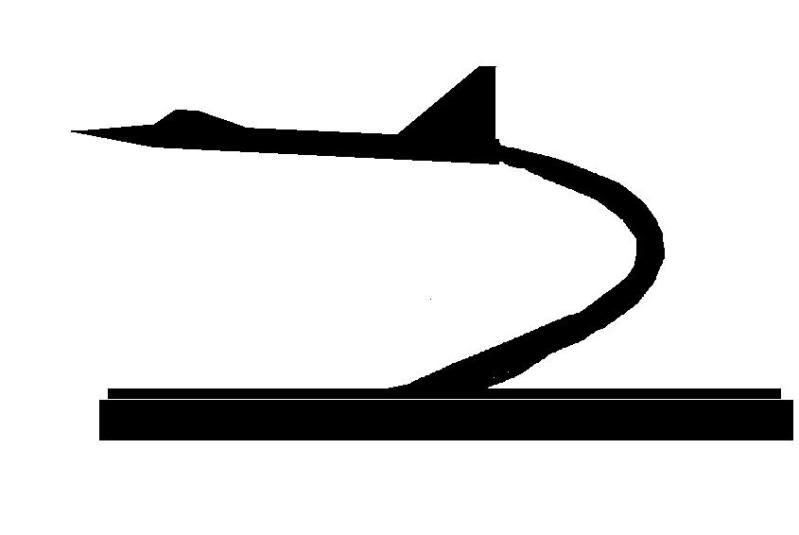
I think if I were to do a jet (not likely) in an “In Flight” profile, I’d use an acrylic rod the same diameter as the exhaust and curve it… I’d also decoupage an aerial photo onto the base…
If I were to display your Viper in that configuration, I would still go the way I did it above. The only difference is that instead of using the acrylic rod, I’s use a brass or aluminum tube from K&S. I use for the most part brass but aluminum can do the trick. As I type, I have on my desk K&S’s stock 131 ( 1/4 x .014) and it slide into the 132 (above) tube with no play at all (very nice fit). If your LHS has the K&S line, chances are they also carry the tube benders (mine does).
I went with acrylic because it’s easier to bend with heat… Boiling water would be enough… Bending brass or aluminum rod is easy enough, but tubing needs a bender, either external, or an internal “spring” type…
I use a wire coat hanger for inflight models. I not use a display base dut just bend the hanger in a triangluar base. The advantage of not using a solid base is that the model looks more like it is hoverig/floating IMHO.
I basically use the same method as Fermis, however I use aluminum or brass. One diameter into the fuselage and the next lesser diameter for the mount. This way you can turn the aircraft to a different in flight position as you deem necessary.
Great looking bases. That is what I am looking for!!! Ok So how do you get the dowels into the kit and model??? Double ended screws? The Viper looks great, and since that is what this whole thread started for…I would love to know more! My hobby room is just starting and I want the planes to have different looks! Thanks agian.