Oh wow that looks awesome Stephen!!!
Personally I’d just use putty but liquid sprue should work just as well.
Good luck!!!
Oh wow that looks awesome Stephen!!!
Personally I’d just use putty but liquid sprue should work just as well.
Good luck!!!
I’ll post some how-to photos of the sprue filler technique to allay any apprehensions to using the process. It really changed the way I build models.
Anyway, this little Seapiggy got worked on last night:
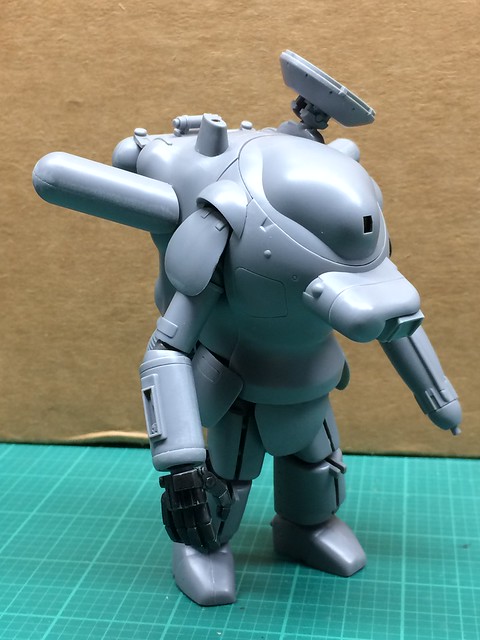


I need to clean up the polycap joints before the leg halves can be glued together. The material the polycaps are made of must be some kind of polymer blend, as it is possible to gently sand off the parting lines. As much as I obsess on painting everything, I think I will leave these unpainted and only apply weathering on them. A couple of buddies did theirs that way and they looked fine.
I need to keep focus and build the piggy. Build the piggy, build the piggy, BUILD THE PIGGY!
Here Piggy piggy piggy! Looks like it’s coming along niceless. Not painting polycaps sounds a good idea.
Made a lot of progress tonight but I’ll show that later or edit it in later because I want to record my success and suffering on this piece here.


The large piece has a flexible and fragile back “wing”. The polycap at the front doesn’t fit unless seriously trimmed down. The red cross bar has to go across another piece you install at the same time and there is no way to avoid having to do all this at once. The fittings are so fit you have to pre-trim them or this would never close and I struggled as it was. I’ve never found a kit with a difficulty curve before but this is the last boss or the super secret boss you’re supposed to do after you finish the game… Either way it’s one of the hardest pieces I’ve ever built.
There’s a lot of progress tonight but it looks way less than the work that went into it. The kit has quite a bit of internal detail but no good way to display it, so you build a lot of stuff only to cover the whole piece with large covers. I have lots of big chunky bits to show off later.
Love the Piggy so far! At some point in my life I’ll have to build a MaK model.
Got lots o part primed. Gotta check/fix my seam filling and then it’s painting time.


Are you going for the original colours Bad or something original?
I guess this is the first true dirty robot post of the thread. Cover any small children’s eyes and maybe the wifes… But here we go!


The legs are untouchable unless you want to go parts hunting. They’re pure grenade and won’t stay together enough to even take a photo with the legs built. I have the rear skirt and the weapons pod to build and then it’s seam fixing time. Seams are really bad on parts but there’s few of those parts.
I have no idea how to split this up for painting. Too many parts rely on each other and it’s too stiff a build to split it apart.
I’m planning going with a desert paint scheme, but then add a worn winter whitewashing to it a la German WWII armor. Never tried that before so we’ll have to see how it goes.
Good luck on your build! You’ll figure a way.
That sounds great. I’ve been wanting to do a winter wash MS for a while not but haven’t got round to it.
Ohhhhhhhhhhhh, those look awesome guys!!!
My wire came in Friday (thanks Real G!) and it fiddled around with it and the LED some Fri and Sat. I was hoping to get her all in place and ready to go Easter Sunday but ended up getting a splitting headache and nothing done.
Cross your fingers I’ll get everything in place this week and be ready to paint.
As promised, here is the sprue technique I use to fill gaps.
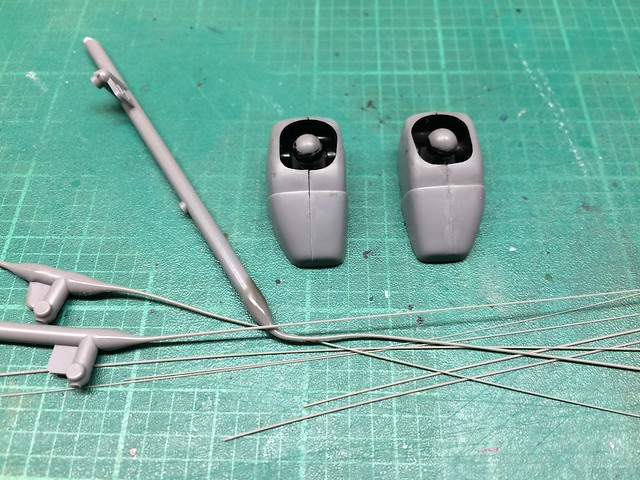


Some conditions, like the heel area, are better off using conventional putty.

And so puttying commences.


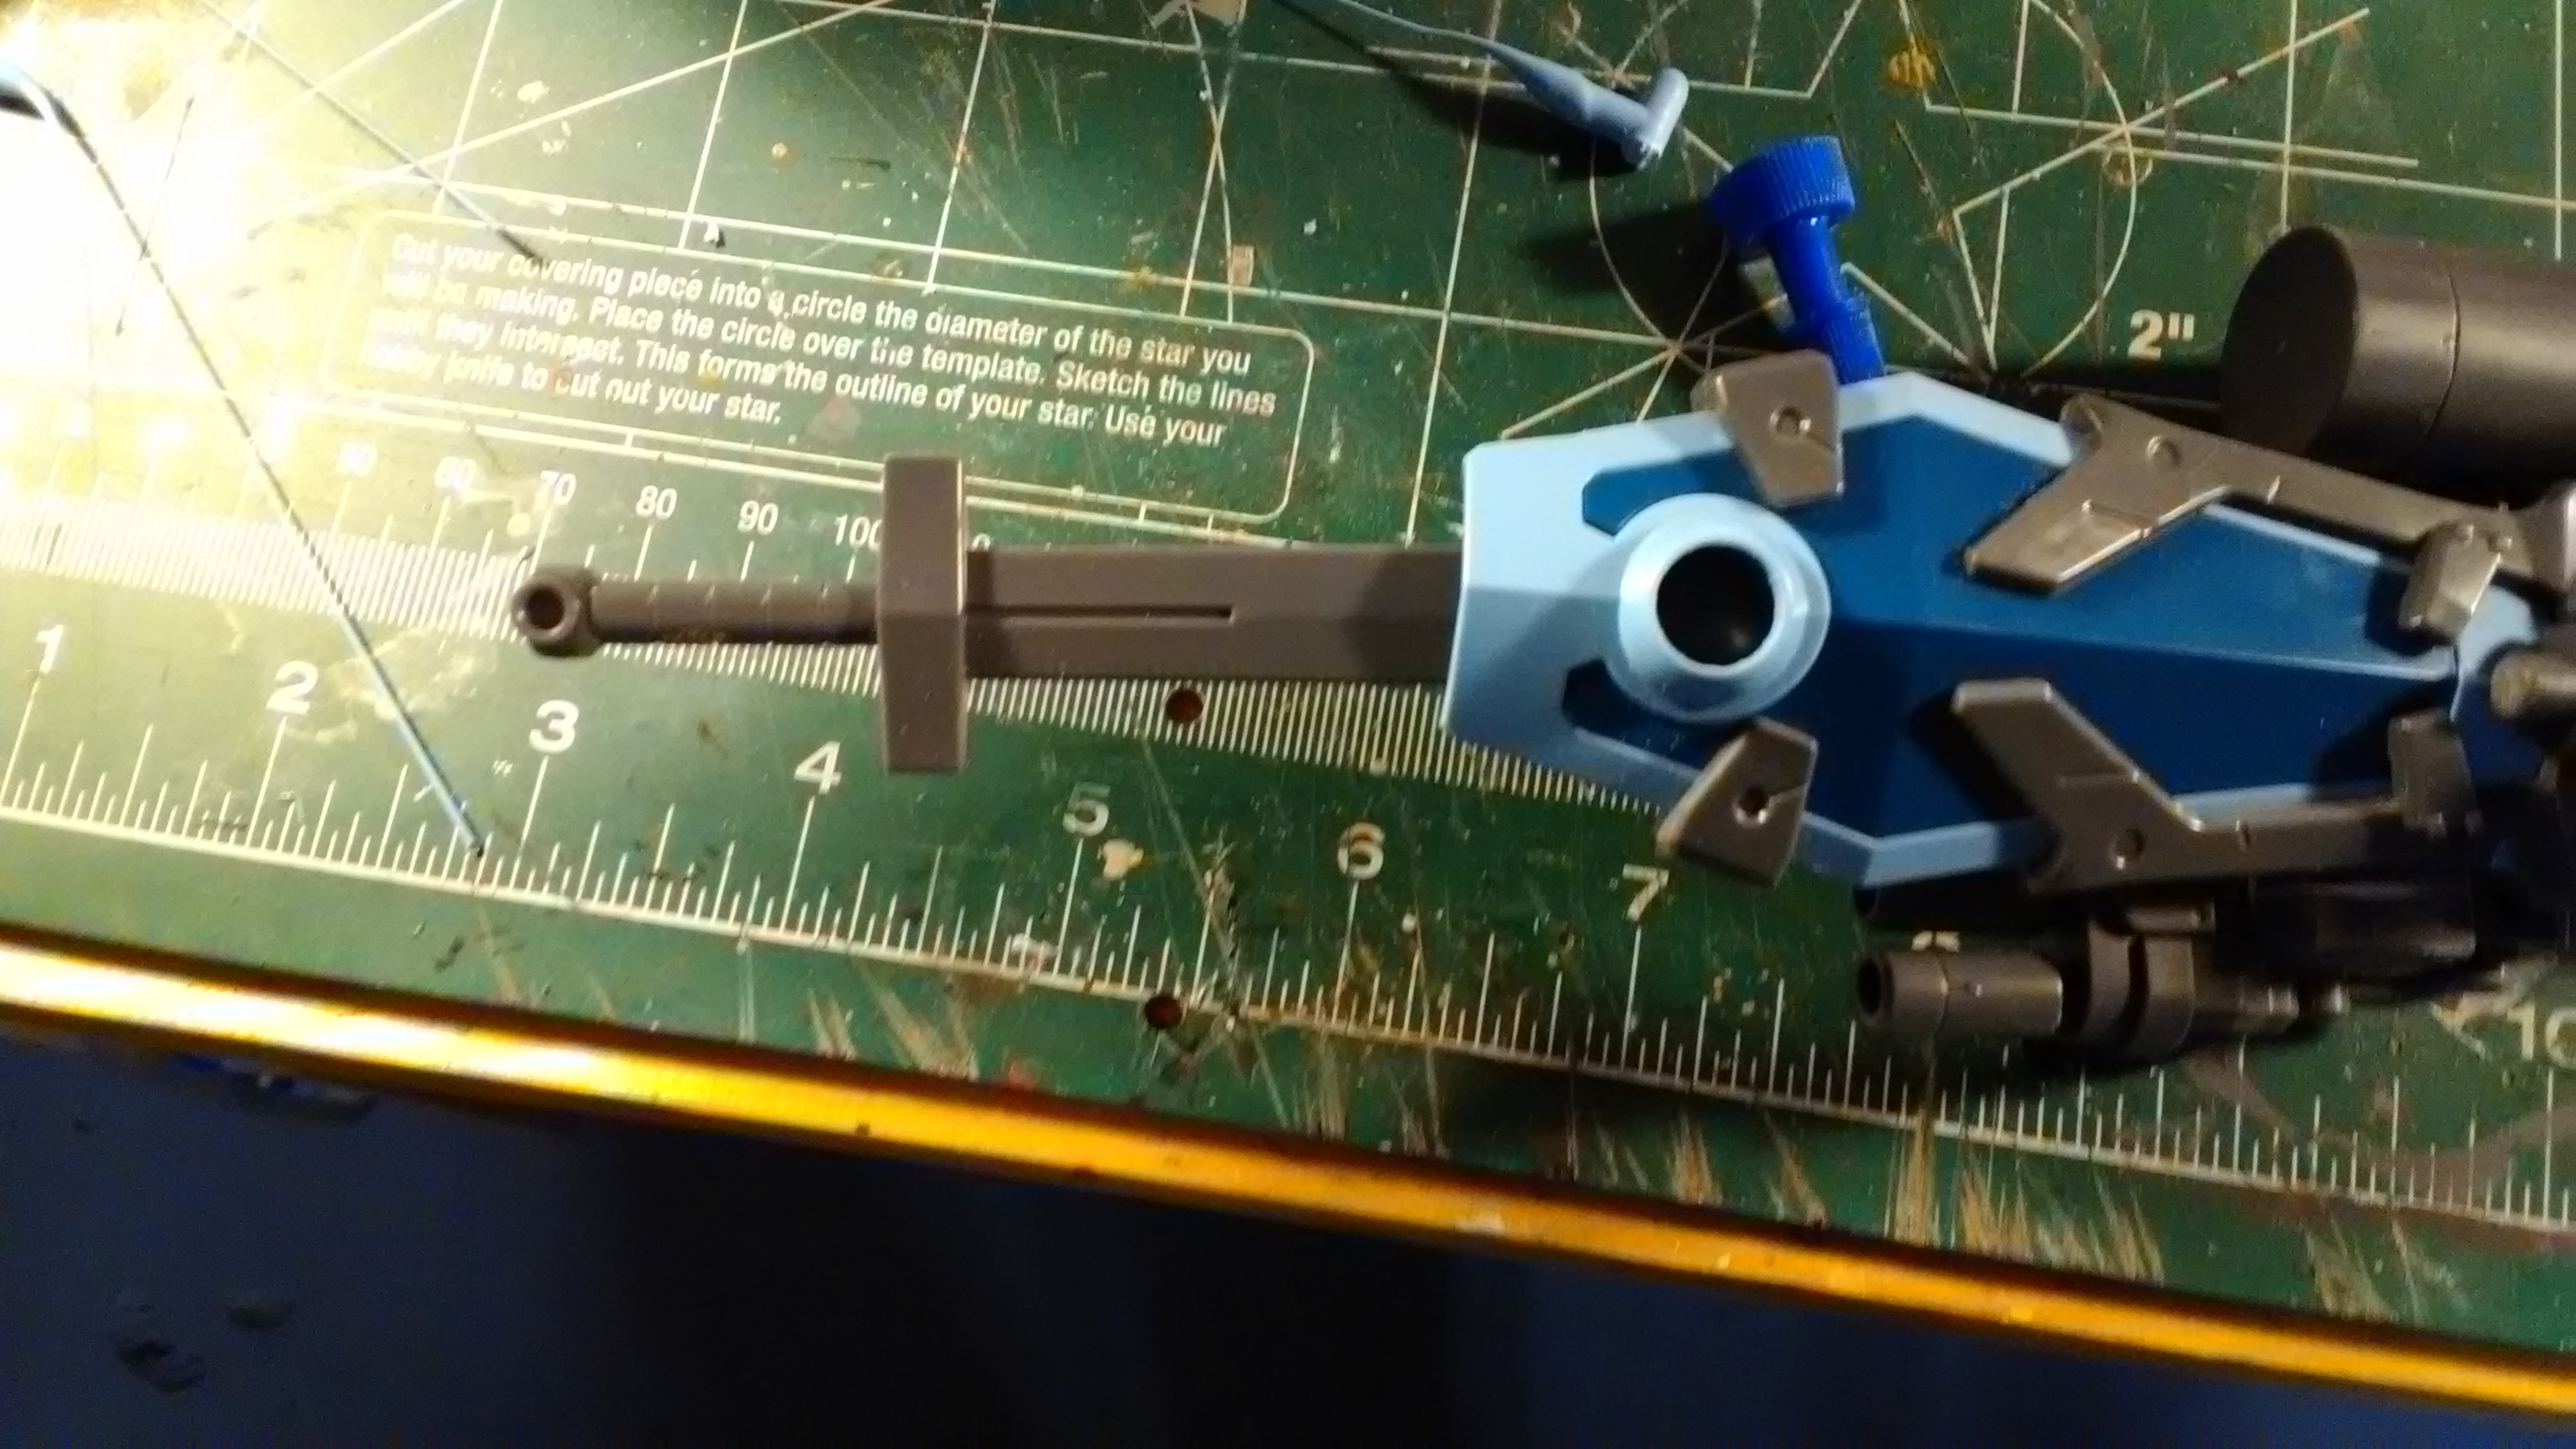
I have the Gouf’s weapons system done. I really like that gattling canon.
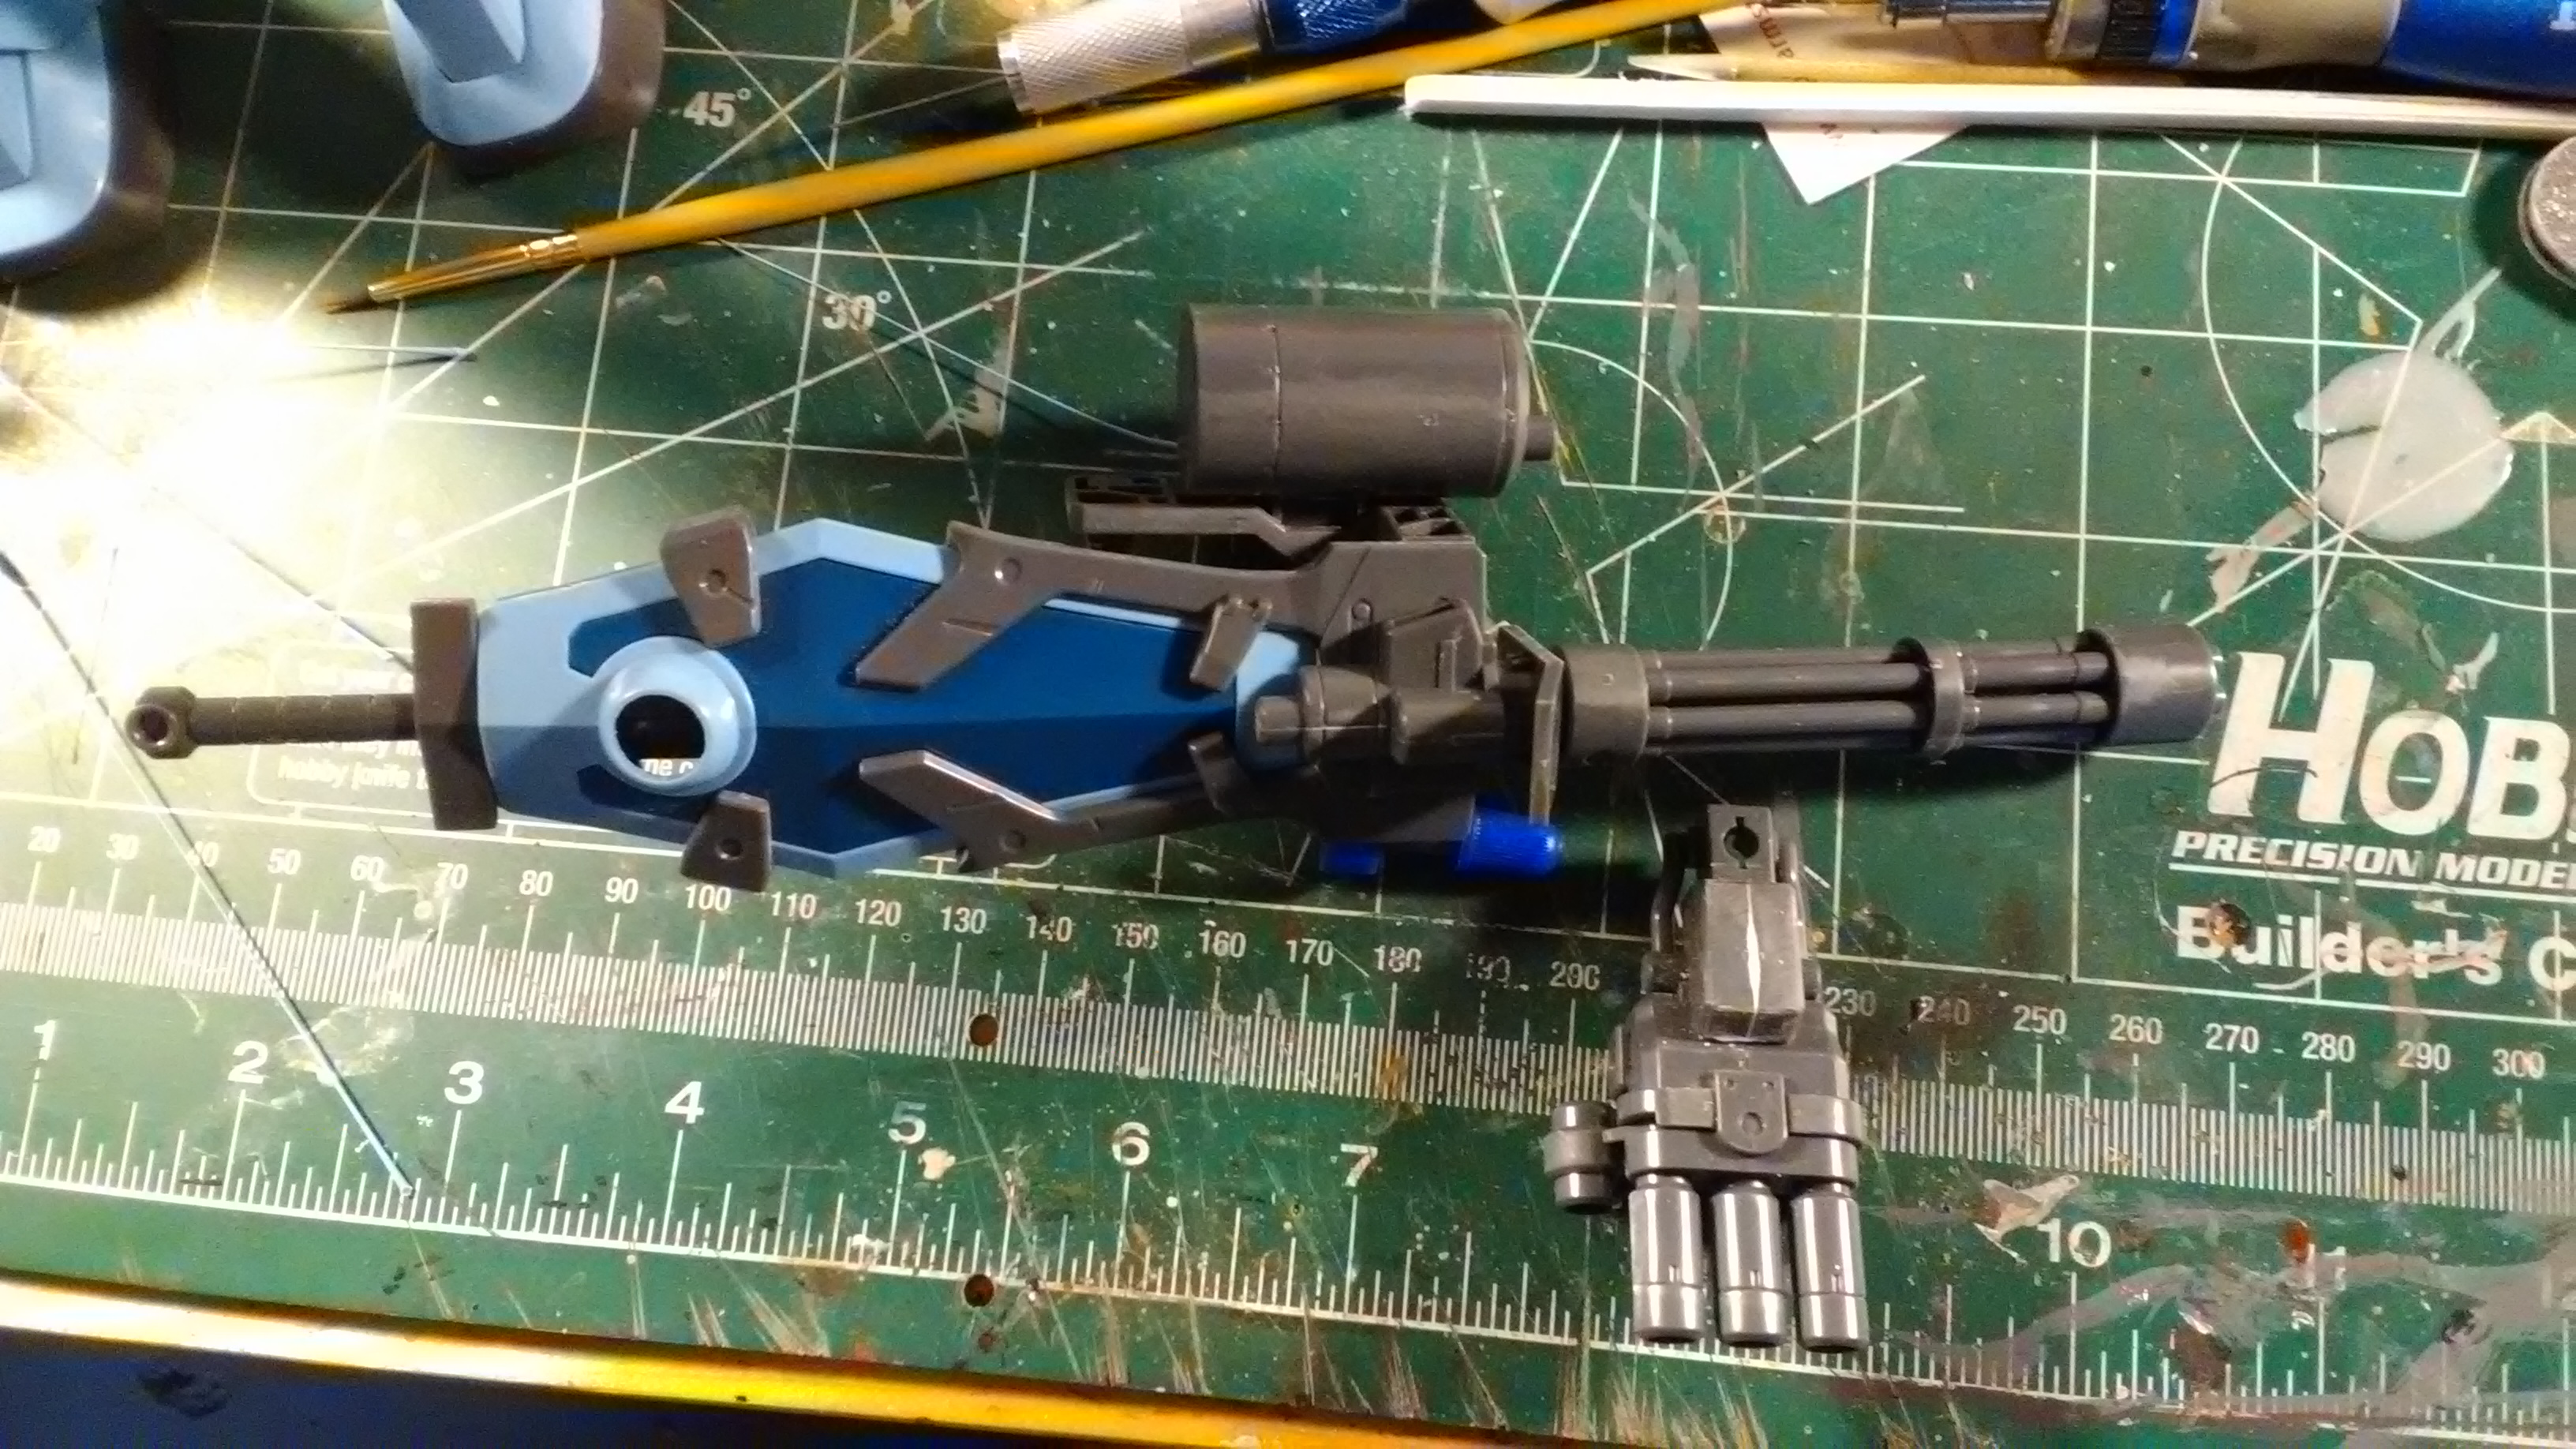
Next up will be fixing the seams and priming the kit.
Real G, I tried the sprue technique but it did not work well for me. Maybe the glue I use is not “hot” enough, I could not get the sprue to keep the curve of the shoulder, even worse on the horn. When I tried putting more glue on, the sprue would break. I use testor’s liquid, next time I will get the tamiya glue like you suggested.
Everyone has some nice builds going on here, looking forward to seeing more.
Stephen
Stephen,
Holding the stretched sprue in the liquid cement bottle for a few seconds helps sometimes. But if the kit’s plastic formula is brittle, it will still crack. Yes use the Tamiya or Gunze glues, as they are a lot hotter than Testors.
was browsing through the Advance of Zeta books as research and stumbled across this Dom, good inspiration. Siek Zeon
That Dom was from 0080: War in the Pocket.
Advance of Zeta introduced the Dom Stutzer, which featured a long vertical fin affixed to its front for some odd reason.
Real G & Stephen: Those are coming along great guys!!!
The kit used is the Dom Tropen from 0083 not 0080. But that scheme is from AoZ which started the Zeon Alive slogans on the suits which is why I mentioned the source.
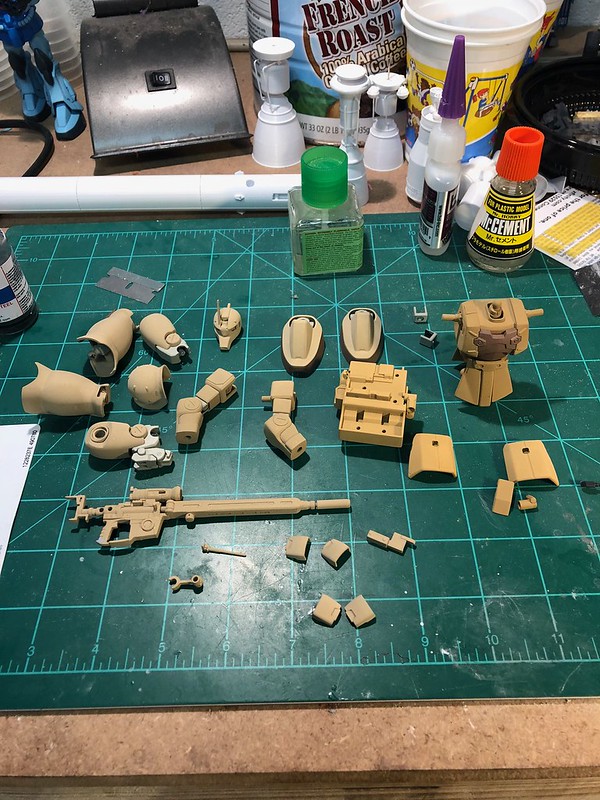
Did some painting on my pieces parts:
I think this paint is the flattest flat ever. I love it, but I need to clear coat, decal, clear coat, hair spray, white, mess up, hair spray, white, mess up, wash, and maybe clear again. We’ll see. Oh, and do the metal parts too. Can’t forget that.
What paints are those Bad? They look fantastic.
Thanks! They’re Tamiya paints - the brown is flat earth, the medium tan is desert yellow, and the lighter tan is buff. No idea why I had them lying around but I’m glad I did.
Got a clear coat on, and wanted to put the fella mostly together to put decals on. Here he is:

I’ll probably take him apart down to arms, legs, and torso to whitewash and gunk up and stuff.
That is looking real good. I like the desert scheme you got going on there.