That would look great. Big ol’ soot stains all down it.
What are the Gouf painting plans Nuc?
Tonights progress. Had some more fitting issues. The crown doesn’t slot in properly and the white part fits on it and doesn’t reach the connecting part below. Don’t think it’s supposed to move but it’s an annoying fit when you don’t want to break the V-fin. The runners have a spare face mask but it’s different on the runner to the instructions pictures. Identical to the one I have installed so I have no clue what so ever. Not a fan of the head as a design but it’s such a small part of the whole kit I can look past it.
Arms later tonight or tomorrow. Fitting issues and having to clean up flash on delicate parts leads to building fatique.
Although I’m not sure I’d go with the gold either there Rob, I kinda like a bronze steampunk look.
I’ve got about two-thirds of my Jaeger assembled. I wanted to light the visor but it looks like that will be a pain, running wires though the working joints just looks like a bad idea. If only the figure were bigger. At least paint shouldn’t be an issue- it’s mainly why I went with Obsidian Fury instead of Gipsy Danger or Gipsy Avenger- OF is almost all metallic black.
Yes, when I opened the box, I was expecting gold chrome plating. I was not planning on painting it gold, but my metallic color choice would be based off of what color I have on hand. I do have some gunmetal and it would give it a wrought iron color, but that might be too dark for my tastes.
The piggy is looking great. Are you going to add some stowage to the back? That extended back would really suit it.
Gamera, can you drill a hole in the neck peg and thread the wires into the chest for lighting it? If you can block the under side of the head it’s probably a 20 minute job with a dremel.
I finished Wondwart’s arms tonight and ended up stabbing myself in the thumb because every single peg is too tight. It’s like the pegs were designed in a computer with zero tolerance for insertion. Have to open up the female part and often shave down the male peg. After 3 hours of peg sharpening the knife slipped and I called it a night. Every piece of the arm has nasty gaps down the center so I can see a lot of putty work being needed and awkward cleaning it up. I don’t mind it being a bit of a pig (pun intended) because the group build becomes motivation to get the kit done. I’m going to do some surgery on a few parts to make them easier to connect. The shoulder wings are really difficult to put together and making the wing split from the box and gluing it in place later is the way to go. The hands are very jacky 80’s all plastic hands, I would replace them but I don’t have anything suitable. Hoping the open hand ones look better.
No stowage on the Space Piggy - they operate out of spacecraft or a base, so they don’t need to carry a sleeping bag! [:P] I believe the suits in MaK are designed for short-duration sorties, not for drawn-out engagements.
Kind of interesting how the non-licensed Asian kit makers do Gundam stuff that Bandai doesn’t get around to doing. Makes Bandai look lazy. The Woundwort is from “Advance of Zeta”, which had its origins in Dengeki Hobby magazine. They sure have a different “look” to them - I sometimes can’t tell where the head or heinie are!
I acquired two sets of metric drills that grade in 0.05mm sizes that I use to bore out the snap fit sockets on my kits. It really saves on busted fingers!
Chinas been hunting them down the last year or so but they tend to be really nice designs… that build like a swine. I was researching it earlier for poses and I found the photo novel features one in full Titans black/blue/purple and I might do with that scheme. It looks a bit weird because it’s just the base for them to slap other stuff on. Which is probably why it got a P bandai kit to go with all the AoZ add on parts last year. Got a cameo in build fighters and is in Gundam breaker 3’s DLC, and I think it’s in the actual AoZ manga so I might be able to find some nice shots. I’m thinking I’ll make it a static model not posable and if the manga has a good shot I’ll copy it.
There’s always room for space stowage. You might not need a sleeping bag but you can might need a space spanner or a space hammer!
Robotism: That is good advice! I need to find some smaller wire though. I know I have some somewhere - it’s just a question of finding it. Darn Radio Shack being out of business, if they were still around I’d just grab another roll of wire…
Robotism and Real G: Those look good guys, helps me to get my motor in gear…
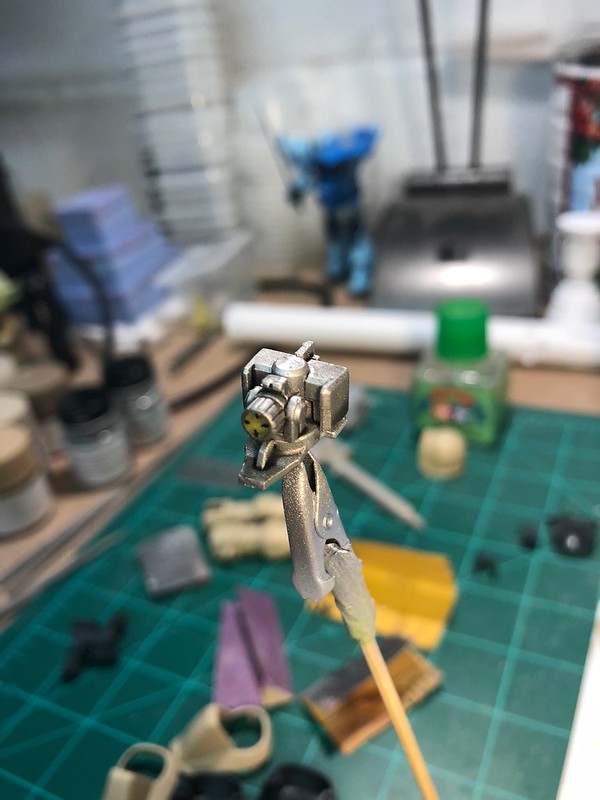
Radio Shack used to sell something called Kynar wire, which was a fine plated copper wire with a thin plastic insulation. A friend gave me a roll back in high school, and I have had some in the supply box ever since then. The last time I was able to buy it at the store was at Frys in Oregon, when I was visiting the friend who gave me the original roll!
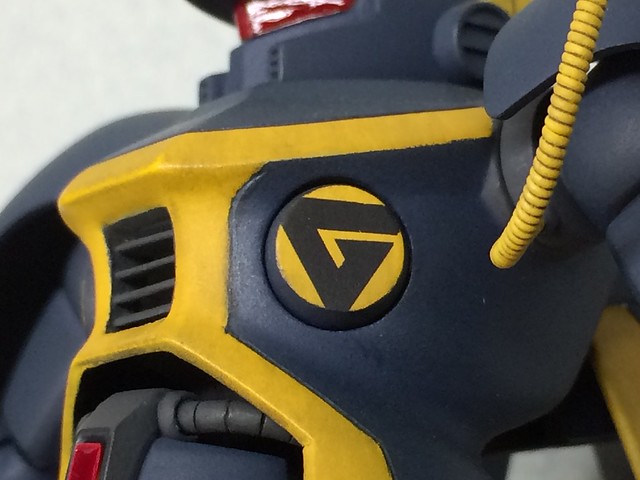
This is what the wire looks like used off the roll, coiled around another wire, and painted:
It’s actual use was for prototyping boards, so it can be used to power LEDs. They are fine diameter, so you might be able to run them to the back of the head without too much trouble.
Is that yellow piping what you’re talking about G? I really want to find a Zaku pipe solution. I have a MG HM Zaku I’m really wanting to build but then I remember the pipe rings and it stays unopened. I got sick of those on the Sazabi.
Yes, that’s the Kynar wire. However, for a 1/100 scale kit, I think it would be too fine for power cables. I too have searched for a good looking substitute, but so far have no answer. Adler’s Nest made precut plastic rings, but they don’t really look good when used on a spring or wire. You really need something spherical sandwiched between the rings. Plus some angled rings to accomodate bends are needed.
There is probably some really basic cable out there which flexs great and looks just right but we haven’t stumbled across it yet.
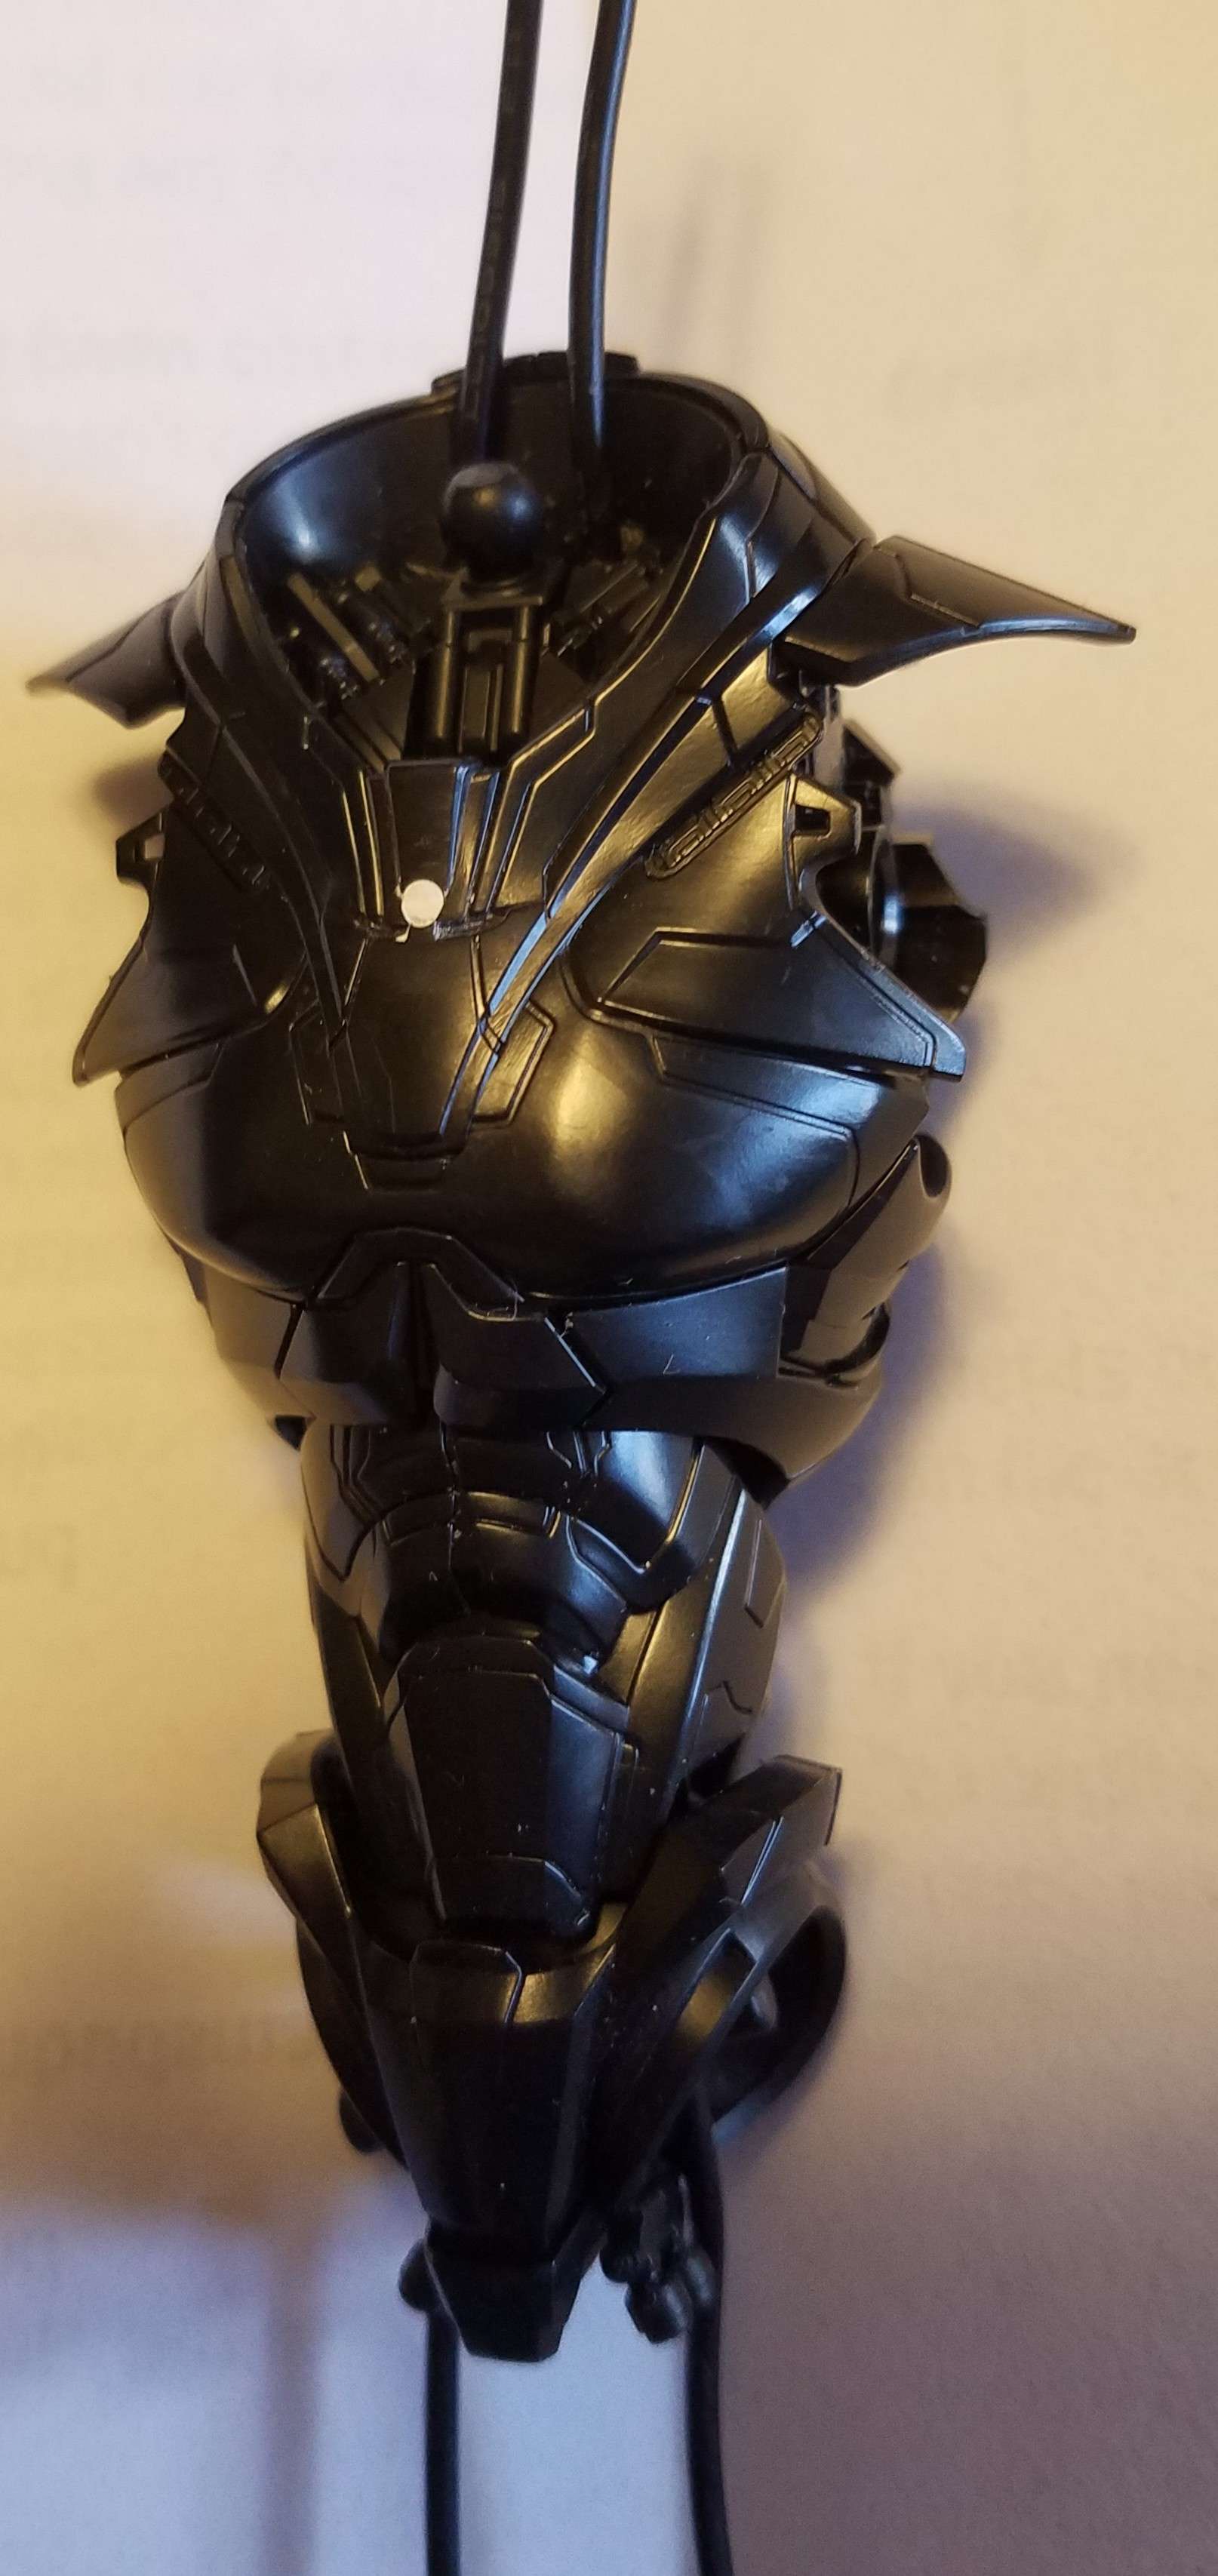
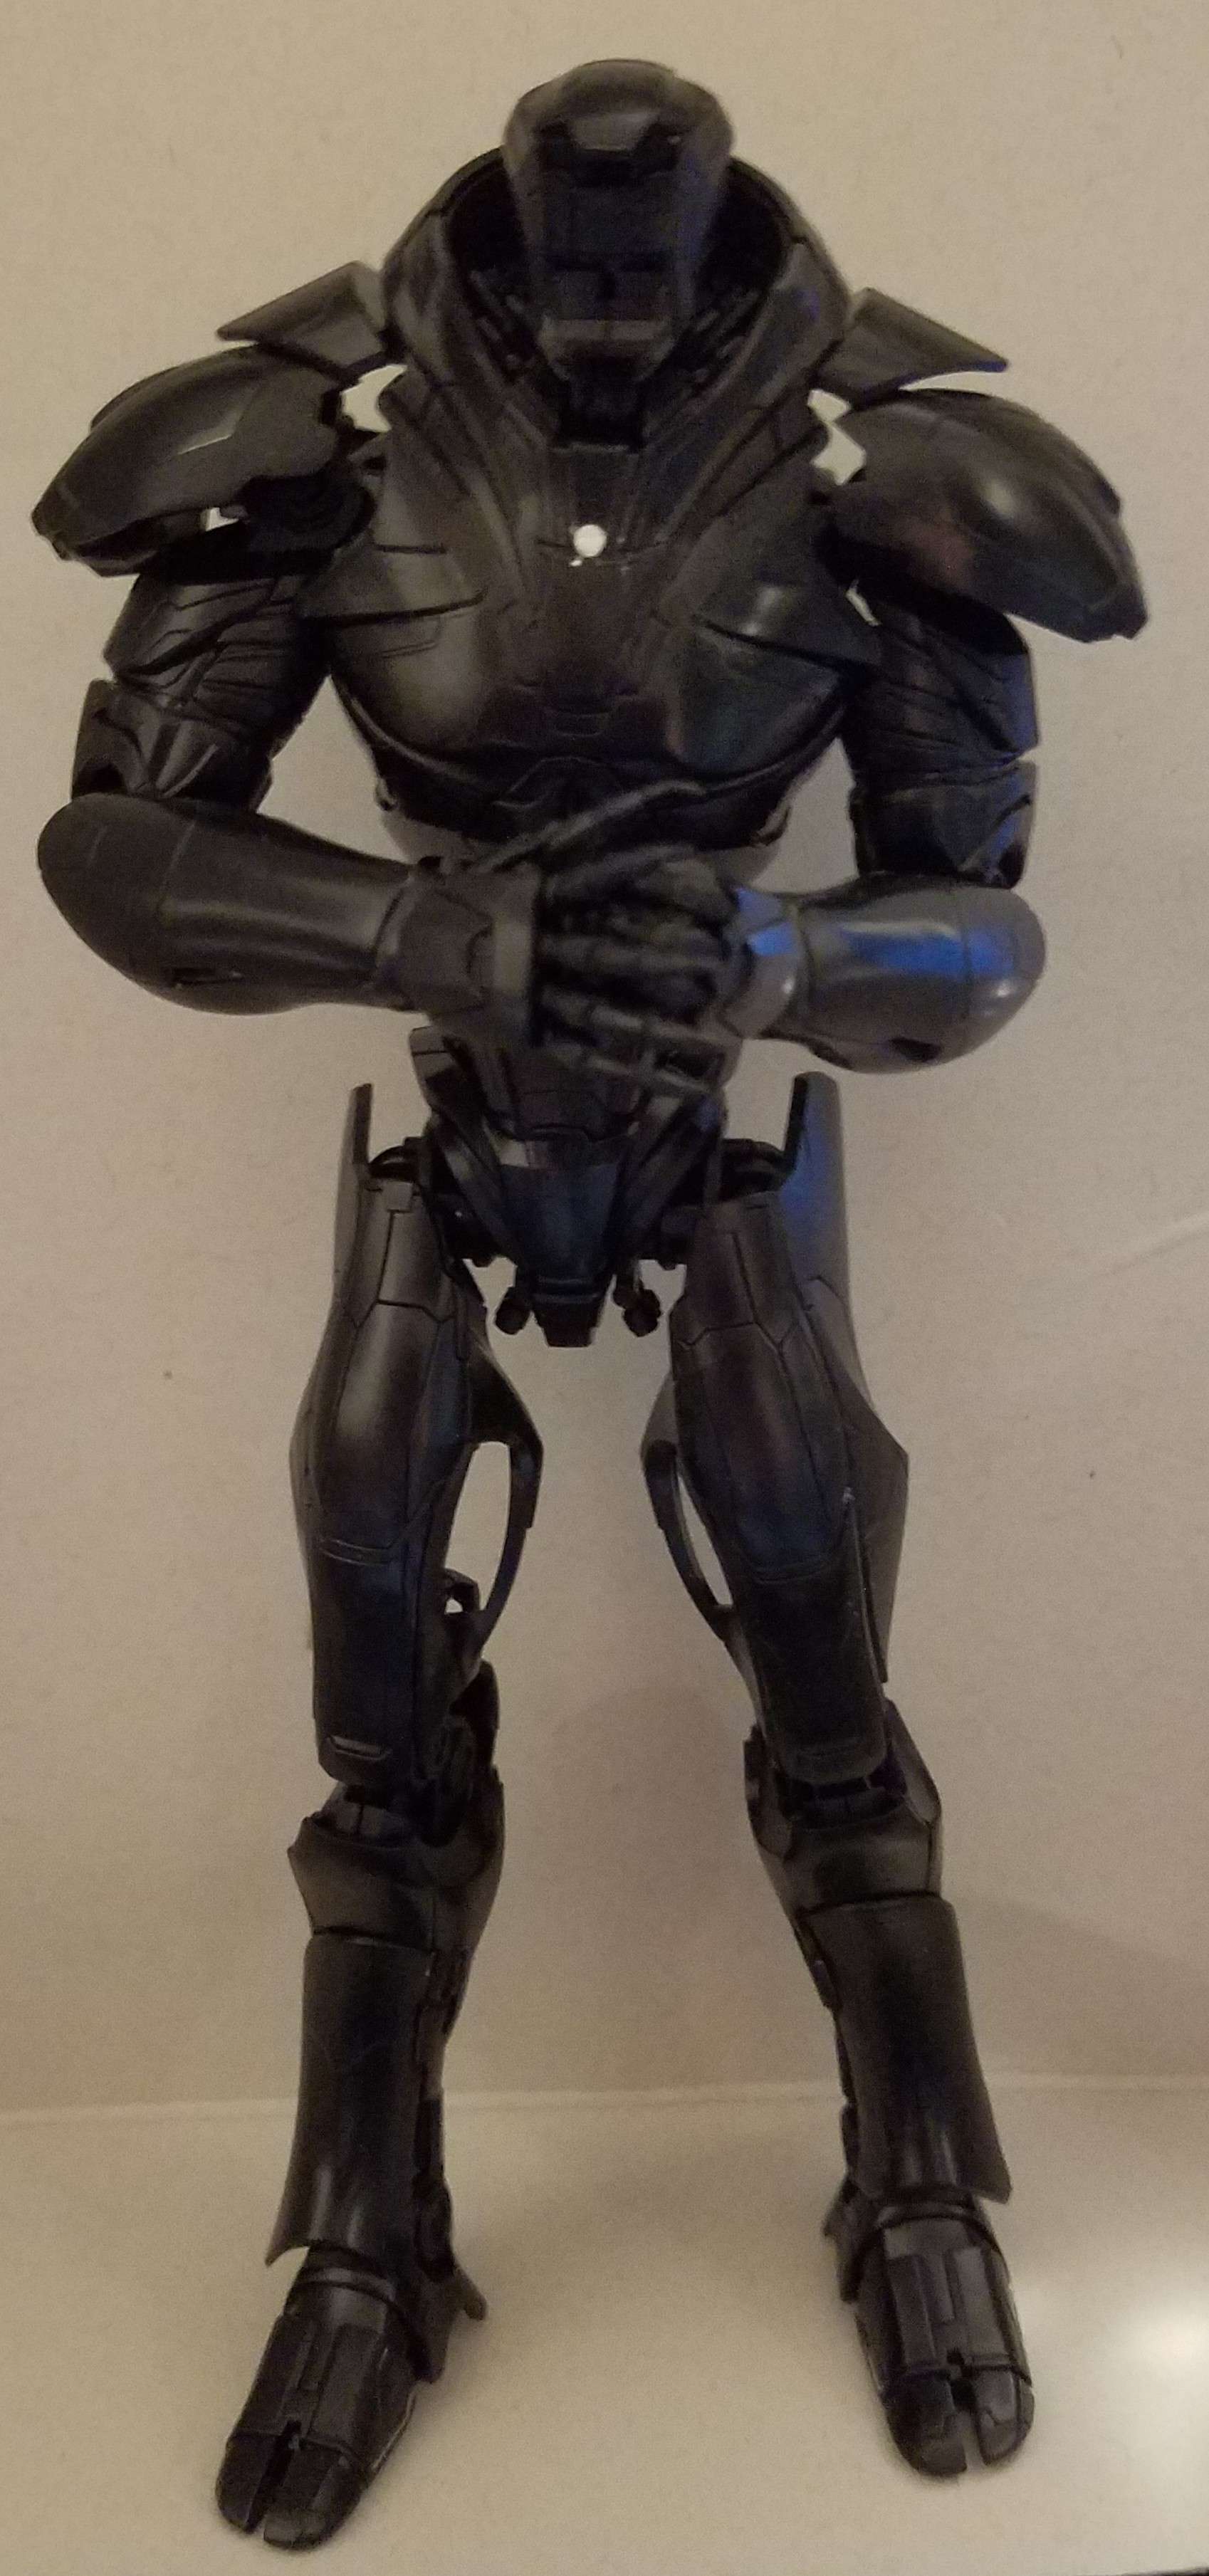
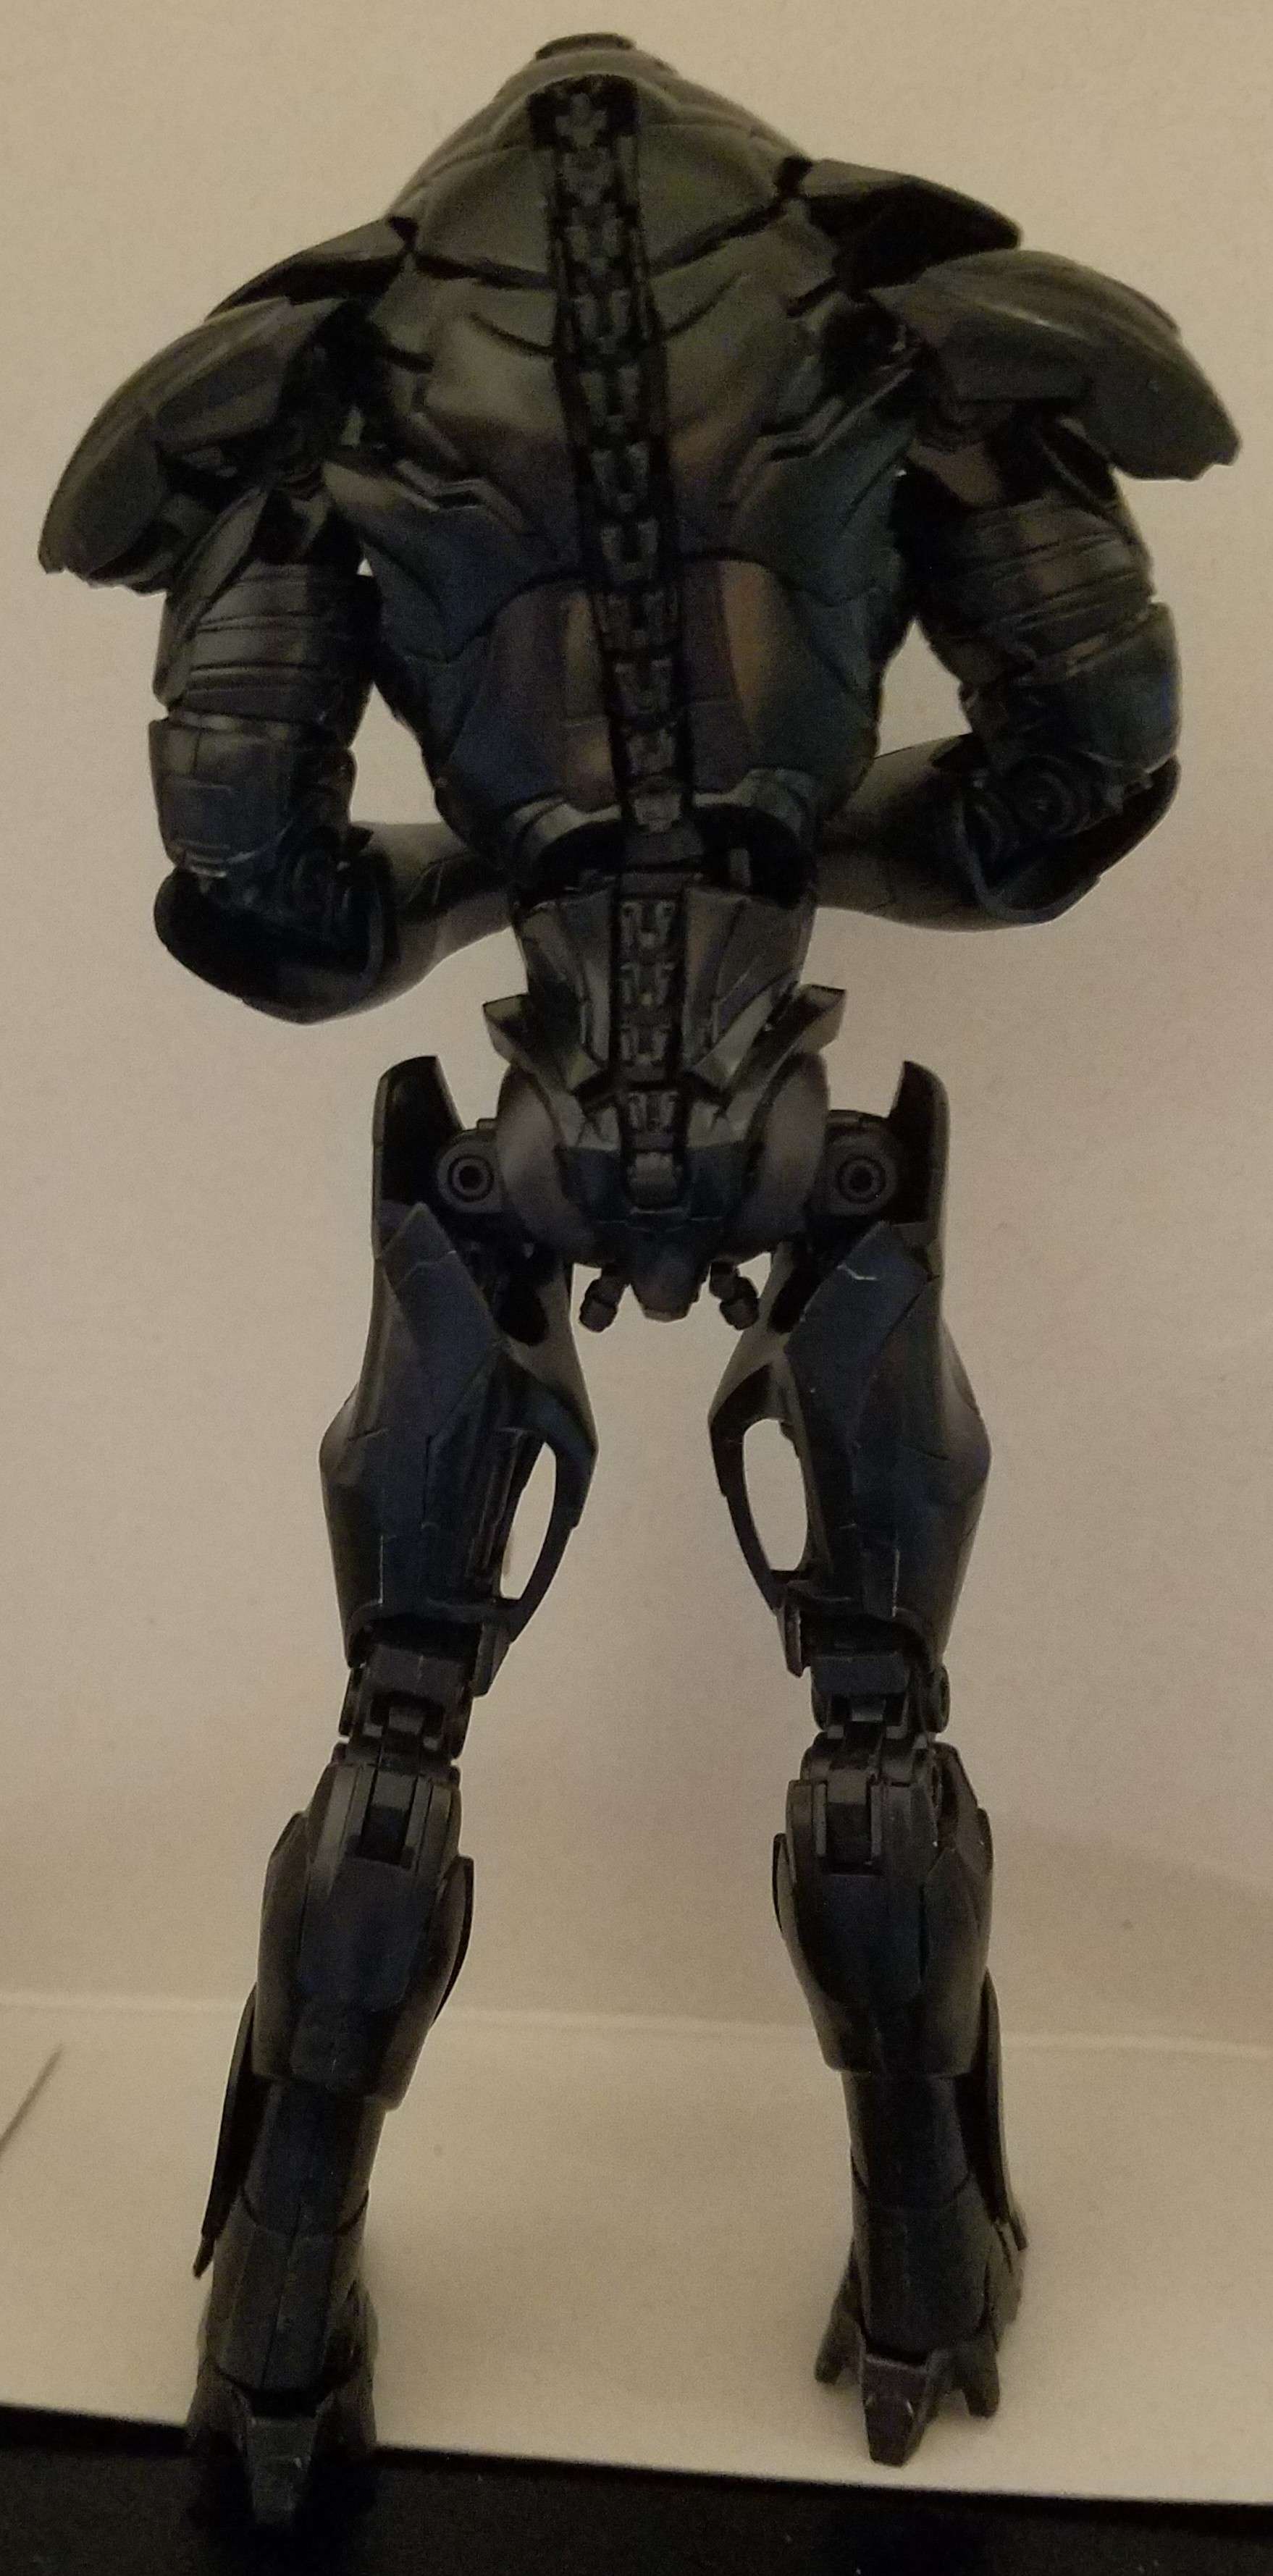
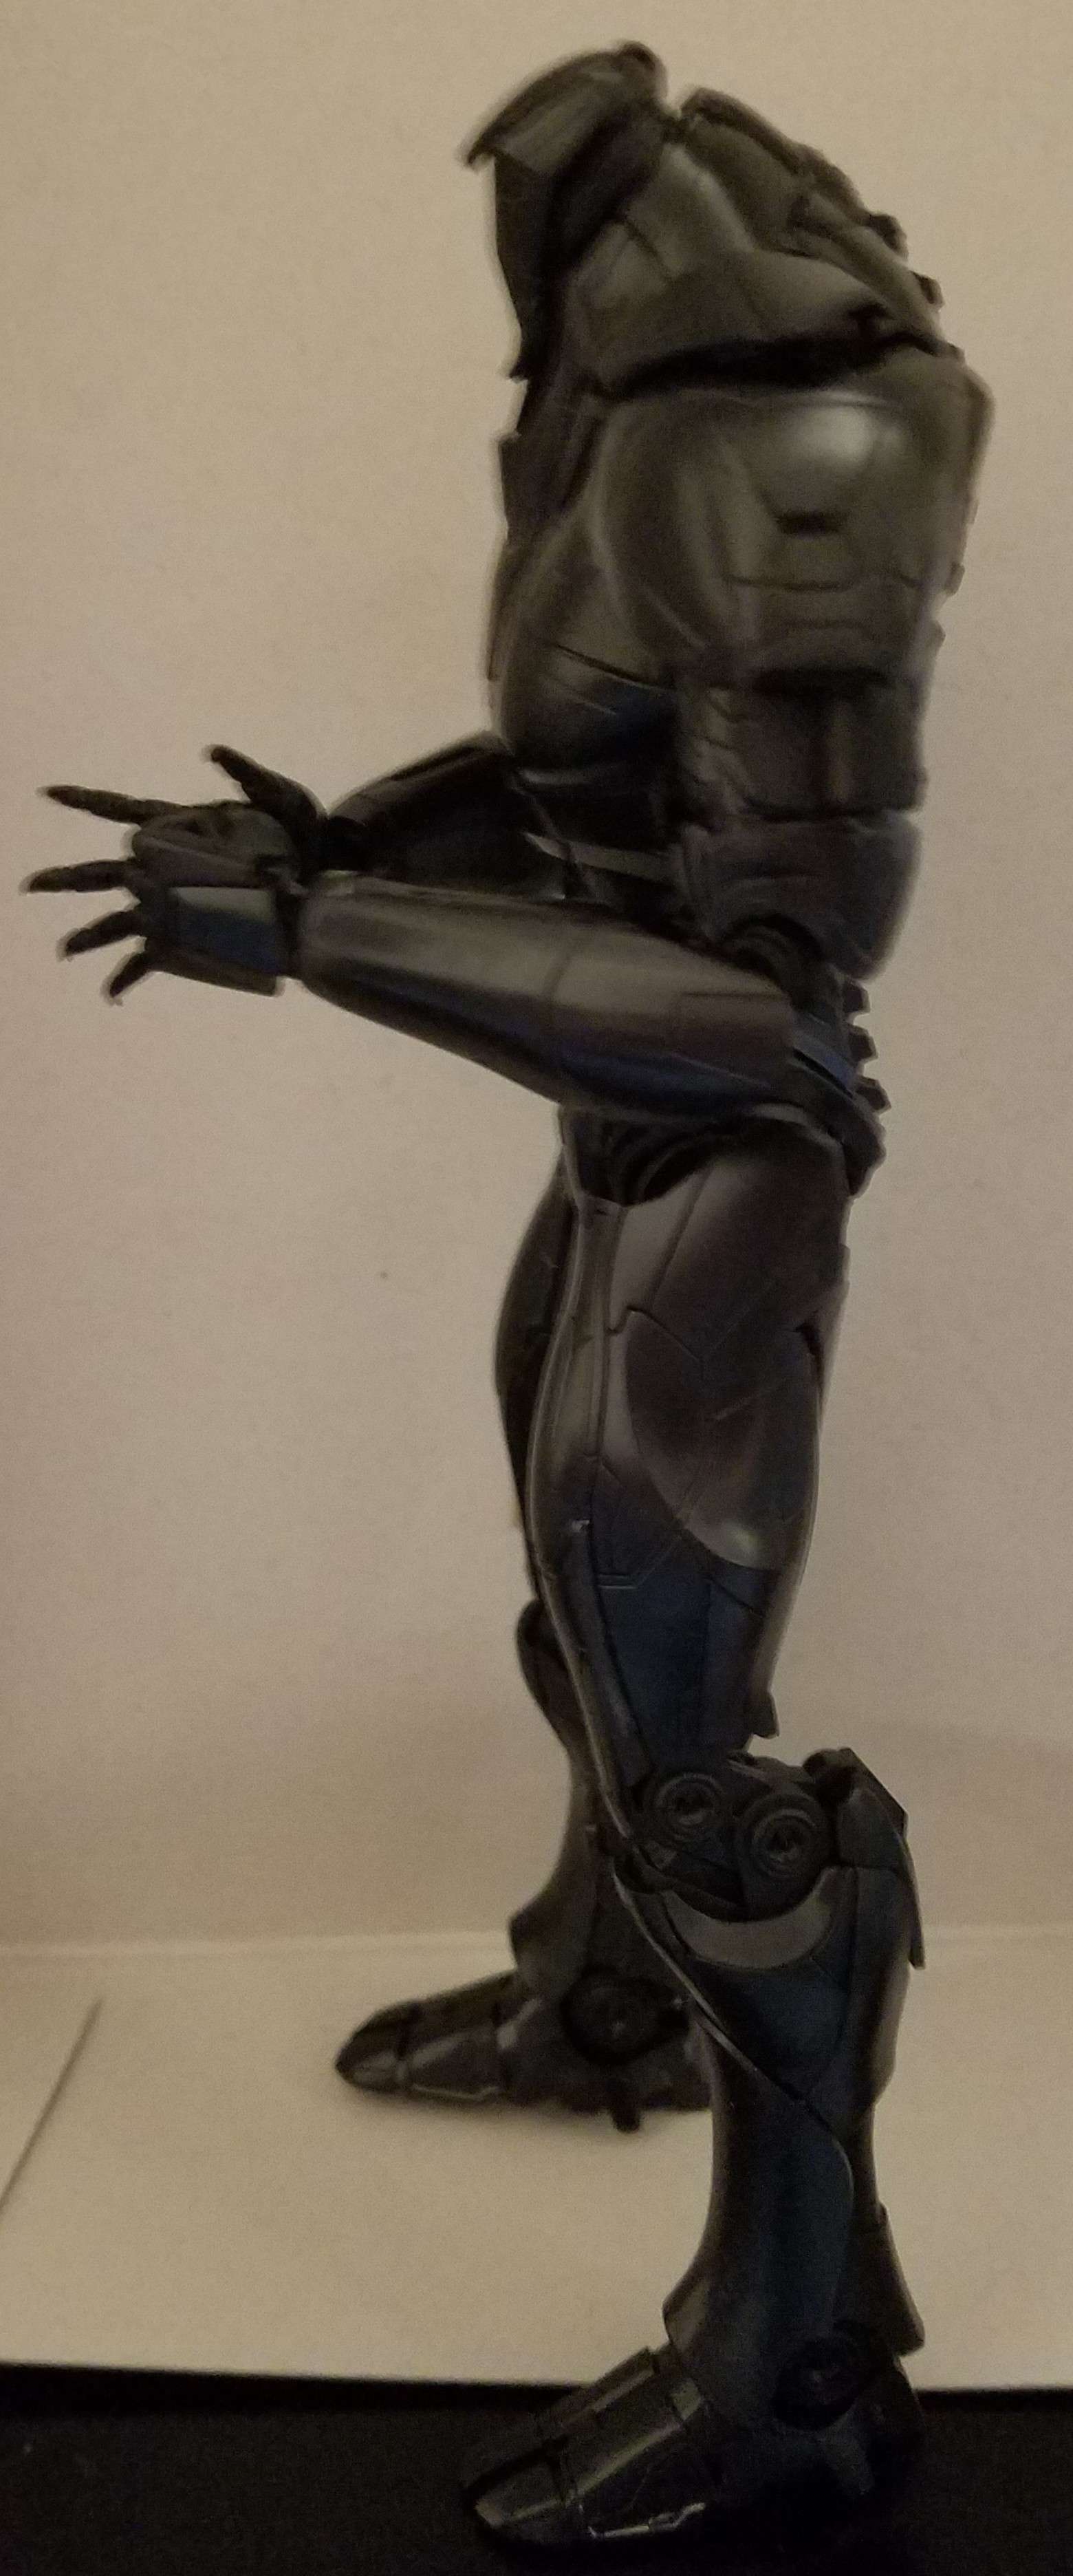
That’s looking great Gamera, I didn’t expect it to be so sleak, in black it reminds me of a Xenomorph. Does te face need any putty work before painting or is it fine going on after everythings done?
Thanks! Hmm, does remind me of a xenomorph now that you mention it. Maybe it’s due to the alien technology incorporated in the design?
The only putty I used on the model is the little dab you can see on the chest- he’s not primed- what you see is what you get. This is the best friggin’ model I’ve ever built fit- wise. All the seams fall on natural lines so there’s really nothing to putty and sand.
I’m going to order some Kynar wire and some black chrome paint- I thought I had some, it must have dried up and been tossed. After wiring him I’m going to paint, hopefully (cross your fingers) no issues there.
I’ve done a bit of work on the Zaku but it’s a bit slow going. I’ve been addressing seams and parting lines while I’ve been going, and also priming and painting as I’ve thought necessary as well. Here are a couple pics;