DesTROYer's 1/35 AAAvn CH-47D Chinook

A new project has begun. I had been planning on building a Chinook since Model Expo 2017, I even had a couple of 1/48 kits in the stash that I was going mix and match the rotors to build a correct AAAvn version, and then just before Expo this year, and I decided that Army Choppers looked so much better in 1/35 and they would compliment the 1/35 Armour I have so much better, so I sold them all up at the Swap and Sell and bought a 1/35 Trumpeter Chinook. Today with the completion of the two Meteors and after clearing of the bench, I got to work.

I’ll be using the Big Ed PE set which comes with masks, interior and exterior details, instrument panels and PE seats for in the cargo area. As I missed out on getting a set of the 1/35 Ronin decals for the Chinook, I’ll be going with the Hawkeye models decals and Werner Wings stencils.

After reading through the instructions a few times, taking notes and marking up where photo etch enhancements will be required, I got to work. I started with trimming and assembling the front console. It was pretty straightforward. Test fitting as I go.

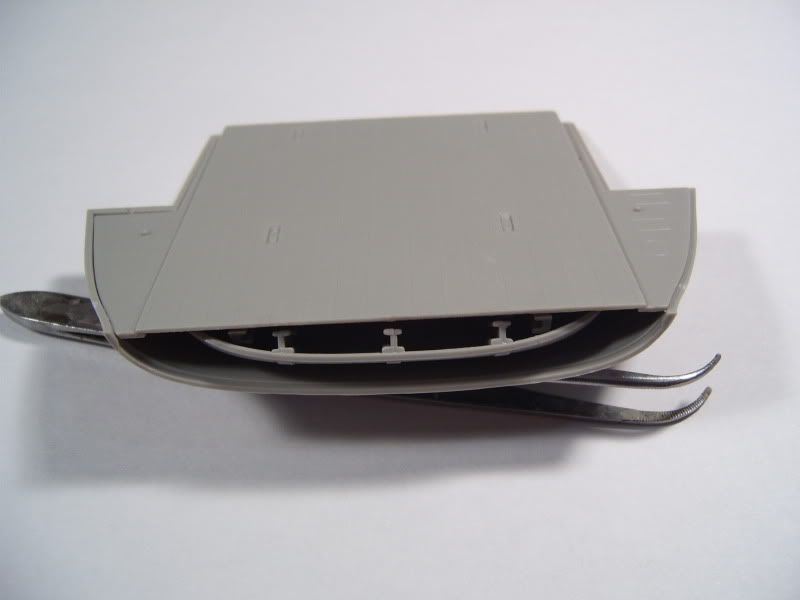
The internal bulkheads were next. They went together pretty well and look pretty good.

A dry fit to see how the components look together. This is going to be a big beast. Heaps will be seen through the big windscreen, so I have to get as many photos of I can of the cockpit so I can match it the best I can. The hunt is underway. Anyone who knows of any good walkarounds that can help me out, please do.

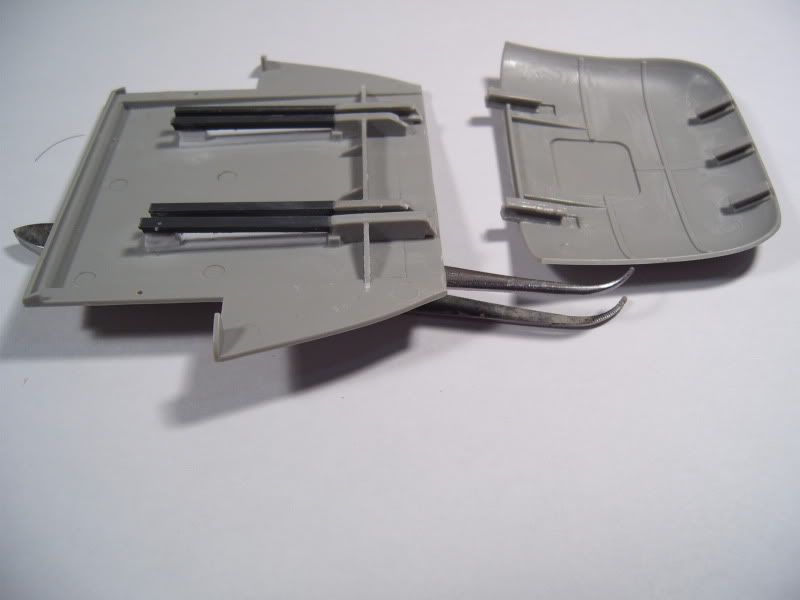
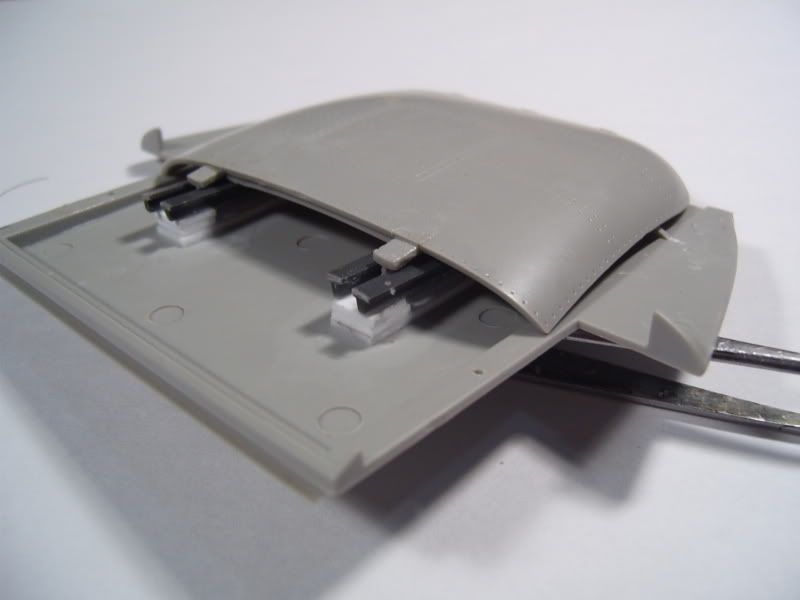
For the most part, injection marks have been minimal with them hiding in either easily cleaned up locations or hidden, but a few have me scratching my head on why. The first why is under the instrument panel combing. They’re deep too, so they will need to be filled. but the main issue to date has been on the shelves in the avionics bay. The sinkholes could easily have been hidden on the underside of the shelves, but no, they’re on the top and will need to be filled before the shelves can be painted, assembled and installed.

The colour call out and parts are pretty limited too, so again some photos of this area would be greatly appreciated.

That’s it for today. More tomorrow.

Oh yeah - this baby is going to be BIG! Good luck with your build and have a nice day

Paweł

I started off today by using my punch set to cut out some 3 and 2mm discs to fill out the injection marks on the Avionics rack.

But something was bugging me the whole time I was doing it. Well two things really, first I couldn’t find a decent photo of the racks in a AAAvn Chinook, and second, I had a sneaking suspicion that when in operation, the quilted blankets would be in place over both the racks and the winch motor. So I spent some tim online trying to find photographic evidence either way. The photos of the racks I found, mostly from US Chinooks were way more loaded up than the kit depicted them and the amount of cabling would drive me mad on such a small area. Then Rod C at Aussie Modeller came to the rescue with some photos. I jumped onto my Silhouette cutter and made up some more quilted blanket. The first attempt had the squares at 2x2mm, they were too big and the blanket too short…

So back to the drawing board. 1.5x1.5mm did the trick.

I then got down to selecting the colours for painting. The colour call out in the instructions pretty much said Aircraft grey everywhere, but the photos I was seeing were showing me that whilst that may have been true in the rear, the cockpit was much darker, so I played around with some paint swatches and compared them them to the photos. After selecting the colours I got to work.

The plan is to next mask up and paint the deck floor, but that can wait until next weekend.

Looks like you are off to a good start. One area where Trumpeter got it wrong is the rear upper hatch. The upper hatch retracts into the lower ramp and is not separate as the kit has you build it. I worked out how to fix it below.

I started testing to see what it would take to get the upper ramp to retract into the lower one. It was actually pretty simple. Trumpeter provided some of the parts needed. In step 23, you attach parts B23 to the upper portion. In step 32, you attach parts D23 and D24 on the lower ramp. These parts make up part of the track that the upper ramp retracts on. By modifying them and adding some track inside, you can retract it just like the real thing. I first positioned parts B23 so that they stuck over the lower edge of the upper hatch by about 1/4". On the lower ramp is most of the work. On parts D23 and D24 for the inner rails, trim them about half of the way back to the curved cross member, angling the ends at a 45 degree angle with the longer parts going toward the ramp deck (G3). For the outer D23 and D24 pieces, they also get trimmed to a 45 degree angle with the longer part terminating almost at the edge of G3. Next, I trimmed down the curved cross member to the height of parts D23 and D24 so it would not interfere and removed the tabs sticking up between the track made up by the D23 and D24 parts. Lastly, I extended the tracks back with “T” shaped Plastruct beams and elevated them with 3 pieces of .040 sheet styrene as shims to raise them slightly above level. You can see the results below. A perfectly rectracting upper rear hatch.

CH-47A001.jpg

CH-47A002.jpg

CH-47A003.jpg

Thanks, that’s some great information and will be a definite help.

With the help of the photos below provided by Rod C at AMI, taken at the Australian War Memorials storage facility, tonight I got home from work and started painting up the rear deck. The Portrait cutter saved me so much time and stress. I really couldn’t have done it without it. Still more details to add, and I should have painted up the ramp at the same time but I think it looks great.

I do like the Chinook, great bird to fly in impessive when your stood underneath it.

Great work so far, looking forwardto seeing more.

I lost a bit of bench time yesterday as I had to work in the morning, but I made a lot of progress anyway.

I started by modifying the ramp. For some reason known only to them, Trumpeters instructions would have you fit the retractable ramp in the top of the airframe, not pulled back into the main ramp. So by modifying the kit parts and adding some extended rails, I was able to make the ramp be operational. It’s a tight fit, but as I will have it retracted when completed, that’s not an issue and it will allow me to paint it up separately.

A big thanks to Gino (HeavyArty) for the tip.

Next up I did a dry fit of the floor and sides to see how it was looking, what mods I needed to make and how much would be seen.

Then I started scratching up some interior detail for the ramp area. The photos I have show this area as very, very busy. Too busy to model accurately in fact, so I used those photos as a general guide only and went free form.

As you can see, the rear section where the APU would be is totally bare as far as detail, so looking through the spare parts box, I again made up a substitute APU to fill out the area. I started up by making up a tape template of the area so that I could cut a piece of styrene to shape and mount all the gear on to. This allowed me to do all the assembly and painting before the two halves are joined and so I won’t have to fill that seam. Paint will bring this area to life.

A lot more detail painting will be done in here over the next week.

I then painted up the rest of the interior with the Aircraft grey base colour. As you can see this is a HUGE beast. Next up, after all the detail painting is done, I’ll seal the paint, apply a wash and the interior placards, before joining up the rear halves, installing the ceiling, deck and cockpit. I will leave one side wall off so I can install the photo etch seats.

Detail painting has begun on the interior.

Excuse the roughness of the vent. you can’t really see it from the side door and from the back entry it looks great.

Ditto on the work so far.

They are big impressive beasts, but I never felt too secure in them in flight. I much preferred flying in a Blackhawk or Huey.

But I think your fire extinguishers should be red or forest green. I never saw yellow extinguishers in the US Army.

Thanks mate. Here are the two photos I have which clearly show yellow extinguishers in the Aussie Chooks.

Is that what AAAvn stands for? Not an acronym that I’m familiar with.

Yep. Australian Army Aviation Regiment.

I loved em, always felt nice and safe in those. Best experiances were flying down the Vrbas valley in Bosnia and dropping off palletised loads in the Afghan desert in the pitch black.

TROY, really nice progress on this, some great detail.

Between work and catch up with family, I didn’t get much done this weekend. Something that I will remedy next weekend by turning off the phone and locking myself in the house. Still I did get some work done, starting with applying a gloss coat of X22 to all currently painted pieces and then applying the photo etch to the instrument panels. You have to love the way this Eduard stuff looks.

I’m making progress in the cockpit too. Fuse panels are in and the control instruments are done.

Work on the photo etch seatbelts is underway. I’d hoped to get the done today, but my nieces needed a cuddle and my nephew wanted me to play with him on my old PS2 I gave him. That was much more important than the seats.

Then it was into the troop area to apply the warning placards. I don’t understand the reasoning behind all of the locations, but I have followed the instructions and references and they seem to be in the right position, just not where i would have put them.

The APU has been painted. Once the two halves are joined, I will make up the APU cover plate and fit it.

The rear ramp has been painted. It will get minor scuffing and some dirt when I get to applying the washes to the inside.

Clear parts have been dipped and are ready for installation. The cockpit front won’t be installed until all other work in the interior of the model is done.

and lastly I have started building up the turbines.

More next weekend.

Wow. That ip is the most realistic one I have ever seen.

Wow, I agree. That detail is incredible [:)]

It’s time for an update. A lot of hours were spent at the bench this weekend, but there really isn’t that much to show for it. Just a lot of fiddly work.
I started off with this shelf that is over the front left window, near the avionics bay in the rear. I haven’t been able to find that many clear photos of it, and believe it or not, one of the best references for it that I could find was in the Movie Deadpool 2.

So I spent an hour or so scratching this up. It will help add some extra detail to the rear. I also gave the ceiling a wash to test out how it would look. It still needs a little more clean up, but it’s getting there.

I also added some more piping, decals and detail to the ramp hydraulics areas, including the pistons for the ramp. They’re tubes, so I’ll be able to slide some rod into them to get the position and height right on the ramp when the time comes.

After all that, it was time to clear the bench. It was a bit out of control.

and then it was onto the seats and all the photo-etch that would need to be folded and fitted. So I got all my gear together and got started.

After three hours, the front seats were done. I only lost one piece too. I really much prefer the fabric belt sets to these PE ones. They just don’t sit right, are a pain to bend to shape without making the paint flake off and just don’t like people with fat fingers like me.

Lastly, it was onto a task I have probably been overthinking too much lately, but once I got started on them, they’re quite easy to do. The rear seats. I’ve done four out of the 12 sets so far and still have to do the frames and seatbelts before I can paint seal and install them.

First, using the bending tool, I roll up the bottom tabs. They will wrap around the tube frame.

Then I fold the seat 90º and move up to fold the straps where the fittings at the top will secure them to the bulkhead.

Only fold them to 90º to start with, so you can fit the buckles on.

Once the buckles are on, apply some CA glue and fold them down flat and clamp them.

Once done, put them aside and move onto the next.

Just got to work through my list of things to do before I can seal up the interior.

Hey Des, I’ve been in the CH-47 community for almost 30 years, so let me know what refs you could use. The errors in the kit that I see are from the design of the kit, which you would have to do a fair amount of scratchbuilding to correct. I wish I had seen this earlier, there are some easy corrections I could have told you about before the parts were painted.