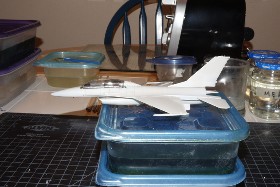
I am currently learning how to deal with panel lines on planes, but I am not sure how to deal with panel lines that are formed by gaps between 2 different parts. They are just too wide, but since this kit is 1/72 it is quite hard to deal with because of how small it is.
I tried:
Filling with Mr Surfacer 1200, too pasty to scribe over
Filling with Vallejo plastic putty, too rubbery to scribe over
Filling with CA gel glue, very hard to sand
Make other panel lines wider using scribing, gap line still much wider
And this was on a straight gap, on a curved gap, like between the wing and fuselage of a WW2 plane it seems even more impossible
Are these gaps something you have to accept at this scale and perhaps easier to deal with at larger scales? Or perhaps the kit is just too cheap to begin with? It is an Airfix kit
Try heat stretching a piece of sprue from the kit. You will need to get it just a teeny, tiny, tad bigger than the gap. Lay it in place, set it with liquid cement, let dry about and hour, start scraping with a blade until most of the excess is gone, then finish with fine sandpaper.
The kit’s sprue will match the hardness and color of the kit, so when you are done sanding, no seam or gap should be visible. You should be able to scribe across it with no problem, so long as the sprue has been thoroughly glued down.
This is my current preferred method of dealing with gaps.
Perfect description from Real G, the stretched sprue will leave a durable and permanent bond when sealing gaps, making sanding, scribing and finishing quite easy. Fillers in just about any form, except the epoxy two parts, just don’t stand up to scribing and fall apart.
A variation on the above is to slip in a piece of thin sheet styrene, edgewise.
put masking tape on either side, then carefully trim and sand it down.
I’ve never had any success filling gaps with CA, but thats me.
I also can’t stretch sprue worth a dang either, so that leaves me with few options.
Any time I do joint fill, I mask pretty close to the gap. Otherwise it just creates more work clean up.
My go-to putty is Bondo Glazing and Spot Putty. It’s one-part, comes in a toothpaste tube and is easy to work with. I also like the Tamiya light gray stuff.
You can try gluing the top half of the wing to the fuselage first, then add the bottom half.
More good ideas from GM, I forgot about the red Bondo, great hard cured surface, easy to sand and durable. I’m in the same camp with cyano, workable, (sanding,) within about 15-30 minutes, longer than that bring a lunch, you’ll be there for a while.
The upper/lower wing treatment works great. Thanks, Bill.
I have tried a few different CA glues and found that the cheap Super Glue (the actual brand name) brush on works beautifully for gap filling. It doesn’t dry as hard as many of the better ones and the brush gives excellent control to where it goes. I don’t use anything else anymore.
Don’t know who may carry it in the US but it is available at most dollar stores here.
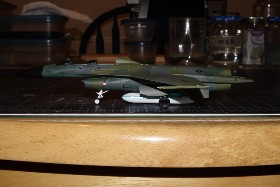
I nearly always fill gaps with CA. I just use a toothpick to put tiny amounts of it into the places where there’s a gap, and I always leave it on at least overnight before sanding. After that, I just take a black sharpie and scribble along the bead of CA, which acts as a level indicator. Then I just take it to my sink with my MicroMesh sticks and gently wet sand with progressively finer grits just until all of the black is gone. About 95% of the time, when I airbrush some primer along the seam to check if I missed a spot, the CA filling is successful the first time. Its also good for erasing errant scribing and starting over. It hardens to become just like the plastic and the only parts of it that come loose are the parts you’re trying to remove. The key is to NOT use any fillers in the CA like a lot of guys use in YouTube videos. That makes the CA hard and jagged, and it ends up shredding your sandpaper like broken glass. Put it on, and leave it alone until the next day. It will sand just fine. It will also mix with primer that is already on the model and do its job just as well, so if you find a spot that didn’t quite fill right when you put the primer on to check…you can just put more CA right on top of the primer. Just dab a tiny bit on, and leave it alone. When you try to force it into places or try to push it around, that’s when you’re going to have issues.
I used this method on this 1/72 F-16B+. No visible gaps afterward, and that was on the first application. Didn’t have to do any sand/repeat process anywhere on it.
I use Gorilla Super Glue with the light blue cap. One of the best features of this particular brand is the design of the tip and cap. It will never clog on you.
Hi, I do this in those situations. I keep a supply of Evergreen strip in the thin sizes,.010,.020 etc. Then I cut a piece to length a wee bit oversize. Slip it in the gap and Soak liberally with glue, let dry for a day or two, Come back shape and sand and Viola’ it’s done. G has a good solution too, and I have used that for years as well. Especially on ship Bottoms!
Thanks everyone for your replies, I think I already typed this reply before but it didn’t get posted, not sure it still needs to be approved or something went wrong
In any case I had a try with the stretched sprue but I found it still hard to maneuver in such a small area with a knife or a sandingstick