Need to take a break from cars so lets do a fun little build of this
.jpg.58637288f2e14ca6e204812f2e5ec8c9.jpg)
.jpg.9d57e20ad4a47f3174f010a048aa70a3.jpg)
.jpg.6c84c6a631858bfe7d17fefa2fe60c3c.jpg)
.jpg.3eee78015be4e8bec19bf0eb6bfb3751.jpg)
Using only the paints that came with the kit
.jpg.bd7c19f139100bf12244b1010057b95b.jpg)
It is 1:16PM on Saturday March 11 and I am cutting the first part off the sprue … NOW
Need to take a break from cars so lets do a fun little build of this
Using only the paints that came with the kit
It is 1:16PM on Saturday March 11 and I am cutting the first part off the sprue … NOW
Fun! Are those paints acrylic or enamel? I really like the revell email enamel paints (though I can’t figure out the name…).
Looking forward to your build. Go Go Go!
Haven’t tried them yet but they smell like dollar store acrylic craft paints. This could prove interesting but I am committed now since I said they would be the only paints I would use
Looks like a nice kit. Can’t wait to see the finished model.
Stay Safe.
Jim [cptn]
This’ll be fun to watch. Bring it on Tony!!
OK so it is time for the 4 hours of bench time (not consecutive) update.
Lower hull and decks assembled.
There were a couple of small spots where the deck just simply would not meet flush with the hull. Keep in mind that these small gaps are about the width of a hair not the trench it looks like here. Paint would likely fill them but I gave them a swipe with some clear parts cement just to make sure.
.jpg.d5f9341ede3ebd45a92c60eb6ce98802.jpg)
Now, let’s discuss the elephant in the room!
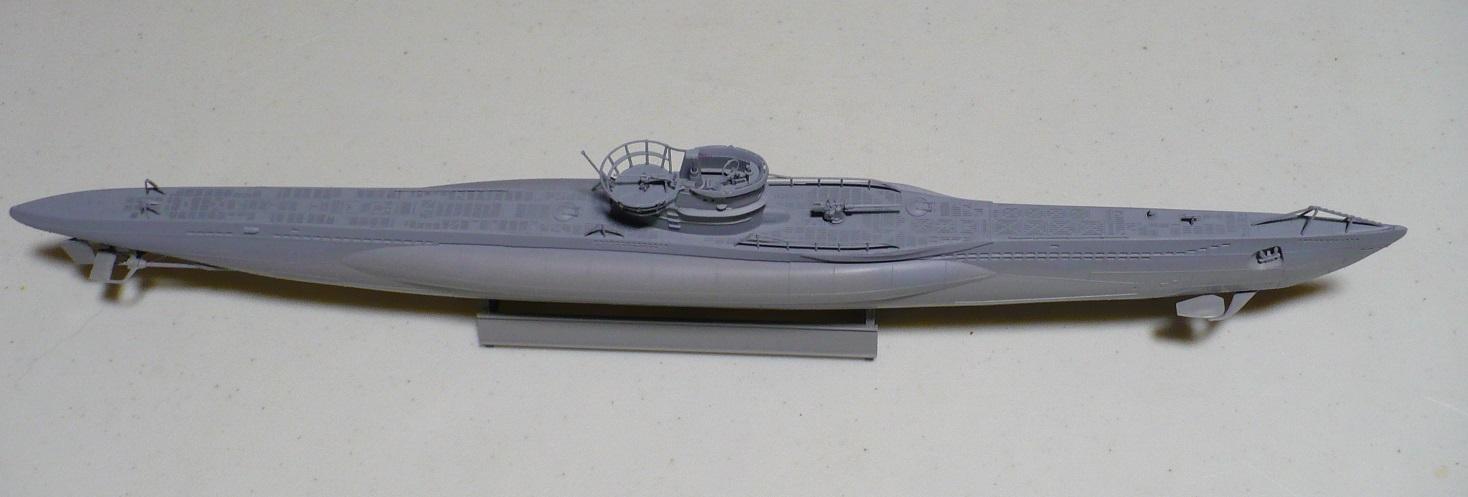
This kit was designed and built in 2006 (Thanks Scalemates) NOT 1966. They have completely beautiful, crisp, scale details. Just look at that deck above.
So why? Just why, did they feel the need to festoon the hull with massive (in scale) rivets and raised panel lines? In scale those rivets are about 4 inches around and protrude about 3. The panel lines are more like 6 wide and 3 high. Not only is this sub going to lose about 10 knots on the surface and be almost immobile submerged it is going to make so much noise while underway that the invention of asdic would never be needed.
If this was not going to be a quick build I would have spent a couple of days sanding all that carefully molded detail off. You just would not see any of this in 1/144
.jpg.b0dba500bdbb9c52e44c3721b036107a.jpg)
.jpg.e7db05167e6ff44414e914c9e4490245.jpg)
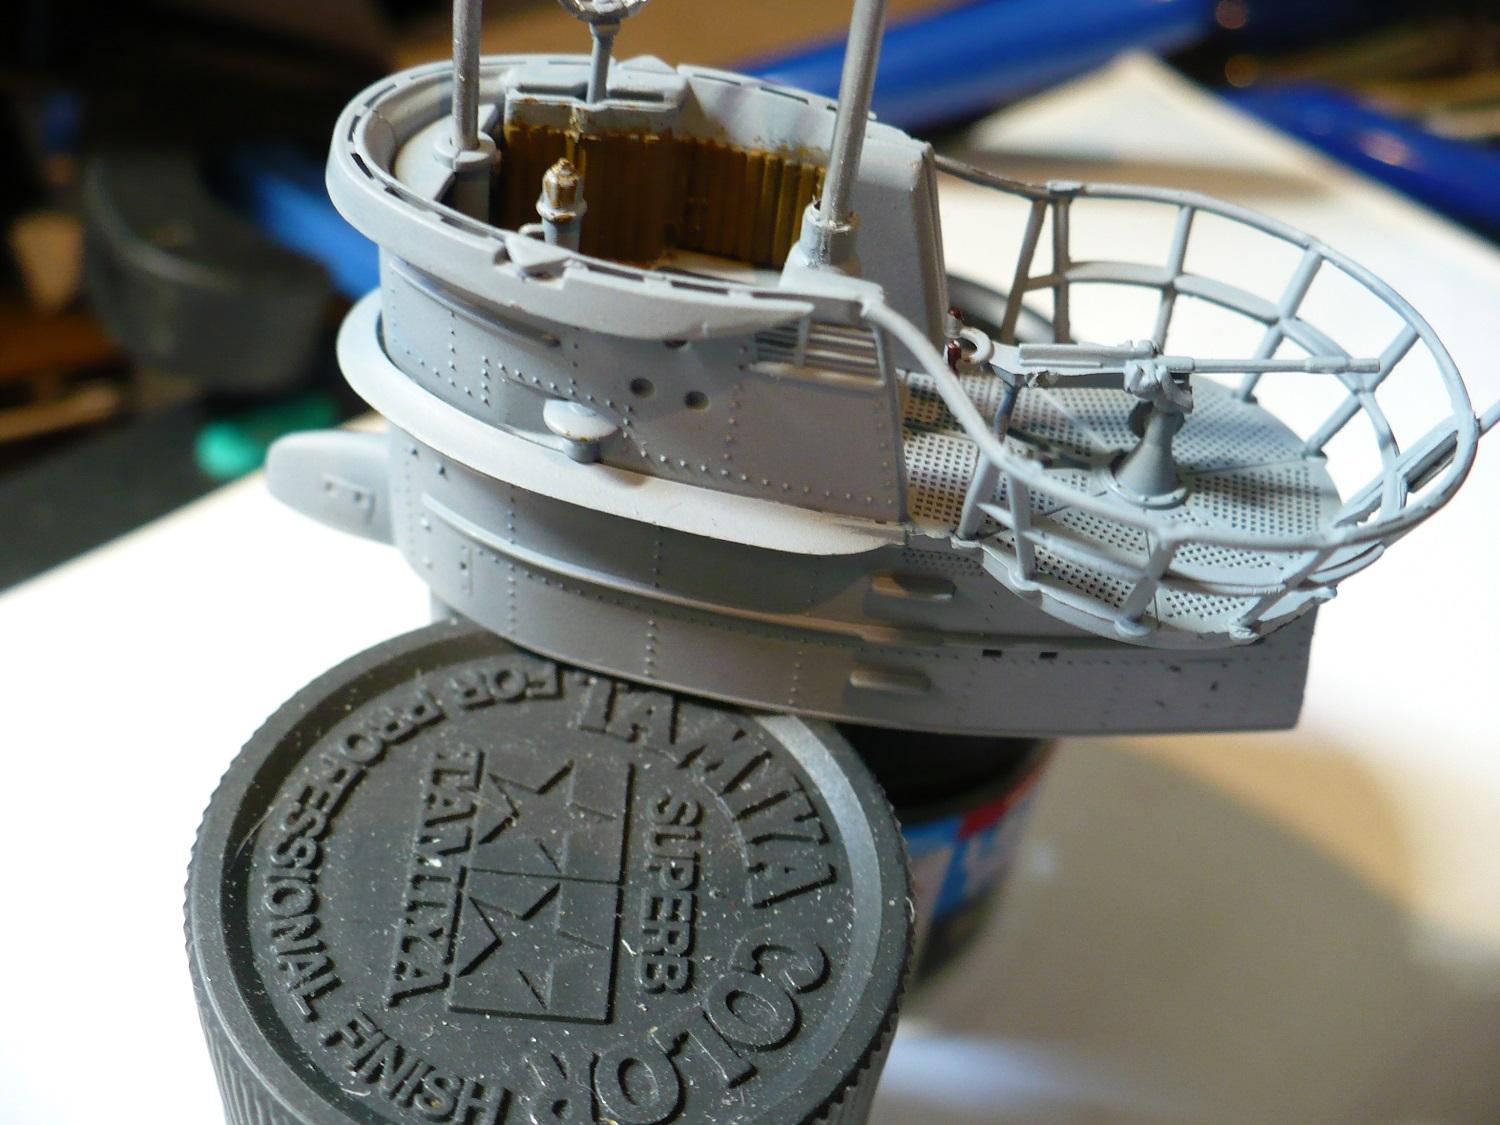
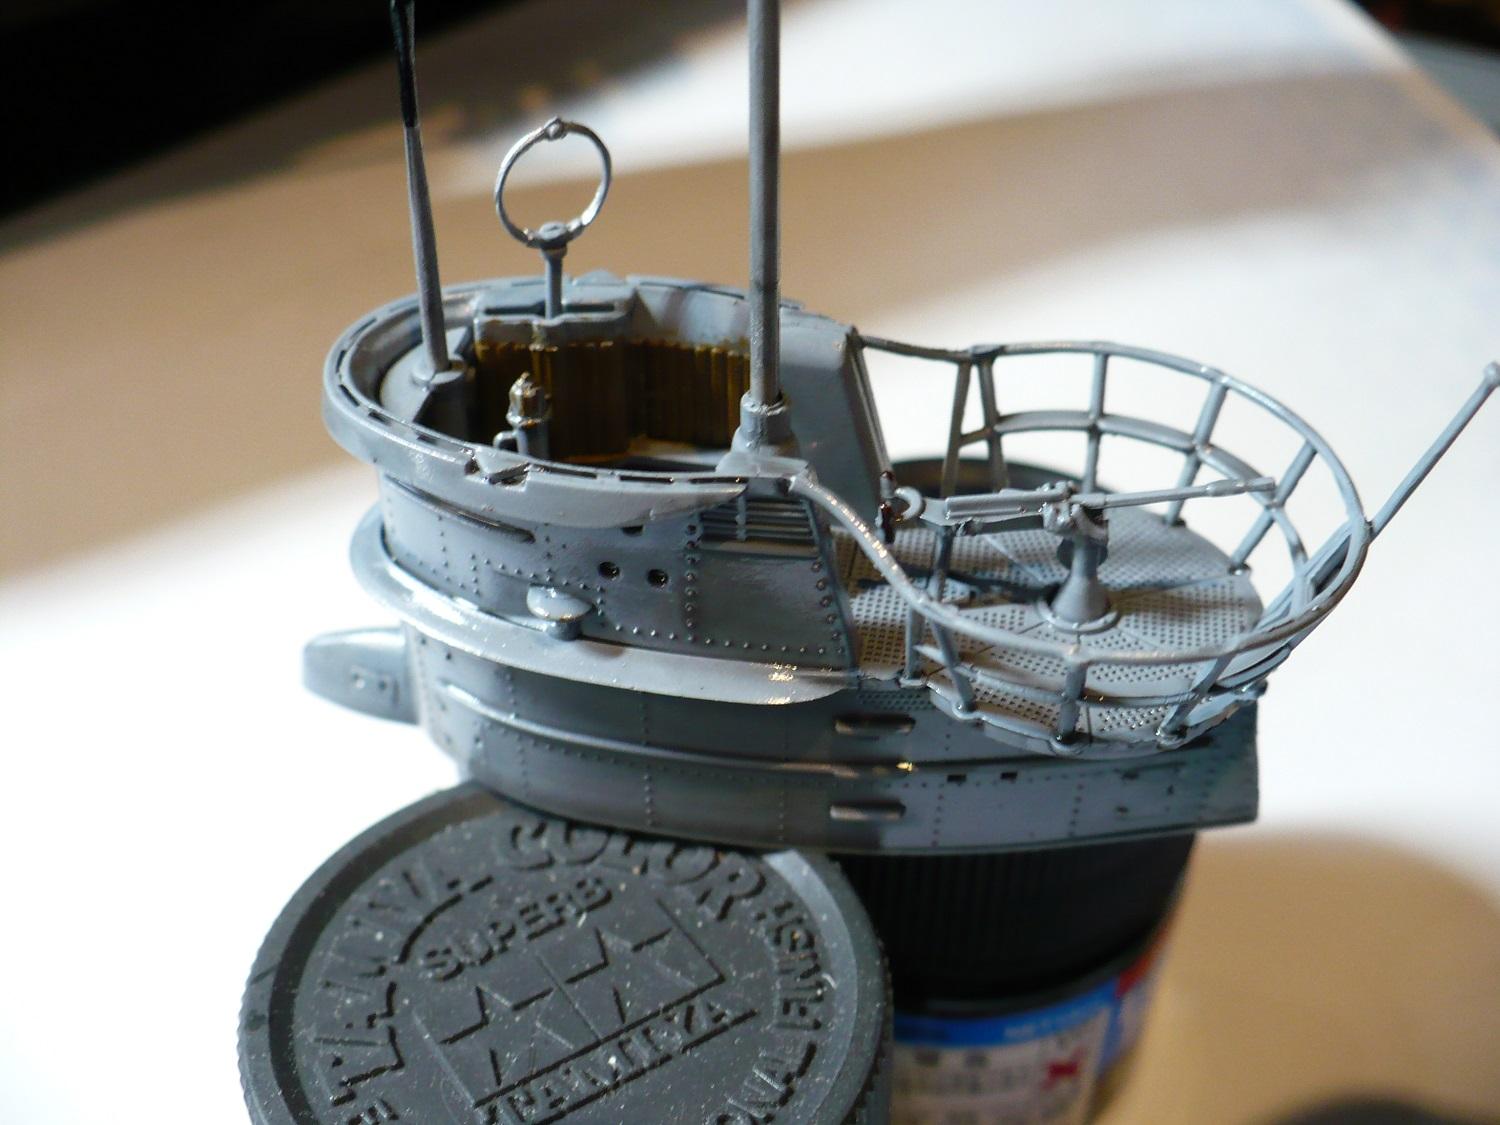
Tower detail is nice. This is where some photoetch may dress it up a bit but not a lot since the molded parts are actually pretty nice overall. That tiny grating and wood bulkhead paneling will pop with a wash.
.jpg.0042b399961590639fc10ce0c351cb92.jpg)
.jpg.b086771cb92c630ce7f62e735a1eb96b.jpg)
The rails are of course a tad overscale and need some serious cleanup but thing they will look good once done. Luckily the styrene is easy to work with being neither too hard nor soft. It would be Goldilocks approved
.jpg.506c5350b3390045a456ca5fa48a0e55.jpg)
Build done. Total assembly time 5 hours and 27 minutes. A fair bit of clean up on very tiny parts extended the time a bit. It was sort of odd because only one corner of one sprue has flash. The corner of the mold must not have bee closed completely. It wasn’t horrid but did need cleanup.
.jpg.874b1ac7d2ef964f2caa4a20defb6021.jpg)
.jpg.b3f1738ebfd79e29581ce4443e343334.jpg)
First coat of kit supplied paint on. This paint brushes really nicely but of course I had to airbrush so took some time to figure out best thinner. It is more like craft paint than normal model acrylics and the only thing that will thin it is water. Just water. Trust me don’t use anything but water if you use these!
Looked awful going on but once dry is a really nice flat finish.
.jpg.d0809c61055067067115791c142663b5.jpg)
.jpg.c005667e4c29bd9daf7c3f195efc74ff.jpg)
.jpg.036262fe44e307119aee0e03f1d78501.jpg)
Wow! You’re a machine. Great progress and the paint does look good. Any particular motive for powering through this kit or just had the time?
Had to get away from cars for a bit and this one just happened to be on top of the pile since I received it for Christmas. Figured it would be an easy 20 or so hour project then back to the bigger projects. All in all it sort of fills the OOB no messing around build that the Corvair was supposed to be but wasn’t.
It is not abnormal for me to have three or four going at once so I can avoid getting bored and resigning a kit to the shelf of doom for no valid reason.
Lower hull and details painted. Those nasty rivets interfered with the masking exactly as It thought they would but that is fine. Technically it is “done” but if anybody thinks I will leave it like this they have surprises coming.
.jpg.3eb6c7cab33cd35a3f0b379844595ec5.jpg)
.jpg.4fa5713319340551a519d3ff86a36570.jpg)
.jpg.00e02135df0ae78517d721758d8bf883.jpg)
.jpg.731628838c245af97e74f2894b220577.jpg)
Well done. She looks the part for sure. I’m with you on the four or five kits going, that’s my usual cadence. Sure knocked this one out in short order.
Look even better when I am actually done with it. I challenged myself to paint using only the kit supplied stuff and that I did but I never promised to stop there!
I didn’t research this a lot so not sure how accurate the colours and pattern are for real Uboats of that period but the kit supplied paint and instructions are bang on to the movie version.

At the start of the movie the paint was very pretty and clean.
Not so much when it returns (And anybody that has seen the movie knows it get’s much worse in about 5 minutes)

Nice Job [Y]
Looking forward to seeing the final cut.
Stages.
Plain paint
to
Future wash
to
black wash to limber holes, guns and hatches only
to
Blotchy Agrax Earthshade wash to overall.
.jpg.b487cb63ca622cbb61bb68d6ff09a319.jpg)
.jpg.3154e27e60030567a821a3382e32dd69.jpg)
.jpg.db2fab5610c548a2d6ff83c0ffdd9ae4.jpg)
.jpg.dac2a472b876447eaa1d956b95ec6581.jpg)

.jpg.d8a2861e4f6bc54aa36c9767fcb3f11a.jpg)
.jpg.14cd2089651bcf48a4cd7974a3816ba5.jpg)
.jpg.17e0155686509533b7665e7982734469.jpg)
.jpg.436b677c8afeb63c11d1db61d55776d0.jpg)
.jpg.641b6c1036c0aa968bdbe48fe8a1b2b1.jpg)
Next up will be a flat coat to knock off any remaining gloss and even things out.
So far it’s looking real good here.
I’m eventually going to be working on a
1/144 VIIC atlantic version in the near future.
Off and on, I’ll be a watching your progress.
I have had one of those built and waiting for paint for about 5 years now. Probably should have pulled it out and did both paintjobs at once.
DONE!
Out of the box with the exception of antenna wires and insulators.
Total working time 10hours 39 minutes.
.jpg.2909d747acaeeb152a04f0010e0fd210.jpg)
.jpg.758fda334cce77eba0ea5df355c3dc39.jpg)
.jpg.97276c18e193df129a1524d1177188e7.jpg)
.jpg.9f37fddafa09a2642d3ac25ca6c52f74.jpg)
.jpg.5ff2b9f15a2c810f800a445b51ce3b35.jpg)
.jpg.17ab02513b64e4dca0909a6c1552a894.jpg)
She turned out great. I started that kit ages ago and couldn’t get the deck to fit right. Well done and record time!
Zat isss!
A vunderbar bilt of zee UnterZeeBoot! Verry nice.