This project has a bit of a long gestation before finally taking shape. I originally bought the basic Nichimo M4A1 in “severely started” condition off of eBay many years ago. But it was incomplete and languished on a shelf in my work areas for years while I wondered what to do with it.
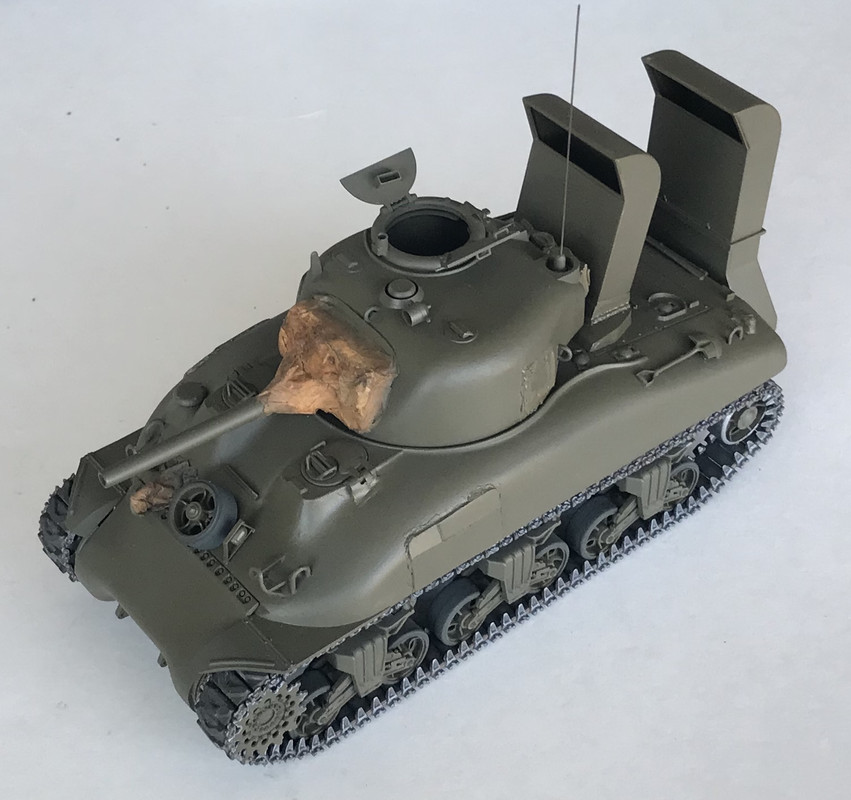
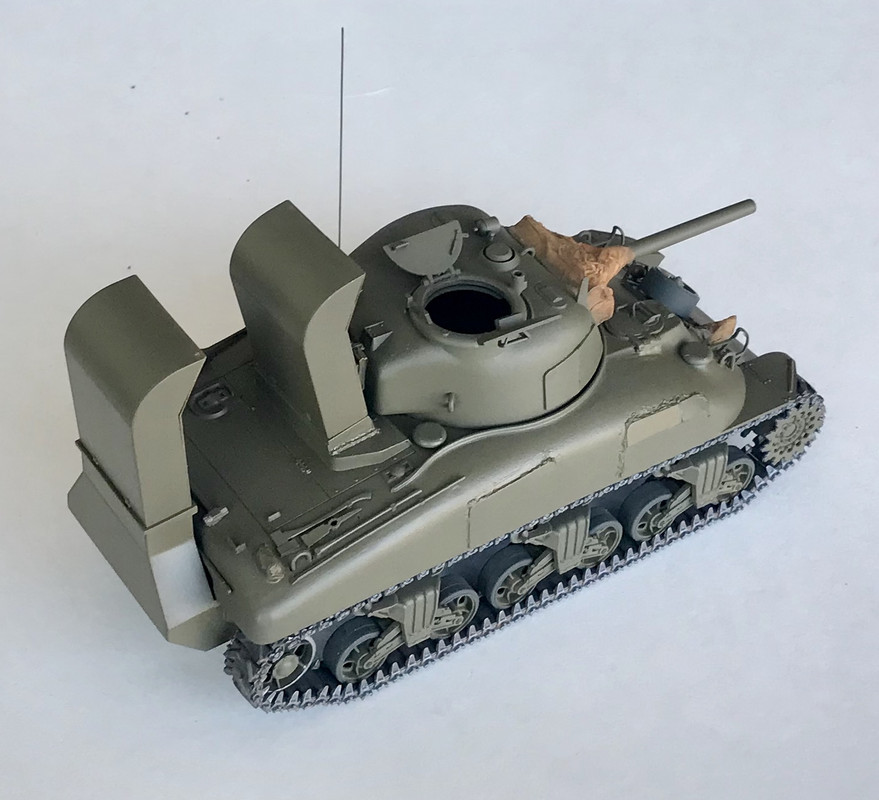
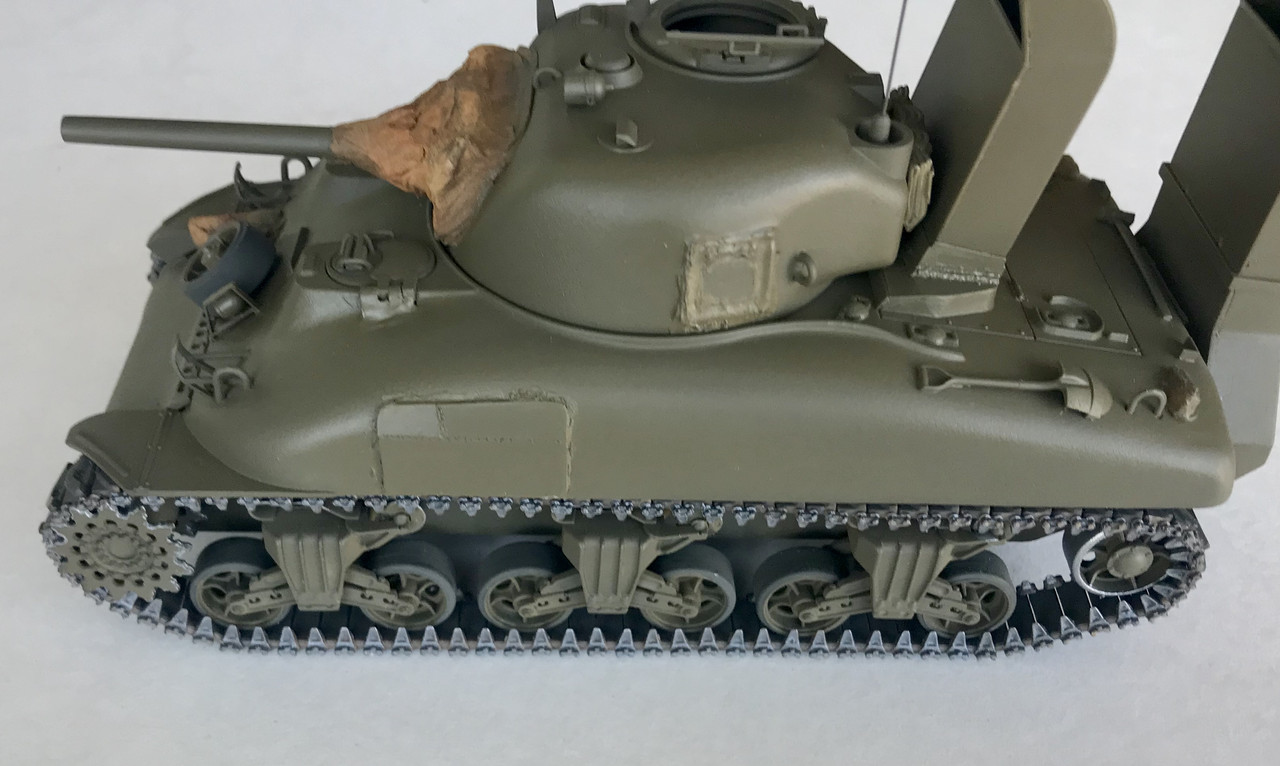
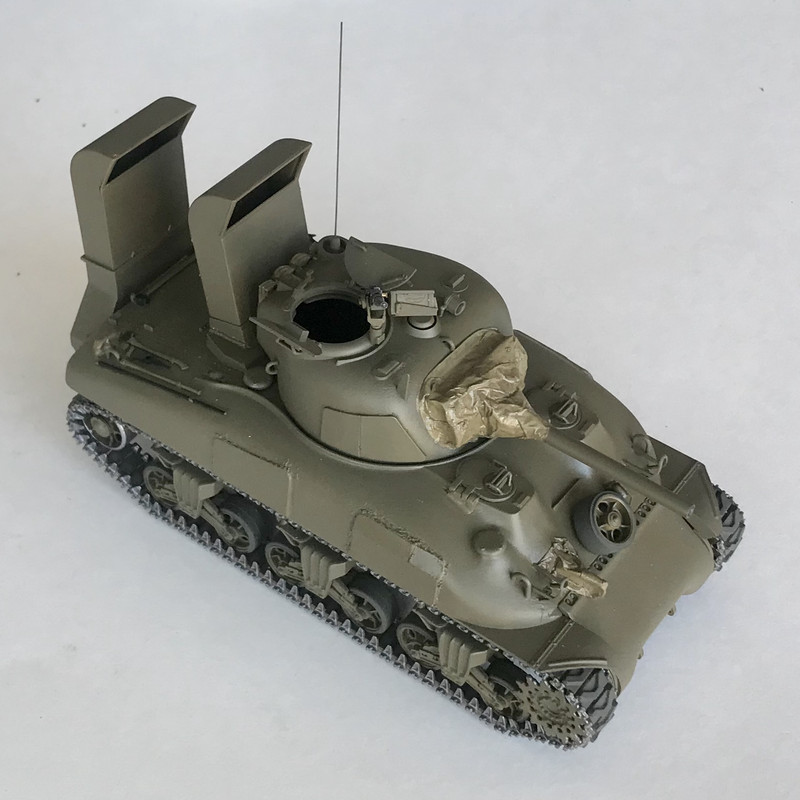
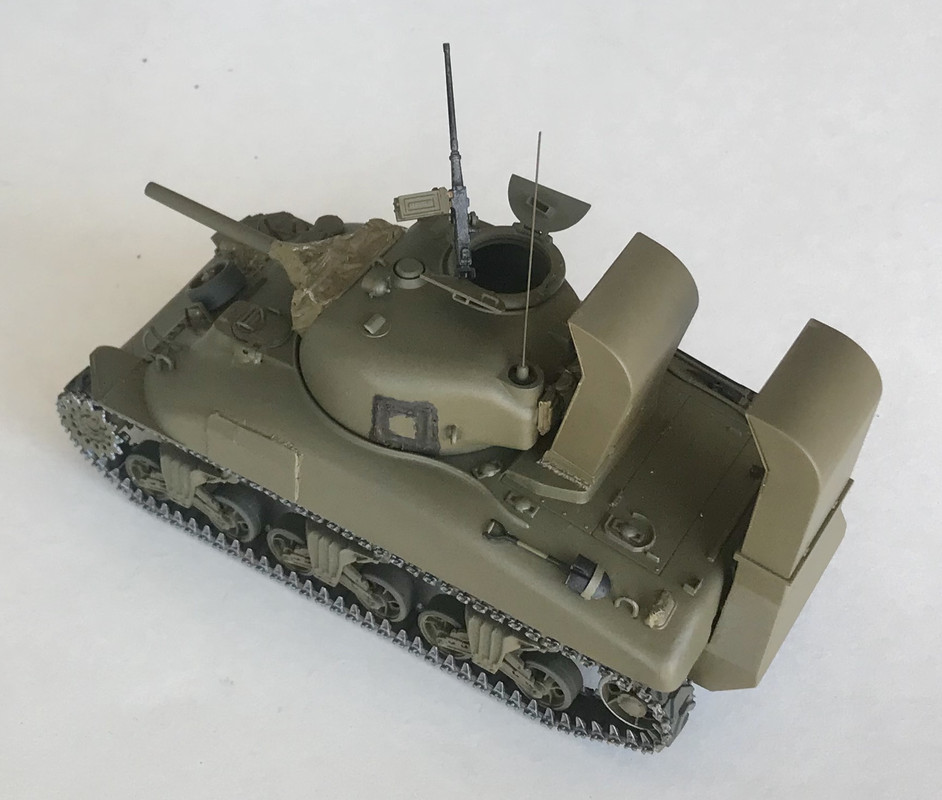
In May, for this past June’s 75th Anniversary of D-Day and also the June IPMS theme, I decided to modify and complete it as a wading M4 of the 741st Tank Battalion on Omaha Beach. The basic mods for wading, adding the stacks and waterproofing canvas and sealant did not take too long to do, but longer than I estimated (of course). And then of course, life gets in the way, so planned work bench times don’t happen. Long story short, this was not done in time for June.
Well, yesterday, I finally finished up the AFV Club T48 indie link tracks. Originally, when I started this project, I had something of a personal quandary about calling this build as my own. Let’s just say that after all the changes and effort that I put into this one, I now consider it “mine”… all ready for final detail paint and decals now…
You should feel good calling it “yours”. All your adds look great. On a side note, I’ve built the Nichimo kit a couple of times, most recently about 15 years ago, and I think it’s still around. In its day it was pretty good, the tracks being the weakest part. Even the solid return skids were fixable.
RB, I agree about the basic kit. I built it once before straight OOB back in the 80s. I have one more in the stash to tackle, and have an idea for that one to dress it up a bit. But yes, replacing the tracks is an absolute must. Did I mention that I hate doing indie link tracks on Sherman’s…
M1, the wading trunks are lifted from the Italeri US Marines Sherman kit, and I modified them and the engine deck area to adapt them to fit right here.
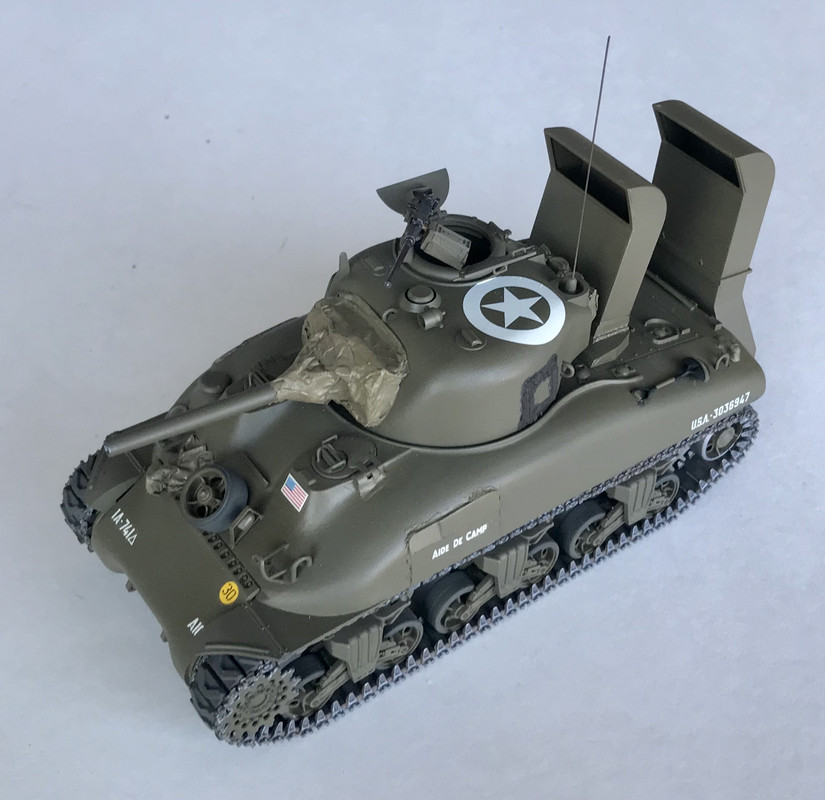
Ill have some more photos posted here soon. I have all the detail painting pretty much done, and it’s all ready for decals now.
Thanks G. I sure feel that way now after those hundreds of links and end connectors… I think that those took a good five days of bench sessions to build just the tracks. You can usually build this basic kit in one day… I’ll give the seller/builder another day of build time for any changes that he made.
Joe, those wading stacks do really alter the look of the Sherman. They were commonly used on tanks from early 1944 on during the early phases of amphibious assaults.
Rob, I agree about the early M4A1. It has the classic lines with that cast hull. This one still has the motorization drive axle connecting the sprockets.
Thank you Glen. The welds are pretty easy to do with thin styrene and liquid cement. I’m with you about large view photos. It’s hard to take in the detail on some builds because their posted photos are small.