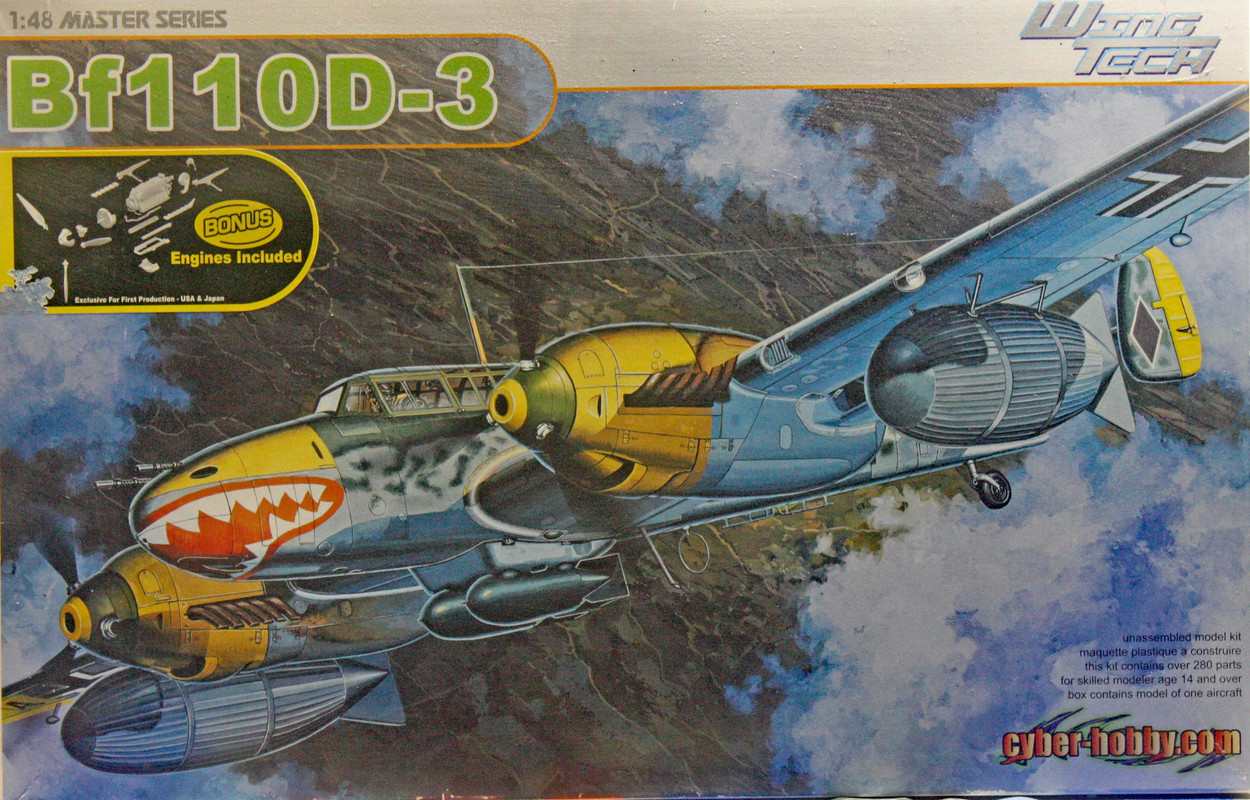
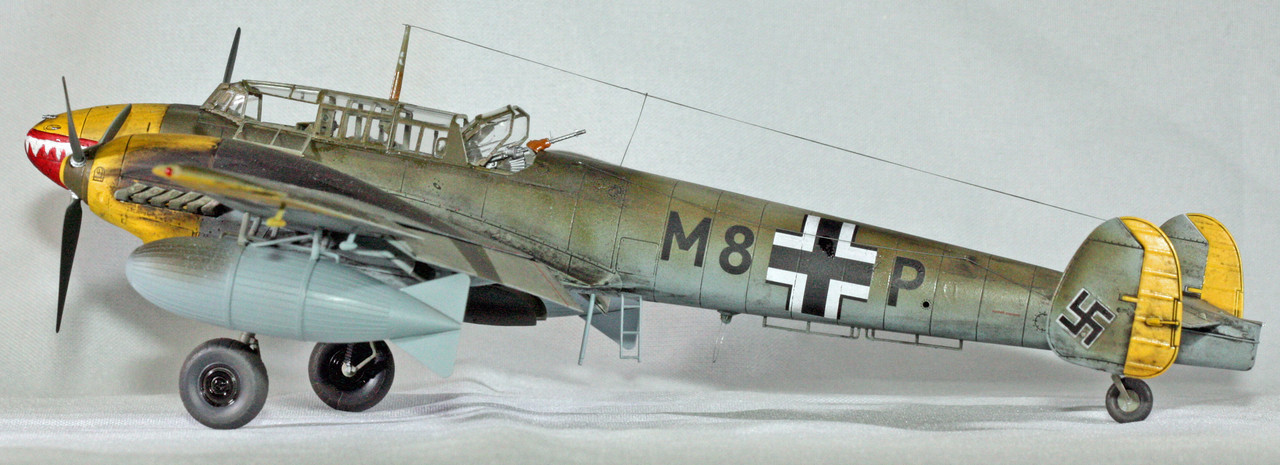
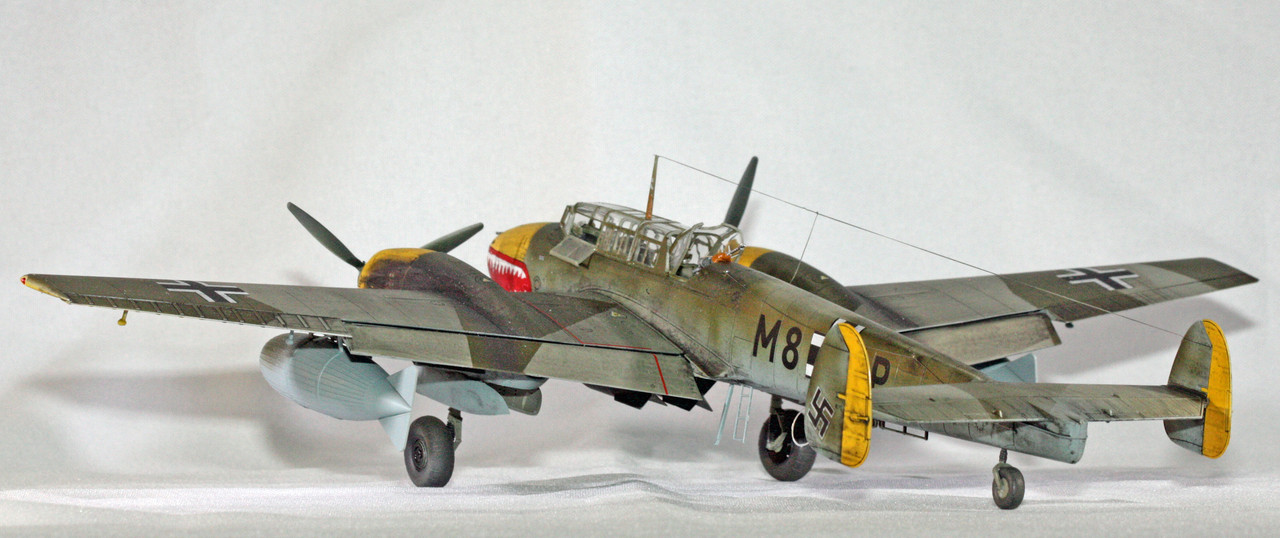
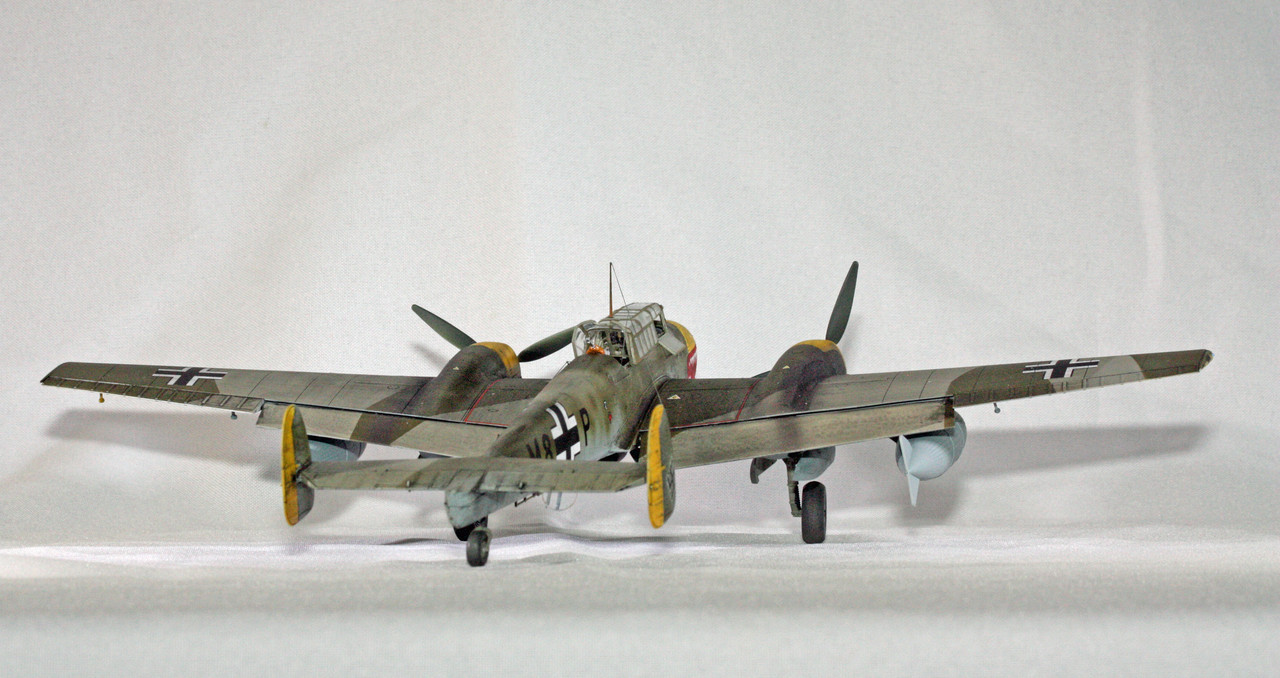
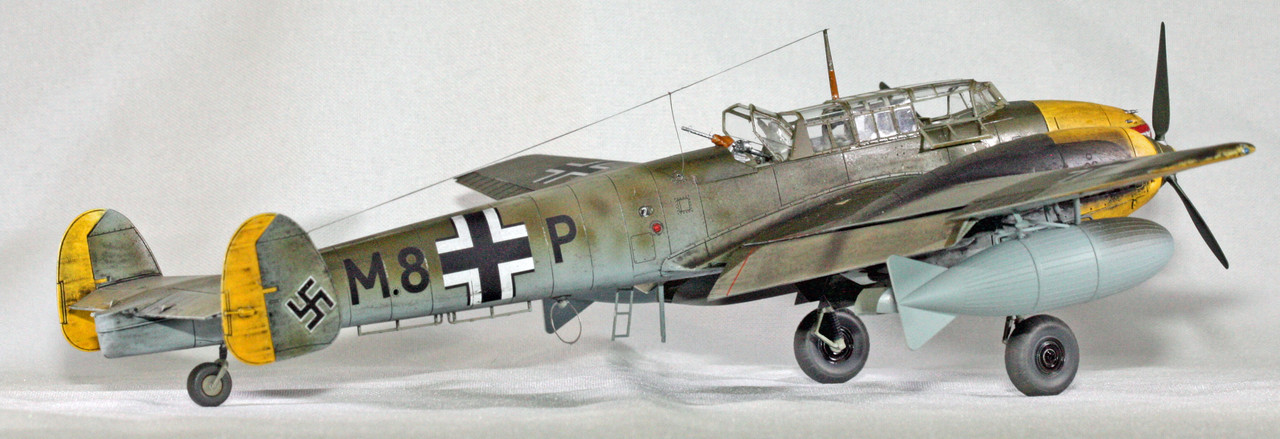
Presenting my latest build, Cyber-Hobby’s (Dragon) Messerschmitt Bf110D-3.
This kit has been in my stash for many, many years. My only previous Bf110 builds were the old Monogram 1/72 kit several times (including once in recent years), the old Revell 1/32 kit a few times (including once about a decade ago), and the Monogram Pro-Modeler 1/48 kit. I had never encountered a 110 kit so well detailed right out of the box. I decided to add the Quinta Studios cockpit detail 3D decal set to this build. I used several Vallejo RLM paints for this one. Weathering is a combination of a custom exhaust mix and Flory washes - more on that later.
There have been times when I run into a kit that just exhausts me and makes me want to punt this entire hobby. While I won’t be punting anything, I am exhausted after going to battle with this kit. It is in my opinion an overly-complicated build in certain respects, most notably in the attachement of the cowlings to the nacelles. Fit was awful in this area. Now it could very well be that the true source of the problem was not the parts themselves, or the engineering, but the instructions that were not clear at all as to which parts go where. They appeared to be hugging trees and trying to save paper, and cram a bunch of construction diagramming in a limited space. They save space by not showing different views of how something should look once assembled (for instance, the landing gear struts), and they do the parts numbers on things like gear doors as 35(36) but don’t really designate which part will go where. Much of the time I simply had to guess based on what fit best.
As it turns out, I took a look at some references of actual Bf110s and noticed (of course after the glue had set) that I installed the gear struts backwards. The instructions show the gear with the tires obscuring the part of the gear (the torque links) that the references show should be facing forward, rather than rearward as I installed them.
Then back to the washes. I’ve used Flory washes for many years now. In fact, I just bought a set of them to replace the original bottles that I bought since those were just about expended. What I forgot is that these should be applied over either a gloss surface or a super smooth surface. Eh, that didn’t happen. I had put down a gloss clear coat for the decals (most of which performed very well) but then put down a coat of flat clear to seal the decals. Then the Flory adhered to the rough flat coat and would not come up as it normally does. So I feel like I ruined the look of the paint job with this wash ground into the flat coat. I’ll leave that for everyone to decide for themselves.
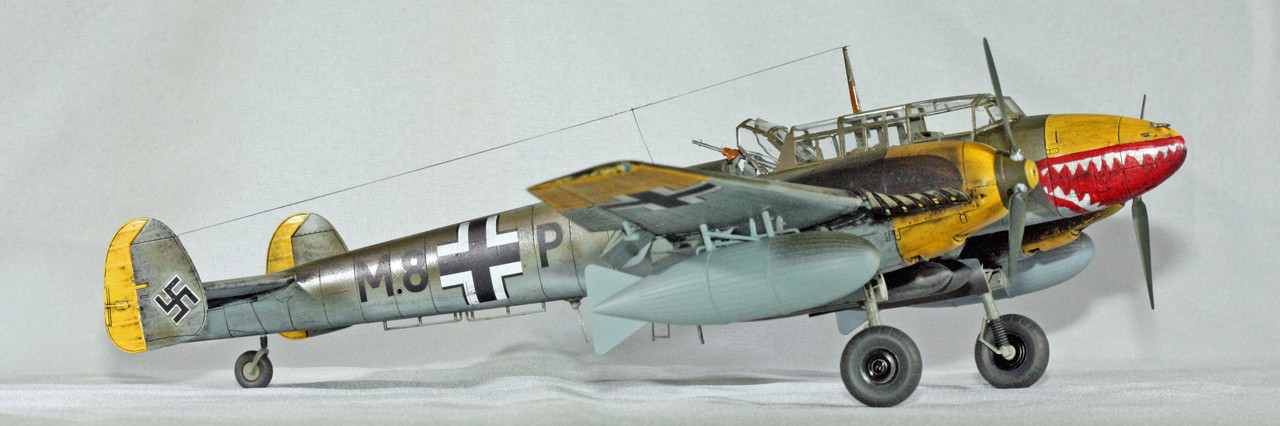
The only decals that did not work, much as I expected would be the case, were the shark mouth decals. Those are notorious for never adhering to curved surfaces very well. By the time I got to that, I tried the decal once, noted the expected behavior, and decided that with all my frustrations in building this one, I didn’t have it in me to fight those decals. I ripped it off before it could set and set out to hand paint the markings. This was a lengthy process during which time I had 2 different movies going on my workbench TV (Star Trek First Contact and Jaws), but it turned out to be a relatively easy thing to do and one that I shall endeavor to do again when the aircraft markings call for it (looking at you Flying Tiger!)
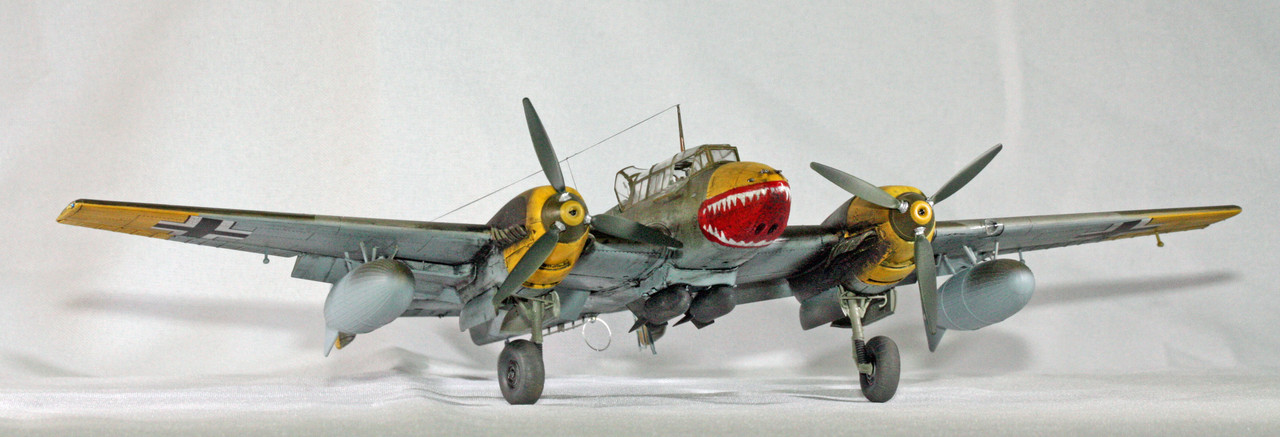
Even with all these challenges, I do feel like I put together a good-looking Bf110. But I will say that only a masochist should tackle this kit.

Next up for me will be an A-Wing starfighter with a lighting kit from Bandai. I expect a much less stressful build for that one.