Hello everyone! This is my first post in this great community.
English is not my native language, so please forgive me for all the mistakes I will surely do (and if you have the will, please correct me).
I have decided to step out of the shadow and share with you my progress on this beautifull clipper mainly to give all the deserved credits to David_k.His build:http://cs.finescale.com/fsm/modeling_subjects/f/7/t/177929.aspx
has pushed me to start mine, so thank you Mr David!
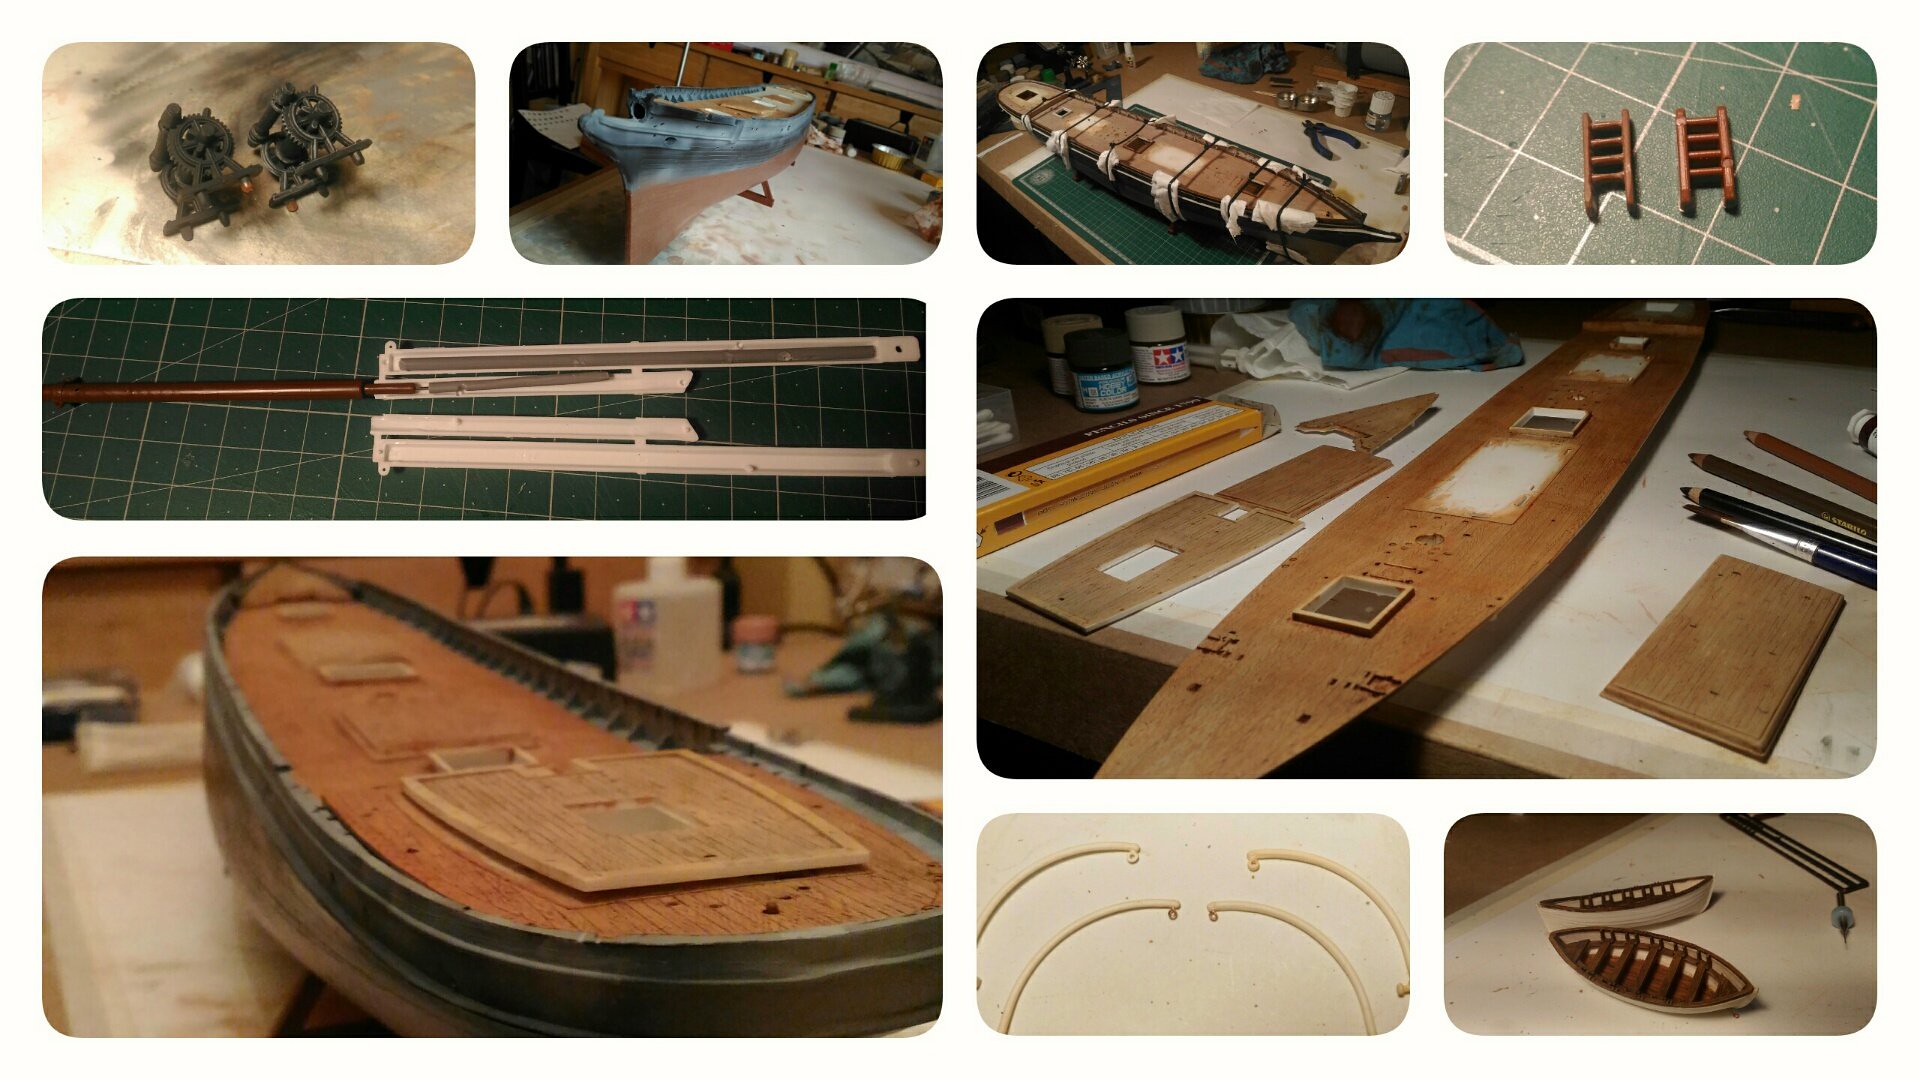
I’m now ending the hull and the deck furniture, but here you have some images of the previous steps. I decided to remove all the original deadeye and to put mine, emulating also the metallic strops. I hope they will stay there, together with the pinrails, once I will apply tension for the ratlines…I tried to put some love also on the cranes (is this they right name?).
Hope to be back soon with more updates!
Sorry for my bad english and thanks to everyone who wants to help me with critics and comments.
This is my firs ship model, so help is more than welcome!
Marco
I noticed that the pictures from the previous post didn’t show well on mobile, they are cutted on the right end side, so I will use a smaller one this time, hoping this will help.
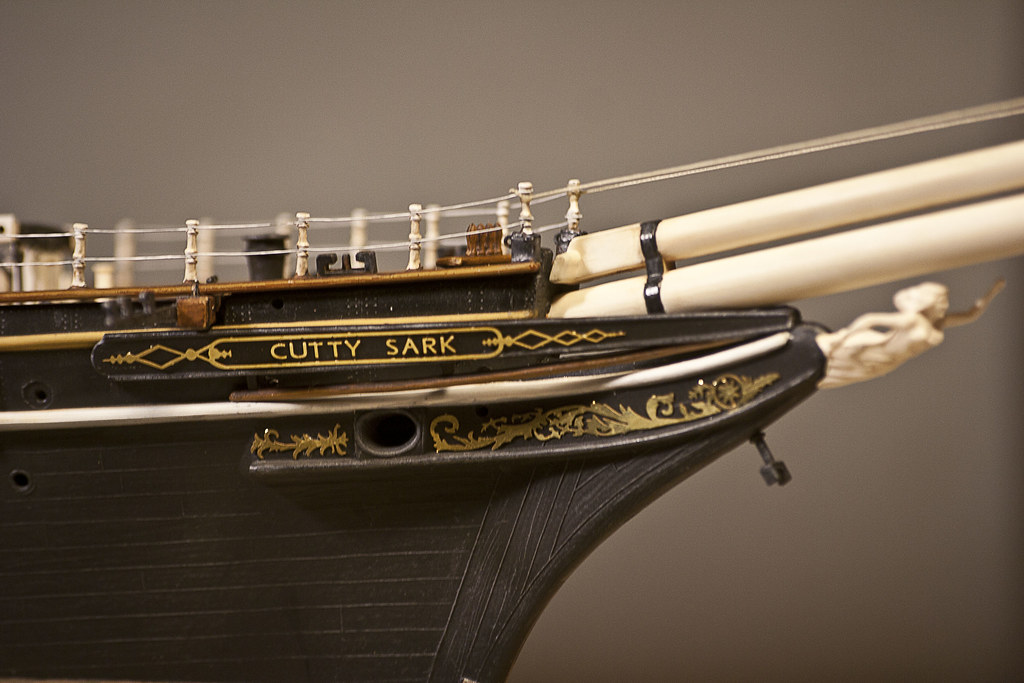
After a long evening, I placed all the photoetched details on the stern and on the bow. I think they really add alot to the model.
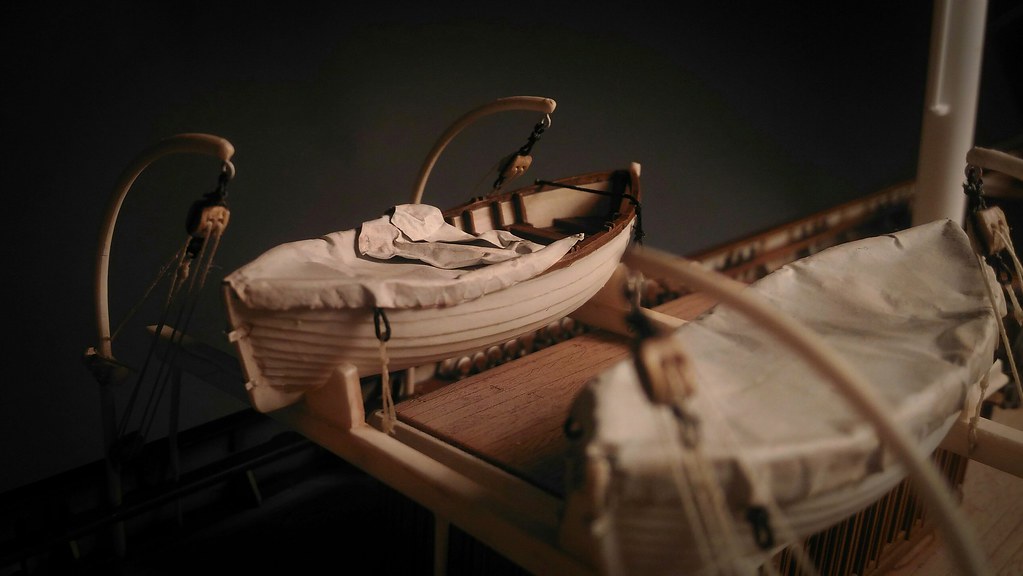
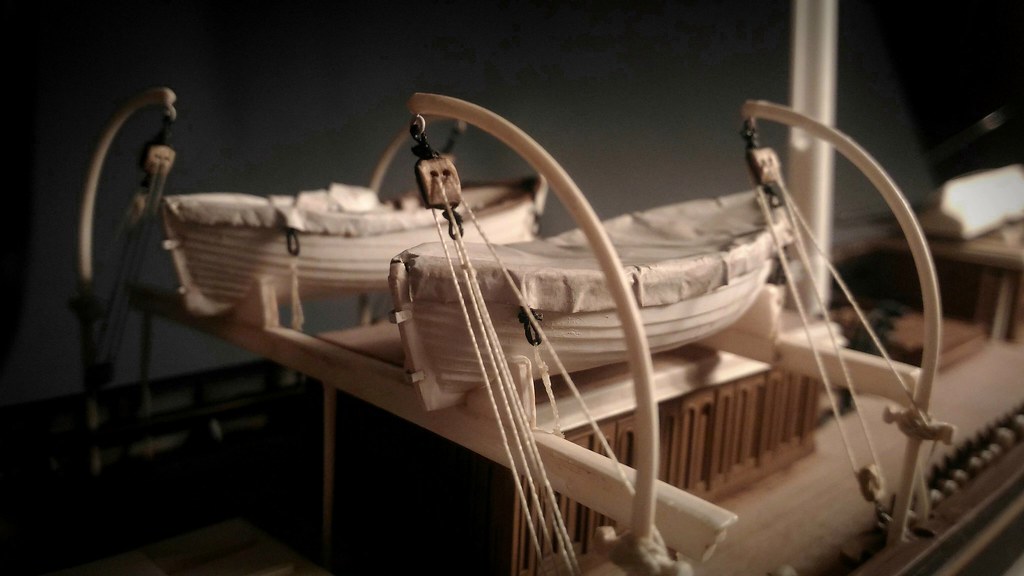
And here you can see the work in progress on the crane and the lifeboats.
The lifeboats shold be covered, so I’m trying to simulate the cover with a quite thick aluminum foil. This is just a test and I will redo it in a proper way, but I like the overall effect and I hope it will improuve once painted.
Moving to the crane, this are my first lines as a modeler, so they are far from beeing good but I hope to improuve a bit. The bloks are revisited, even if they are after market, they didn’t have the right shape, so I tryied to modify them a bit hoping to get a better result.
Marco, great build and thanks for sharing! Really like your paintwork effects, the coppering, desks and the hull black. Stunning work. What paint did you use for the gold? More pictures please as you progress…?
Bruma, The model looks great - a few pointers. IF you used the plastic eyebolts, consider replacing them with metal that has been glued down, the plastic may break on you. Also, the life boats were covered most of the time, so you might wish to do so as well? You can make the covers with 4-5 plys of tissue ot toilet paper painted with diluted white glue, then after they dry you can paint and weather with a faded canvas color.
I like to replace the plastic eyebolts on my ship models with the eye of a fishhook. Once in glued in place, they will never fail. I place the hook in a vice and cut the eye off, leaving as much as the shaft as I think I need for a glueing surface.
I look for straight eye hooks. As a fly tyer I have collected many different sizes over the years, not expensive. Many are black or very dark gray so you dont even have to paint them after they are glued in place. Some are shiny, so a drop of dullcoat applied with a brush tones them right down. I usually apply the dullcoat after the line or knot is done. A pack of 100 hooks will go a long way, depending on the model.
I have a set of round nose pliers with very small diameter tips. I find a can hand make eyes for larger scale fine. For smaller sizes I wind wire around a pin stuck in a block of wood. I do not solder the eyes closed- I have yet to pull a rigging line out of such a hook.
Even a small spool of fine wire will make hundreds of eyes, so it is cheap to make your own. I do not do it to make a stronger eye- the plastic ones are plenty strong enough. I just fear that plastic eyes look too large for most ship scales.
I do not make eyes for 1:700 scale and rarely for 1:350. But I do for anything larger.
I too have this kit in my collection of kits. I started working on it 15 years ago, but was unhappy with how it was turning out. I will try to repaint some of the parts and follow your build.
I believe you mentioned DavidK’s build. He did a great job on his build as well.
Thanks for the fish hook idea, I think I will steal it.
Marco, your build is really superb. You must already be a great model builder to do this kind of beautiful work. Keep more coming. David K is the best to follow.
Everything looks very tidy, and I’m glad you went with the photoetch emblems from Hismodel…quality stuff.
Can you tell us about your treatment of the deck parts? I can’t see if you used the kit parts and painted them for that effect, or if you installed a wooden deck laminate?
Anyway, you’re doing a great job, I can’t wait to see how you decide to present the rigging.
Thank you everyone for stepping in and for the kind words, I really appreciate!
What parts do you refer to?
All the ornaments are photo etched and they are in they natural colors. The compass and the bell are painted with metal colors, and in this case I have used Gunze metallic colors.
Thank you for the tip!
I have tried another way, using aluminum foil.
Surely the tissue would have been a good option but I didn’t want to cover the lifeboats with glue without beeing 100% sure of the result.
For the eyebolts, I think I will stick with the plastic one in most of the cases, replacing them with hand made ones for the most stressed.
The eye of a fishhook are a great idea, but I wasn’t able to find the proper size for this scale, they where all too big…
Thank you Dave for the comments!
The deck is the original plastic one.
The wooden deck is awesome but a little bit too expensive for me.
So I paint the deck with a uniform clear brown acrylic color, and I shaded it with oil paint, applied as a filter.
At this stage the color was too warm for my taste, so I applied a higly diluted layer of acrylic brown (deck tan if memory serves me well) to make it less saturated and uniform.
Lastly, with a soft dark pencil, I brought back all the fine details.
If you don’t mind I have a question for you: how do you applied the decals avoiding silvering?
I have ordered them from His Model, usually I spray a uniform coat of clear varnish, than I set the decal, another clear varnish and a matte coat in the end.
But in this case the hull is huge, paing it all seems to me a little bit an overkill but on the other hand I fear to ruin the uniform finish if I paint only the needed parts…
I hope you can understnad the question even with my terrible english, sorry…
Anyway, the life boats should be finished.
I have added the rudders ancoring points (I’m sure they have a proper name…) the retention lines (and again I miss the correct name) and the covers. The cranes are also glued in place, they only miss the coils of rope, I will add them later.
The result is not perfect but still I’quite satisfied
When I applied the draft scale decals, I didn’t prep the surface with any varnish.
I use a 2-part product, called Micro Sol and Micro Set. One part will make the decal very soft and able to fit the shape of a rough surface (copper plates and rivets on the hull), and the other part causes the decal to tighten up against the surface as it dries.
I really expected more from you ! !LOL.LOL.LOL.LOL. That is one very fine job. Those boats and subsequent areas look great ! I like that you are not hurrying this project. The results speak for themselves. Are you going to put it in a case? If you do Please, please don’t forget breathing vents for the case. Beautiful Work deserves a safe Port.
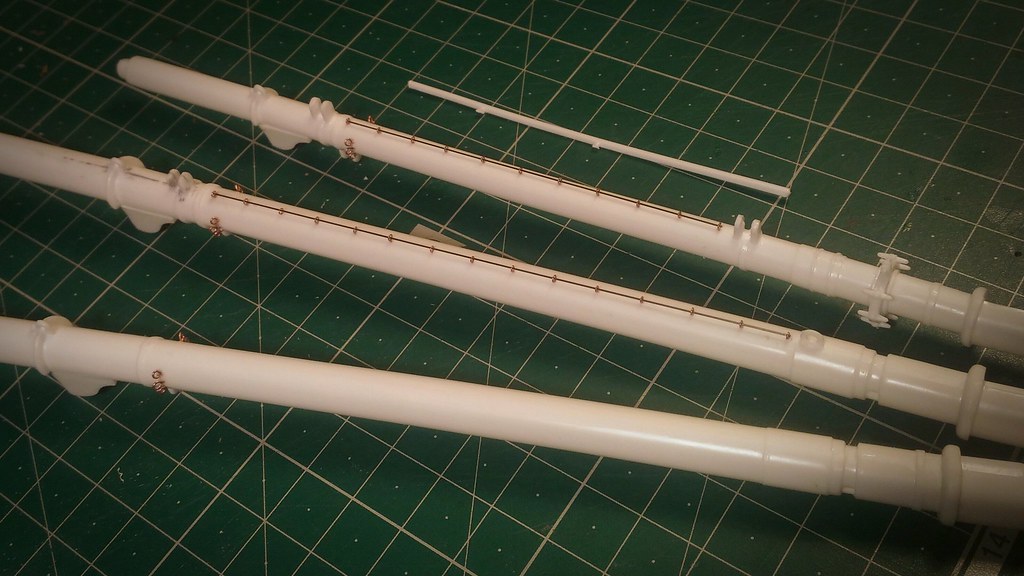
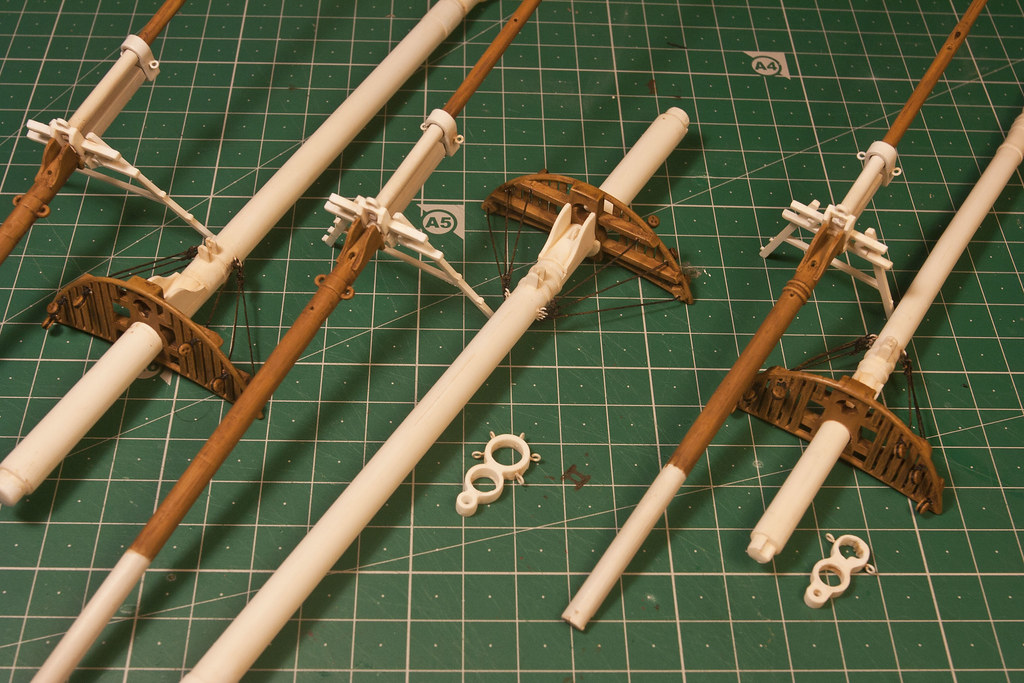
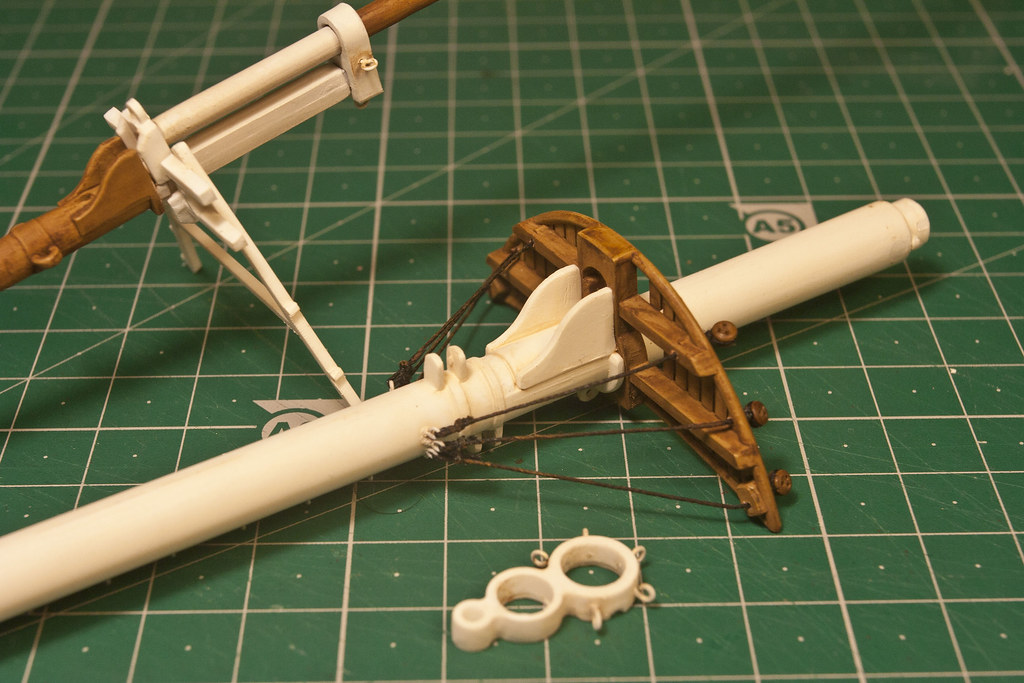
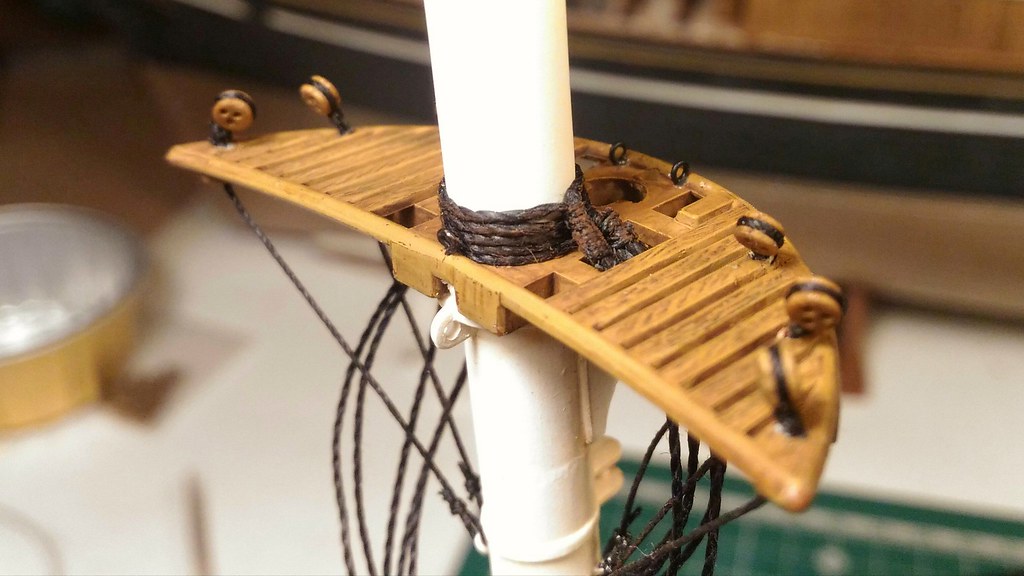
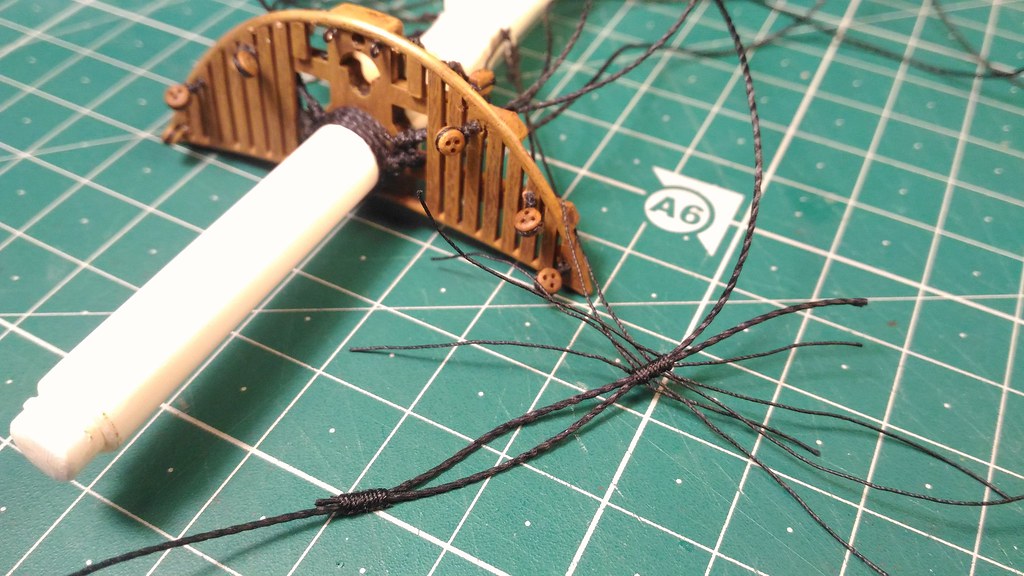
As you can see the main mast and the mizzen mast have a sort of railing on the stern side, wich was reproduced in the kit by the piece of plastic cutted away in the top part of the picture, a little bit to bulky for my taste.
Unfortunately I don’t know what is the purpouse of that rails, but they are quite well documented in many pictures so I tried to reproduce them.
Speaking about eyebolts, I also added tha ones used for the futtock shrouds.
The masts assembly put me in front of the fact that I need more informations…
I have the campbell plants, wich are great, and a ton of picture, but still many things are missing.
Have you some books to suggest me?
I tried to buy The “Cutty Sark” by Nepean Longridge but the ebook is not available in my country and the paper copy is a bit expensive…
EDIT: found a ebook version for less than 7 euros!
Back to school now, i have many things to learn on my new book!
 2019-10-22_06-55-34 by Marco, su Flickr
 2019-10-22_06-56-58 by Marco, su Flickr
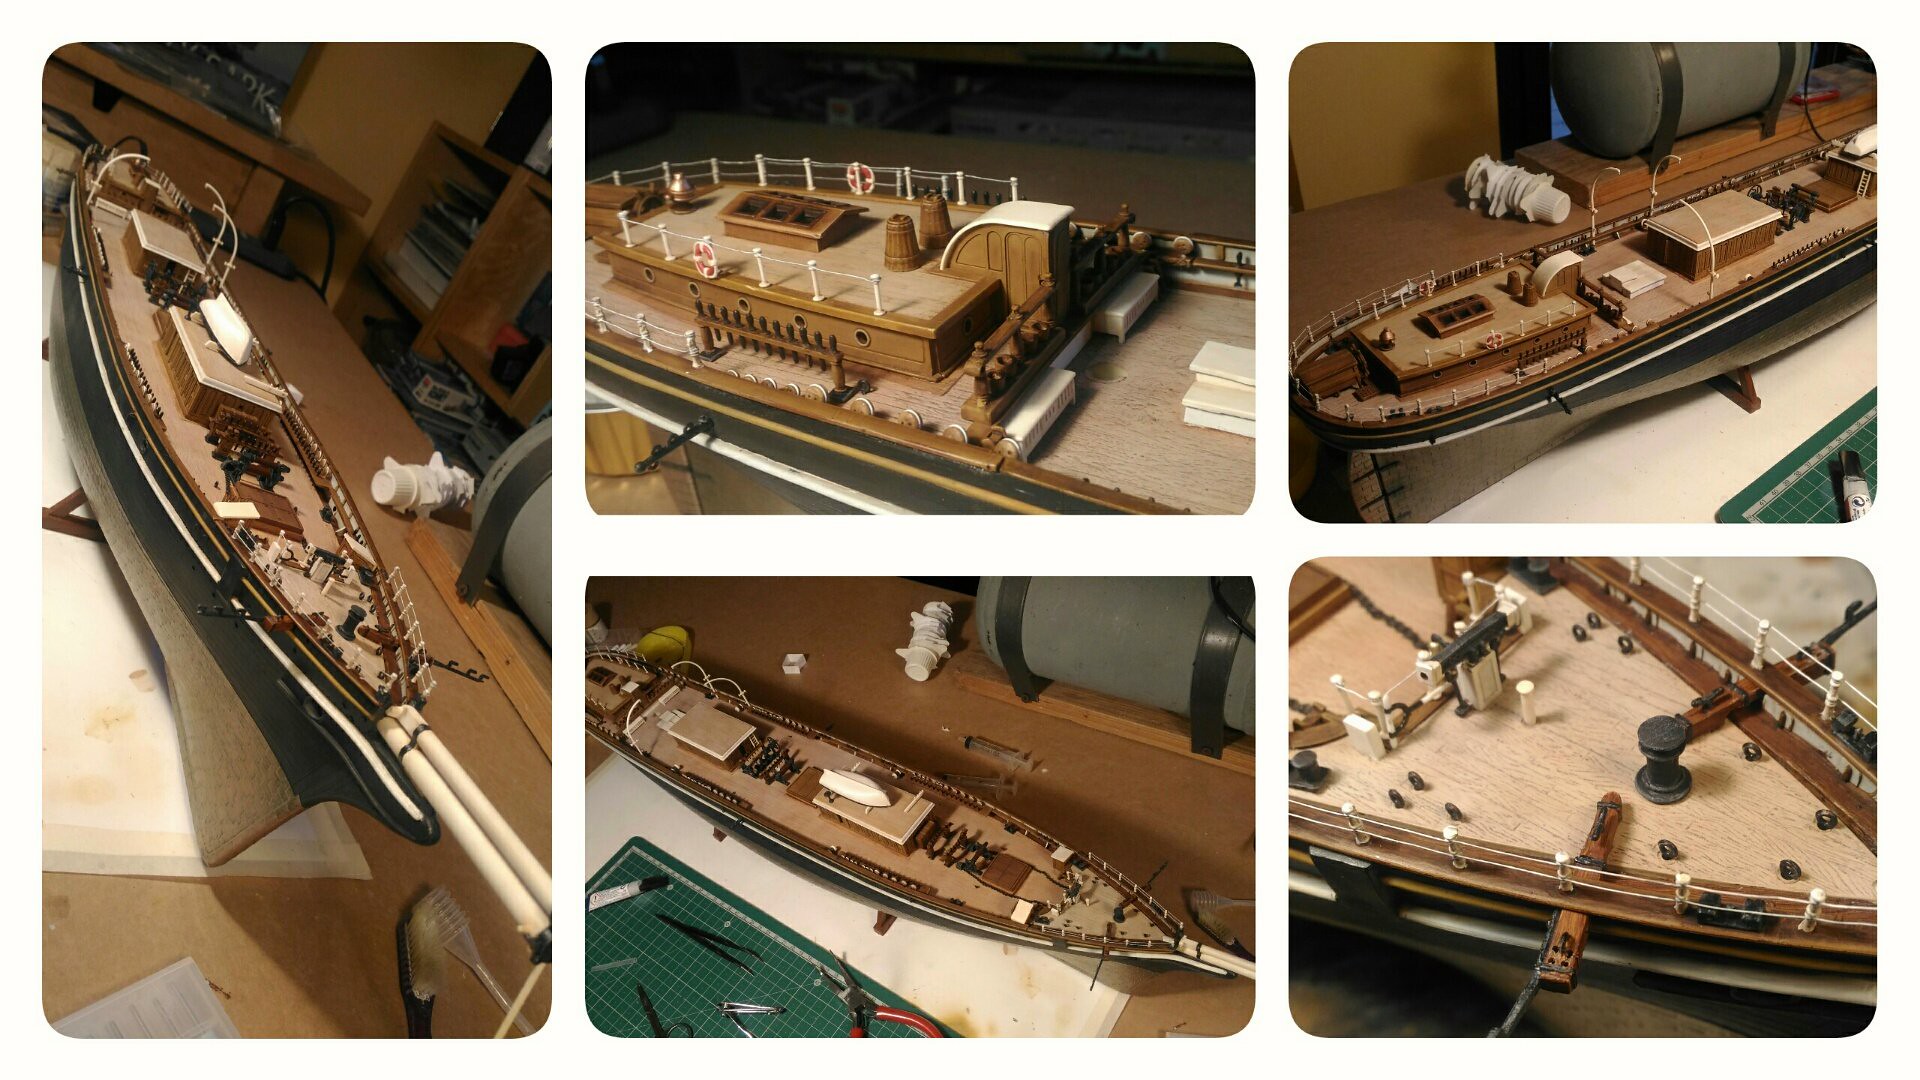 2019-10-22_06-57-31 by Marco, su Flickr