Finally got the radiator mounting and coolant lines figured out, and making progress now. A couple of pictures below. This is the Roden 1:72 scale kit. It is essentially the same as their Felixstowe kit with a couple of new parts, instructions, and new decals
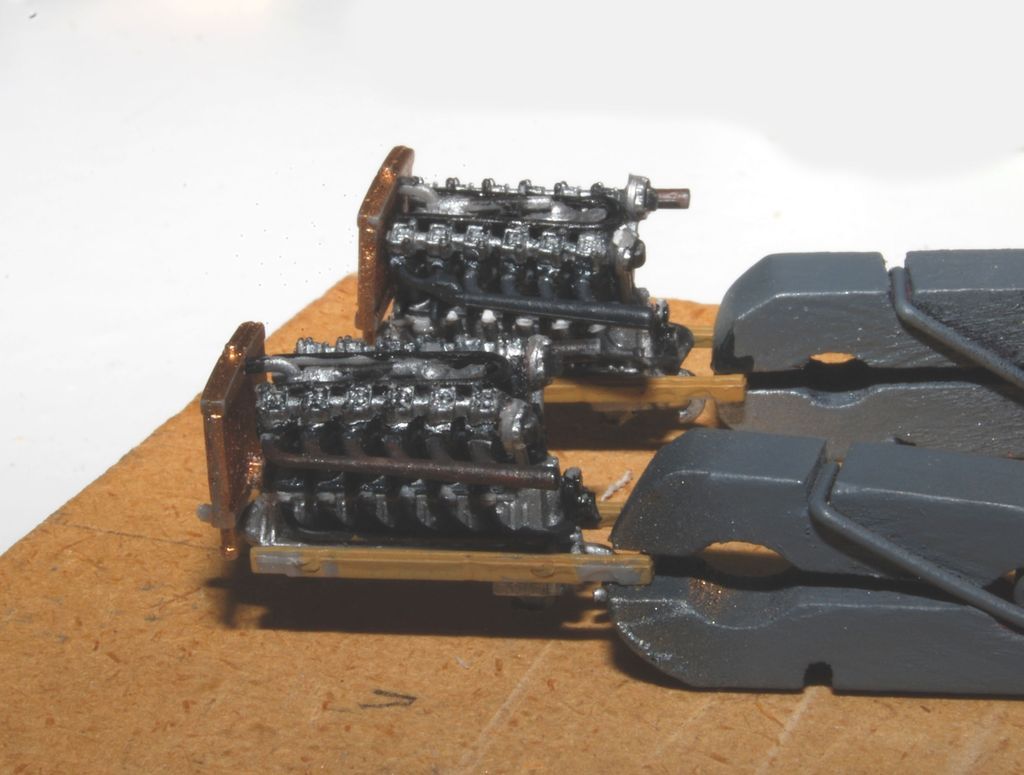
Once I figured out exactly where things go (the Roden assembly drawings are terrible) the engine really looks nice. Some flash, but it cleans up okay and the detail is great. Those are miniature clothspins from Model Expo- the engines are less than 3/4 of an inch long.
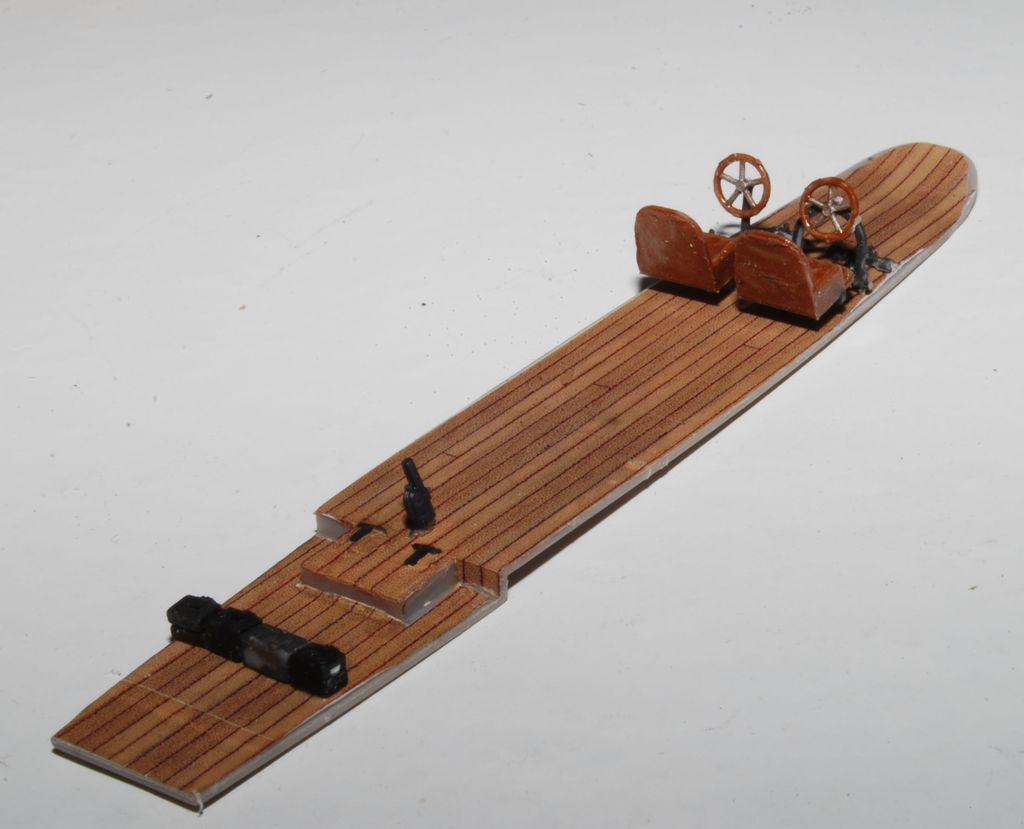
The floor is supposed to be planked natural wood. No plank lines molded into floor, so I made an oak-grain colored decal and placed parallel lines on it in brown. I think the result is a pretty fair appearance of wood planking.
Now I have a real dilemma. The fuselage, instead of being the normal two halves, is four pieces- two halves that form the bottom and sides, and two top pieces. The forward section of the top can be done now, but the top section must be added after the wings are added, because the bottom wing of this biplane is a shoulder wing mounting, and the wing includes carry-through spars for a center section.
Now, if I finish assembling the wings, as shown in the instructions, I must then add the top section. The wings and the fuselage are different colors. The wings, if fully assembled as show, will be very fragile, and would not be able to be masked.
I could paint the fuselage seperately before assembly, painting the partially assembled fuselage and the fuselage top. Then, I could finish and paint the wings. I could then insert the wings into the partially assembled fuselage and then glue on the remaining fuselage top. But… here is the rub, if the seam along the top/side joint needs any filling and painting, keeping the paint off the wings will be very difficult!
Still, that is what I am planning. I am trying to prepare the join surfaces on the fuselage sides and tops as carefully as possible, hoping the seam will not be noticable. Scares me, though!
That is the best isdea for your build at this time. I do agree with you in that the seams, glue, and mask will cause issues. If anyone can overcome these issues, it would be you sir.
Ahh, so it IS a usual Roden kit!! I really like their subjects, and they usually have a decent amount of detail, but they constantly have assembly instructions where you have to put together no less than 3, and usually 4 or more, parts at a time, with no support or locating pins!!
I found myself building many temporary jigs to put together their PKZ-2. The finished kit is awesome, but work came to a halt many times trying to figure out how to get the parts together with the right alignment.
I talked to someone who has completed the Fexistowe version, which is basically the same kit with a few details different.
He solved the dilemma by only mounting the lower wing before gluing on the top. Much easier to mask when touchup painting. Then he erected the top wing while the bottom wing was on the model. Tricky operation but it worked. I have decided to go that way.
Disaster! After gluing the fuselage top on, I had the plane propped up since the clamps made it tippier than normal. I accidently bumped the workbench and the prop fell away, allowing the plane to tip over onto a wingtip. I knew that lower wing was very fragile, and should have propped it up better. But sure enough the starboard wing broke off at the the carrythrough spars. I have drilled the spars (they are about 1/16 square), and tried to drill matching holes in the wing, to put brass rods in. Haven’t tried to glue it back on yet- I am fearing the process. If the holes do not line up properly, the interplane struts may not work when I try to glue on the upper wing! And the fragile wing will be very floppy till I get all the rigging on. The interplane rigging will be very function on this bird! Just picking up the plane with the lower wing on, the tips of the wing would droop at least an inch!