[Edit 16 Aug 2025]: I decided to jump in and figure out how to modify the Trumpeter kit on my own. For anyone who is interested, I will post my progress in this thread.
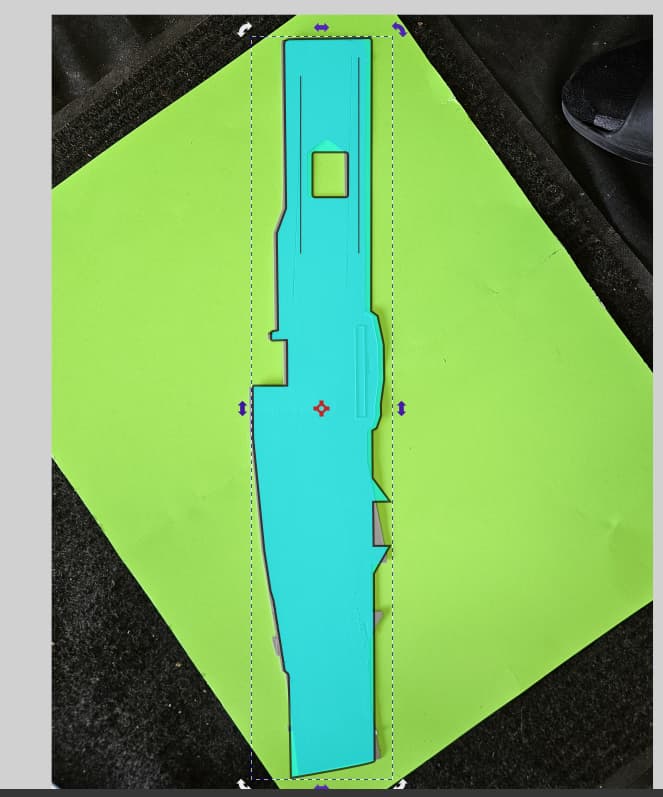
I just got my Trumpeter 1:350 USS Intrepid, with the goal of converting it to the USS Hornet in her post SCB-27A and SCB-125 configuration. This would be as she was on my Dad’s first deployment on her in 1959. My good friends at the USS Hornet museum have been very helpful in providing photos of the primary differences, which include the flight deck shape, the catapult locations, the forward elevator shape, the #3 elevator location, and the mast configuration. There may be other smaller differences, but these are the noticeable ones (I believe) for 1:350 scale. My biggest challenge is the flight deck, where there are major differences, and I am not convinced that trying to modify it is the best approach, which is why I’m considering building a flight deck from scratch in the proper configuration. I have put the correct configuration into Inkscape, so I have a vector rendering that includes the location for the island, the correct elevator sizes and locations, and the correct catapult locations and sizes. Has anyone undertaken a project like this? It would also be ideal to find pre-scribed styrene or wood with the proper dimensions, as the flight deck on Hornet was 100% wood in 1959. Is it possible to get a flight deck of this size (almost 30") 3D printed?
Has your colleague made any progress? Cutting up the Trumpeter flight deck seems like a lot, but maybe easier in the long run than having to scribe the deck and put all the tiedown locations back.
I may still do that. I did get the proper size/shape flight deck into Blender as a 3D model. I think I would just print it smooth and overlay with the smallest scribed styrene from Evergreen, but then I still have to do each tiedown, which would be very tedious, since I don’t have a drill press
Its been a while since i heard any updates on it. From what i recall they were completely scratch building the flight deck to fit the version that they were building. I will take a look back at past meeting posts and see if i can find more info when i have some time.
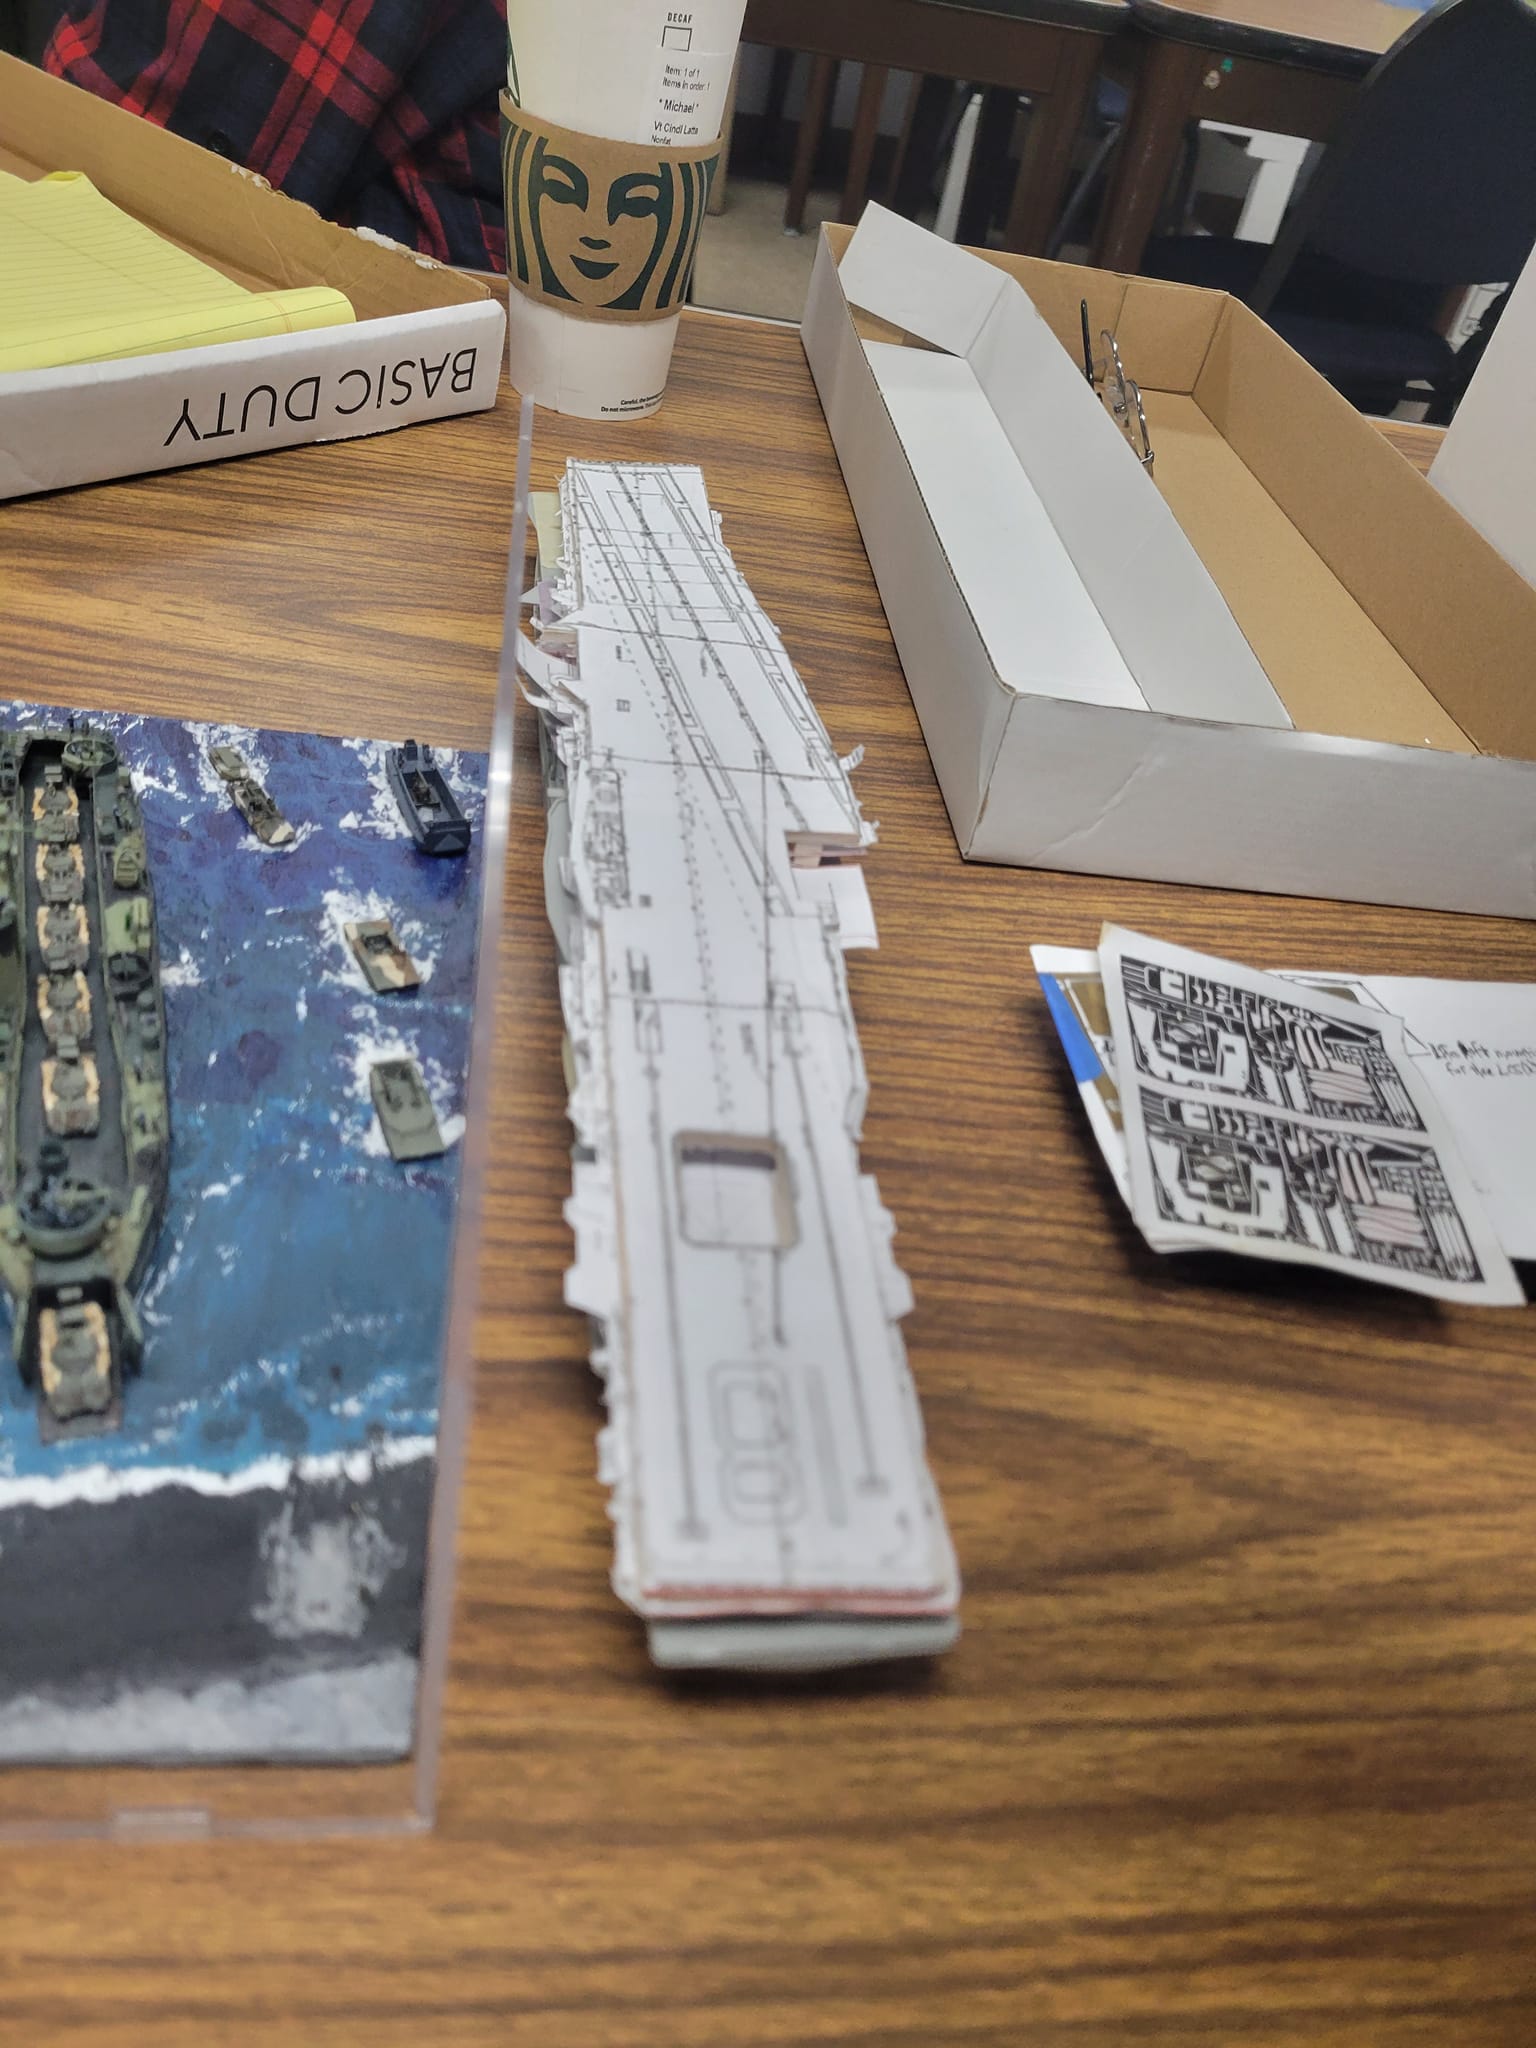
OK, so I had to go back a couple of years to finally find the last time it was brought in, as such I am going to assume the project is currently shelved or in active. Unfortunately that month I believe the person who normally collects the info on what people brought in was out as there was no caption for it. This was the only photo that I could find.
From what I remember, don’t take this as gospel, was going to use pla plate to shape out the deck and use combination of kit and aftermarket parts to fit it out. Sorry I could not be more helpful, if he is at this month’s meeting I will try and remember to ask him about it.
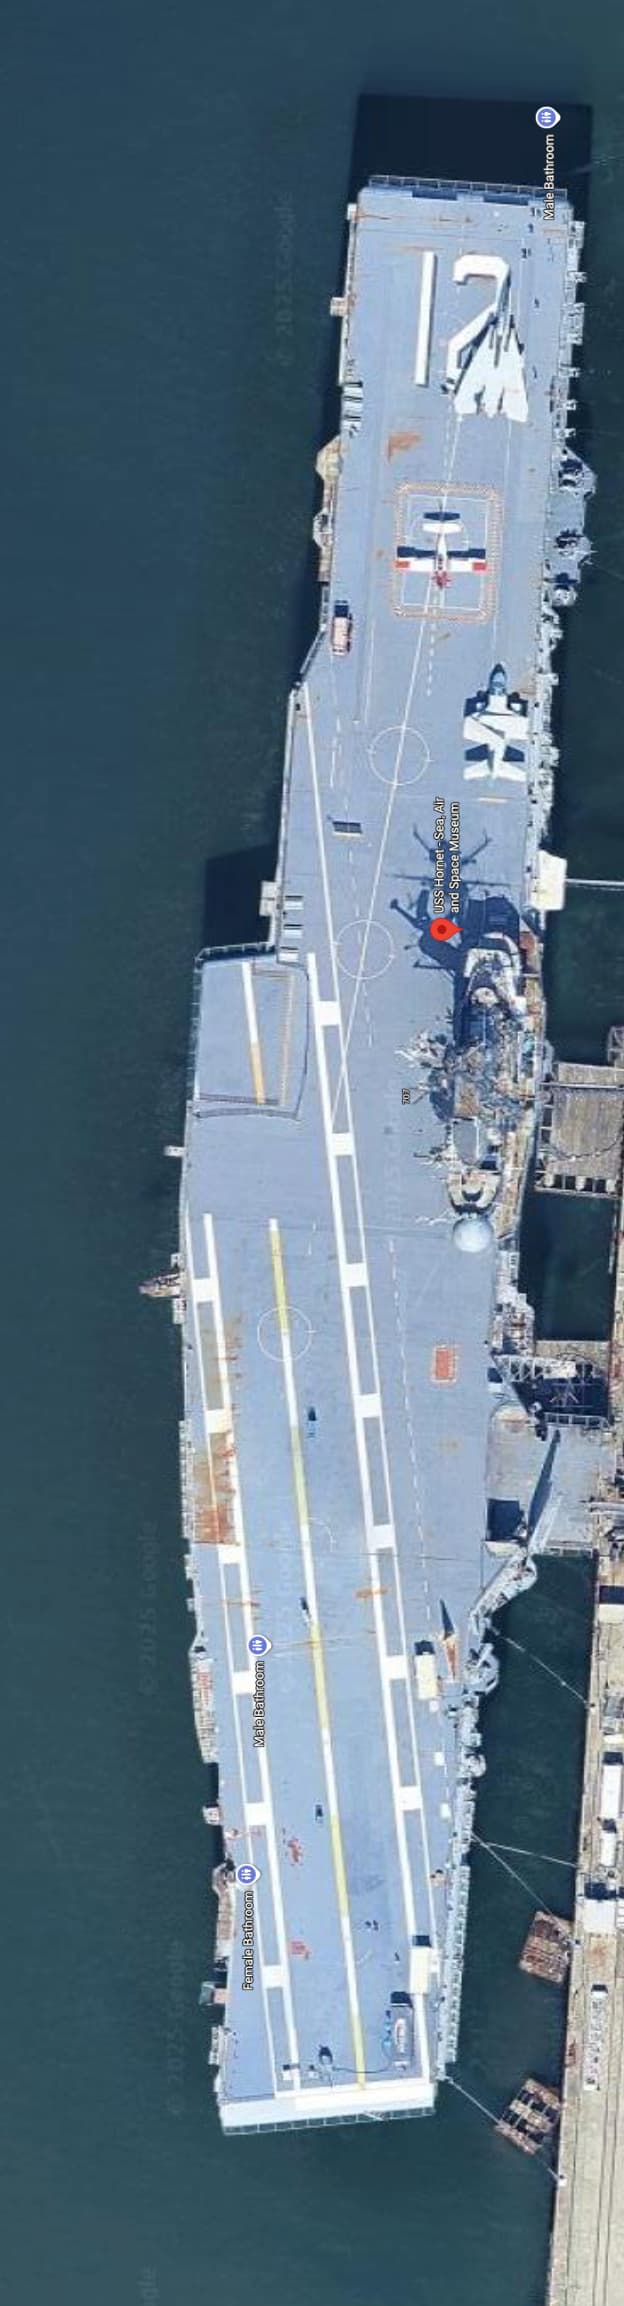
I had to break down the differences between my target configuration and the kit across a couple of dimensions. First, I started with getting the correct configuration of the Hornet for this era. As you might expect, most of the photos and data online are for the Apollo 11 recovery configuration, which has some subtle but noticeable differences from the 1959 Westpac configuration.
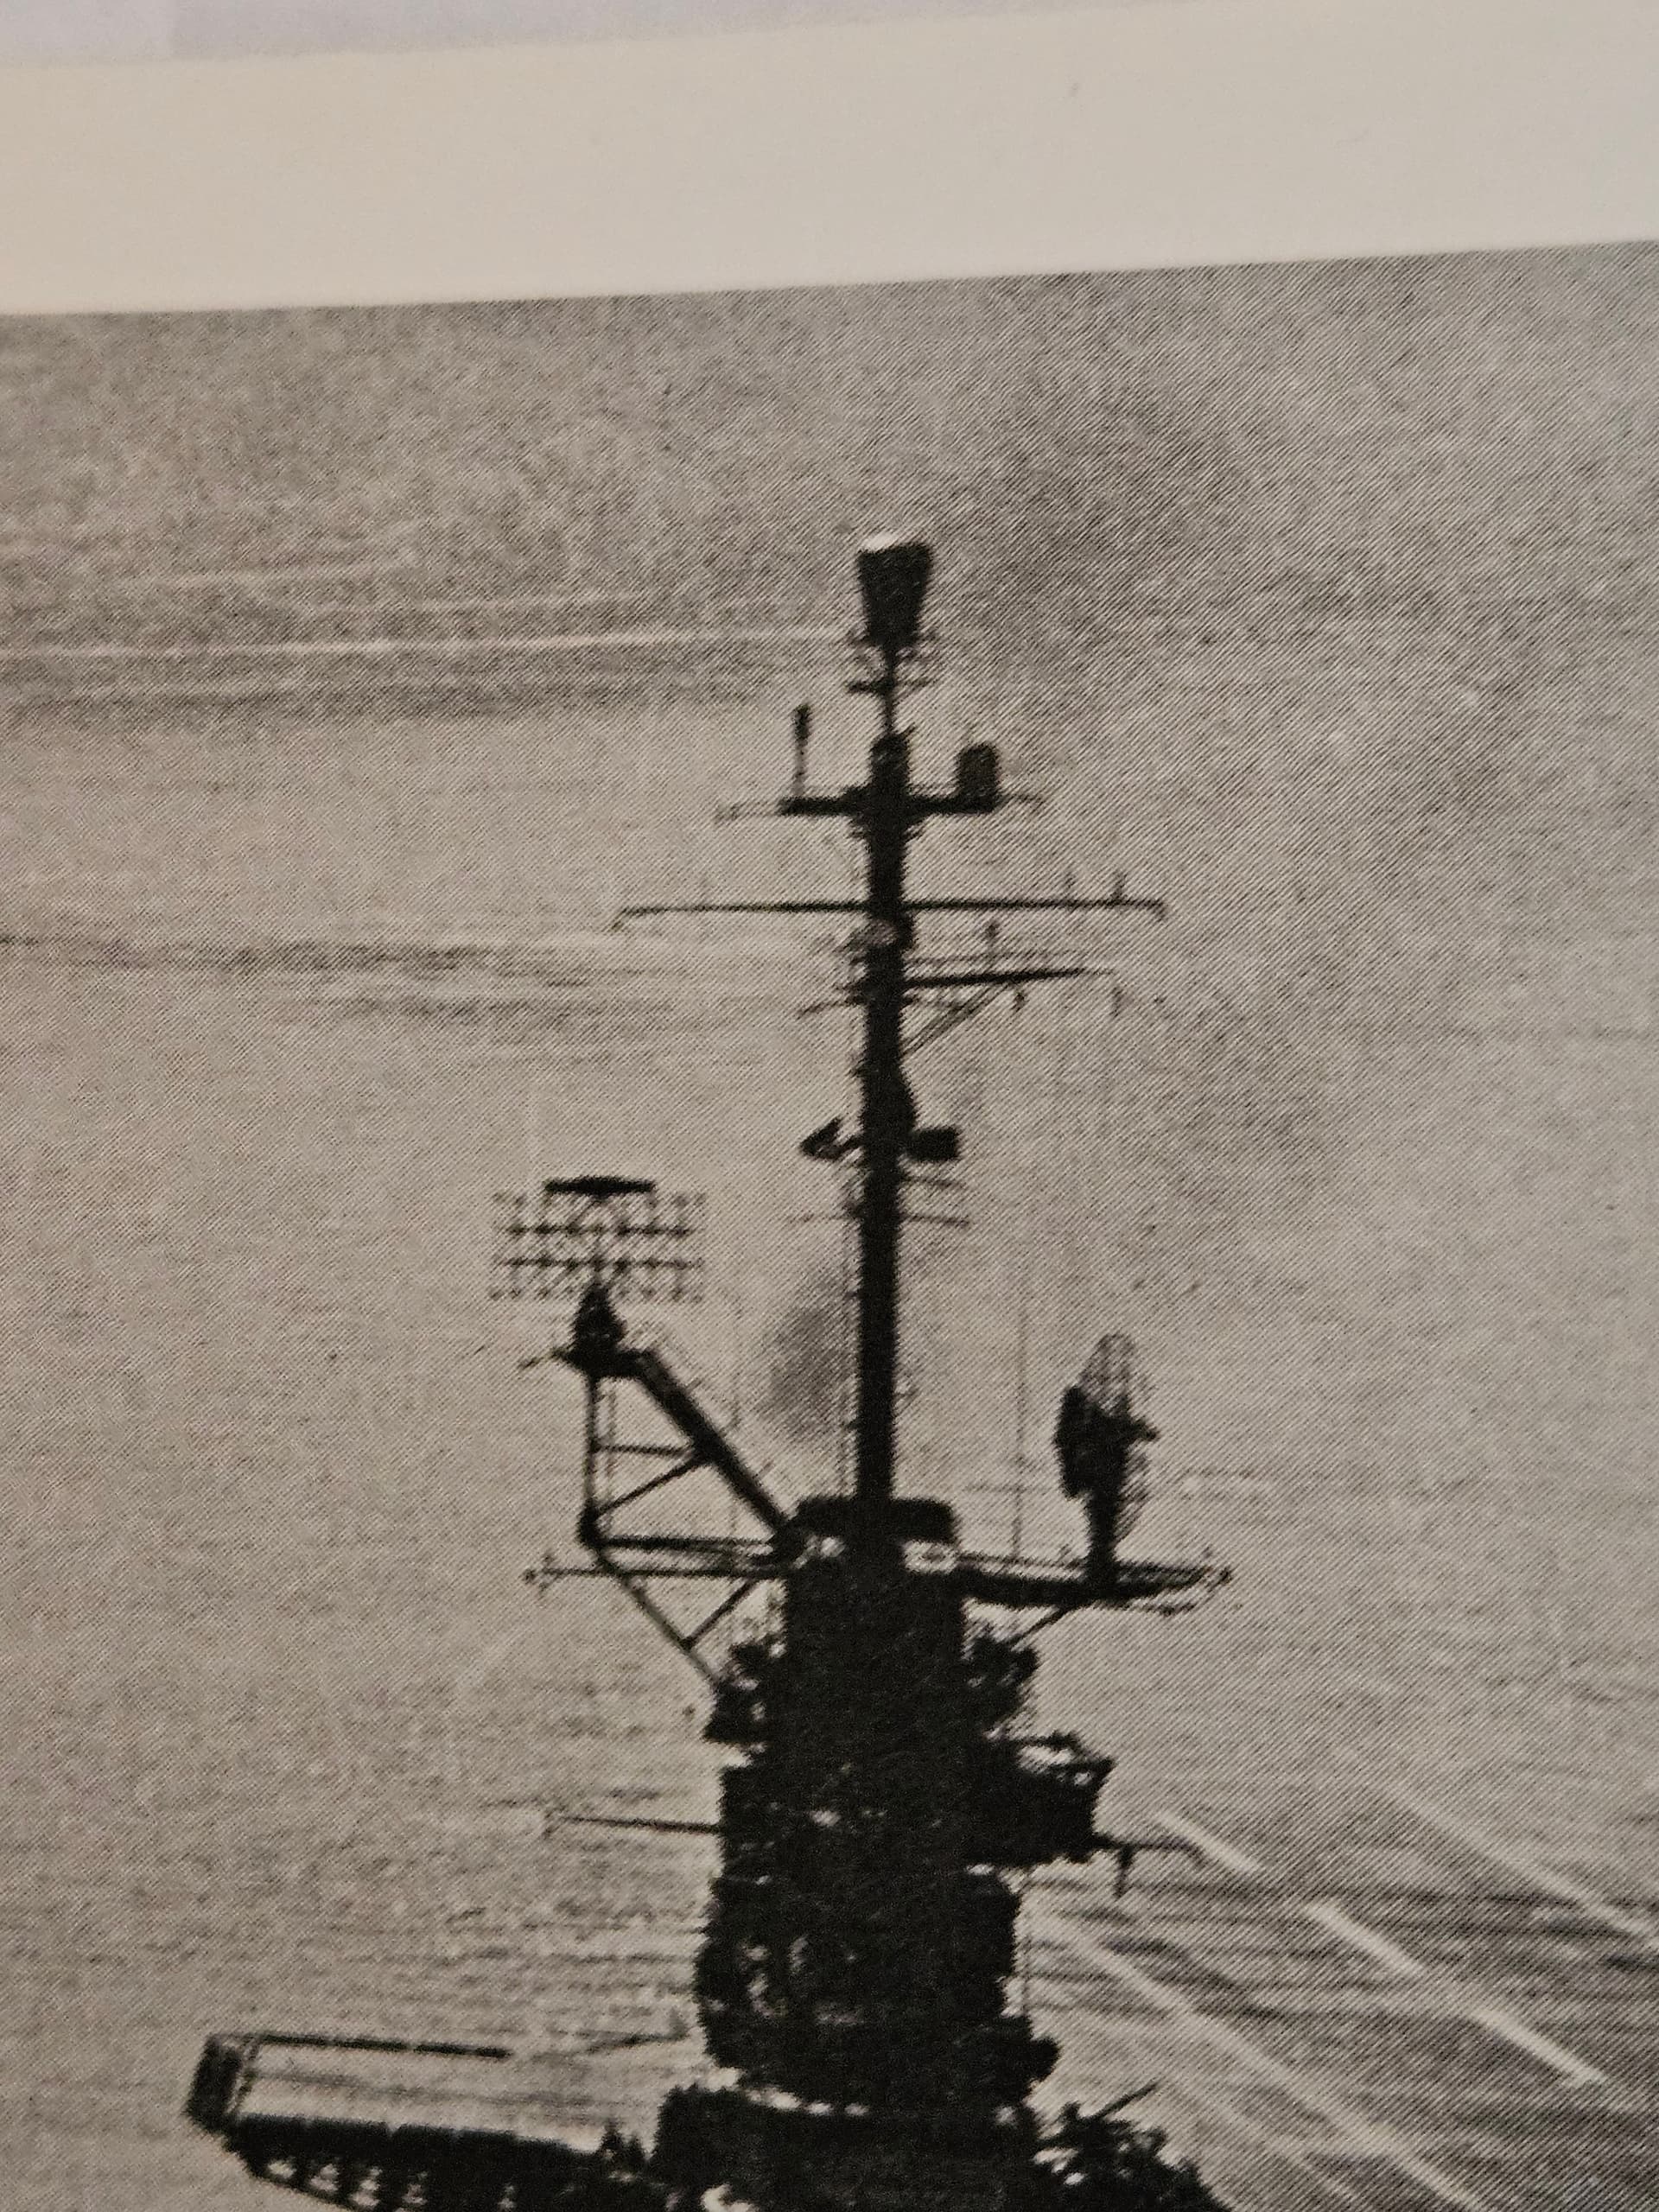
The 1959 configuration of the Hornet is somewhat ephemeral. To the best of my knowledge, this configuration only lasted a couple of years, with obvious visual changes being the mast and the various antennas, the SPN-8 vs. the SPN-35 for radar-controlled approaches, and the general painting and appearance of the flight deck. Also, each island structure in the post-SCB Essexes has subtle differences. Here, I chose to get the Model Monkey Hornet island, which will be very close to what I need, even though it’s the 1969 Apollo 11 configuration.
Fortunately, I have my Dad’s cruisebook with tons of pictures from that cruise. This proved to be indispensable. My other secret weapon was the ship herself. I lived in the Bay Area for a few years and was lucky enough to serve as a docent on the Hornet. The docents are very knowledgeable and helpful and I’ve been able to correspond with them to check on various aspects of the ship’s layout that can help me get the right configuration. I highly recommend a visit to the ship if you’re ever in the area.
Knowing now the nuances of the 1959 Hornet, I compared the correct configuration to theTrumpeter kit. That’s when I realized the magnitude of this undertaking.
The most obvious differences from this perspective are the shape and size of the #1 elevator and the location of the #3 (aft stbd) elevator. The catapults are also very different in size and location (Intrepid had newer steam catapults vs. Hornet’s hydraulic cats. The Intrepid also had much of its original deck planking covered with a thick non-skid coating that obscured the planking below it. The 1959 Hornet was almost completely showing the planked flight deck. Here’s what you get when you overlay the outline of the Hornet’s flight deck with that of the Intrepid:
The Trumpeter kit’s flight deck has a nice level of detail, but given the nature of the lack of planking in key areas, the size and shape of the #1 elevator, and the location of the #3 elevator, I decided that I needed to build my own flight deck to get the details and shape right. I considered 3 main options:
Laser cut basswood. This would probably return a pretty good result, provided the laser kern was fine enough to capture the planking details and the aircraft tiedowns. I opted against this option, since the software needed to make this was different that what I had been using and my learning curve on that software was already steep enough. I have been using Inkscape to render the 2D drawings of the flight deck, along with making the decals I will need. I will talk about that more in a follow-up post.
I considered just getting a piece of ABS cut to the right size and shape for my flight deck, but the lack of planking and tiedown detail meant this could only really serve as a base to laminate a thin, detailed layer on top. I considered a printed deck to put on top, either with very thin wood or just paper itself. The 2D nature of this, even at 1:350 scale, put me off.
3D printing. This is what I’m going with, and I purchased a 3D printer (Elegoo Mars 5 Ultra) to experiment with this process. I liked the level of detail it could offer and there’s lots of free software you can use to make the printable files.
I’ve been reconsidering my flight deck options, but have commissioned a 3D print of the flight deck. Given the size of the flight deck, I had to break it up into 4 pieces for printing. Fortunately, the Hornet has expansion joints that run across the flight deck, making for convenient points to split the deck. I have not given up on laser cutting basswood, either. I think that if the engraving of the planks was done right, this could turn out really well.
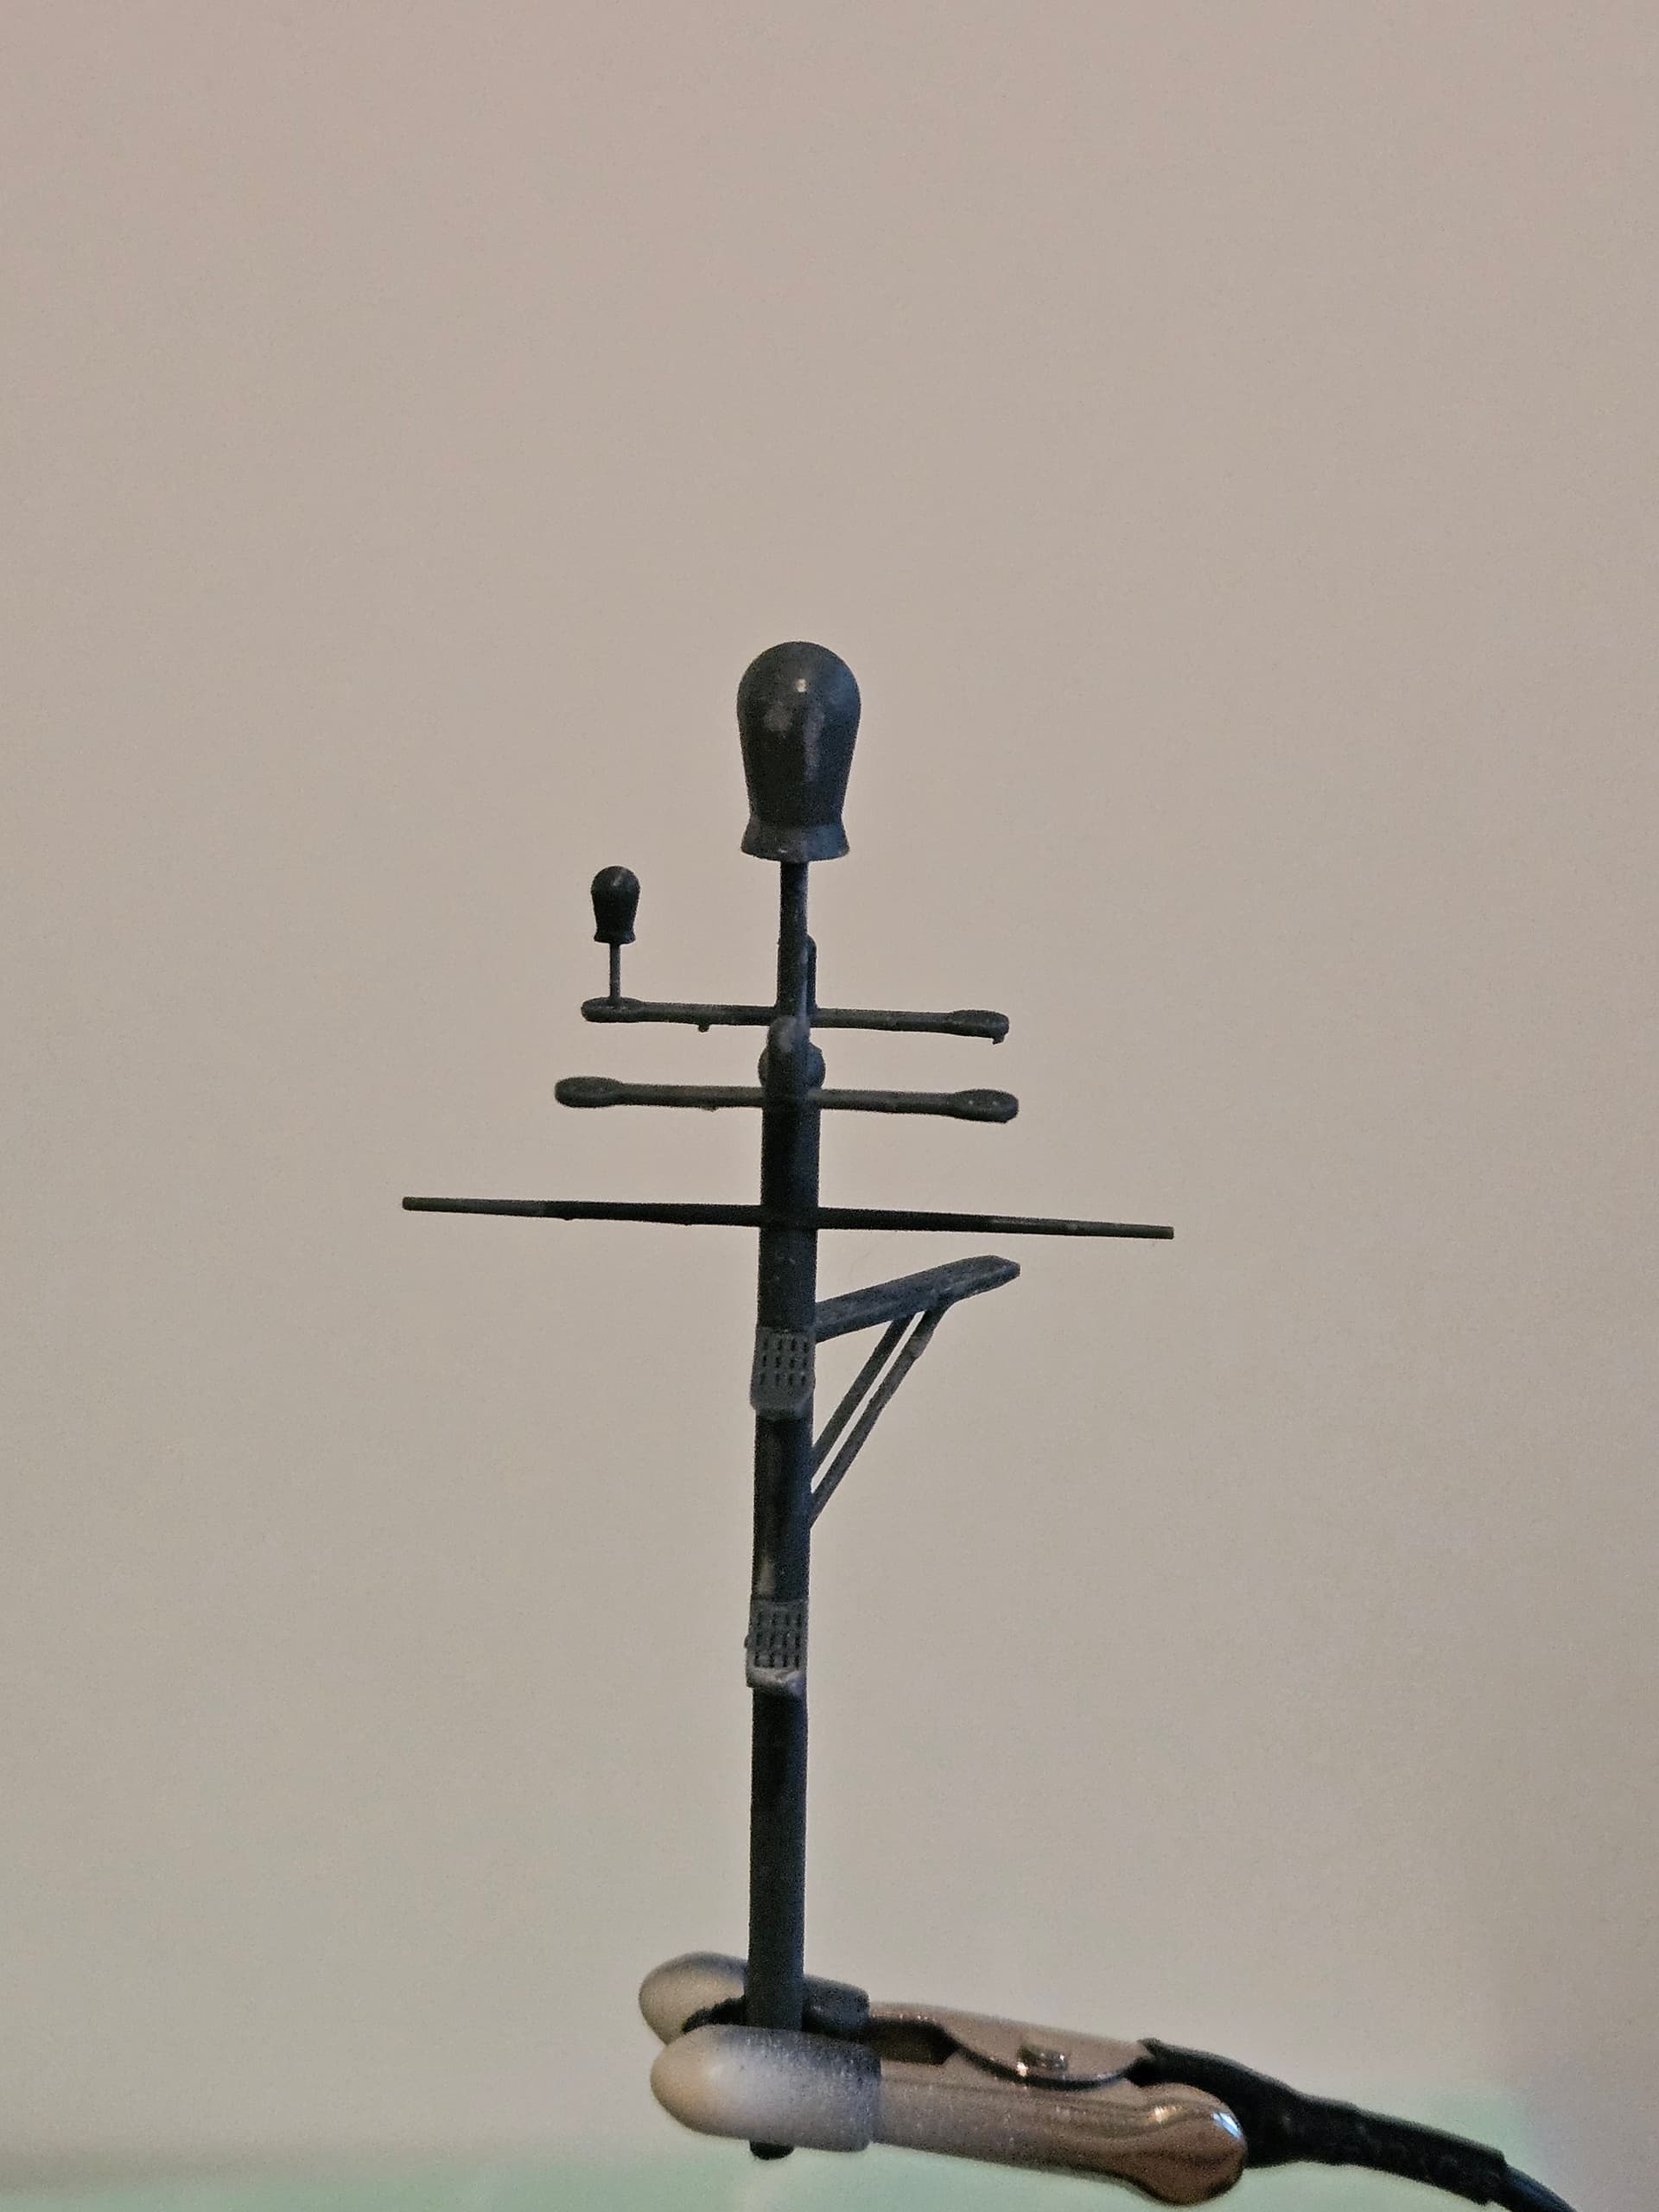
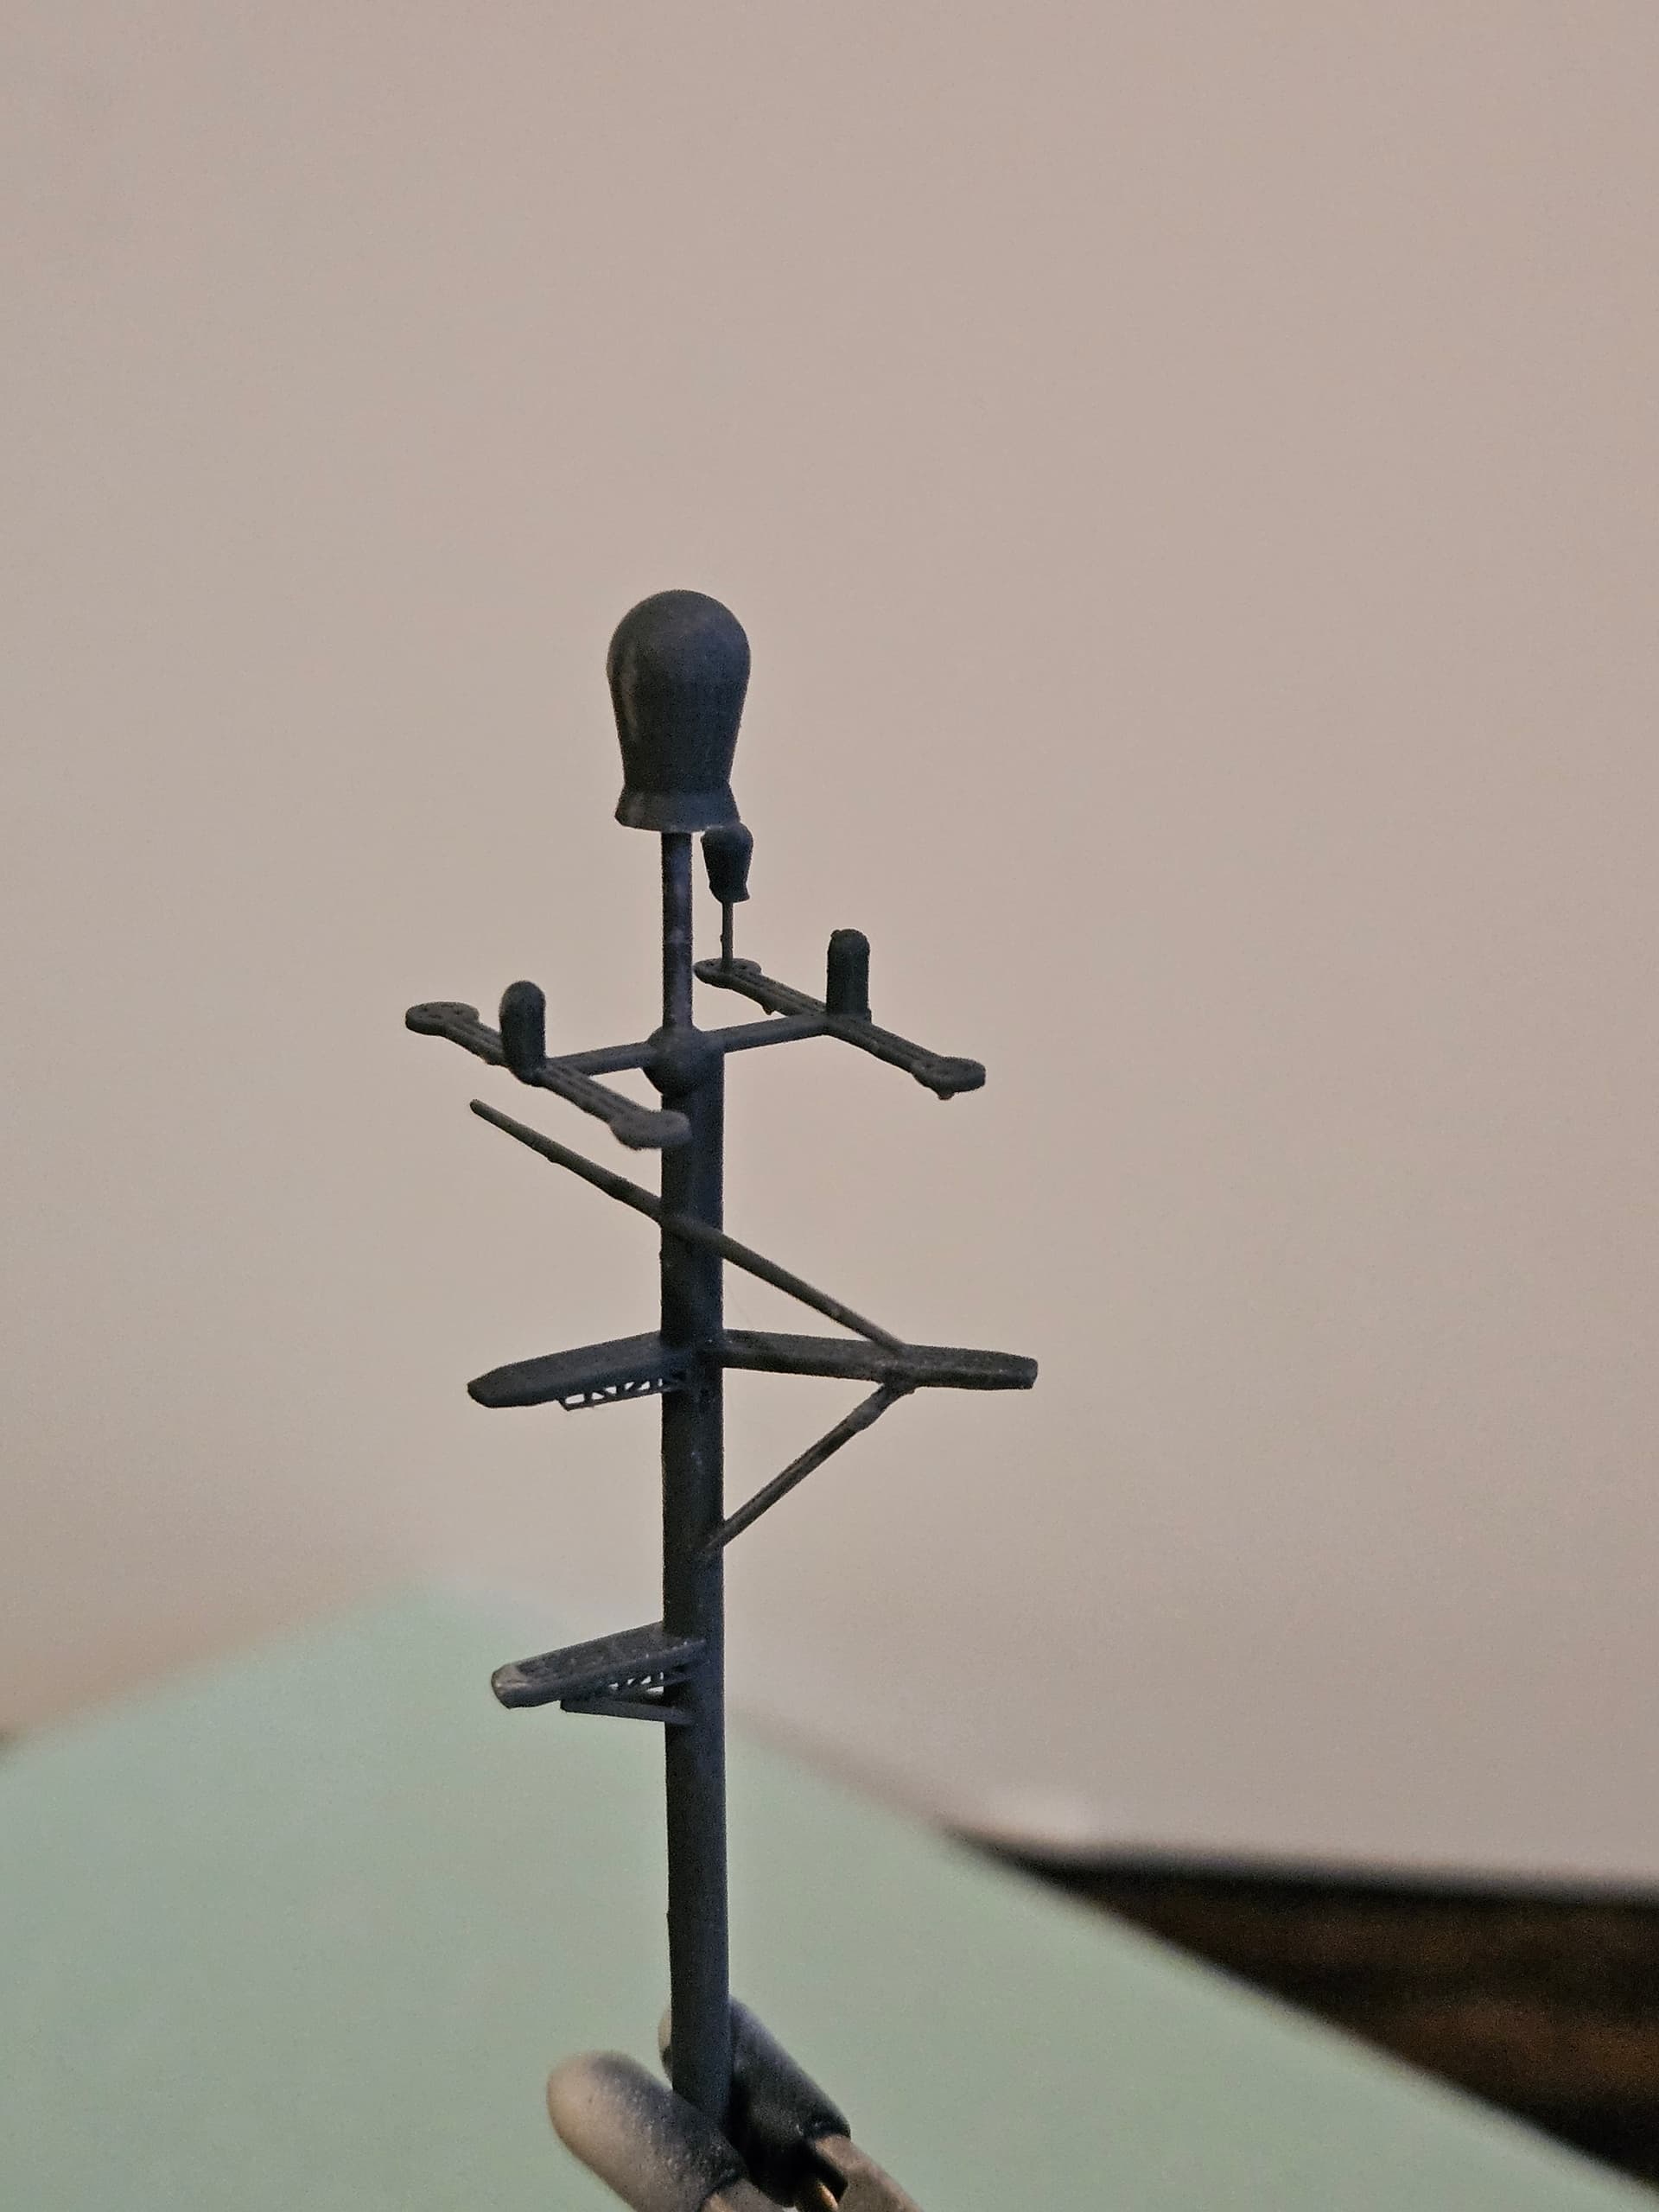
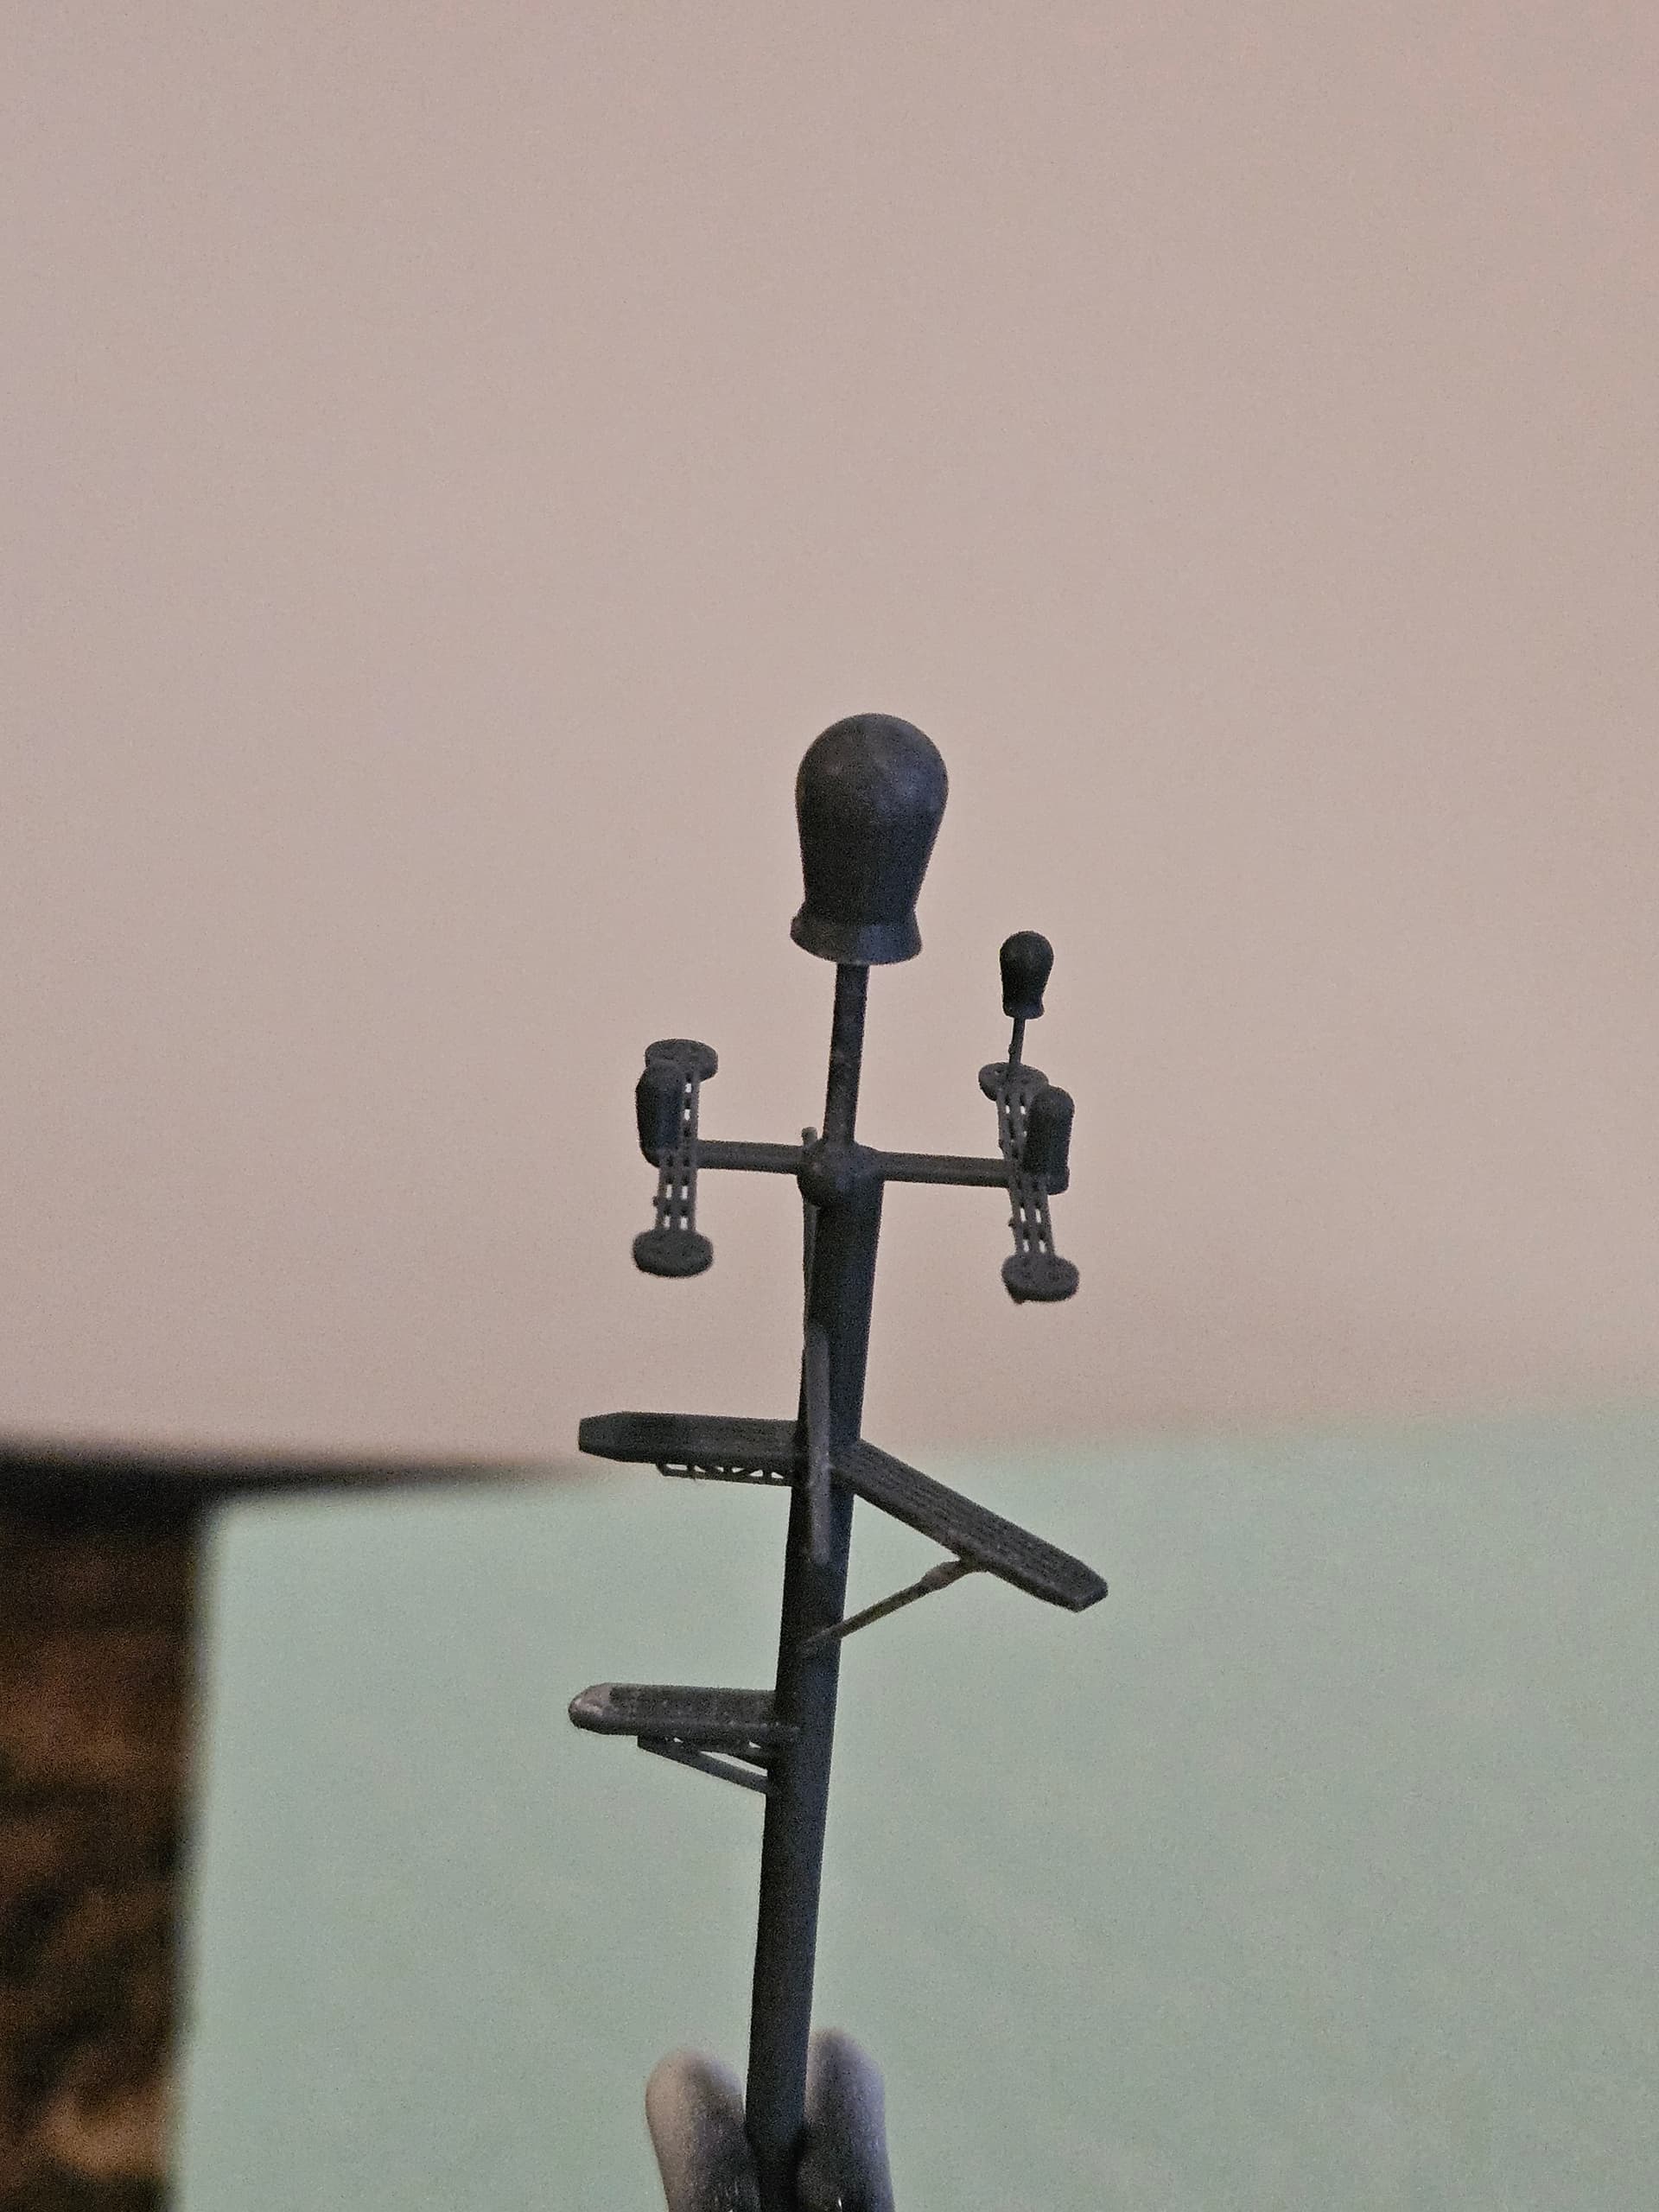
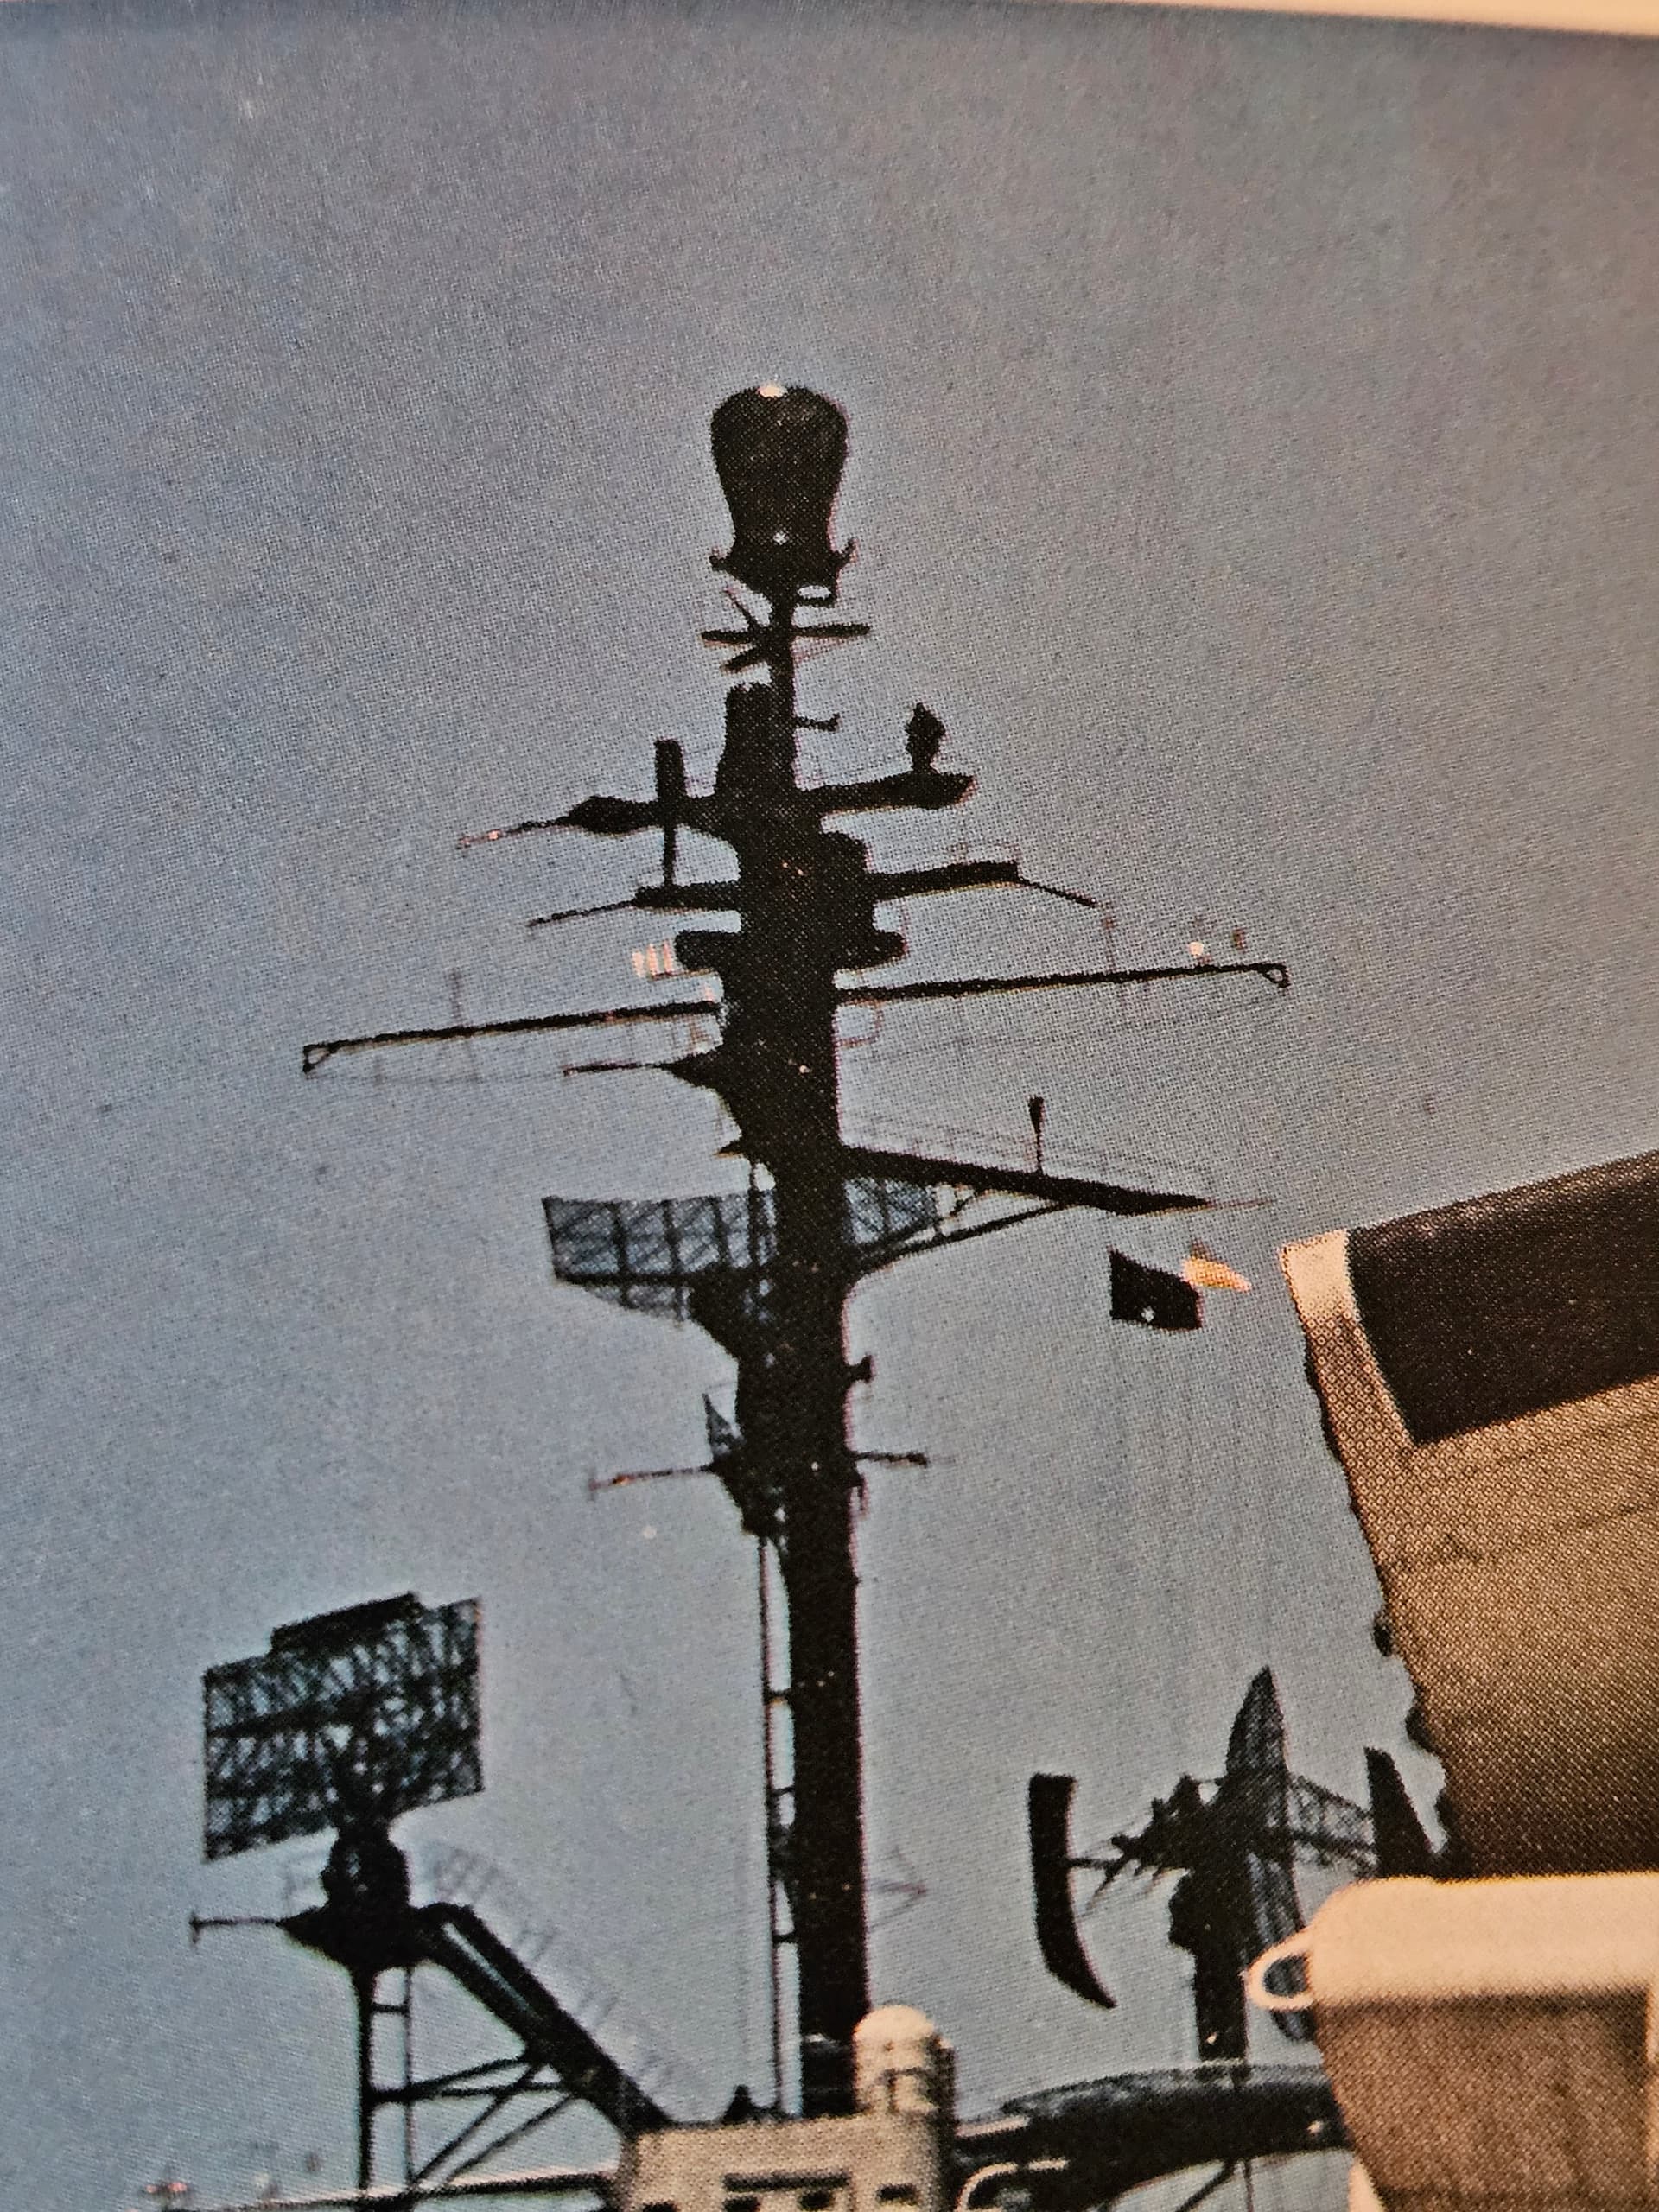
The 3D printing experience for me has been very good. In addition to learning Inkscape for the flight deck, I have used Blender to design my 3D shapes, and Lychee to slice them and make them ready for printing. Results have been very good for me so far. I printed the mast of the 1959 Hornet in 3D as a single unit. So much easier than fiddling with each individual part. I will still need to add railings and the radars, but I’m super happy with how the mast turned out:
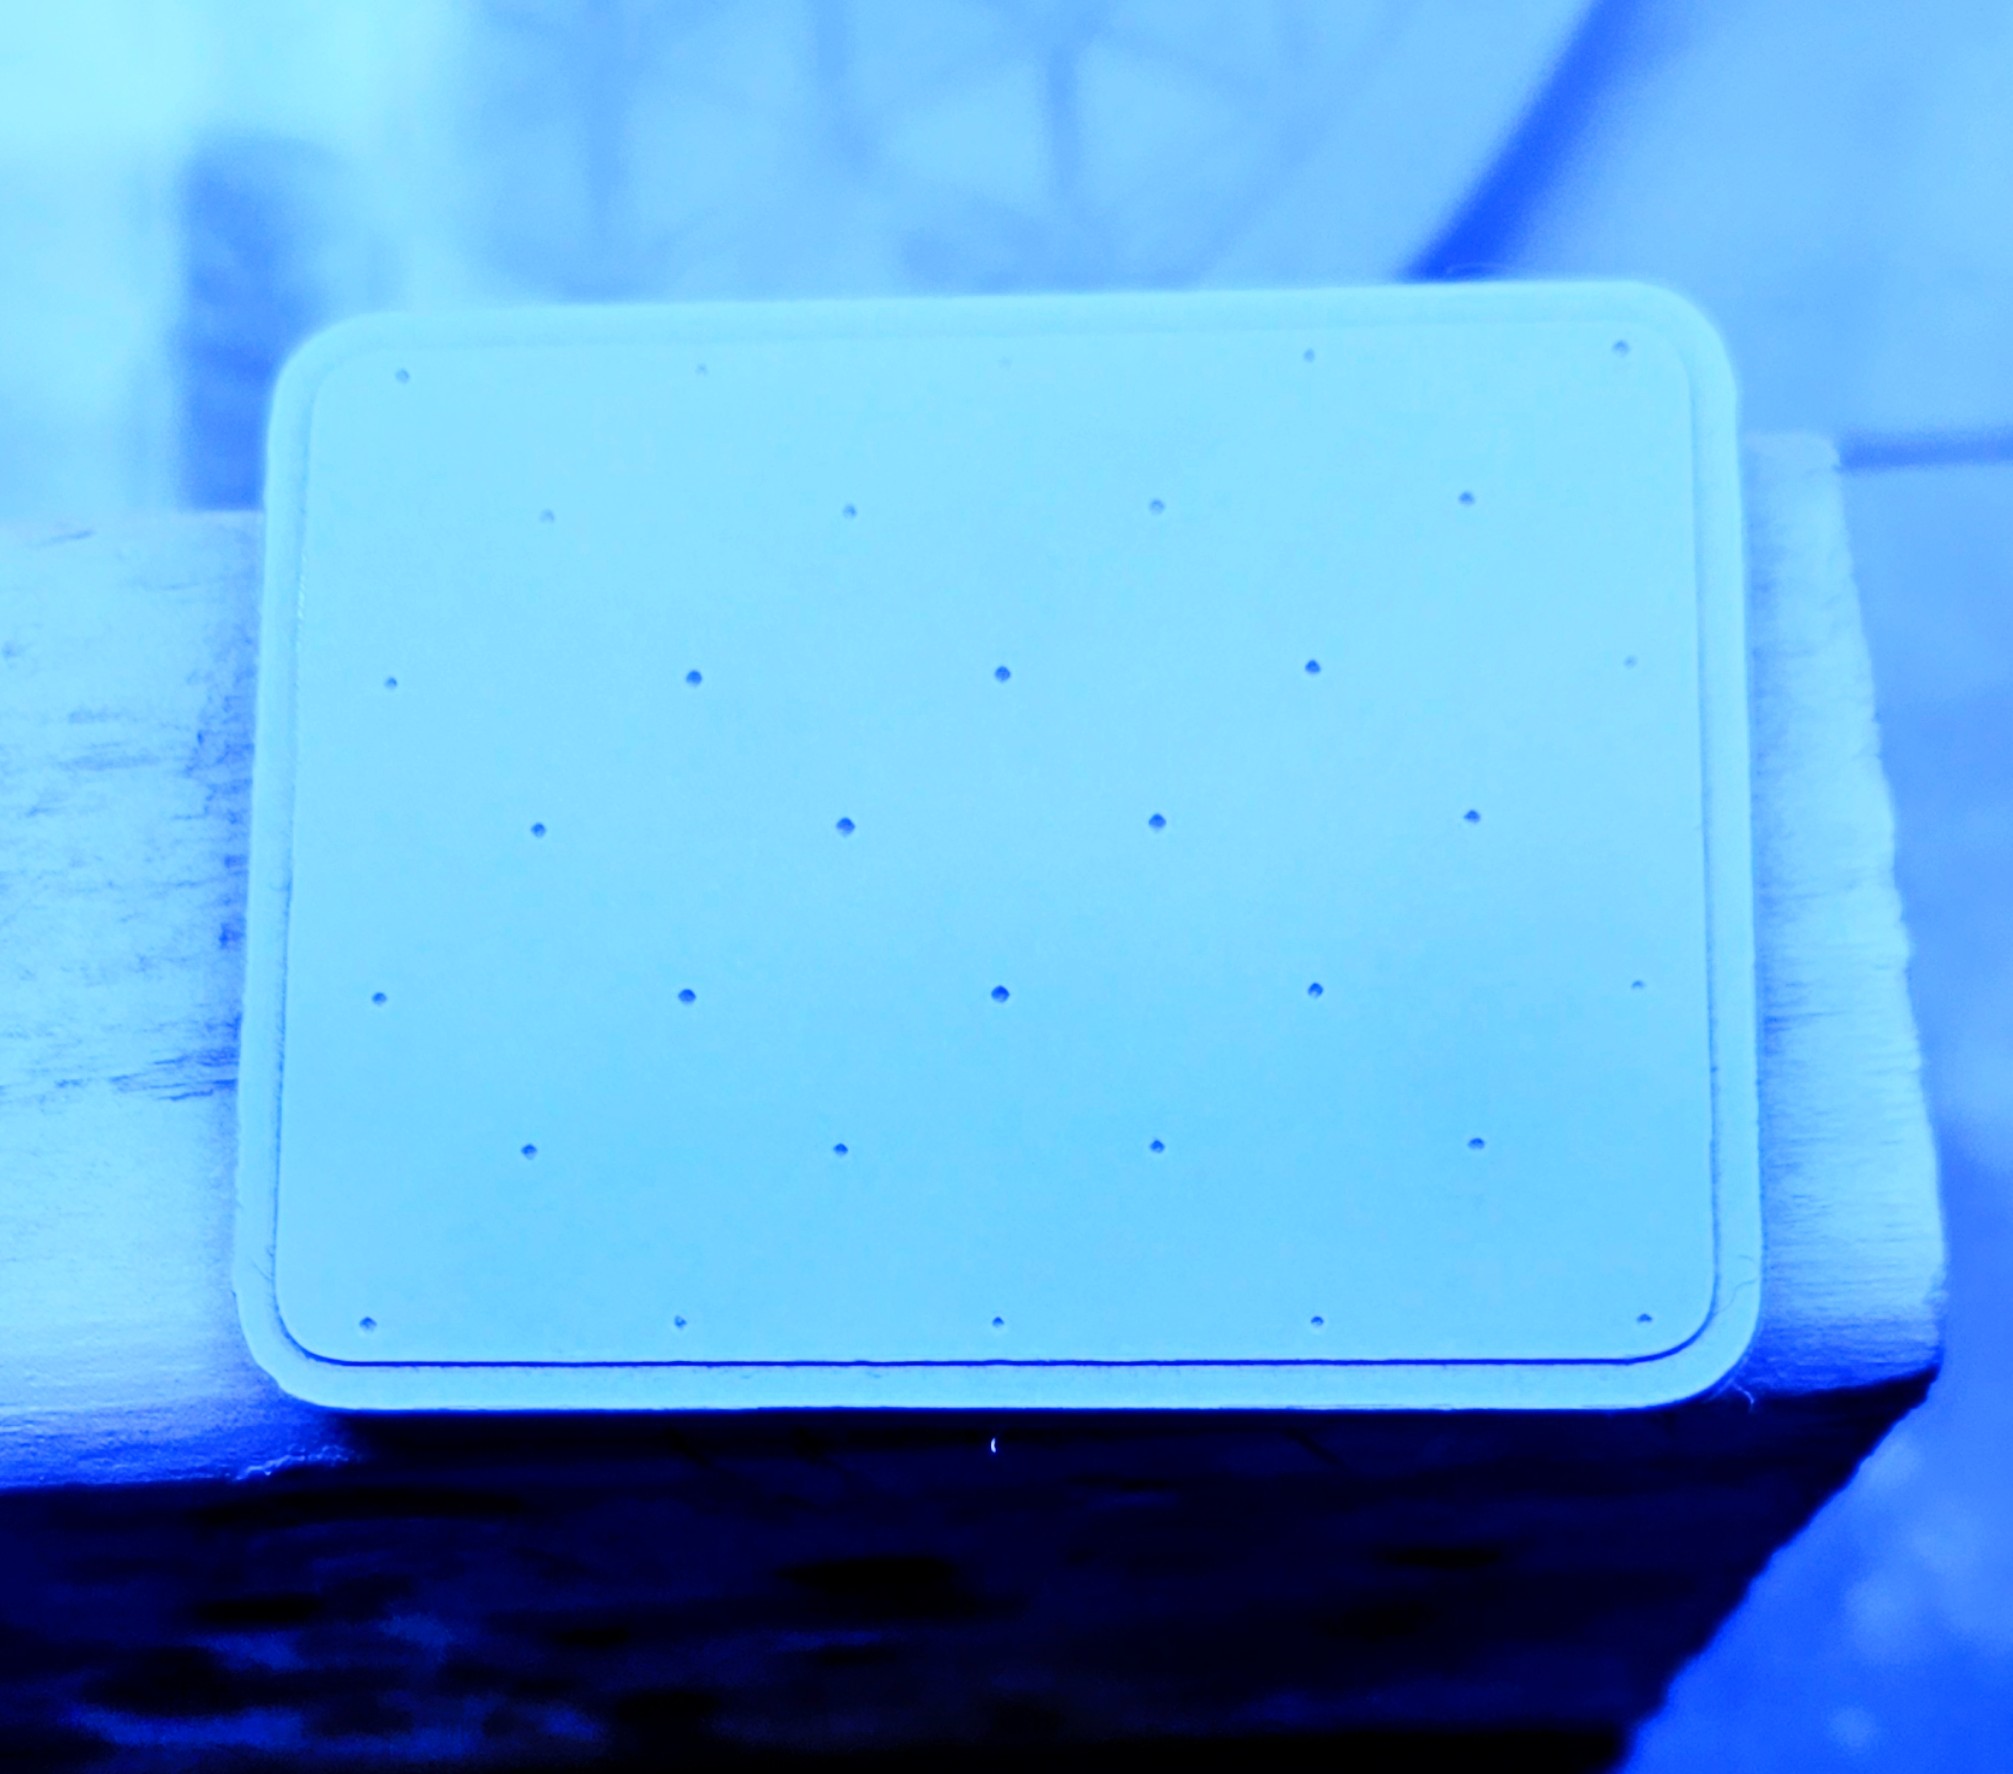
The #1 flight deck elevator on Hornet is rectangular vs. pentagonal on the Trumpeter kit. I printed out the elevator on my 3D printer and am very happy with how it turned out, particularly the tiedowns:
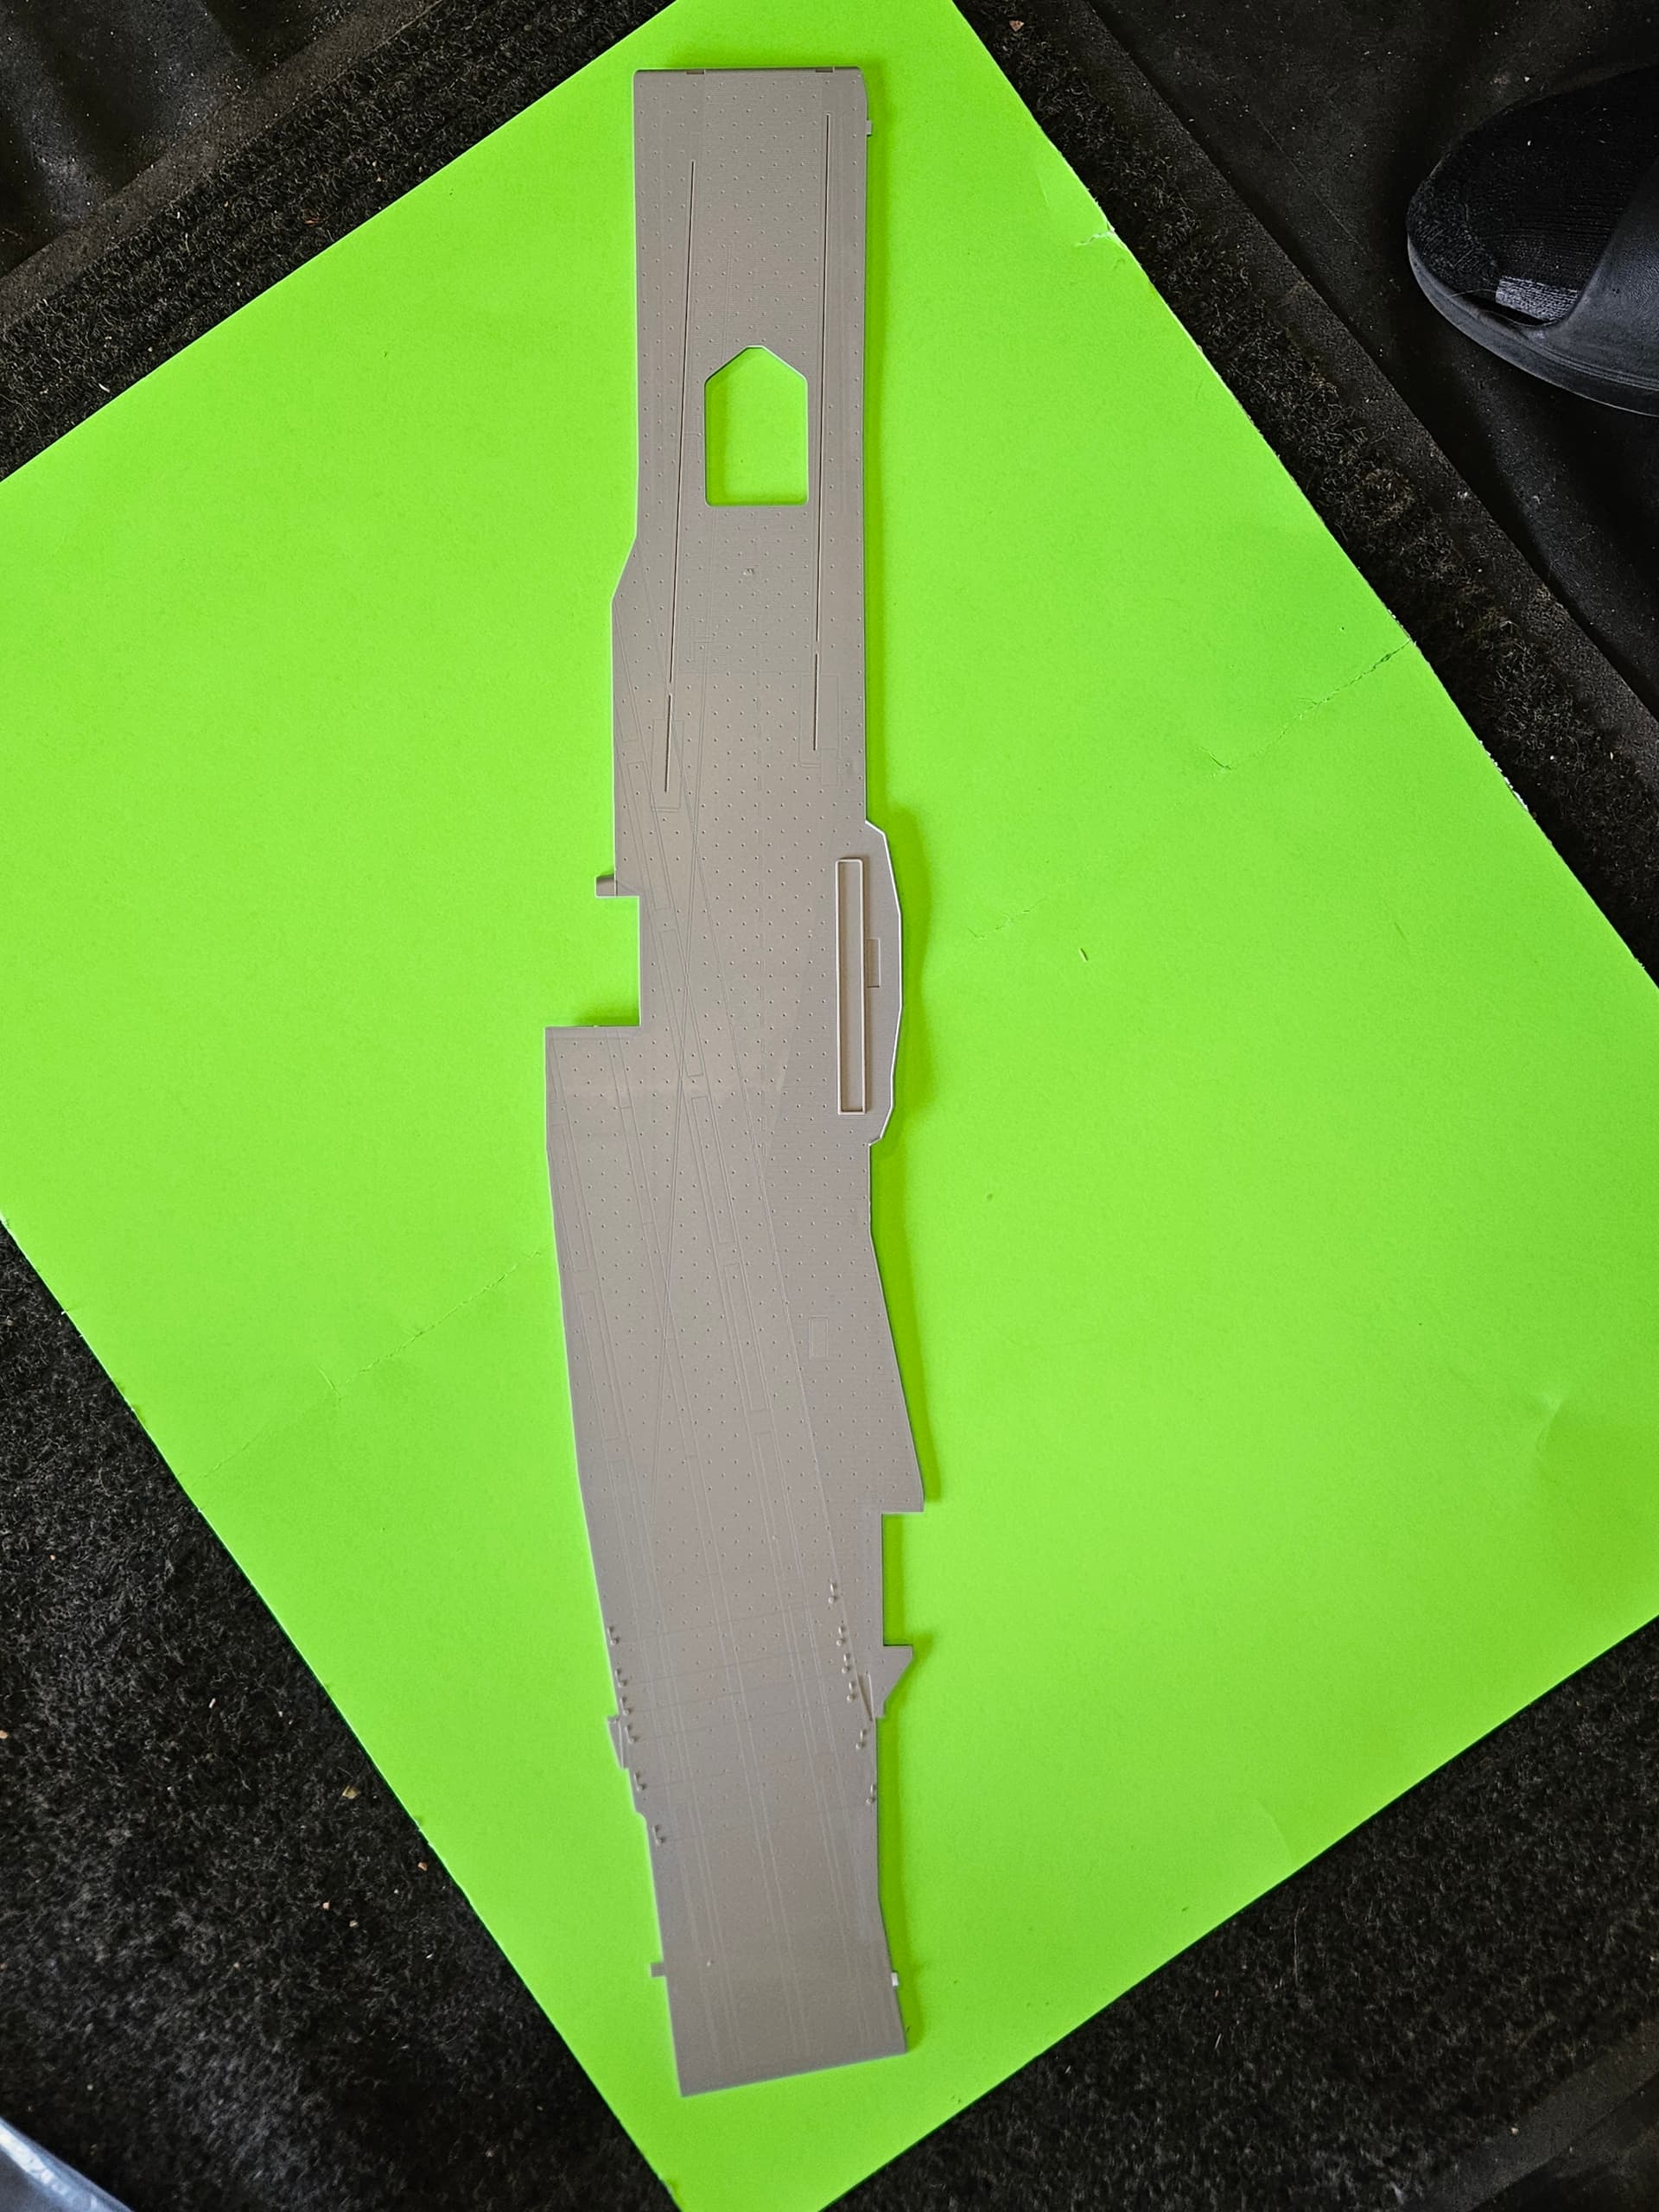
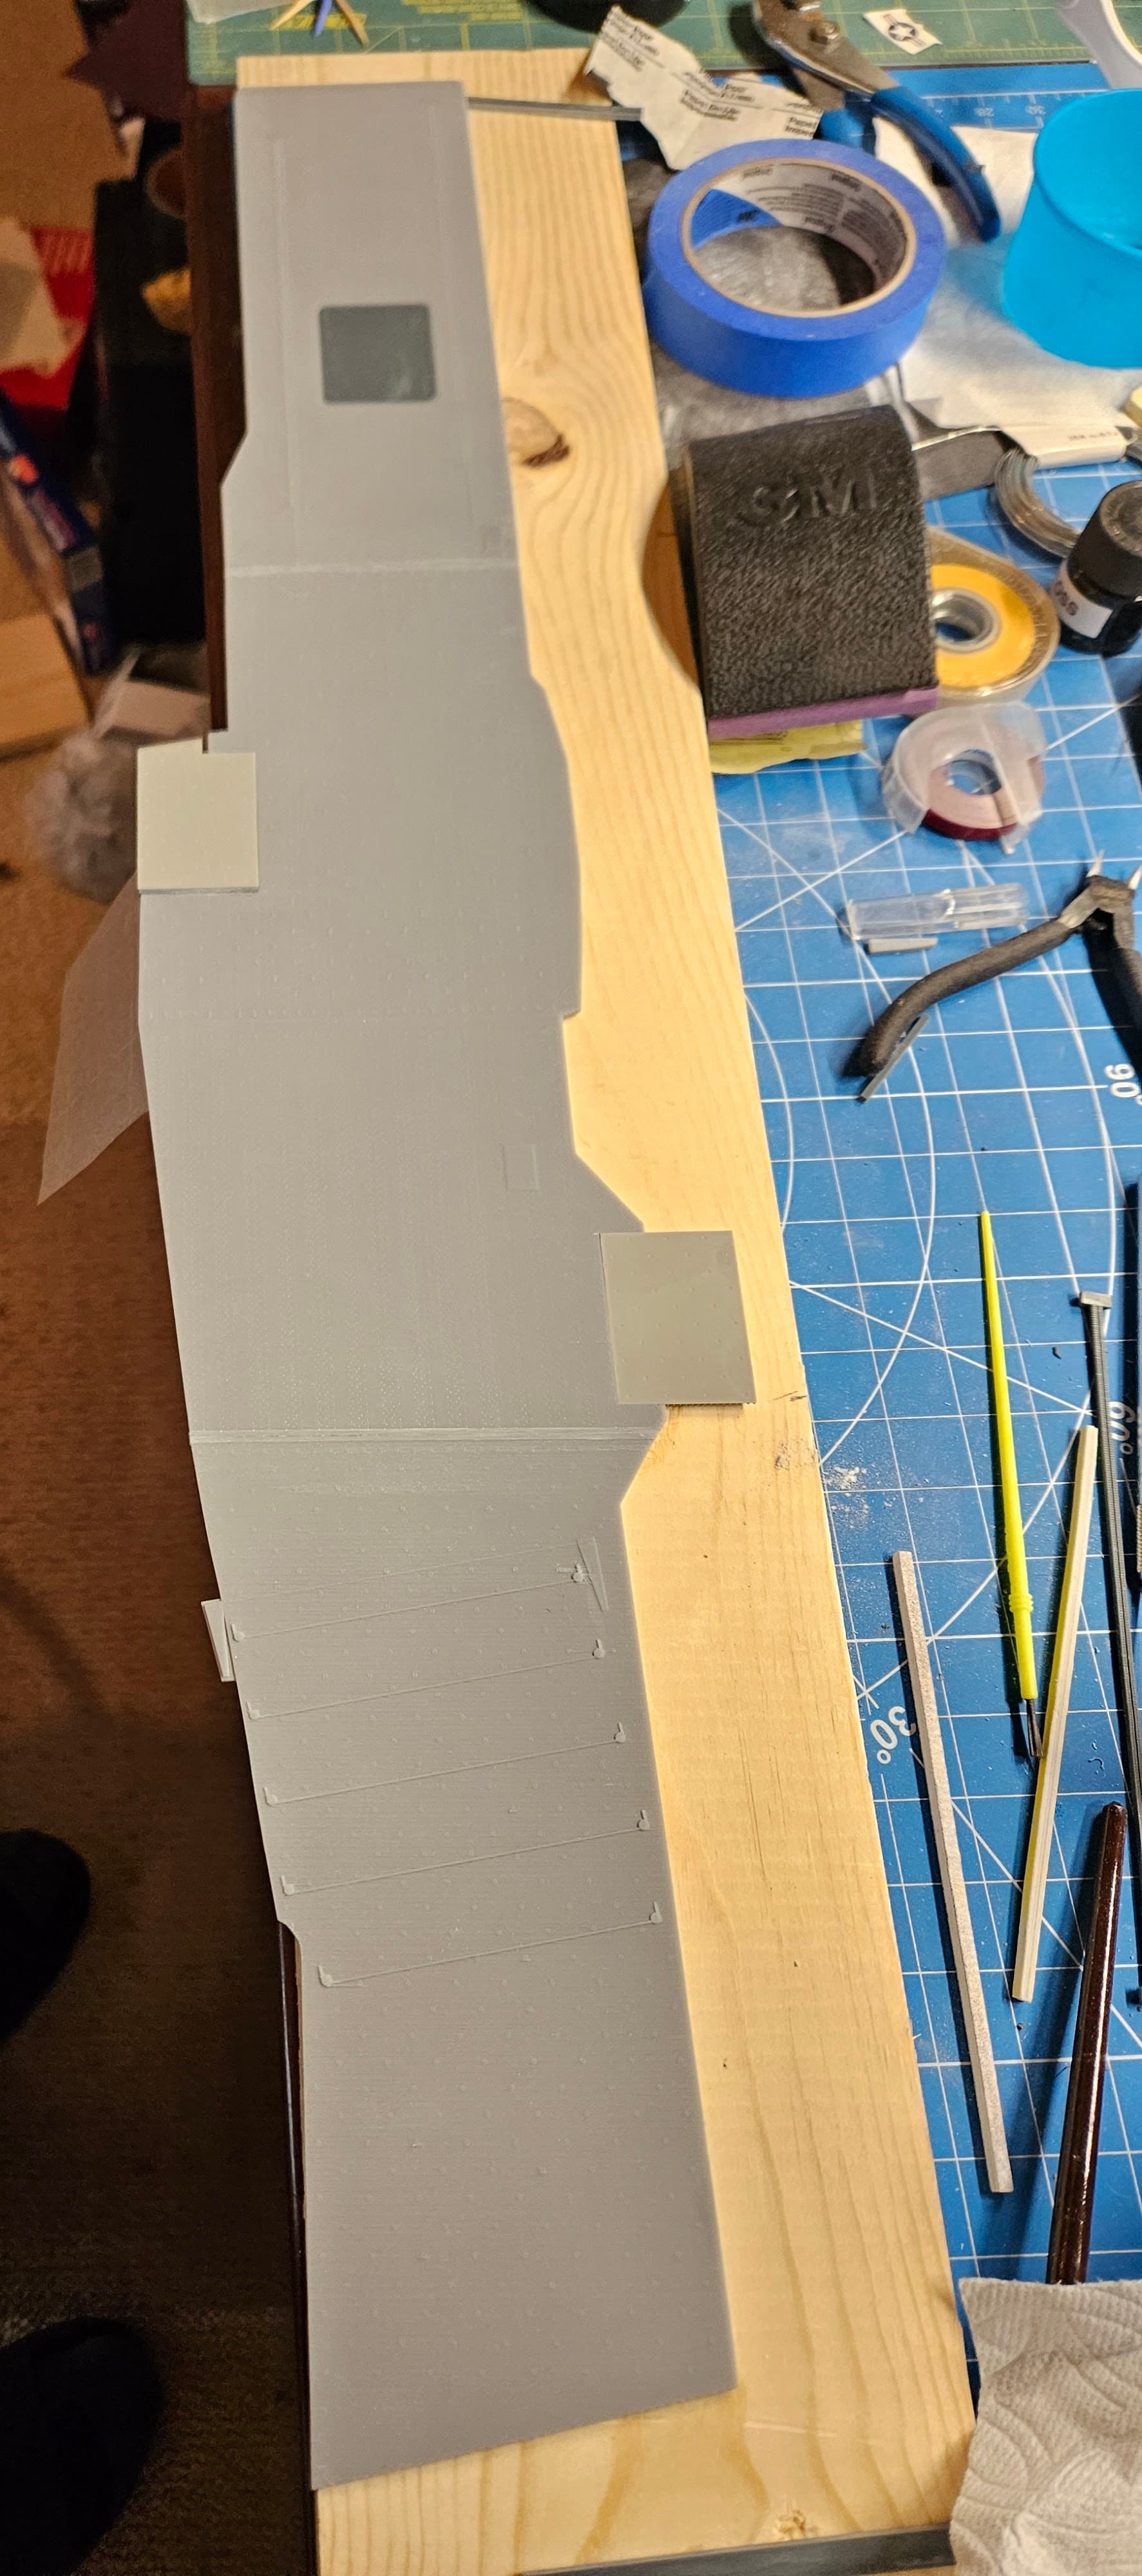
After a couple of weeks working on the kids’ cars, I’m back on the project. I received my 3D-printed flight deck back earlier this week, and am pretty happy with how it turned out. I was able to fit the #1 elevator that I 3D printed into the flight deck with minimal sanding. It’s in 3 sections, so next up will be joining and strengthening them before I begin work on the hull.
I have joined the 3 pieces of the flight deck. Conveniently, the Essex-class carriers had some nice expansion joints on the flight deck that served as good points to split the flight deck. I had to do a little bit of work to get the elevators to fit, but they’re all fitting quite flush now. I used super glue to tack the flight deck sections to each other and then I put a thin aluminum sheet underneath each joint and secured them with epoxy. The deck is pretty solid now. The bow and stern ramps are going to be added once I have the main deck assembled and can verify length and fit of the flight deck. Next up, I will now actually start building the kit! I still have to get the hull mountings to my base measured and drilled out as well. Weather here is not great and my indoor booth is too small to do the hull, so I will wait for some better weather to spray the boot topping and then the hull red and gray colors. I also got my custom decals back for the air wing, so I’m all set there.
I’m actually going to try the method outlined in the Ship Modelers Handbook that FSM published a few months back. It reduces the amount of masking and looks like it produces very clean lines.
This week, I also used my Cricut machine to print flight deck masks: one for the tiedowns and another for all the deck markings and the hull number. I was able to import the exact outline of my 3D printed flight deck, so I’m hoping I can just lay this on top of the deck and get everything perfectly aligned. I’m thinking now that I will actually do the flight deck before I install it, since will be much easier to manipulate/mask/etc.
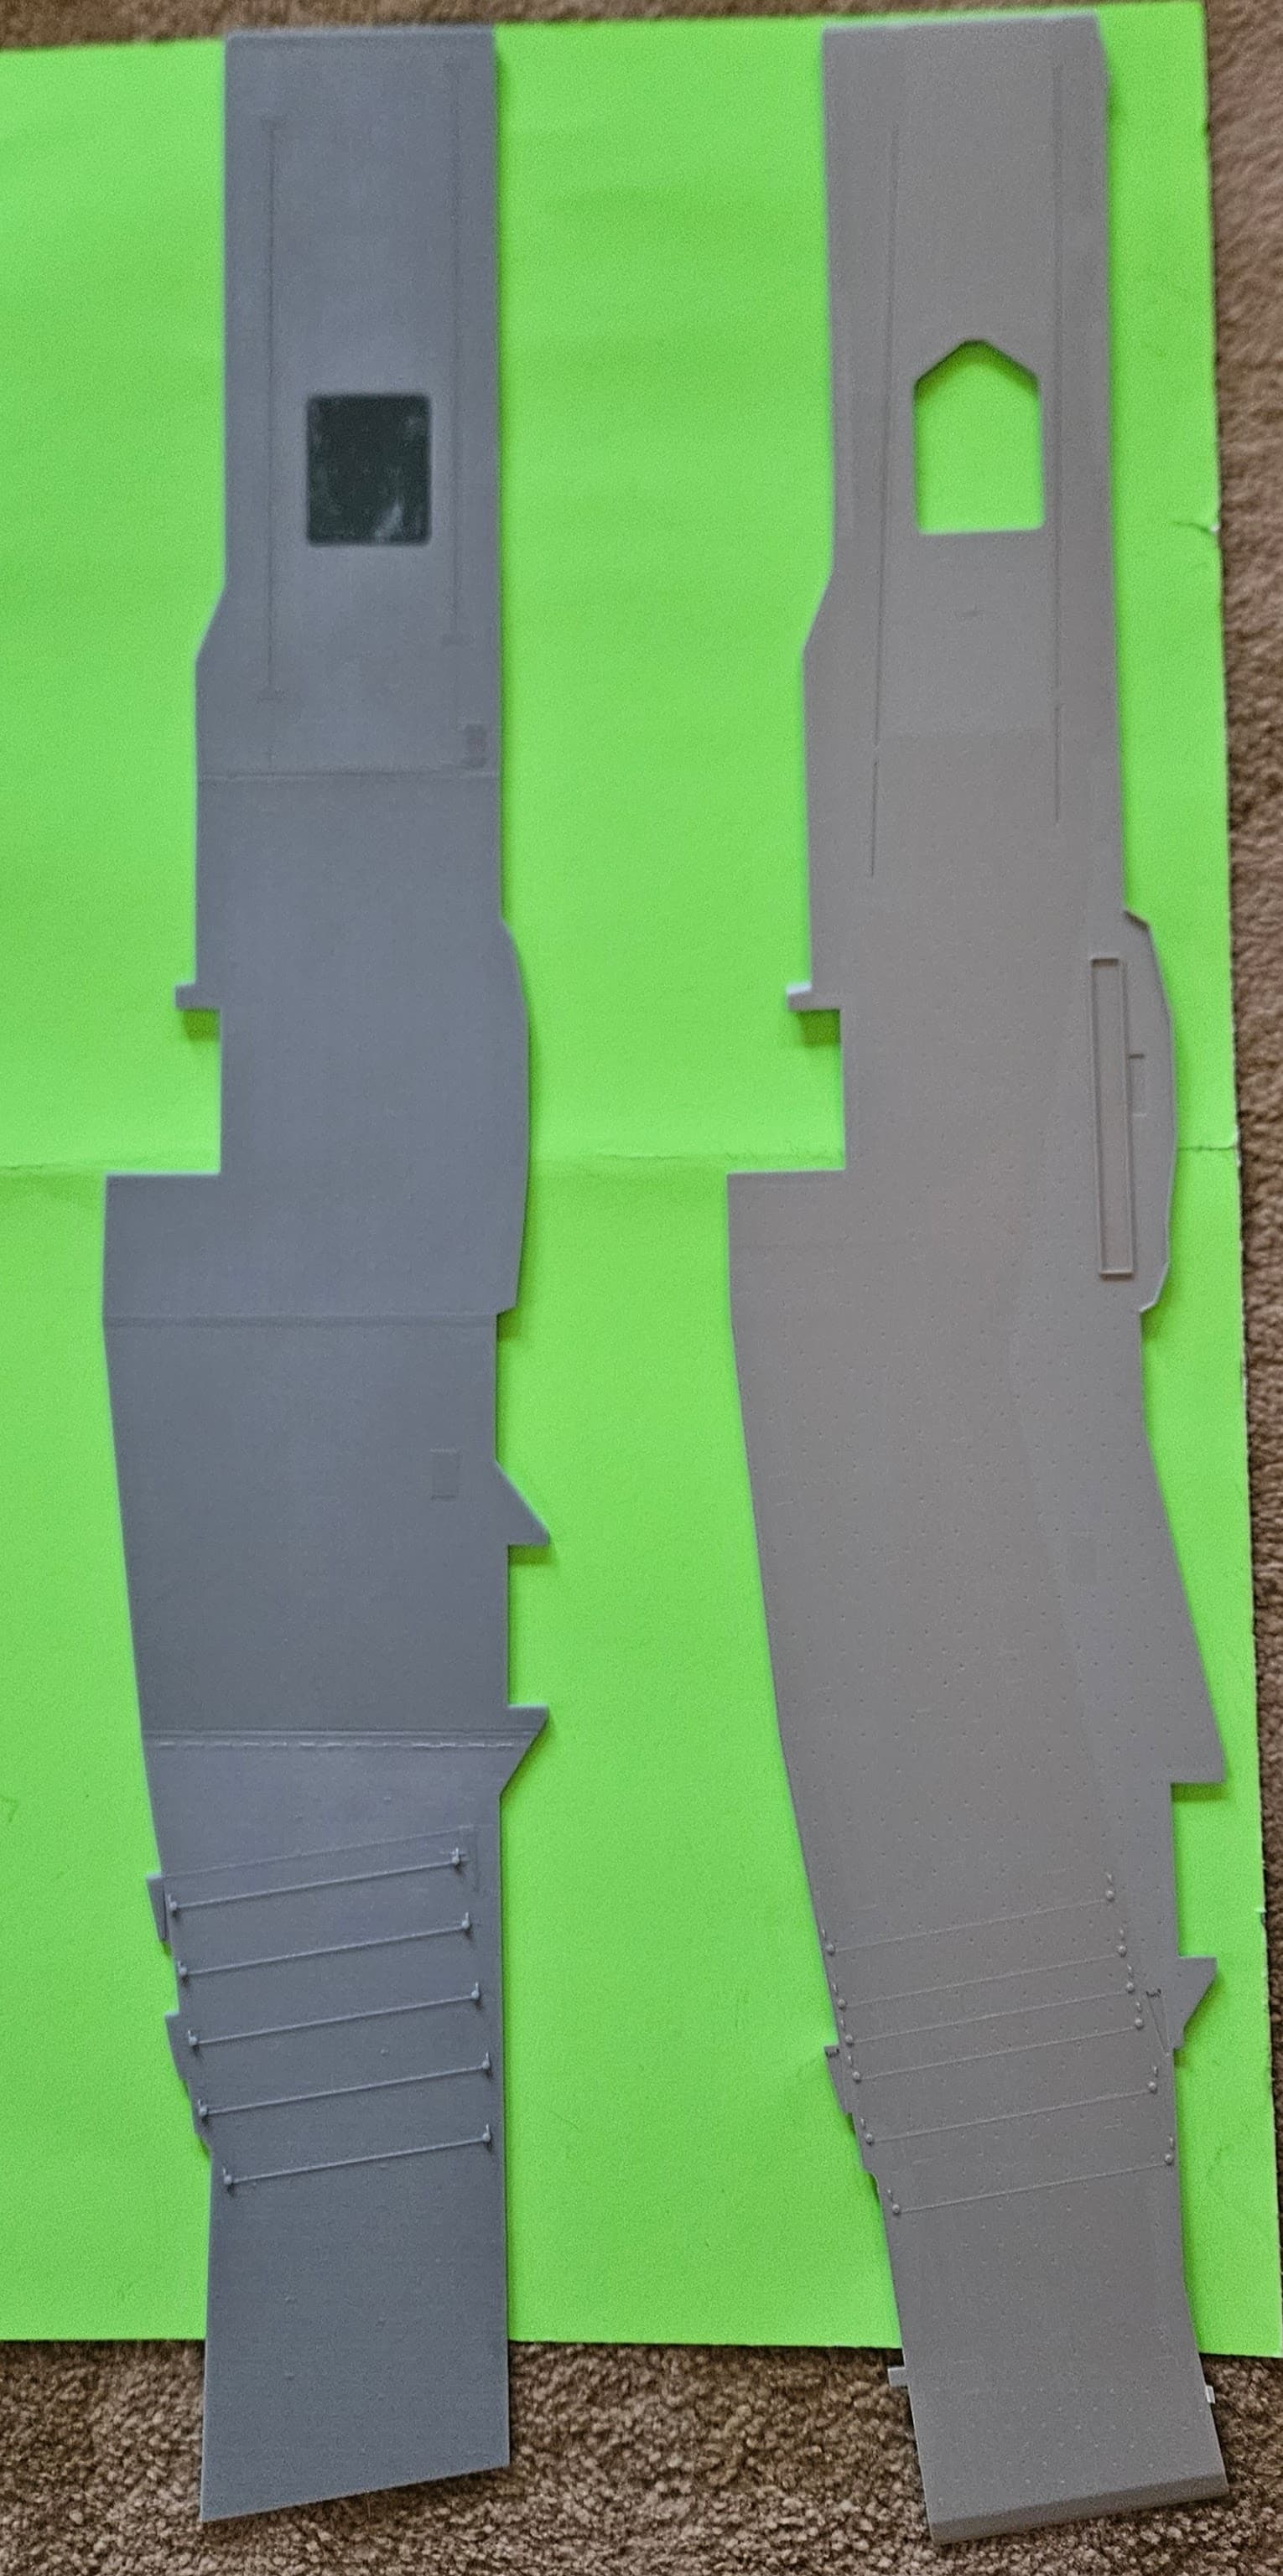
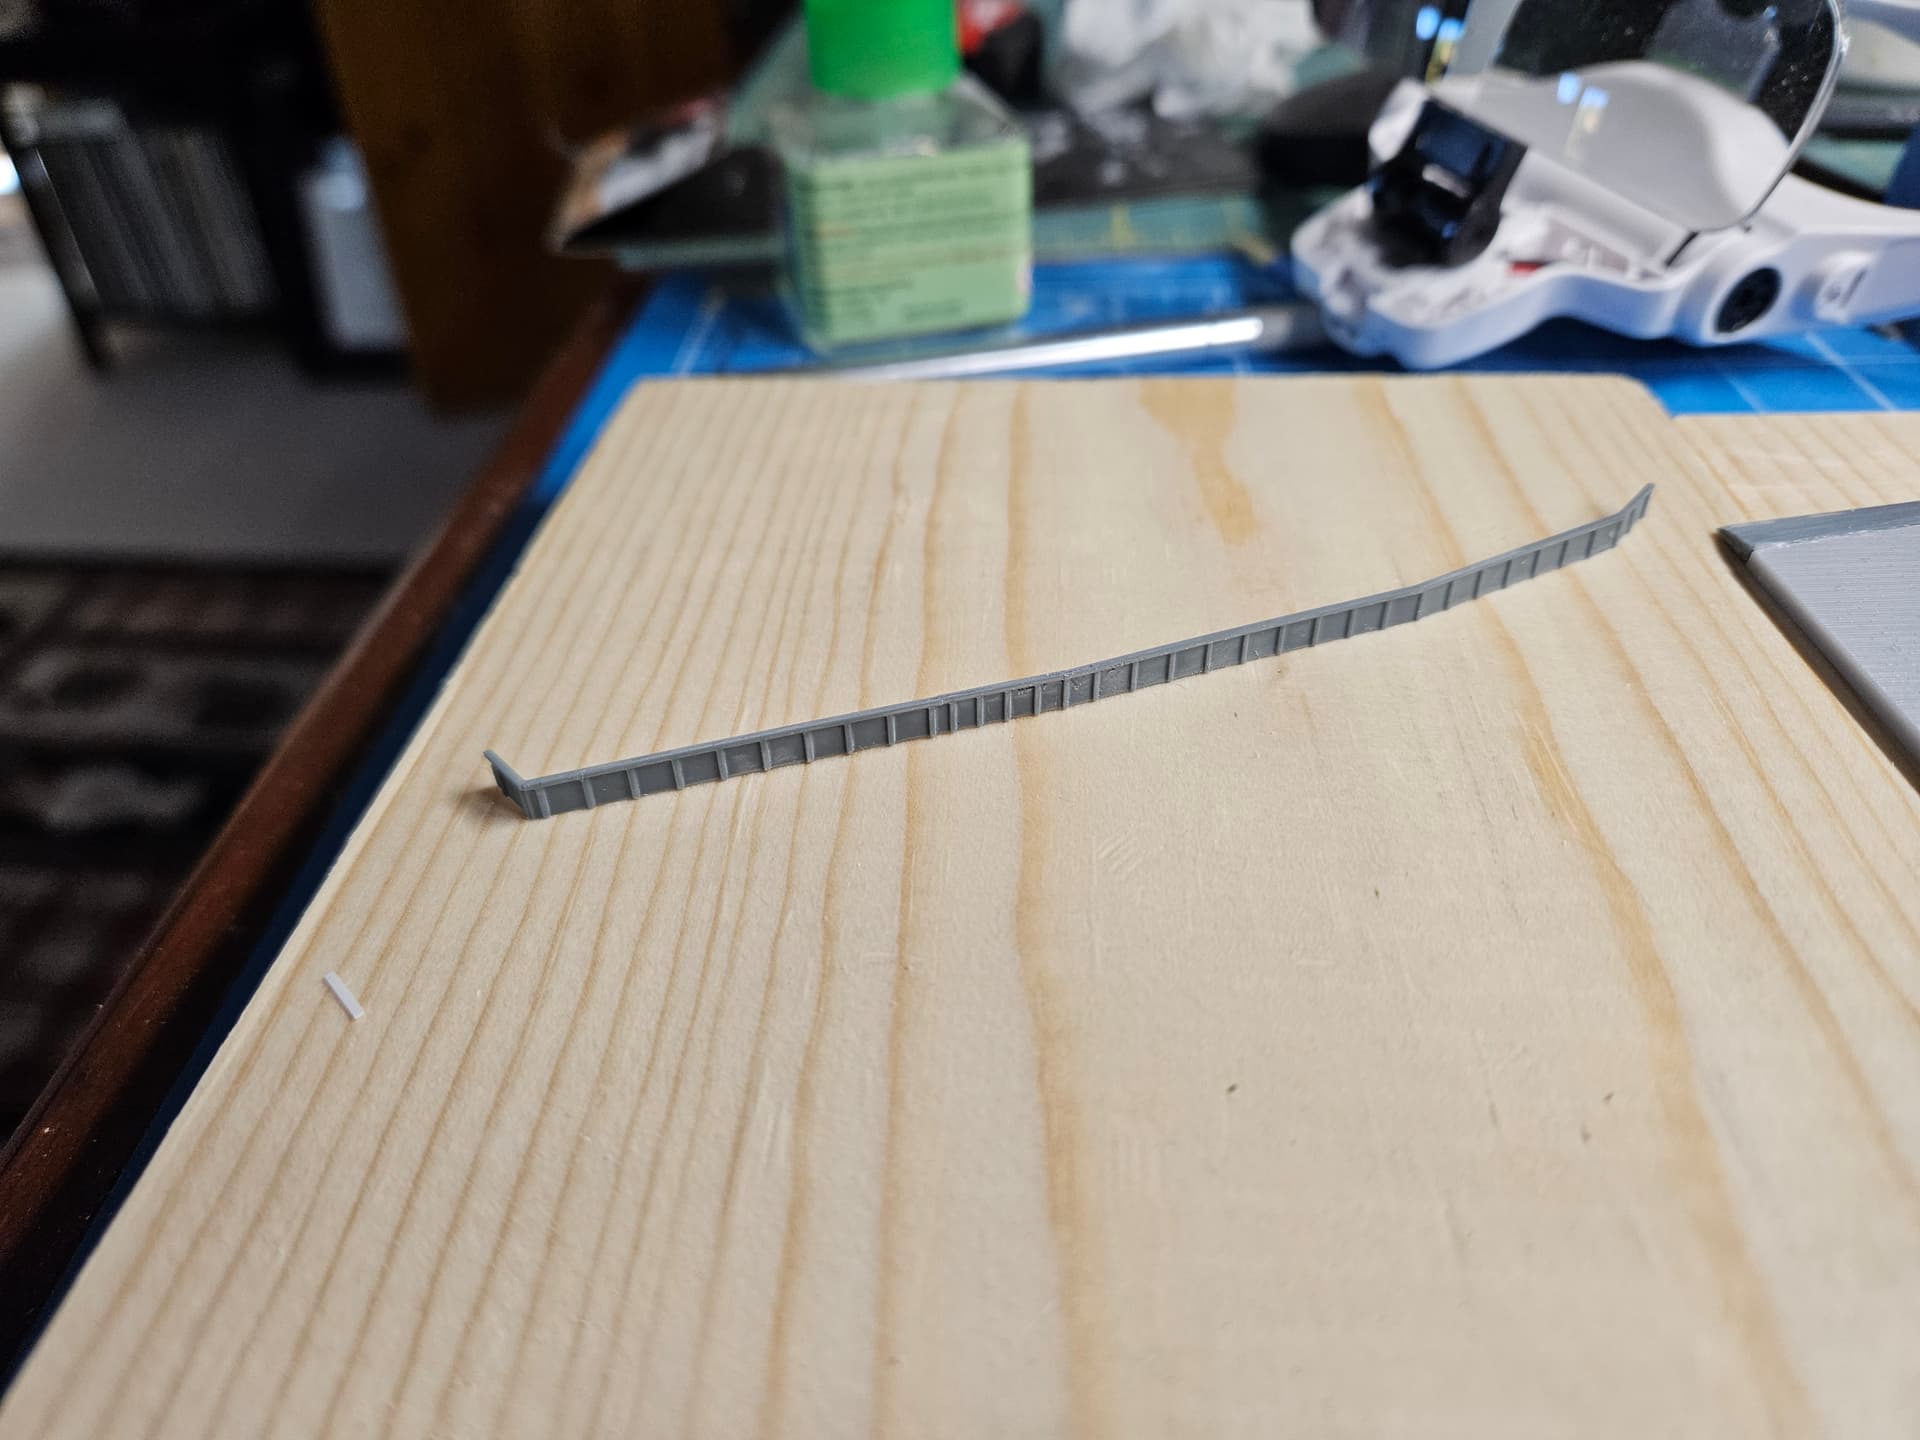
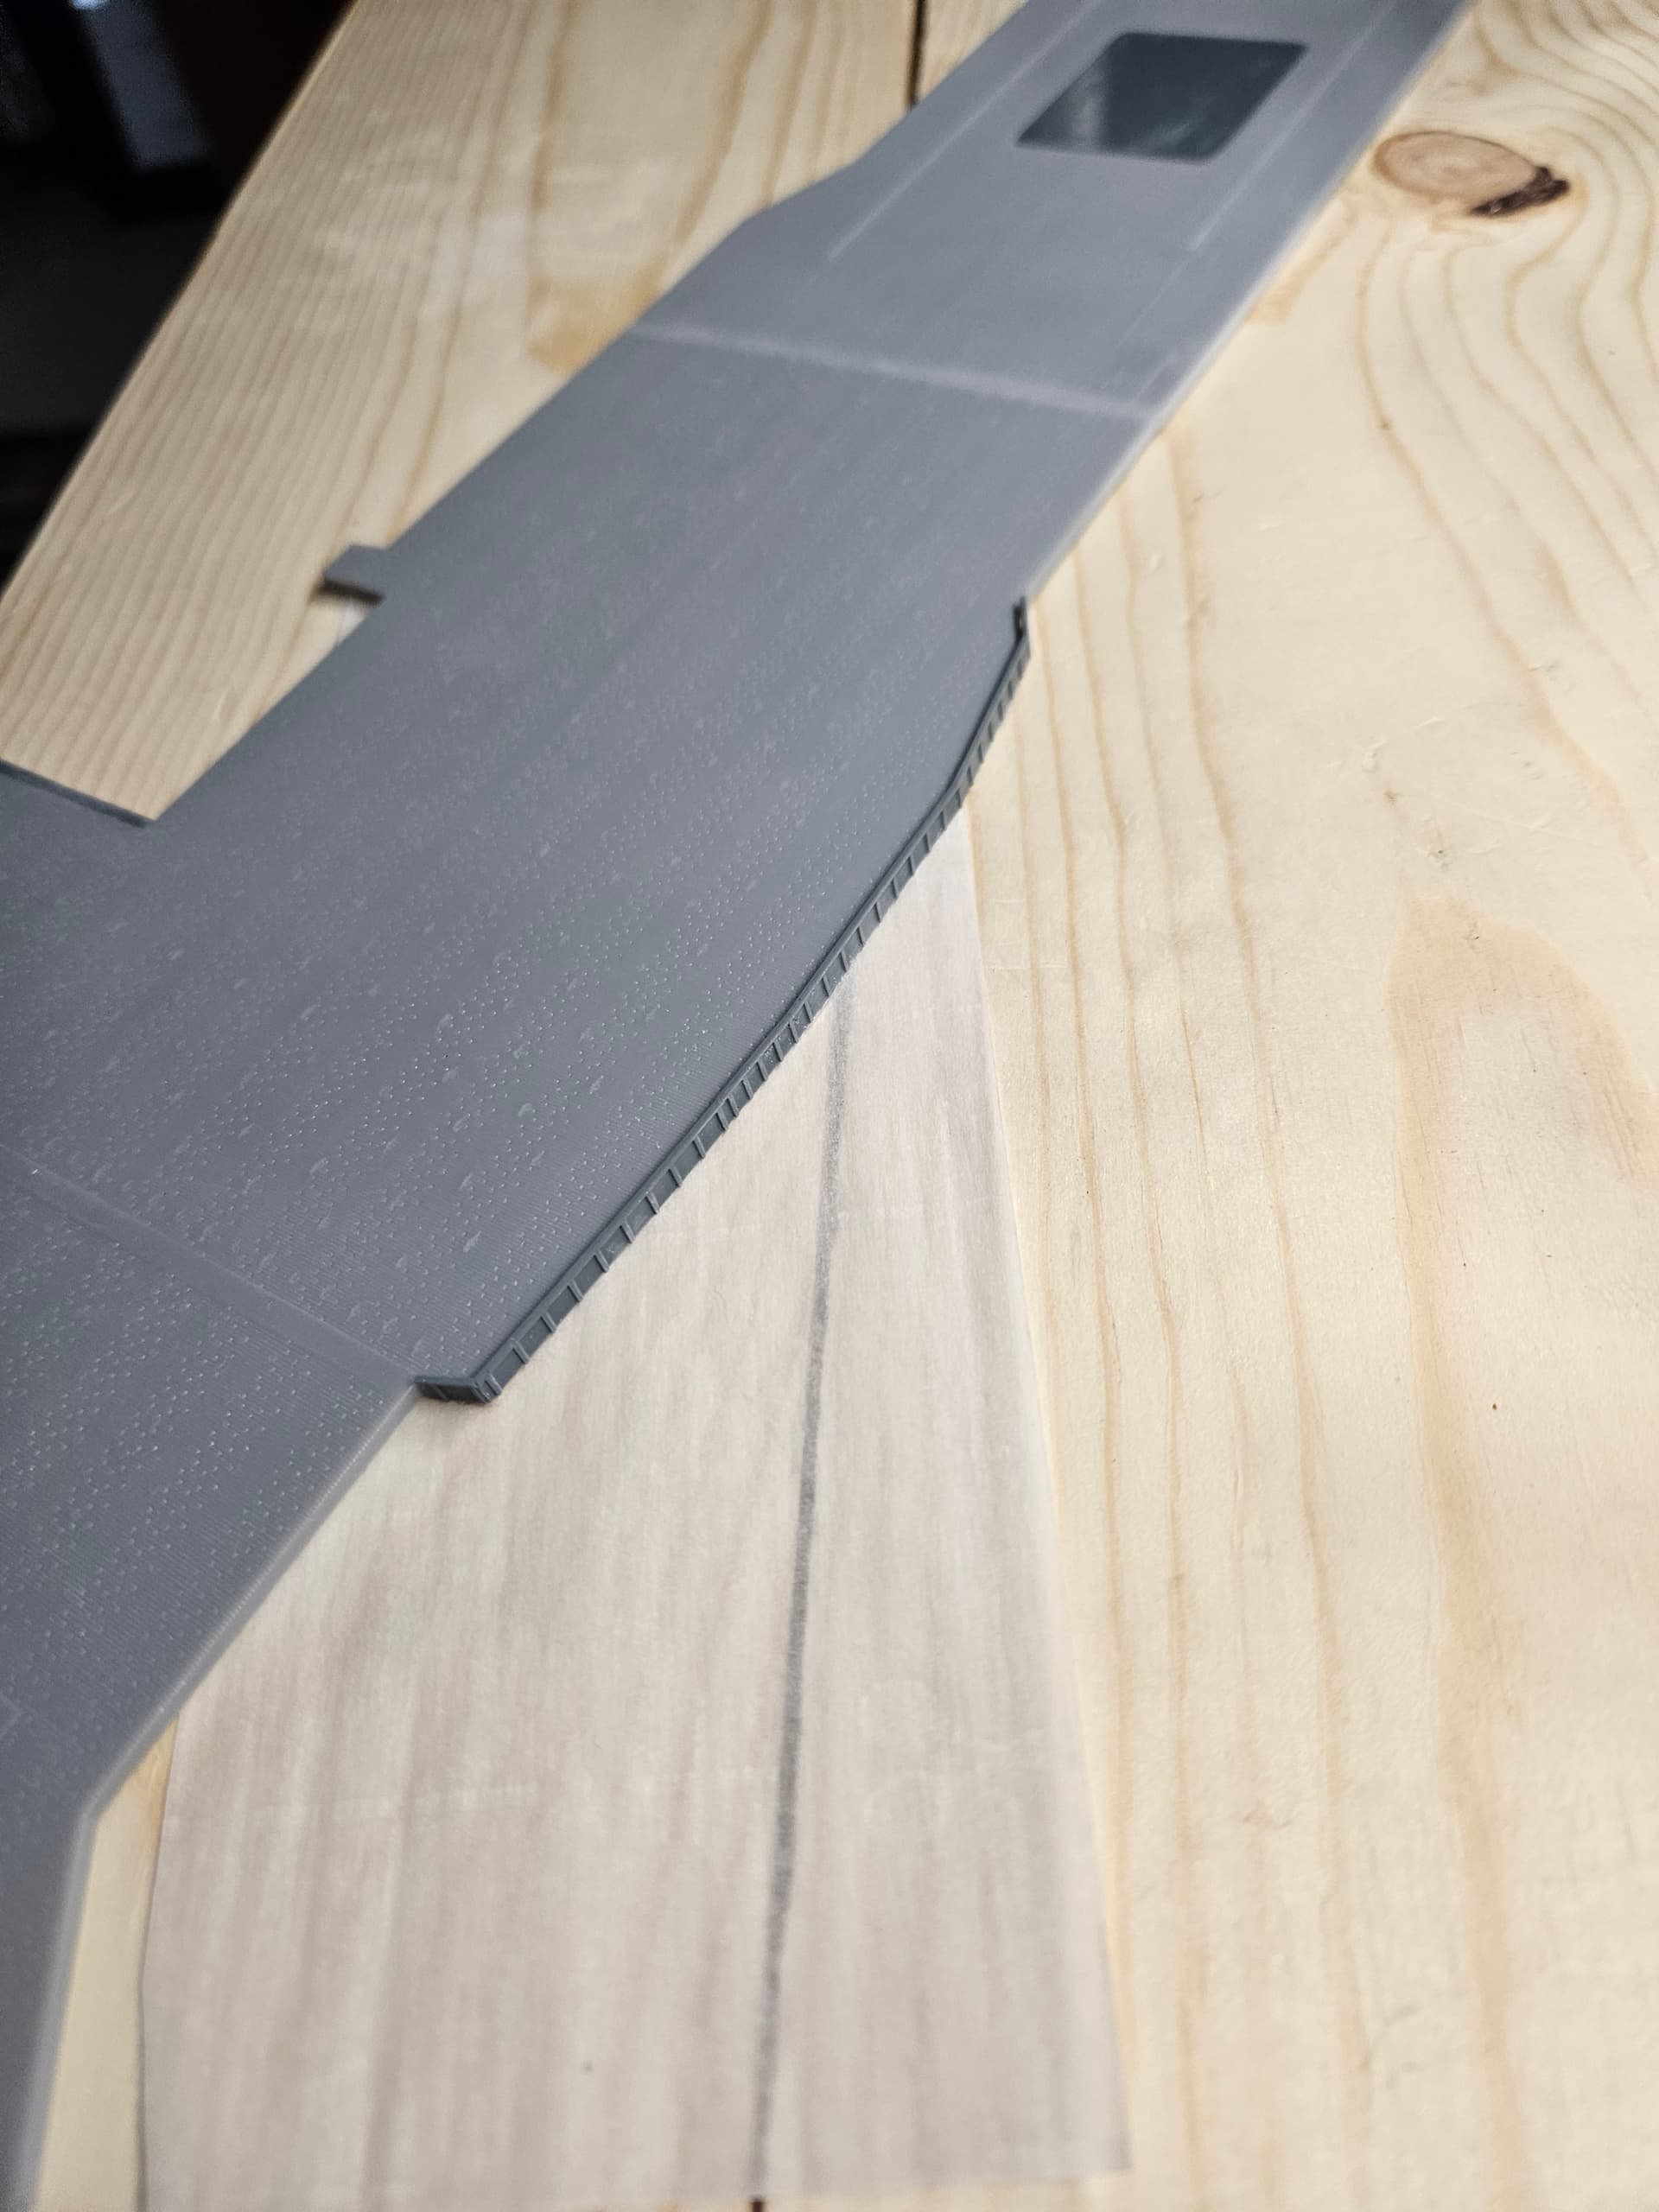
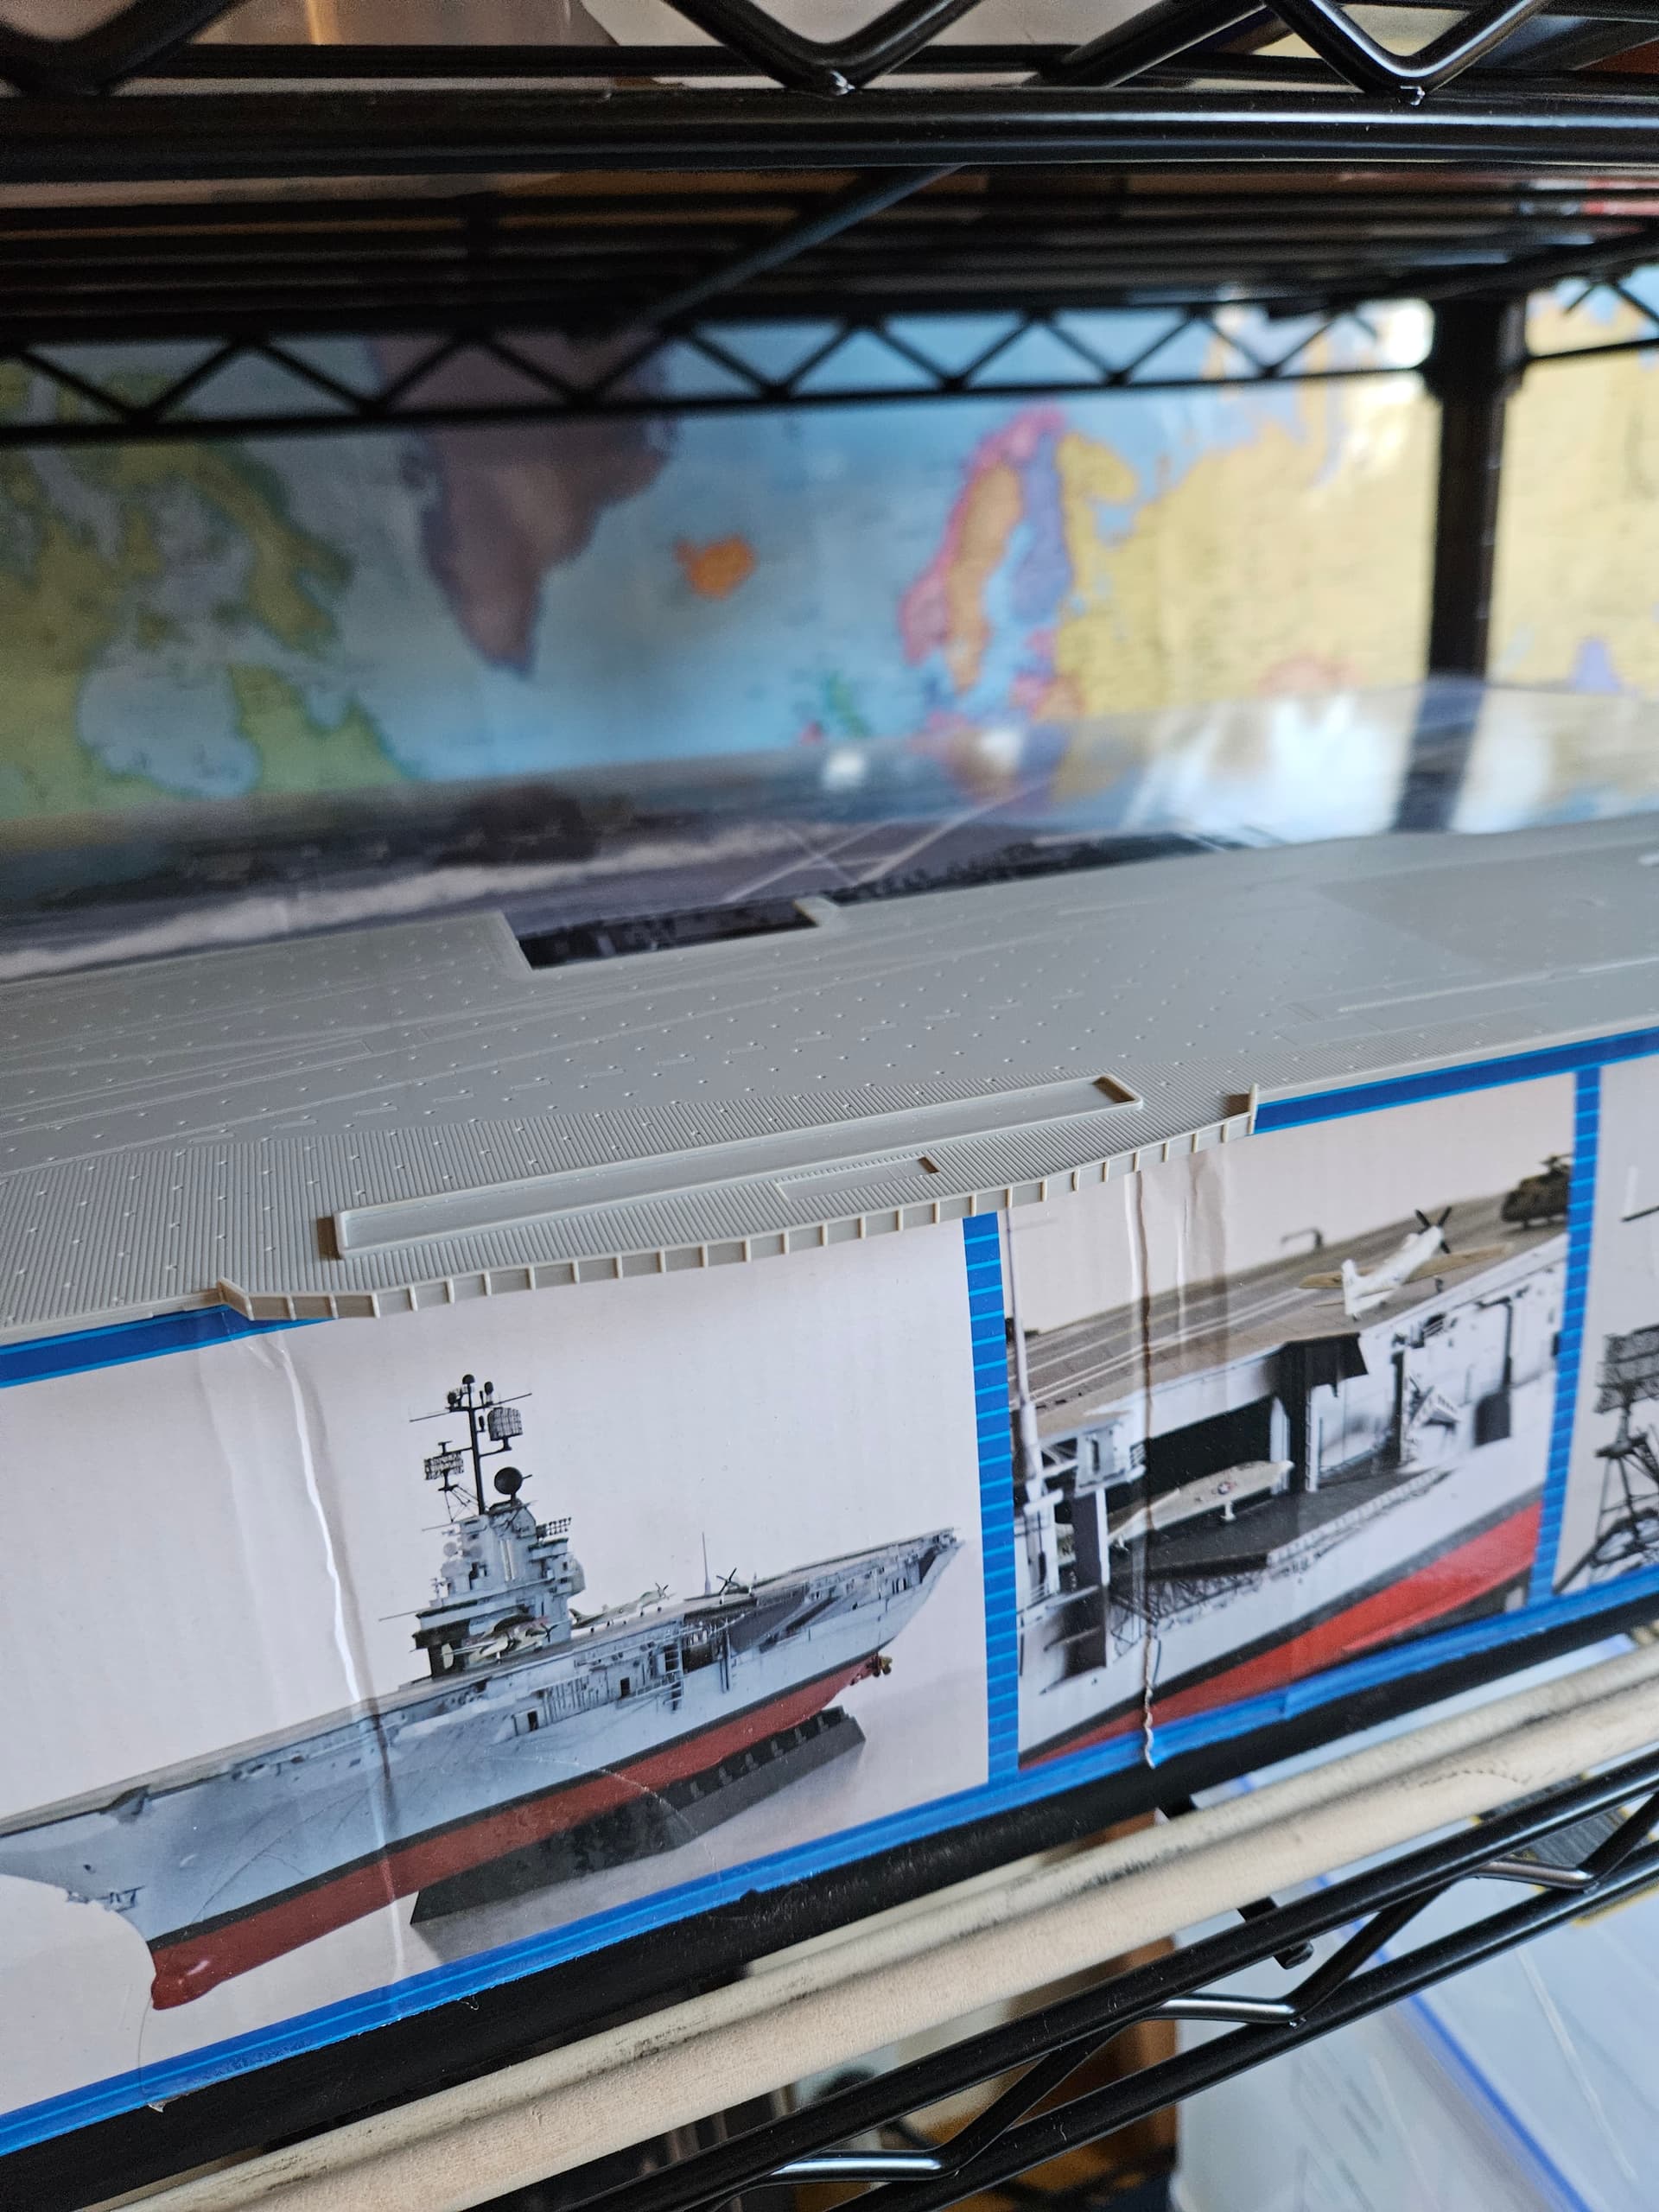
Outboard of the island, there is a ribbed mini-bulkhead that follows the contour of the flight deck in that area. This is instead of a typical railing, most likely because that’s where flight deck tractors would sometimes be stored. In retrospect, I probably should have just included this on the original 3D print of the flight deck, but I put together my own design of it in Blender and 3D printed it myself. It turned out pretty well IMO:
Here it is mounted on my flight deck, along with a comparison of the kit version. I am a huge fan of super glue accelerator, as it makes attaching a piece like this so easy:
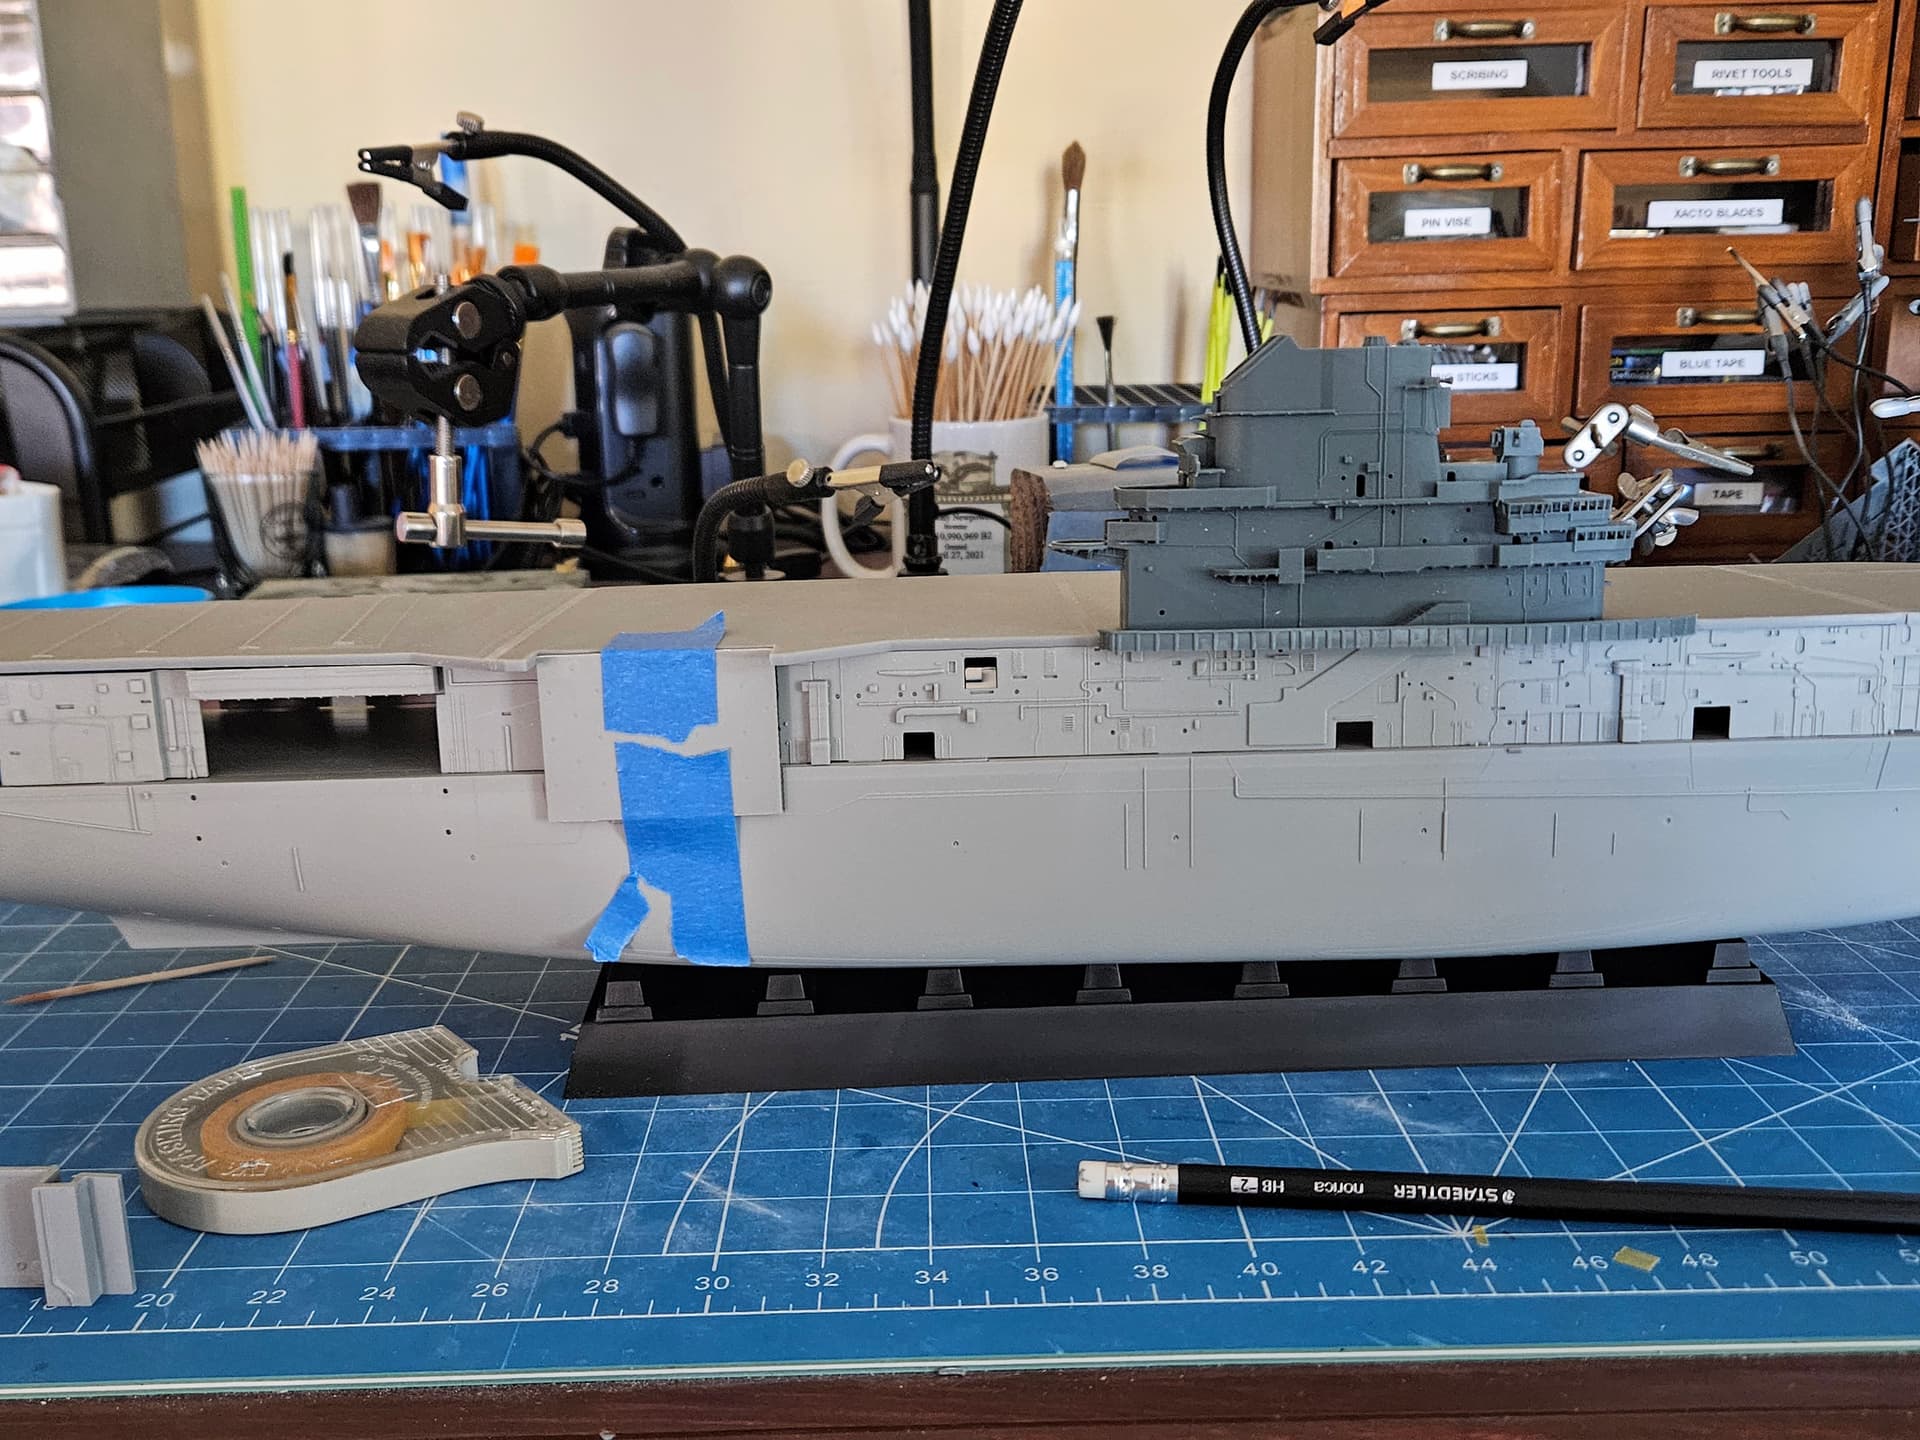
I did some dry-fitting today and identified the bulkheads that will need to be cut/replaced to accommodate moving the #3 elevator to its proper spot forward of its location on the Intrepid. I taped the elevator against the side of the ship to get the dimensions marked for where I will have to cut the bulkheads. I will cut out the kit opening on the hangar deck and move that forward.