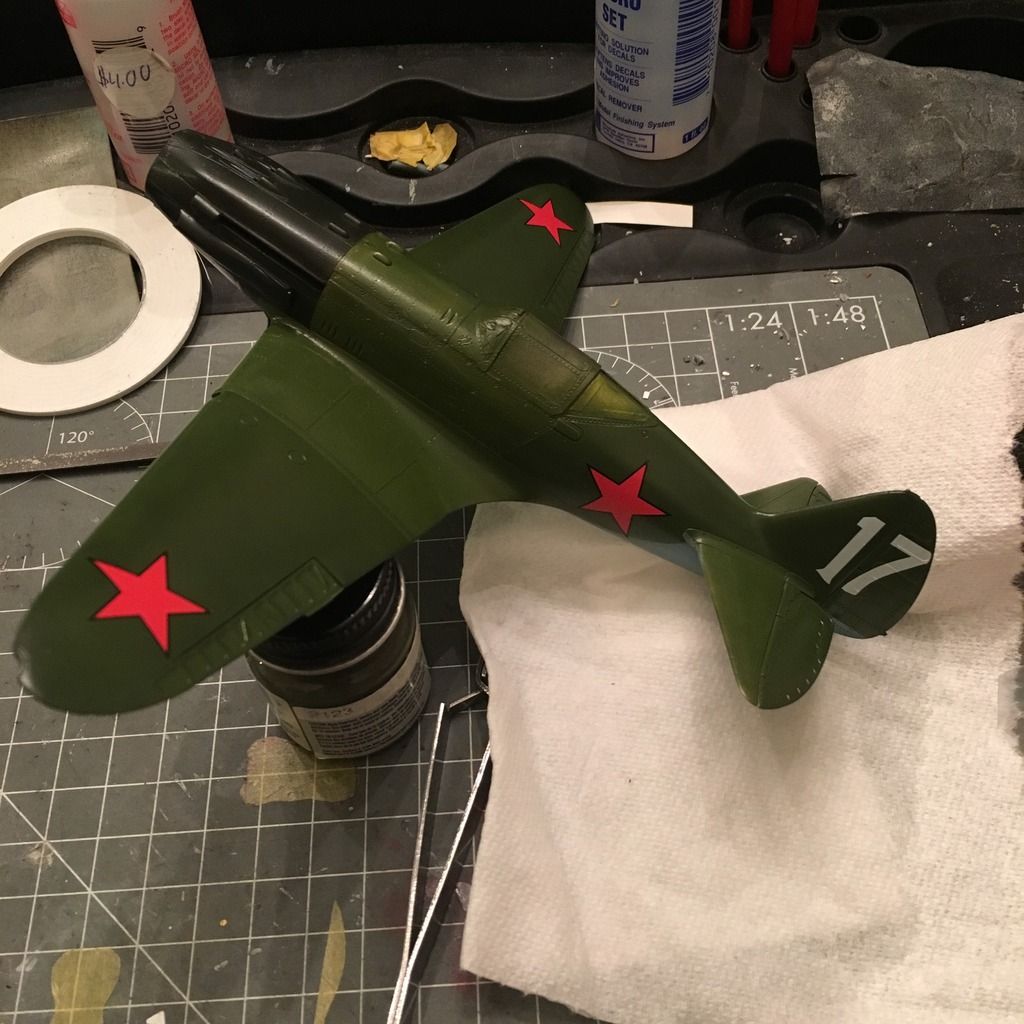
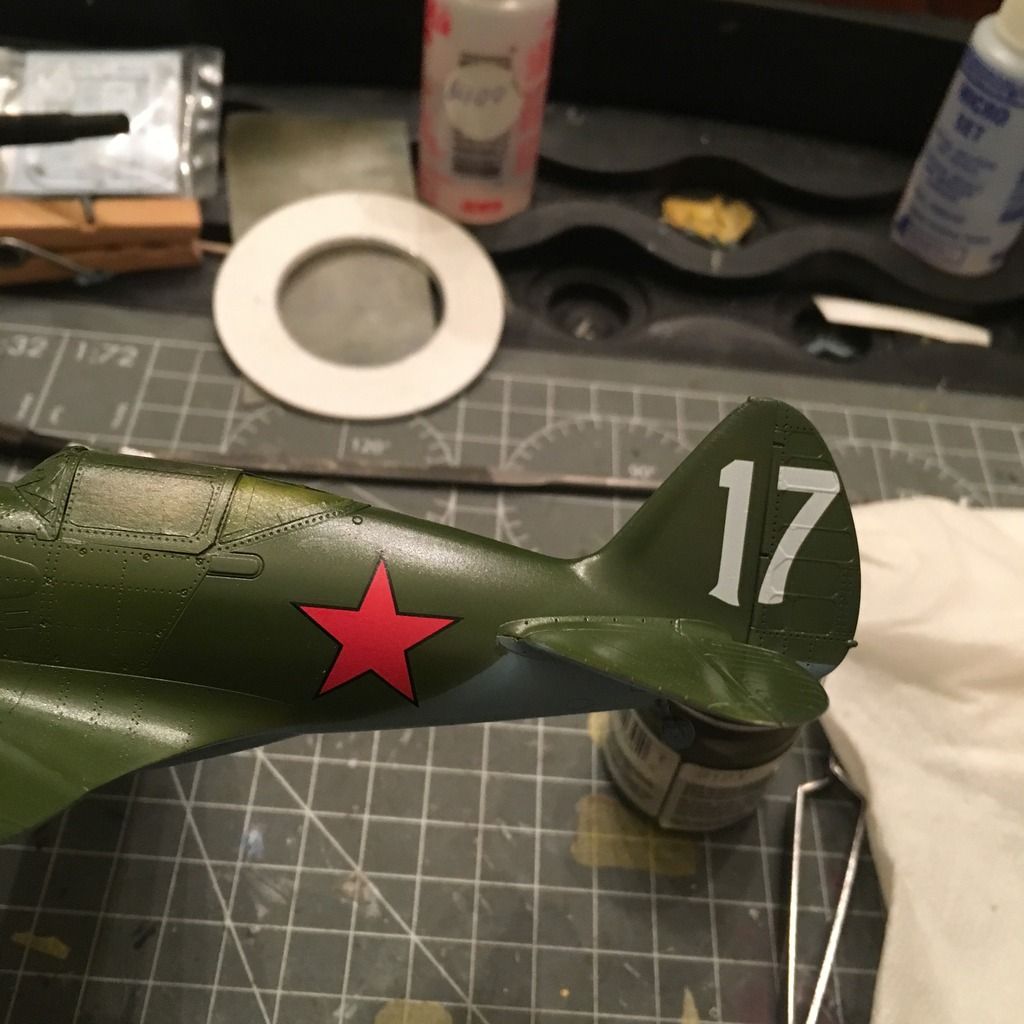
Completed: 1/48 Trumpeter MiG-3 Early

Hi all,

After my last builds, I fell into a bit of a modelling slump, and real life got in the way of my having more than my lunch hour to be on here, so I ended up putzing around with a SPAD XIII and am now working on Trumpeter’s MiG-3, mainly because it seemed like it would be quick and fun, and it is!

The cockpit fell together easily, and I am not throwing any aftermarket at this one, especially since I read somewhere that you see them without harnesses from time to time, and that (plus an instrument panel) is really all that this one falls short on.
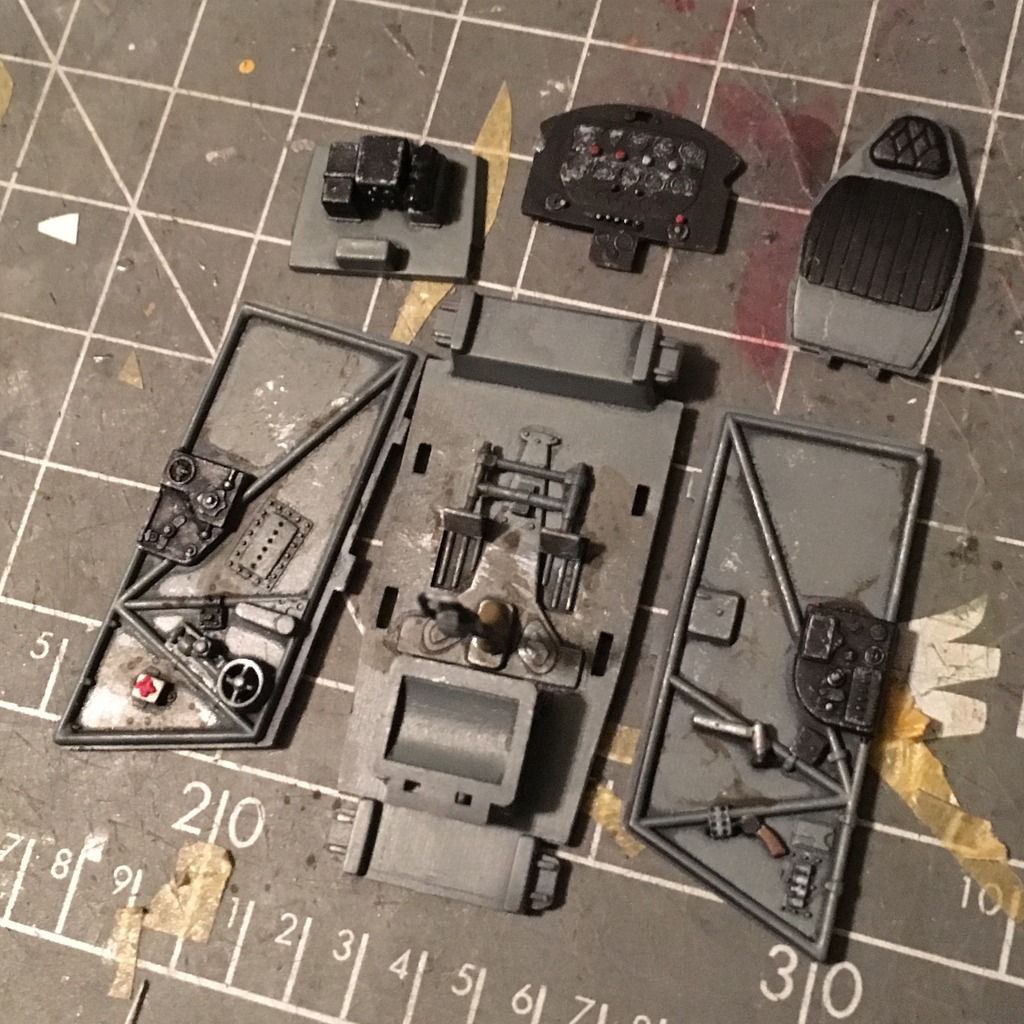
I painted the interior with Mr. Paint Blue Grey (or maybe it was Grey Blue, I can’t remember, and yes they are different colors). I then used a Vallejo grey wash on it, did some dry brushing and dirtied it up with a Flory Dark Dirt wash.

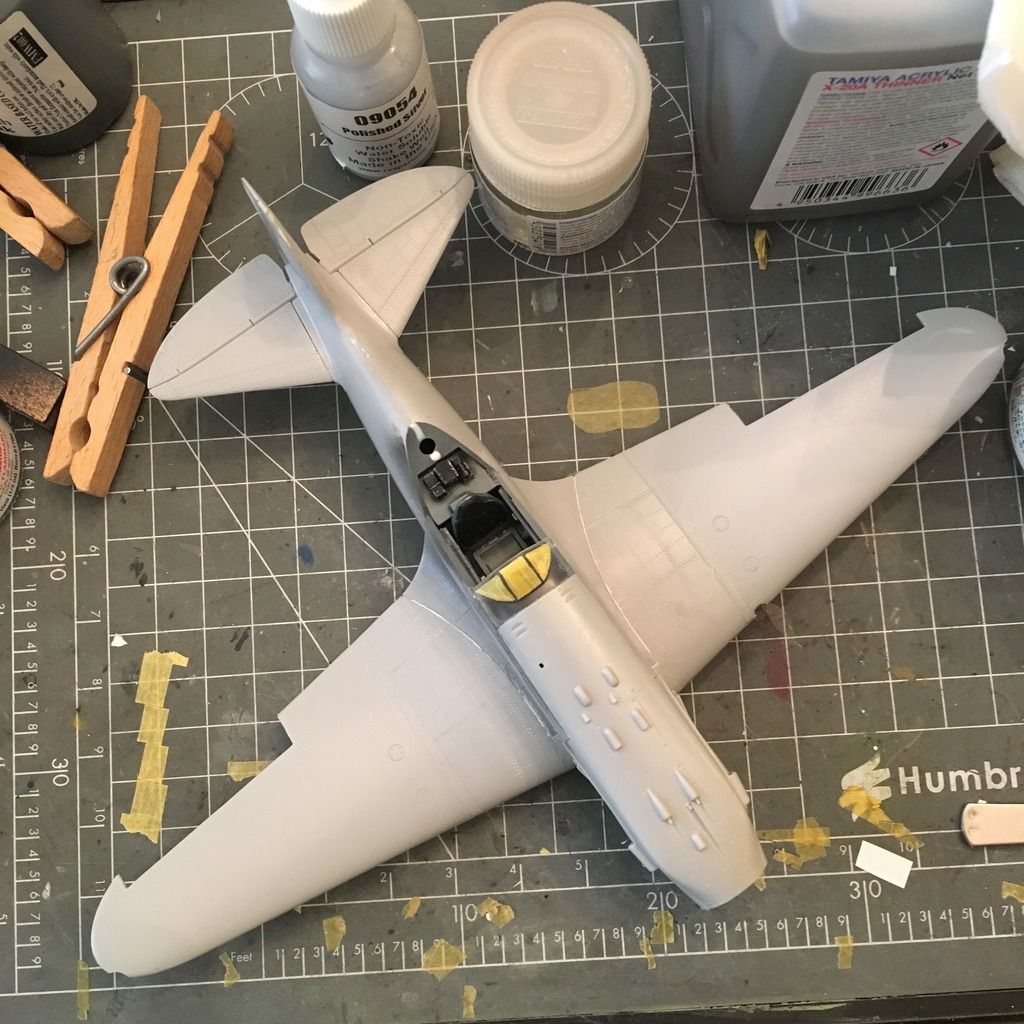
Next up was addressing a couple of issues in the kit. The wing air intakes look great when you fit them to the assembled wings, but they leave a significant gap upon mating to the fuselage. The wings also have a small, rectangular-shaped indentation where they meet the fuselage, so I cut more sheet styrene to fit and then filed it down to size.

That takes me here, and with those two small modifications, I was able to get the wing root seam to be a faint line instead of having two significant gaps to fill. As I am terrible at filling and hate it, this makes me happy.
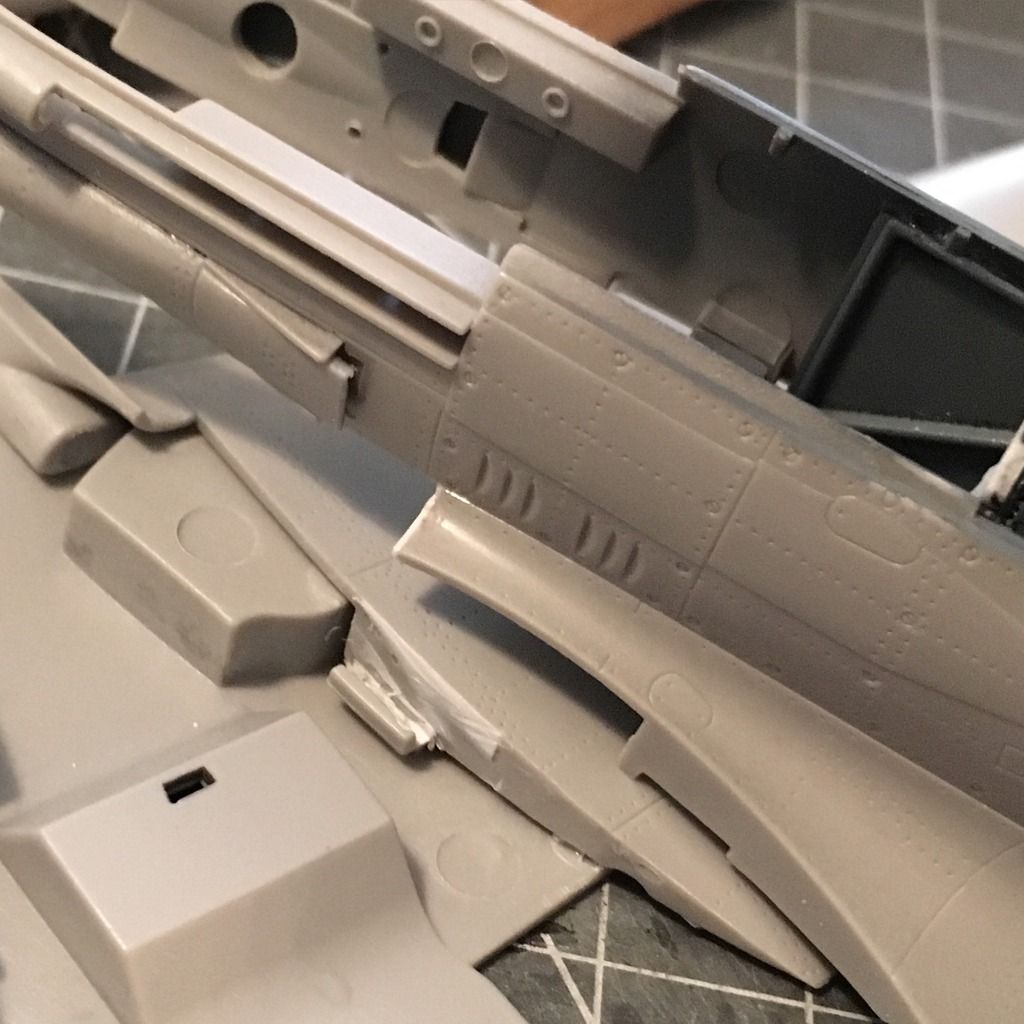
Trumpeter did something with this kit that I wish more manufacturers would do and molded the front of the plane in four sections (each fuselage half has 1/4 of the engine covering, and there are single pieces for the upper and lower cowlings that fit along actual panel lines, negating any need to fill). The belly scoop housing is also molded separately and almost completely covers the seam where the rear of the lower wing meets the fuselage. Excellent engineering!

The fuselage only has seams behind the cockpit and the wings, and they were easy to fill. The only really questionable thing I’ve come across so far is the flimsy tailwheel, which must be installed when you close the fuselage. I am sure I am going to break it before all is said and done.

Anyway, I can’t wait to finish assembly and get this thing into paint.

-BD-
Hey BD,

I built this kit a little over a year ago, nice kit, and I see you found the only trip up, the wing roots.

The kit will slam together after that so you will be painting soon.

Looking great Brandon. I always kind of liked the MIG-3. I look forward to your progress.

Thanks, Modelcrazy and lawdog! And yeah, I may have spent some time on War Thunder in the past month or so…

Anyway, I got the major parts of the build done yesterday and today at lunch. Everything fit together pretty nice after I got the sheet styrene pieces shaped and fitted. I used some Perfect Plastic Putty at the wing roots and a few of the other seams just to knock them down, but left seams visible as they are panel lines on the real thing.

Then I got the upper cowling on, with the weapons installed first, and was happy to see Trumpeter did my favorite thing with the windscreen and molded part of the cowling with it so seams are not so close to the “glass.”

I wont have much time over the weekend, so this will likely be boxed up until next week, but I’d like to get the rest of the canopy masked and the interior color sprayed so I can go straight to primer and paint next week.

-BD-

Brandon, that is some really fantastic work that you’re doing so far. Everything looks great, can’t wait to see the finished product.

Toshi

I too built the Trumpy Mig-3, just the late version. Probably the same basic kit. I enjoyed the build and did it very fast and had very few issues. I do remember having to use a vise to close the pit tightly, but other than that it was a pleasant little kit to build. Nice to see an older Soviet bird again.

BK

Really cool BD, always nice to see something different around here.

Looking great Brandon…

Thanks, all! And yeah, Brandon, I think it is a slightly different kit, but almost entirely the same. It would be interesting to know the differences. I think the early version kit technically has late exhaust fairings, but I don’t feel like changing that. Nice to build something out of the box for a change.

I got some work done on it - mostly just paint prep.

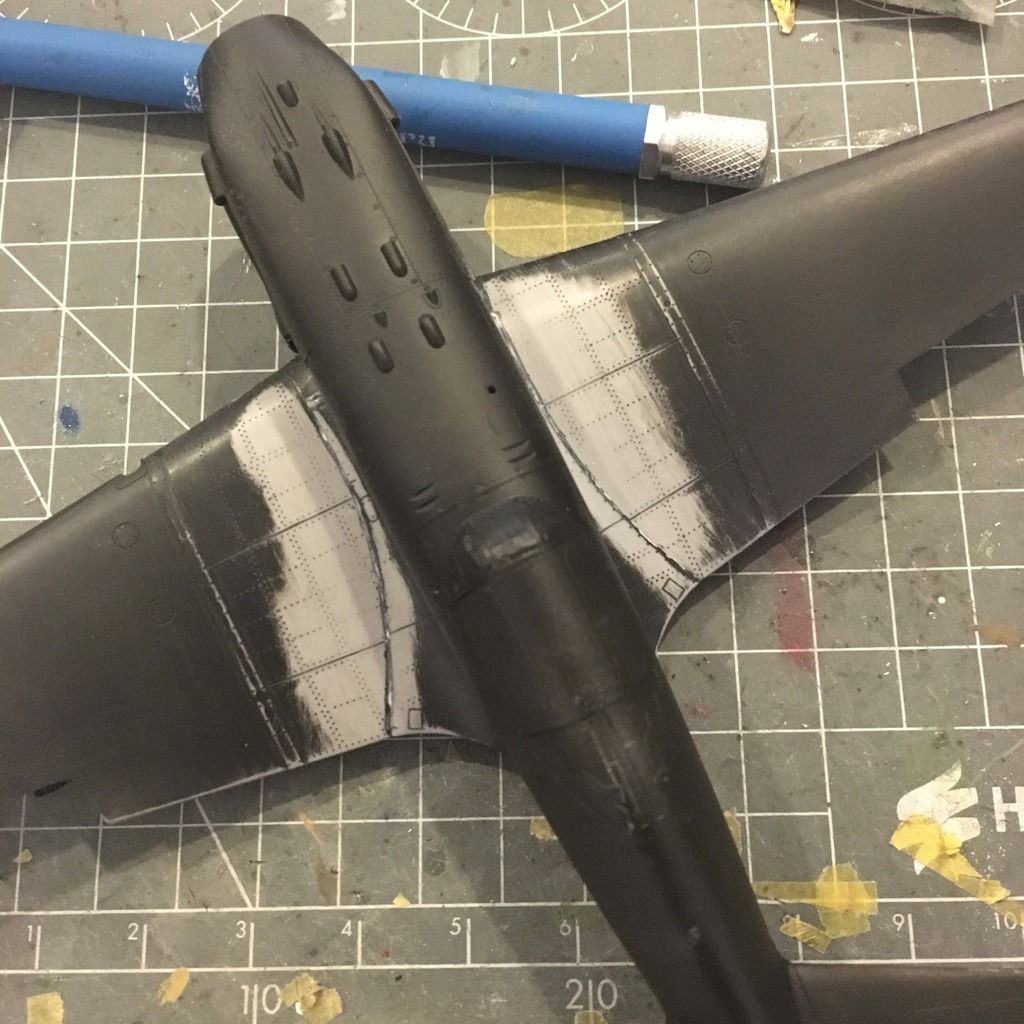
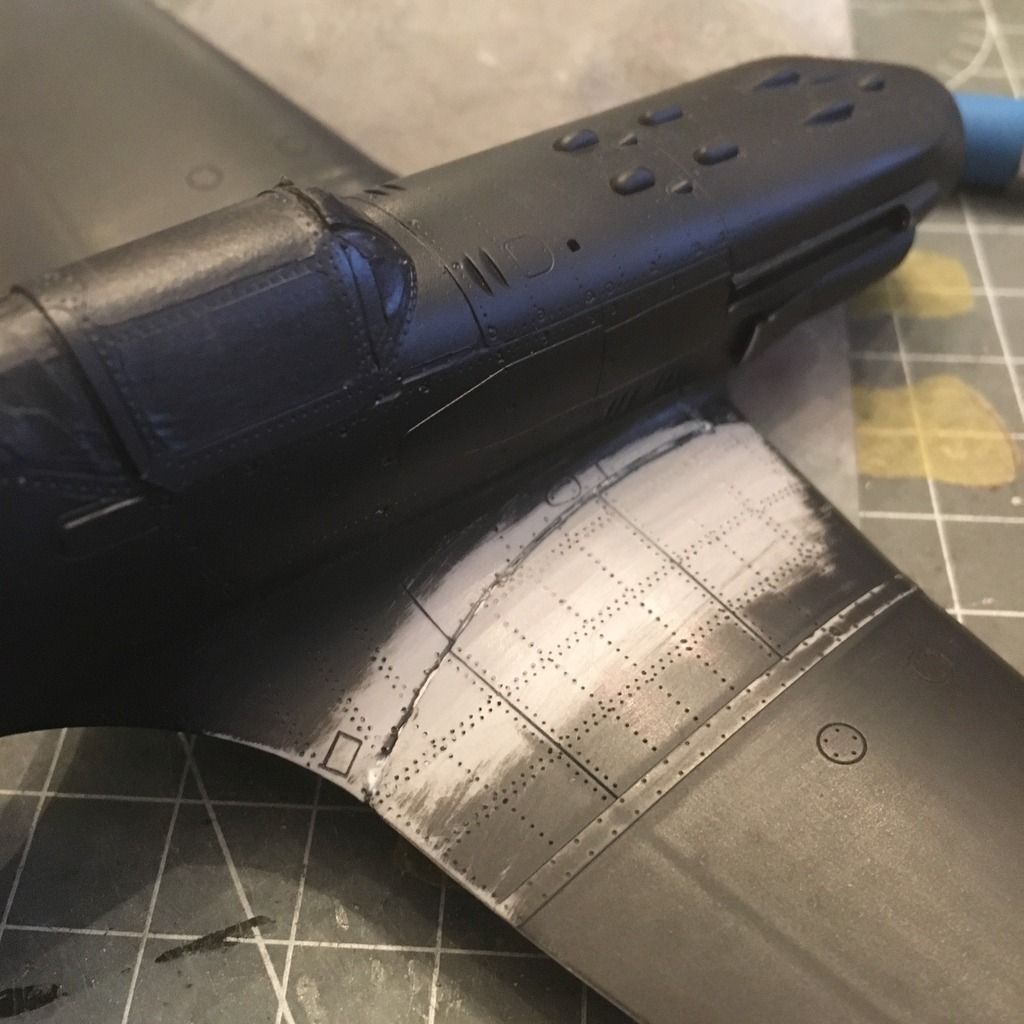
Primer coat went down, and the roots needed a little work, so I fixed those, as you can see below.

I actually sanded away some of theprominent rivet detail, so I went to work with my new riveting tool and did it manually. A couple of them are too deep, but I’m hoping that paint, a little sanding and weathering will even them out.

I got another coat of primer on it last night, and it looks mostly good. I missed a line of rivets and went back and did those, so hopefully with one more pass of primer it’ll be ready for paint this weekend. I think I’m going to try using a bare metal base for the metal parts and weathering the paint a bit more than I have in the past. We will see if/how I like it.

-BD-

Yep, it’s a great little kit except for that PIA wing seam.

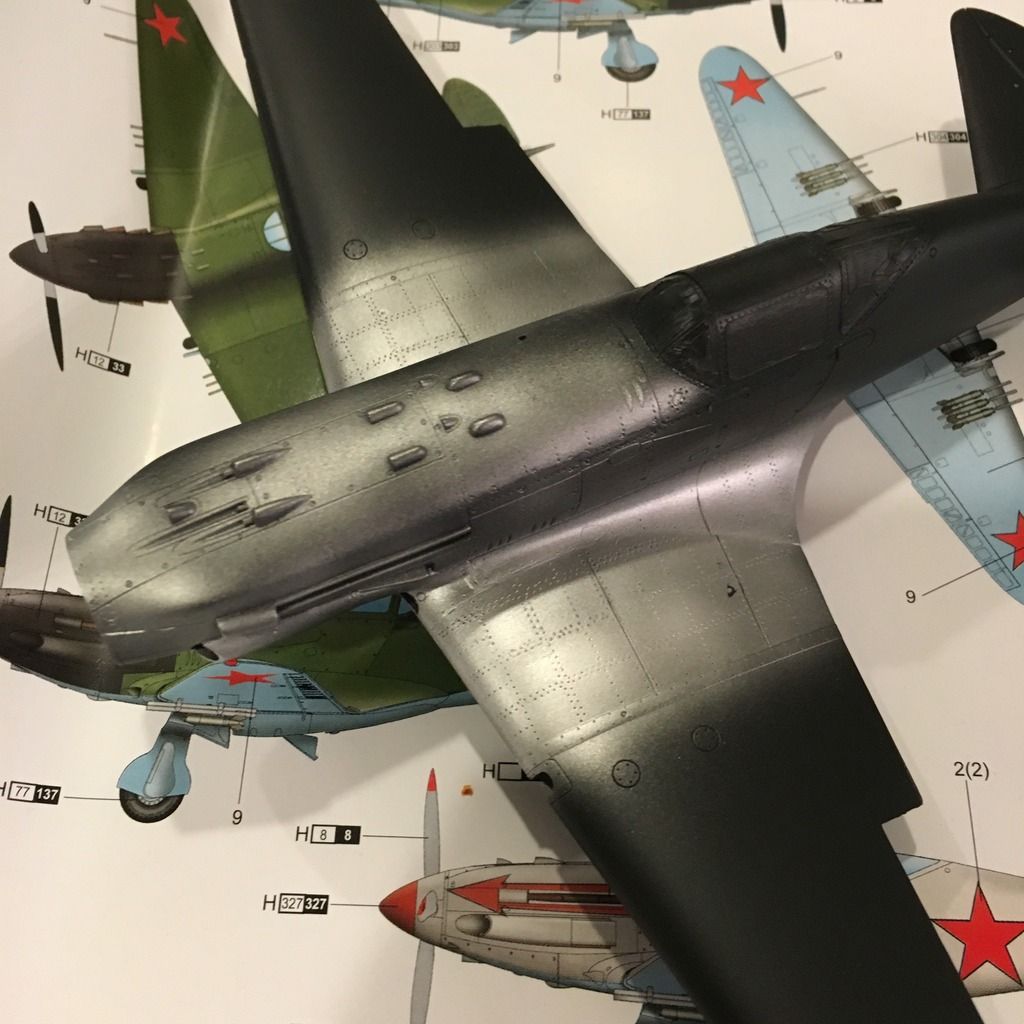
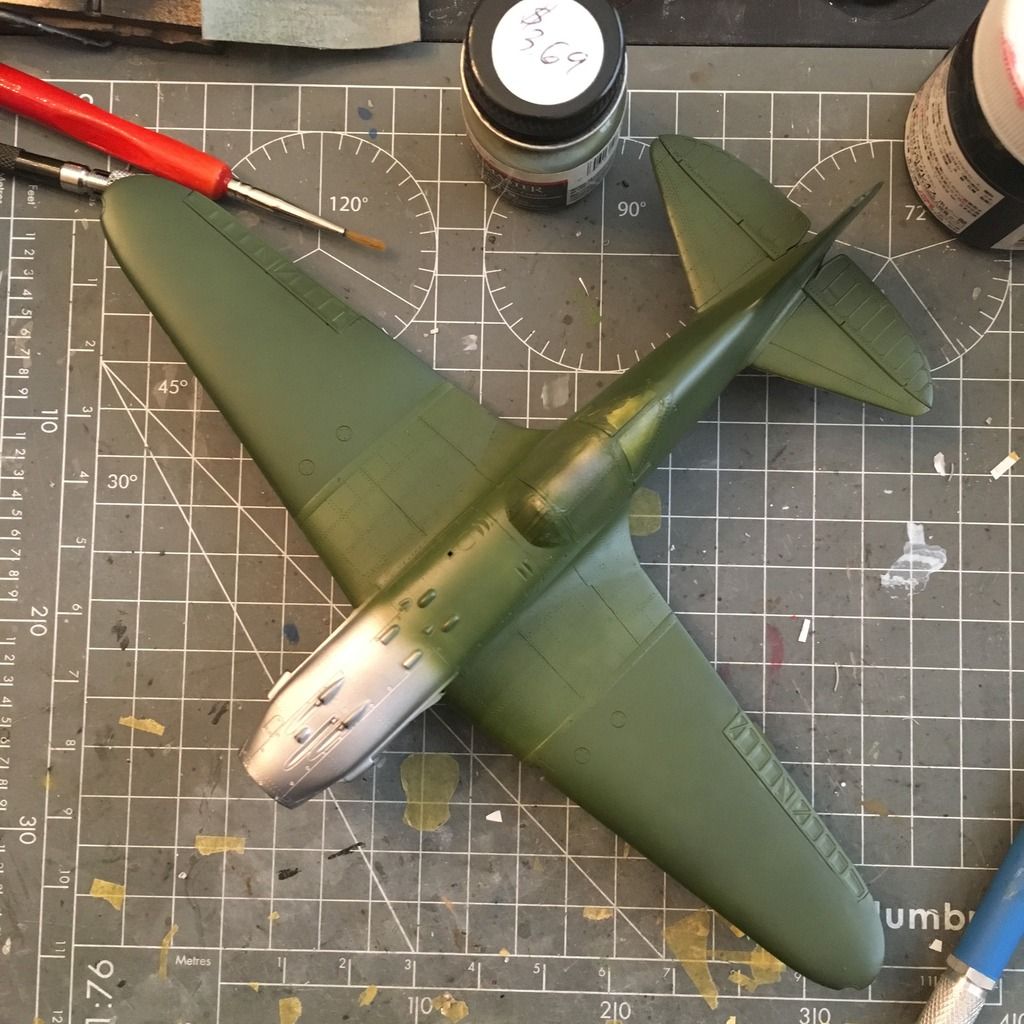
I spent the past few days at lunch getting some paint on the MiG-3. After priming in Mr. Surfacer 1500 Black, I shot all the metal parts with Alclad Polished Aluminum (and later cleaned it up by masking and shooting crisper lines of Mr. Surfacer).

Why?

Because I read that the MiG-3 tended to have different shades on wooden parts vs. metal parts, possibly due to being assembled at different places (though I have a hunch it was more likely that they sprayed thin coats of paint and the materials just showed up differently. But I really have no idea). Anyway, I wanted tome subtle tonal variation to show this off.

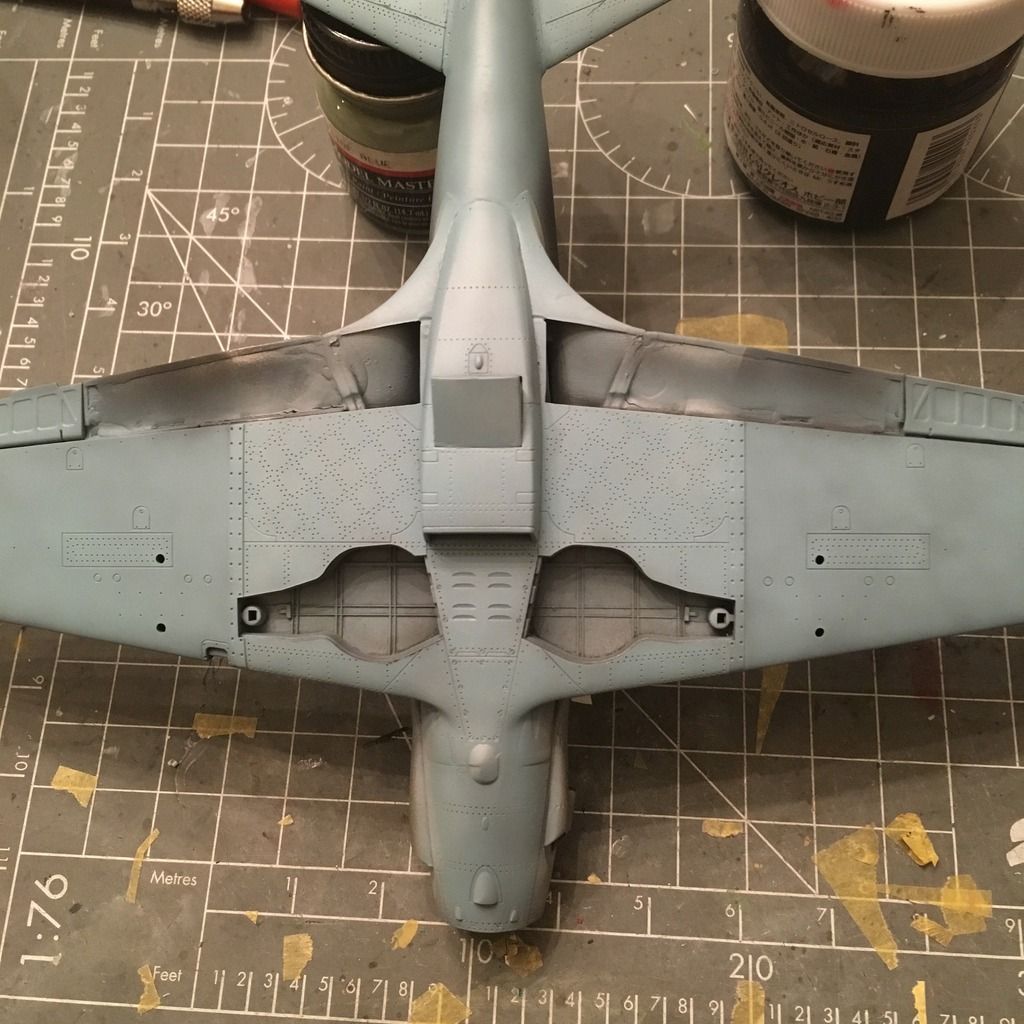
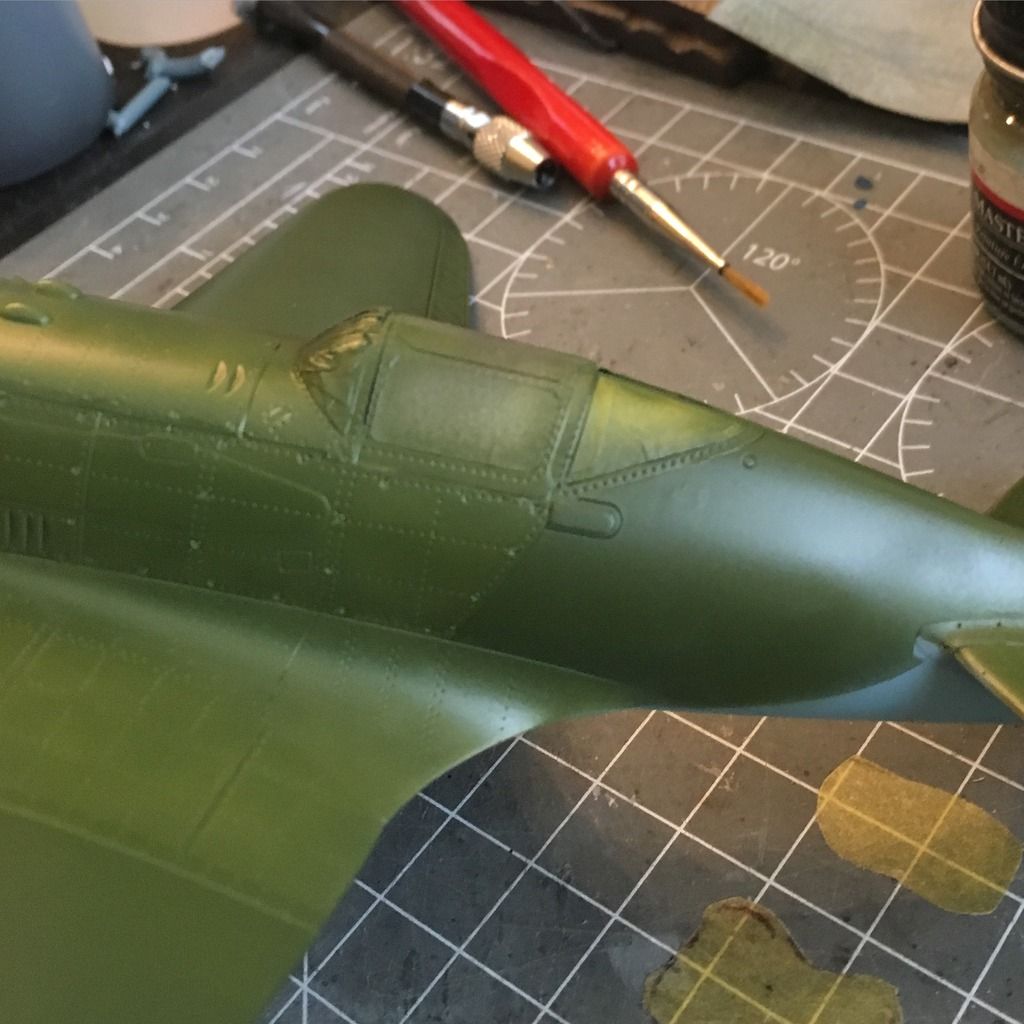
Once that was all dry, I did the underside in Mr. Paint Gray-Blue. It’s an AMT code from later aircraft, but it’s close enough, and may have been used on the MiG-3 for all I know. I did my standard method of mottling it with a thin sprayover (Mr. Paint paints are great for this and I love how easy they are to use since they’re pre-thinned).

On the underside, it’s pretty subtle, and also where I was testing the technique. I like how it came out, since I imagine it would be pretty close, especially after some operational use.

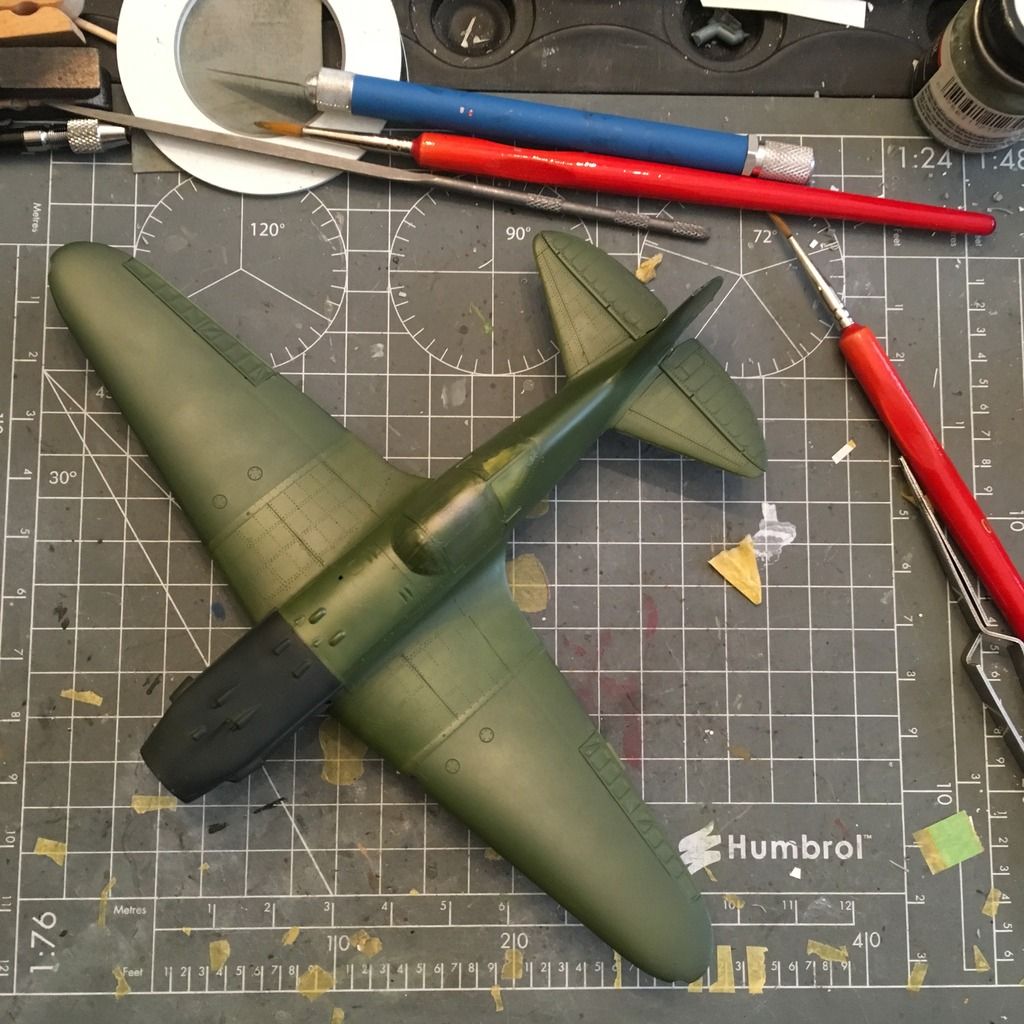
I repeated the process on the topside.

In the above image, you can see the variation. I left the cowl unfinished because it will be painted black.

ANd there’s the demarcation line on the fuselage. I did the same with the horizontal stabilizers, and for the fabric control surfaces, I sprayed them heavily so they will (maybe) appear lighter than the rest of the surface.

I hope to get the cowling done today at lunch, shoot a clear before dinner tonight and maybe, just maybe, get decals on it this evening.

-BD-

D’oh! Looks like I need a tad bit of touching up around the underside root of the horizontal stabilizer.

-BD-

Looks like you whipped that wing seam into submission. Are you going to pose the flaps down?

Thanks, ModelCrazy.

Yes, I intend to pose them down. Maybe partly down, as I don’t have parts forthe innards, but with the way it will sit, the inside basically won’t be seen, so it’s not bothering me too much. I told myself that this one is strictly out of the box so I won’t stress over it too much [:D]

-BD-

If you don’t mide here are two small pics of the one I did, Black 7.

Yeah, you really can’t see too much of the flaps.

I don’t mind at all. That’s a nice looking one. Thanks for sharing. And yeah, thanks for confirming what I suspected about the flaps.

-BD-

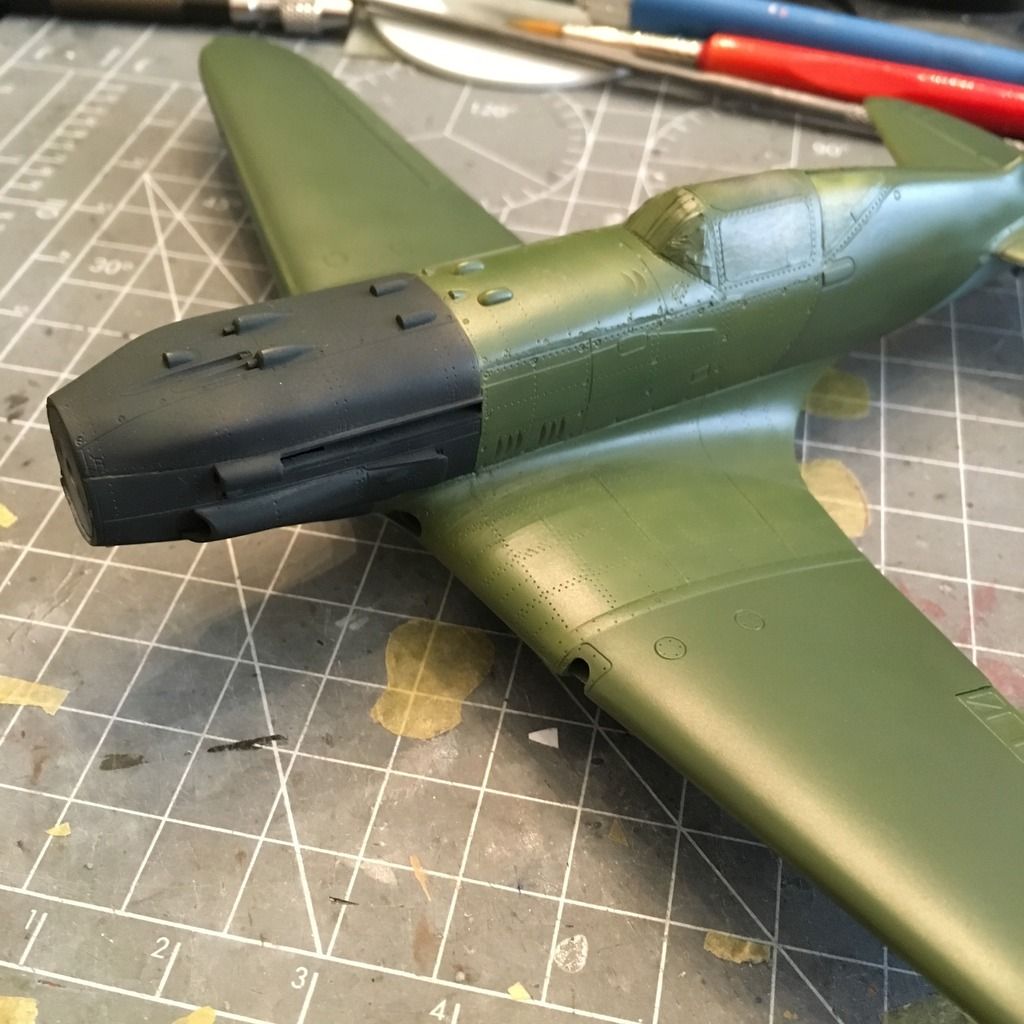
Well, I went home at lunch and got the black done on the cowling. I’ve read that it either faded quickly or may have had green paint in it or been painted really thin over the green, so I mottled the bare aluminum with Tamiya Flat Black and then used a heavily thinned coat of Tamiya Black Green. I needed some touching up around the base, but that was easily done, and I also repainted the bays for the flaps on the underside since there was heavy overspray from the blue, and touched up the root of the port horizontal stabilizer. It’ll get a coat of clear after work and decals (all 8 of them!) tonight.

Thanks for looking.

-BD-

And now the decals are on. I thought there were 8, but Trumpeter actually split the “17” into two individual decals for each side, which is nice since it prevents excess carrier film having to sink into the rudder gap, but it would have been nice if they weren’t shown as a single decal on theinstructions. I thought I’d torn it at first!

The decals were very nice and thin, and they snugged down into the surface detail on the tail very well. One thing I like about this kit is all markings for all aircraft are provided, so there are plenty of spares.

-BD-

Very nice paint work Brandon.

Chris

Man, this is looking real good. Outstanding paint job and I love the subtle mottleing. I’m going to attempt your technique on my current F-111E build .

What brand of rivet tool did you use, because it looks very realsitic ?