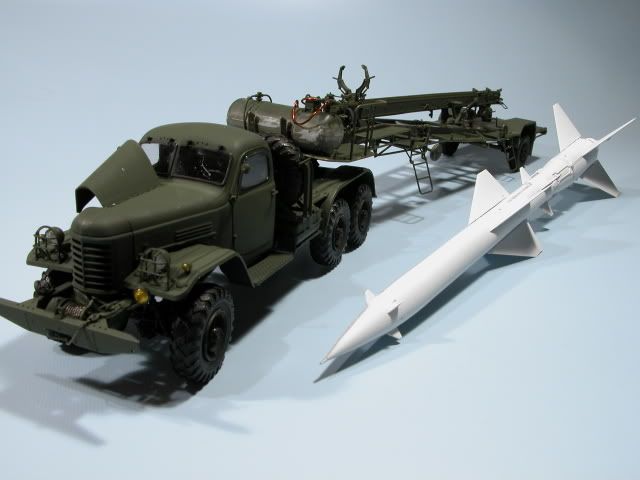
I recently bougth the Trumpeter 1/35 HQ-2 missile transporter with ZIL-157 truck. Here is a picture of the kit:
In the next days, I’ll try to post pictures and story of that build.
First thing to mention is the incredible amount of parts. Trumpeter did a great job at detailing that vehicle. Everything is there, the motor, transmission drive shafts, a complete interior for the ZIL-157 truck. (That zil-157 truck can be bought separately as a complete kit) The trailer for the missile has excellent details also. Two small flexible springs are supplied to simulate ribbed hoses and it look very realistic.
Now, after analysing the instructions, I decided to pre-paint some parts to make sure I would not have difficulties to paint them once on the complete assembly. There is a lot of interstices and hidden spaces that could be difficult to reach with the airbrush once completely assembled.
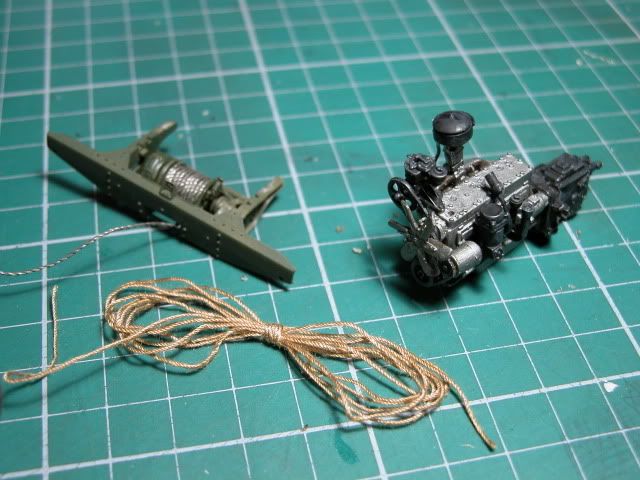
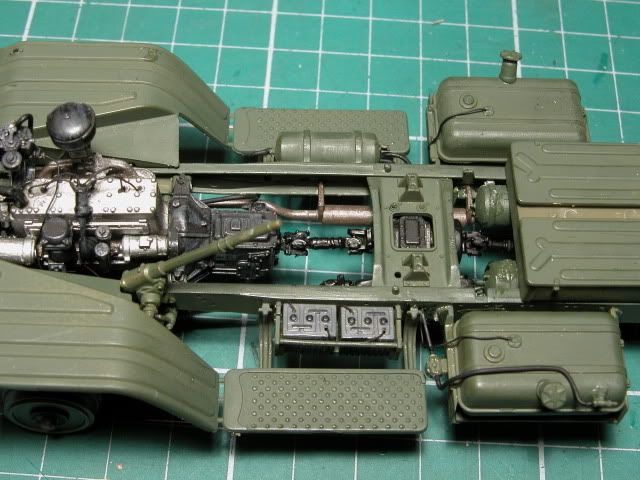
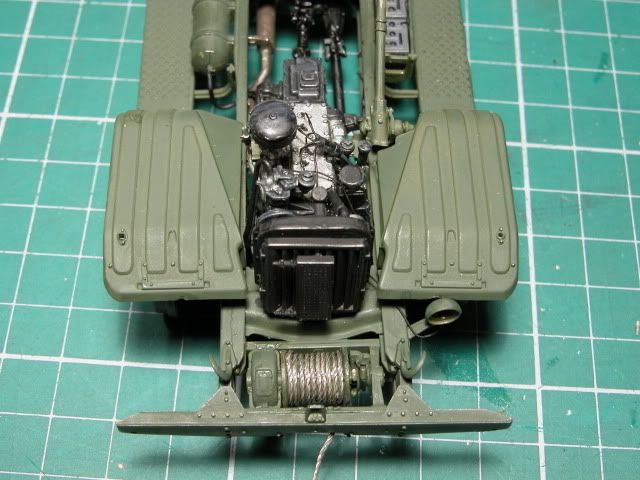
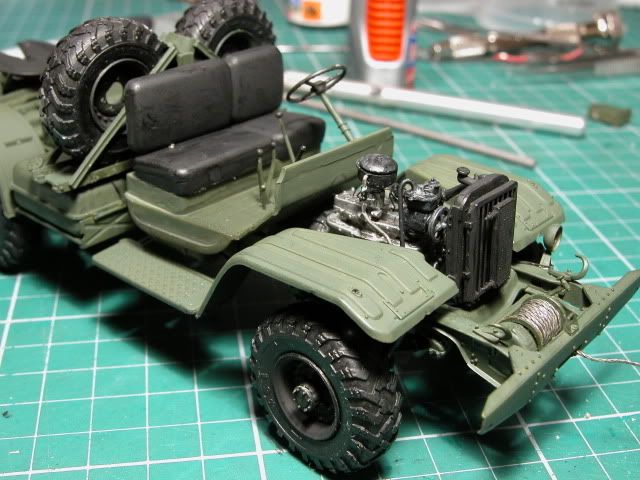
So after a few painting, here is the first assembly: the motor and the front bumper with the winch.
Everything fits correctly but this is not a Tamiya kit. You have to dry fit everything before glueing together to make sure it fits. I prefer using superglue for all those parts because most of them doesn’t have a big surface of contact to bond properly with regular plastic glue.
You can see on the picture that I installed a steel wire around the winch instead of the thread supplied with the kit. I think it looks more realistic and I can save the thread to simulate ropes on future builds.
The only missing detail in that kit is all the wiring and plumbing of the truck (spark plug cable, hoses, etc…) If anyone has detail about that, please help me cause I plan to add these wires and hoses.
If you want a really good reference on the ZIL-157 truck you have to find the Wings and Wheels Publications’ Zil-157K and Variants book. It’s book number 9 in their Present Vehicle Line series. In addition to great photos of the interior, engine and drivetrain, the book also has great photos of the SA-2 transport trailer and launcher. I think I got mine from VLS Mail Order for about 30 bucks, but you may be able to find it elsewhere if you look around. I bought the cargo ZIL from Trumpeter, but I haven’t built it yet. Looks pretty complex! In the meantime, though, the book has been a big help in finishing and detailing my collection of 1/72 ICM/Omega-K ZIL-157’s . Good Luck!!
Thanks luckybob! I found another one “Russian motor books” which has a lot of details inside, probably the same drawings as in the one you suggested to me.
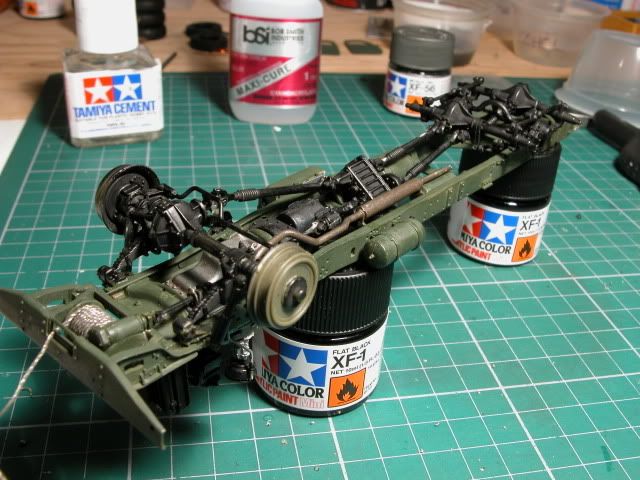
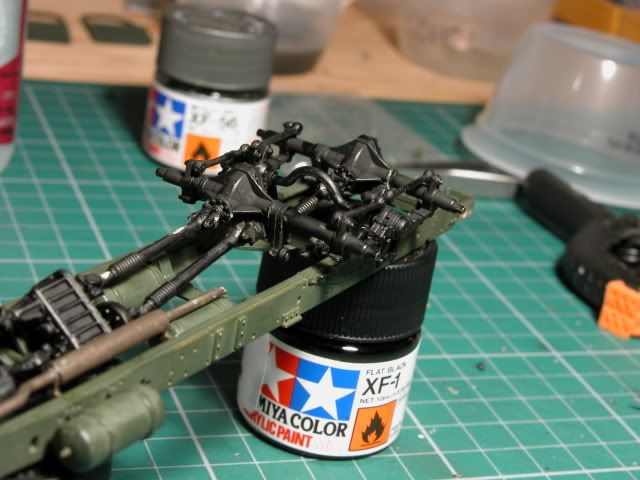
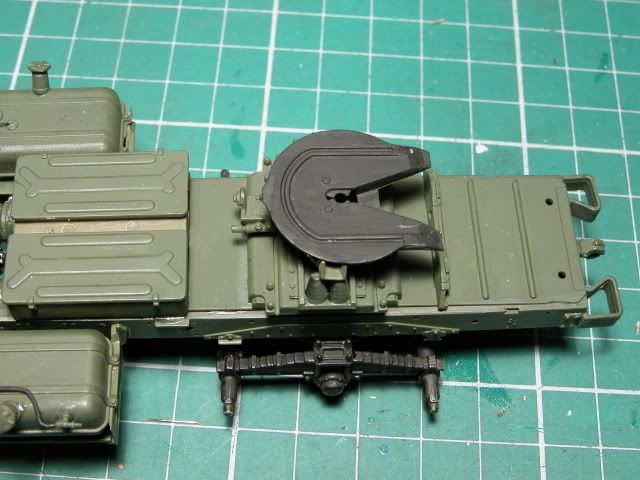
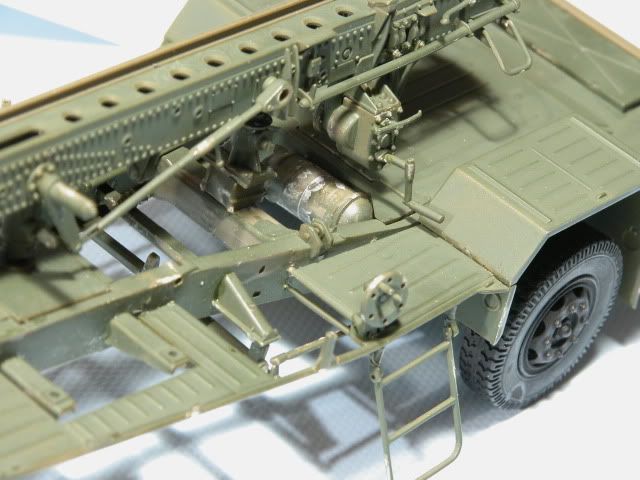
Anyway, here is the main frame almost complete with drivetrain. I got to tell you that the level of detail is again amazing and it was not easy to assemble. First, the instructions doesn’t warn you about the fact that you must leave one universal joint unglue before installing the drive shafts. The orientation of both ends must match correctly. I can hear you say that it is obvious but I didn’t think about it and I had to break them apart to reposition. The main frame itself fits perfectly and there is not much cleaning to do on the parts. Has you can notice on the pictures, you have to be carefull with the glue if you want the front wheels to turn freely and be steerable. I’m glad everything work on mine.
Looks good. The frame is coming along nicely. On the painting, don’t know about the Chinese version, but Russian trucks are all flat black for the frame, running gear, etc., pretty much anything from the frame down. Just a note though, you are building the Chinese version which uses a Chinese Jiefang CA-30 tractor, a Chinese copy of the ZIL-157. It is basically the same, but has a different front grill and fenders. Trumpeter makes both the ZIL-157 and Chinese Jiefang CA-30 military truck. They also do both the Chinese HQ-2 missile truck and the Russian SA-2 missile truck with ZIL tractor. There are a coouple different sprues for each model. You can compare them at PMMS.
Good looking so far either way. Keep up the good work.
This is comming along great. Just keep us posted, I’m really enjoying this one. I finished mine not too long ago, and it really is a spectacular model. I’m very interested to see what you’ll end up with.
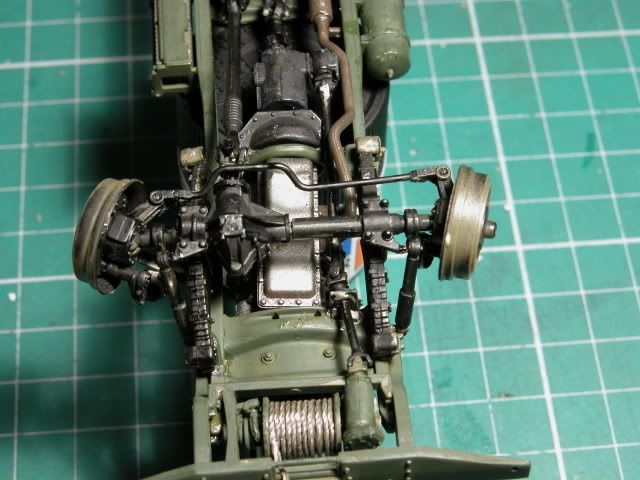
Ok, I’ve done some wiring. Not an easy task. First I had to find good references, then find the proper medium to simulate the different cable and hoses. So on these pictures you can see that I’ve plumbed up the fuel tanks and the fuel level gauges are wired up also. The spotlight in front is also wired and the ignition wires goes on top of the motor head. I still have to put some sparkplugs there but I don’t know how to do it. Any suggestion welcome. I guess I’ll find some tinny spare parts that would do the job.
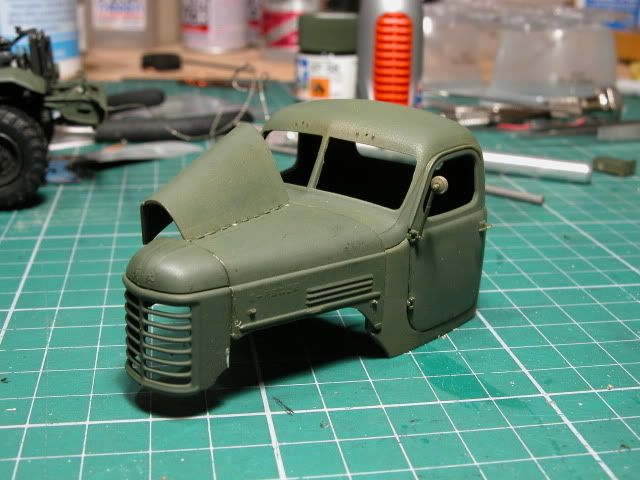
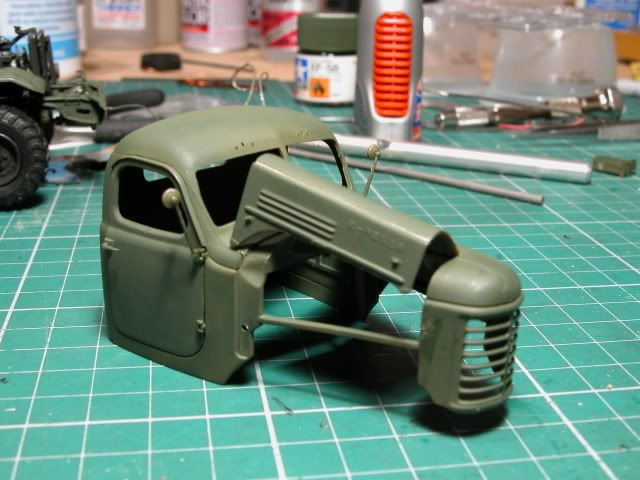
So know I’ll have to make some touch up. I did not take any picture of the cabin yet but it is assembled and I will have to weather the interior before installing it on the frame and close the doors.
Anyone who wants to build that model will notice that the kit is very well detailed by its one and at the same time, there is still a lot of room for scratchbuilding and super detailing. Really cool model.
lol yeah I was looking for pics, then I realized I deleted them off my host. I’ll have to snap a few after the weekend (away for a bit) then I’ll post them up.
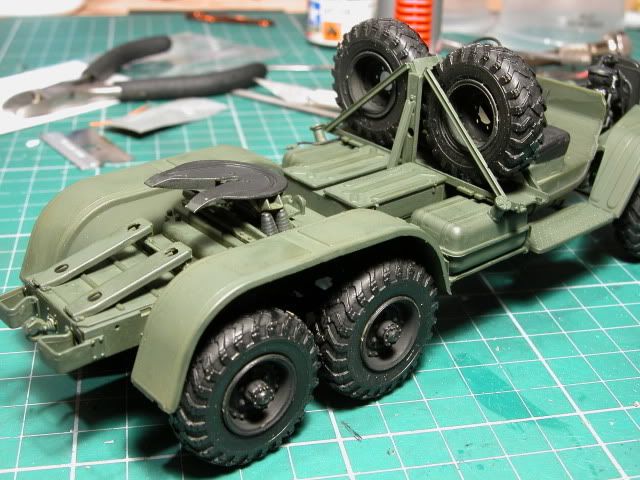
Ok! Wiring is done. Know the wheels are installed and the cab is somewhat started. I still have to weather the interior prior to put the cab on. One cool feature is that you can bend the hood to install it in open position. Really easy to bend and fits in place perfectly, good rendering of the hinges on top. Know I might spray another green coat everywhere to smooth everything. I used Tamiya acrylic olive green. That’s the closest color I found for the “dark green” they suggest in the painting guide.
I had a hard time to install the rear wheels correcty, the undercarriage was not centered with the fenders and one of the wheels was touching the interior of the fender. I had to relocate the undercarriage. That was the hardest solution but the less apparent.
I’m having a hell of a fun with that model so far, I recommend that kit to any detail lover.
Edited: I forgot to tell that I do not bother too much about sopts of glue and paint thickness in some areas cause I plan to make that truck well weathered and dirty.
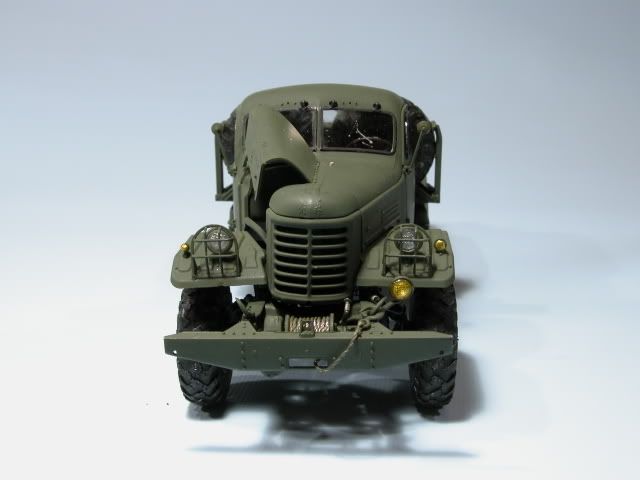
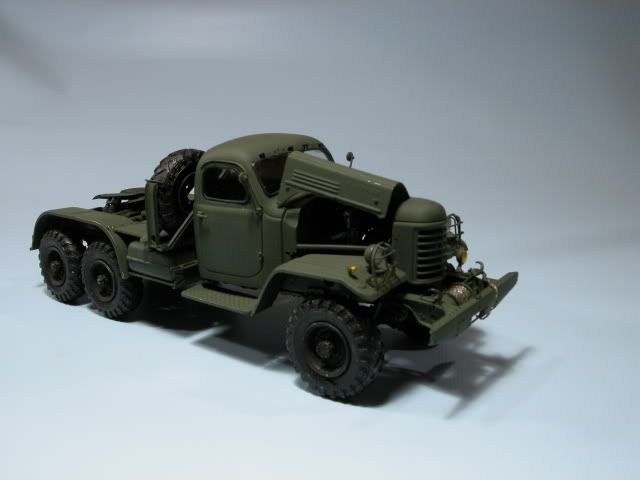
The truck is almost completed. I had a hard time fitting the cab over the interior, there is not much room to put the fingers and press it down so I broke the drive shaft underneath. The fit is pretty good by the way. On the pictures you can see the front spotlights and I’m very impressed byt the Tamiya clear colors. It was the first time I used it and the yellow spotlight looks very convincing in my opinion. I like the overall look of the truck.
I have one question about the truck: how does the flat bars that holds the spare tires in place are kept vertical? Should I strap them together or what?
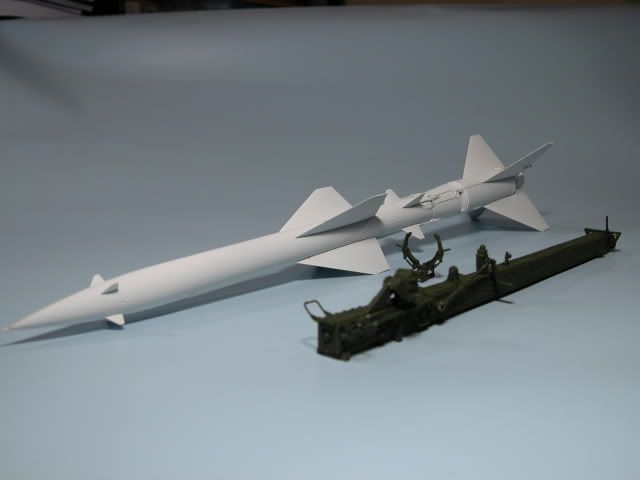
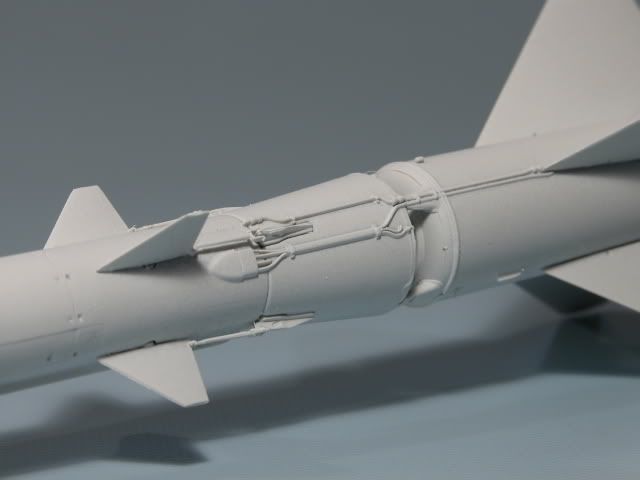
The missile is also completed but still on the primer. Details on that missile are very impressive as you can see on the pictures and its a very big weapon. The missile rail seems to have plenty of details too.
The trailer is coming along nicely. There are a lot of small parts difficult to deal with but overall, the fit is good. There are still some detailing to do but I worked until midnight last night and I did not have the time to finish. I will probably spray a coat of green before making the plumbing and wiring. I took some pictures of the almost complete assembly so you can have an idea of the size of that missile, it’s quite impressive. I can’t wait to finish that kit, this is the level of detail I like on a kit.
I still have to clean that build a little bit, there are some glue spills and knive scratches in some places. And I have to pour some "/$*?%$/%?/$ putty and sand in some areas. Damn it.
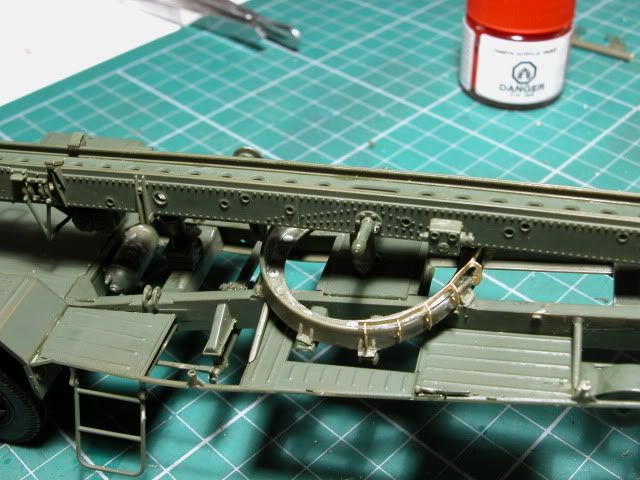
I worked on the circular rail last night and I never saw something like this before; there is approx. 20 pin marks to get rid of inside the ring. It is a hard to reach place and I had a $%%¬¢¢¤¦¢¤ hard time to smear putty and sand. And do I have to say that I hate to smear putty and sand. Anyway, I think it turned out ok but its not perfect. Now I’m almost ready to paint to whole model.
I have no pictures to show cause there was no real progress and I was too pissed-off to take any.
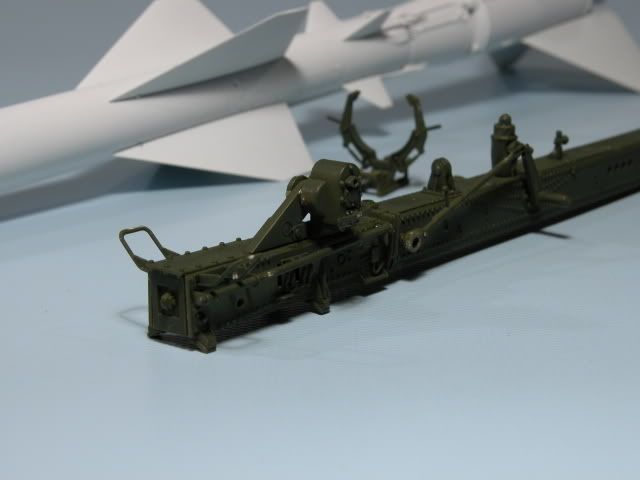
Now I’m stuck, I have no reference on the missile trailer. There is a bunch of fitting for hoses on that trailer and I want to do the plumbing right.
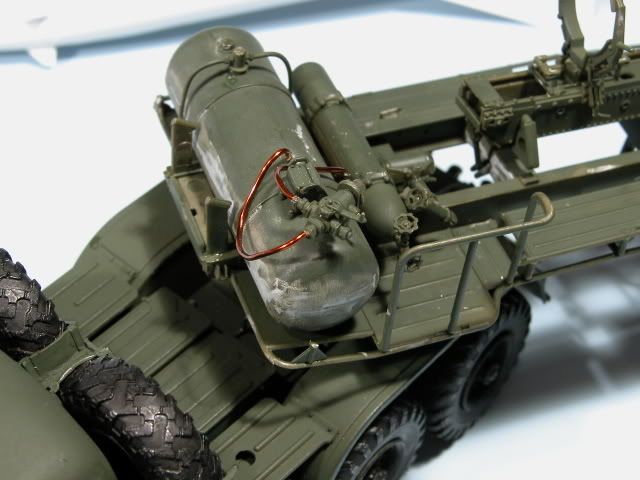
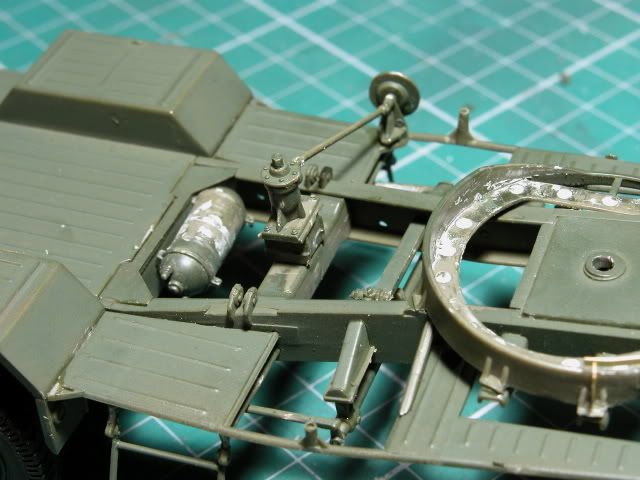
Picture 1: I’m pretty sure that the fittings on the front of the trailer is a link between the brakes of the trailer and the brakes of the truck.
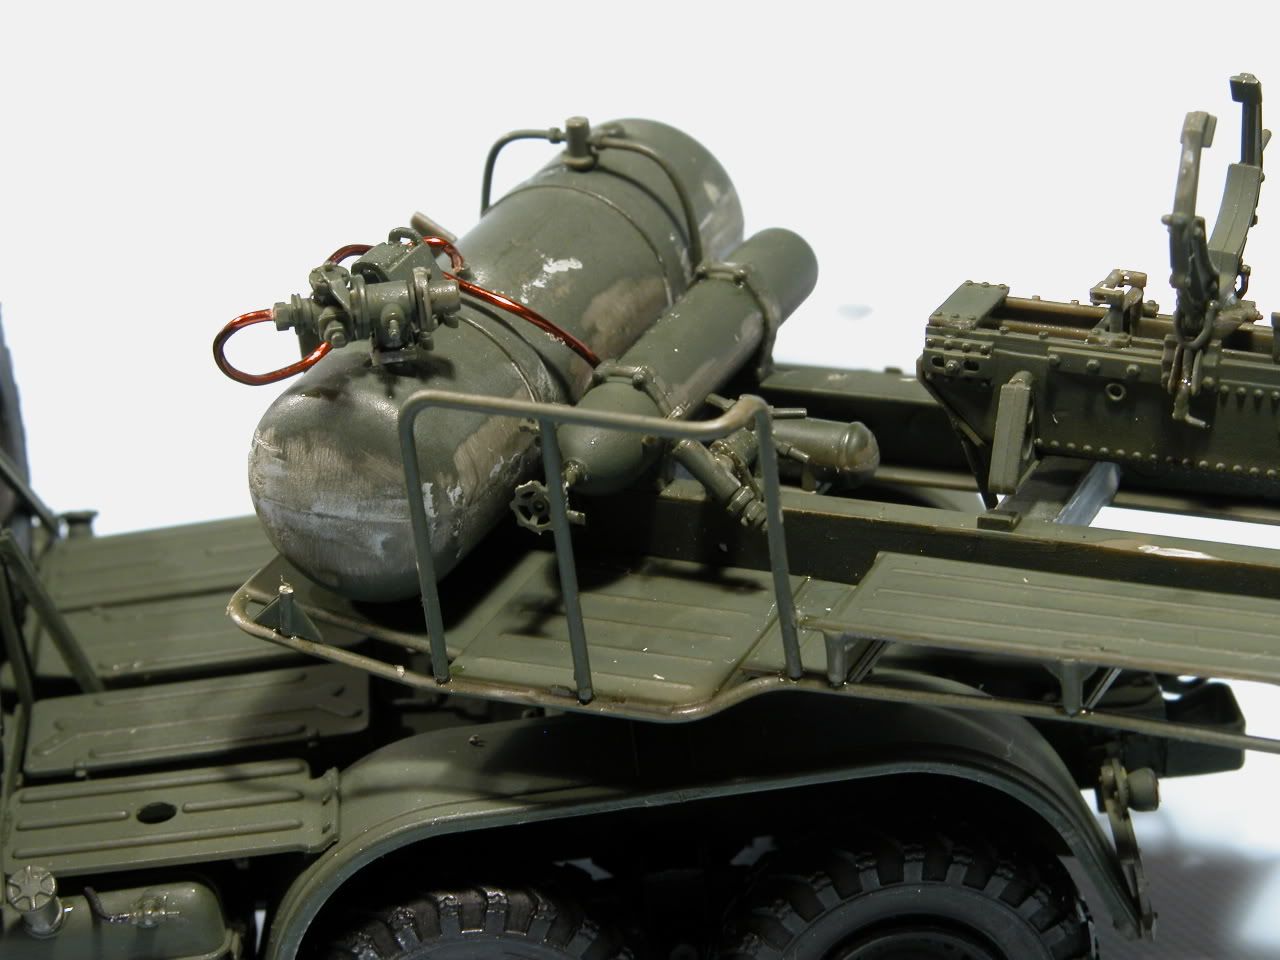
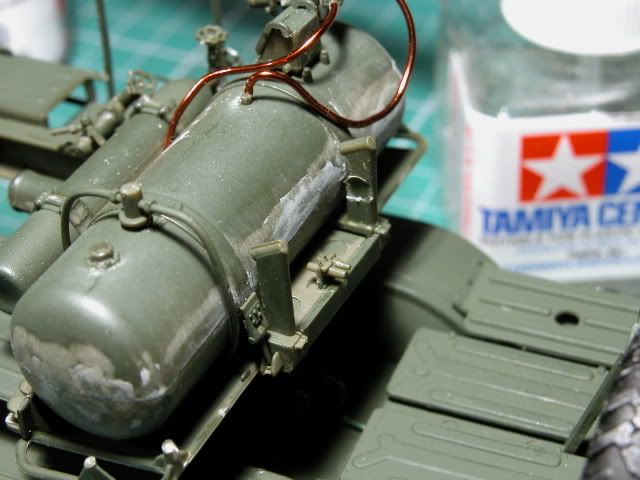
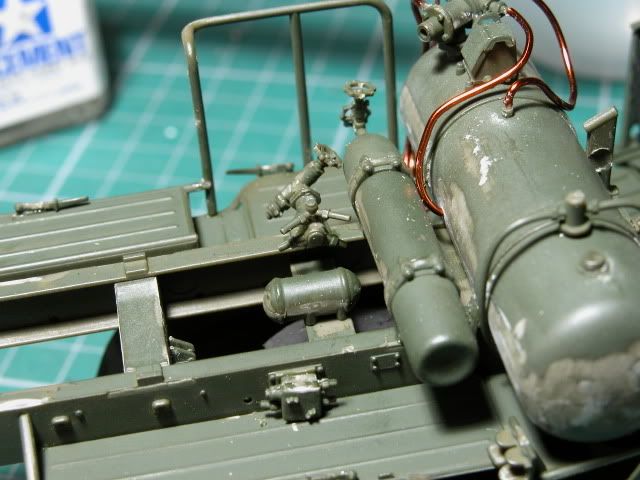
Picture 2: There are several fittings on there. I have no clue about the role of the pressurized tanks. I’m pretty sure there is a pressure relif valve on the side of the trailer which have three ports and one adjustment screw but I don’t know what should be connected to it.
Picture 3: There is also a pressurized tank at the back of the trailer.
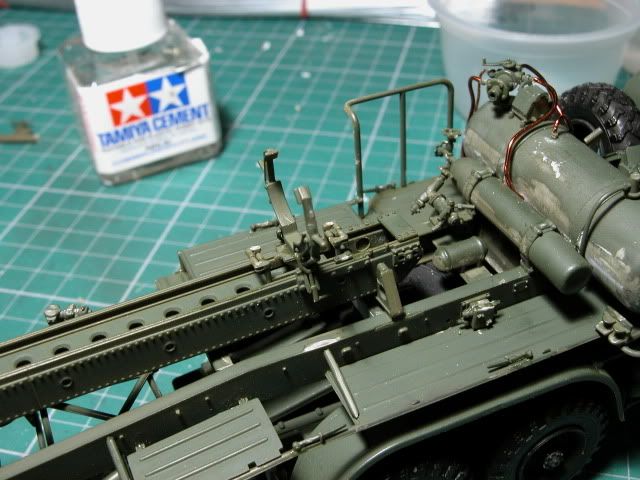
Pictures 4& 5: The rail that holds the missile is locked and unlocked by a manual handle, there are one hydraulic cylinder on each side for som kind of elevation adjustment I think (not installed yet). There is also a clamp at the front of the rail to hold the missile in place. That clamp is activated by cylinders and is mounted on a sliding rail which is I think controled manualy by a winch at the bottom (kind of chain mechanism)
So how should I plumb all this? Is there any reference material available?
Ok I found some interesting pictures and I think I can do some plumbing. I may cheat a little bit and install some hoses that end up at some hidden places under the trailer but that is sufficient for me.