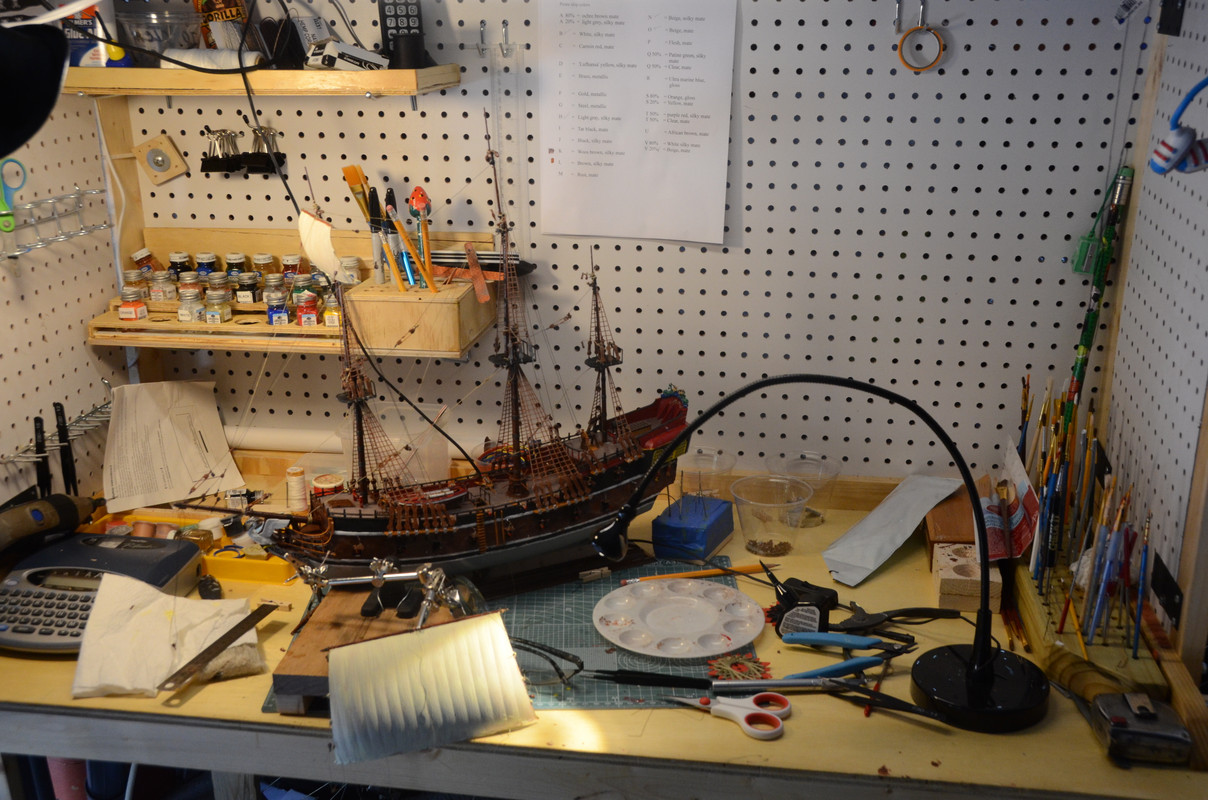
Atrtached is a couple of pictures of the pirate ship under constroction, it also show my workbech not as neat.
Here is another angle
Does avery one has dificulty building the rigging? Working with the small threads and attempting to tie them to places you can barely reach is troublesome.
Yes, rigging is a seperate skill different from all other model building tasks. It takes practice, and you use the touch quickly if you are not constantly doing it. If I finish a model and don’t do another right away, it seems to take me forever to get the moves right again. After about 30 minutes to an hour, I start getting the moves again, and the muscle memory kick in again. However, for a first rigged kit. I recommend you realize that rigging is likely to take longer than the entire rest of the build.
First, take your time and learn patience. Even today, after building sailing ship models for decades, If it has been awhile after the last rigged ship, I find, even after I recover my muscle memory, I cannot work on rigging for a protracted length of time. Too much concentration and fine manipulation are required. I never work more than an hour at a time. Any longer and my concentration will falter and my hands shake.
Also the right tools are important. I have two home-made tools I find essential. The first is a hook, about six inches long, made from a large, long needle like a chrochet or needlepoint needle, and cut the eye to make the needle. A chrochet hook is also okay. The other tool is a fork. I use one of those large sowing needles and cut the eye in half making a fork. Sometimes you need to push a thread between two lines close together, and that is where the fork comes in. Other times you need to fish out a line from an inner region of the rigging, and the hook is what does this. Vision aid is also a good idea- I use cheap readers from the dollar stores (now closed). I am glad I am in good shape for those.
Lastly you willl be tying thousands of knots. A bit of pratice, tying twenty or thirty knots in a piece of thread before even starting on the rigging is a good idea.
Well Don, you are so right!, It seems that the treads has magnetic property becuase they are always stiking to intems they are no supposed to stick to, I also having problems tying knots, if I do not put some glue on the knot, many of then simply would unravell.
I am beguining to do as you recomended and only work for 1 to 2 hours then take a long breack, and I also being praticing on how to be patient, and that for me is very dificult because I tend to be hiper. I will keep trying
Bill, I do try to work from the inside out, but, at times I find that the instructuion tells me otherwise, today I was trying to add a front sail and it took me about an hour just to tied and secure the 4 treads that support the sail and the reason was becuase of the location of the tye in ports being in a crowded location.
My present workbeach is basically a 2 x 4 piece of wood, I just need to convince the The Boss ( the wife) to see is I can increase the size to something like 3 x 8. In case you are wondering, my workbench is located in the warehouse that we call a garage.
First off, you model is looking good so far, nice and neat. Keep it up and you’ll turn out one fine looking model.
All the advice so far is spot on. We all have different techniques but the basics really don’t change. Work for the inside out and do your standing rigging before your running rigging.
I usually wax my lines with Bees Wax to keep it from fraying too much. I also start with the bow sprit but that‘s me. I also tend to work from the bottom up but I’ve seen beautiful models rigged from top to bottom.
I also try and do as much work off the model as possible and add lines I know will be needed to things like belaying pins before it gets really crowded. I add blocks to spars and masts before they’re glued onto the ship. Using a tiny bit of CA on your knots will usually hold them. Just remember’ it’s like the old Brylcreem commercials, “a little dab will do ya.”
You’ll find your own style as you go so try not to get frustrated and the instructions are not always correct in terms of steps, so don’t be to rigid following them.
I should have added- it is almost impossible to cut a piece too long. I always try to leave at least three to four inches extra in length so I have a longer end to work with- that should stop unraveling. I never regret having a piece too long (and having to spend more time working with it) but I sure do regret it when I cut it too short.
I cut the extra off and put a drop of thinned white glue on it for running rigging, a drop of black paint on black thread (standing rigging). I may go back when it dries and trim it a bit closer with suture scissors.
“I cut the extra off and put a drop of thinned white glue on it for running rigging”
I have been using plastic cement on the knots, but, sometimes this makes a mess due to the cement melting the plastic. You mentioned using thinned white glue, by this you mean Elmer’s glue? and if so, what ration of glue and water do you use?
Elmer’s and water. Thin enough to soak into thread and lock it in place. I have two old medicine bottles: one is 50:50, the other is a bit thicker at 70:30. If you are using cotton thread or Syren rope, you can also get the rope to lie straight by wetting it and then hanging with a clothespin on the end and letting it dry overnight. Takes the kinks out before you use it for rigging. I hang about 8 to 10 pieces the day before. And always pass over the beeswax 2 or 3 times before using. Cuts down on the fuzz and dust collection.
For standing rigging, you can add a bit of black dye or black tempra (acryl) paint in the Elmer’s mixture to darken it up.
Thanks Dave, thanks Bob, I will set it up on a couple of empty bottles. Bee wax I do not have any, so I will try to order it from Amazon or other vendor.
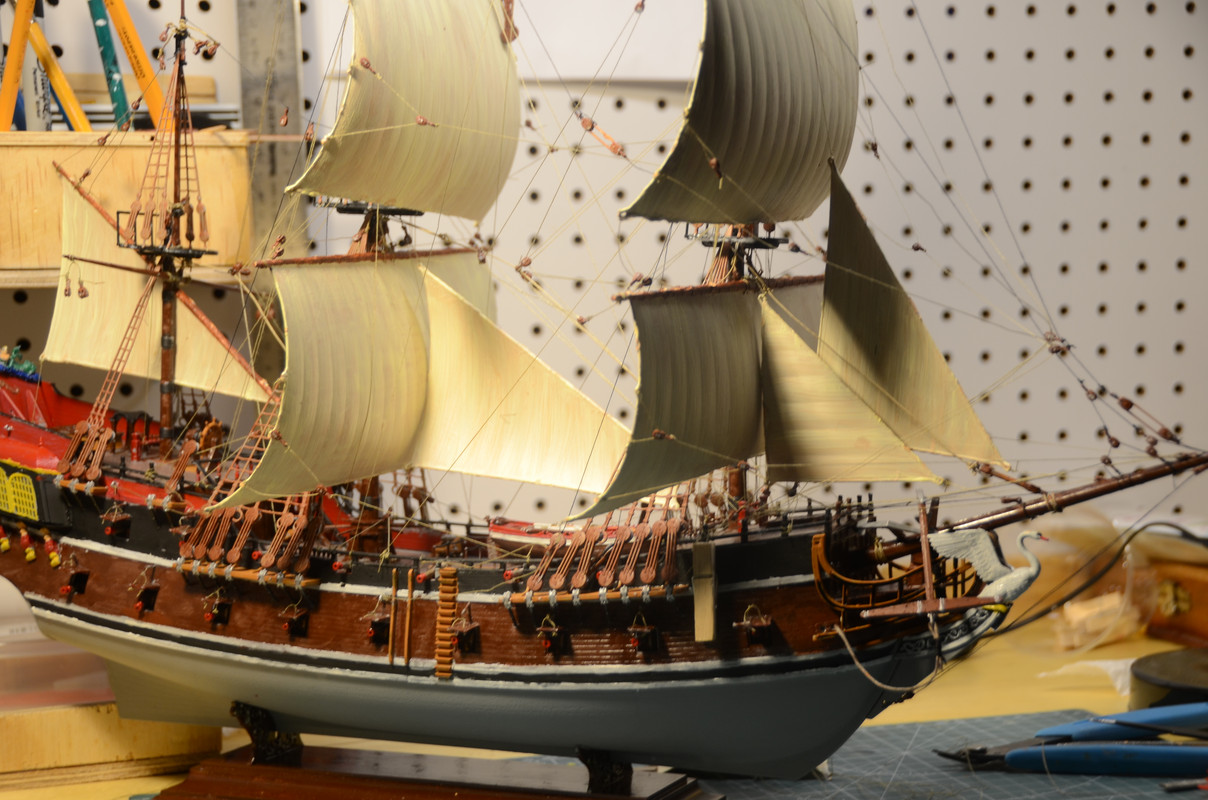
Here are 2 more photos of the Pirate Ship, it is almost completed, then I will have to fix all the bugs etc.
A side view
Here is a photo of the front of the ship.
I know that the ship may be showing the fact that I am still a beguiner, but I am learning.
PD It looks like I will have to break out my micro lenses to get photos that are sharp, my present lens only focus to 1 feet, so if I get any closer it looses focus.
That’s a nice build, sir. I look forward to the next one.
One ridiculous part of the kit, no reflection on the builder; is how the main mast is coaxial with the capstan… design by Disney I suppose.
For spell checking, one way to do it is to type your post in Word, spell check, and then paste into the forum. I do that with longer posts and WIPs like yours here because this forum has an annoying way of sending partial posts to the ether halfway through.
As I was told when I asked, there is no spell checker on this system. I am the first one to agreed that I need a spell checker, one of my worst subjets when I was going throught school was spelling, so, if some one needs a spell checker system is me.
Gmorrison says that he types his posts in Microsoft word, spell check it, then copy and paste, I will investigate such procedure.
Do you have any control of exposure? Is there any mode for closeups, like an icon with a flower? Selecting a high aperture ratio/small aperture really helps for closeups. Otherwise, yes a closeup or macro lens will do the job.
The camera I am using is a semi-profesional Nikon D7000, it has a 18 - 200mm zoom lens attached to it, and that may be the problem, this lens is very powefull, but it only focus to about 12 inches. I also have a 50mm fix lens, I think I will try it to see if I get better results, if not I will try to put some extenders on this lens to increase it magnification.
Yes, the camera has all kinds of special adjustments, I also need to find the correct setting, but, as you know, I will have to keep trying until the correct formula is found.
Go to aperture priorty exposure. Select f/16. You’ll need a tripod, but most people find they need a tripod anyway for closeup model photography. I bought mine for about twenty bucks a few years ago at Walmart. Also, exposure will probably be about 2-3 seconds indoors, so using the timer delay eliminates shake from pushing the button. I take all my model pictures with an old Nikon D50x, have a later model Nikon for the rest of my photography.
Here is a closeup of the rear of the ship. I believed that the boat was completed, however, after seeing this photo I realized that I still have a lot of work to do.
Took the photo using a 50mm lens with an aperture of 22 and with a small micro tube.
The ship has some bad cracks on it as it can be seem in the photo, I just ordered the Tamiya putty recommended by you guys and also a set of very fine brushes so I can work on the details.