Have played this video a few times recently and now have the materials to build a light box. However, I cannot get the video to play via Edge or Chrome. How do I get the video to play?
If one if familiar with building a picture frame or wooden frame structure, it’s not that difficult to add a small light source and an opaque or light defuser panel to this frame. A good size is approx 2’ x 2’ as anything larger may allow the center of the light defuser to sag or not offer support to the subject without added support brackets within the frame which could detracts from the final product. I doubt anyone would want to see the support frame within the light box thereafter. I happen to get lucky as the shop send me a very small light box which I use for taking pics of home made/shoe string facet gems.
Well AmpLighter after admiring your photography yesterday, I decided it was time for a light box; plenty of spare boxes and card here at work. Looked this up might be a help to others with the same aim.
Joe
Thanks for viewing my photographs, but that’s odd I never used a lightbox in any of these images just a textured white piece of laminate as a back drop.
Didn’t mean to imply you had AmpLighter; sorry for the misunderstanding. I complimented your photography because I didn’t have time to reply on your thread yesterday, it was my clumsy way of including you in my reply to the OP and anyone else interested in a light box.
Viewing your work was a timely reminder that I have been lazy in the area of photography, especially with my modelling hobby and with a very simple solution I could do better; even if I continue to use my phone.
Keep safe
Joe
As I mentioned earlyer, I was given a small light box, but often this box doesn’t offer enough light, So i would use it in conjunstion with natural light and a handheld mirror place off camera then used to redirect soem of the natural light. The light box measures 6’’ x 6’’ and sits flat on a table top so it is also portable. But I’ve never found any use for the light box other thna takign pictures of shoe sting facted gems stones.
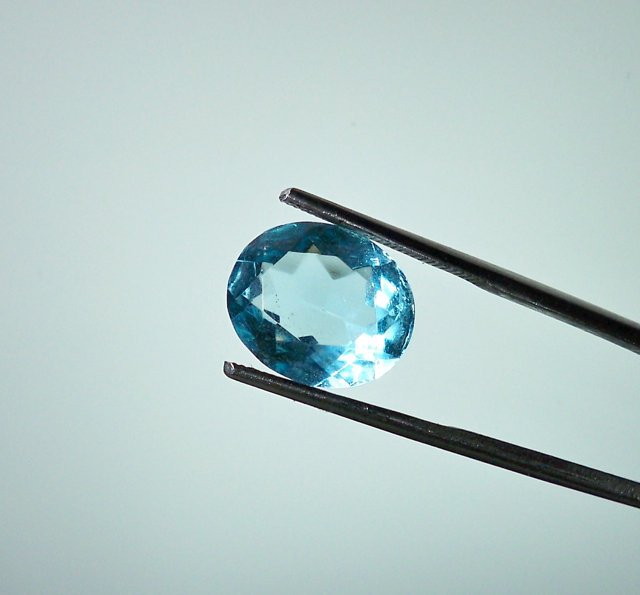
Image of a home made/faceted (Shoe Sting Faceting) blue oval topaz. In order to hold the gem, I used a desktop/table mount adjustable lacross tweezer
My landlady does Stained Glass;
She has a specific type of light box. Now I have created a frosted piece of acrylic for when I use it. I use it for studying plan details and transfering them via ink on onionskin.
I have used this “photo studio” from American Science and surplus
https://www.sciplus.com/portable-illuminated-large-photo-studio-64741-p
It is easy to set up and has an included LED strip as well as a white and black background to chose from. The sides were a bit flimsy for me so I reenforced them with some foam board.
The company has a lot of things like containers and small tools that are a good bargin.
(I have no connection to the company)
These days light boxes are dirt cheap online. Orangemonkey does a nice folding light box called a foldio. You can get cheap knock offs for about 10 bucks which work almost as well. LED strips light so well and are so cheap there’s no reason to put lamps in front of paper sidings any more. If I’m photographing a larger model I will use LED lamps and adjust the brightness on the lamp it’s self.
Bumping this up for us noobs to see how to improve our photography to better display our models…
1 Like
Surely youve all seen the cheap light boxes on amazon that are usb powered…
I still have a light box I got several years ago. It served me well over the years, although I never really enjoyed using it. The background material never covered the entire back side of the box, so I was always having to crop out portions of the photos. Plus, I found that it was limiting which builds I could photograph due to its 20"x20"x20" size.
I have since started using a 6-ft table with a huge white Muslin sheet draped over a supporting rod on tripods behind the table, with 4 photo studio style umbrella light fixtures and a couple of table LED fixtures. This setup has worked far better for me than the light box did, and will accommodate any size of build I need to photograph.
This is the type of discussion I was hoping to create when I bumped this topic. Looking forward to seeing what other tricks you experienced modelers have for photographing your models.
I considered a light box. However, to get one large enough to meet my use cases just wasn’t reasonable. Instead, I use the methods Tim and Aaron outlined in the their video.
It’s a little dated but the general advice about setup and lighting is gold.
This is my workbench and all the lights I use. I actually cleaned the bench a little for this photo.
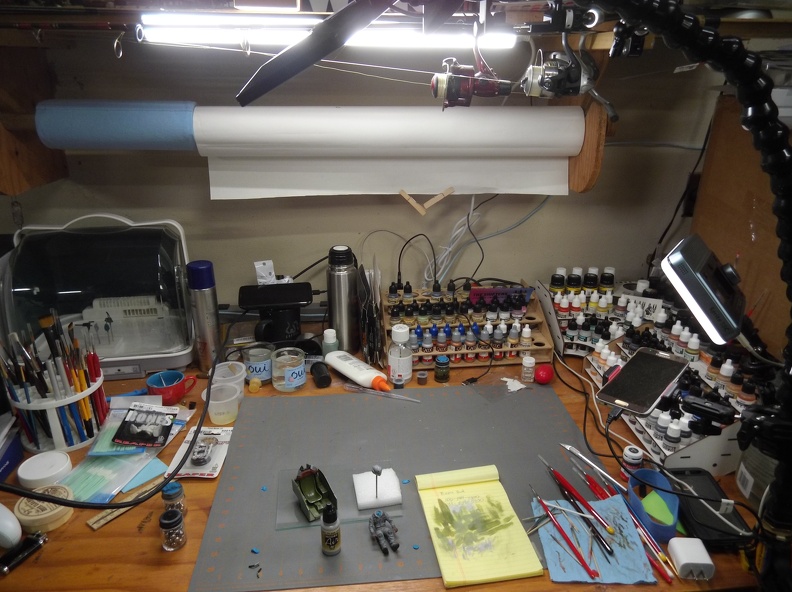
I have a roll of butcher paper hanging just behind and above the work surface. When ready to photograph I just pull down some paper.

And place the model
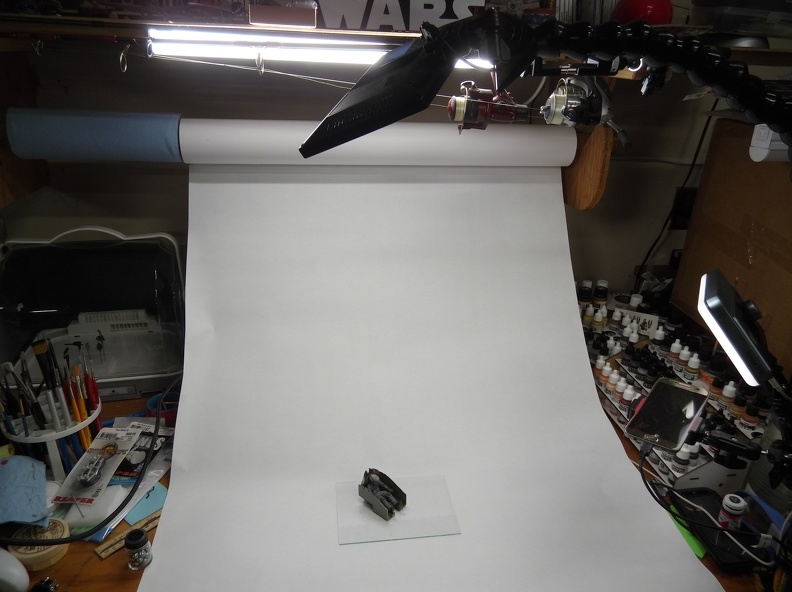
My photography lights are the same as my bench lights so no other setup is needed. If the paper gets dirty or badly creased. Cut it off. and I have a new clean sweep to work with.
Take the photos.
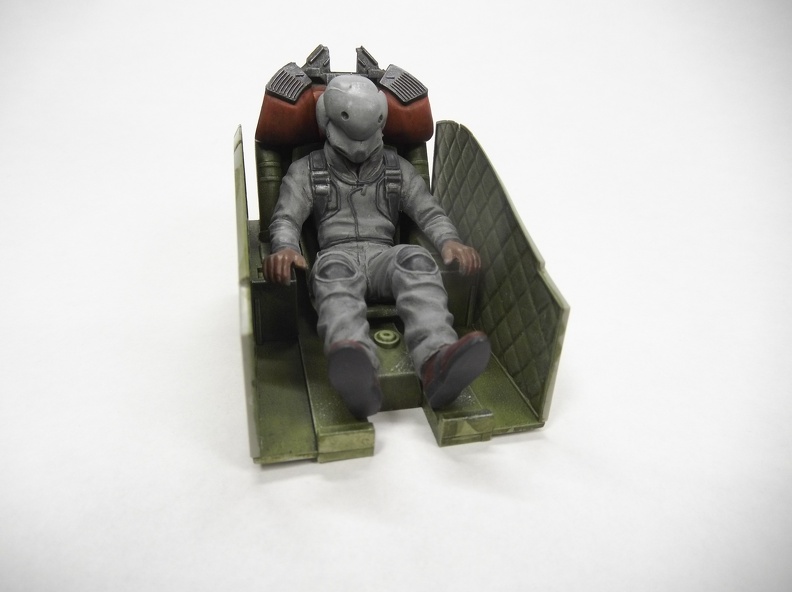
Lots of flexibility in positioning the lighting, subject, and camera. And it easily accommodates larger models while taking up minimal space. When done, I just roll it back up.
3 Likes
My light box isn’t really a box, but I have a background that is almost like a scaled down version of @PhoenixG’s background, but mine is a few layers of wax paper. I have like 2 different lights (or 3) that I bought from Costco, and have set up at different angles with a sheet of wax paper taped to each in order to diffuse the light more. I think the whole set up was really cheap because (aside from the lights which I already had) I only used tape and wax paper. I’m also working on a college budget hahaha
1 Like
Nothing wrong with a cheap homegrown solution. If it does the job I count it as a success. My original lights were an old desk lamp and a discarded brooder lamp. ![]()
1 Like