Here is a resized badge.

Here is a resized badge.
Size is ok, but now the title’s hard to read… Can you try rearanging it a skoshi-bit?
Hi Hans, could take me off the tentative list and put me down as a definite starter, thanks.
Cheers
How’s this, Hans?

Works for me, John. [Y]
Yup the group badge John did has my vote.
Hans-I have a request-will you change my build to be Lt. Fred Ohr’s Spitfire MK IX as flown in Italy? He scored one kill with this plane before transitioning to a Mustang and scoring five more. The kit will be the 1/48th scale Hasegawa…which is in my stash (along with decals), thus saving money and reducing my stash…
Thanks
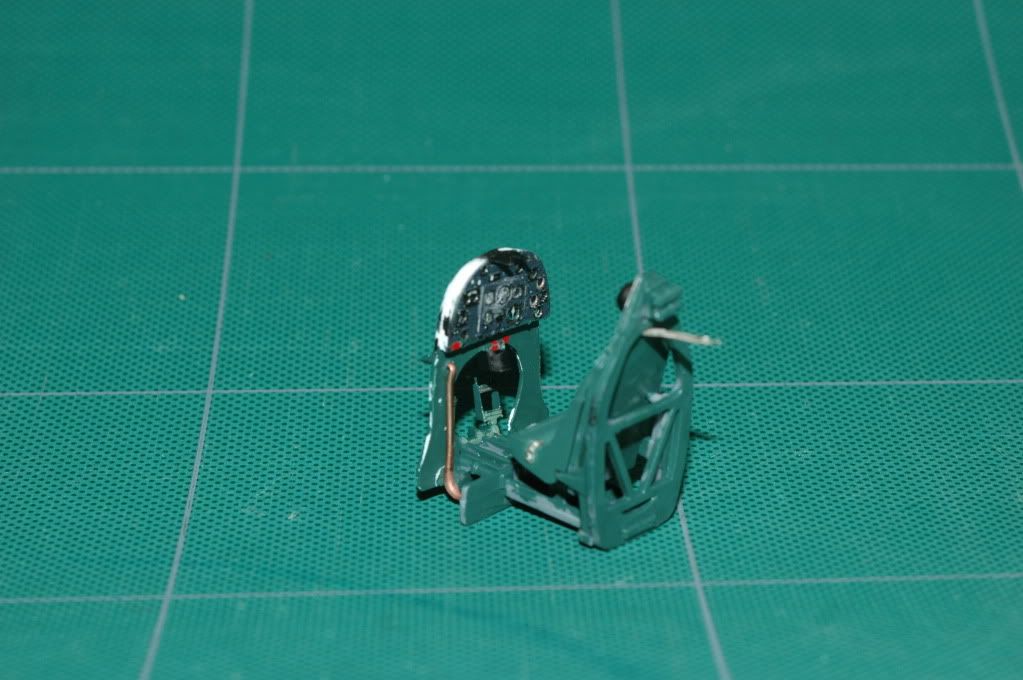
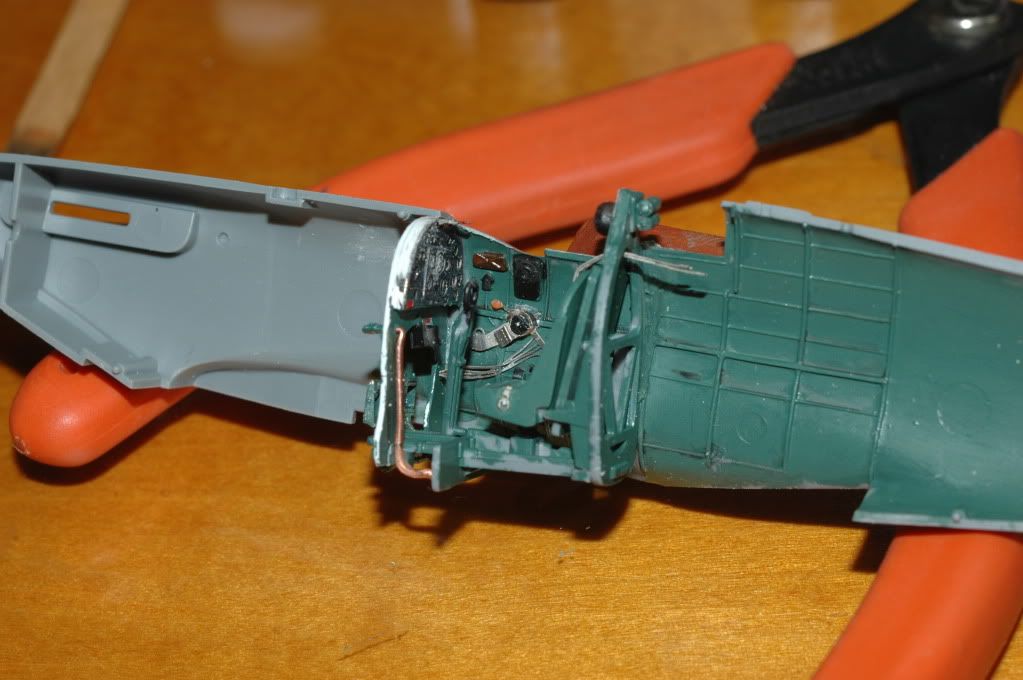
I’ve got a good start on Don Gentile’s “Buckeye Don”. I’m working on the Tamiya MkVb kit. I’ve finished the cockpit with Eduard IP, seatbelts, controls and placards. Sctatchbuilt the IP bulkhead and rear bulkhead (not shown here), headrest, wiring and handles. I’ve since closed up the fuselage, attached the wings, and am currently working on the camo scheme. In researching I’ve found several discrepancies to juggle, including the actual ID numbers his RAF Spitfire carried. I plan to display “Buckeye Don” with British Roundels rather than the American Star with the Operation Torch yellow circle surround. I’ve located several good photos of Gentile with his aircraft, but have not seen the definitive photo of the craft with roundels. The time frame from when he shot down his first two aircraft and the Eagle Squadron being transferred to the USAAF was only about a month. I’m confident that “Buckeye Don” flew with Roundels, but probably had the two kill markings for a very short time before the British markings were painted over and the USAAF markings added. So, now I will proceed slowly. I’ve got a book on the Eagle Squadron coming. If anyone has some good insight regarding that question, I’m all ears. Like Hans said, Ive spent more time researching than building. That’s what makes this hobby (obsession) so fun. Rick
Rick, nice start! Glad to see that I’m not the only one who’s started. Speaking of that, I’ve got the pit on the Mustang done, installed, and closed up the fuse and whatnot. Here are some pics…
!(http://i154.photobucket.com/albums/s269/swingr1121/Models/Tamiya Mustang/IMG_1231.jpg)
!(http://i154.photobucket.com/albums/s269/swingr1121/Models/Tamiya Mustang/IMG_1232.jpg)
!(http://i154.photobucket.com/albums/s269/swingr1121/Models/Tamiya Mustang/IMG_1233.jpg)
!(http://i154.photobucket.com/albums/s269/swingr1121/Models/Tamiya Mustang/IMG_1234.jpg)
!(http://i154.photobucket.com/albums/s269/swingr1121/Models/Tamiya Mustang/IMG_1239.jpg)
That’s where we stand now. Soon enough I’ll have it primed and ready for paint.
Mike
Rick and Mike nice starts [Y][Y] I havent built a Tamiya 51 yet and cant wait to get started on mine
This is my first one and it looks like it surely won’t be the last…
Good to go…
Done
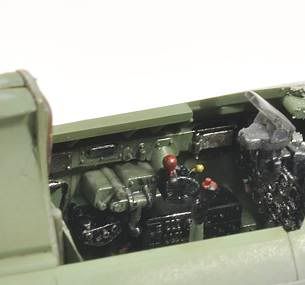
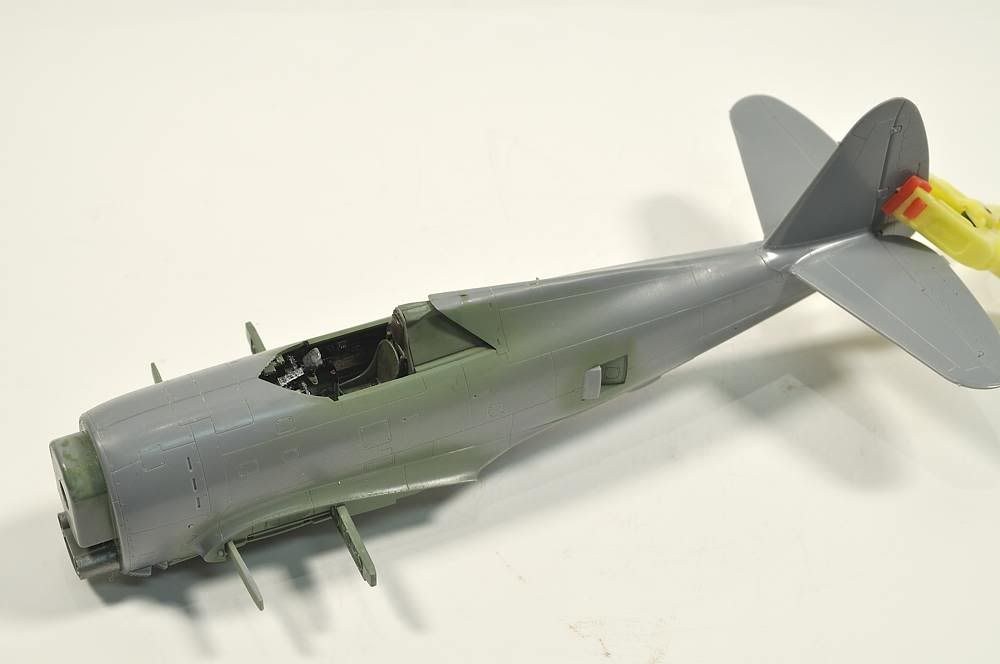
I switched out kits, went with Eduard for this one… I wanted to do the gunbay up right for the Monogram kit, and the plan won’t work for Old Crow… I recently came across some research that pertains to my Uncle John on Guadalcanal and his Cactus Air Force P-39, so it’ll be done on the Guadalcanal build…
The Eduard 'pit so far… I used the PE panel with a dial set, but I think I’m going to rebuild the gunsight… I just don’t like the kit part…
!(http://img.photobucket.com/albums/v233/HansvonHammer/Screenshots/Models/P-39 GB/AndersonP-39002.jpg?t=1262784467)
!(http://img.photobucket.com/albums/v233/HansvonHammer/Screenshots/Models/P-39 GB/AndersonP-39004.jpg?t=1262784492)
!(http://img.photobucket.com/albums/v233/HansvonHammer/Screenshots/Models/P-39 GB/AndersonP-39006.jpg?t=1262784543)
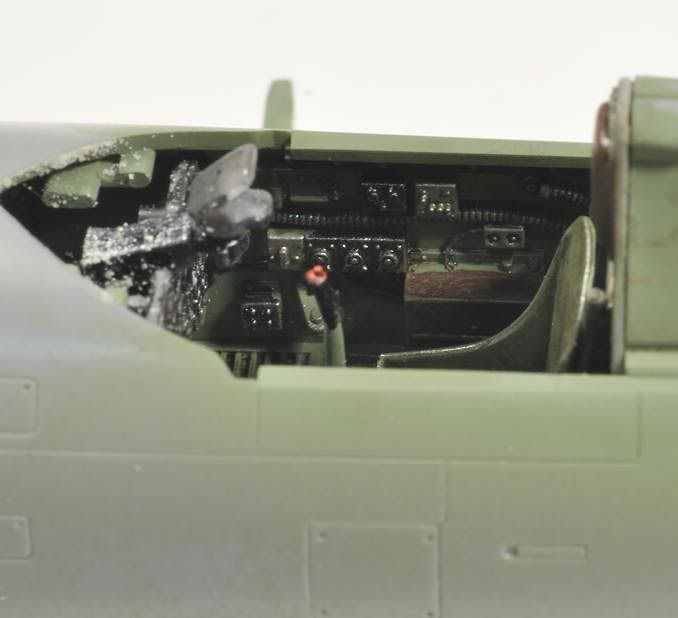
I added four stretched sprue bolt-shafts to the IFF mount behind the armor. The IFF wasn’t installed stateside, but I did add the power cable, which is a PE piece… The seat adjustment lever (The Airacobra seat was adjustable for up & down only. The pedals were adjustable for leg-length, although max-height for a P-39 pilot was still only 5’8". Taller pilots had some issues) is also sprue. There WAS a kit part for it, but the carpet monster ate it, so…
The seat is a resin casting
Also…
I added a link to the Reference thread to the first post of this one. That way you don’t have to hunt for it on another forum page… Here it is again, just because I can:
/forums/t/123752.aspx
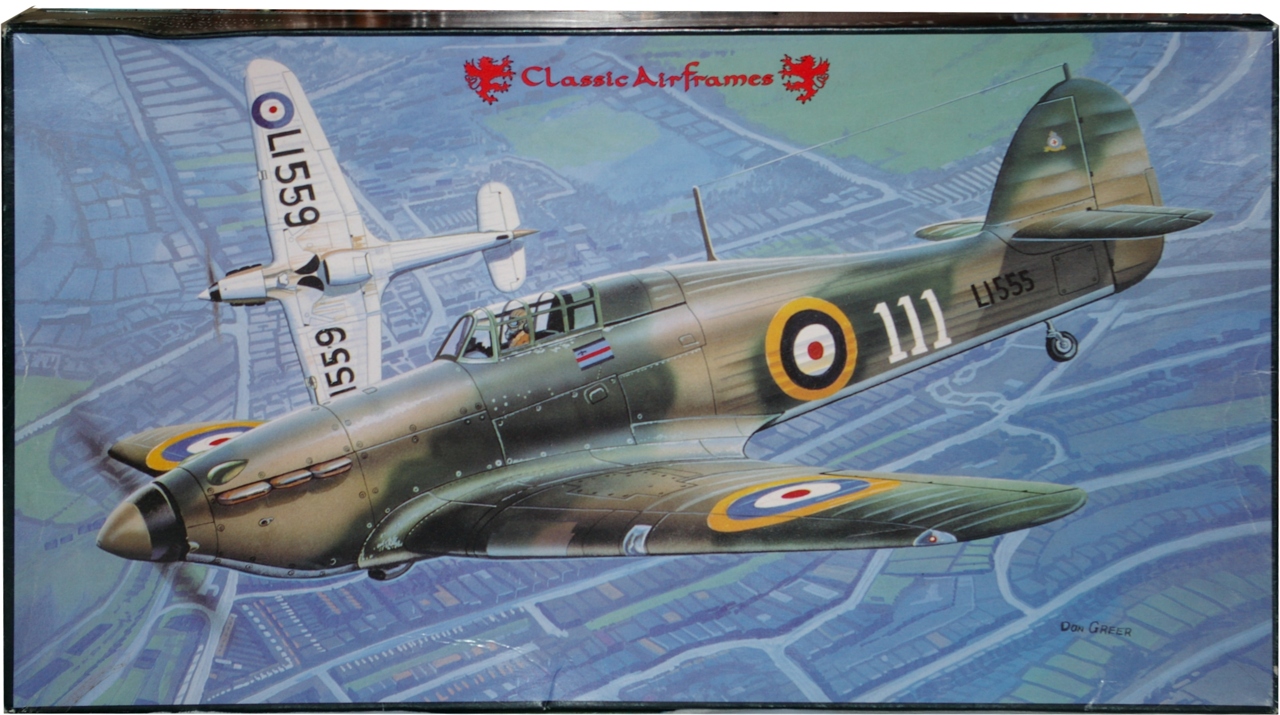
Got the Classic Airframes Hurricane Mk I out of the deep stash today, here is the boxart:
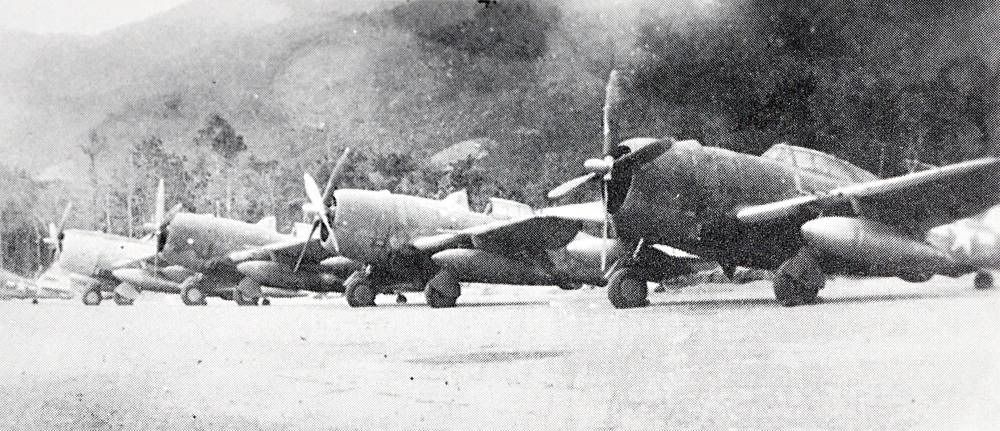
Lt. Col. Neel Kearby was the top P-47 Thunderbolt Ace in the SWPA, accruing 22 kills flying with the 348th FG from early September 1943 until he was shot down and killed over Wewak PNG on March 5, 1944. For a time during early 1944, Kearby, Dick Bong, and Tom Lynch were neck and neck in the race for top Ace in the PTO (Bong - 24, Kearby - 21, Lynch - 19).
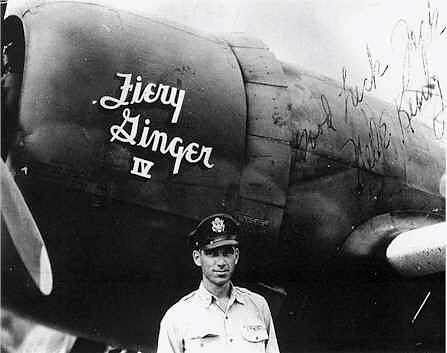
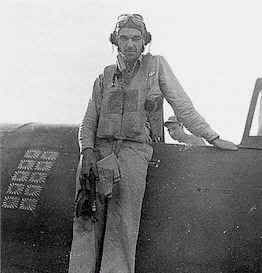
The P-47 was not looked upon favorably by most of the USAAF pilots who preferred the P-38 for its better agility and maneuverability at lower altitudes, its longer range, and the comfort and perceived security of having two engines when engaging the enemy meant flying over vast expanses of open ocean. However, Kearby recognized the strengths of the Jug and championed tactics that took advantage of its high altitude performance, dive speed, fire power and its ability to take punishment. When looking for information about Kearby’s aircraft, it was easy to find photos of the plane that he flew in 1944 up to the time of his death. This was a P-47D-4 christened Fiery Ginger IV, named after his wife Virginia.
It was also readily acknowledged that Kearby flew a P-39 in Panama before training in the P-47 and being deployed in the SWPA. While modeling Kearby’s P-39 would have been more in the spirit of this GB, I found virtually nothing about this aircraft (still looking; any known refs would be appreciated).
But calling an aircraft Fiery Ginger IV suggests that there was a Fiery Ginger I, II and III…; or were there? There is some confusion regarding Kearby’s earlier aircraft, mostly about Fiery Ginger II, which some refs say there is little known about. The best answer in my searches came from “Mustang and Thunderbolt Aces of the Pacific and CBI” by John Stanaway. This reference states that Fiery Ginger I was actually the plane that Kearby used stateside when training. His first aircraft in the PTO was christened Fiery Ginger, but was in effect Fiery Ginger II. Stanaway also suggests that the name of this aircraft was mis-spelled as Firey Ginger, which was subsequently corrected on his later planes. I haven’t found a clear photo showing the mis-spelling yet. However, sometime in September, Kearby switched aircraft to a second D-2 which he christened as Fiery Ginger III (although one ref states that this was a D-16, serial 42-75908). It was in Ginger III that Kearby tallied six kills in one mission on October 11, 1943. The original Fiery (Firey) Ginger was apparently transferred to the 342nd FG and subsequently lost with its pilot in the third week of October, 1943. Later in 1943, Fiery Ginger III was transferred from Kearby’s 348th to the newly arrived 58th FG and Kearby flew in Fiery Ginger IV, the P-47D-4 pictured above.
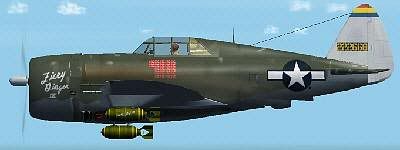
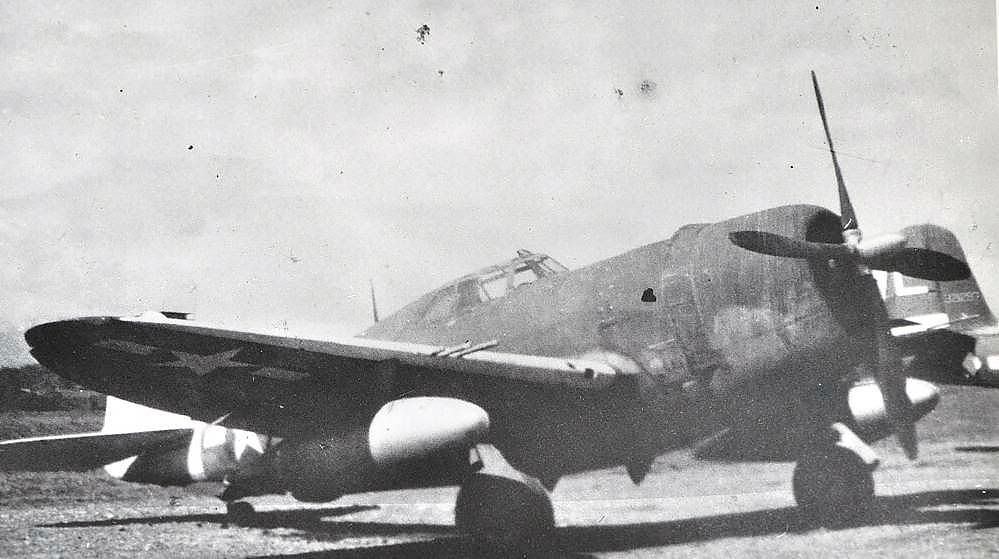
So Lt. Col. Neel Kearby actually became an Ace in a day in Fiery Ginger III. But, he had three kills prior to the October 11 encounter and these are recorded as being shot down by Fiery (Firey) Ginger. So I will argue to Hans that Fiery Ginger (or Firey, or Fiery Ginger II, whatever one wishes to call it) fits into the spirit of this GB and will be the subject of my build. A P-47D Razorback; serial number 42-8145, having the theater markings of a white tail and identified by a blue 73. The leading edge of the wings of his aircraft were also painted white.
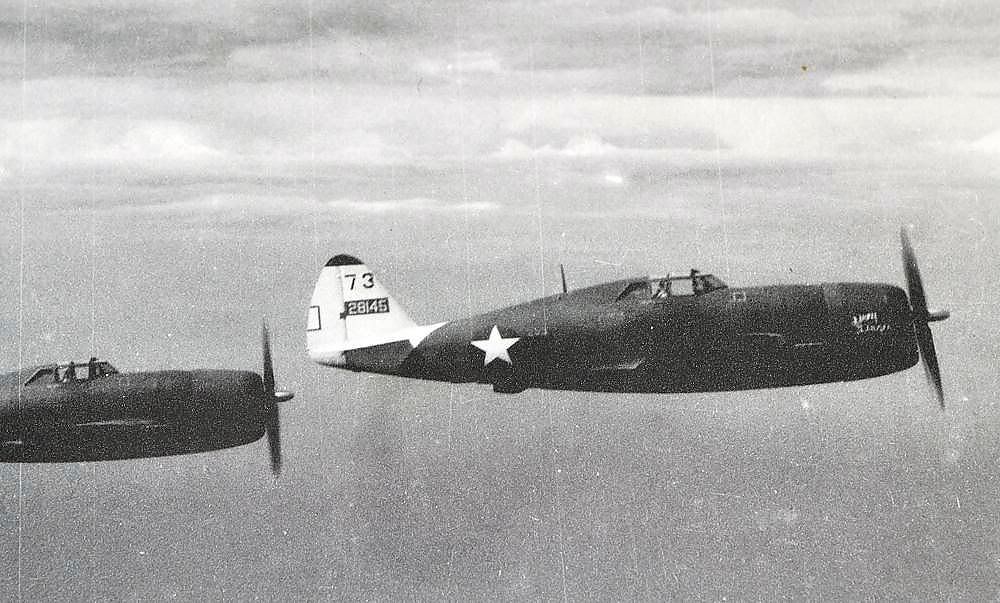
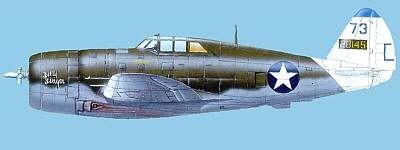
That said, there is still some confusion since Fiery Ginger III may have had the same markings, but it is not clear to me what the real serial number of the Ginger III was. But one other thing may distinguish Fiery Ginger from Ginger III. In late August/early September, there was a change in markings from the roundrel with star to the star and bar. The 348th was not quick in making this change, so the aircarft shown in this photo and the one above likely represent the 348th P-47s around September when Kearby made his first 3 kills (73 is Kearby). Photos are reproduced from “Kearby’s Thunderbolts” by John Stanaway and are presented for discussion purposes only.

Aside from the markings, the demarcation between olive and neutral gray seems to be a bit higher on the early Fiery Ginger than on later versions, so that will be reflected in the finish of this build. One last thing; a major concern regarding the use of the P-47 in the PTO was its limited range compared to the P-38. To address this issue, a variety of different drop tank designs were used that ultimately led to the design of a suitable belly tank. Given the scarcity of equipment and supplies in the PTO, this took a bit of time. In the meantime, give you one guess what solved the problem… converting P-38 drop tanks for use on wing pylons of the P-47. This must have been quite effective since they were apparently used even on later NMF P-47s. Forum member RadMax responded to my plea for 1/48 P-38 drop tanks, so they will be mounted on the wings. Thanks, Max!!
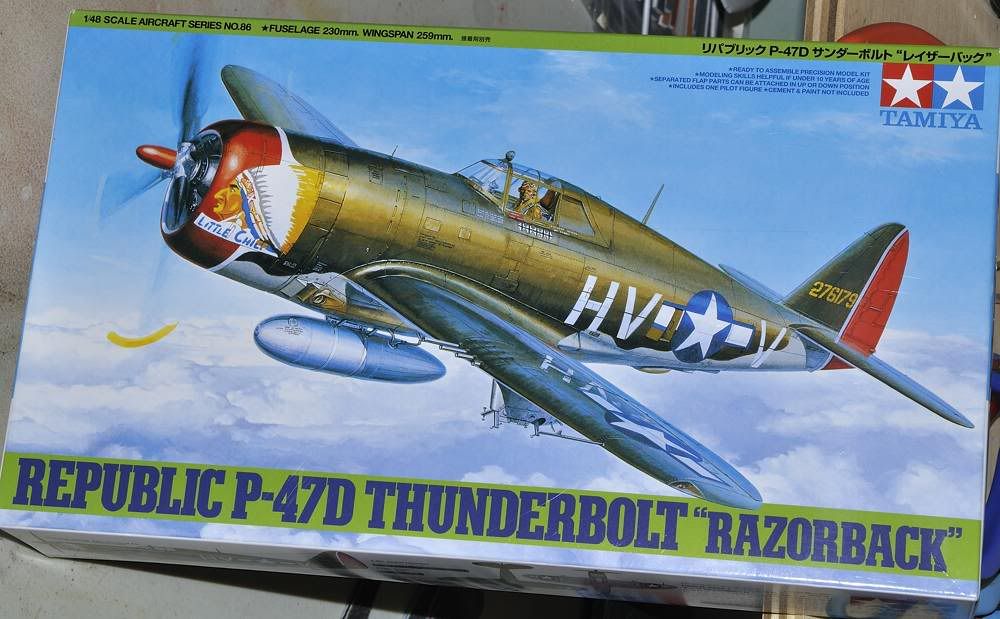
The base kit is the Tamiya P-47D Razorback shown below:
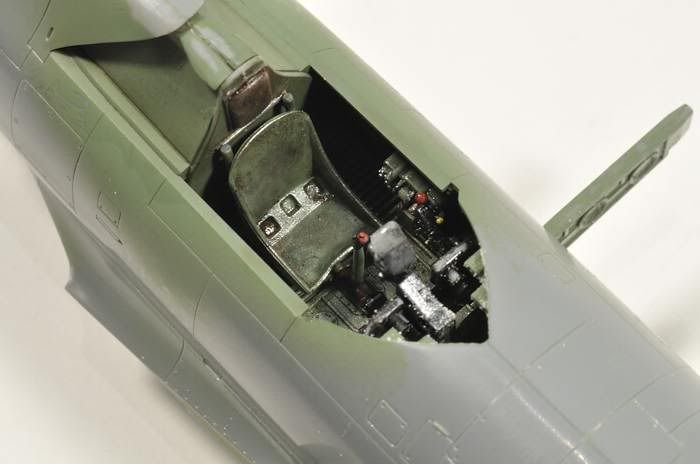
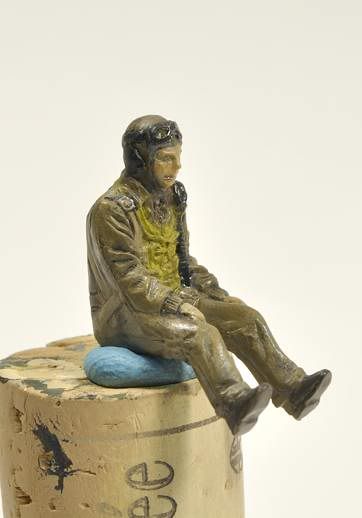
Construction will be mostly if not fully OOB and starts as usual with the cockpit which is then quickly zipped up between the two havles of the fuselage. This cockpit is impressive; highly detailed; I can’t see justification for using PE to improve it, aside from adding seatbelts. But ol’ Neel hisself will be occupying the seat (see below) so I won’t need those.
A few seems to take care of still. Here’s Neel tucked in…
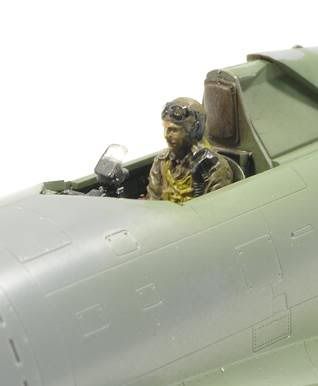
See the resemblence?
This is how you fly a plane, Pilgrim…
Further updates in the near future. Thanks for looking.
Don
Don, Fabulous looking cockpit detail, Lt. Col. Kearby looks great too. I enjoy the slice of history that you shared. I just happened to see a bit on Kearby on “Worlds Deadliest Aircraft” today. Great Start. Rick
I’ve got to spend some good time with “Buckeye Don” this week. The squadron markings on the fuselage are tight, but believable. I’ve got a good photo of the right side and it is pretty close. I’ll have to sit back and decide about the aircraft number in the fuselage band. It’s there on the painting, but does not seem to be there in the photograph. It is amazing how ragged the exterior of those airplanes appear. Rick

Looking good, Rick. The hard edged camo came out really well. Was it masked using silly putty; I’ve been meaning to try that in the near future.
Don
Thanks Don, I’ve become a believer in the blue painters tape. Scotch or 3M work really nice. You can buy them in varying degrees of tack, but frankly off the shelf at Wal-Mart has worked great for me. I’ve had no trouble pulling off paint, or with paint wanting to bleed under the tape. The painters tape is just what it says. It is very thin and comes off the model leaving a very clean edge. I do cut it into narrow strips when working in tight complex areas, but it holds very well even in tough areas. I blew on Model Master enamels with a Paasch single action airbrush. I did have to take down a lip on the yellow leading edge with some 1200 grit sand paper. It did build up a little at the tape. I blame that on the yellow. Now if I could just perfect the feathered edge… Rick.