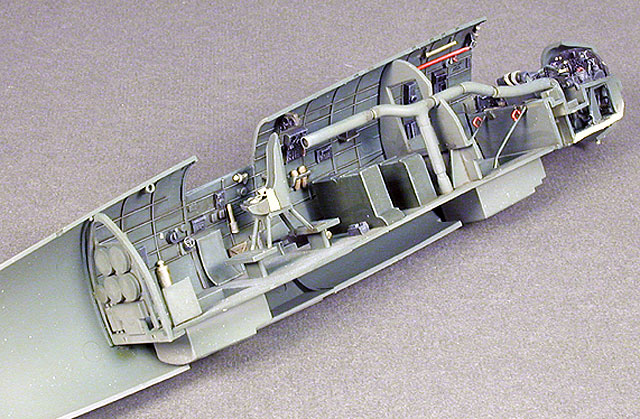
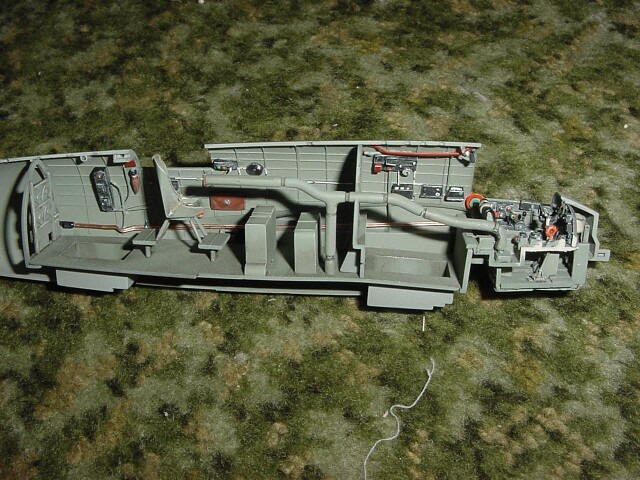
OK, so I think I’ve got it, I’m going to use stryrene sheet to build up the instrument panel, seats, and bulkheads. I’m going to also use it for misccenlaneous details. I’m going to get some wire to add some more details. Does anyone have a good picture of the interior of one, All I found was 2 interior ones of models. Question, does anyone know what the big tube on the right side is for. I’m guessing intercom.These are the pics I found.
I believe that tube was to provide either heating or cooling to the cockpit and passenger areas; it was fed in from the engines somehow, so probably heating.
SAM Publications Modellers Datafile Bristol Beaufighter has scale plans, reproductions of the manuals showing the interior and walk-around photos of museum exhibts. Should be able to get it from any good specialist bookshop or online model shop like Squadron. Or, see their website http://www.sampublications.com/samfront_a.htm
It is there but you have to dig around a bit. Price £15.
I looked through a couple of pics I’ve got from my F-I-L in his, and cannot see the pipe in question, nor do I see it in Crushers photos. His problem in Tunisia was heat not cold and they flew in T-shirts alot, plus he went up on as many engine checks as he could. Maybe it’s a cold weather fit more common to England.
i would guess its a heating duct too. The RH engine probably had a heating muff around the exhuast collector or stack and it was routed through the wing root into the fuselage. Looks like the bottom of the tube lines up about right, and it look like insulated segments.
How do you guys think I could recreate the seat cushion, I’m guessing putty. And then the bulkheads look to be about 3 inches thick which in 1/72 scale would be 1/25 of a inch (I think) which would basically be sheet styrene. For the rear seat, I’m guessing to use wire or strecthed sprue, don’t know how thick, and use styrene to form the rest of the seat. It doesn’t need to be perfect, just give the impression that something other than a blob is there. For the pilot seat, I think I will use the original bench as a base and ad a piece of styrene to the back and maybe get a set of those Eduard PE seat belt buckels. For the cockpit, I think I’ll just build the basic part, not all the details. This is going to be my first Scratch built project. Thanks for the input,
You could use a small piece of tissue and then coat it in white glue. I think ive seen it done on here before. Or use some putty. Shape it off the chair. Dimple it with a sponge or the like. Paint it, wash it. Bobs your uncle.
So, I started building the gunners eat and back of pilots seat as well as putting the floor in, doesn’t look great but is better than nothing. I’ll keep you updated and will post pics sometime tommorow.