Back to the Future is one of my favorite movies, so when I saw Polar Lights’ 1/25th “Snap it” kit (snap together, but more on that later), I had to get it.
For a simplistic kit, this car required a lot of work, and a ton of paint.
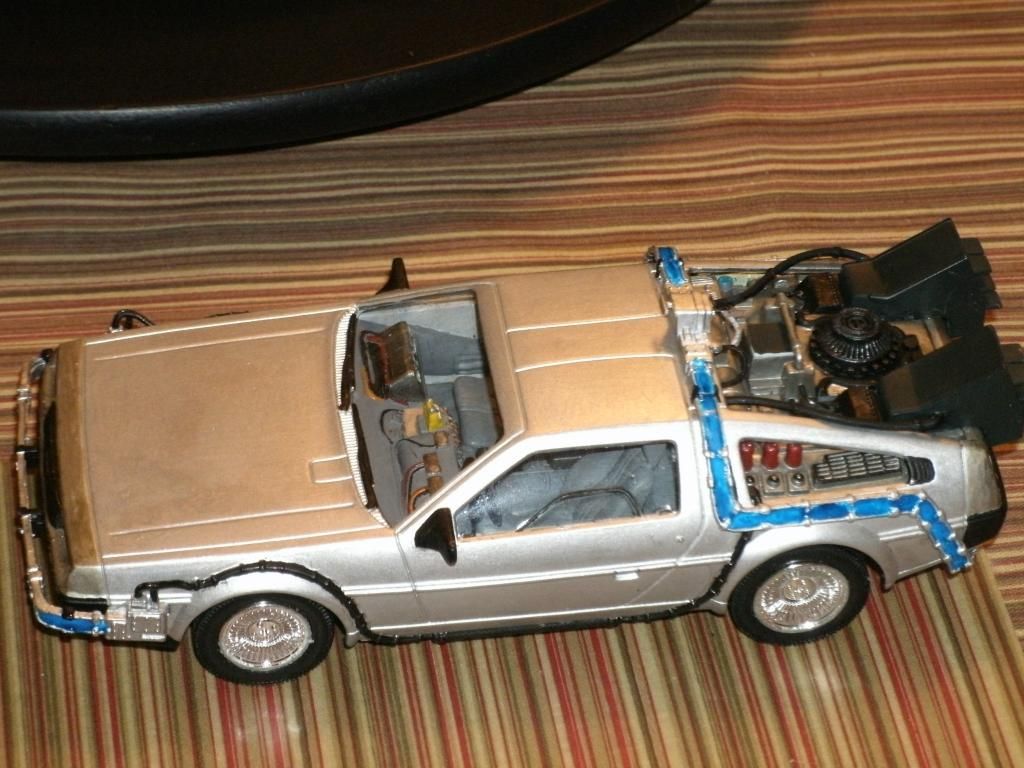
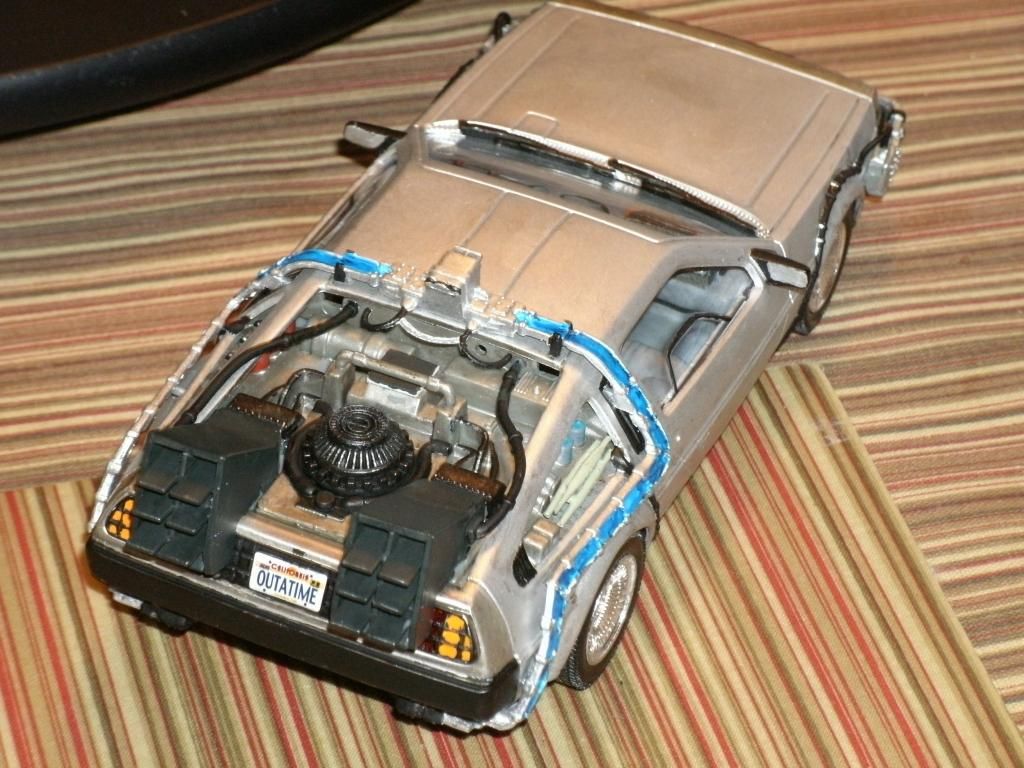
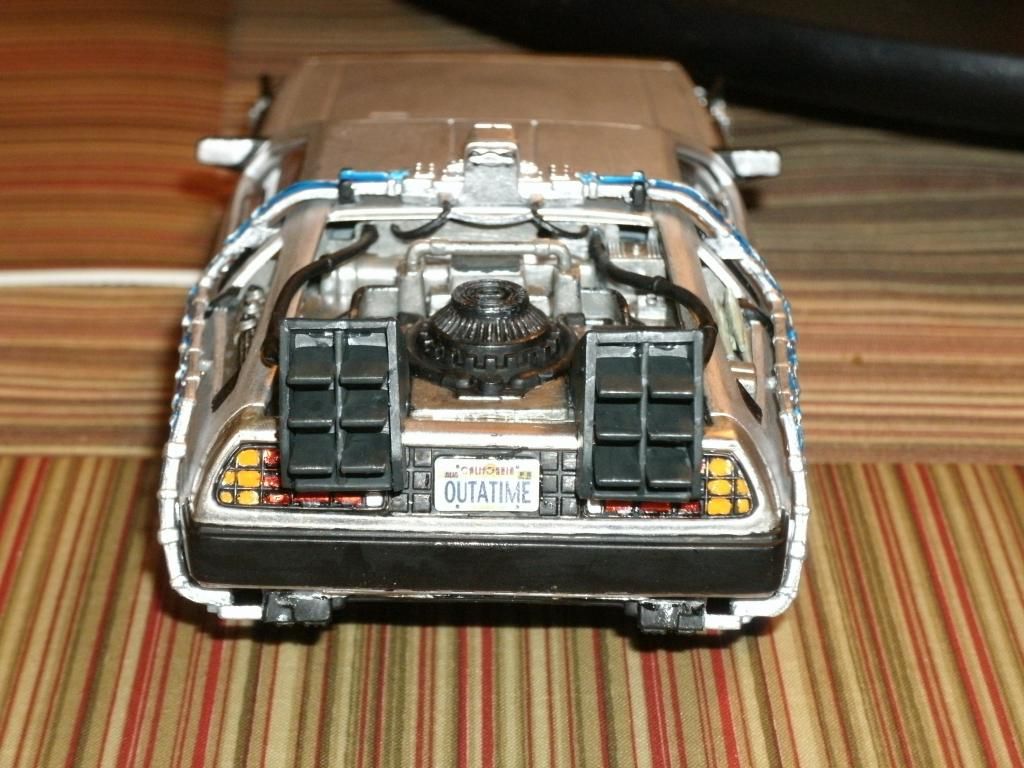
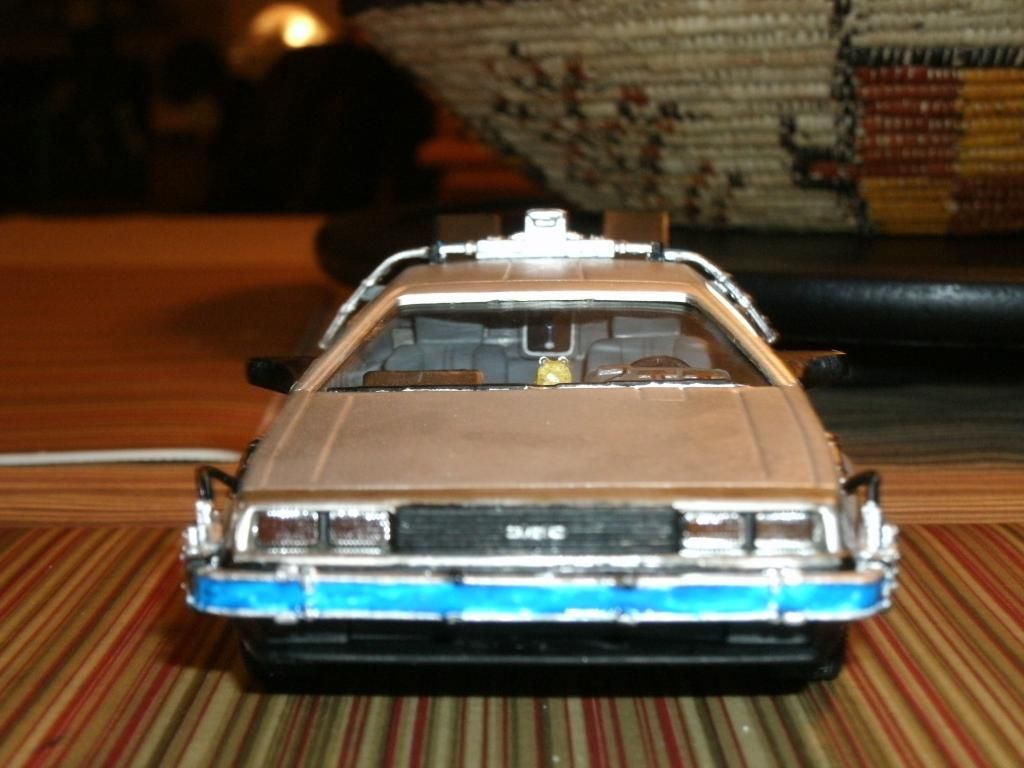
Finished pics for you all:
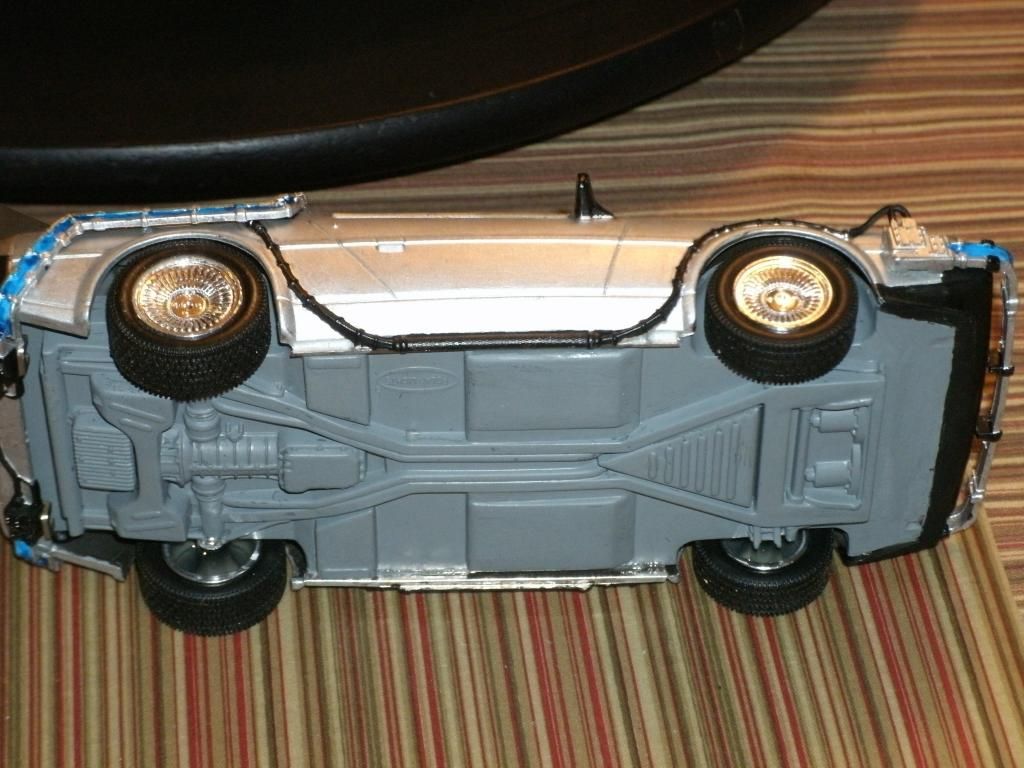
The kit was cast in grey, silver-chrome, and off-tan silver colored plastic for the various components and body shell, which was one piece. The bottom of the kit was not much of an improvement:
But, really, for a snap-tight kit, what can you really expect?
Although the kit had two options–the car as it appears in the first film, but with the ridiculous antenna on the back, and as it appears in the second, with the Mr. Fusion generator (no hover mode, though)–I chose the first one, and with no good reference pics (everyone who has a DeLorean, it seems, has made their car in a facsimile of the Time Machine, with no two looking exactly alike), I just put a piece of cardstock over the holes for the antenna rig.
As for fit, I cannot believe that they marketed this kit as a “Snap-Tight” type kit. Nothing just snapped into place and actually fit there (except the steering wheel, which was the only piece I neither glued nor modified in any way to get the fit). Nearly every part had to have its snap-to-fit points shaved down, off, or completely reshaped to get it to fit in the place it was meant to go. And, even with all that, there were still spots that wouldn’t fit right.
When it came to painting the car, the instructions literally say “look at the box art for paint references”, which would not be so bad had they included more than the one picture repeated all over the box.
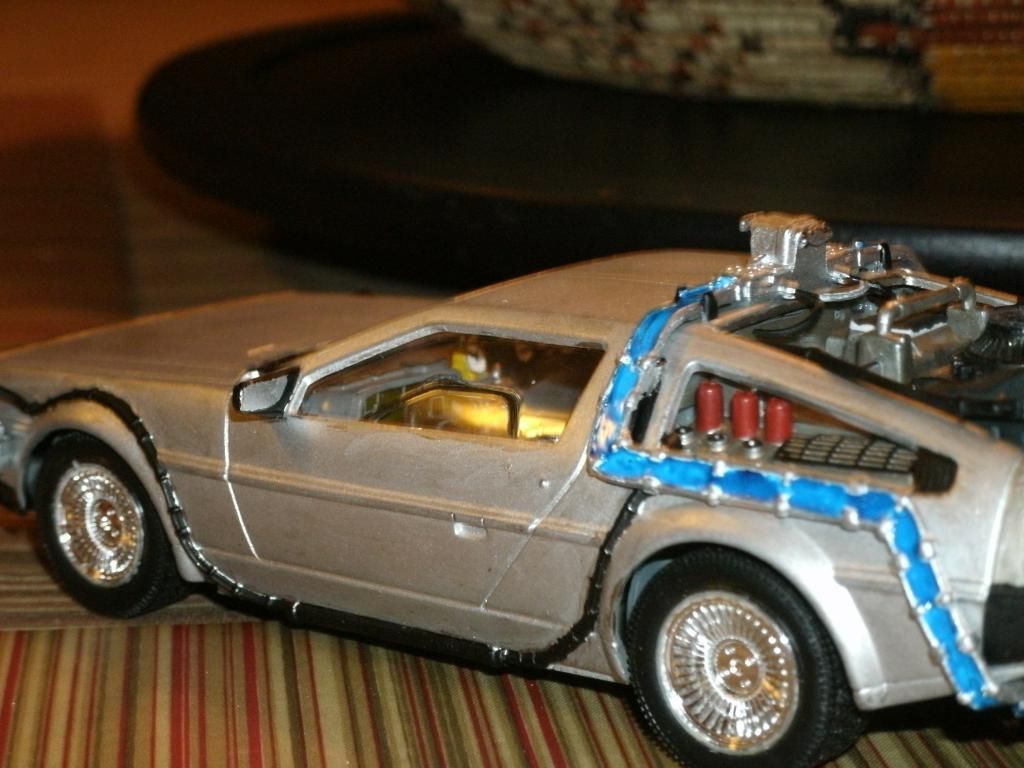
Fortunately, most of the fit issues are hidden on the undercarriage, and can only be seen from this angle:
No matter how hard I tried, I couldn’t get the “Flux Arrays” on the sides to sit right with the “back panel” on the underside–it was the back panel’s fault. Also, the “exhaust fans” are misaligned, as you can see.
What ever the problems I had with this kit, I have to hand it to Polar Lights–every part is labeled for the builder, not just with parts numbers, but with the name of that part.
The Flux Capacitor is even molded so as to make painting easier:
You can kinda see it peeking out in the back. (whoa, that is a BAD picture, my bad). They even included the alarm clock:
also molded so as to ease painting.
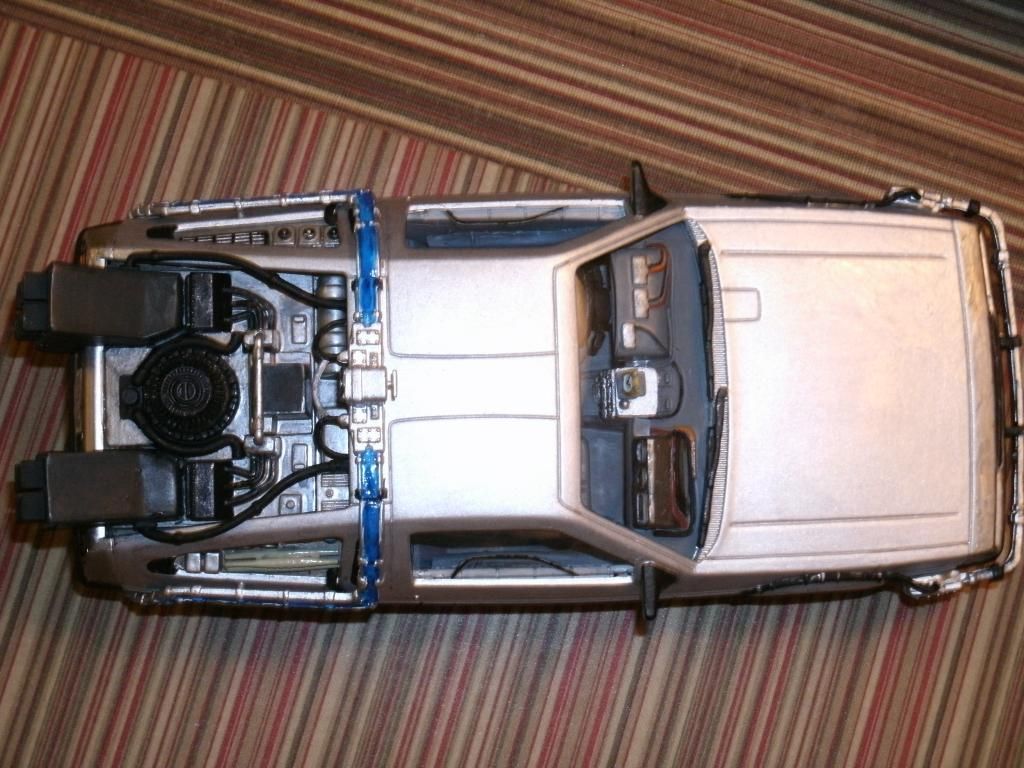
And, finally, a top-shot for you:
Overall, despite fit issues, alignment problems, and missing details, I had fun building this kit, even though it turned out not to be the relaxing, easy build that I thought it would be. I am glad with how it turned out, and the best part is that it ROLLS! (thus confirming my suspicions that this was intended as a “toy” kit)
Comments, criticisms, anything else, welcome and appreciated.
Klik
P.S. I know that all the issues in this kit would have been easily fixed by modelers with greater skills than my own, but I am more of a Out of the Box builder and just finished several tough kits back-to-back and was looking for something easy when I picked this up.