All the cowls I have seen are natural metal inside. The only reason for zinc chromate is corrosion protection, and it is used in areas that cannot be easily maintained or accessed like inside fuselages and wings, or places that get a lot of splash like wheel wells.
Save your money on the Profimodeler PE sets. They are junk. They do not address any of the accuracy issues or really give you much better details than the kit parts. Doogs has posted pictures of the barrel set, and they seem to look good. I’ll be posting some more in progress pictures of my build in a day or so. The more I am working on the interior the more I am finding inaccurate (such as the wrong instrument panel now).
I have already bought most of the sets. just waiting for the cockpit set and paint masks set to arrive and then the exterior and bomb bay sets to be released
Might as well make use of them and report back to you all on how I found the sets and what use thay are.
Looking at the various sets, one of the most useful one is the nose weight. Saves messing around with fishing weights etc.
also looking at the diagrams and what is included in the sets there is not only etched brass but also resin parts. The instructions may not be up to much, but looking at what is included in the waist gunners set also has wire to make the cables that attach to the machine guns for balancing.
Isn’t this what the forum is all about?? and how do you know that the profimodeller sets are rubbish for this model until you actually try them. I never waste money on kits or detail parts as model building is always a learning experience. Eduard are still working on their B25 detail sets. I want to start building this and as profimodeller has already got sets on the market why not give them a try. After all, this is a hobby and at when we get down to brass tacks and the bare nitty-gritty it is our own time and money that we are spending. This is a new kit and the company is the new kid on the block with some big ambitious models coming. Profimodeller are reasonably new to the aftermarket scene surely we should at least support them and give them a try!
want me to post a review of the detail parts that I have to date then I will do no problem as it is informing the community of my views on the parts and giving them good photos so they can make up their own minds.
I know the sets are rubbish because I wasted my money on 2 of them. I am building the kit. It nees a ton of interior work to make it remotely accurate. Here is a link to the posting: cs.finescale.com/…/147710.aspx The Profimodeler sets do not fix basic flaw - the waist set for example does not fix the wrong placement of the MG mounts. They should be at the corner of the window not at the center of the window as HK places them. There are a lot of other things that the profimodeler sets just replace with bad PE without correcting anything.
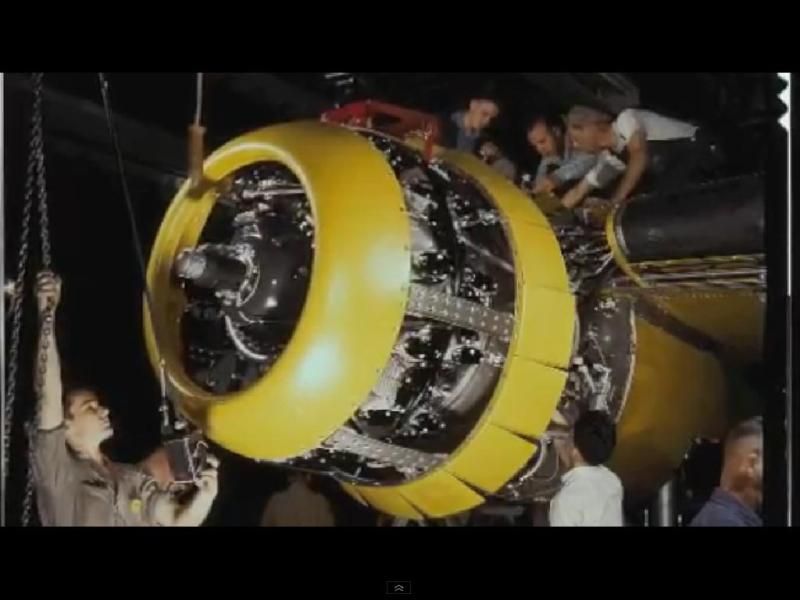
I would go with oil. The R-2600 like all radials had a very high rate of oil consumption. A lot went out the pipes, but a lot also leaked out inside the cowling.
you should not need new parts to fix the waist gunners flaw. This is a simple fix and should not, unless you mess it up, need etched parts.
you very very carefully cut off the mount from its current place in a straight line with a sharp knife (mind the fingers and move it back to where the gun should be correctly mounted and glue it on!
Simple, effective, elegant - and the gun should still fit correctly through the window and the “canvas” part. You then just add the detail parts as per the diagram that comes with the detail set.
A hint here. It is marketed as a detail set not as a surgery set to fix every problem. The Profimodeller set is intended just to add details not to fix problems.Sometimes you have to think for yourself and the KISS systes works fine for me
I have seen your thread and you are doing some excellent work on that b25 of yours, but how did you get that for free??
One of Bronto’s customers gave him that to build for his son. I have seen Bonto’s build here on this forum and in person. If a kits is not right he will tear it down and make it right. His comments about the Profimodeller sets were made to help anyone on the fence about a purchase to save their money…In the end a modeler should build what ever makes him happy.
The IPMS Stockholm guide states that early B-25s (B/C/D) used yellow chromate on the cowl interiors, as well as the fuselage interior aft of the cockpit (save the bomb bay, which was aluminum lacquer). It also states the -J was standardized to interior green for all interior surfaces, but I’ve got photos of bomb bay doors that clearly show them silver/natural metal. No mention given of the the cowl internals.
The B-25J maintenance manual states the interior crew areas were Interior green, the landing gear was silver lacquer, and the landing gear bays, engine firewalls and cowling interiors were to be left in natural metal. This is only true for the B-25J, other variants had slightly different colors.
Hmmm, I think the bomb bay doors even in earlier models were aluminum lacquer. What isn’t made clear in the IPMS Stockholm guide is what is considered “interior”. I considered interior to mean the inside of the fuselage, and not wheel-wells, cowls, bomb-bays. If the maintenance manual says they were natural metal, then that’s good enough.
On a personal note, the guide says that P-47 engine cowlings were NOT painted Zinc Chromate Green, but were anodized aluminum (except for the engine mounts).
I’d watch out for “absolutes”… IPMS Stockholm doesn’t always get it right either…
“Interior Surfaces” in a US military maintenence manual vs a civilian’s interpretation of what it means oftentimes differ… You also need to, in the case of USAAF aircraft, have to decide if you’re finishing a bird as factory-delivered version of a NMF’s aircraft, or one that has had it’s camouflage-paint removed in the field…
“Interior surfaces” in aircraft manuals don’t generally mean interior surfaces of cockpits or crew-cabins/compartments…
At any rate, “A nod’s as good as a wink to blind bat”…