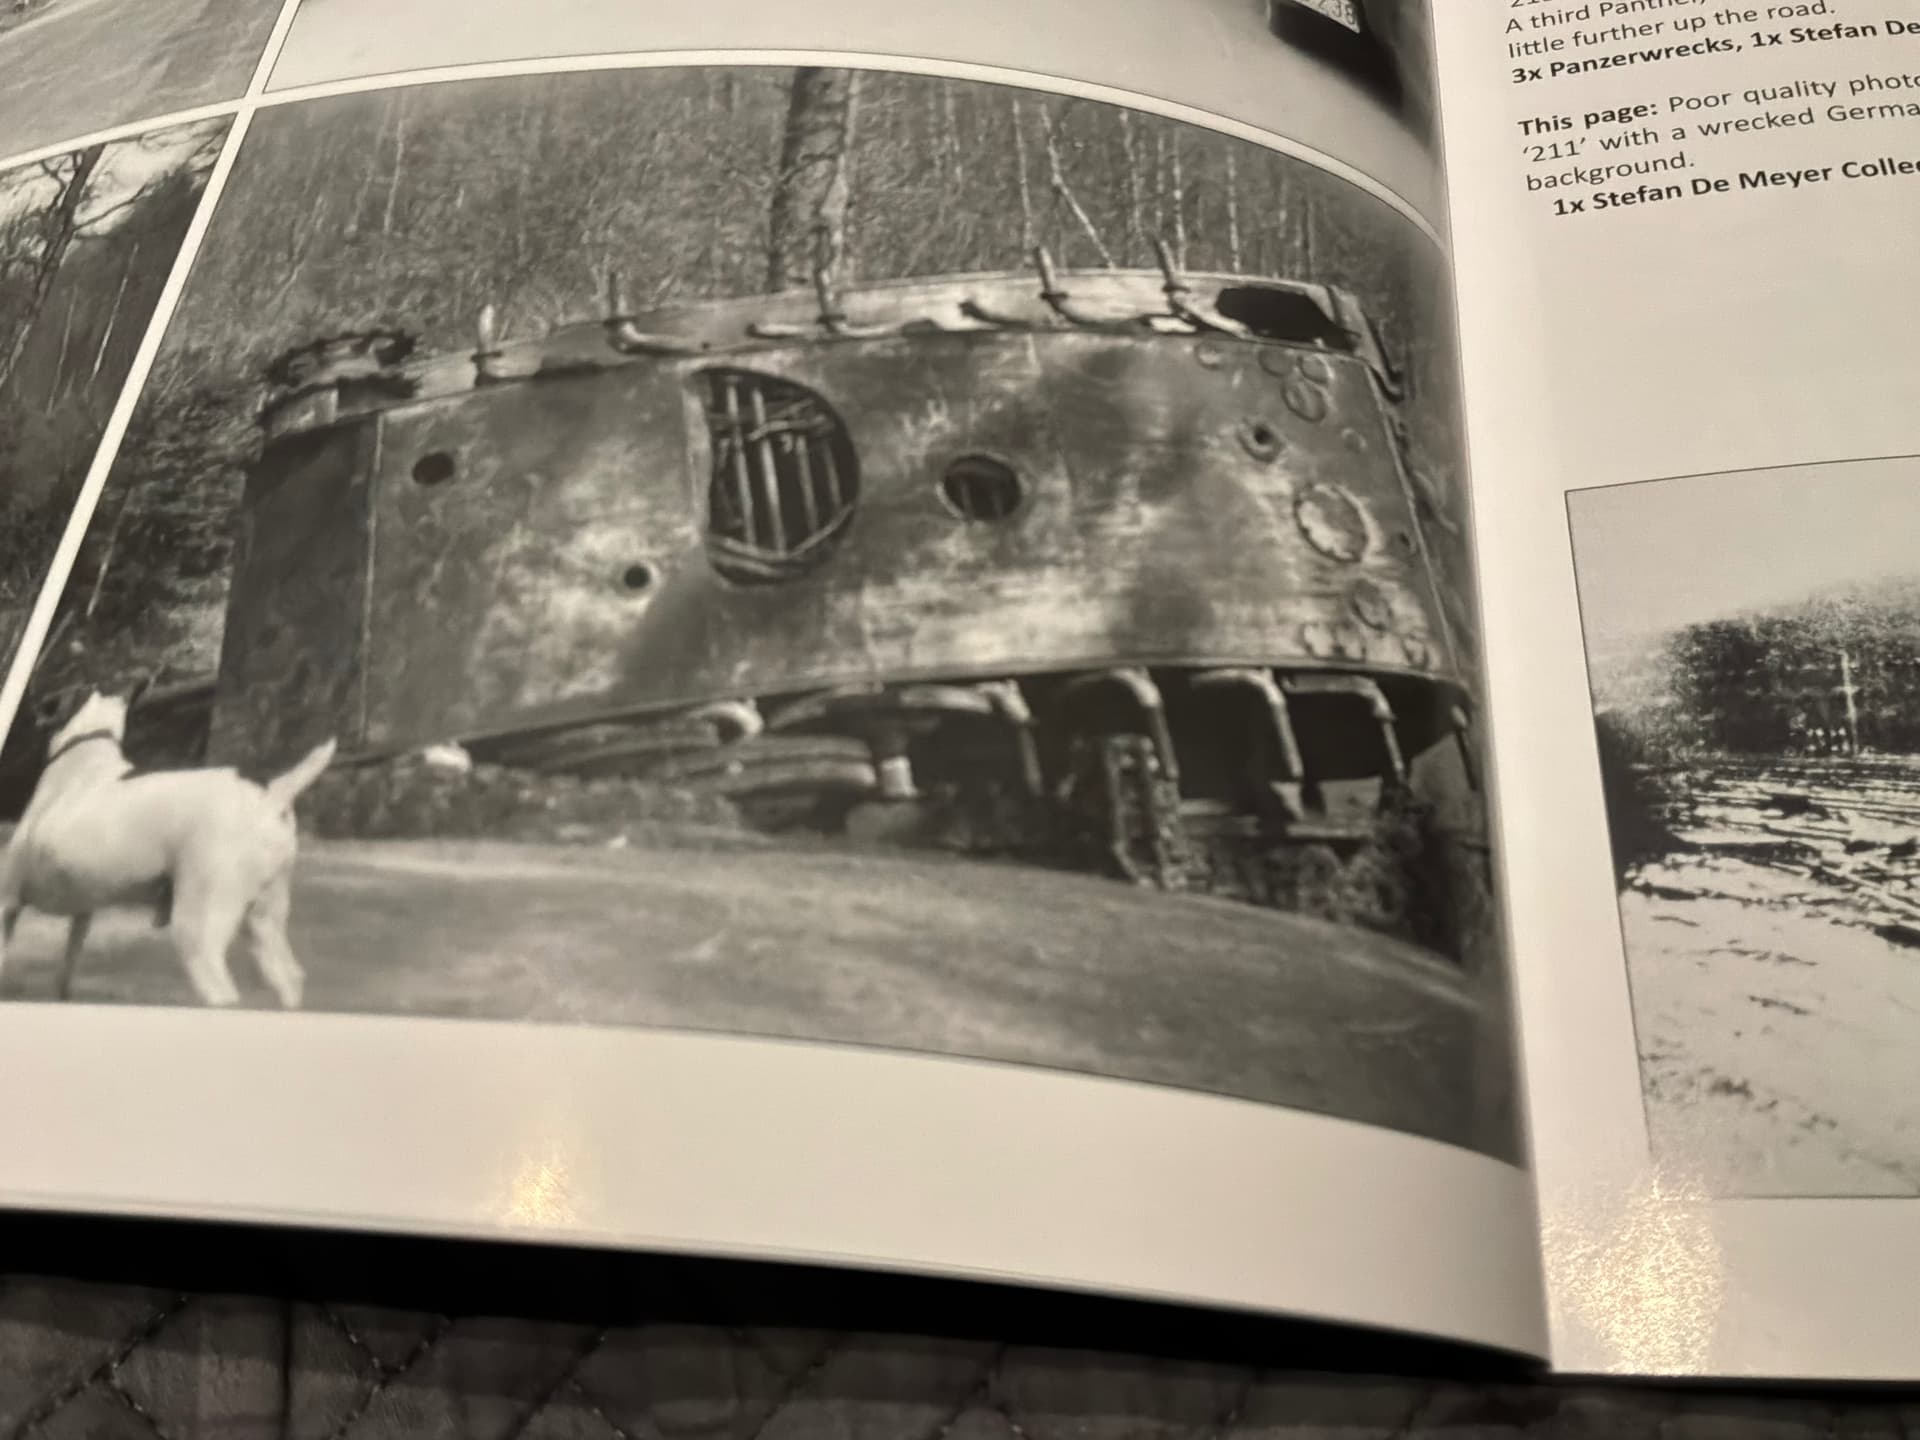
I am wondering what an armored vehicle in the field looks like underneath…I envision base layer factory paint all scratched up and gouged, streaks of rust and bare metal front to back. Then mud and various foliage. Was the escape hatch cleared every day? How much would the crew put up with before sending the FNG underneath to clear and scrub?
2 Likes
A friend was a TC on an Abrams, and he told me that he once saw the underside of a tank after a “training mishap”. It was as you described - scratched and gouged to heck. Cleaning? I don’t think anybody actually crawls under tanks to clean them. They just drive them to the wash rack and blast away.
On a humorous side note, that same friend tended to not do any weathering to the undersides of his tank models, reasoning that no one picks up his models to look underneath.
3 Likes
Yup,I throw a layer of the basecoat on and that’s it.I will weather the back side of the wheels that can be seen underneath though.
2 Likes
The 113s and 901s that I was on had their bottoms scoured clean of paint. They were full of scrapes, scratches and dings, but the aluminum armor on them was pretty bare of all paint. At the end of every field problem all mud and dirt was blasted off the track with high pressure hoses. First at the wash rack and later in the motor pool at the “bird bath”. In the field whatever dirt and mud was on there was on there until ENDEX and the wash rack. Dirt and mud was not tolerated on the parking line in the motor pool. I can’t answer for tanks as I was not a tanker, just a grunt.
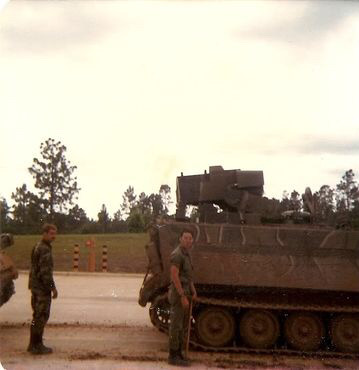
Knocking off the heavy mud before going in the wash rack
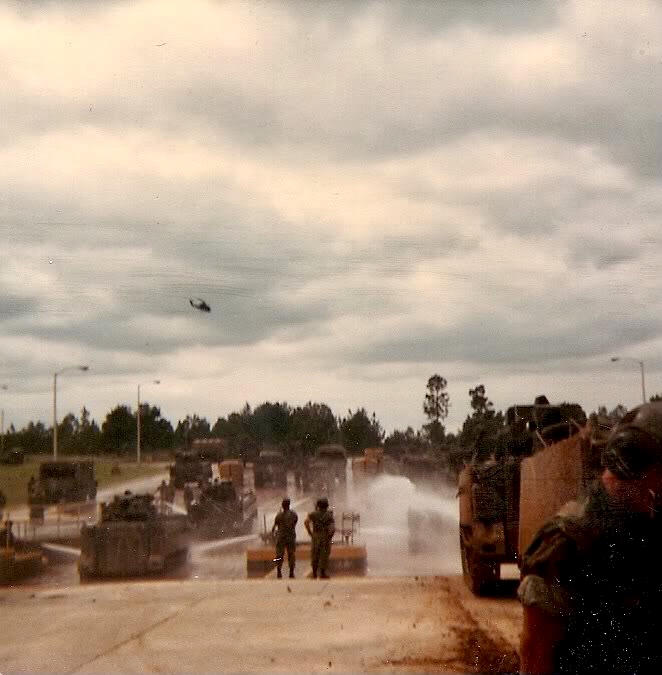
In the wash rack hosing the tracks off with the high pressure nozzles
1 Like
That settles it then. Scratched and gouged to heck, followed by whatever the wash rack manages to blast off. 
For that matter, the same argument could probably be made for aircraft. Nobody is picking up one of my aircraft to inspect the underside either. I know some people display them over mirrors so you can see all that work underneath, but I don’t think I’ll ever be one of them.
I also have to admit your friend’s philosophy on weathering the underside makes a lot of sense. If somebody at a show picks up one of my models to see whether I weathered the bottom properly, we’re going to have an entirely different discussion.
All of my tanks are on vignettes, so there’s a little bit of work required to ensure that the tank looks like it belongs in the scene. The underside will be based and shaded per the rest of the tank, but no effort made to highlight it.
You can potentially leave it there if you’re not expecting anyone to look under the tank, but if it’s a case of “nobody will see, but I’ll know” then some extra work is required, but you can simplify this as far as you feel comfortable. You’d basically follow the same method by which you mud your tracks and undercarriage, with a slight difference - You want to ensure all of your brushstrokes run from front to back, ensuring the paint/texture follows the line of motion
1 Like
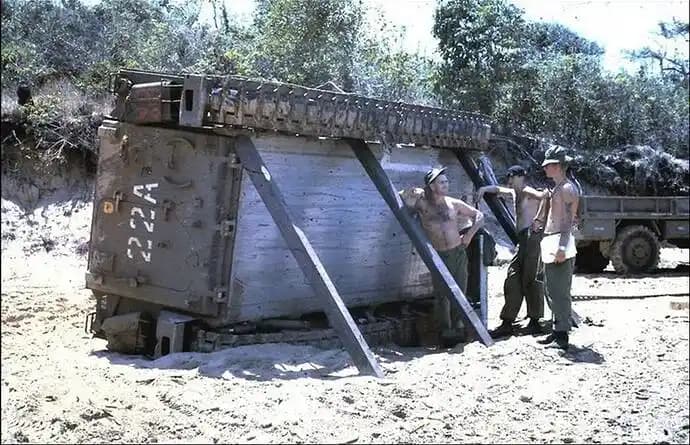
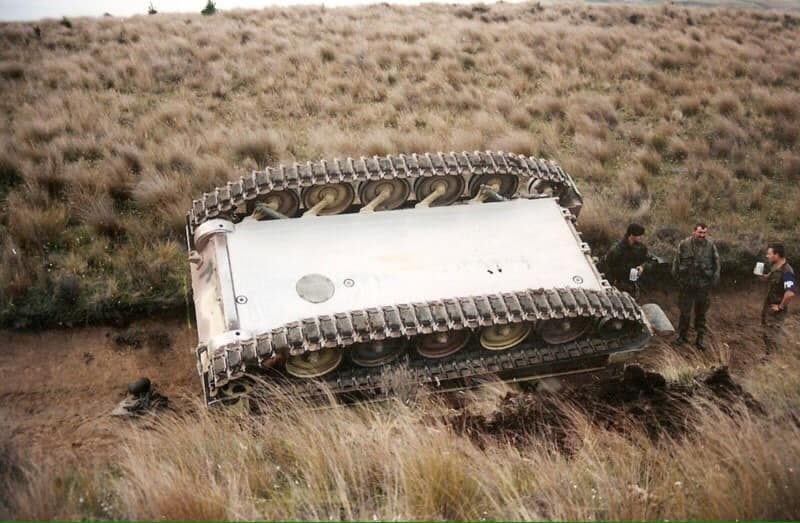
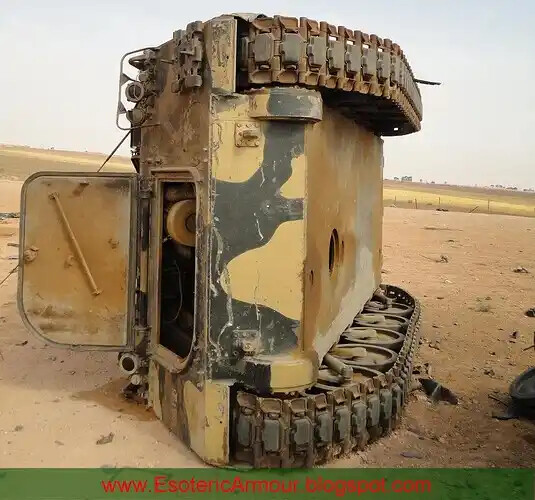
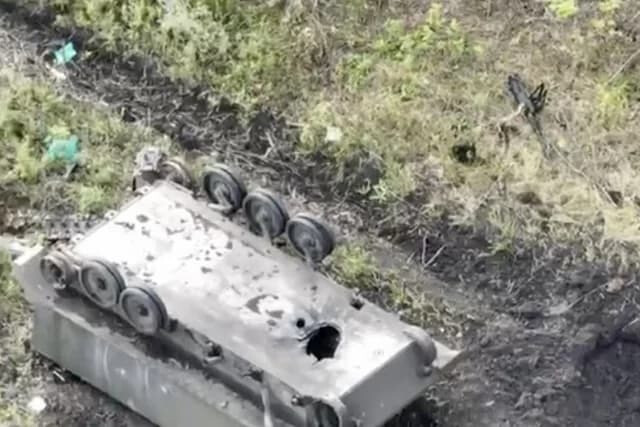
Yeah those pics pretty much validate my approach.
1 Like
This one shows the underside plugs and plates to great advantage. Now my memory is a bit hazy on procedures at this point, but all of the drain plugs would be removed before using the bird bath wash rack in the motor pool, for drainage. There are three on the bottom of the hull and one under each final drive. The larger access plate was used for draining engine oil and the transmission oil. Which was a fairly regular occurrence due to oil contamination in the wet climate of Ft Polk.
In the field the procedure for that would probably give the tree huggers a heart attack. Dig a hole, pull the track over the hole and drain the oil into the hole, then fill the hole.
3 Likes
That’s really interesting. Your explanation got me curious enough that I went and did a little more research because I didn’t really understand what all those plugs were doing under there.
Now it makes a lot more sense. The hull drain plugs were literally there to let accumulated water out of the different compartments of the hull—rain, fording, washing, whatever managed to get inside. Then some of the larger access plates provided access to things like the engine and transmission drains for maintenance.
So what initially just looked to me like a bunch of little details molded into the underside of a tank actually had very specific jobs. That’s exactly the kind of thing I’m trying to learn by paying more attention to armor builds.
And your description of the old oil-change procedure—dig a hole, drain the oil into it, fill the hole back in—definitely sounds like something from another era.  I suspect the environmental folks might have a few more steps in the procedure today.
You have no idea on how much the environmental folks changed stuff in the DoD in the intervening years between then (mid 80’s) and when I retired. Sometime around 2000 I went to a training class so that I could sign for training ranges/areas. Part of the class was on what to do and not to do at and with said ranges/training areas. Two things that were huge changes stood out in that class - chopping trees and brush for various purposes, and digging holes for fighting positions, etc. Both have extreme tactical value, yet at that point were said to be no no’s for “questionable” reasons that made no tactical sense based on my previous experiences. It certainly did not adhere to the train as you will fight philosophy.
But this was 2000 and you can form your own conclusions as to who was running things at that time. Things got a bit more focused in the wake of 9/11, but those policies were still in effect when I retired from the Guard in early ‘07.
1 Like