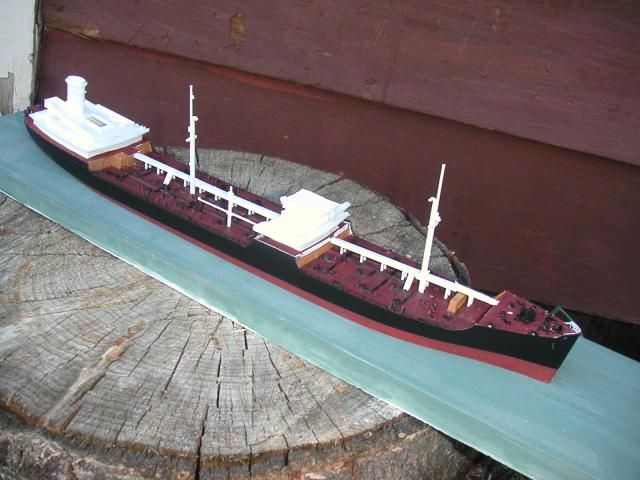
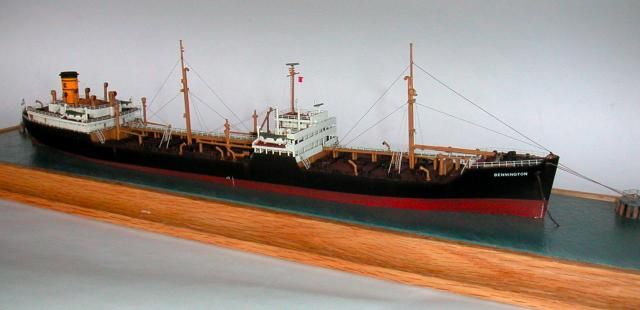
I started on this, the last old Revell T-2 (Esso Glasgow ) in the stash. I hope to fix some of the flaws in the old kit. starting with the half-waterline-but-not-really flat bottom. I cut the hull to show the ship down by the stern, as tankers will be when loading or discharging. The cut is near full draft at the stern, and at the bow just enough to free the bottom of the hull. Are you watching Bondo?
I’ll send you a more detailed list of what seemed important to me.
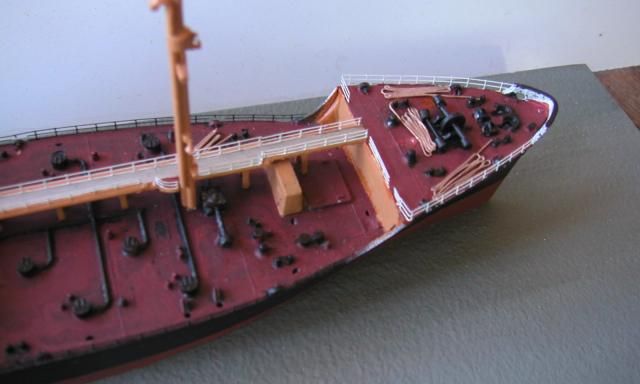
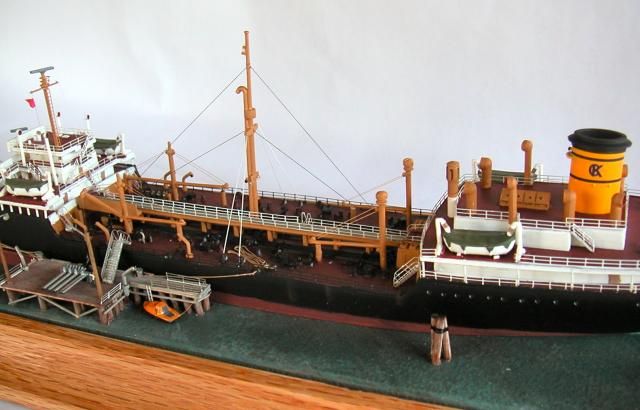
First, all that impressive deck piping is bogus. The major pipes from the loading hatches are in fact just the 4" hold vent pipes that were ganged and sent up the masts. Replacing those with thin wire is a bid plus.
The hold hatches are ok, but all of those other little bumps are supposed to represent the vertical shaft and hand wheels of the valves connecting the holds to the unloading piping. I tried to find tiny little hand wheels with no luck. N scale were too big. One thought was a straight pin and its head.
I spent a bunch of time carving off detail- in hindsight it would have been a lot easier to make a new deck.
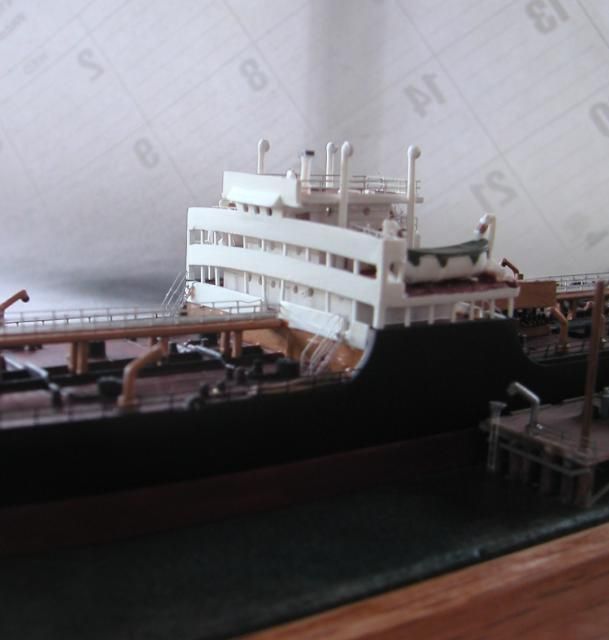
Other more minor stuff- a new bridge front that had camber across the face of the spray rails, even though the decks behind them stayed flat, and round bridge windows. Actually was not hard to make up. The real thing is pretty dodgy anyways so was not too neat.
I replaced the catwalk as the railings had to go, but that was kind of a pain.
Add GMMs excellent 1/400 us navy set which also does Pine Island and you have a winner.
Thank you GM. Yes, I plan to do some of those alterations. I am keeping the piping as is. I hope to do the camber on the bridge front, if I can. Old Bondo kindly sent me a pattern with the requisite camber. He had the ship’s plans from the Smithsonian. As you pointed out, the bridge decks are still flat, so that presents a problem. I plan to try to bend the decks down at the edges a little to alleviate that. I thought about scratch building an entire deck superstructure, with the camber, but I don’t want to spend that much time on this. I’m altering the filets between the fore deck and the raised deck forward. All eight of them could use it, but the ones forward are most noticeable. All the moulded rails will be replaced.
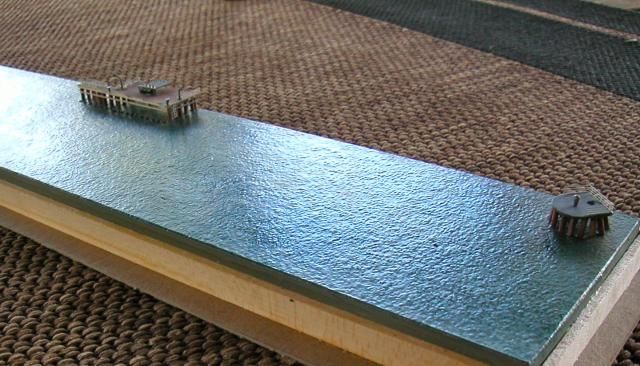
Finally, if all goes well I hope to have the ship at a loading dock, with mooring lines and cargo hoses connected. Summer project.
Yep, I went over to Bondos for a cocktail, or three and looked at his T-2 AO.
He also made up discharge hose sections from lengths of black wire insulation say about 1" long, dipped the ends in brass paint and laid them in racks made from photo etch scrap. He made simple little boom rests. His engine room skylight was plated over with little round holes in the plates as scuttle hatches. He was a pretty darn fine modeler.
Bondo told me a good story. By then we were into the rum. His daughter, who’s a heck of a fine looking young woman and smart too, is casually dating a guy who’s an engine room mechanic on the Jeremiah O’Brien. Said guy knows that a way to a gals heart is only gonna happen through her dad of course, and Bondo is a crusty old f art.
So Bondo is getting a collection of hull plates, cable, paint etc. And he gets to go aboard whenever he wants and wherever.
Most interesting engineering space- the manual steering gear in the stern.
The stern has a nice sharp ridge down the back from the deck to the rudder post, on the actual ship. Revell has a smooth round stern. He glued a piece of styrene rod up-down. Then he sort of filleted in with putty from both sides. Sanded it and is has a nice kind of ridge.
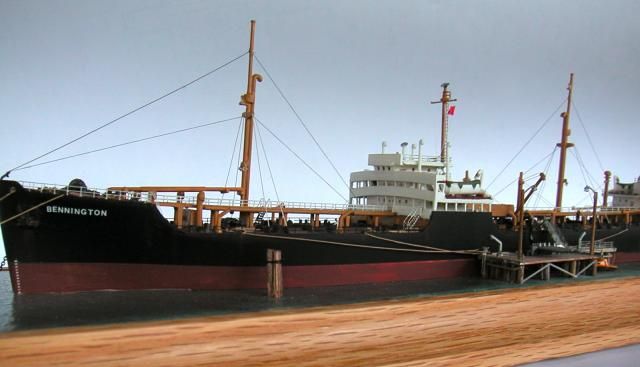
Some progress has been made. Hull and decks painted, some PE rails added along main deck, the white parts are dry fitted. I think I will use the kit catwalks with PE rails added. The after deck superstructure will be modified, the part below the stack scratch built and a new, smaller engine room skylight built.
It occurs to me that if I’m going to show the ship at a dock with mooring lines, I have to show the tag ends of the lines on deck. This is painted brass wire.
Beautiful job so far. The T-2 tanker is near and dear to me. My grandfather was Master of the Fort Mims when it was owned by California Standard Oil after WWII. I was fortunate enough to inherit his license, sextant, some charts and a lot of photos. I have always wanted to build a model of it but have not been able to find a good kit.
I’m looking forward to seeing more of your work on this one.
Thanks Wayne. I think this old kit can be made into a decent model, but it’s just slightly less work than scratch building the thing. Anyway, work continues.
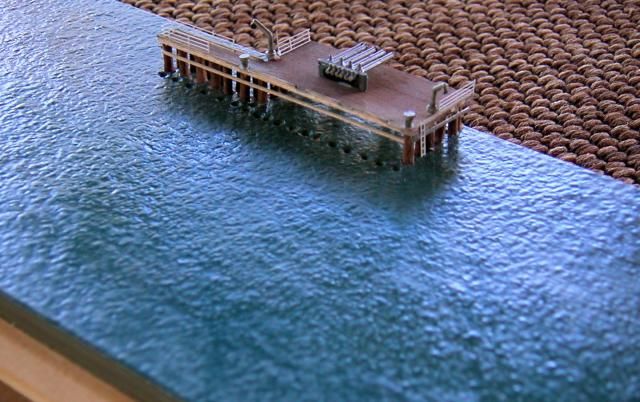
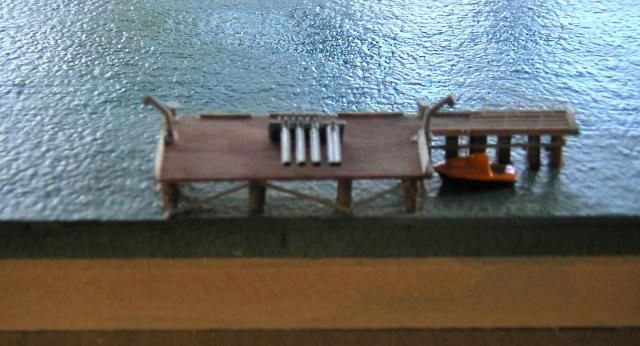
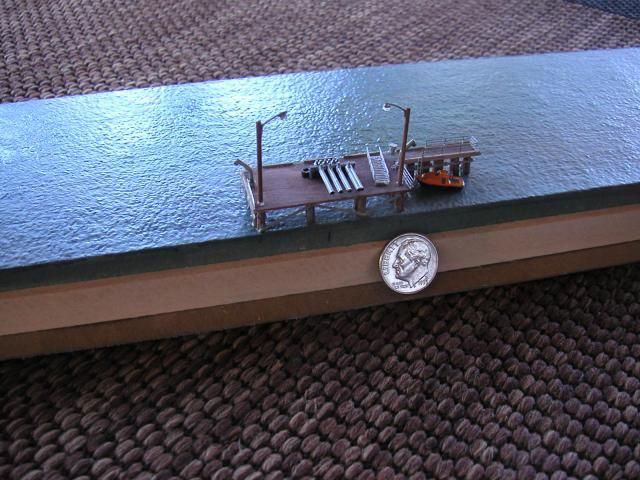
Work continues on the T-2, and I’ve finished most of the oil loading dock that will be part of the base, with the ship moored and cargo hose connected. There are still a few details to add, but so far:
There’s a terminal like that at the east end of the Richmond-San Rafael bridge, which I cross a couple of times a week.
It serves the Chevron refinery over the hill there. Big ones come and go a lot, and smaller ones too. There’s a regular, the Cygnus Voyager. Not to burden you, Fred, but… a couple of overhead lights on the pier would be pretty cool.
I really like where this is going- can’t wait to see more.
I have an idea for overhead lighting already. A friend says I need 1/400 scale pelicans sitting on the railings. Now that’s a burden! I used the gun tubs that come with the kit for the mooring platforms fore and aft. The piping on the dock is also a kit part, the thwartship manifold piping.
Do you know those things that sometimes are used to hold tags on clothing or other items, it’s like a bead-chain of transluscent plastic blobs? I have an idea that those blobs would make good flood lights in ship scale. We shall see.
Getting toward the homestretch now. I spent a lot of time modifying the bridge front to show the distinctive camber to the decks. Bondo gave me a pattern made from the ship’s plans. Forming the cambered bulwarks was easy. The trouble is the decks behind the bulwarks is still flat, so nothing will line up as seen from the side. I solved this by bending the decks down a little, but it still took a lot of finicky fitting. It is worth it, because this camber is a very familiar feature of the T-2.
There are a lot more stanchions between the decks than the kit shows. These are a little too thick and clunky, but most of the kit parts are thick and clunky: