Hi Folks, I was encouraged by another forum to share my recent experience printing my own decals. Hopefully this will assist you to either avoid my mistakes or appropriately remedy them should you fall into the same traps I did while making my own decals for the turret inscription on this Trumpeter 1:72 scale T-34/76 mod. 1942
Other than the usual stuff for decal application, you will need
- A properly-calibrated Laser or Inkjet Printer able to print on 200gsm paper
- Image manipulation software - I use GIMP (https://www.gimp.org/) which is free
- Decal paper suitable for your printer - I got mine here (Dr Decal & Mr Hyde)
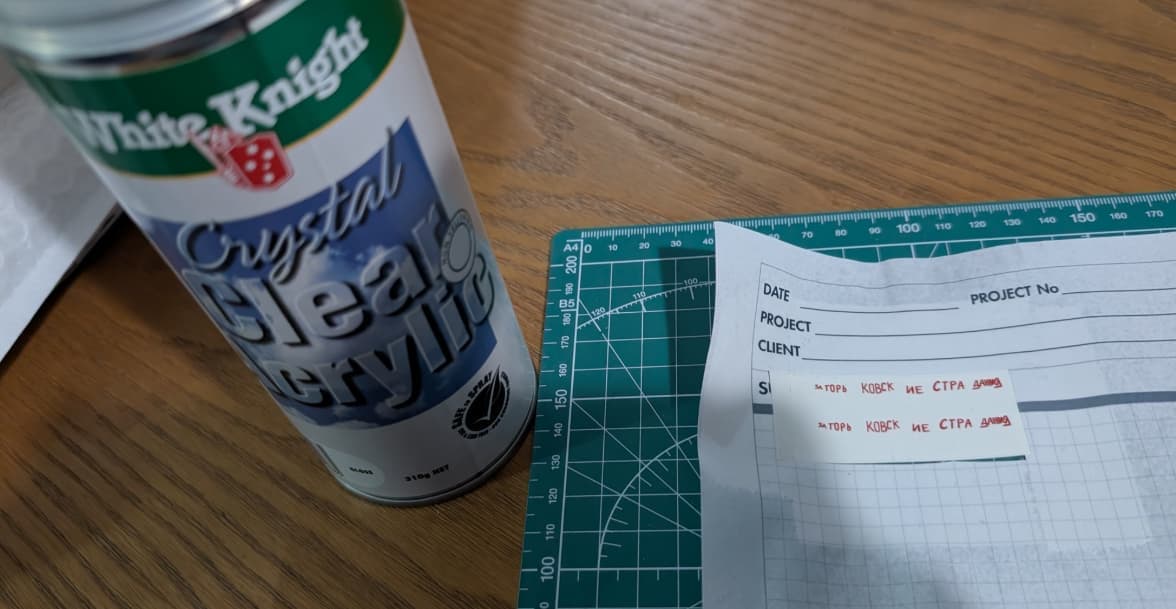
- Clear Gloss rattle-can paint - I used White Knight Crystal Clear Acrylic as recommended
- #2000-#3000 Grit Sanding Sponge in case things go wrong
- A scanner - If you’re just wanting to scan your original decal sheet in case it gets ruined
Why print your own decals?
Most model kits will include a decal sheet, and one that’s probably of better quality than what you’ll be able to print at home, but…
- What if you didn’t have to be constrained by the one or two schemes available in the box?
- What if you felt you could make a more historically-accurate representation?
- What if there was a particular branding you wanted on a civilian truck or commercial airliner?
- What if you absolutely butchered the decals that came with the kit and need a replacement
You need not scour the open market, particularly if you have a decent laser printer or inkjet print in the home or office… you just need the right design, and the right paper!
A Case for Custom Decals
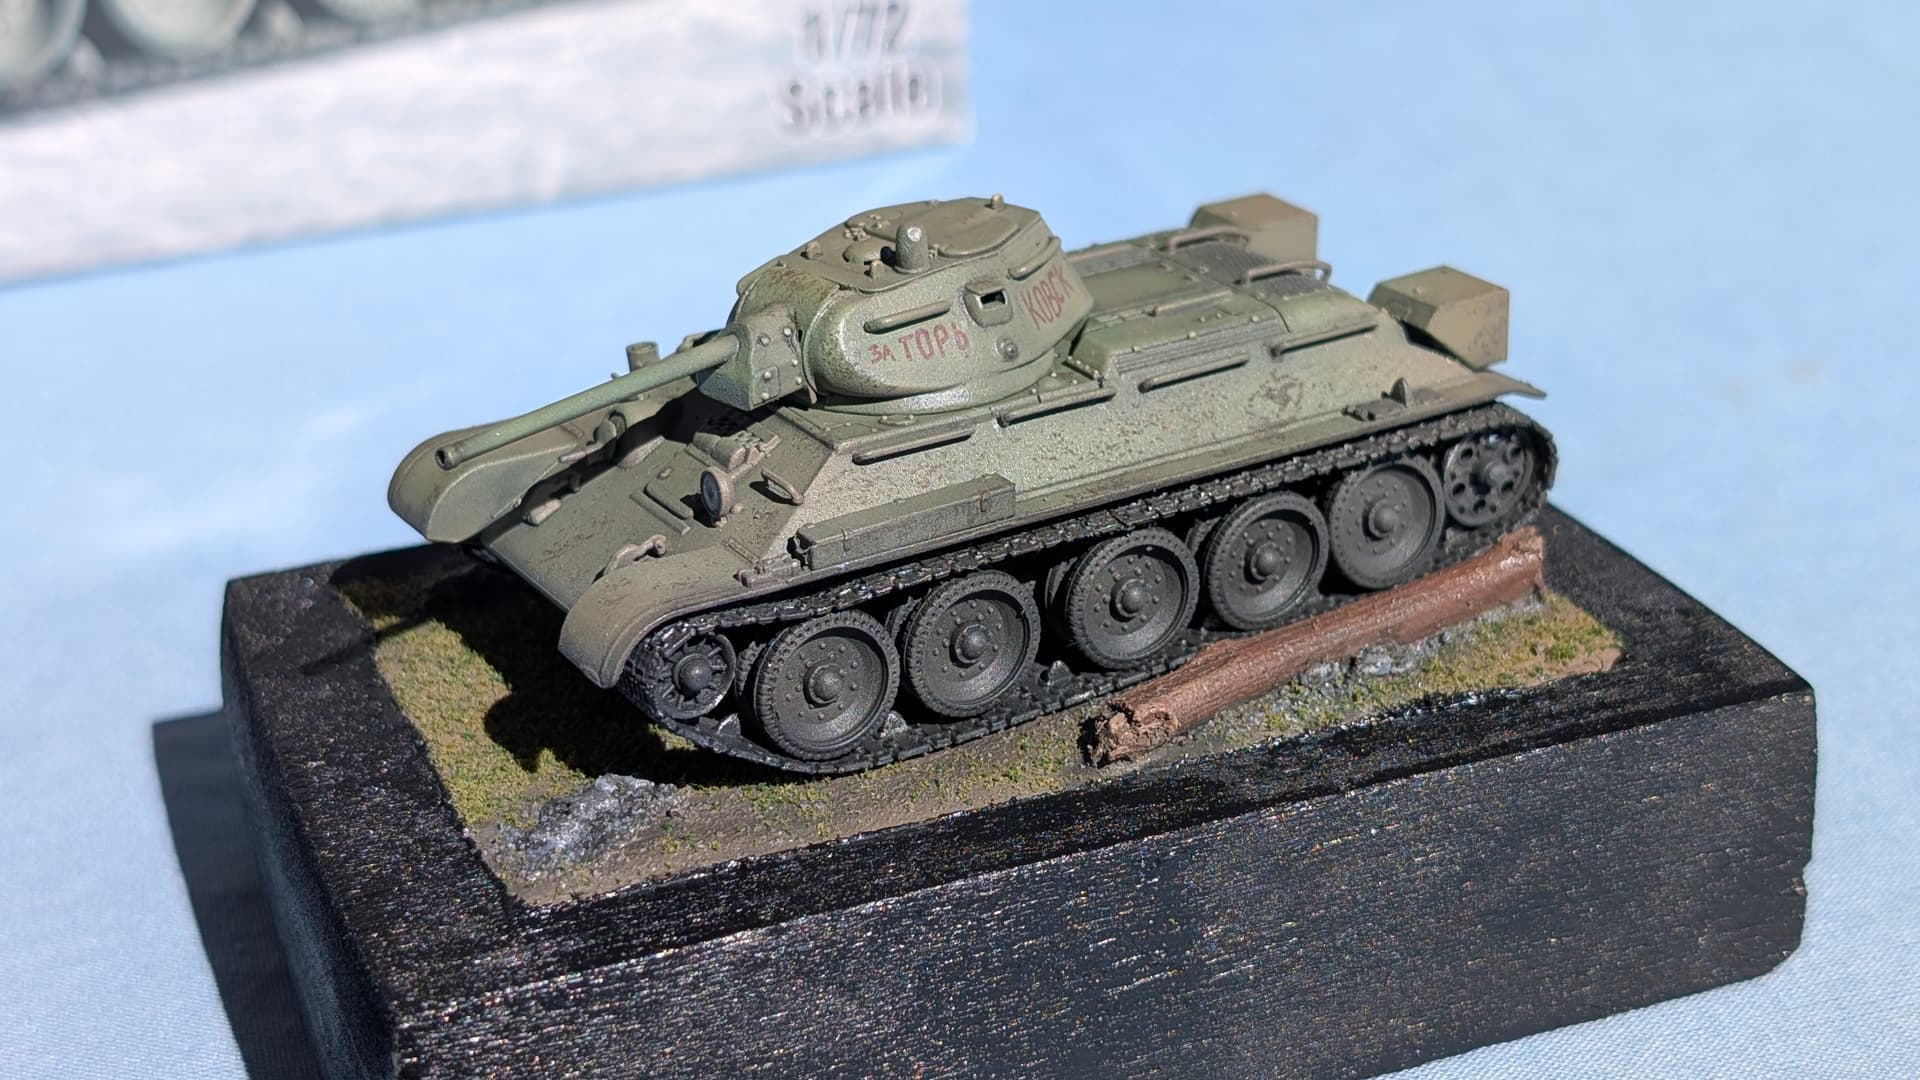
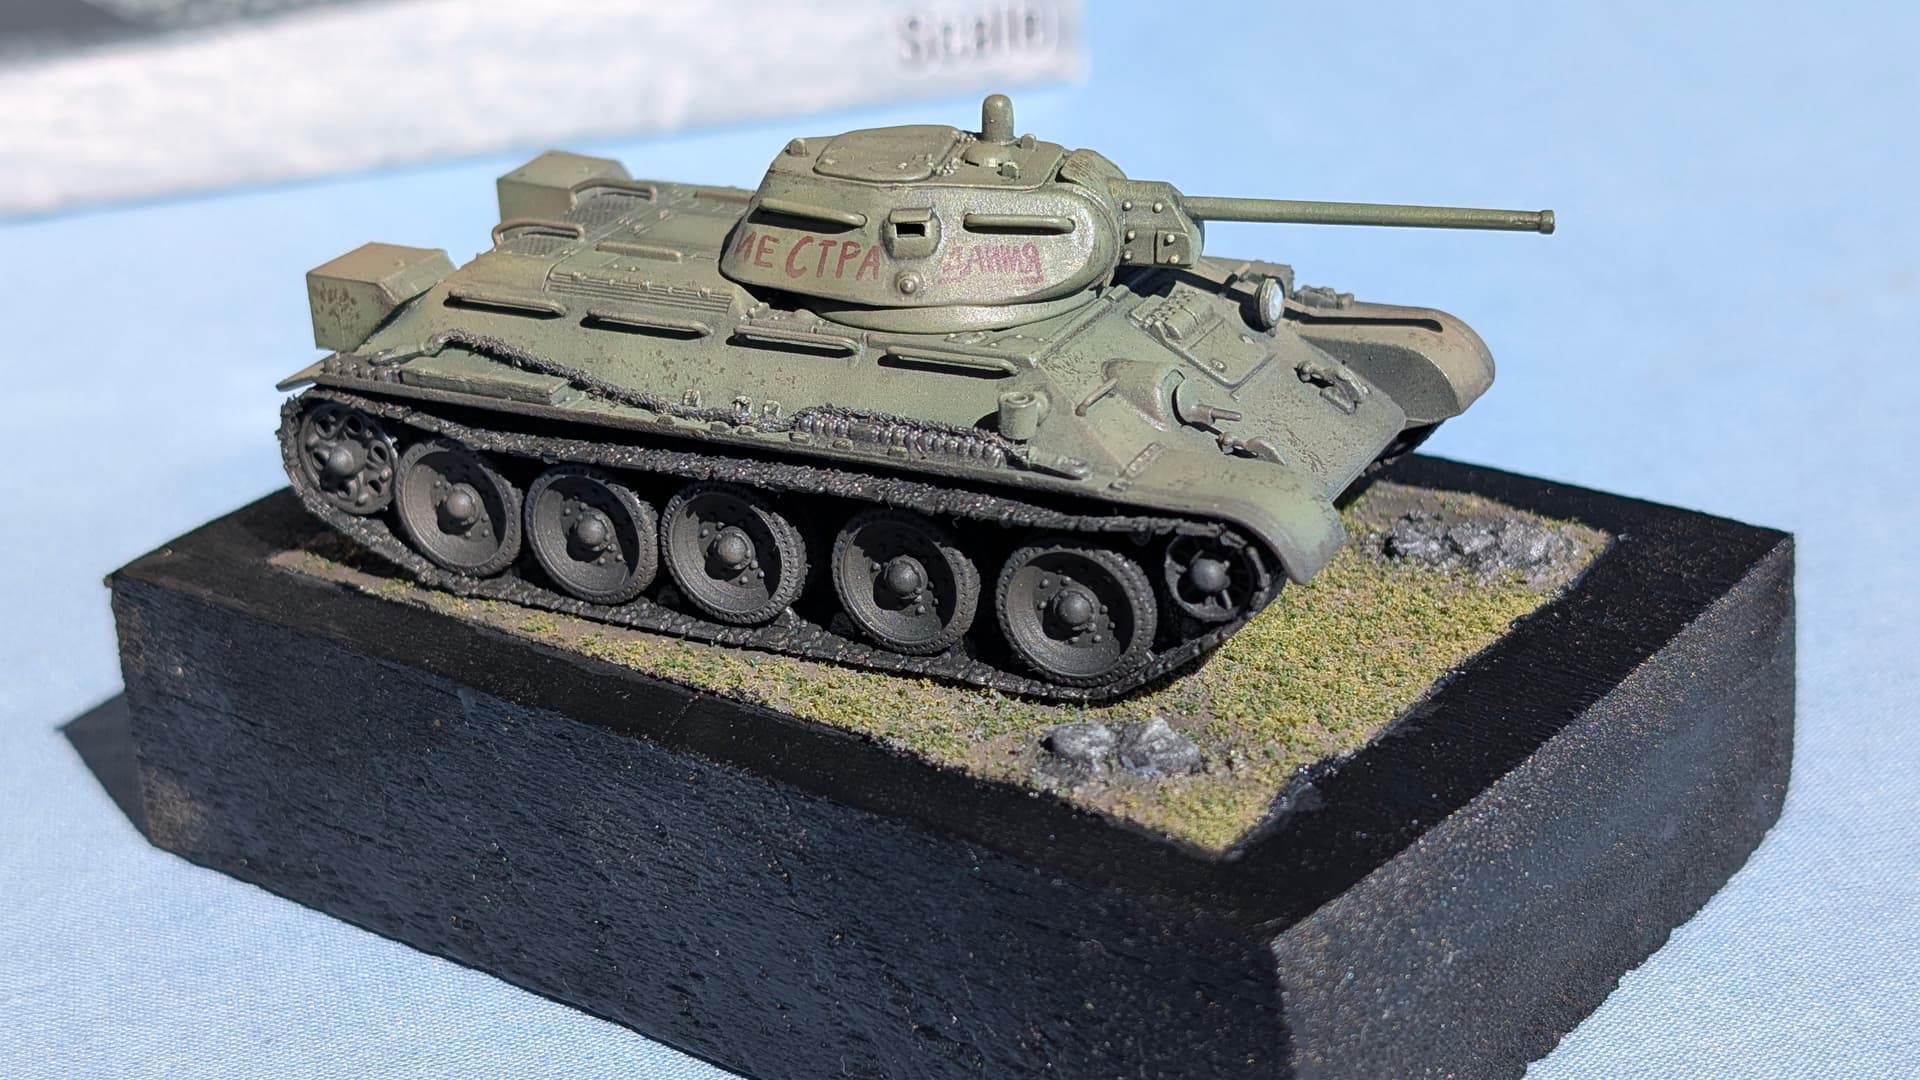
Our story begins with trying to establish some historical provenance of our T-34/76, for which Trumpeter had given us little assistance. I was not alone in this endeavour, but thanks to another forum user we learned that Trumpeter had been duplicating decals from a couple of reference photos across large parts of their product range
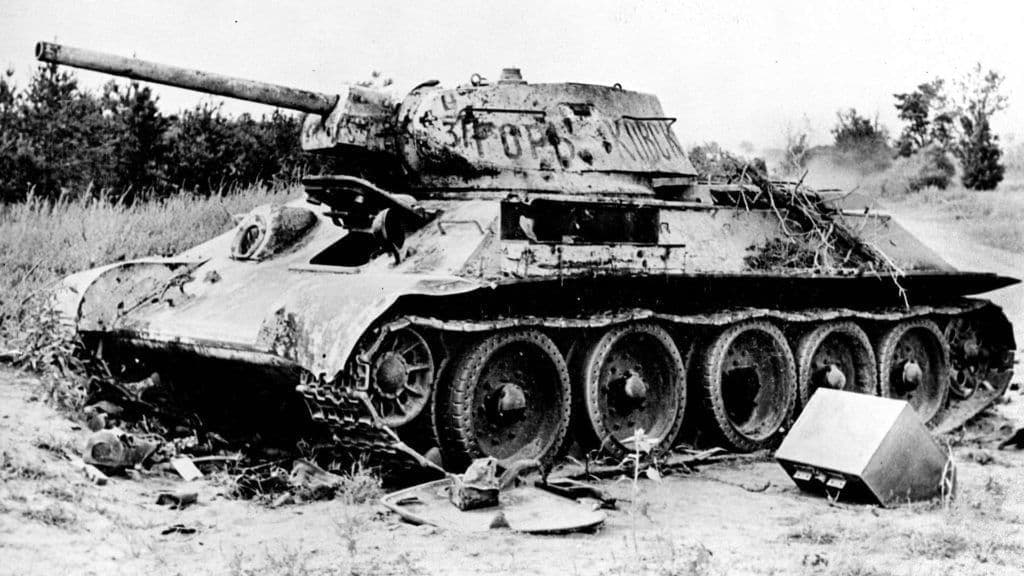
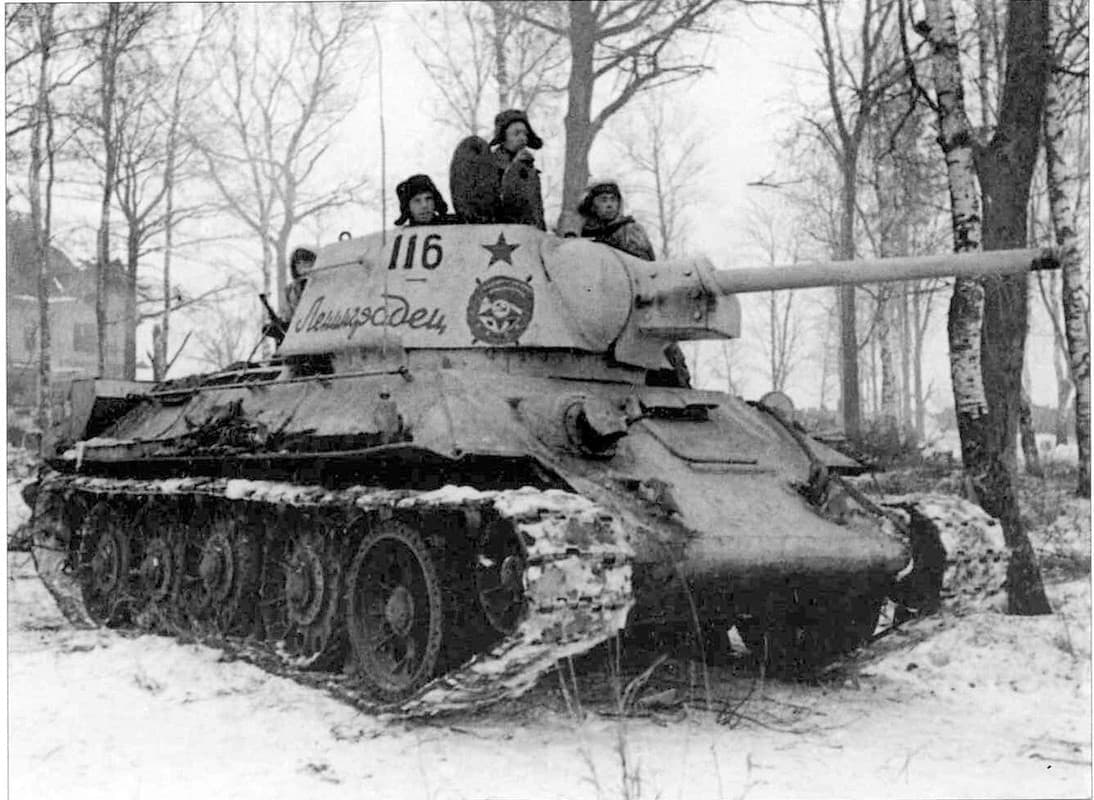
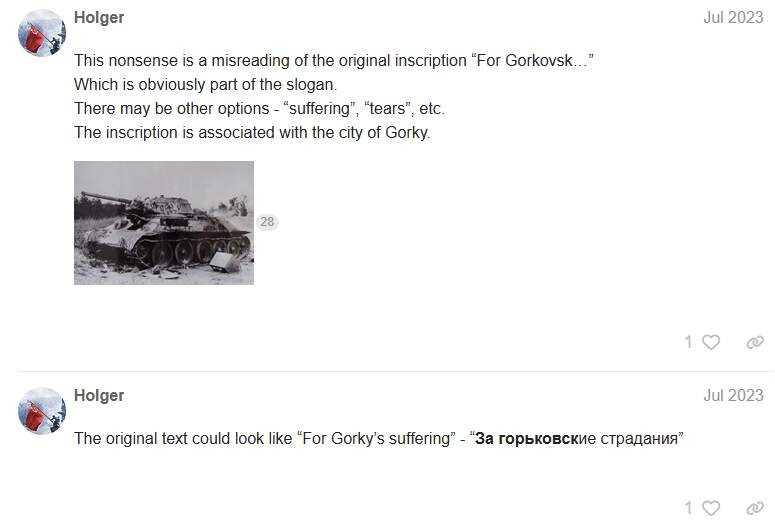
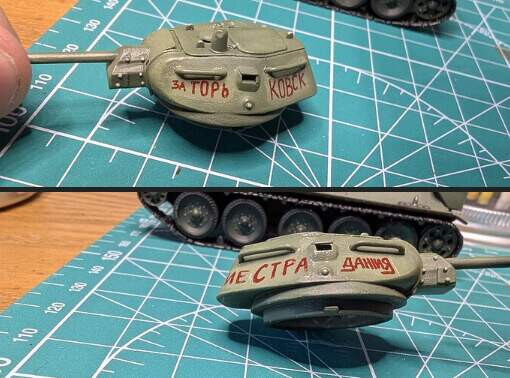
Unfortunately in the case of my T-34/76, the decals had been produced to infer that they were symmetrical unit-markings to be placed on either side of the turret. While a non-Russian speaker would probably be none the wiser, it was pointed out to us that the decal as-produced was gibberish and likely part of an inscription that wrapped around the turret…
And thus began our journey to attempt a more faithful representation of the vehicle used in Trumpeter’s reference photograph…
Decal Design
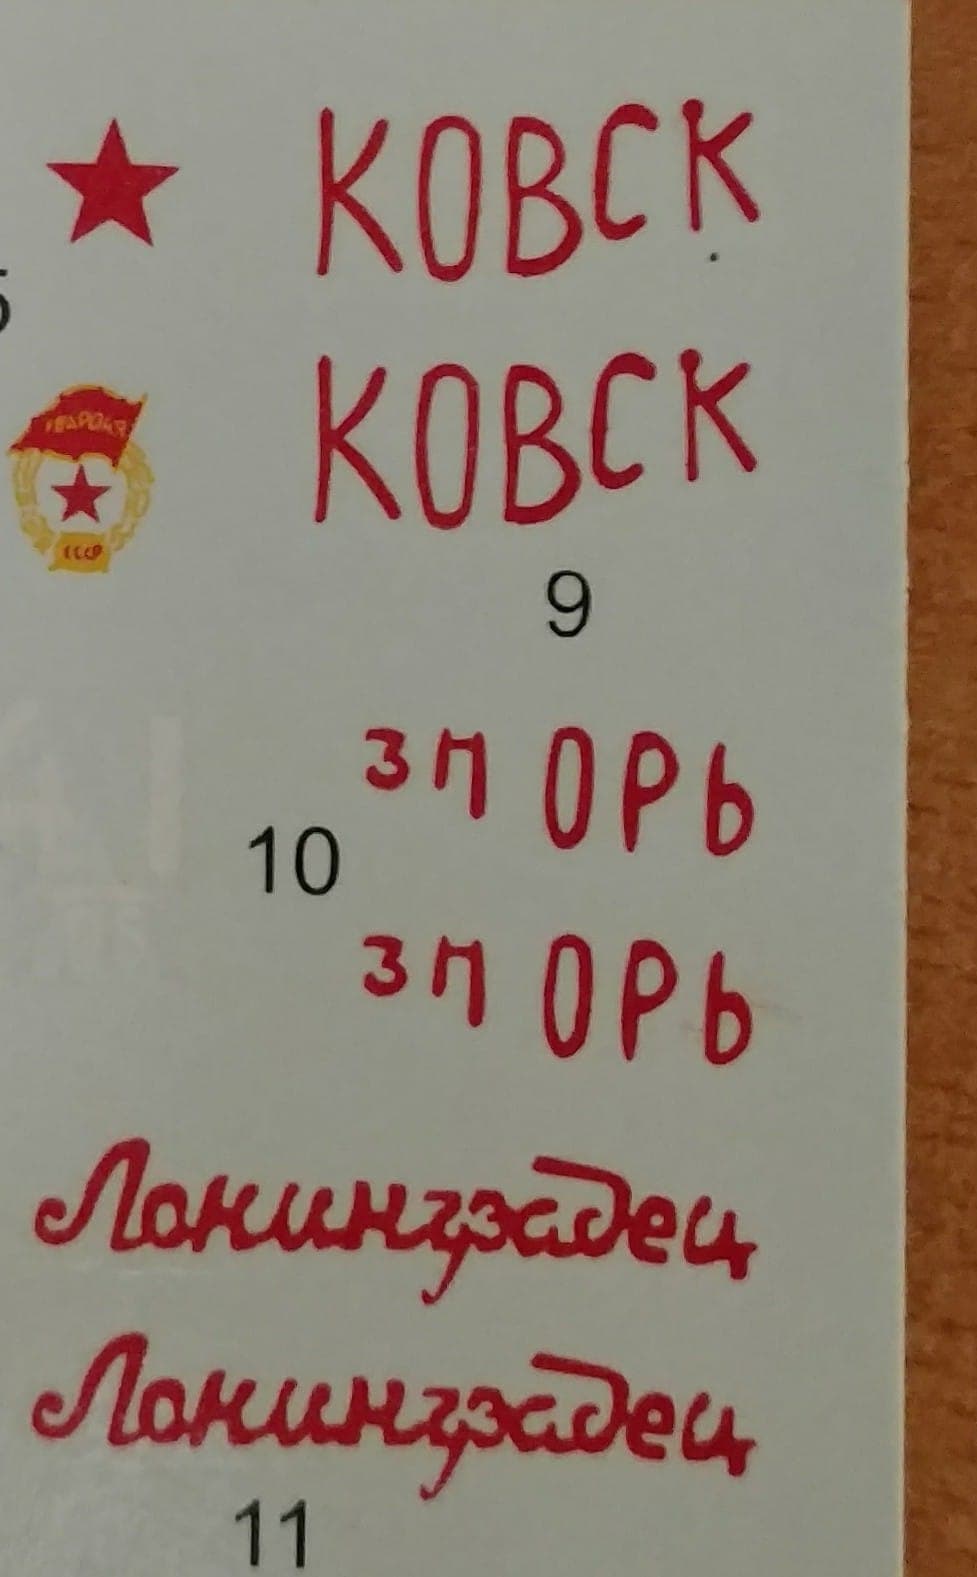
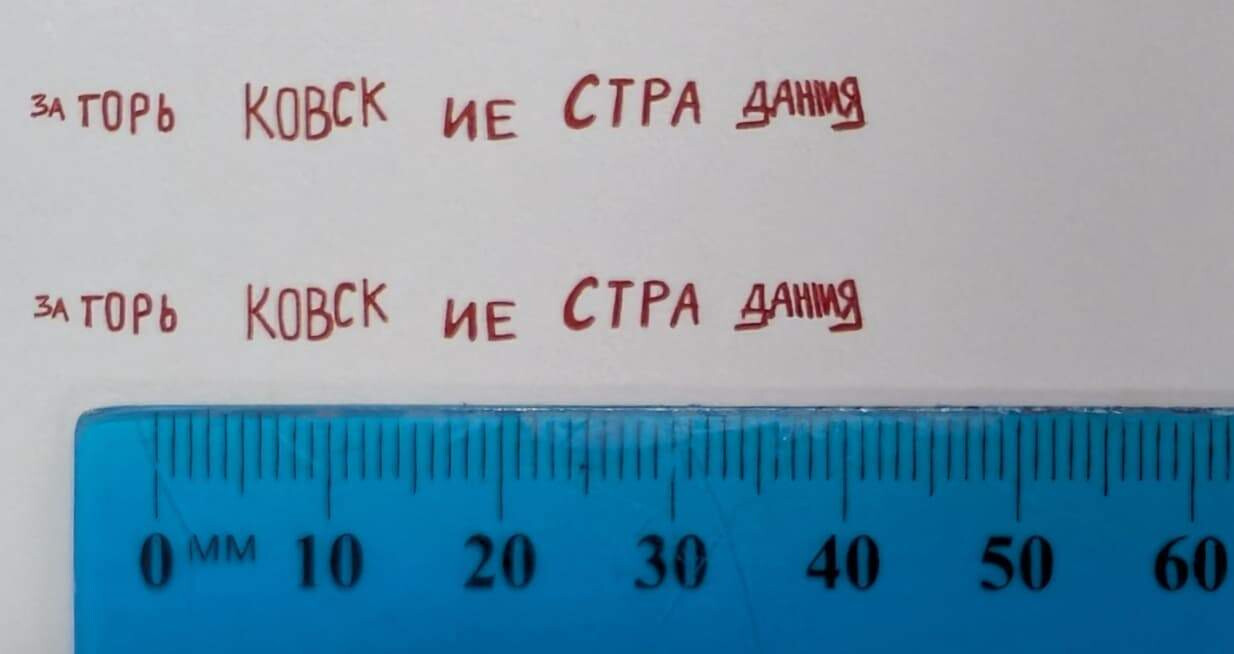
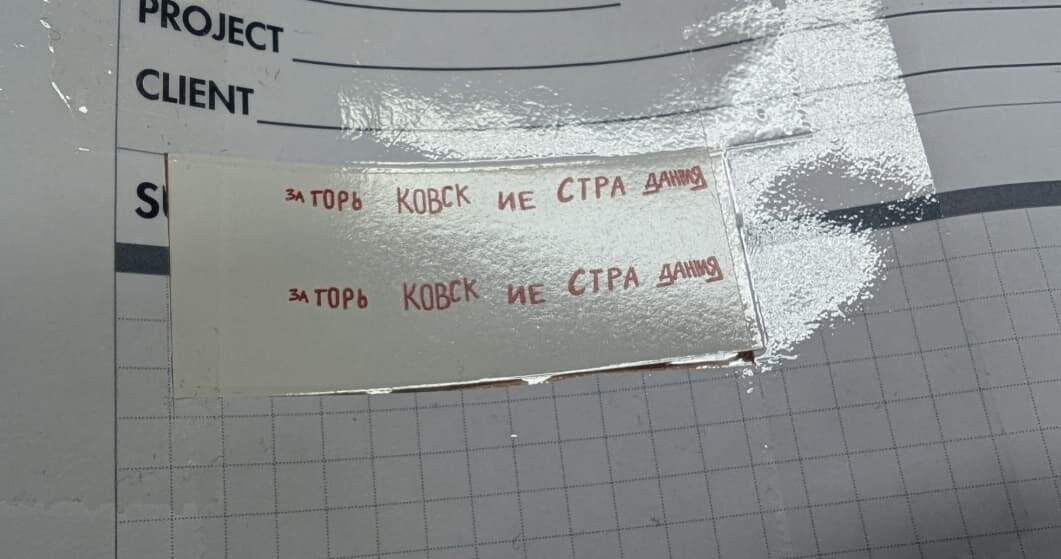
Running Holger’s text suggestion through an AI (I’m pretty sure I used ChatGPT) with the prompt that it’s represented in red paint over a white background we came up with this image:

We then manipulated the resultant image using the free Photoshop clone GIMP2 to come up with more uniformly-sized text to make up the inscription:

We took a number of profile photos of the turret with a metal ruler in frame, so we could get the size of the decals correct, also using GIMP2 to align and scale our images as well as break up our inscription into pieces that could be distributed around the turret

Satisfied that our sizing was correct, we printed a test run on plain paper, yielding satisfying results. This would also point to where the decals would be positioned on an A4 sheet
An important point to note is that unlike the printers at Airfix or Tamiya, your home printer probably doesn’t print white, so it’s good to plan your solution if your design has white parts by either:
- Using clear decal paper, and carefully painting any white areas on the model
- Using white decal paper, and carefully cut around the edges of the decal after printing
Decal Printing
I felt that I’d get a better result if I dialled up the settings on the laser multi-function centre at work rather than chanced it on the printer at home, so I bought the decal paper suitable for laser printers from Dr Decal & Mr Hyde. Incidentally, the punnery in the name of this fine Australian business has also forever firmed up the appropriate pronunciation of “decal” in my mind as “Deh-Kuhl” rather than “Dee-Kal”
In the printer settings, we cranked up the resolution from its usual 300dpi to 1500dpi to improve the sharpness and resolution of the print. You’ll also probably need to change your printer settings to suit the thick decal paper, as the 200gsm decal sheet will jam on rollers spaced for your typical 80gsm copy paper
Since I was only after a pair of 50mm long decals, I didn’t want to waste a $2 sheet of A4 decal paper on a tiny transfer set, so I printed my decal image on a sheet of grid paper with the idea that I would carefully cut out the location of the print and replace it with decal paper secured by tape. This method was ultimately successful, if a little off-grid…
The printed decal was then sprayed with White Knight Crystal Clear Acrylic as recommended by the manufacturer. One coat is enough, as two coats will make the decal too thick, and it’ll take a lot of work to make them appear to conform to the surface
Allowed to dry, the decals can then be cut from the paper and applied in the usual manner. There were no issues using solvents such as MicroSet or MicroSol.
I stuffed up and sprayed two clearcoats…
Overdoing the clear-coat will make your decals too thick and prevent the surface of the decal from demonstrating conformance to the underlying surface for that coveted “painted-on” look. Holding a piece of #3000 Sanding Sponge in a pair of self-closing tweezers allowed me to thin out the obvious edge of the decals as well as generally thin the decal to allow underlying surface texture to come through consistently. I scuffed my own paintwork in this process, so some extra clear-coat for your model will better protect it from whatever aggression you use to sand the decal edges
Alternatively you could simply sand the decal edges while it’s still on the paper, bending the paper to give the edge some tapering. This will place your model’s paintwork at much less risk if some heavier sanding is required.
Importantly, you want to wet sand rather than dry sand. I found sanding the decals without a little water tended to make them go cloudy which is far from ideal

Conclusion
In conclusion, this was a highly satisfying exercise allowing us to better represent the subject. The historically-minded modeler would do well to explore the world of print-it-yourself decals particularly if there’s a particular time, place or unit that you’re trying to represent at scale. For civilian vehicle modelers, the options are unlimited.
Please feel free to hit me up with any questions, or share your experiences with decals you’ve printed yourself! Note that this was my first time, but do I feel like I have learned a few hard lessons that I would love to save you from having to repeat if possible…