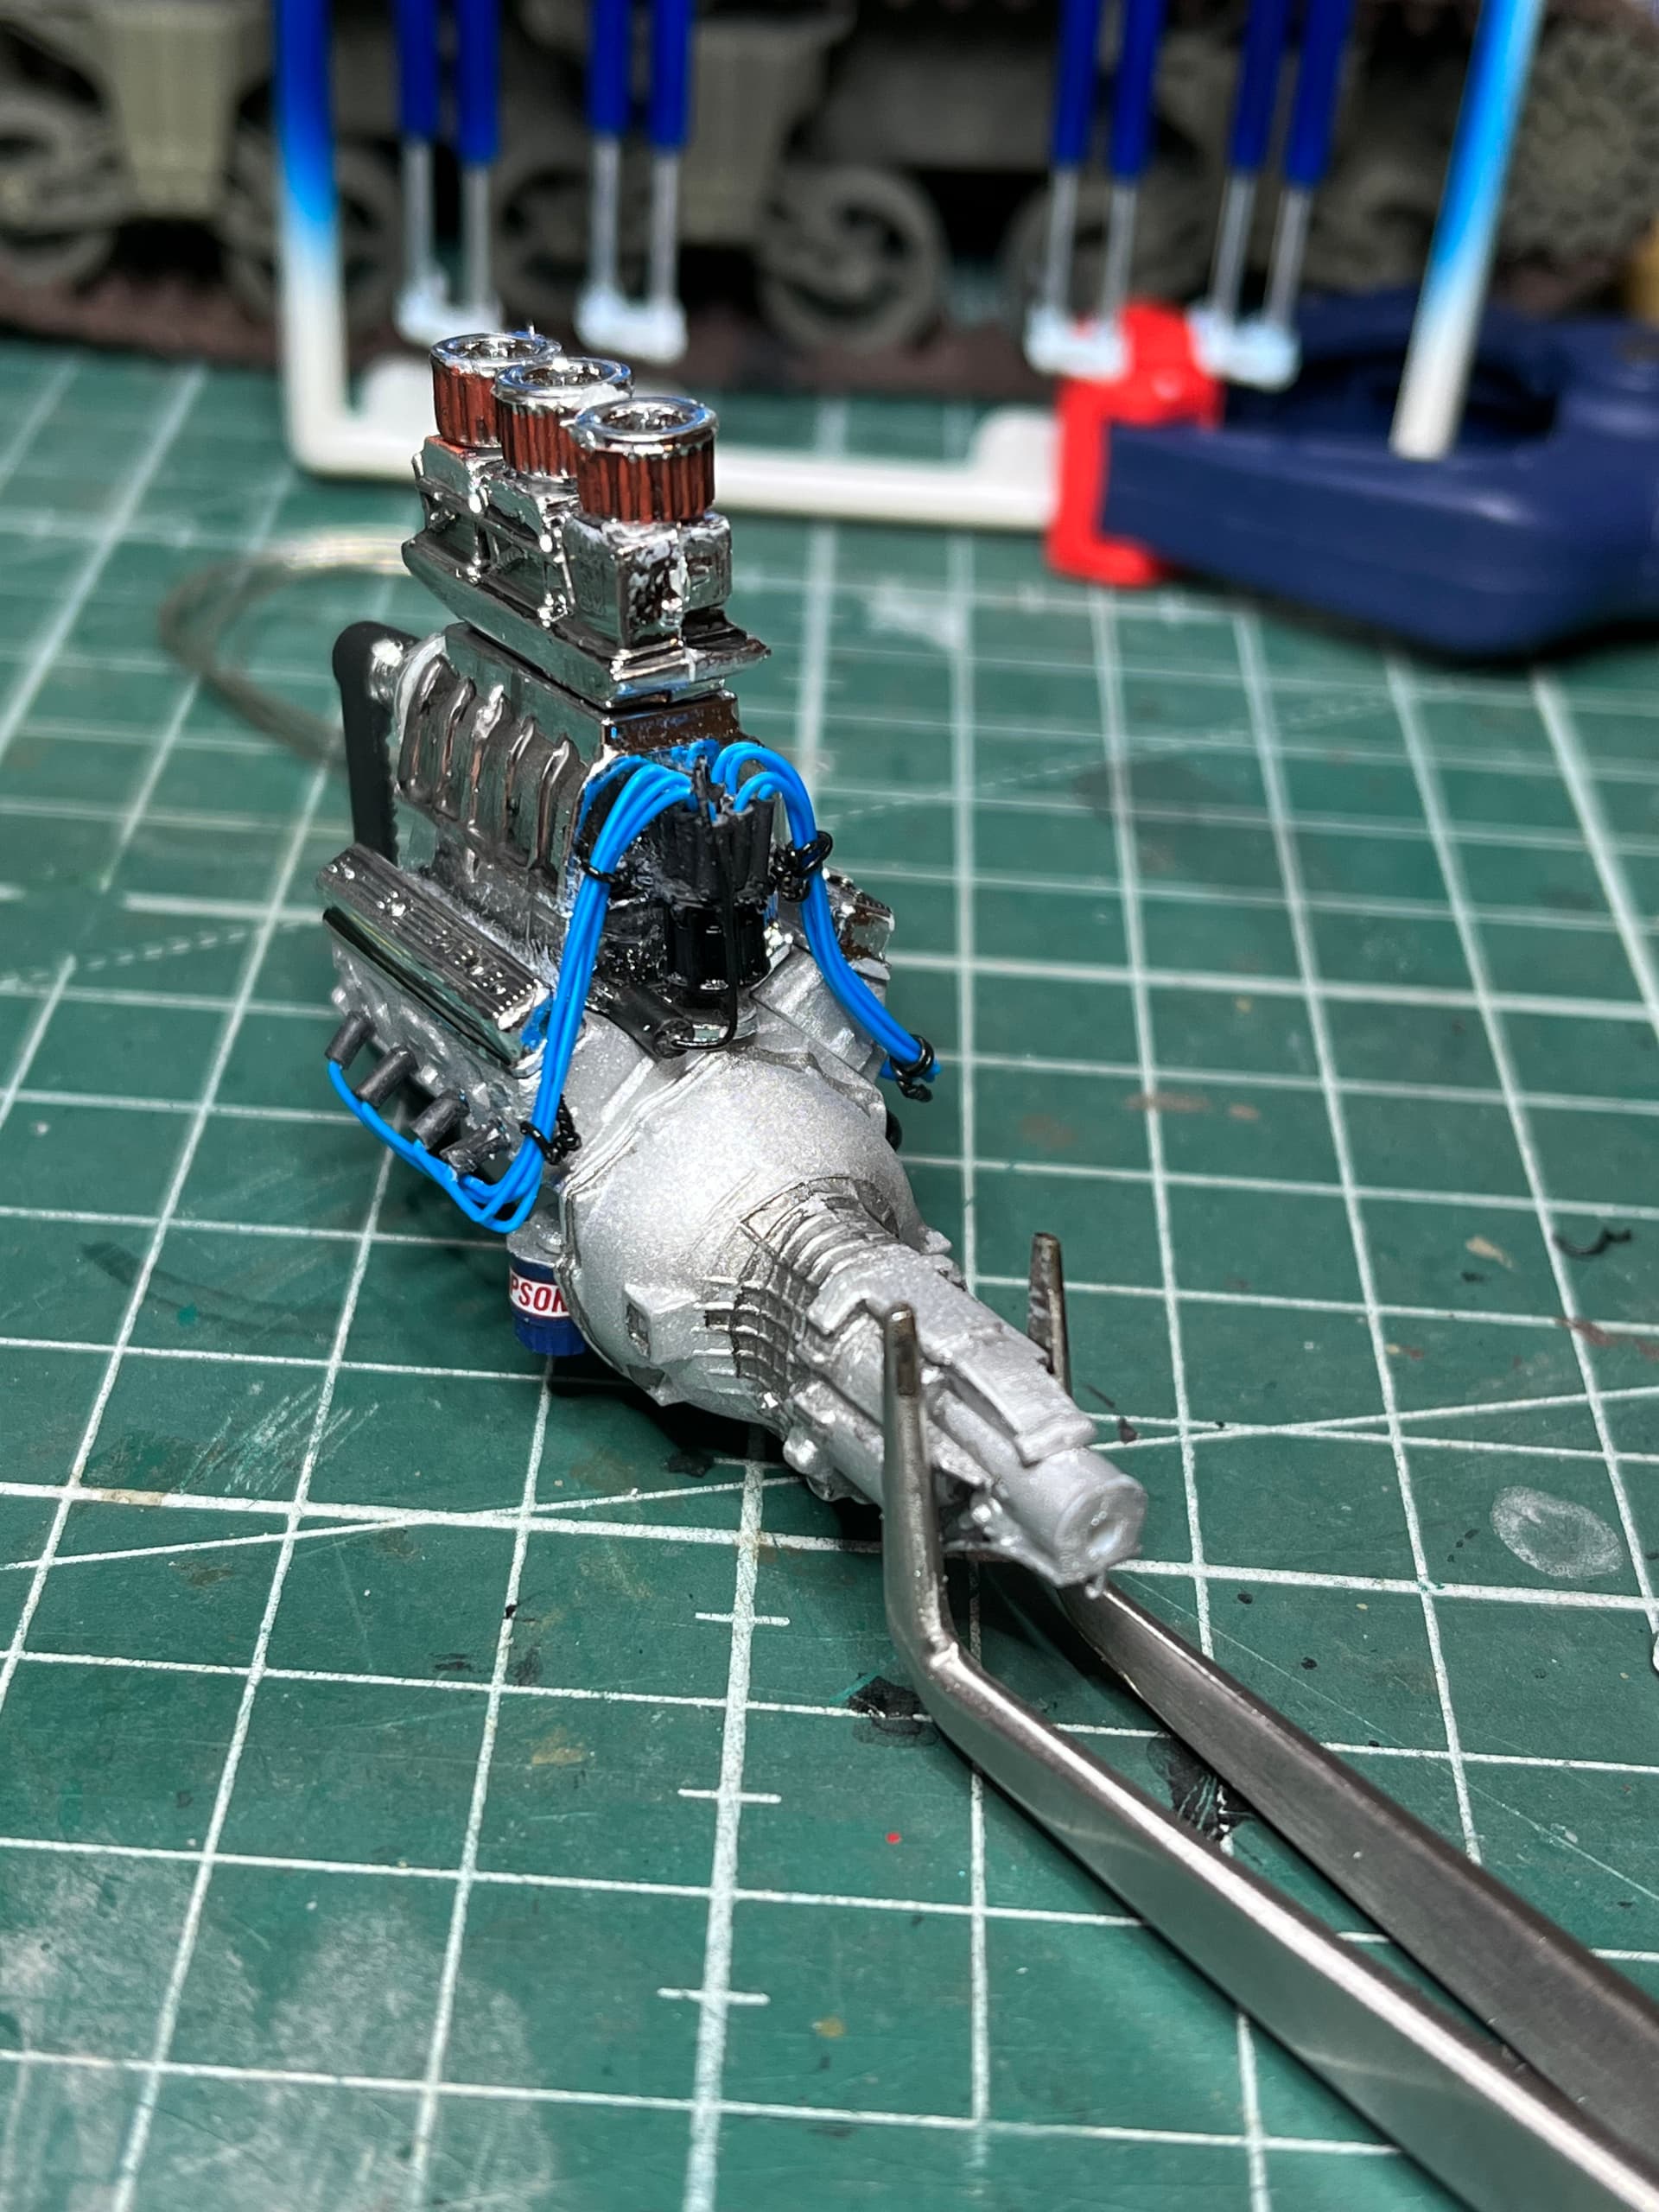
WIP Chevy Silverado monster truck. Started a few weeks ago, Just added the coil, plug wires and pin wash. First Monster truck build. Not alot to write about yet, the kit is pretty basic. Its what i got going on and i wanted to do a test post on the new platform.


5 Likes
Nice work on the engine.
Are you going to finish it like the kit with USA-1 graphics? Or are you going to do something custom with the paint work?
I honestly haven’t really thought that far ahead, I just grabbed this kit because it was on sale awhile ago and just sort of started on it. I made it as far as choosing blue for the wires and shocks to flow with the white body so i guess subconsciously I’ve already made up my mind without telling myself.
Interesting.
I don’t think I have ever built a kit in that order.
I really only build car kits and when I do build a kit I have a vision of the finished project in my head. In fact I finish the body first nearly every time, unless for some reason I can’t paint the body first.
I build armor and air as well, I usually have a plan to some degree but never a solid full-blown plan. I usually have basic colors in mind, a basic weathering idea, but this was a spur of the moment build, I’m working on another armor project that I lost interest in, so I just needed a break from it for a while. and that brought me to this.
1 Like
Got the springs, front shocks, transfer case mounted. Engine is in place. Everything was primed with Vallejo black primer, sprayed with a iwata eclipse. All the other paints have been Tamiya acrylics.
Idk if you guys have a onilab paint mixer but I got one about 6 months ago and it’s just plain badass.

1 Like
Got the drive train installed, had to do some touch up paint here and there. I go to move my tamiya extra thin bottle out of the way and the lid wasn’t screwed down…. Lucky the mess was manageable.
Mounted the tires an did a quick pin wash on the wheels with tamiya black panel line and sanded the tread a bit.
Started on the interior, painted the dash with tamiya xf-19 and the seats with xf-19 with several drops of tamiya x18 to off set them. I mounted the exhaust after trying my hand at heat staining with tamiya x-23, x27 and x-24. I don’t think it came out horrible……
l Got some paint on the body tamiya x-2 with Mr super clear. I’ll tell ya painting white paint on white plastic is stupid. ![]()


2 Likes

I tried to get a decent picture of the heat stained exhaust but It hides the blue and makes the red pop. In real life the colors are very very light and it flows pretty nice.
excellent job on that. look really good
1 Like
I was on a roll today, did some touch up, put the decals on, installed the firewall, I had to screw this up somehow, someway. But…. I noticed the body had a few blemish’s I could take care of real quick while the front bumper was being prepped. Me being me it sounded like a great idea, so I masked off next to the decals and around the engine bay and shot a few more coats of white. Feeling good about myself I started taking the tape off only to realize I had taped on top of a decal. Wtf. So it ripped off… luckily there is a “ new version and old version “ of the decals so I can try to remove these tomorrow and try again. If all else fails I’ll just repaint the body in defeat. Time for a beer folks.


1 Like
I remember that truck. I worked the monster jam shows in MPLS for 8 years. Seen some trucks come and go. I remember that one tho. You are doing a great job on it.
Thanks for checking it out.
That sounds like a fun gig, I guess like anything it would get draining after awhile… what did you do?
Not a whole lot of progress on this one today.


Removing the decals was a lot more work than anticipated, put hot soaked rags on them for like 10-15 min and it didn’t do much, I had to scrape them off, sand the adhesive off and start all again sanding, priming. I did get the headlights smoked and the turn signals painted with clear orange. Lesson learned with the decals……
2 Likes
Got it all put together, body has a few imperfections I missed after the last prime and paint but whatever I guess, got the decals on, still waiting for them to fully dry then I’ll hit it with the clear coat and call-r a day. It was a fun build, first monster truck build. Not my best work but like I said I had fun building it. I took last week and this week off from work so it was nice to sit down and finish this.


2 Likes
Great recovery, Demo! I’ve had special aftermarket decals pull up with masking before. So frustrating. You rallied! Truck looks properly ridiculous. ![]()
1 Like
Thanks! The good thing about dumb moments is once in awhile I learn something from them. ![]()
@Demolition : I’m a real sucker for ANY C1500 build (I own two 1:1 C1500s) and have gotta say this turned out to be a sharp lookin’ build. These AMT offerings are pretty solid examples of these trucks too.
1 Like
Thank you, I learned a few things as well so pretty happy about that, it was a fun one.
1 Like