I’m still waiting on some things that are necessary to proceed with my Kingfisher build and I’m tired of not being able to be at the bench SOOOOO…
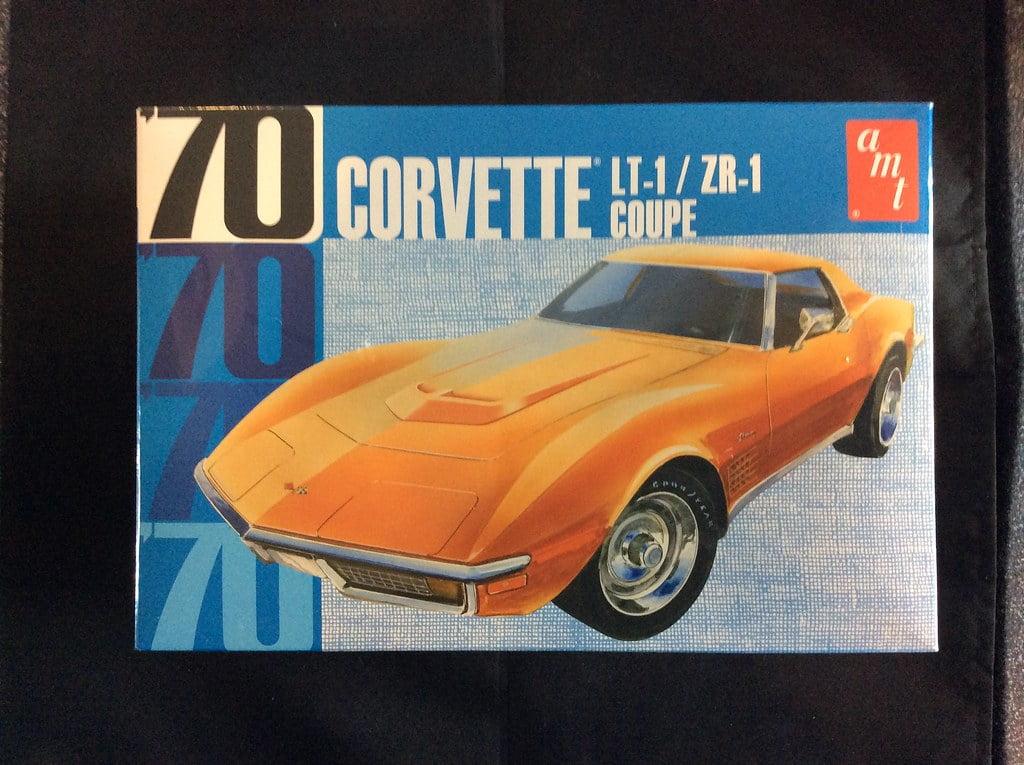
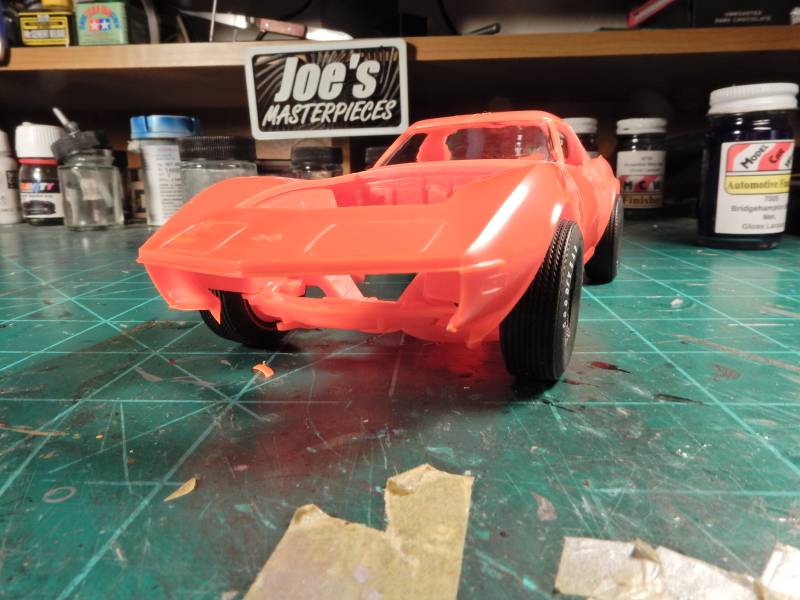
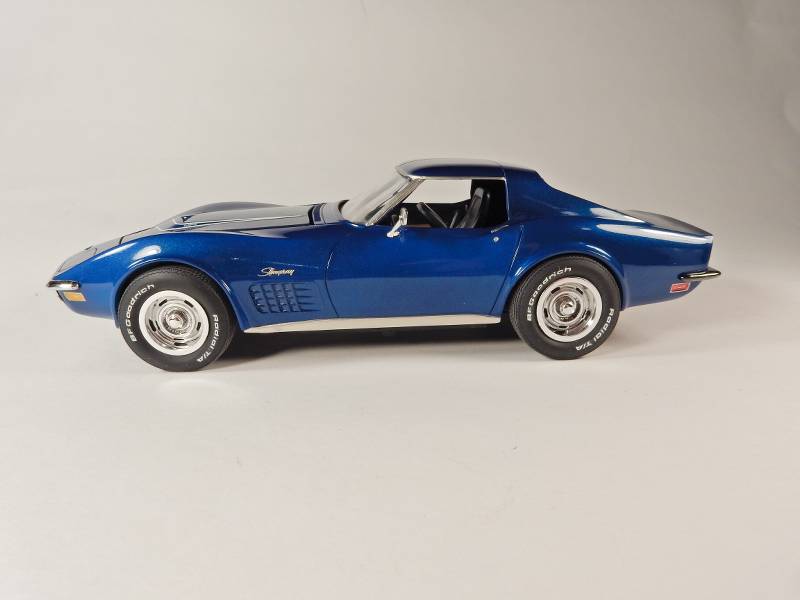
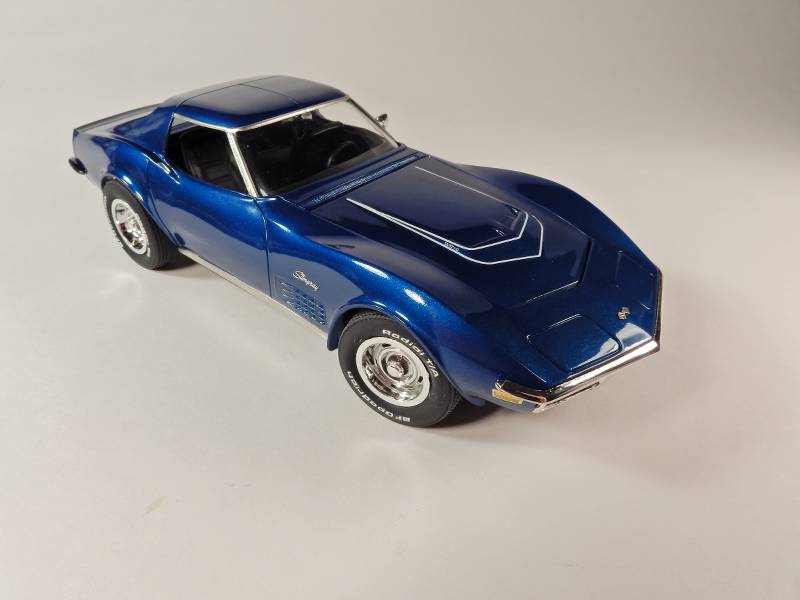
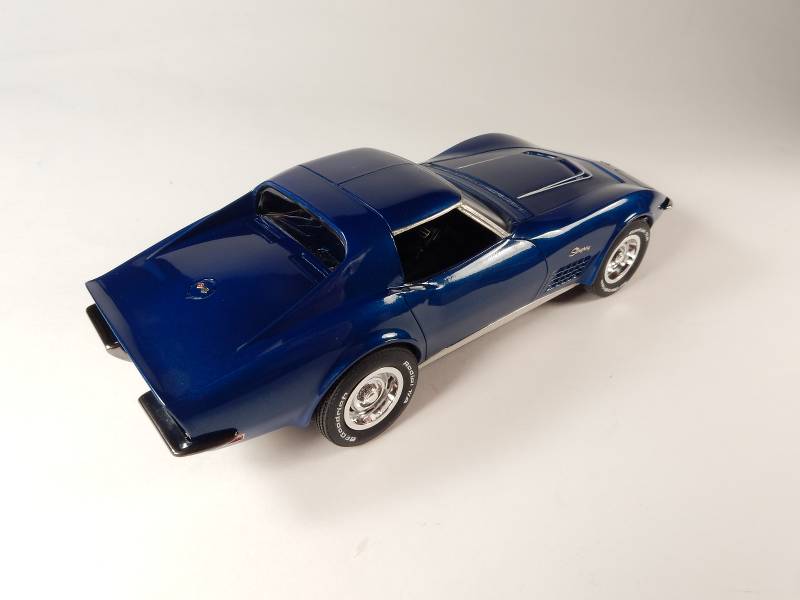
I’m breaking out of the slump with a car that I’ve wanted to build for a very long time. A late 60’s / early 70’s Vette. This kit has a few pitfalls that affect the stance and wheel/ tire position but there are corrections that can be made and I’ll be pointing those out. I’ll be painting this one Brockhampton Blue and we’ll be retaining the LT-1 350 small block for the car. The only external changes that’ll be made are to the stance and wheel locations and I’ll be going with BF-Goodrich T/A radials.
Two big issues I had with this kit. One, the wheels stick out far too much, but that is easily fixed. Second, and more difficult was the radiator fit and hood clearance. I was never able to overcome the issue and was forced to mod the shround and remove the hinges and make the hood lift off. I just could not get the hood to fit or work around the radiator. Probably something I did, but best to watch out for.
Both are really challenging issues to resolve Brandon. This kit is definitely NOT for the faint of heart in regards to the corrections that have to be made to make this car look the part. I had a really tough time trying to get the correct stance and wheel/ tire location right relative to the wheel openings. LOTS of work involved and necessitated the acquisition of a second kit to mock everything up unpainted in order to make the necessary adjustments in regard to stance and wheel positioning.
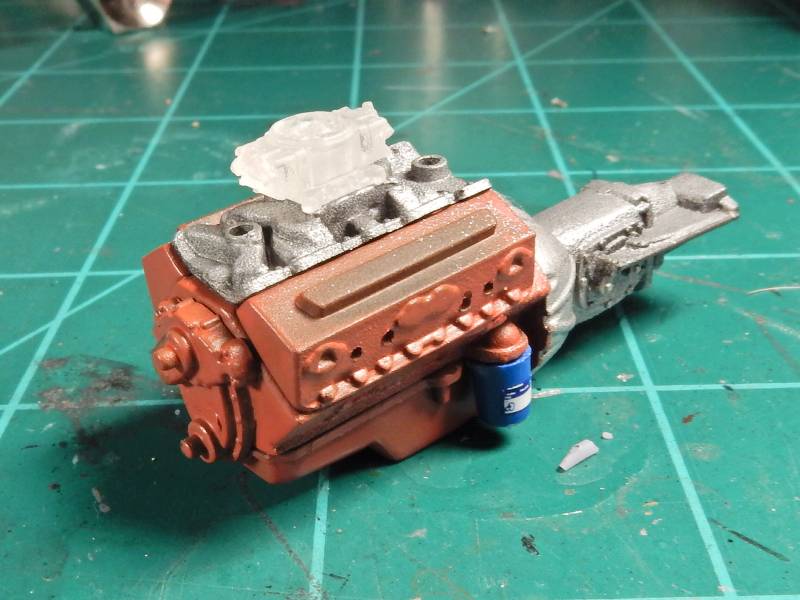
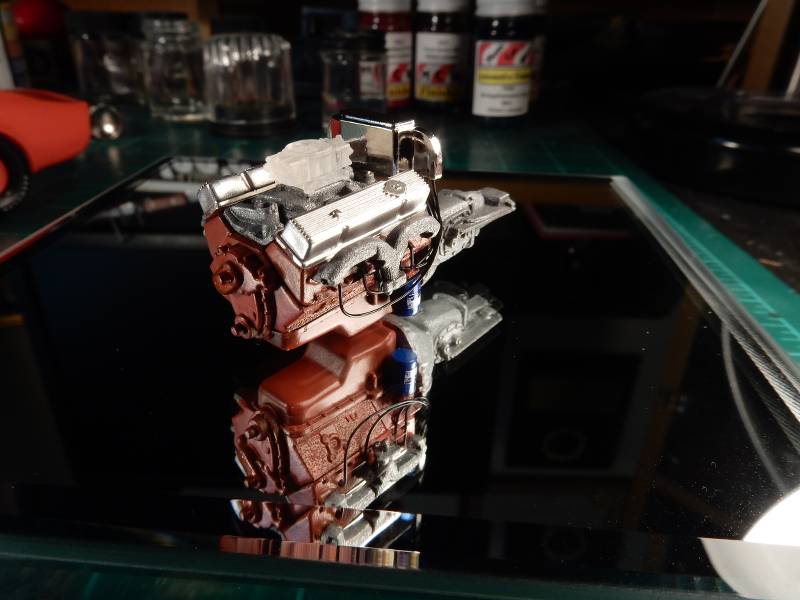
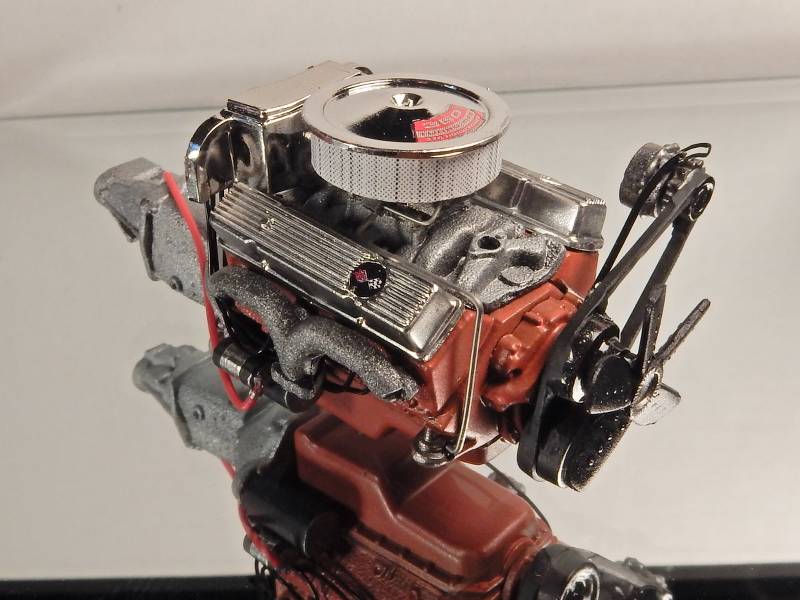
I also used a double pumper Holley from Shapeways and I had an AC Delco decal in stock for the oil filter. Here’s the block in base build form with the color applied.
I bought the spare kit that I mentioned in the previous post so I could build one up and make modifications to the suspension and stance. I always tend to screw something up along the way so I use two kits for almost every build. Its come in handy more than one time.
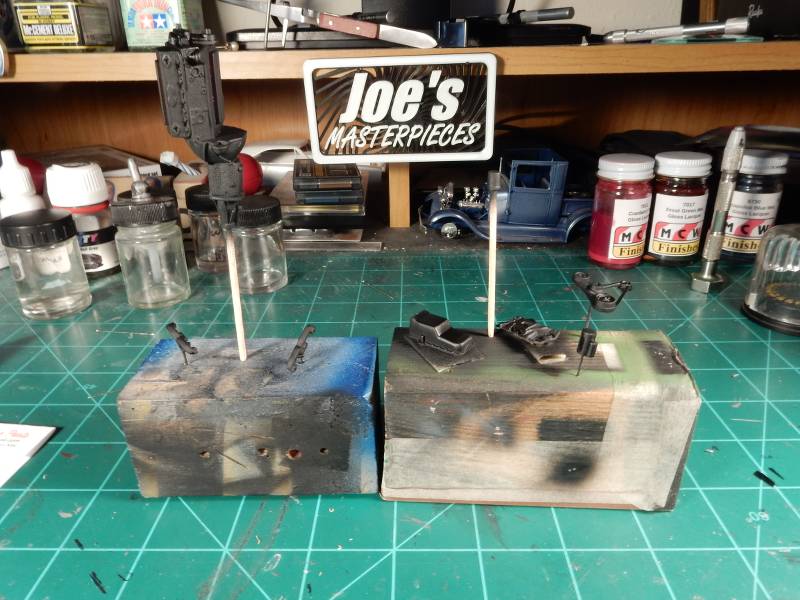
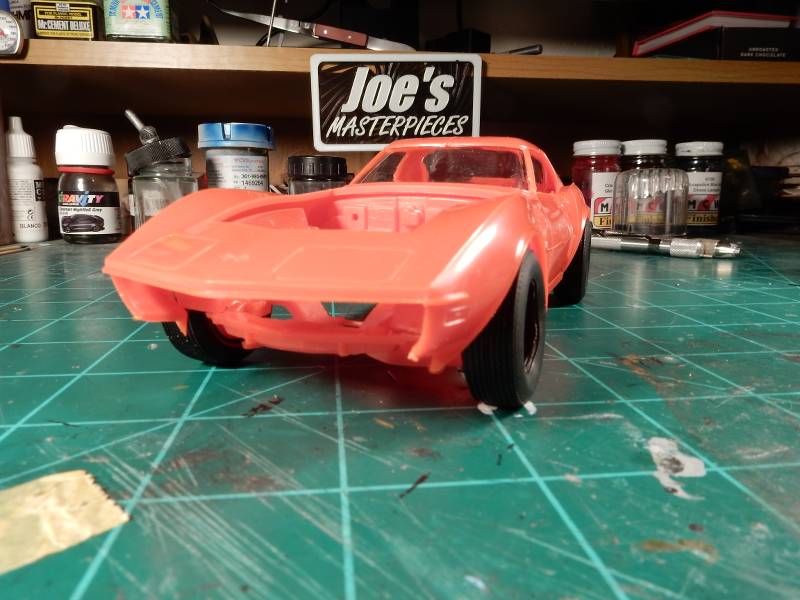
Stance and wheel/tire location relative to wheel openings before:
and after the modifications:
After the suspension mods I turned my attention back to the engine:
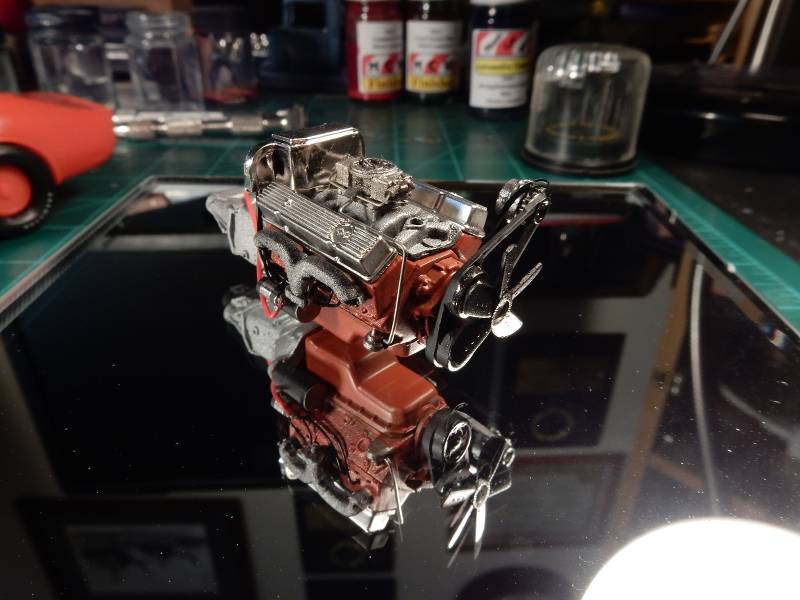
Here’s after the addition of the distributor housing, spark plug wires, rocker covers and exhaust manifolds:
Bob: AMT kits really have a lot going on for them but it seems that extra attention always has to be paid to the stance of the cars/ trucks.
Been a while since I’ve commented in this thread so we’ll get things going once more here…
Here’s with the carburetor painted and the details picked out with a light wash, got the fuel lines added, installed the starter with the positive battery cable connected, modified drive belt without the air pump installed, and the alternator bracket installed.
Thanks fellas. It’s been a while since I’ve updated this thread so here goes…
I topped this one off with a new technique on the air cleaner by printing off a picture of faded vertical lines from an IPC code that seems to work perfectly.
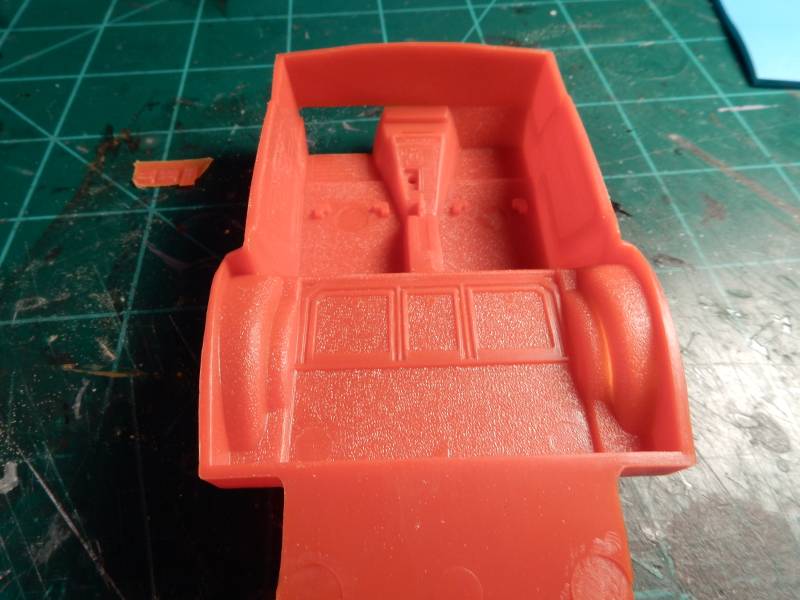
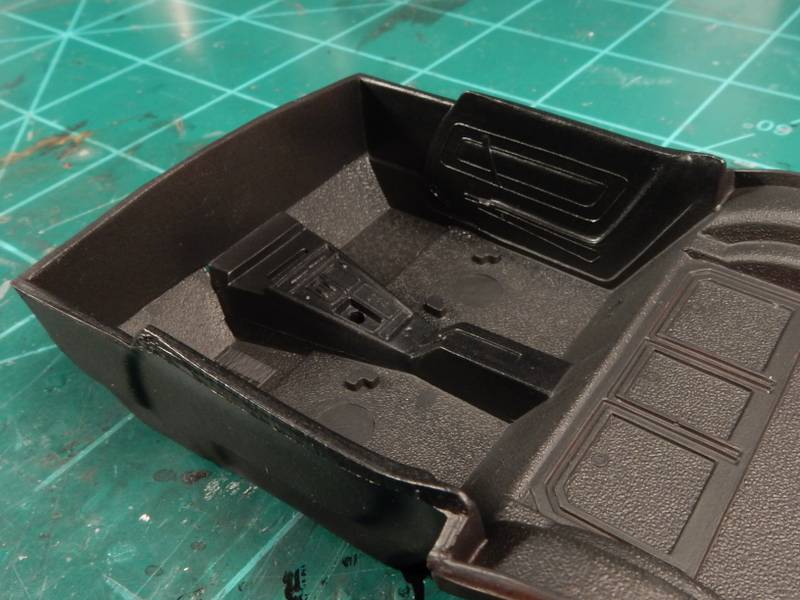
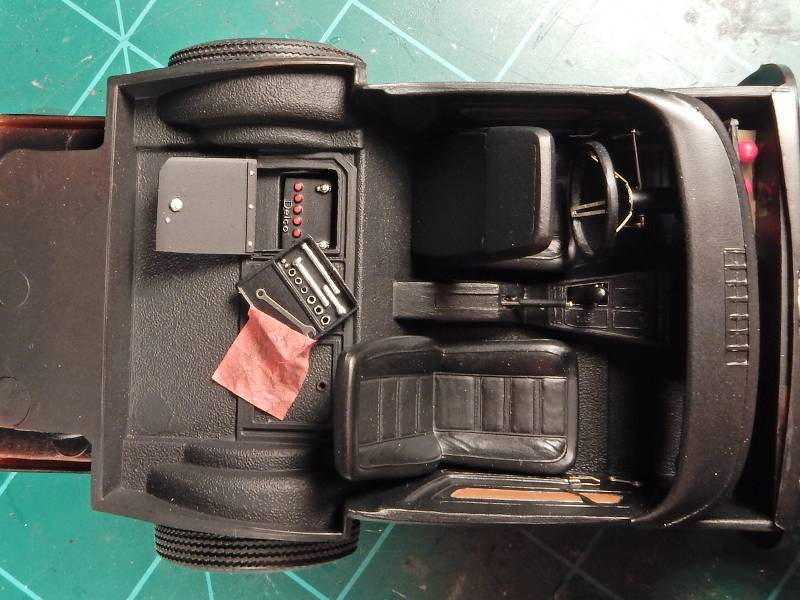
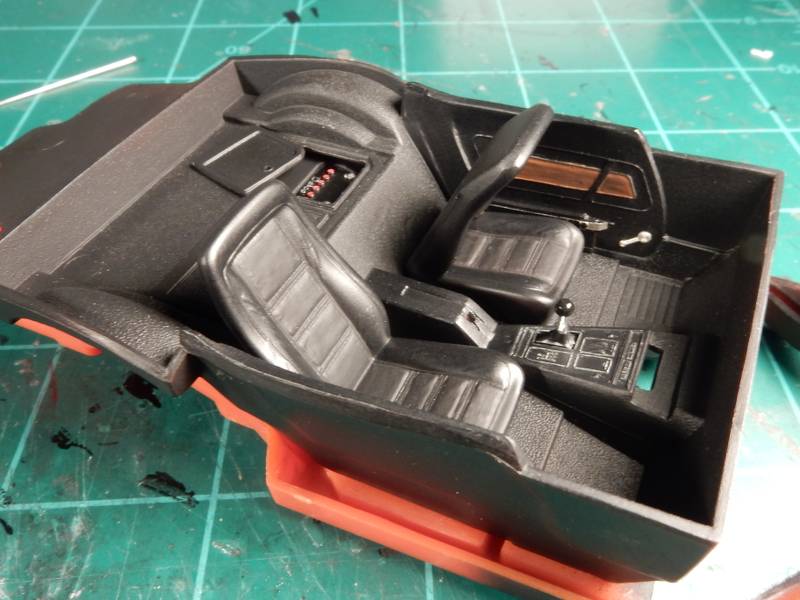
This morning an little progress on the interior…my OTHER favorite part of auto building. If there’s one thing that I cannot STAND, it’s molded in foot pedals. They just look so dang fake!! The fix…is to remove the toe board on the drivers side.
Then cut a piece of Evergreen styrene and glue into place and then a piece of similar textured grit sandpaper over the styrene piece and hitting it with a coat of gloss to even everything out and make it look like the passengers toe board.
We’ll come back to those foot/ swing pedals a little later on…
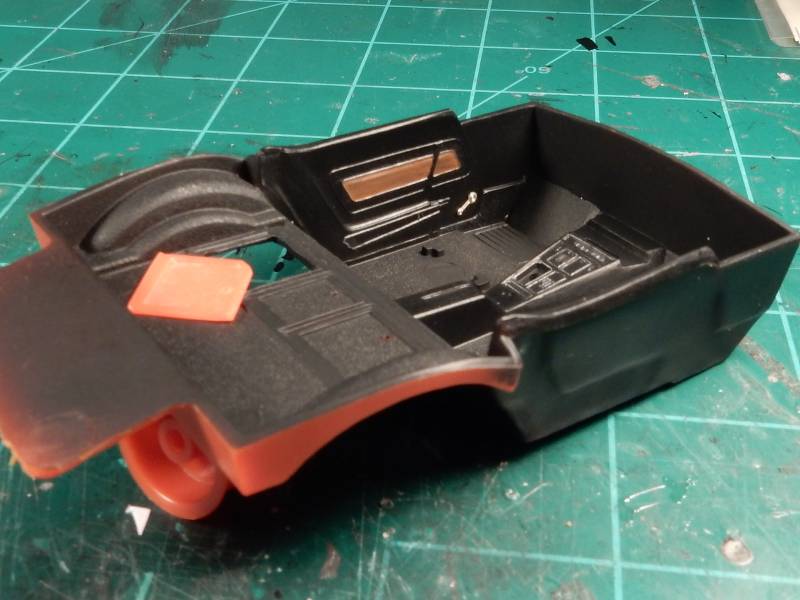
Here’s with the interior tub painted with a base coat of black primer and painted up door panels & console in a semi-gloss black. Driver’s toe board where the swing pedals were is pretty much blended in at this point in the build. Since I’ve painted it, I’ve re-thought the situation some and have decided to open up a panel for displaying a little more detail.
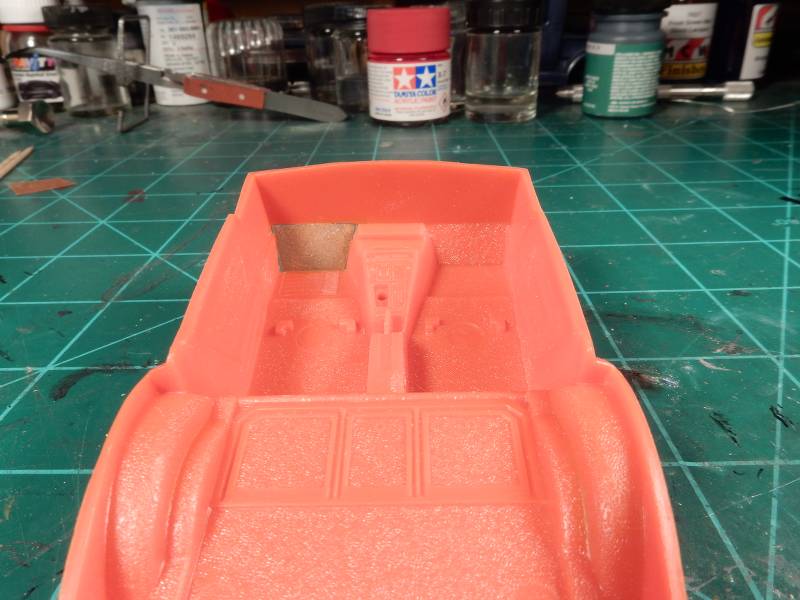
I’ve decided to open the battery compartment up behind the drivers seat and have painted a battery all up & detailed it already. I’ll be cutting the drivrs seat to display it in the leaned forward position to facilitate visibility back to the battery compartment in the coming updates. I’ve started on both door panels by painting the wood grain effects in the paneling & outlining the chrome strips on the panel as well as installing the PE window crank handles. I’ve also begun the center console detailing process.
Sorry about not posting on this fellas. Couldn’t log in to post alot of times but now that the forum is back up and running I’ll post up the completion here.
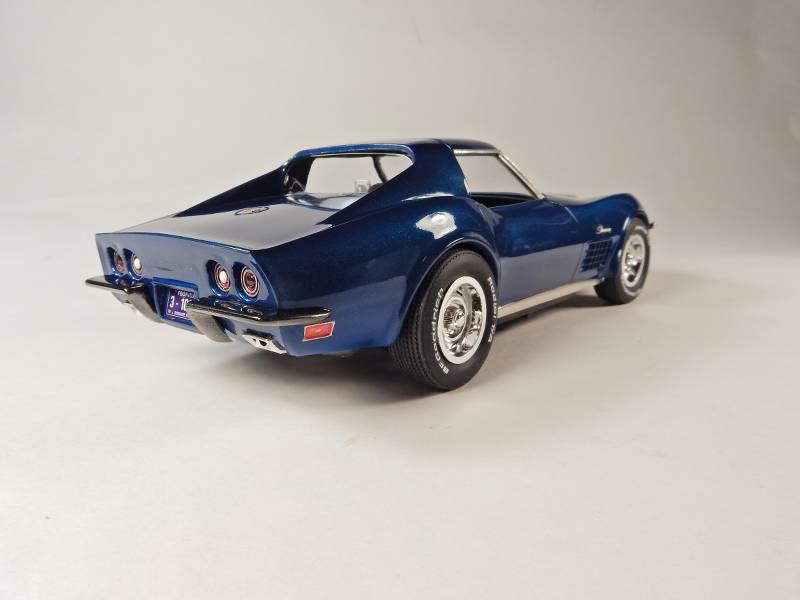
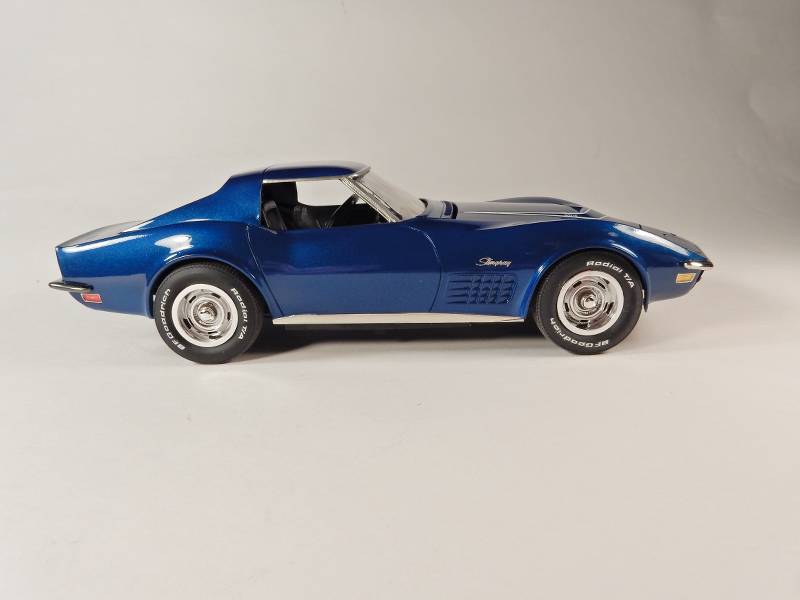
When I started this project back early on in 2023, I knew that this kit was a somewhat problematic build as far as getting the stance right. I spent a good couple of months in the planning phases, building up a complete unpainted model of it to help with the positioning of the wheels & tires relative to the wheel openings as well as getting all the mods necessary for pulling off the correct stance. All of that paid off in the fact that the stance came out exactly how I wanted it on the “real” build.
Starting with the engine I detailed it out as much as I could get by with using the OOB base engine and then working from there with some aftermarket and scratchbuilt items. I also didn’t like the molded in details on the engine bay sides so I sanded all of that off and fabricated vacuum and electrical harnesses to replace that with.
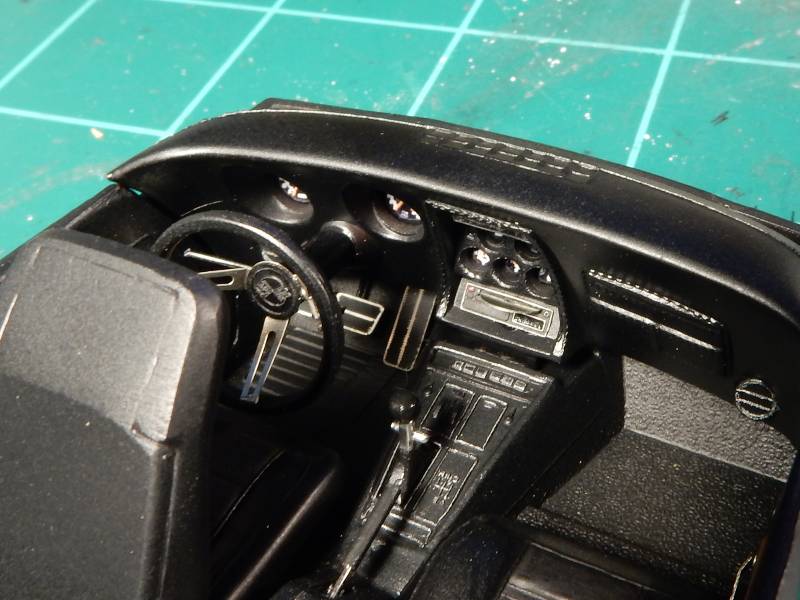
When it came to the interior I wanted to jog things up a bit by displaying the drivers seat back in the forward position and opening up the battery compartment and displaying a set of tools necessary to remove a battery with. Tool kit was from spares along with the PE wrench. Red rag was fabricated from red tissue paper and given “the treatment”. Some other areas that got some “lovin” was the replacement of the molded in park brake handle with an actual handle made from a needle and some electrical wire insulation for the handle, the replacement of the stock radio with a CD player, and the addition of foot pedals. The whole OOB toeboard with the foot pedals molded in were removed and PE parts and fabricated swing levers were swapped in. Instrument panel faces were drilled out and decals placed on plastic backings were installed from the rear of the dash to create a more convincing IP. The steering column and steering wheel ring are the only OOB parts used on that part of the interior. An AM steering wheel, ignition lock cylinder face and ignition keys were used from the Model Car Garage PE set for this car. The door panels were upgraded by adding PE window crank and door handles (that were modified to look a little more convincing). OOB shifter was cleaned up (A LOT) and utilized and shifter plate details picked out with a Prismacolor Silver Lead pencil. Battery compartment lid bottom saw the addition of scratchbuilt latches, retaining straps with PE screws and fasteners. Battery was taken from spare parts I had laying around.
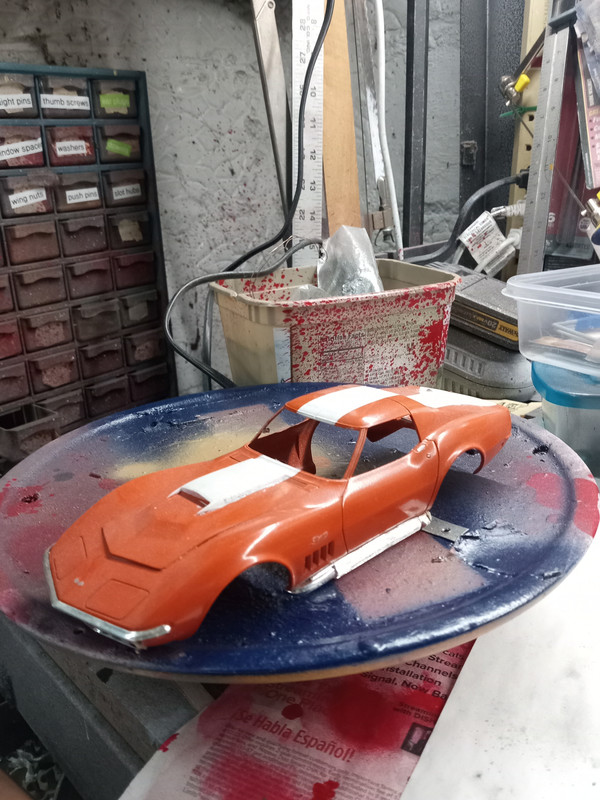
I was going to use some AM Bf Goodrich T/A radials but they proved to be GROSSLY big for this car so the OOB tires were used with Bf Goodrich T/A Radial decals that I had and I picked the details out on the OOB wheels and used those. Color is Bridgehampton Blue from MCW with Testors Wet Look Clear that was decanted from the can and shot through the airbrush. I know it’s not a factory shine on the car but I just couldn’t help but to make this car shine and Wet Look does a great job of that. PE scripts from the Model Car Garage set was used for the emblems.
In any case, here is the results of a 9 month long “true labor of love” on this car. Many thanks goes out to those who looked in on and/ or took the time to comment on this build along the way.