Excellent mods to this kit. I’m watching and learning [H]
A quick shot of the new chassis. I am ad-libbing this thing as I go, so I made some silly measurement and conceptual errors, but I think everything will work out. I sat at my desk until early this morning trying to figure out the best way to get durable and easy to install/adjust steering linkages added. I think I got it. Stay tuned…
https://flic.kr/p/BmeJje]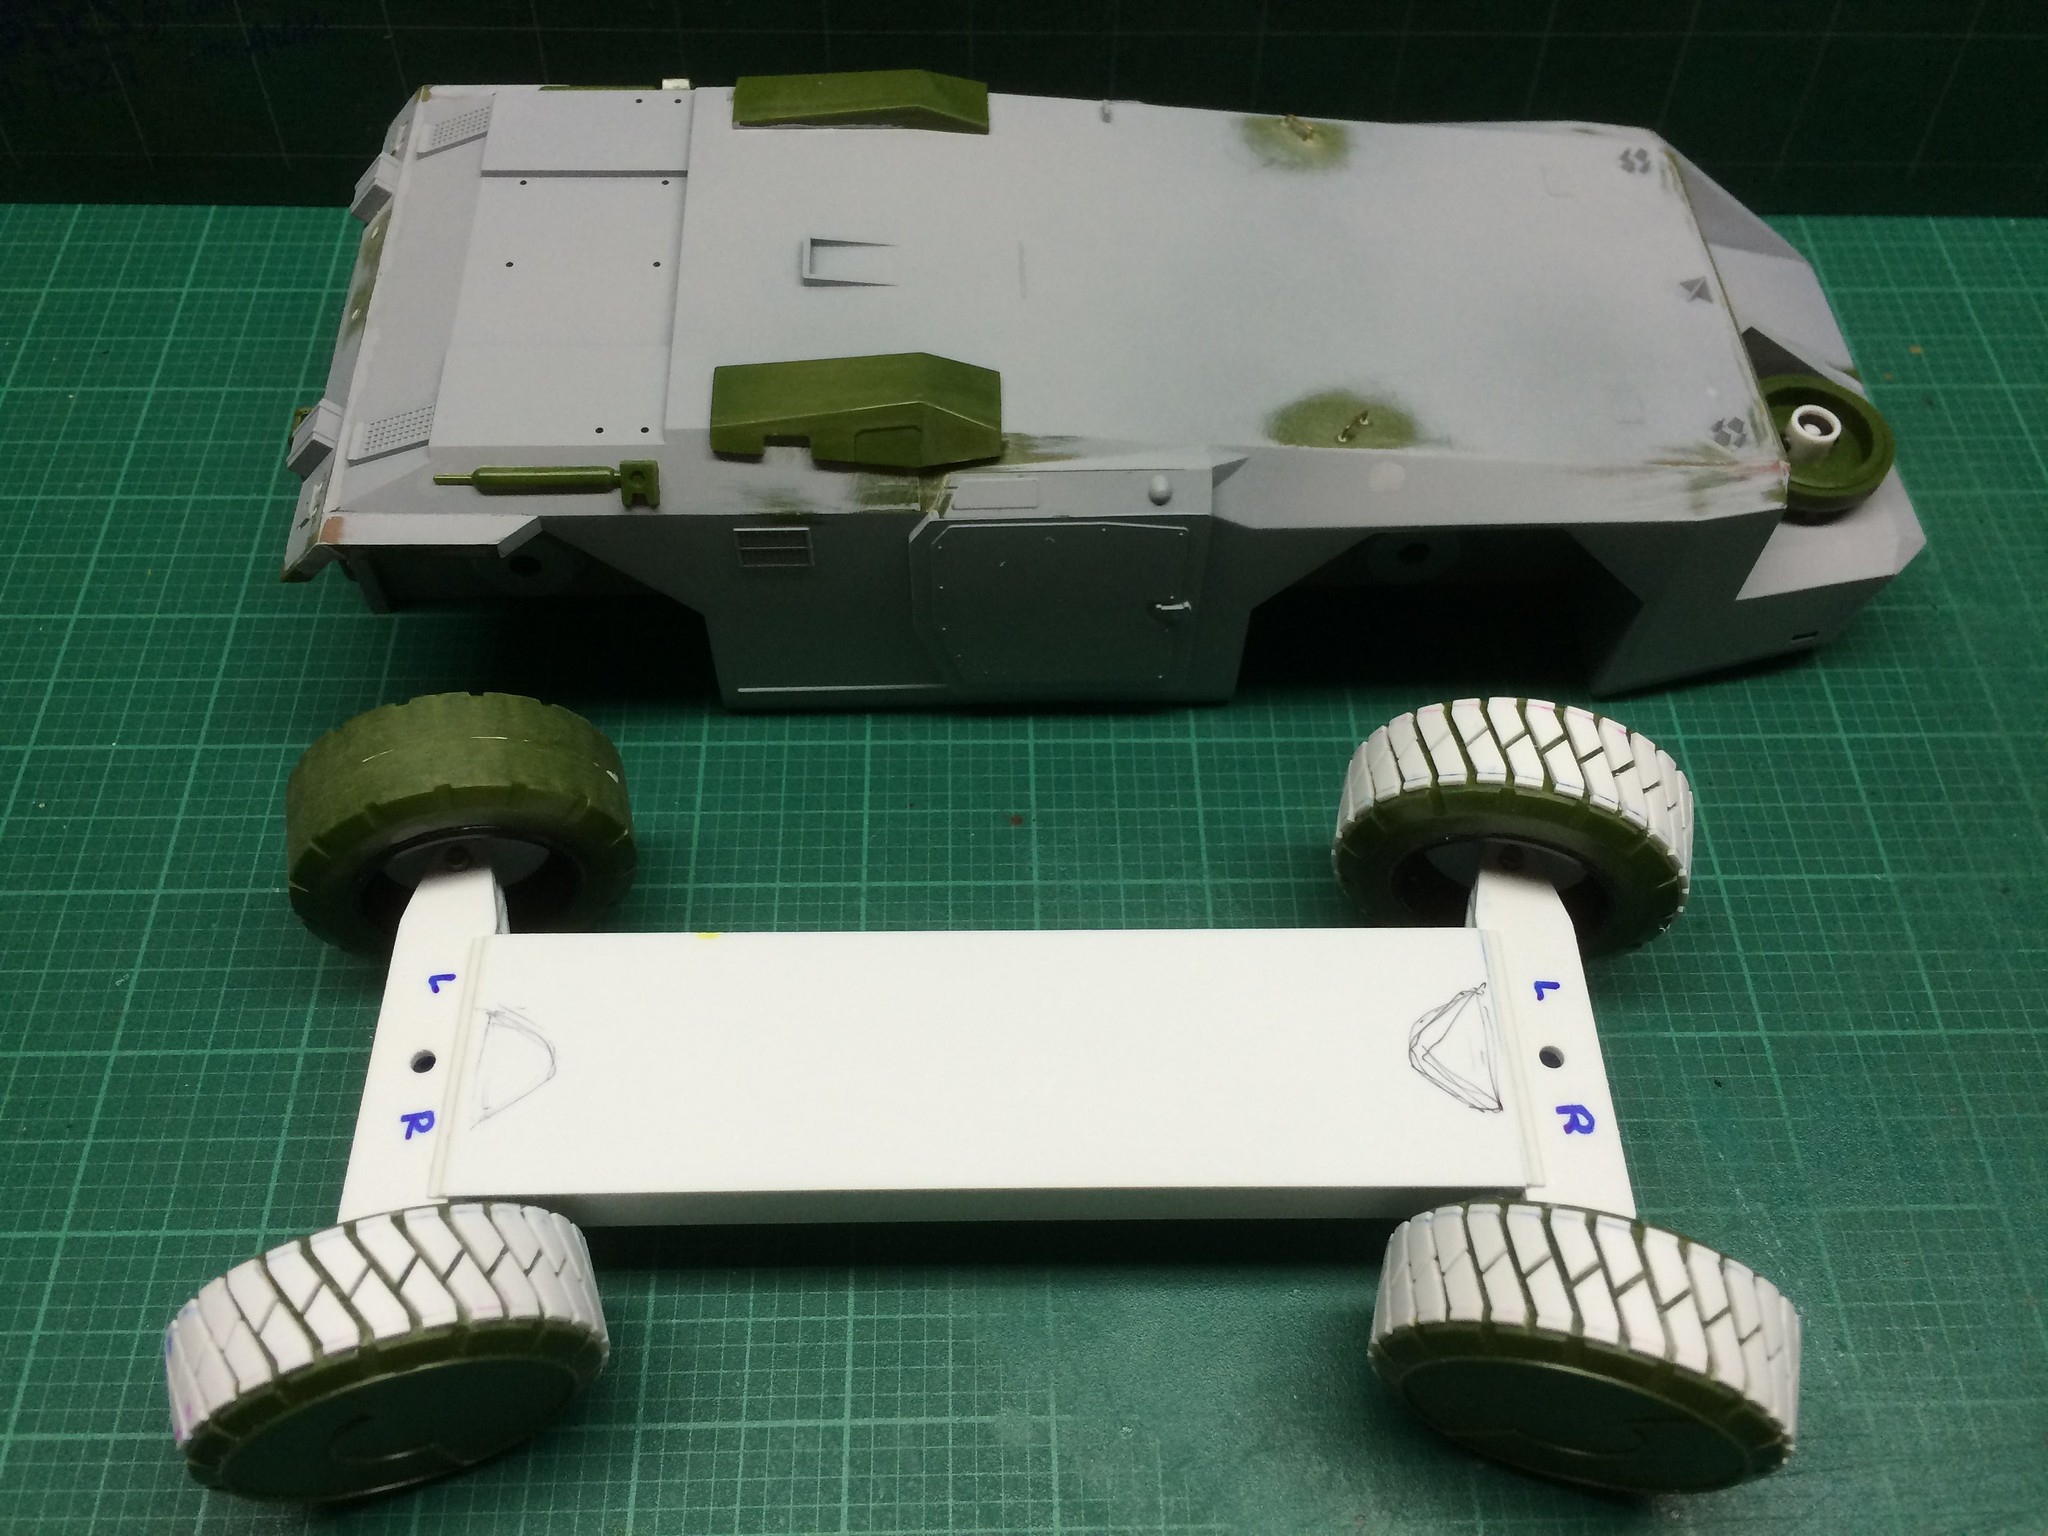 [/url]APC-21 by N.T. Izumi, on Flickr
BTW, the kit wheel wells will have slots cut in their sides to allow the new chassis to slide in place.
OK I dont know what you said, I don’t understand what your doing, I can’t understand the weird buzzing in may head  -eather.
BUT I do love what your accomplishing,  it looks like you have this one on the run. Tires are fantastic (well, except for the left front- I’m just sayin’ )
Am following with great interest and making notes for my future builds
Steve,
I think that modeling forums are a lot like kindergarten - it’s a place where kids congregate and spread germs to each other. At least modelers infect each other with ideas, not chicken pox or measles. Of course, sometimes a thread will catch the diharrea… [+o(] So load up on the Immodium and let’s see if we can get through this without anyone throwing up and being sent home!
I had always wanted to gte one of these but never got rounf to it. Your doing a really nice job on this, can’t wiat to see more.
Now i wounder if i can still gte hold of one, and those resin wheels.
Thanks Bish! As Gamera suggested, maybe someone will tool a new kit. I’m kind of enjoying myself at the moment, but we really could use some nicer Aliens kits.
I started trying to make the steerings arms tonight, but ran out of wire. Off to the LHS at lunch time tomorrow.
Sounds like a pretty good description [;)]
And nice work there on the suspension!
I bent up some steel wire last night to check for smoothness of operation and clearances. The wire is a little too hard for my girlie arms to bend into precise shapes, so I will be using brass wire for the actual installation.
https://flic.kr/p/AxpXgR] [/url]APC-22 by N.T. Izumi, on Flickr
I made some 0.040" plastic dics to mount the lugs for the steering arms. These will be glued to the kit wheels, so no rolling around on the carpet when I’m done.
Too Right! I nearly always feel as if I just missed the milk and cookies by staying too long at nap time-well off to suck my thumb and think grand thoughts -------------- Was that a squirrel?
Do like the progress in “turning” your model around [Y] [Y] [Y]
After a frenzied night of work, the four wheel steering system is now functional!
https://flic.kr/p/BuuNbj]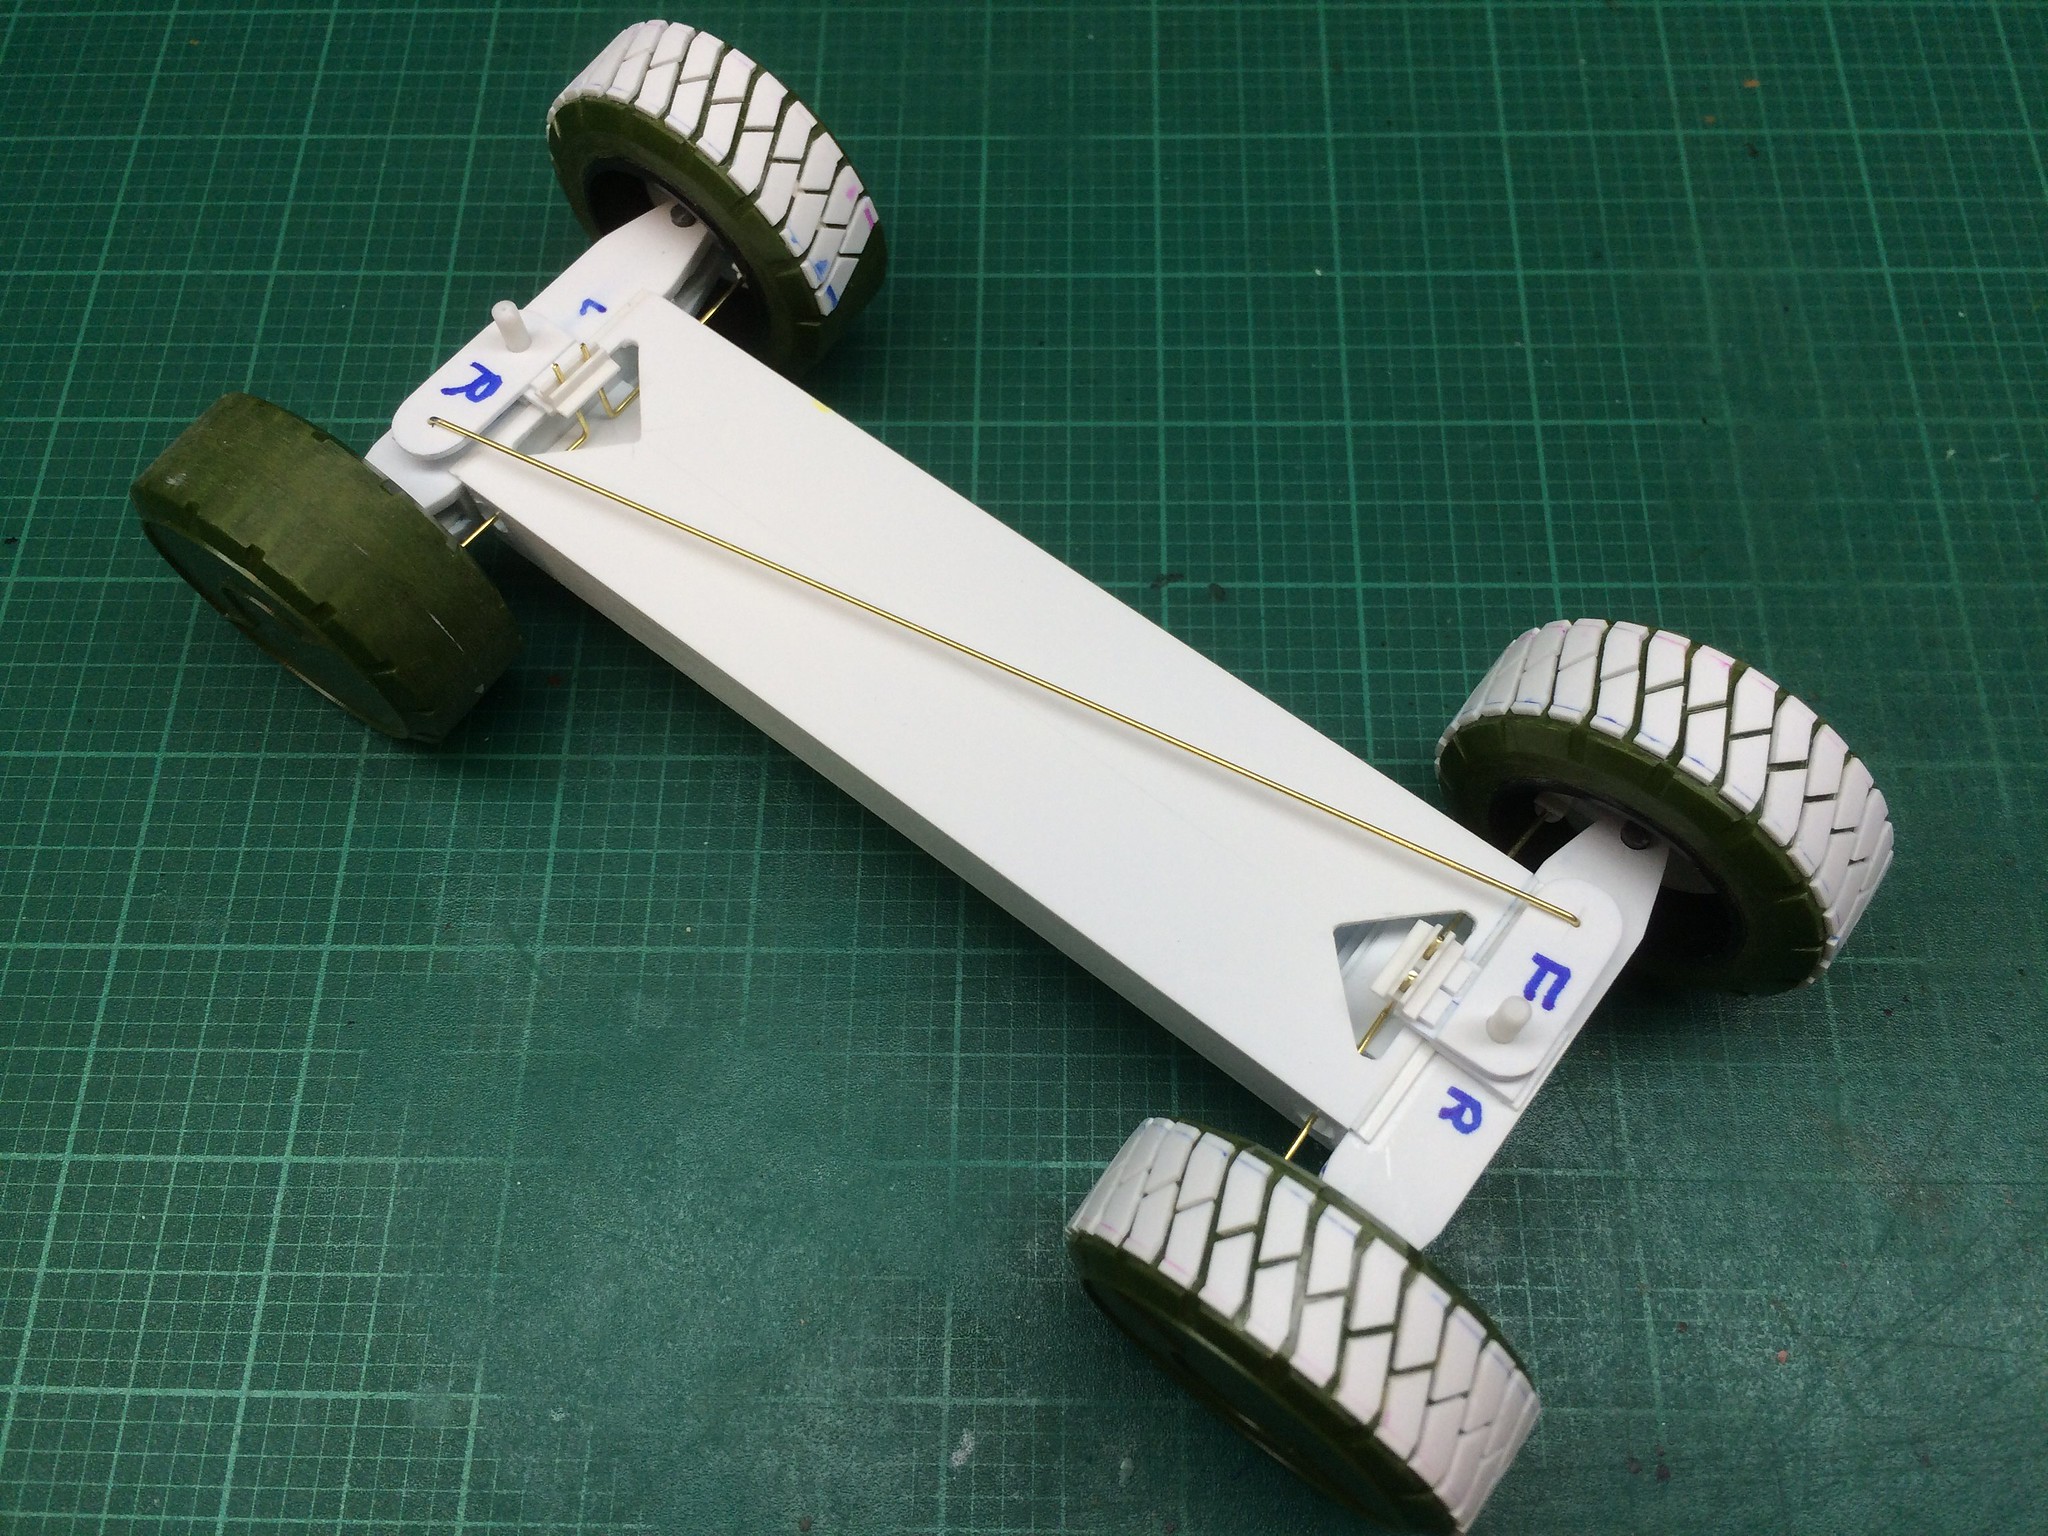 [/url]APC-23 by N.T. Izumi, on Flickr
https://flic.kr/p/B5EQty]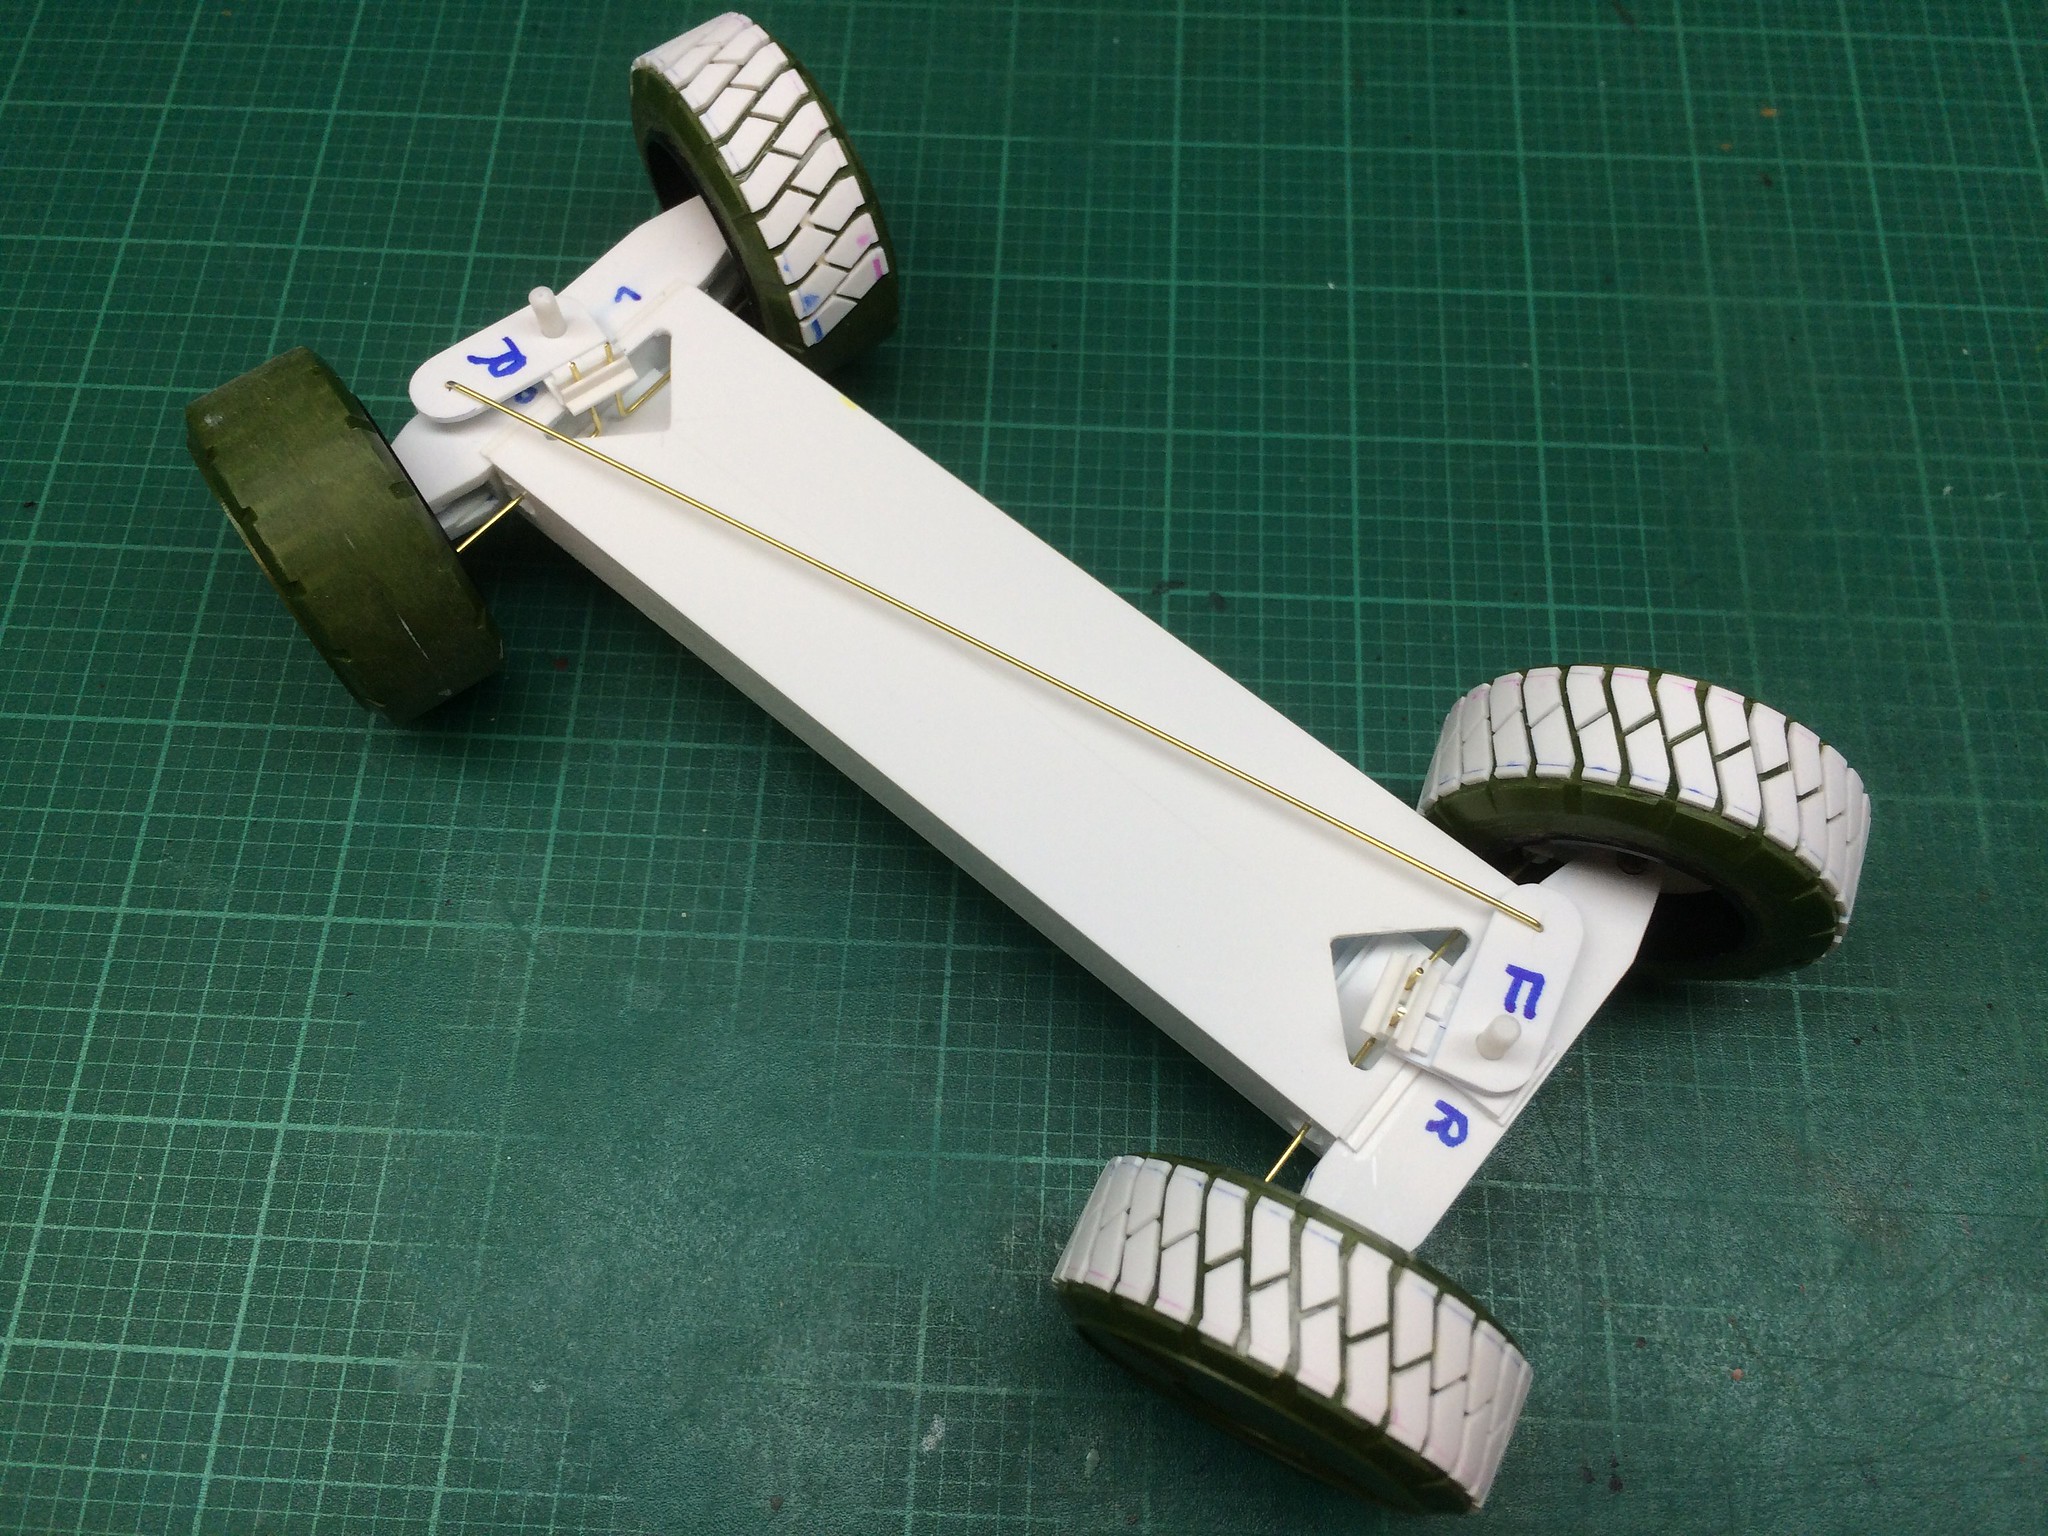 [/url]APC-24 by N.T. Izumi, on Flickr
https://flic.kr/p/Azp3cH]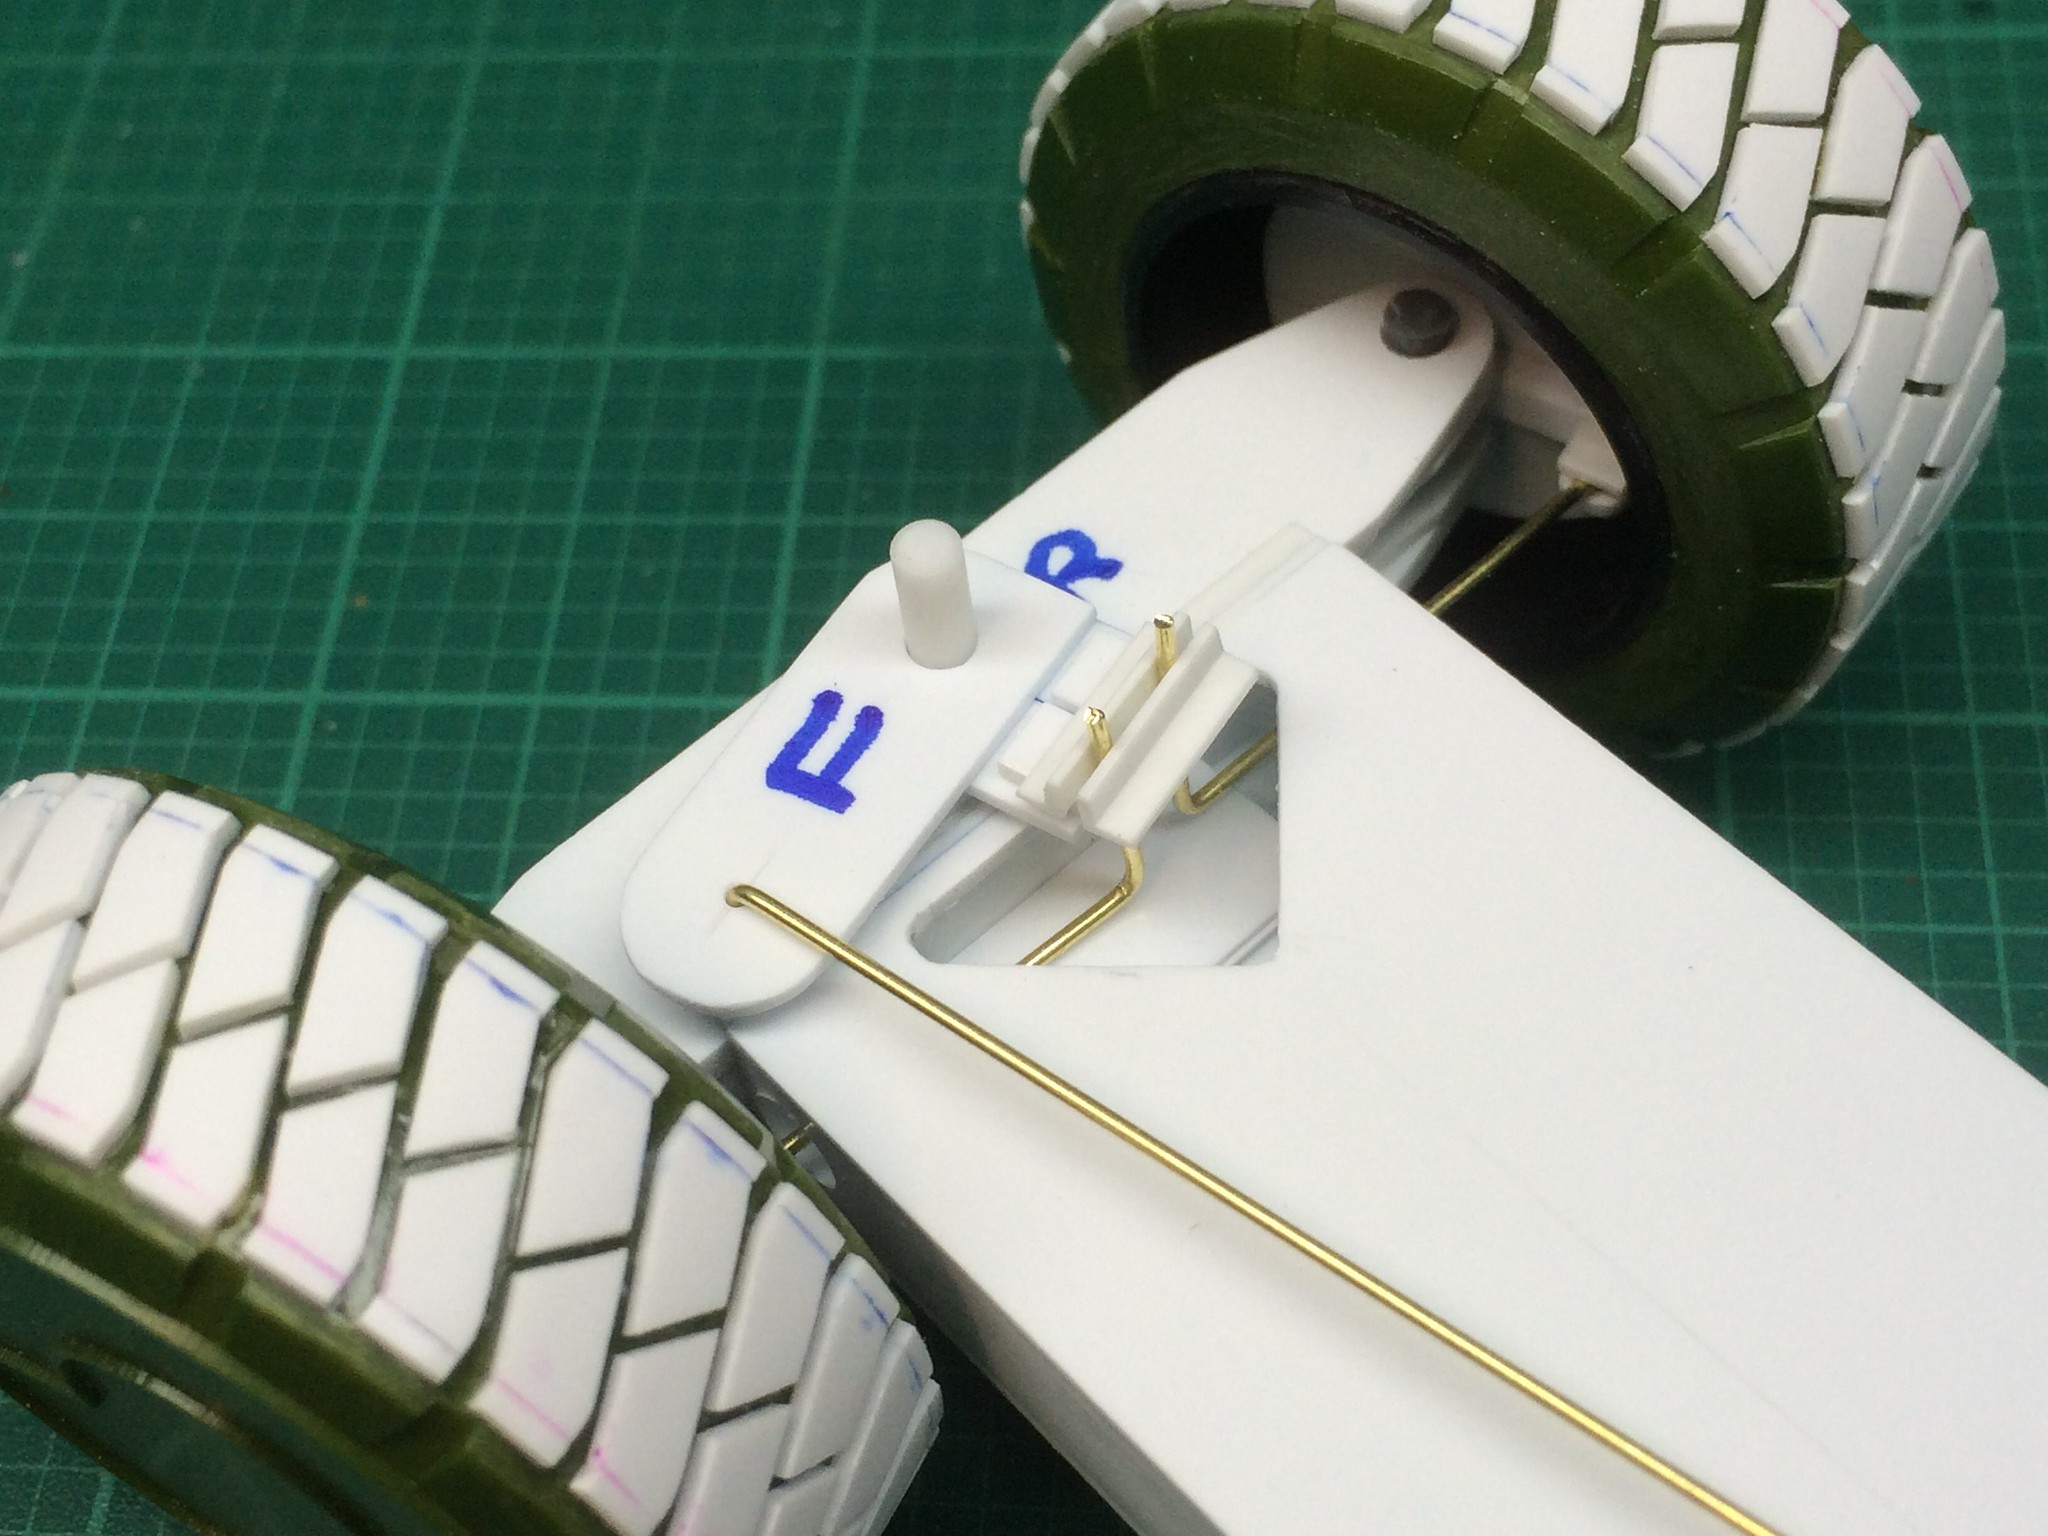 [/url]APC-25 by N.T. Izumi, on Flickr
There is some play, and I still need to secure the bellcranks and make spacers to keep the steering arms from riding up. But it works! BTW, the reason the bellcranks are made up of so many tiny pieces is to allow fine adjustments in spacing the steering arm wires before gluing. I’m a measure once, cut twice guy, so this approach works better for me!
Now I have to finish doing those tire treads…
Happy Thanksgiving folks!
Some really nice work there, I really like what your doing with this.
The new chassis is ready to be fittted to the kit body. Rails made from sheet plastic reinforced with square stock are used to set the chassis height. A simple gauge has been made to hang off the sides of the body shell to help align the rails (see thing with the blue arrows).
https://flic.kr/p/BbRxru]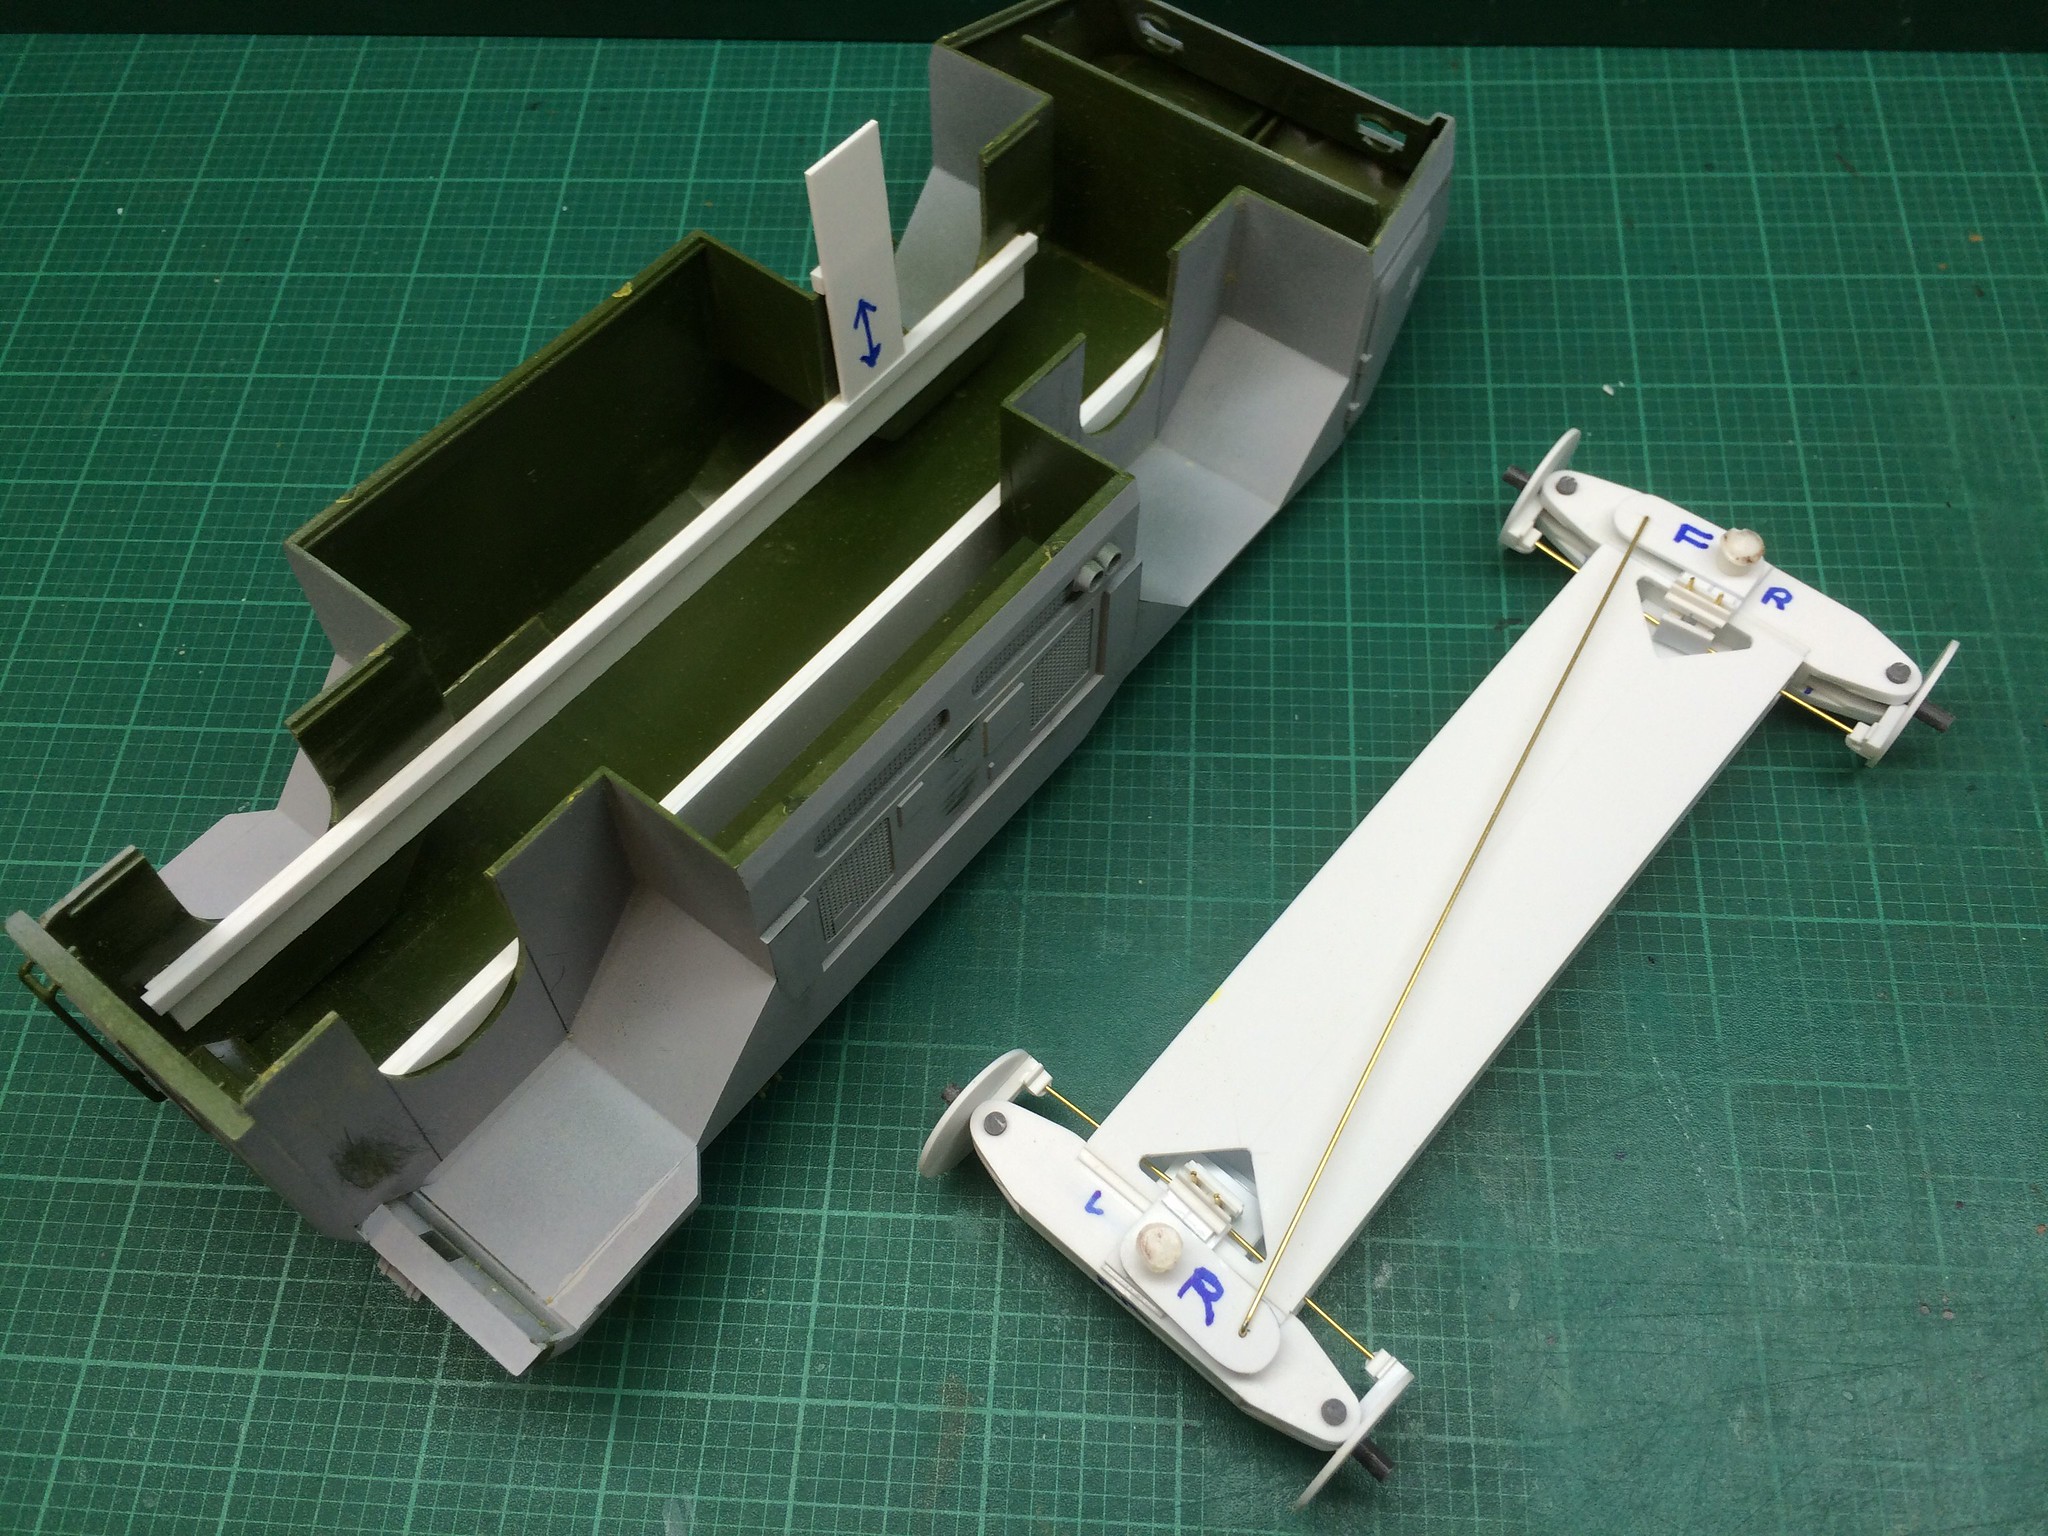 [/url]APC-29 by N.T. Izumi, on Flickr
A test fit into the body shell confirms the steering system works as planned.
https://flic.kr/p/B7L9cN]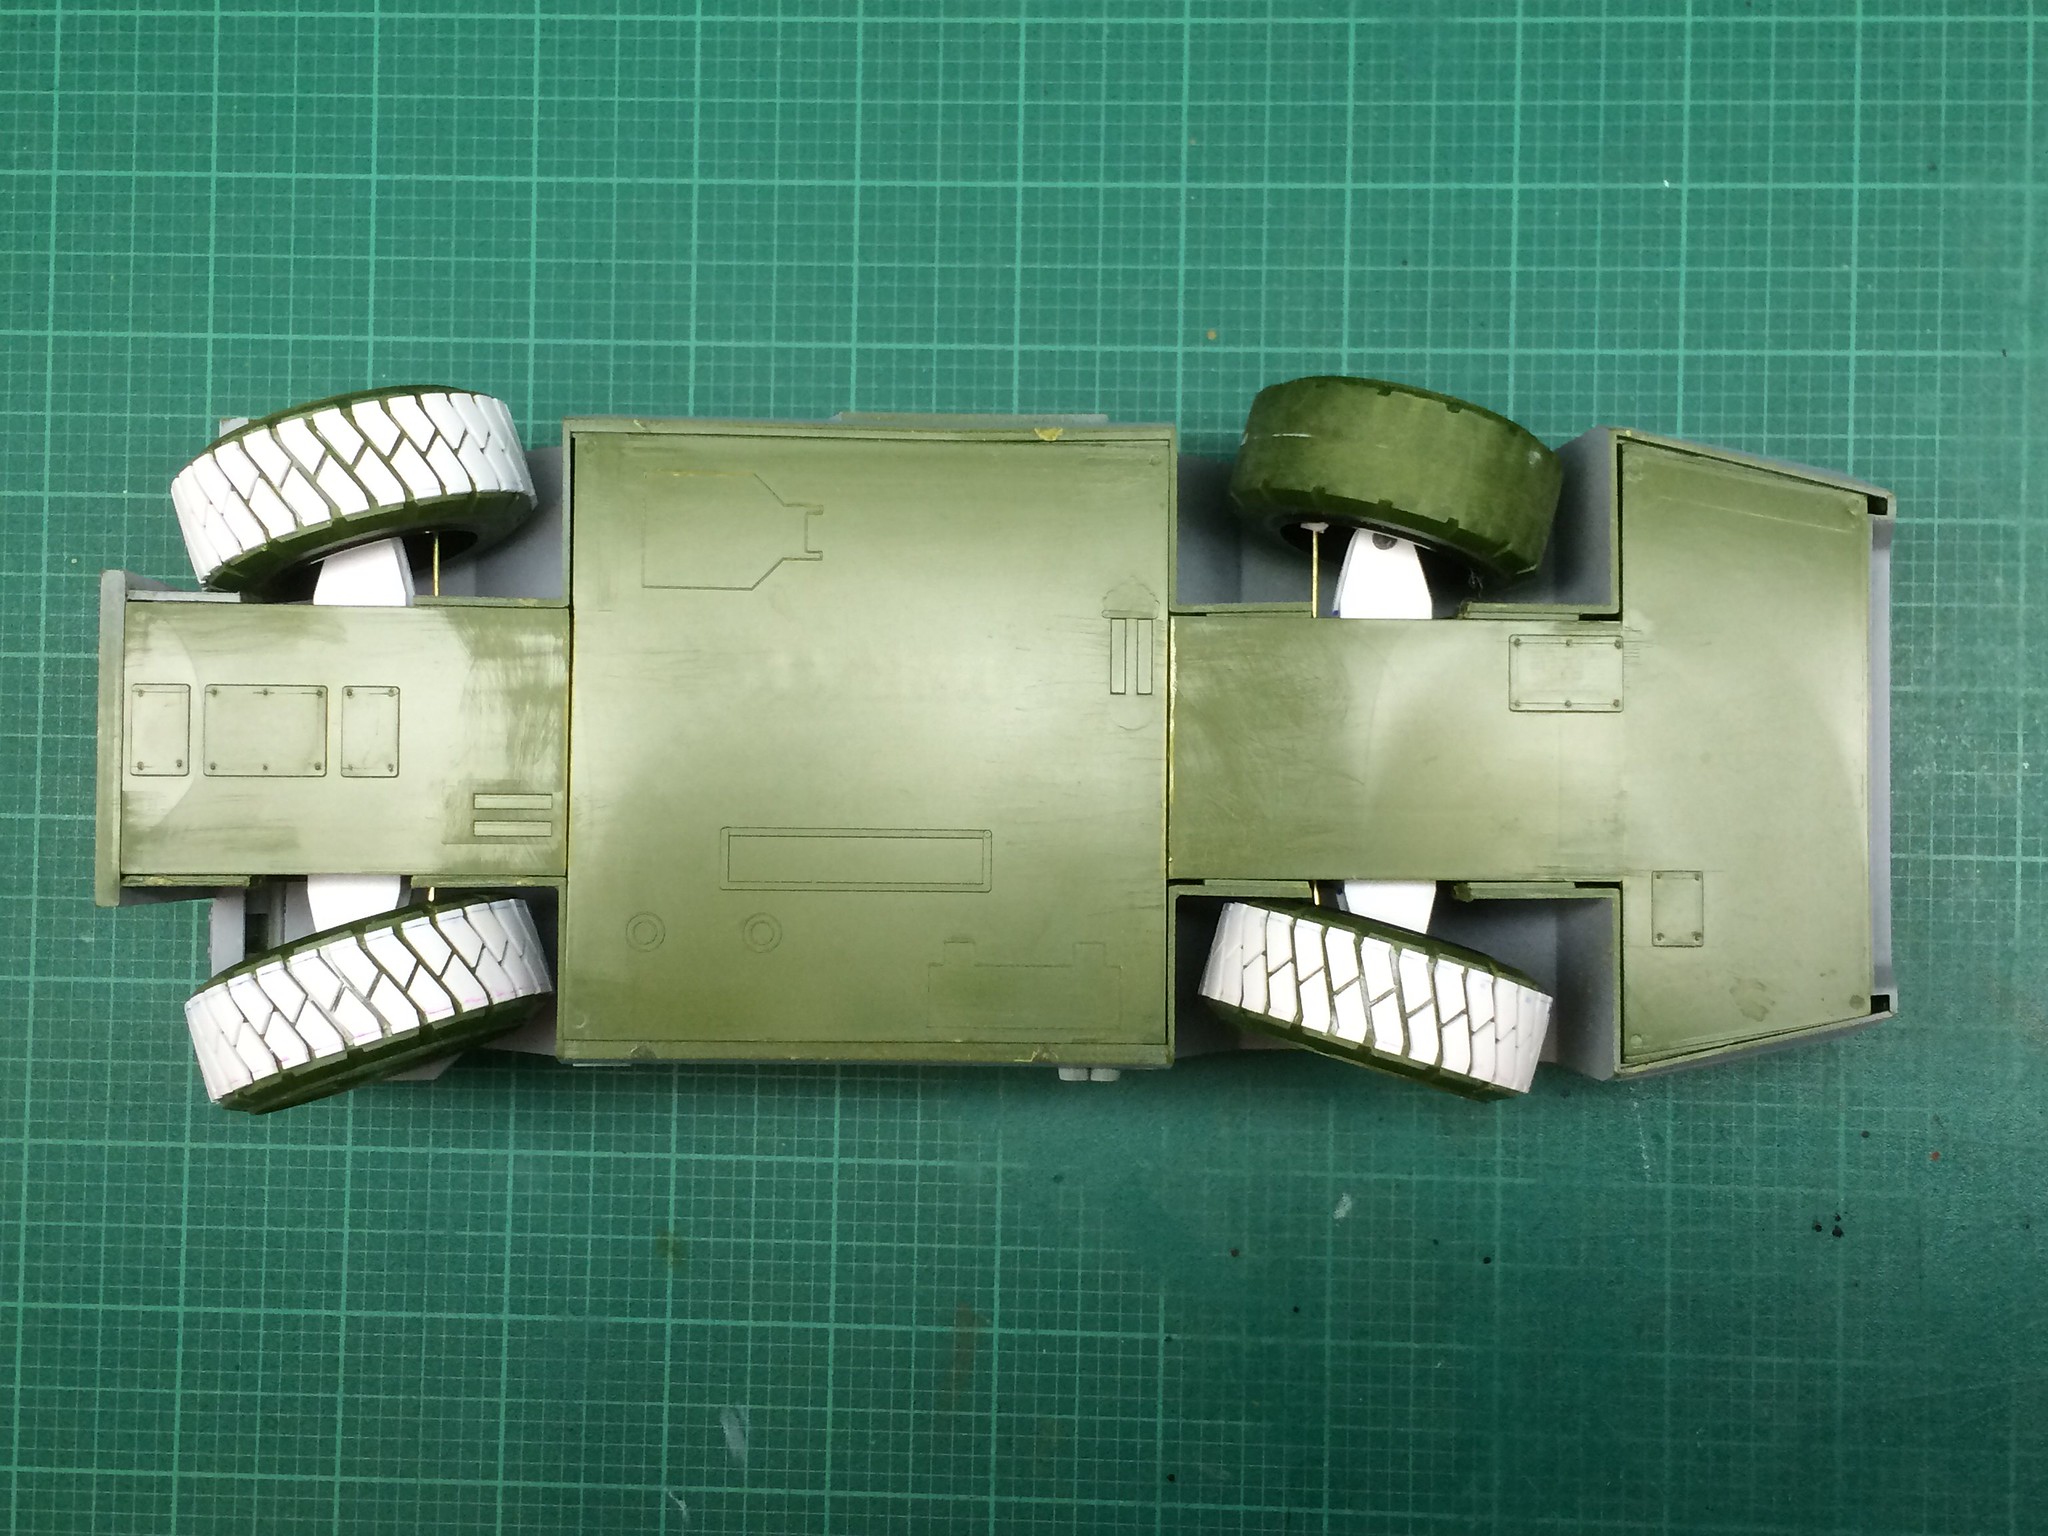 [/url]APC-28 by N.T. Izumi, on Flickr
Yes, yes, I know i have to get on with the treads. Here is the front wheel at maximum deflection. Not as much as I wanted, but I am okay with it.
https://flic.kr/p/ABngeN]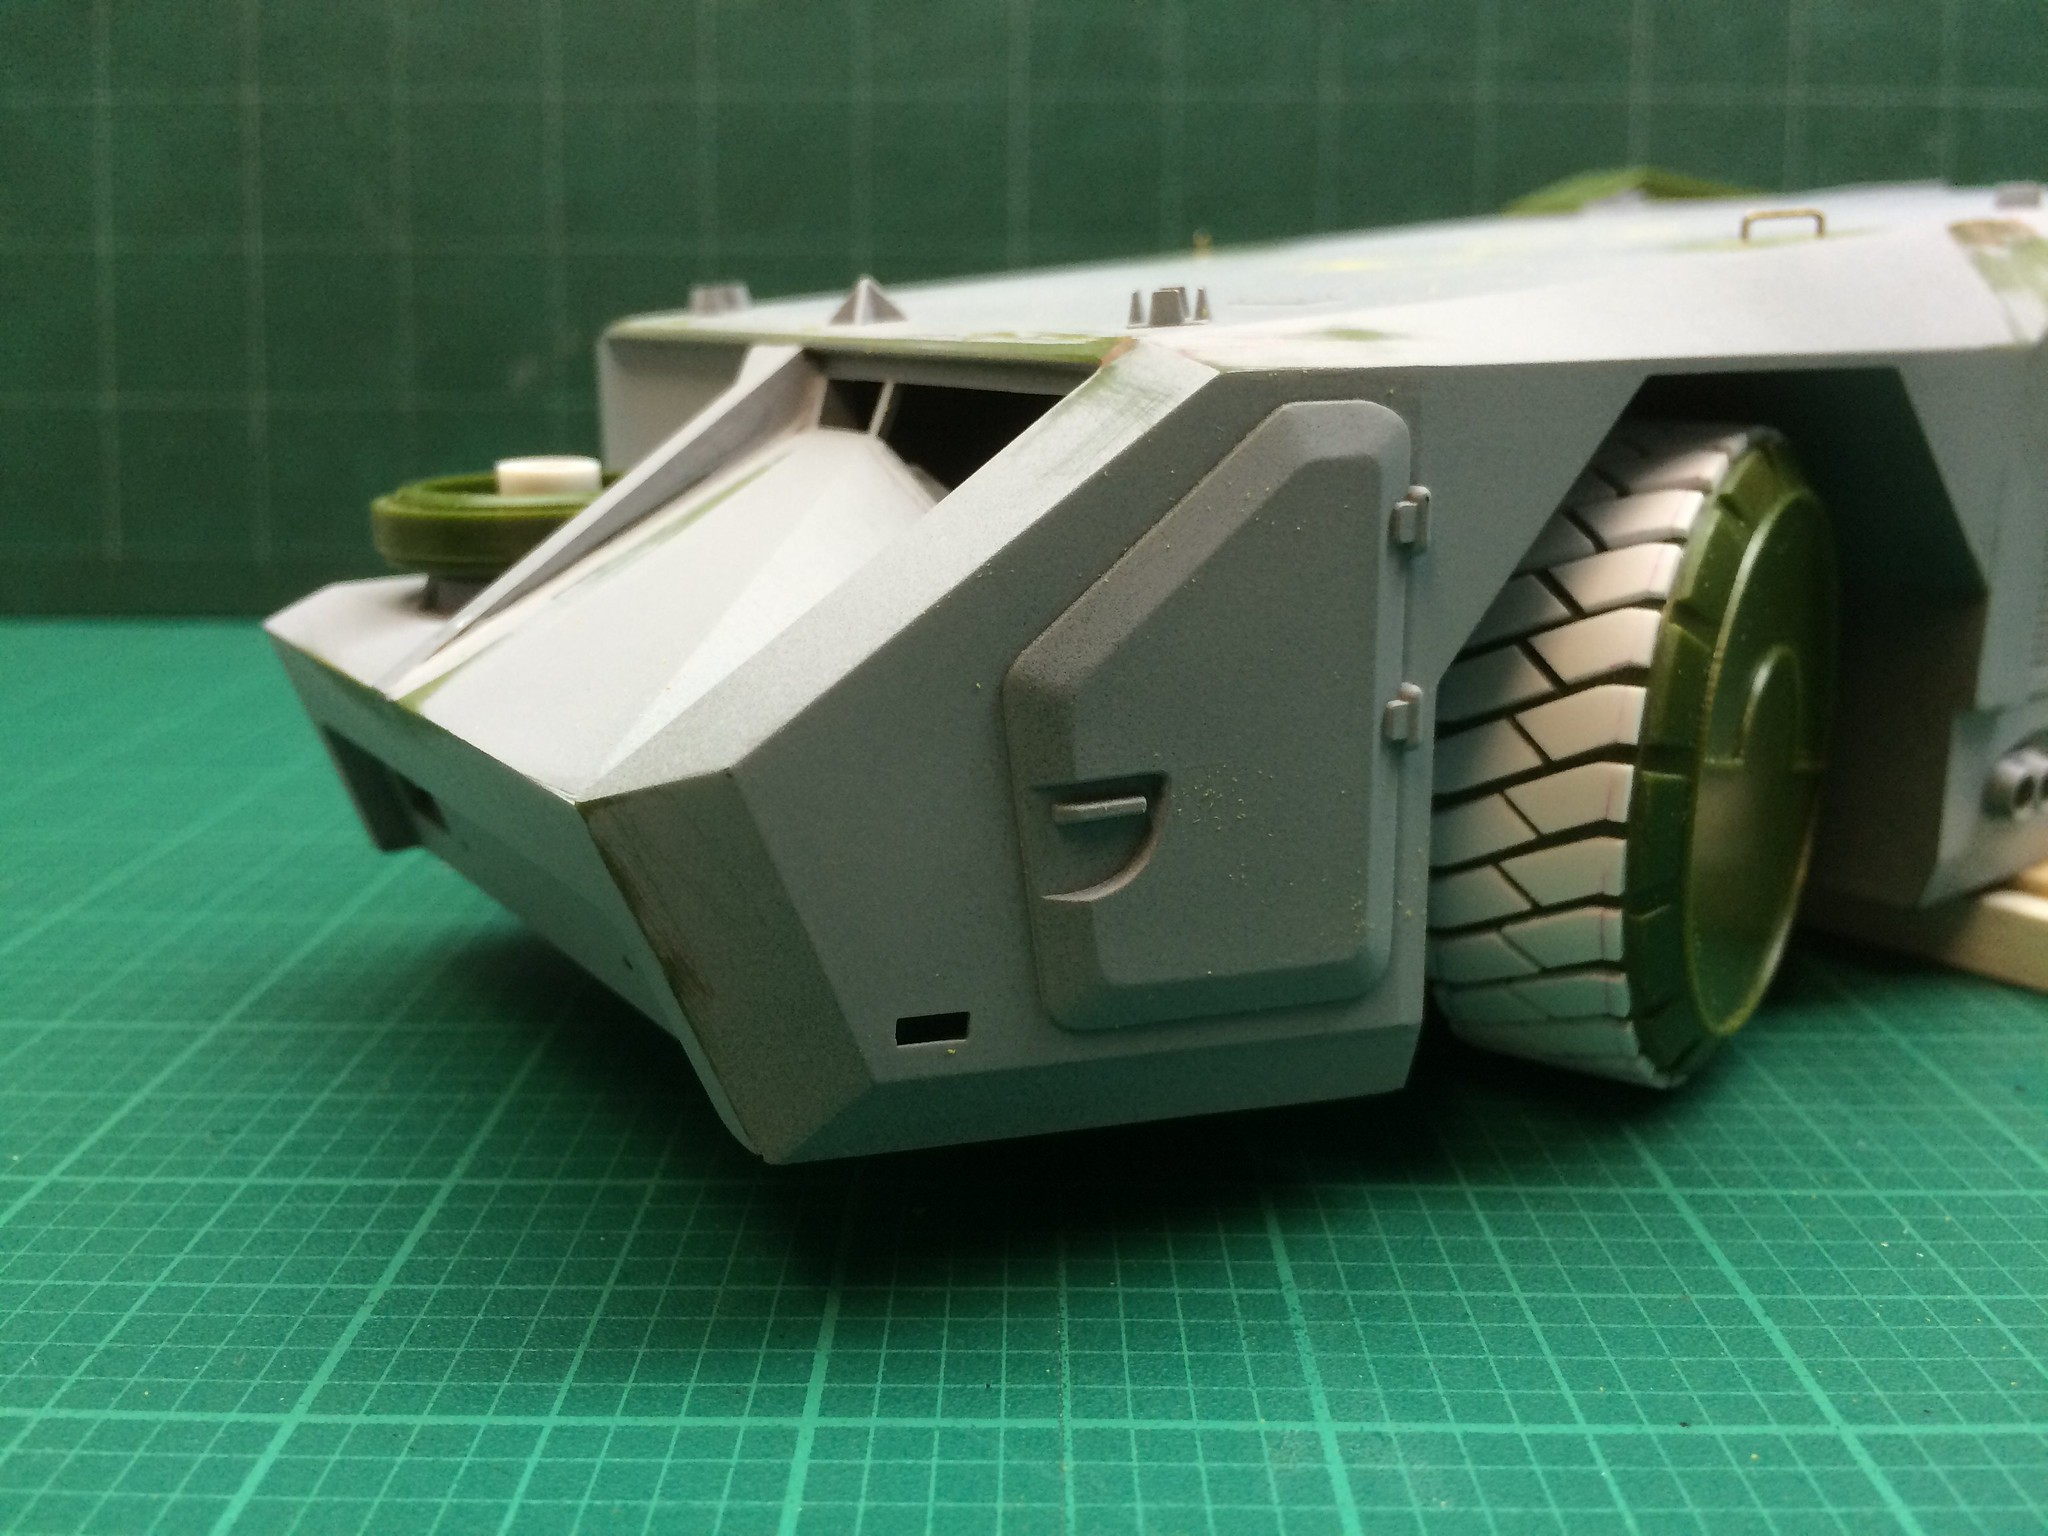 [/url]APC-26 by N.T. Izumi, on Flickr
This looks so flamin’ Cool 
Thanks all for the ecouragement! I promise to keep the fire hot!
While rounding up a shopping list to light the model, I decided to see if there were any other projects I wanted to light. So I figured that the Dropship should also get some LED love.
https://flic.kr/p/Bj9SpU]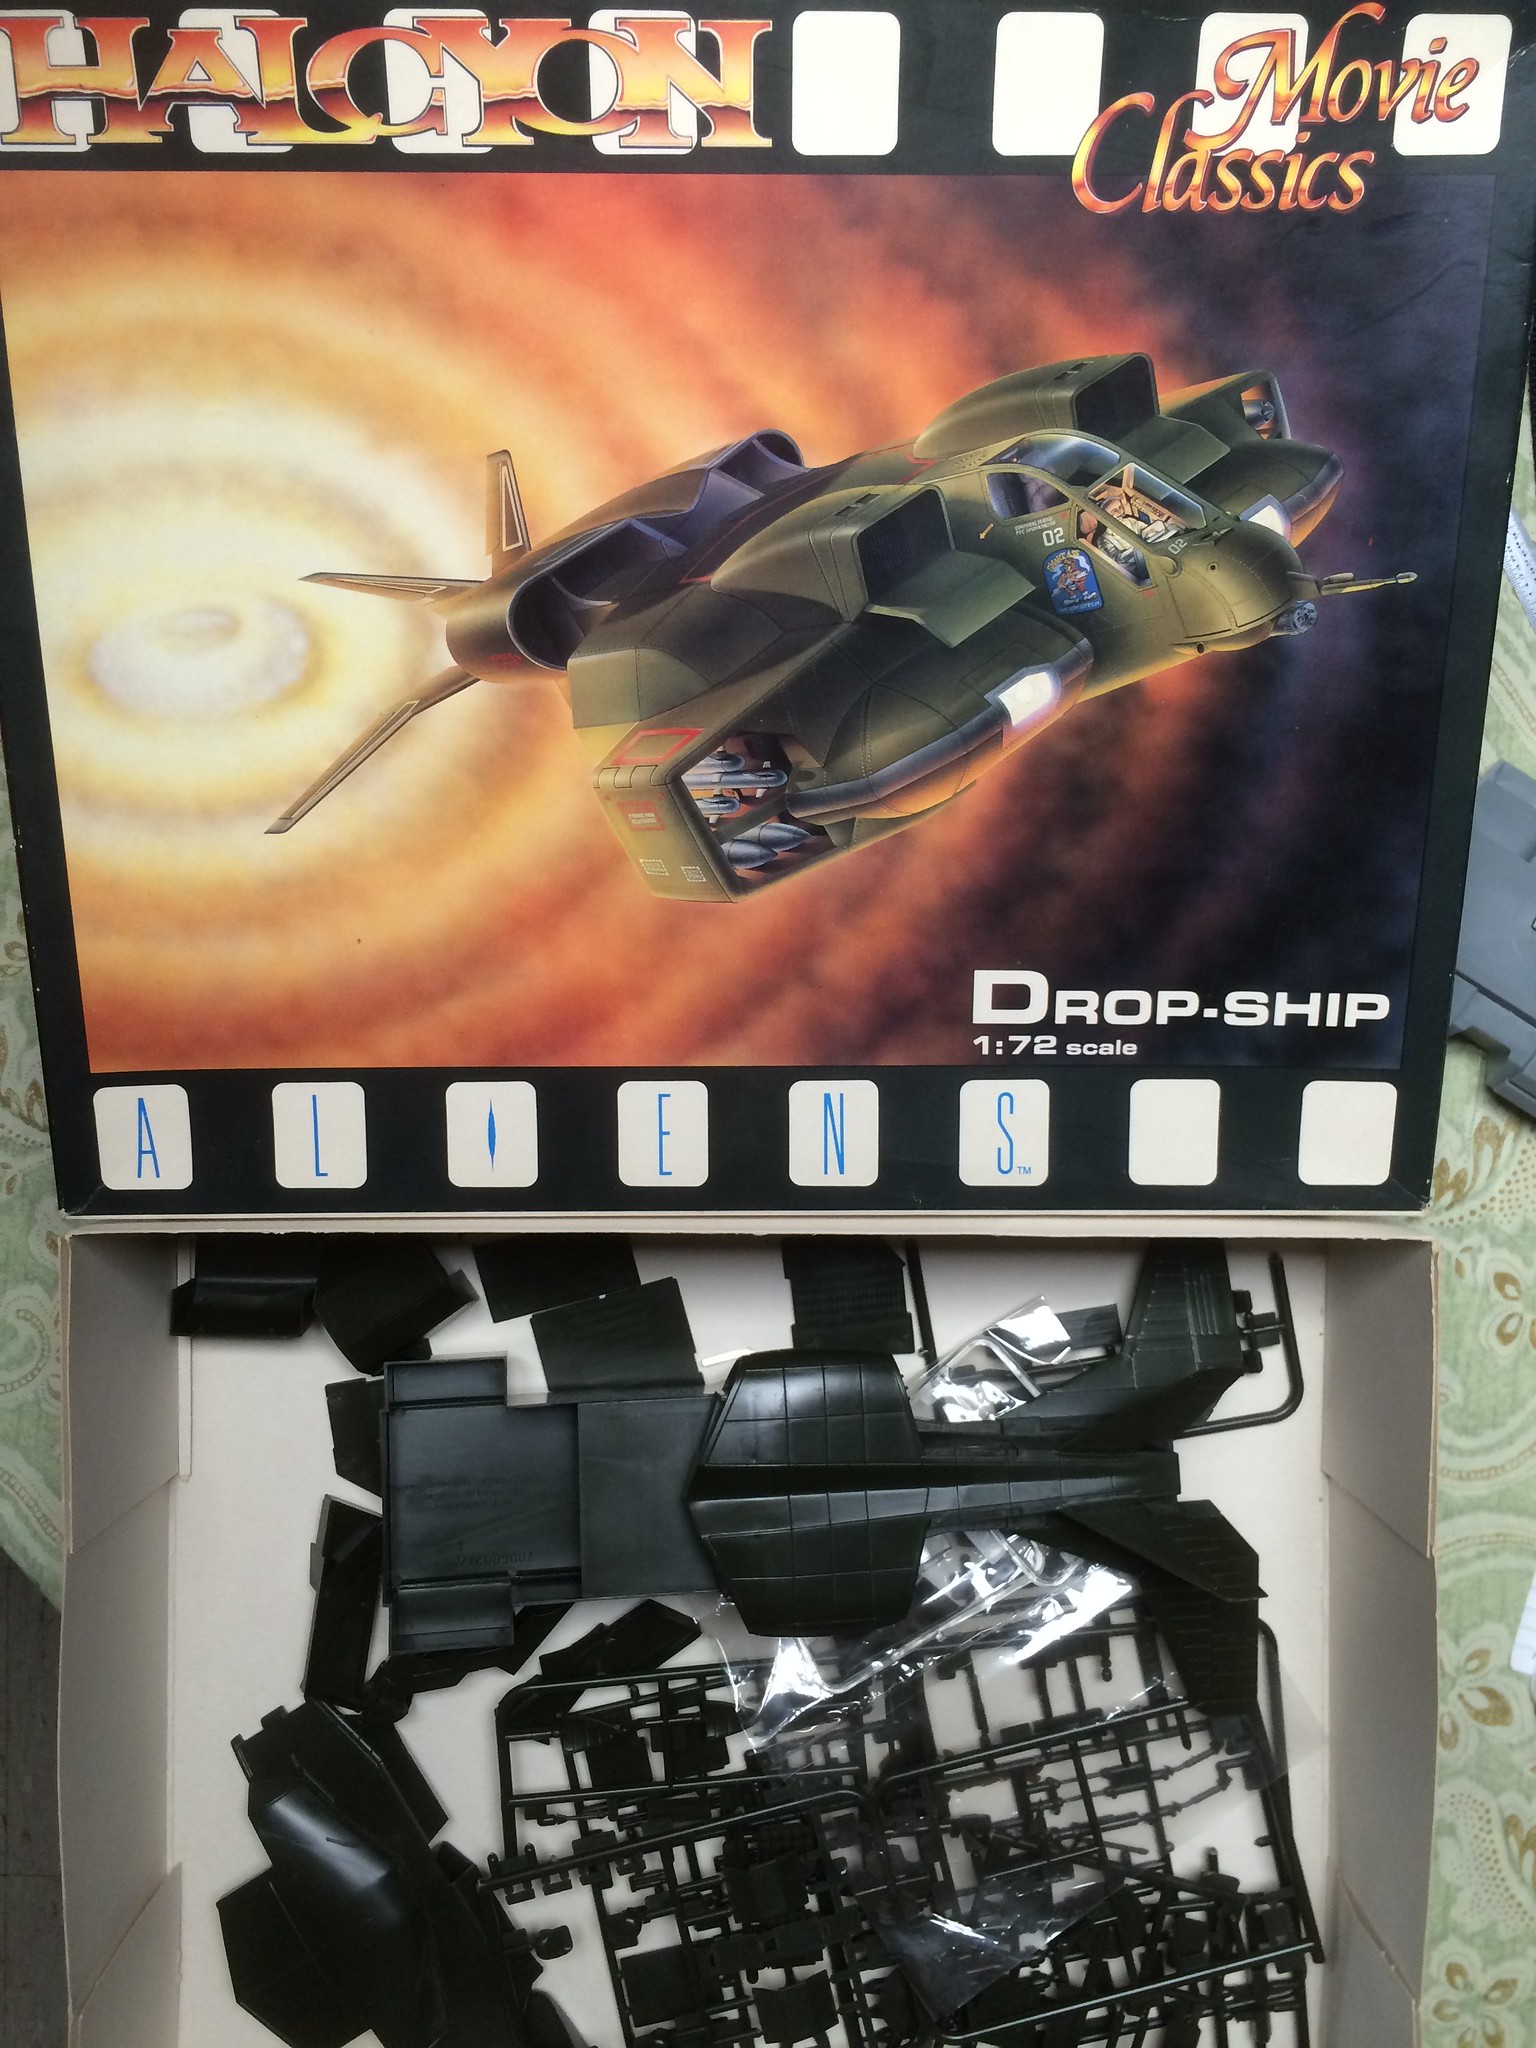 [/url]Dropship-01 by N.T. Izumi, on Flickr
I just realized I forgot to get teeny LEDs for the landing lights on the gear legs. D’oh! Anyway, I’ll get to this one after the APC. I’m not planning on a scratchbuilt bay or a 1/72 APC, but a removable ramp would be a convenient way to access batteries and such.
She’s looking great there Real G, and that dropship is pretty cool too! A guy in our club built the APC but didn’t correct all the stuff you did, I don’t think I’ve ever seen the dropship built.
Gamera, I have seen some pretty impressive builds of the Dropship on-line and in magazines, but they all involved a staggering amount of work. My plan is to streamline the project to end up with something that isn’t too crazy but looks good enough. I do want to make the weapon stations moveable though.
I finally finished adding the new tread blocks to the last tire last night. So relieved! I just have to sand the blocks smooth and add a little detail to the suspension arms, then it will be time to move on to work on other areas.
https://flic.kr/p/BefQU6]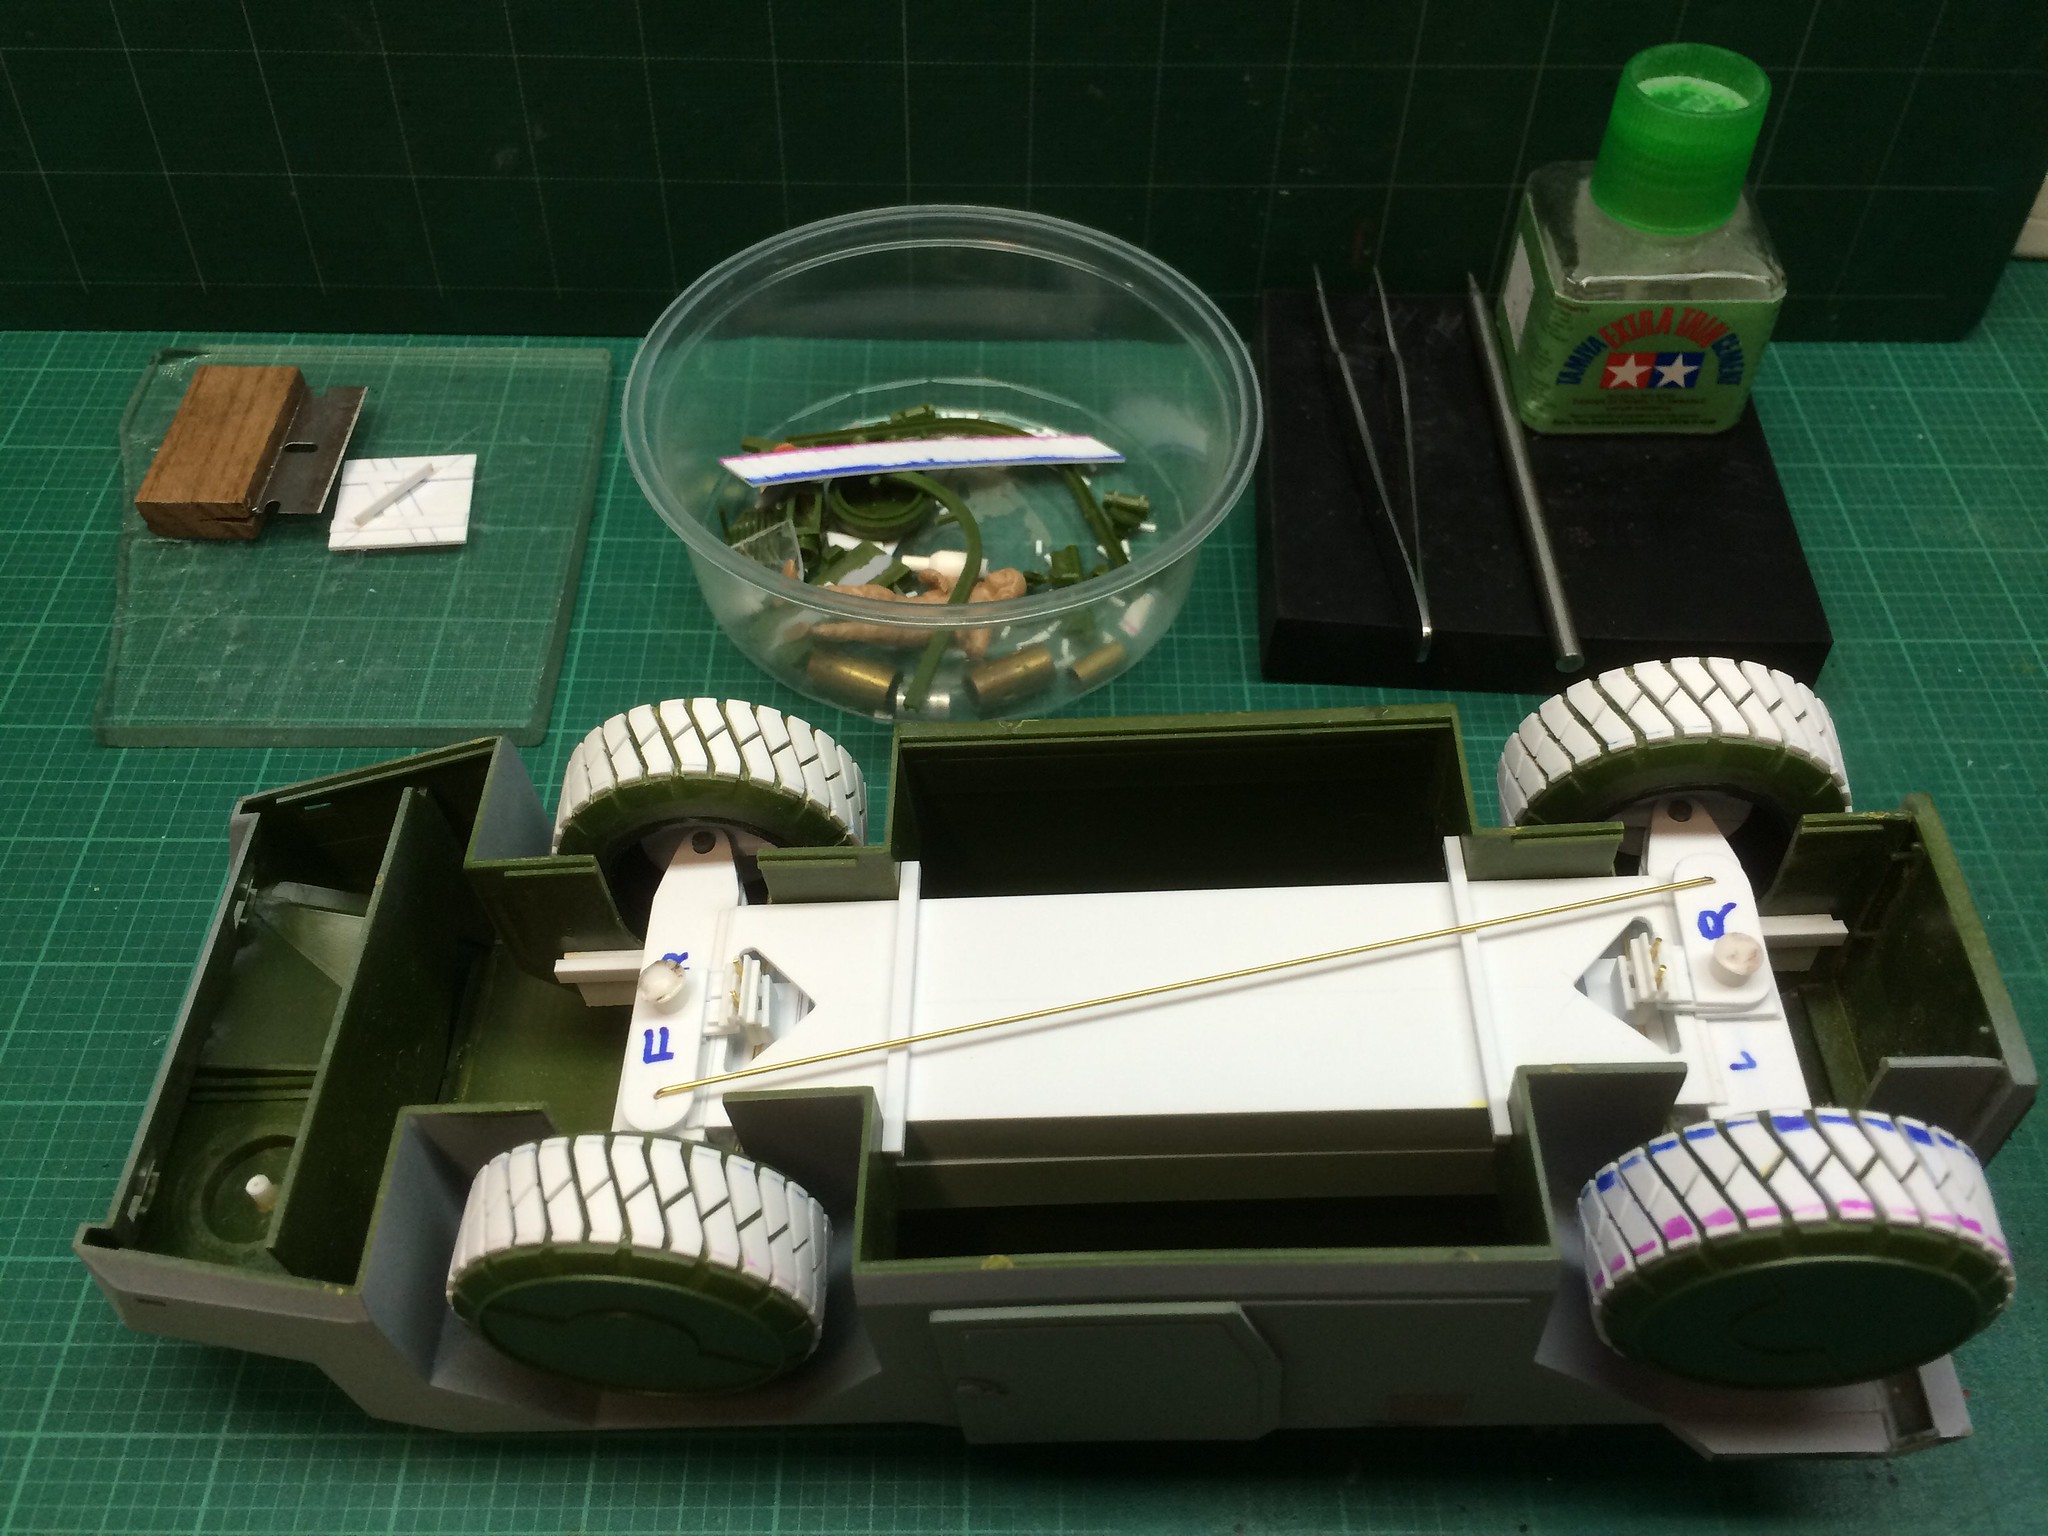 [/url]APC-33 by N.T. Izumi, on Flickr
I’ll be replacing the milky headlight and spotlight lenses with aftermarket ones from Modeler’s. But I think I’ll use the kit’s side markers and tail lights, as they will help diffuse the LED lighting.
https://flic.kr/p/BMM6kV]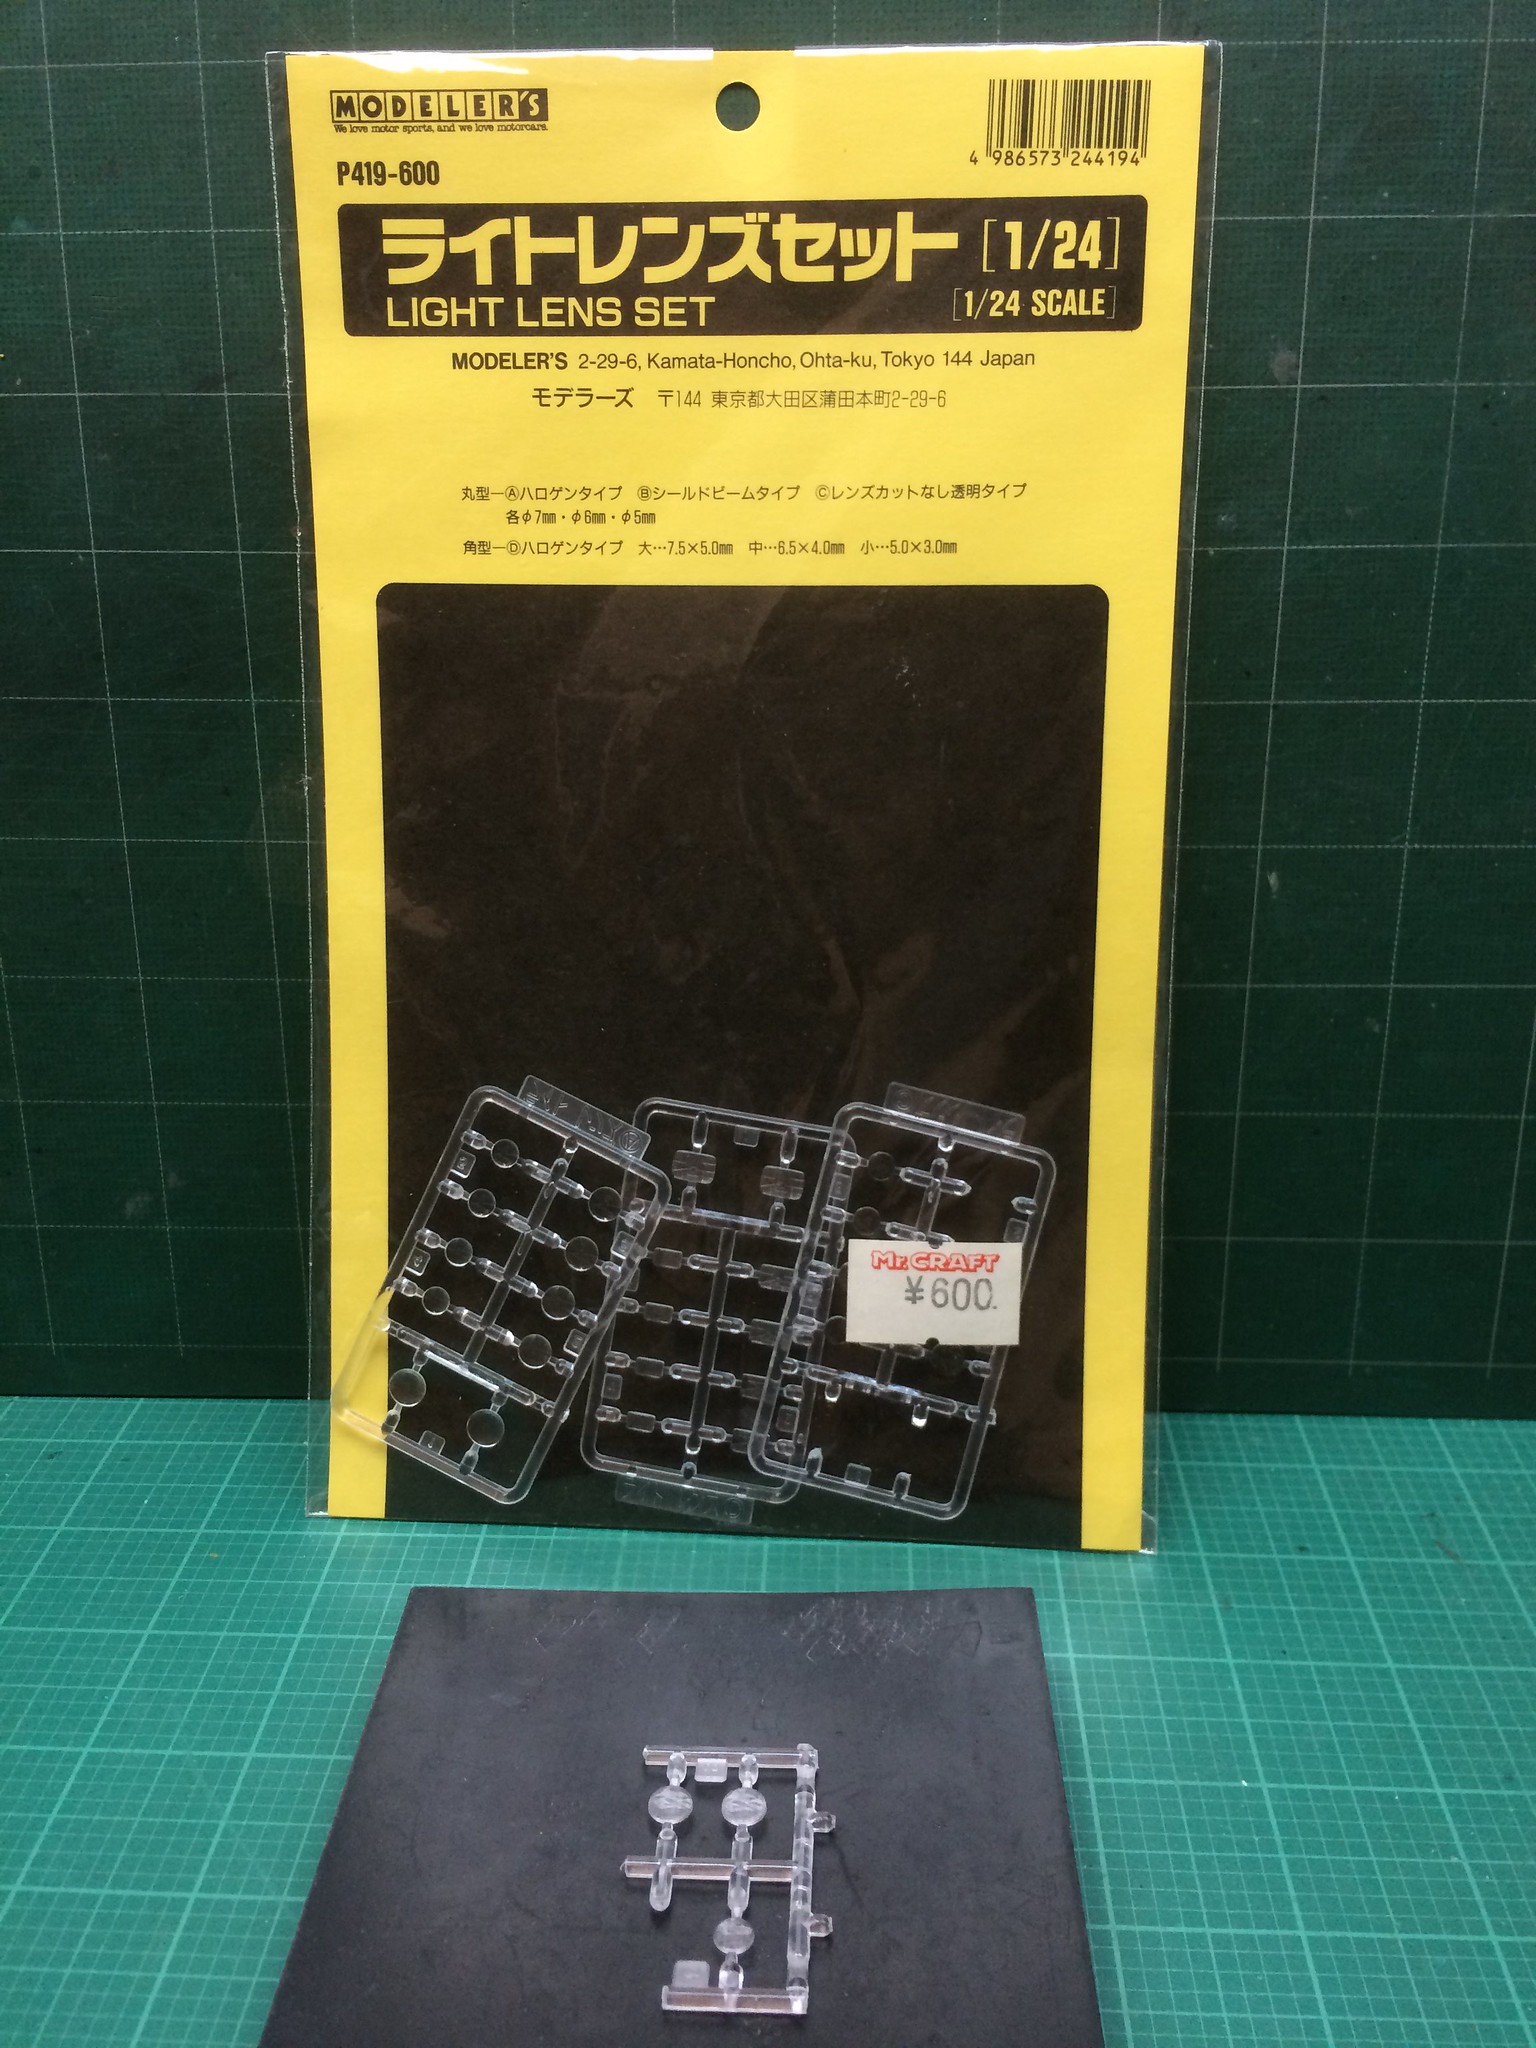 [/url]APC-34 by N.T. Izumi, on Flickr
I ordered LED parts from these guys:
http://www.modeltrainsoftware.com/
Once I got used to their catalog system, it was pretty easy to order what I needed. You tick off boxes to specify style, size, color, voltage, lead lengths, etc. If you know what you want, it is super simple. The nice thing about their LED products is that idiots like me who do not dabble with soldering can still make up some simple set-ups. I tip my hat (if I had one!) to the Star Trek guys who do those incredibly intense lighting projects. Now I know why they have to add power supply systems to their projects.
I reworked the rooftop spotlight guard by replacing the grating with 0.020" plastic rod. I really should have used a finer diameter, but the next size down was a little too floppy for my clumsy fingers, and I thought I’d just make a mess with CA glue and metal wire.
https://flic.kr/p/dPPw1g]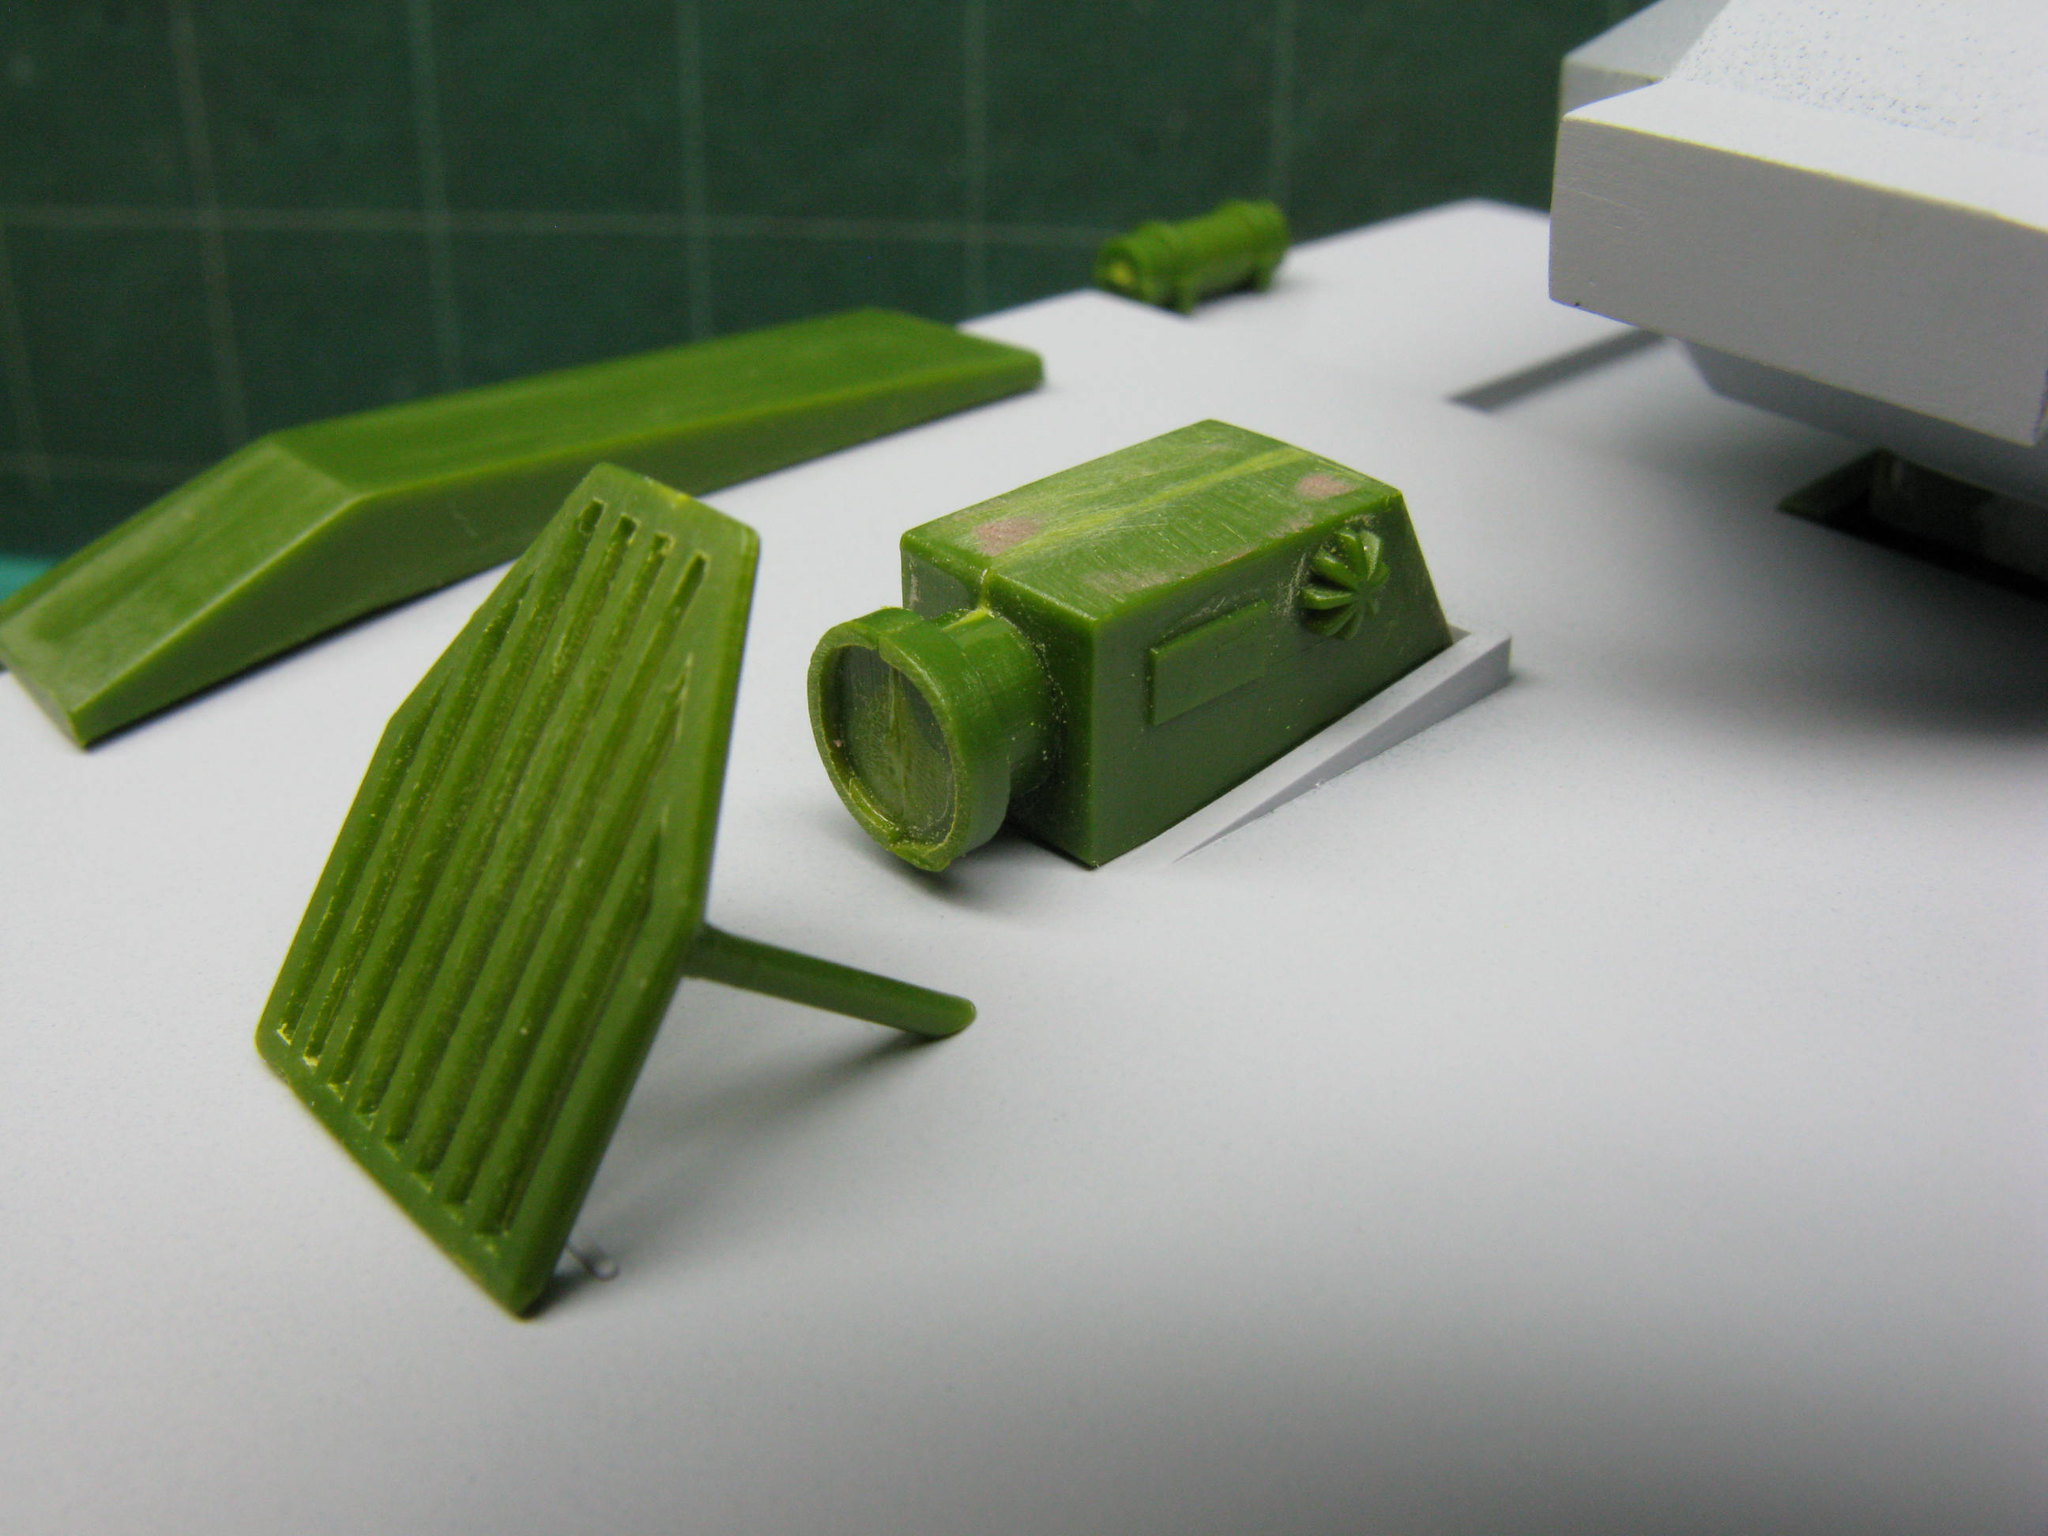 [/url]APC-6 by N.T. Izumi, on Flickr
https://flic.kr/p/BTxHc6]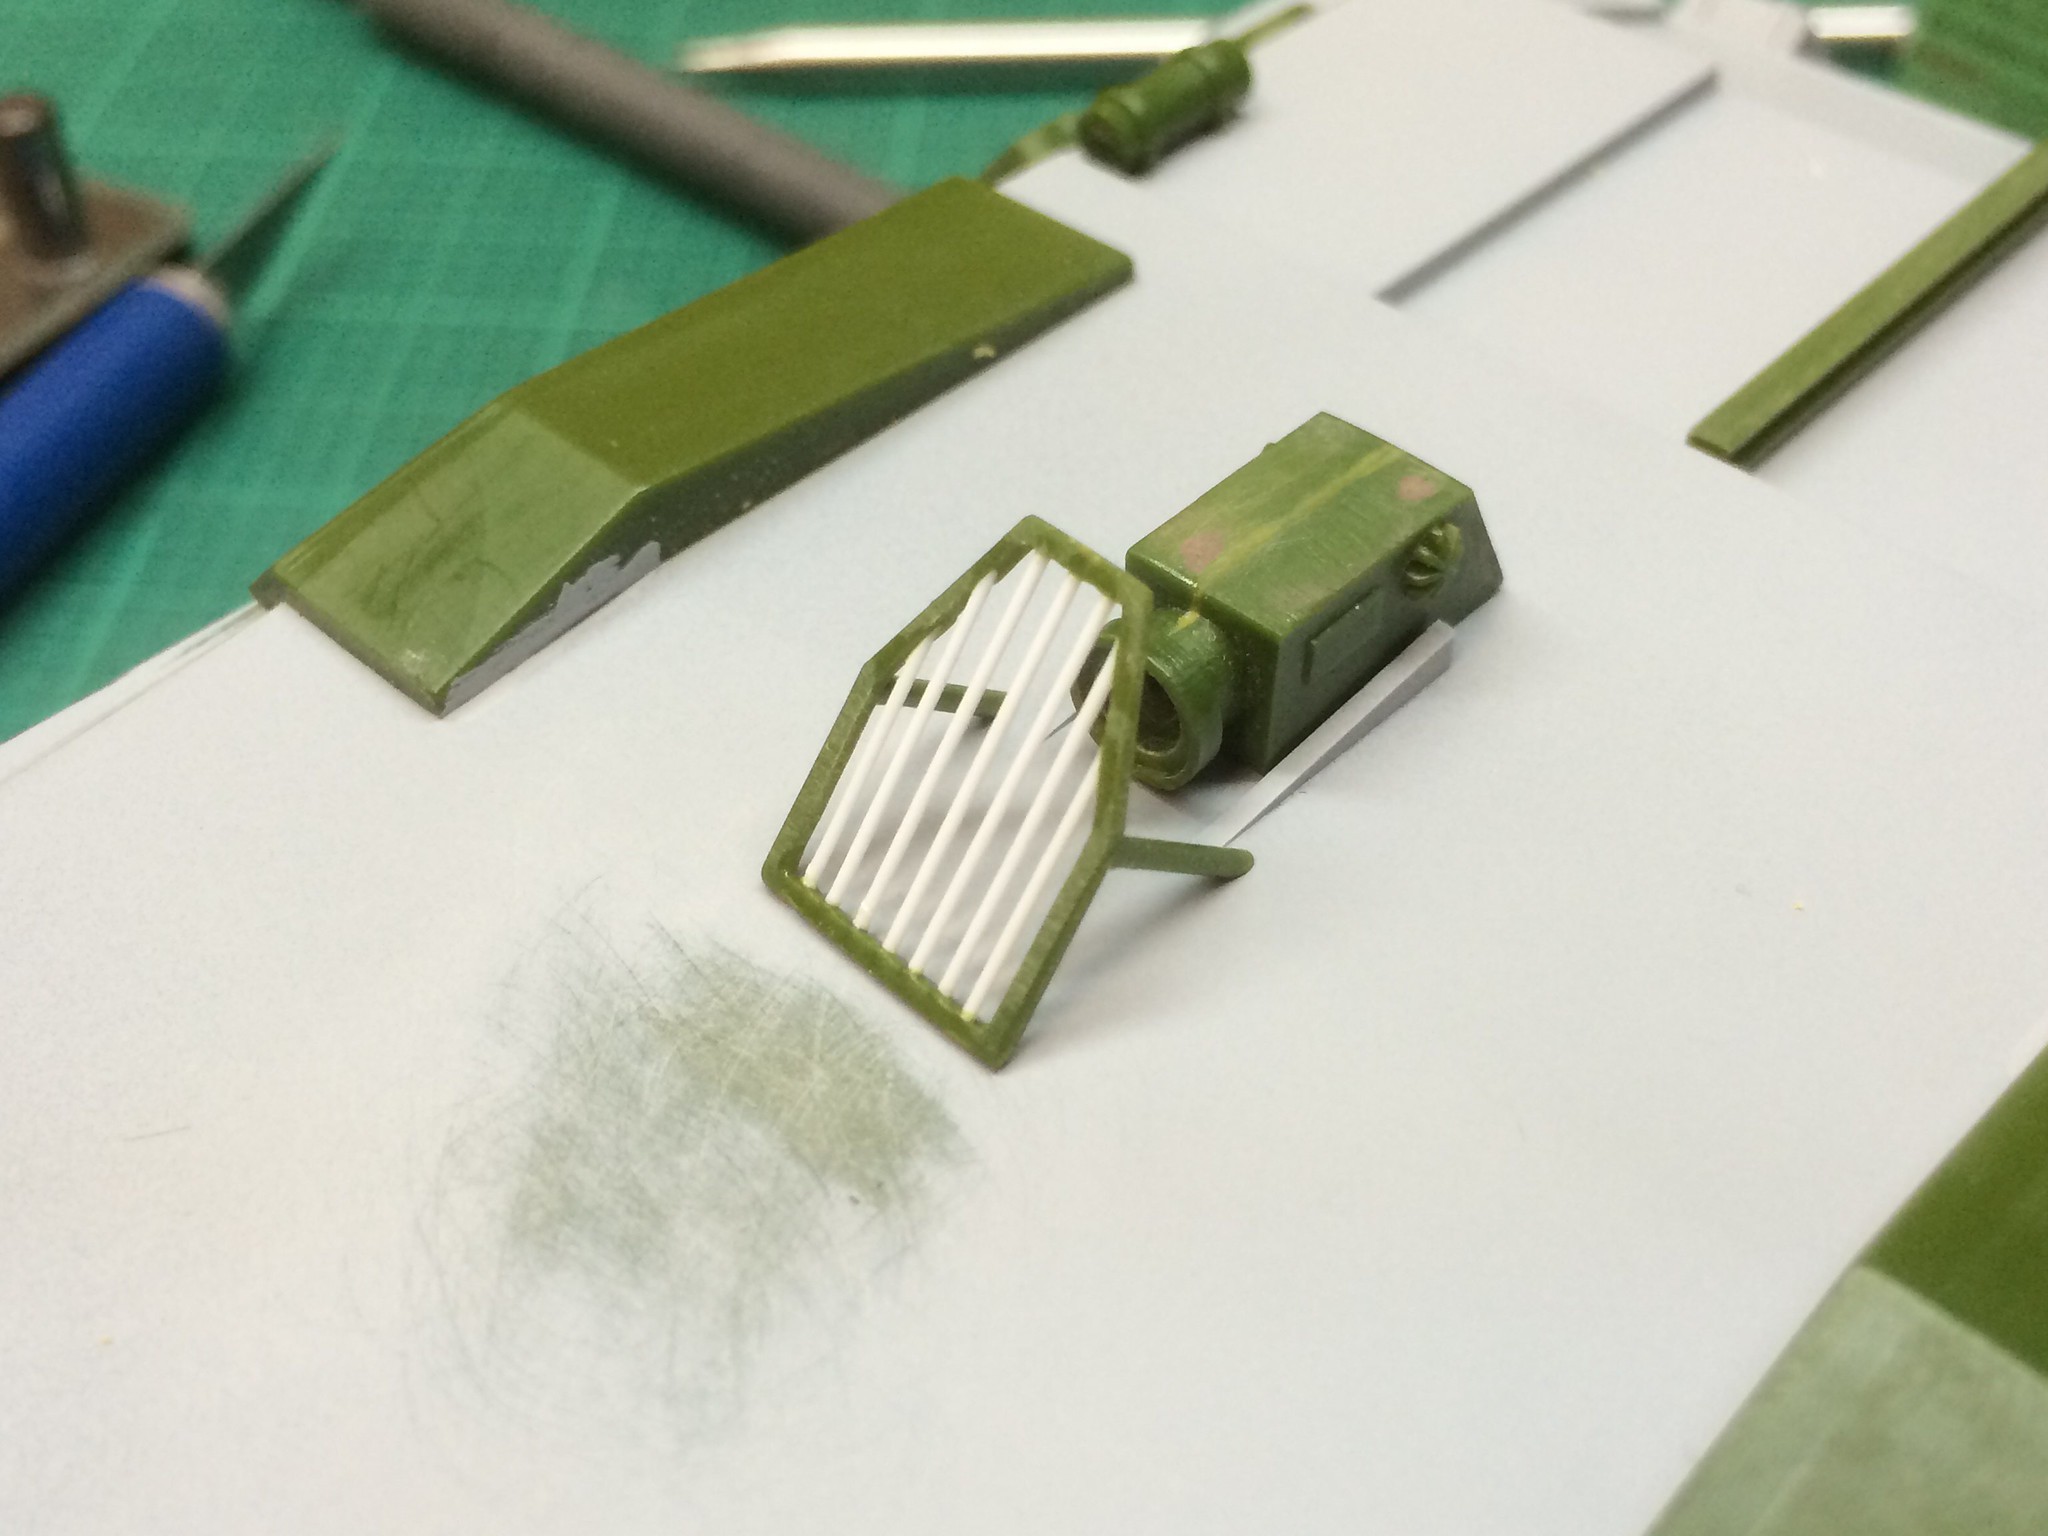 [/url]APC-36 by N.T. Izumi, on Flickr
Photos of the real filming vehicle had a curved cover over the spot light, so I made one from wrapping a 0.015" sheet plastic strip around a brass rod, securing it with tape, then plunging it into boiling water. A handy tip here: use a Pyrex measuring cup with water and microwave on high for about 2-3 minutes. So much easier and faster than using the range! The flanges were made from 0.010" plastic strip and was detailed with punched washers and bolts.
https://flic.kr/p/AW3569]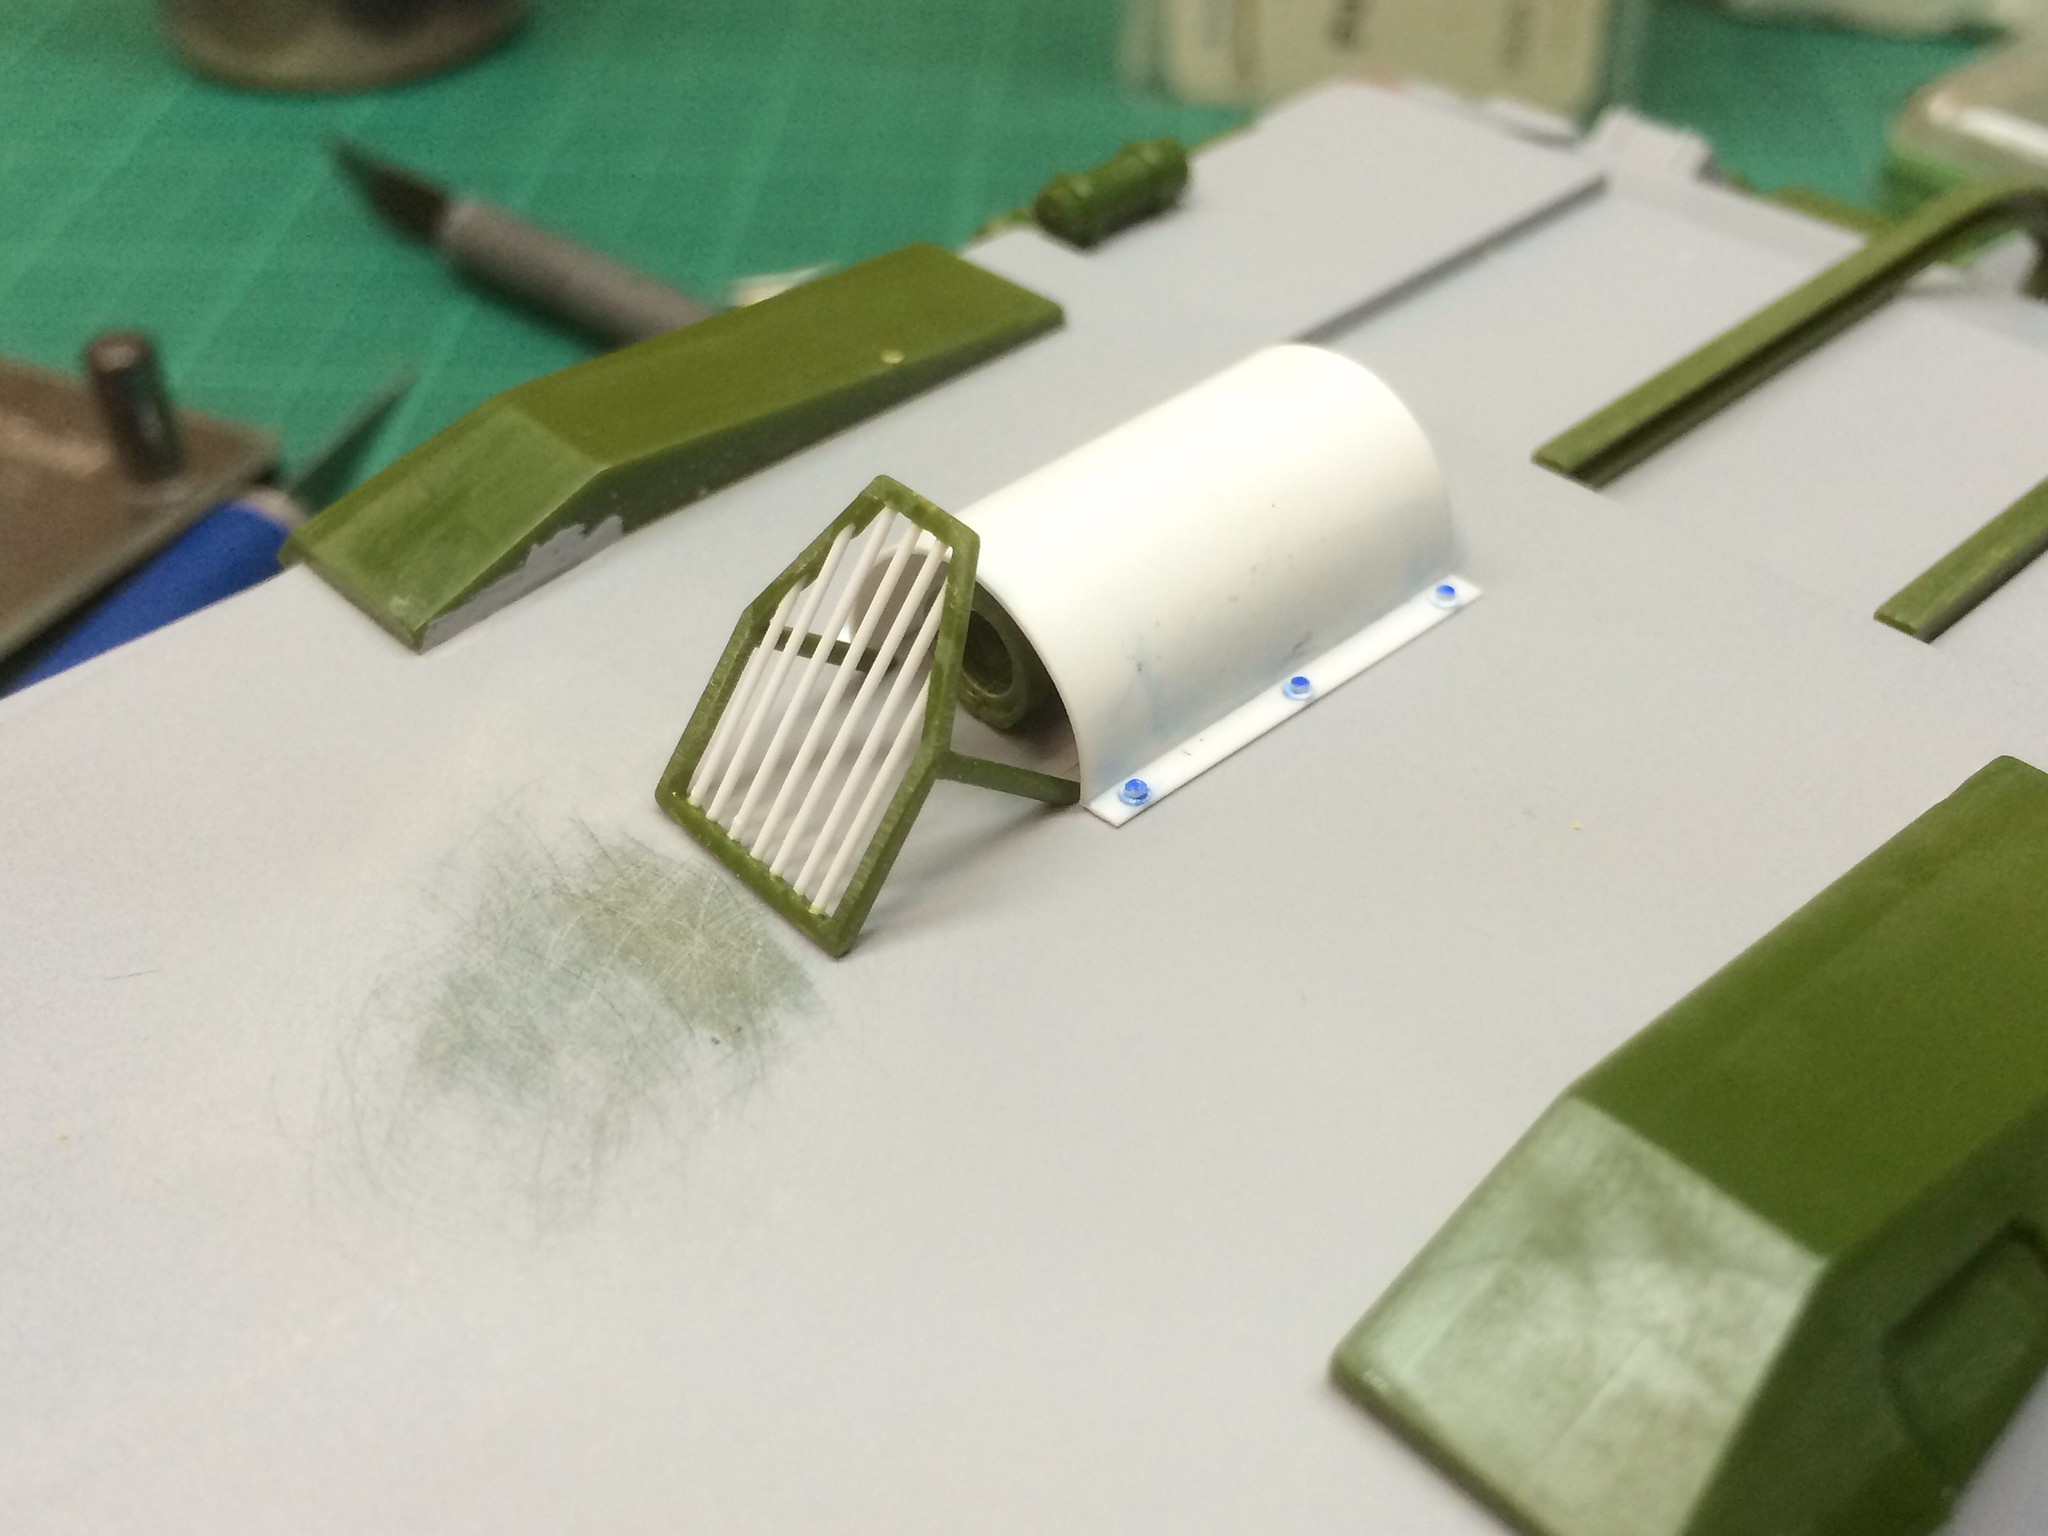 [/url]APC-37 by N.T. Izumi, on Flickr
https://flic.kr/p/Brqyj1]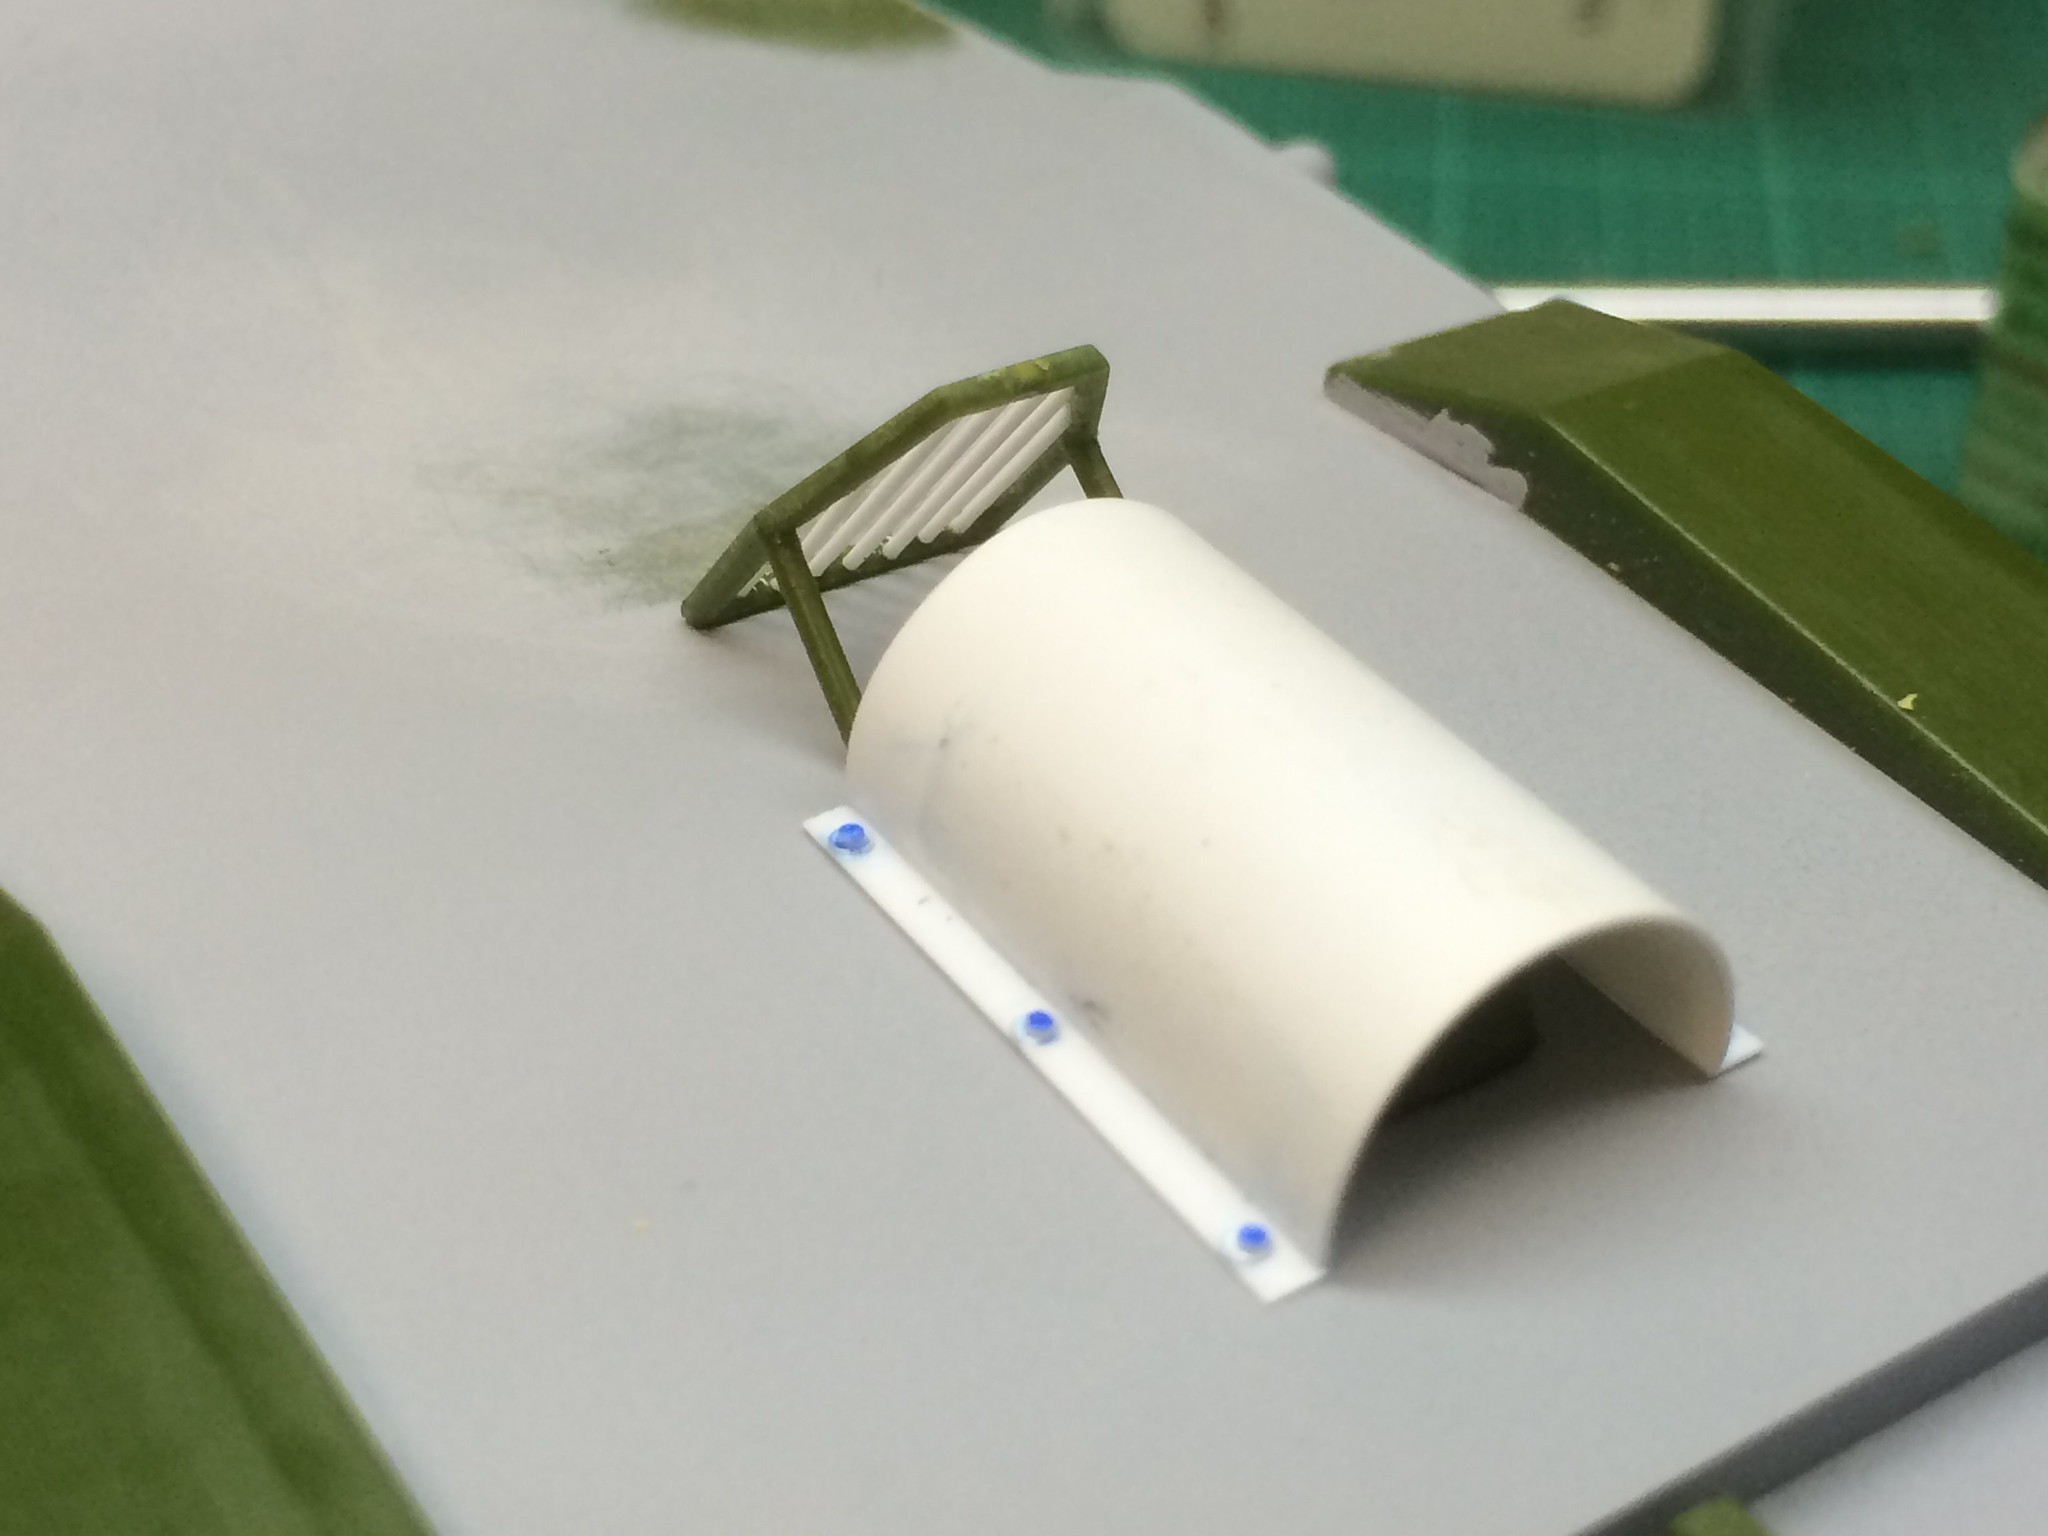 [/url]APC-38 by N.T. Izumi, on Flickr
The LED parts arrived from Model Train Software in just three days - thanks for the personalized service Dave! I’m kind of excited to get-it-on!
https://flic.kr/p/AZ5hH1]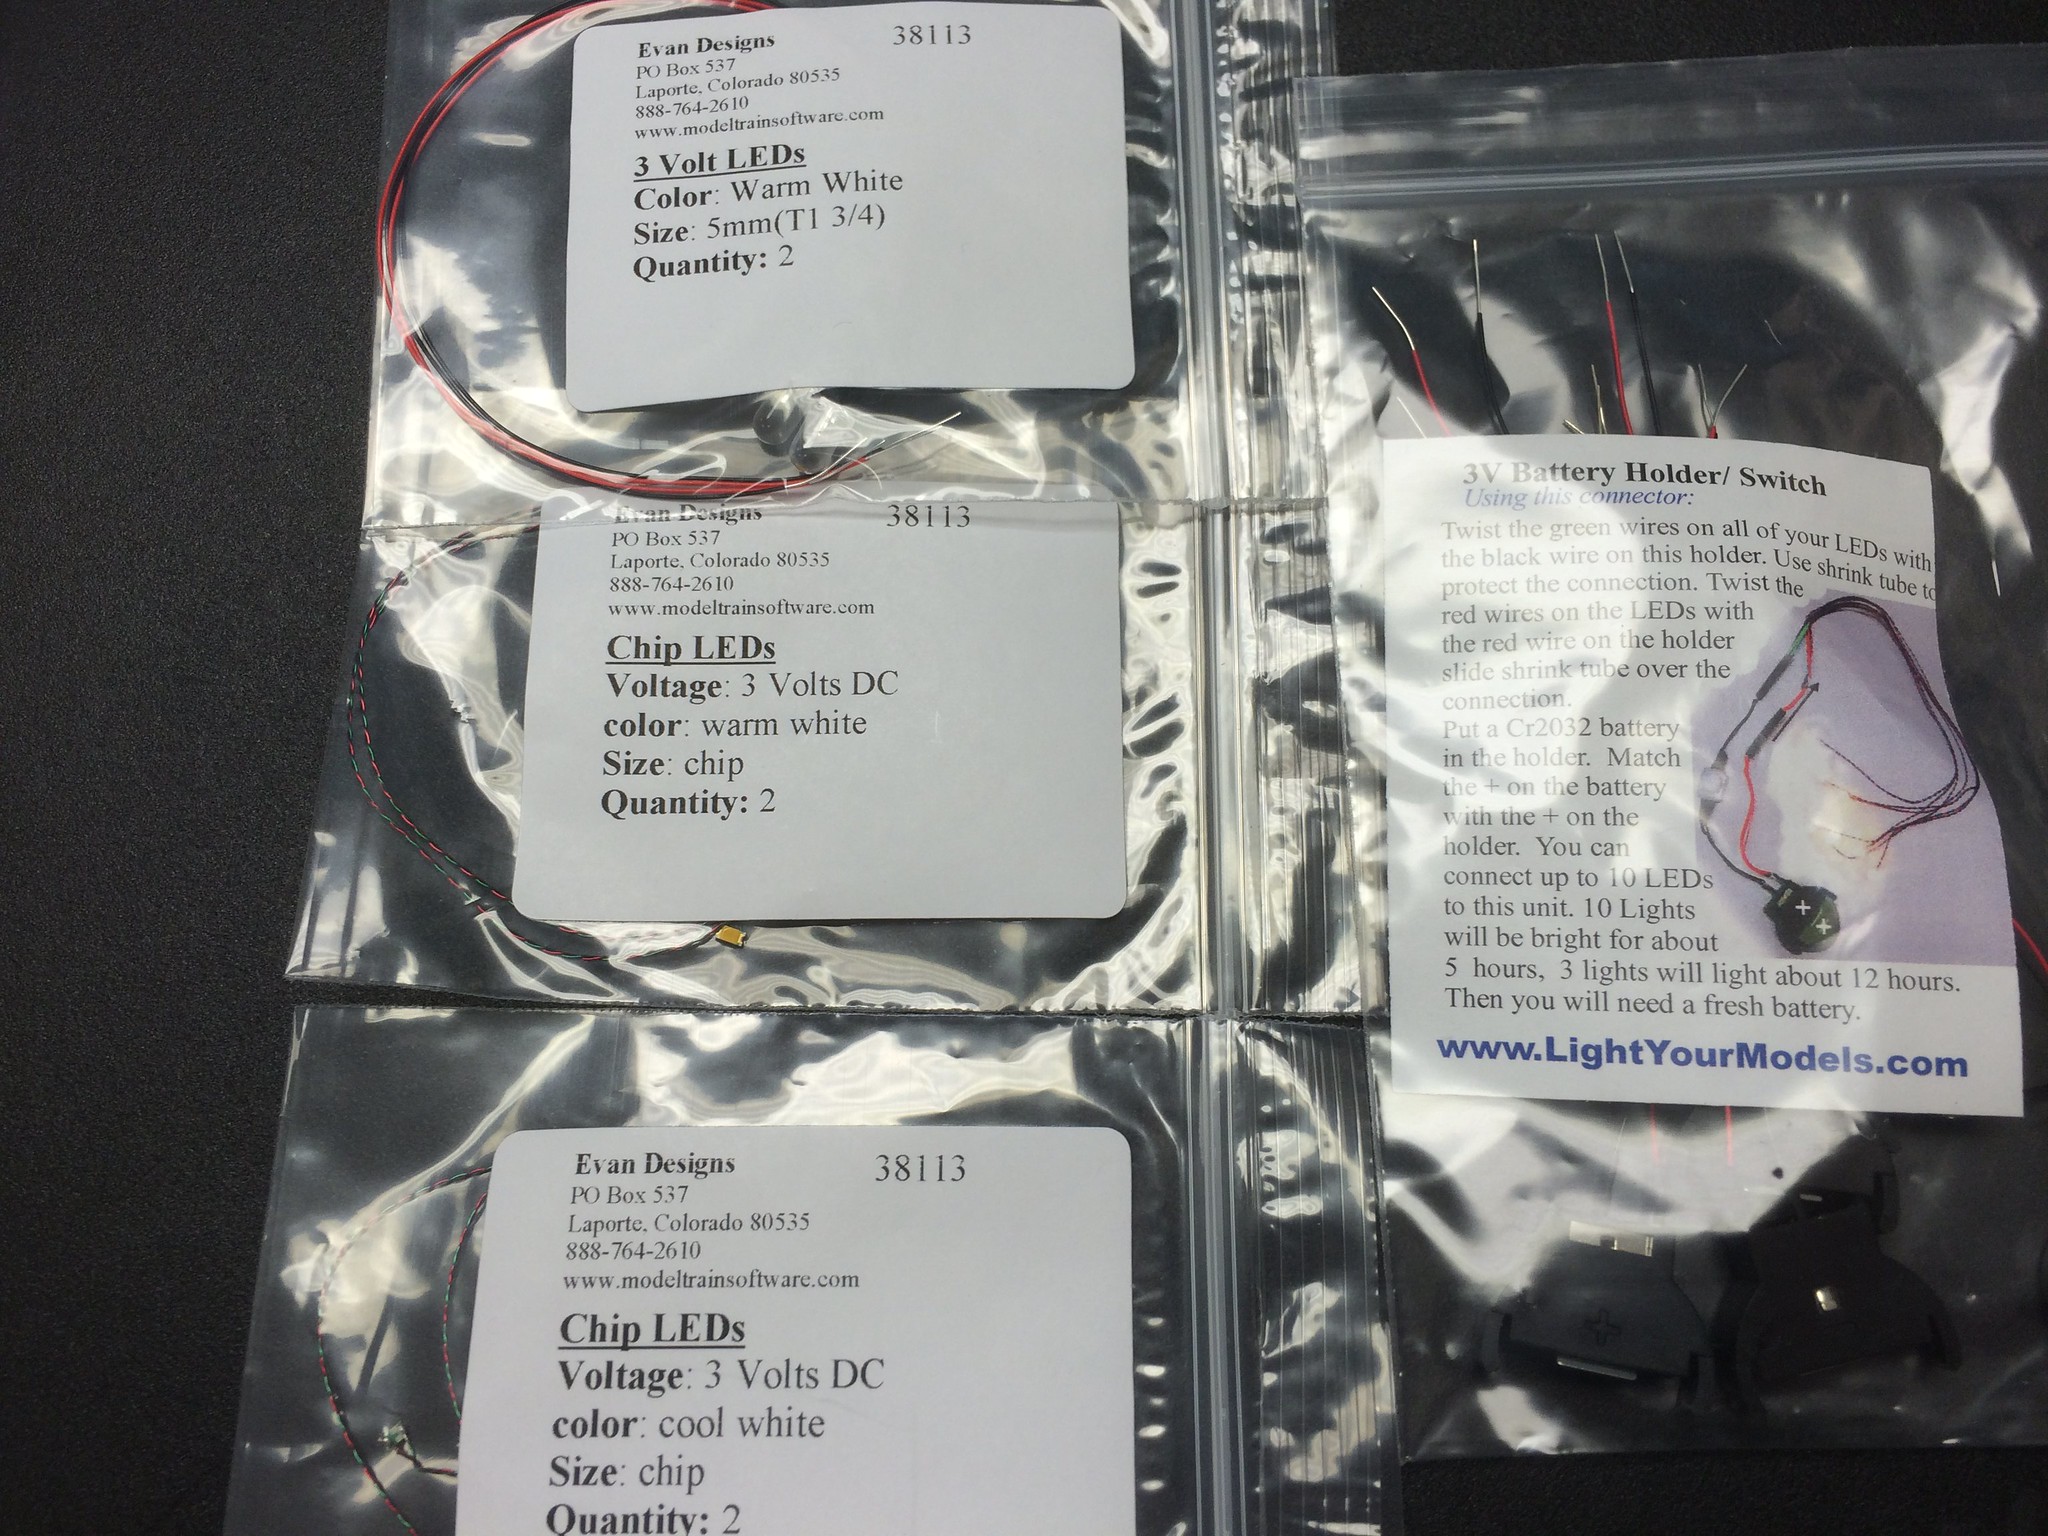 [/url]APC-39 by N.T. Izumi, on Flickr
I hurriedly stuck the leads together and hooked up a battery to test the lights - and they all work - hooray! Note the different temperatures (colors) of the white lights. I chose to go with warm white for the head lamps and running lights, and cool white for the spotlight and tail lamps. Strangely, the tail lamps are bluish on the movie prop, so that’s what it’s going to be on my model.
https://flic.kr/p/BPZCWR] [/url]APC-40 by N.T. Izumi, on Flickr
I forgot to mention that the spotlight had to be moved back a little along with the guard, as the shroud’s front edge has to sit on the roof’s contour break. The guard is scooted up close to the front of the shroud. The repositioned peices seem to match those of the full size vehicle.
Very cool G, looking forward to seeing all the lights in place.
Time for a small update. I should be finishing the hull details, but I could not wait to figure out how to install the LED lights. I made up a sheet plastic box to fit inisde the front of the hull to take the headlights, and slipped the LEDs in for a quick check to see what they look like.
https://flic.kr/p/BtiKVZ]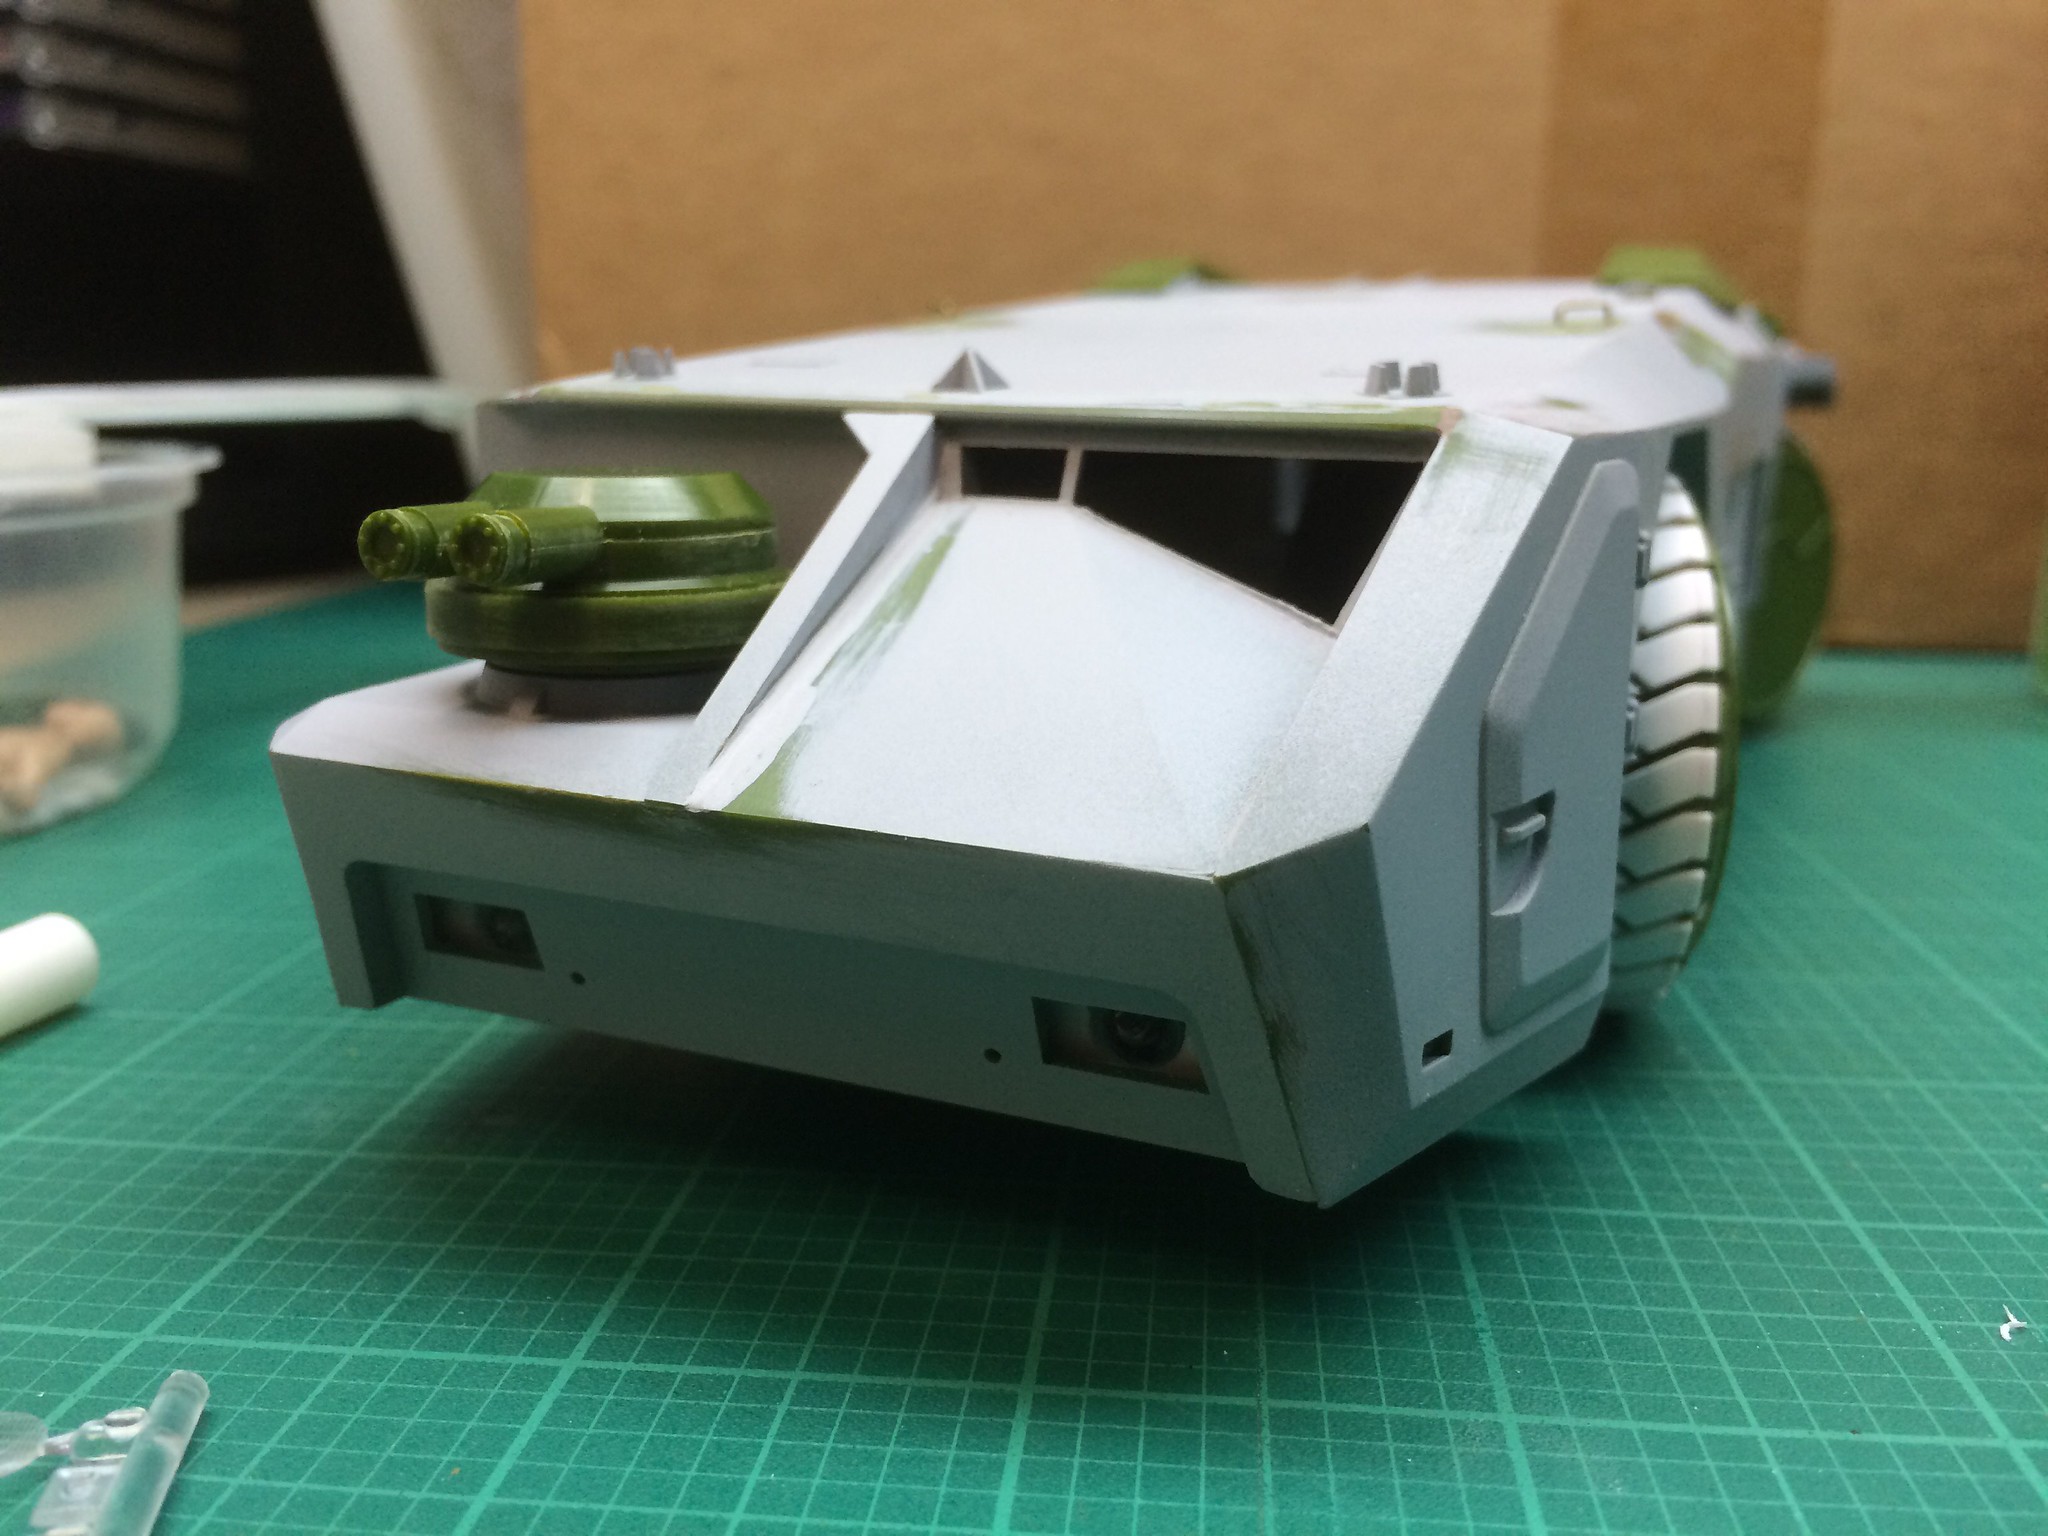 [/url]APC-41 by N.T. Izumi, on Flickr
https://flic.kr/p/BSekCU]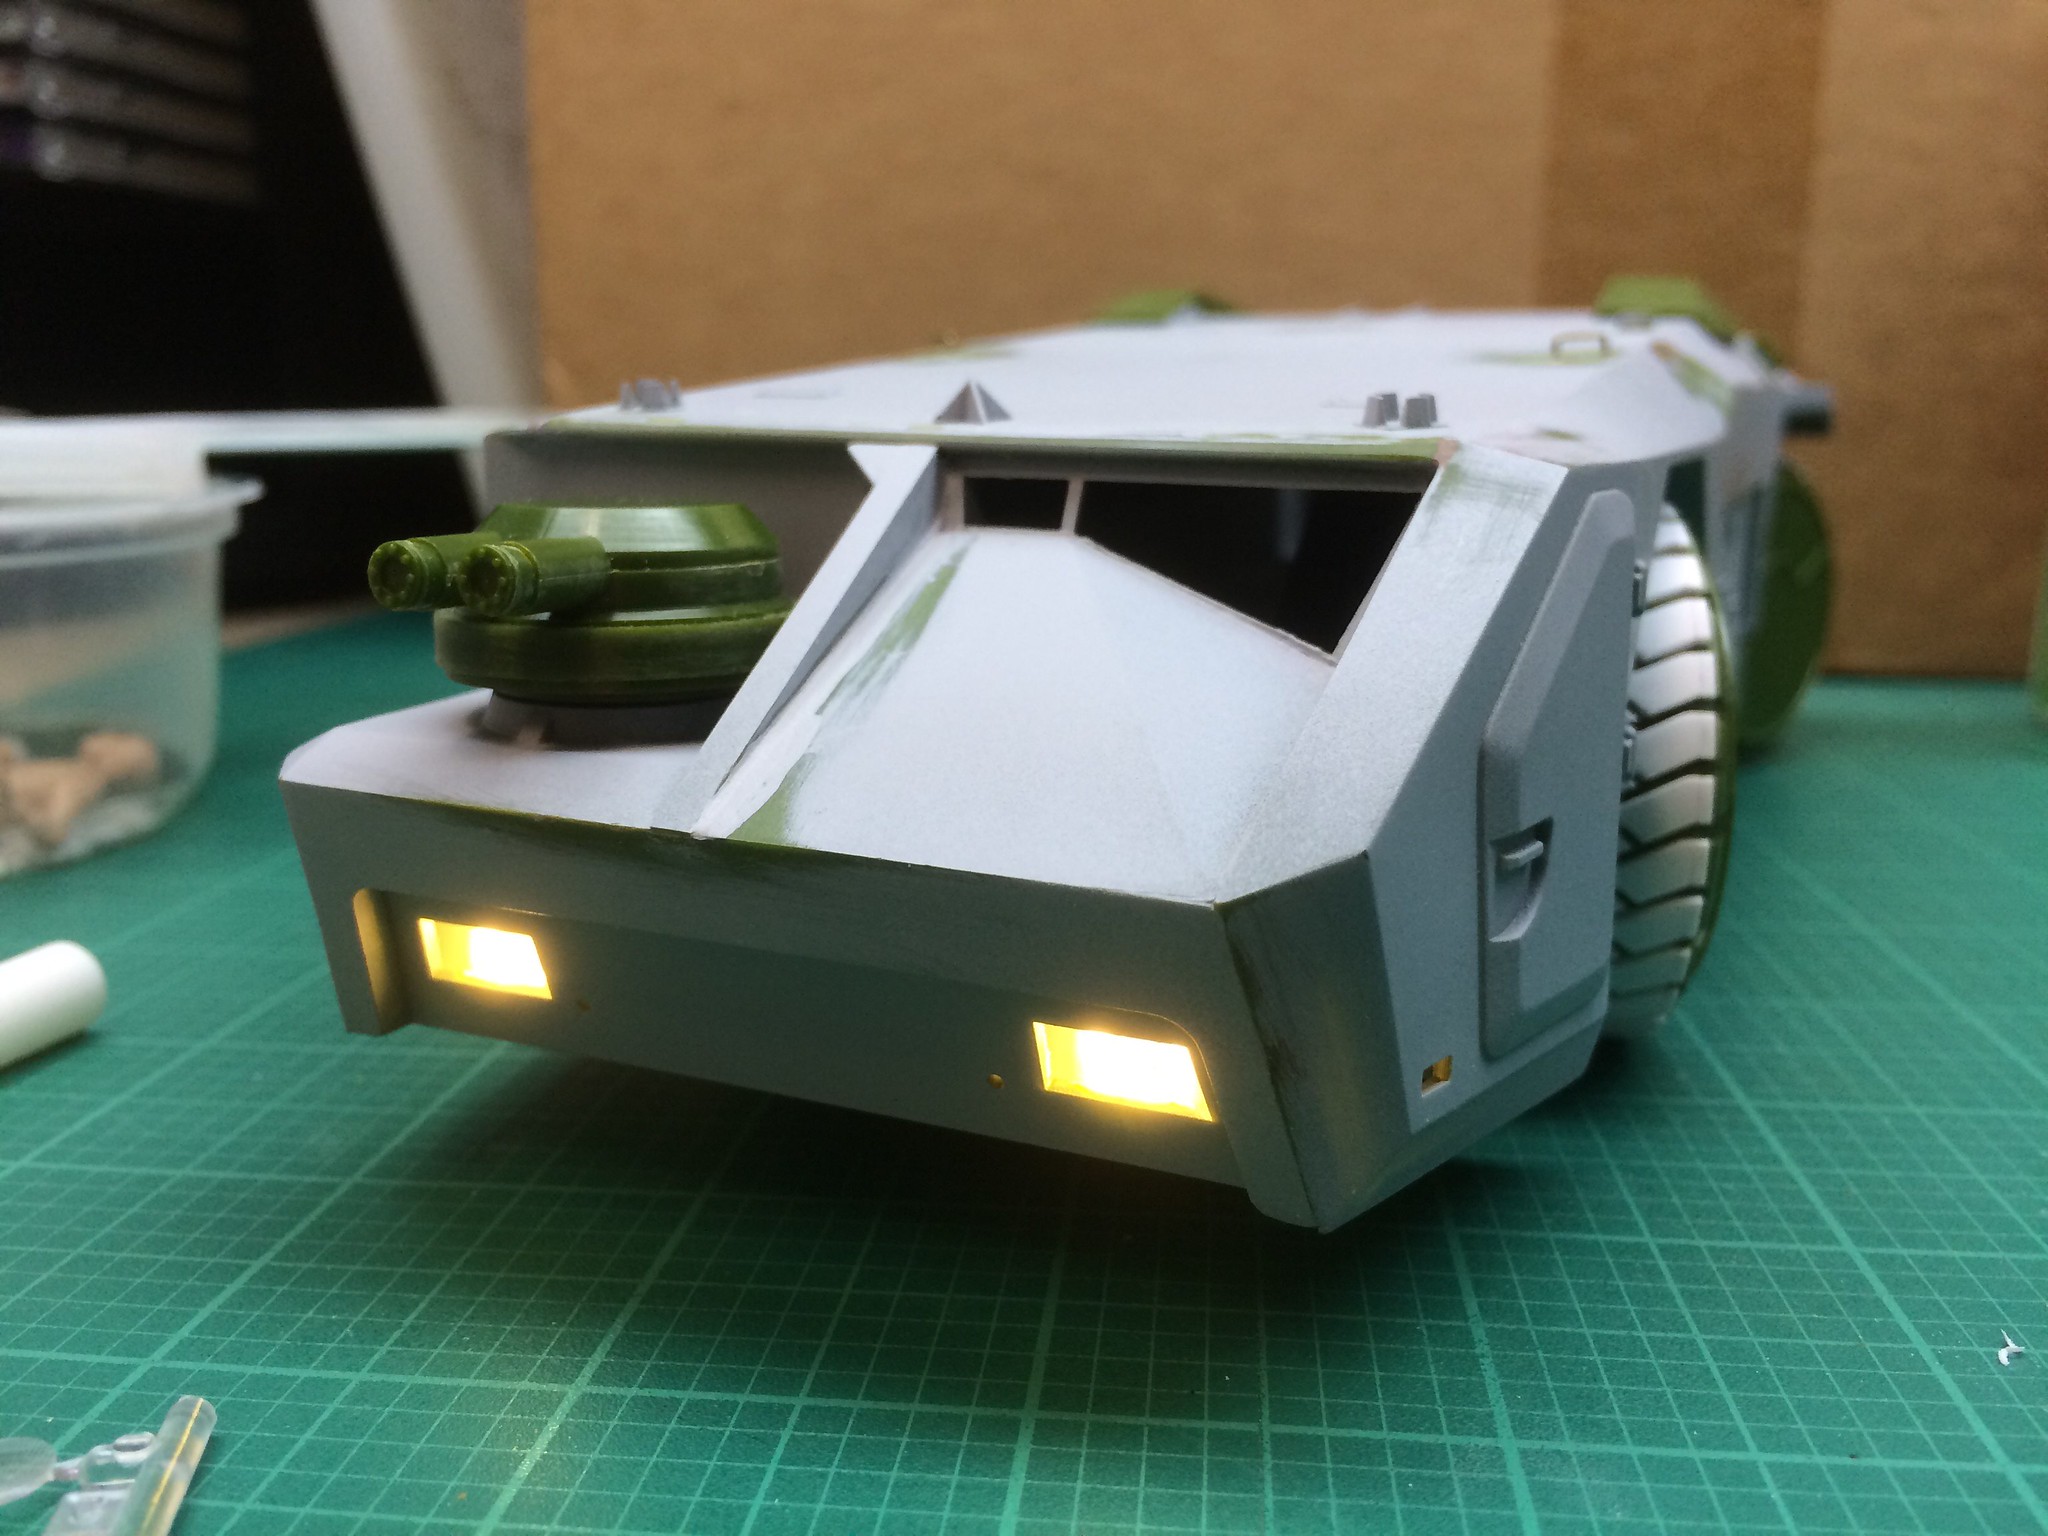 [/url]APC-42 by N.T. Izumi, on Flickr
I also bored a hole through the hull roof and test fit the spotlight LED.
https://flic.kr/p/BSeAyA]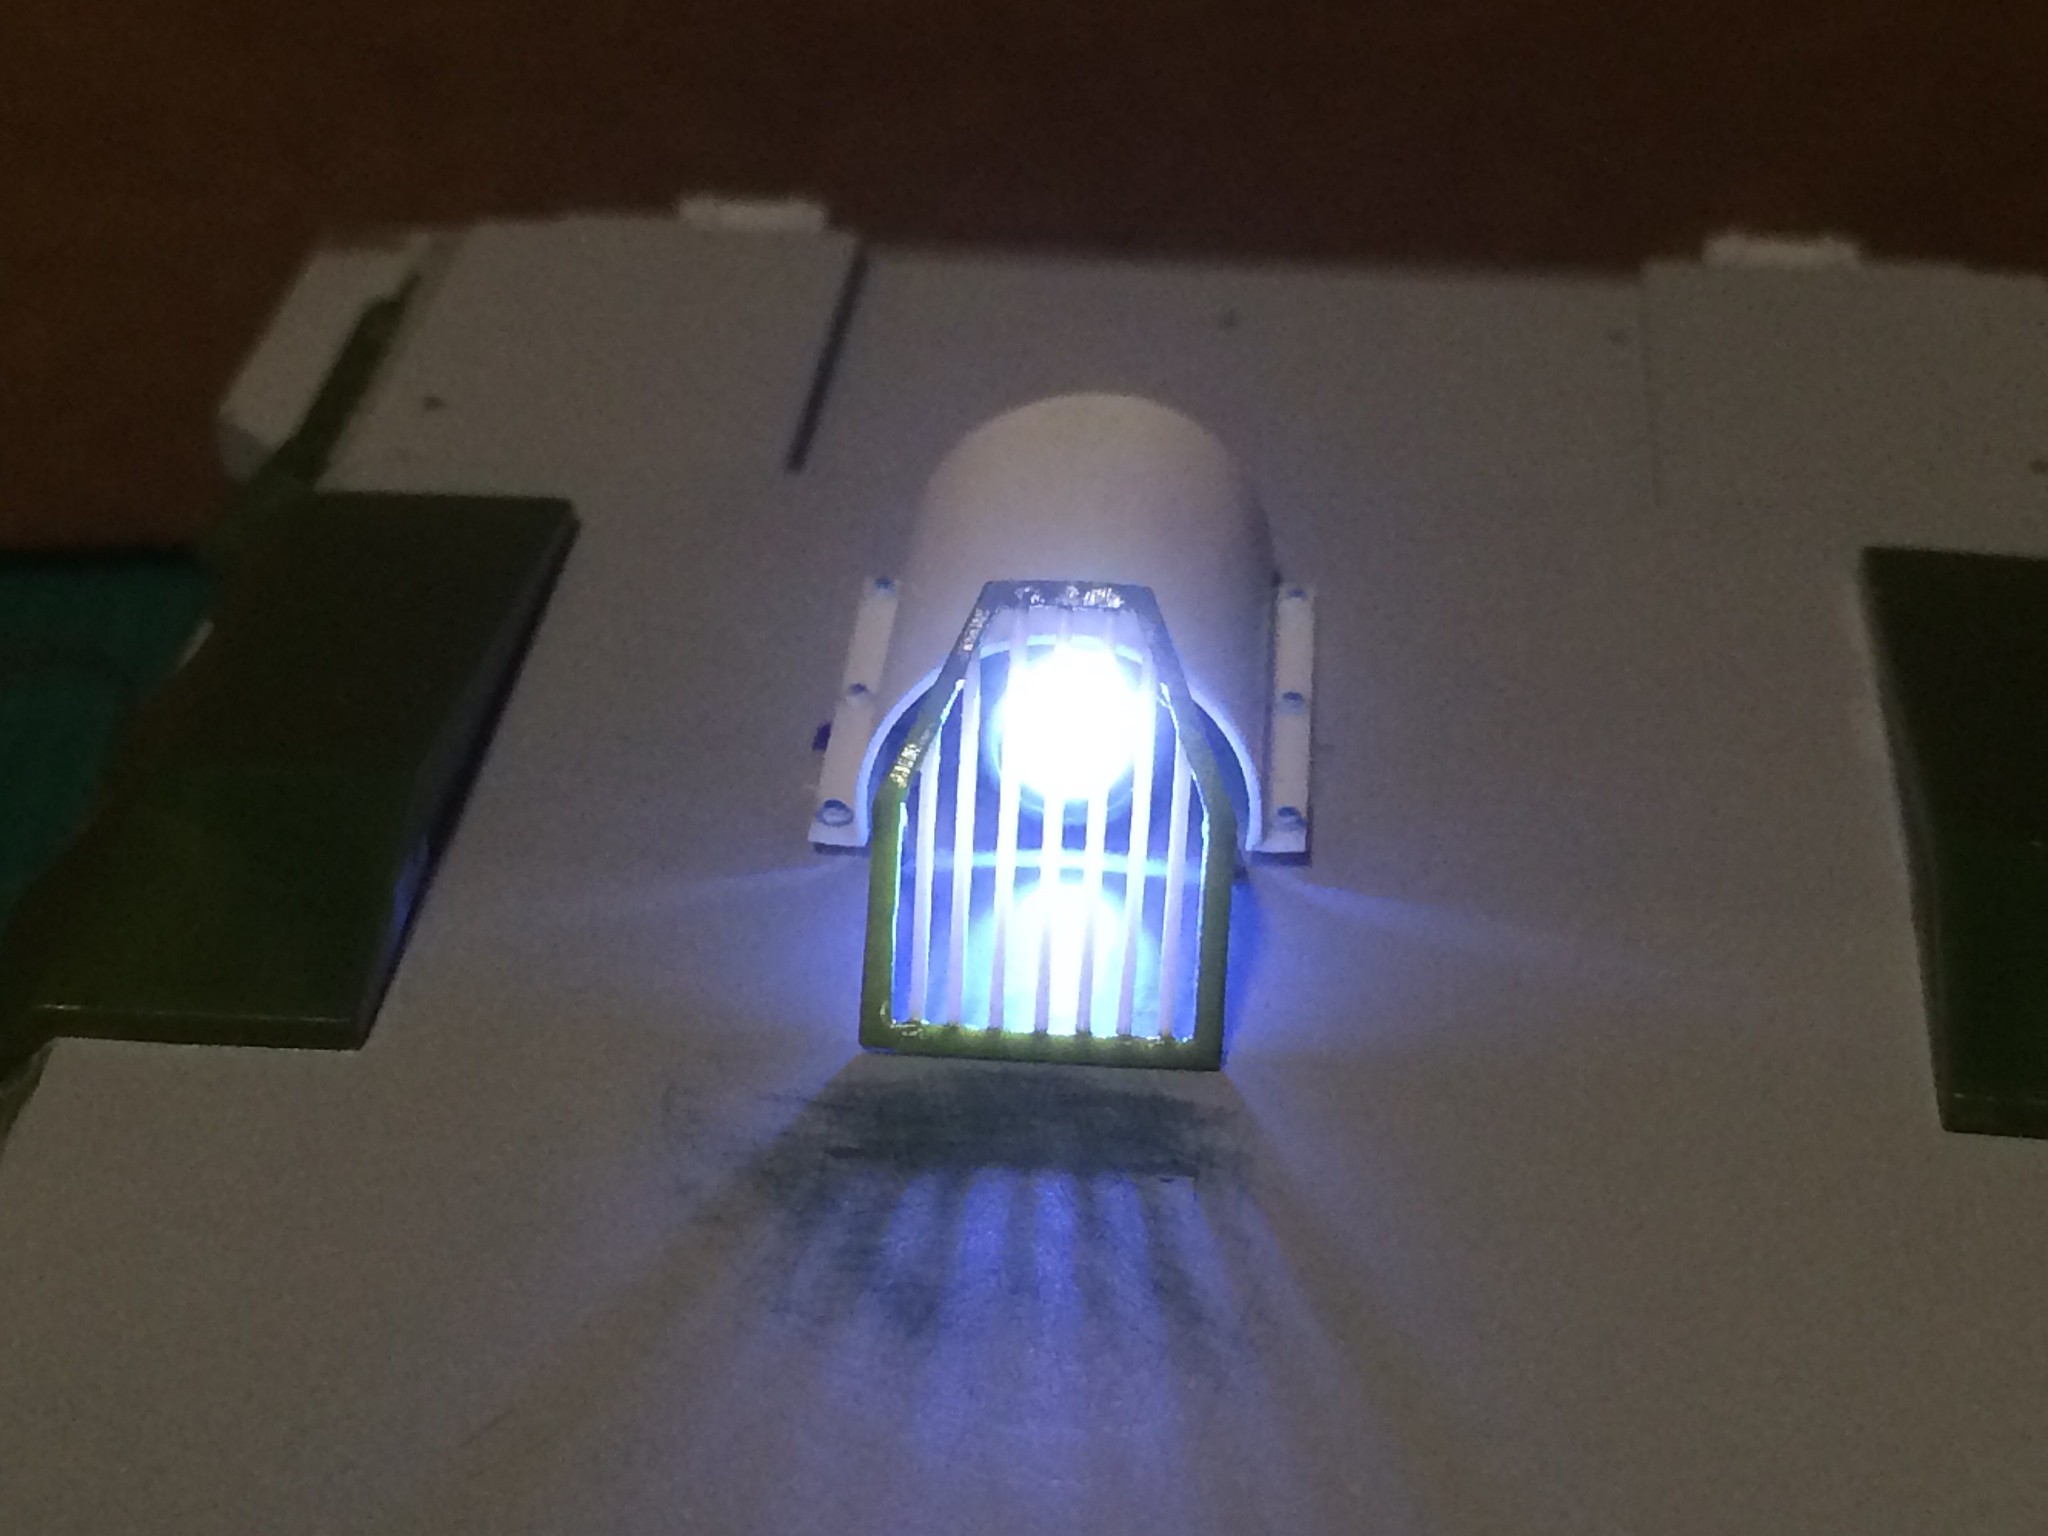 [/url]APC-43 by N.T. Izumi, on Flickr
As my first lighting project, I’m really enjoying this!
Okay, back to finishing up the hull.