Airliner Group Build 2014-2015

Here’s the official Airliner GB 2014-2015.

This is a really simple GB: Any airliner or passenger service aircraft. All scales and eras are welcome. Crossovers are ok and partially completed builds (< 50%) are welcome, too. That’s it! One thing that I will ask is that you post a pic of the box art so that I can put it next to your name in the roster. This way we can see who’s building what.

The official start date will be November 1st, 2014 and it will end on October 31st, 2015. If we need to go longer that’s fine but I doubt we’ll need to. If you want to start adding WIP now that’s ok. The start date isn’t really firm. I picked it because I won’t be able to start until after November 1st.

Feel free to post pics of the airliners you are actually working on, too!

Here’s the badge for this GB. You can copy and resize it as necessary:

Roster:

modelcrazy: 1/200 Hasegawa American MD-82, 1/200 Hasegawa Braniff 727-200

Fly-n-hi: 1/200 Minicraft (Hasegawa) Continental DC-10-10

jelliot523: 1/144 Zvezda United 787-8

hogfansfs: 1/144 Minicraft Continental 777-200

B_one fixer: 1/144 MPC ??? 737-200

SubarooMike: 1/200 Hasegawa American MD-87, AMT 1/48 Vega AlaskaWashington Airways

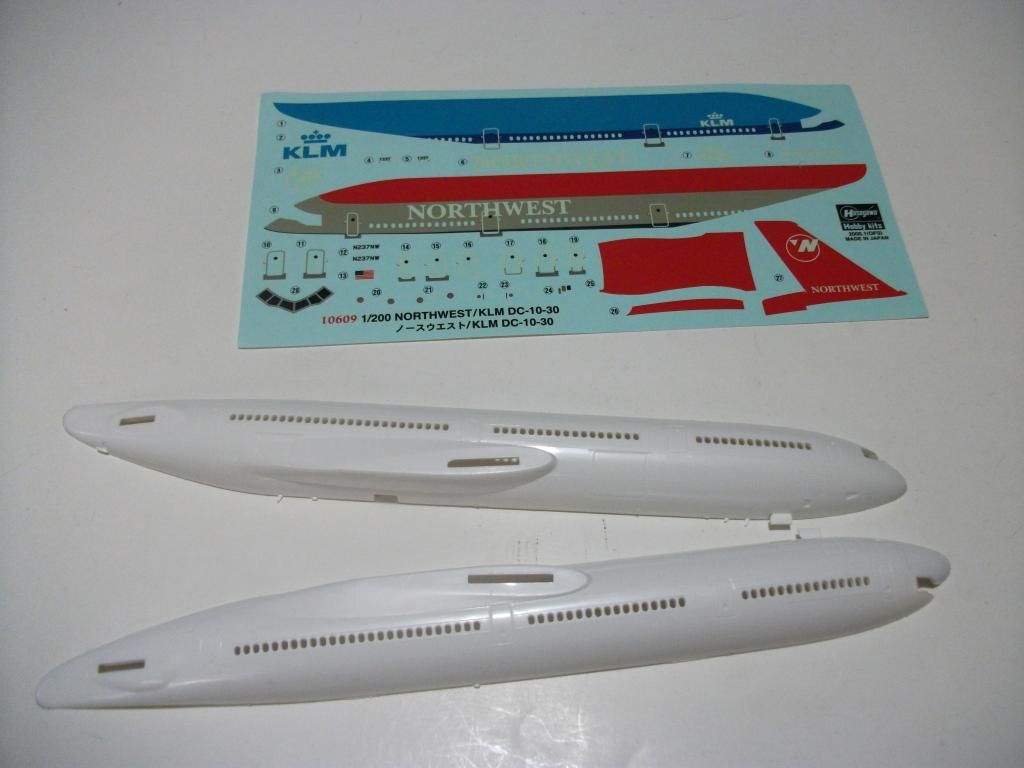
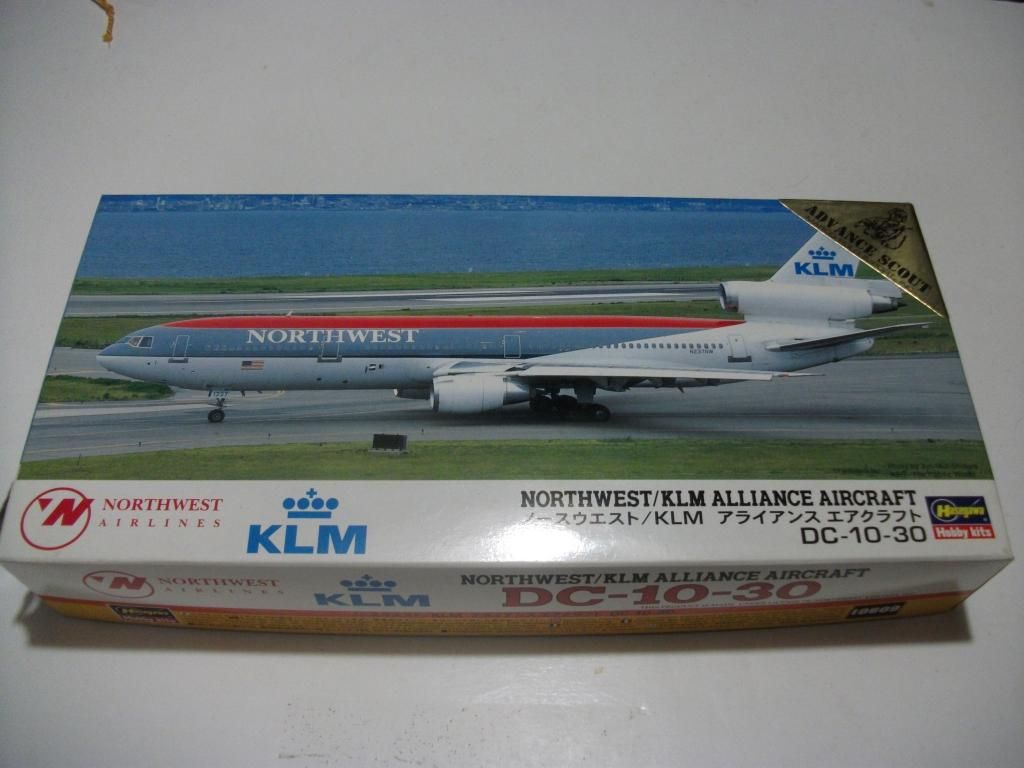
falconmod: 1/200 Hasegawa Northwest DC-10-30

lostagain: Sikorsky S-40…maybe

lewbud: 1/144 Nitto 747

kg4kgp: 1/144 Airfix British Caladonian VC-10

Finished builds:

B_one fixer: 1/144 MOPC 737-200 Delta Airlines

modelcrazy: 1/200 Hasegawa American Airlines MD-82

Ok, I’ll be the first, here’s my offering.
1/200 Hasegawa American Airlines MD-82

Steve

Here’s what I’m going to be building first (I will probably build another one). Its the 1/200 Hasegawa Continental Airlines DC-10 in the Modelcraft boxing:

In the feeler thread I said that I would build it as a -30 but I’m going to build it as a -10 instead. I just hope the decals are ok. After all, this kit is about 30+ years old. Its ok if they aren’t because I’m prepared to paint the gold/red/orange if I have to.

Are you gonna use Alclad II for the paint, Steve, or another brand?

I have received my Zveda 787 that I am going to do for this GB, I plan on leaving it OOB as much as possible, the only change I am going to make to it is using decals for a United 787 instead of the Dreamliner decals in the kit.

Here is my build for this GB:

1/144 Minicraft 777-200. I plan to convert to a 777-200LR, so, I ordered Continental Airlines decals. And will convert the UA P&W engine to GE90-115B engines.

I won’t be starting for a month or two, but, I am looking forward to this GB!

You know it baby! I love that Alclad! [Y]

Here is my entry for this GB. not sure what decals I will be using though.

I also have a few zvezda’s 767-300’s sitting collecting dust. I might build one of those too.

What is the quality like for Zveda’s 767? I just received the 787 yesterday and have been considering picking up one of the 767’s if they are of good quality, as well as being able to find one.

The quality for the 767 is outstanding. The recessed lines are fine and the fit seems to be very good. The only downfall really is the decals. It’s a vast improvement over the revell 767 kit. But the kit itself is very well done. Thats why I have so many of them. I am sure thier 787 is of the same if not better quality.

Okay gentlemen, I have officially joined the group build! Thanks to modelcrazy’s extreme generosity, I will be building Hasegawas 1/200 America Airlines MD-87[H] It’s funny how it worked out because the 82/87 is my favorite airliner[Y]

One other thing that is nice about the Zvezda 767-300s is that the CF6 engines that come with the kit are much more accurate than the Revell CF6 engines.

Very cool! My father flew MD-80s for a while over at TWA.

Here’s what I’m going to build, anyone know what to do with the open windows in the plastic? Do I fill them? the decals just have clear spots, Do they make window decals that will fit 1/200 scale?

John

John, I usually fill the windows with Aves Apoxie Sculpt. It is a two part resin that looks like Play Dough when you knead it together. What I do is stuff it into the openings of the windows from the inside of the fuselage part so that it squeezes out towards the outside a bit. Then you wait for about 6-8 hours for it to harden and then sand it flush with the fuselage.

Aves does not shrink so it works really well for this purpose. And if you end up having a few windows that didn’t get filled completely you can use some CA glue to fill the remaining gaps.

Just be prepared to lose the raised details on the fuselage. Between sanding the widows flush and sanding down the main seam you will probably end up having sanding down all the panel lines on the entire fuselage.

I’ll be posting pics of my DC-10 with the filled windows when I do this.

Here is my project that I will be working on. I got started on it a little last night. I’ve dry-fit the fuselage together and the fit is wonderful. I’ve only come across one small issue that I will be working on. See photo below:

It might be kind of hard to tell, but the wings have some obvious warping to them. I’ve ran them under hot water then dunked them in cold water to get some of the twist out. It took care of some of it but not all. Anyone have any suggestions on how to alleviate this problem?

Awesome!! Way to go Steve for getting Mike going so he can join this build![Y][t$t]

When you say you ran them under hot water do you mean that you turned on the faucet and and held the wing under the hot water that came out? This water isn’t hot enough.

What you’ll really have to do is get a large pot of water and bring it to a boil. It doesn’t have to be a raging boil…just the initial gentle boil is good enough. Or the hot water just before it boils should work, too. The more the boil the faster the plastic reacts so use caution!

Then without touching the plastic to any part of the pot hold the part in the water for about 3-4 seconds (or start at 1-2 seconds…don’t over do this!!!). Sometimes the plastic will have a “memory” and move back to its original shape. If this happens immediately run it under some cold faucet water. If not you can take the wing and press it against a flat surface like the counter top and work it back into shape and then run it under some cold water. If this takes several “dips” that’s ok!

Take it slow at first because the hot water can ruin the plastic if it is too hot or if you leave the wing in there too long. You can always dip it over and over and reshape it slowly but once the wing melts it’s done. I know because I did this to my C-17 build a few months ago and had to order new wings from Revell. But I’ve also used this technique successfully several times.

I forgot to mention that, yes, they do have window and door decals for the 1/200 DC-10. Draw Decals makes them. Look here. I bought these for the DC-10 that I’m building.