Im getting there lol. Everybody is welcome. Ill sort the front page out presently. Congrats on the first 2 completions. Feel free to grab the badge…I did upload a badge right?
Yes, yes you are! But we all do it. [:$]
Thanks Scorpiomikey for the acceptance.
Bought this kit at my LHS in the “trunk of shame” (where the old, partial built, unloved, and ridiculously silly models go). BUT they are cheep, don’t cost much and there is a “pearl among the swine”… sometimes.
I’m building this for a friend who likes antique cars–not a commission darn it- just friendship [t$t] !(http://i171.photobucket.com/albums/u294/PropDuster_album/muddle tee/100_0663.jpg)
!(http://i171.photobucket.com/albums/u294/PropDuster_album/muddle tee/100_0664.jpg)
Now off TO WORK!
Correct me if I am wrong,but is DUSTER building the oldest kit so far?
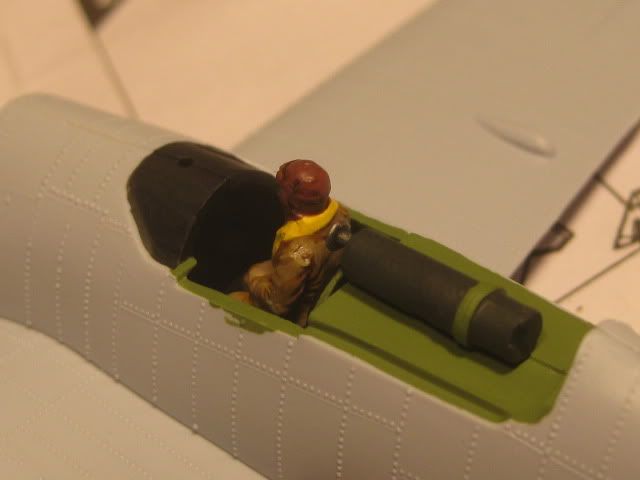
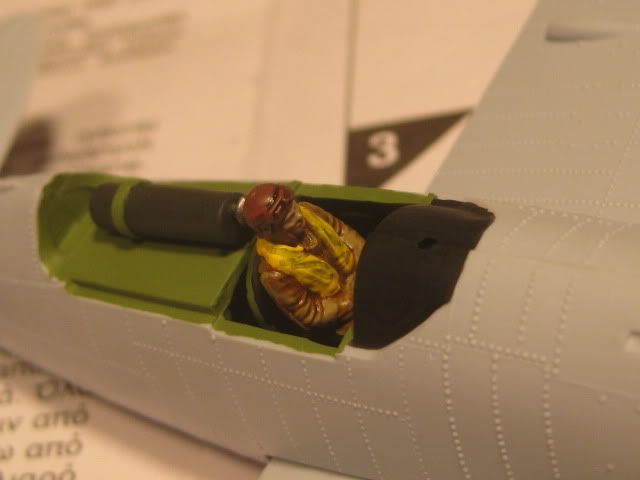
Current progress on the Buffalo.
From what i can find it was released in 56. So if its an original 56 kit then yes, as everything else i think is a repop of an old mould.
[:|] … [ip]
That’s a great idea, thanks! I might try that out next time.
Gee guys you say 1956 as if it was along time ago. OH WAIT it was along time ago… even if I remember it as a pretty good year 
Well the kit is interesting; it’s plastic is bright red and not brittle but more like a hard plastic. The flash is fairly minor. Except the wheel spokes were awful! The mold had slipped or was not aligned so the spokes were overlapping about 1/2 way from one side to the other on 2 of the 4 wheels, the other 2 were less so.
I picked what I thought was the best of the sides, marked it and cut sanded filed the spoke problems away. The body of the car was fine mostly but removing the flash at the front floor caused a need to replace it .
Configuration of the canvas top ( folded down on the back of the car) looked very out of scale and childish - so of course I cut it off. The seams of the body halves were not bad- if you like trenches. But when filled up they disappeared.
My research reveled some errors on the dash board/firewall as well as an out of scale windshield molding so, once again out with the knife. A replacement was fashioned and now looks the part-at least with the lights off.
Nothing bad to say about the motor -there isn’t one
There are a few minor bits done -cutting off the English sized license plate holders, recreating the body line on the back at the door level, considering and rejecting opening the back doors, figuring out why the body wont fit on the finder/frame part.
FUN at every turn
In the next post I’ll put up some pictures of this hack job -er- work ta date.
Ford Model A, 1910 1/72 Scale
!(http://i171.photobucket.com/albums/u294/PropDuster_album/muddle tee/100_0650-1.jpg)
!(http://i171.photobucket.com/albums/u294/PropDuster_album/muddle tee/100_0646-1.jpg)
!(http://i171.photobucket.com/albums/u294/PropDuster_album/muddle tee/100_0645-1.jpg)!(http://i171.photobucket.com/albums/u294/PropDuster_album/muddle tee/100_0641-1.jpg)
DUSTER - welcome aboard! 1956… they had plastic back then??? [whstl] Sounds like you’ve still got some work ahead of you on that one I actually helped my grandfather restore one of these for a local collector in (I think) 1987-1990. I still remember countless trips to the local machine shop and a request to “make me a couple of these gizmos” on all sorts of parts that were simply not going to be sourced from originals. Ahhhh, the good ol’ days!
According to the wonderful ‘Airfix Tribute Forum’, the Ford Model T was indeed 1956. The ‘BTK’ Spitfire was first produced in 1955 (copied from an American 1/48 kit, all errors included!), and the very first Airfix kits (aside from the intial tractor) were 2 ships in 1953. People often get them mixed with the Spitfire, thinking it was 1953, which is why in 2003 Airfix, by error, did a remake of the original. Of course, that molded in pilot, and moulded in wheels, nothing like kits you’d have bought even a year or so later!
Here’s the link for the Model T: http://airfixtributeforum.myfastforum.org/1956_Ford_Model_T_1910_1_32_about137.html
Being 1956, it was one of the first Airfix kits.
My Sopwith Camel is 1957, and the Widgeon 1959 (and if I build it, 1974 for the Gnat, based on a 1964 original mold)
Of the others, the Walrus is 1958, the Buffalo is youngster in 1972
How about, we put all the kit ages, with the kits we’re doing?
The Camel has huge gaps between the lower wings and the fuselage, which I over-filled with green putty:
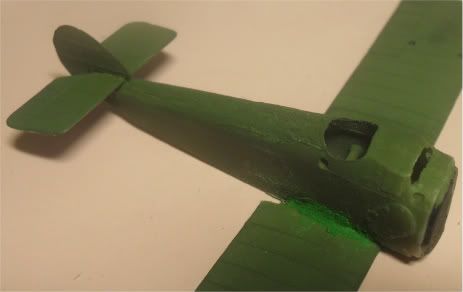
After a lot of wiping with nail varnish remover, and sanding, the results are like this:
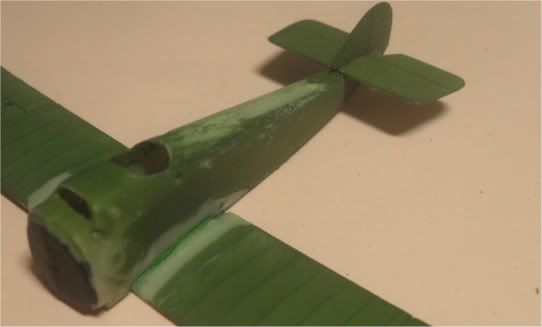
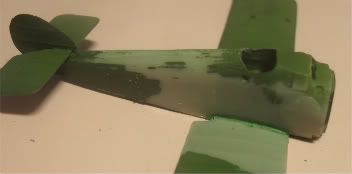
The rear deck has been smoothed out, after my experiment with fishing line was a disaster!
Good luck with the Buffalo, I’m really interested in how it turns out. The Walrus looks uber cool!
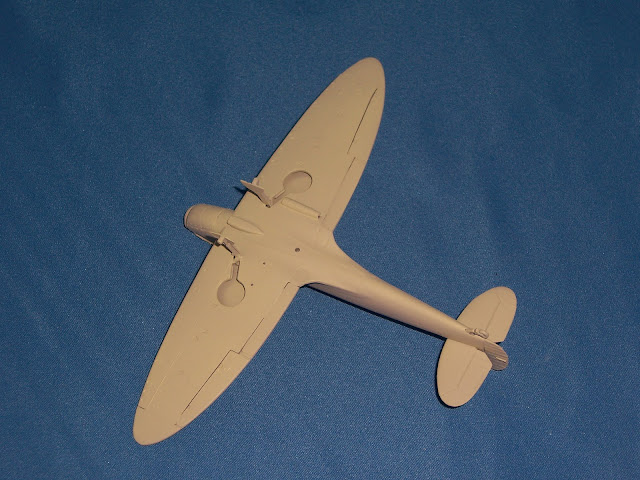
More progress on my Spitfire Mk I. According to the Airfix Tribute Site, this kit was first released in 1979 and later modified to a snap together. I actually found my instructions and decals and they’re dated 1989, kit number 1071. Decals look pretty good, but the serial looks too big and the Medium Sea Grey codes look too dark; I’ll stick with my original plan with the Aeromaster decals.
Anyway, seams were all cleaned over the weekend and the underside was painted Sky (Humbrol 90).
After a day I started the uppersurfaces, Dark Earth first (Humbrol 29). I decided to stay old school and brush paint the camo. The picture is after the first coat.

Two additional coats later, I started the Dark Green (Humbrol 116). That only took 2 coats as it goes on much better than the Dark Earth for some reason.
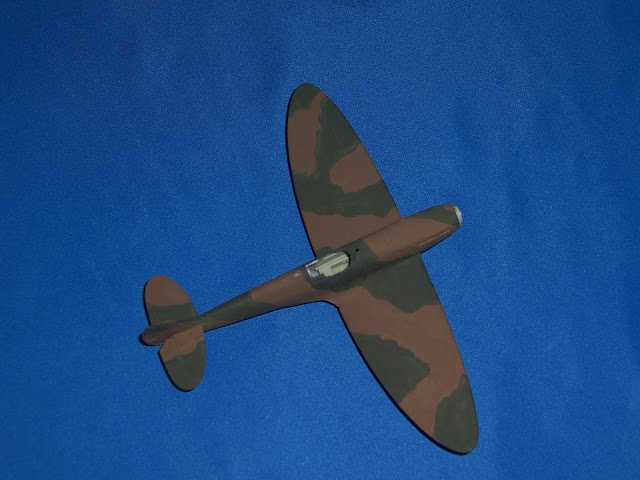
It’ll now get a couple of days to fully cure. After that I’ll coat it in Future. I’ll start the wheels, prop and canopy while all that is going on.
Tim
I’ll be looking forward to hopping in on this GB. I’m using a Airfix on the Spitfire GB, but want to do another one for this GB, maybe the Pe2 its been awhile since Ive done a ruskie. I’ve been eyeing the PBY5 too…Let me get my Zero trainer a little further along and I’m in.
Good looking Spit, Tim. I’ve not used Humbrol, but their dark brown looks like a good shade. The MM variation always looks like it tends toward an olive.
Humbrol must brush pretty well. Me, I can’t paint anything without an airbrush and have it look decent. Even then, sometimes. . .
Nice work.
Actually, the 2003 “50th Anniversary” Spitfire kit was the 1979 tooling issued in blue plastic with the iconic “BT-K” decals. The original tools had long since been lost or destroyed
Yes, that’s right, and the 1979 molding, was nothing like the 1955 molding - some years back this was extensively discussed on the various forums. The 1959 molding (of the Mk. IX) used, so legend has it, the same mold base as the 1955 mold, at least, that’s what was discussed back in 2003, meaning it had been changed forever. Even if this is not the case, the mold isn’t extant anymore.
If you can find a DH.Comet (racer) kit, or the Gloster Gladiator kit, you’ll find the same style of closed over cockpit, with molded in pilot. The Aurora kit it was based on was 1/48 scale, and neatly pantographed down to 1/72 scale. One ‘feature’ of the kit was molded in wheels, something which I think wasn’t copied. Anyway, this website I found sometime back is an invaluable source of information:
Thanks CMK02, MM RAF paints are not the right shades/colors. I base that on the opinions of folks over in England who have seen real subjects in original paints, as well as my own assessment after a visit there. The Brits use better matches from White Ensign Models, but I can get Humbrol easily and haven’t found an easy source here in the US for WEM paints.
Brush painting is actually very easy. Patience is your partner. Humbrol enamels use a very, very fine pigment. Just like with airbrushing, hand brushing needs to be done with thin layers. I thin with MM airbrush thinner. I put a few drops of thinner in an artist’s mixing pallet, next to it I put a drop or two of Humbrol paint (after stirring it very well to ensure a good mix). I dip my brush in the thinner, then in the paint. I make sure the paint is a smooth consistency (yeah, this is a “feel” thing that takes practice) and then brush it on the model in smooth strokes. No going over already painted areas as it’ll disolve the first layer and leave brush marks. I work quickly and then give it a day to cure. Typically 2-3 layers are required for each color; always lightest to darkest. The clear coat of Future/Klear evens out the tones.
I’ve done a number of Spits and Hurris this way, even though I still use my airbrush for wide-area stuff like undersides and single color uppers. The Dark Green usually goes on better (smoother) over an airbrushed undercoat of Dark Earth (or Ocean Grey) but if I have to touch up the appearance is not quite right. The end result is good, but obviously different next to a similar model done with airbrush only, but it’s a subtle differrence.
Tim
Thanks for the information, Tim. In the past, I’ve used MM for RAF BoB fighters, and was surprised to see the color difference with WEM paints. I haven’t used Humbrol for probably ten years. Once opened, they don’t seem to have a very long shelf life–not as long as MM or Floquil, some of which I’ve had for ten or fifteen years. Do you have any ideas for increasing Humbrol shelf life? I’d be interested if you do.
As for Colourcoats, I’ve found MidTenn Hobbies to be a good source. They usually have a good stock, lot of variety, and shipping is fast, service is good.
http://store.midtennhobbies.com/raf--fleet-air-arm-c251.aspx
WEM’s dark earth looks very similar to the Humbrol in your photos. I’ve been using WEM’s paint on my Spitfire group builds. They come in the same kinds of tins as Humbrol, but I haven’t had them long enough to know how their shelf life will be. I decanted them into glass paint bottles the size of Floquil RR paint, and used their Navy colours on a 1:700 USS Lexington, but I haven’t needed that paint since.
I’ll give them a try, thanks. As to shelf life, I had that problem back in the '80’s when I first started using Humbrol. I’d open it and next time I needed the color it was useless so I quit using them fairly quickly; availability was also a problem. I’m finding today that if I seal them real tight they are lasting longer than then; plus I’m using them faster as most of my builds are RAF. My current tin of Dark Earth is about 2 years old (I use a label maker to put the date I open a tin/jar). I’m starting to think that thorough mixing is a positive thing for shelf life as well as application. Also a few drops of high quality thinner each time I open it may not be a bad thing – I did that on some Dark Green and it’s still good at the 3 year point.
I’ve made a commitment to acrylic for the long term. Oil-based paints and the solvents are probably not a good thing given how much time I’m spending on this hobby. I plan to retire in a couple of years and my modelling will be near full time then… So as each tin of Humbrol is used I’m finding a replacement. Tamiya is easy to come by but I have to mix to get the right shades…not a bad thing as I like to experiment but I think I may waste it – I’m looking forward to trying some WEM paints.
Tim