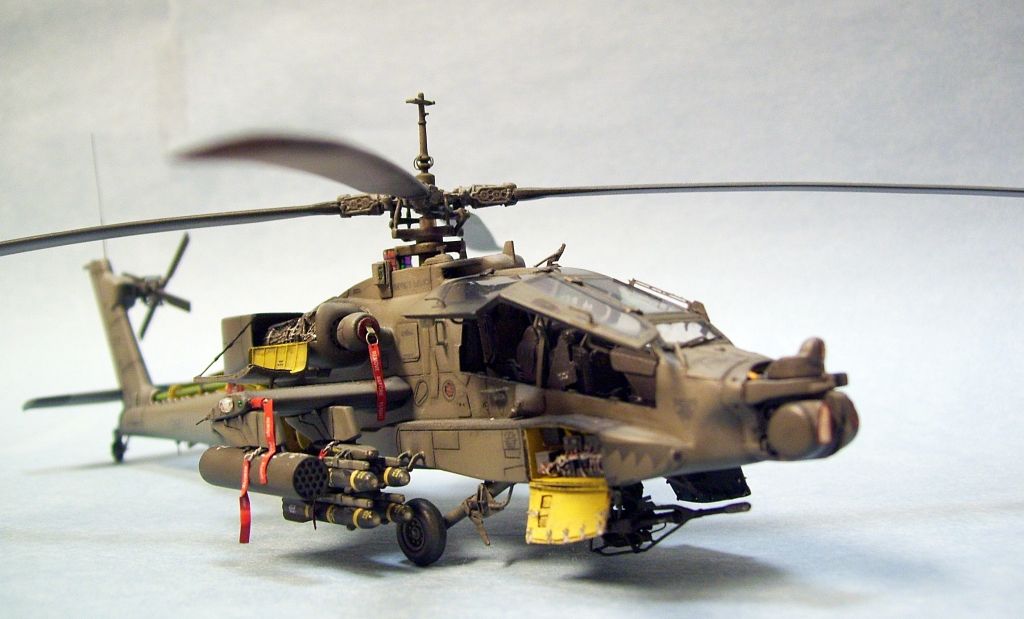
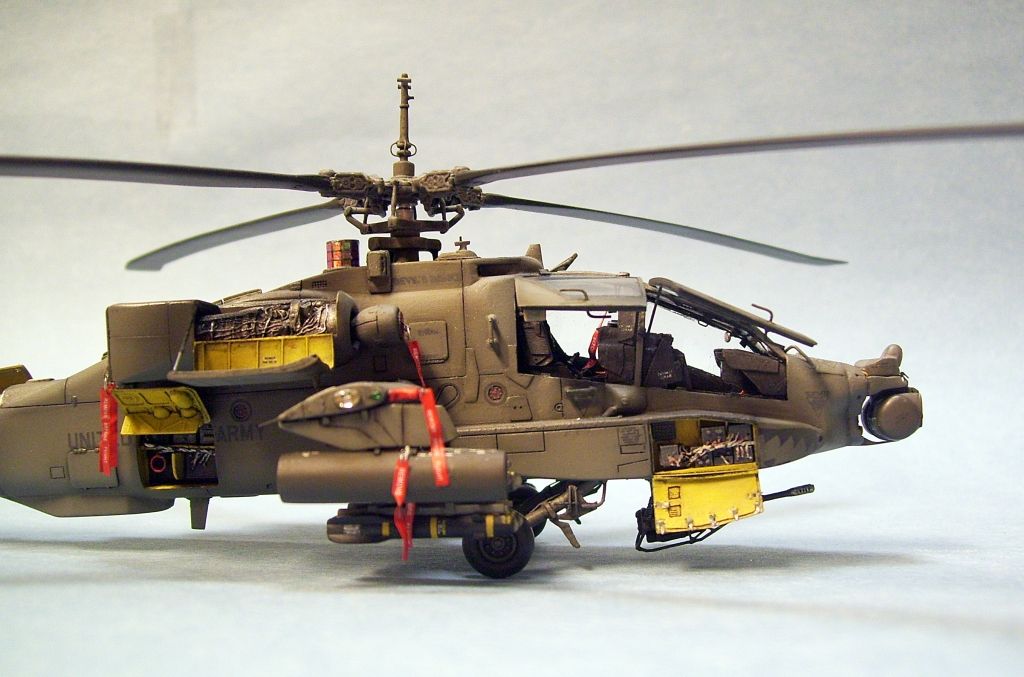
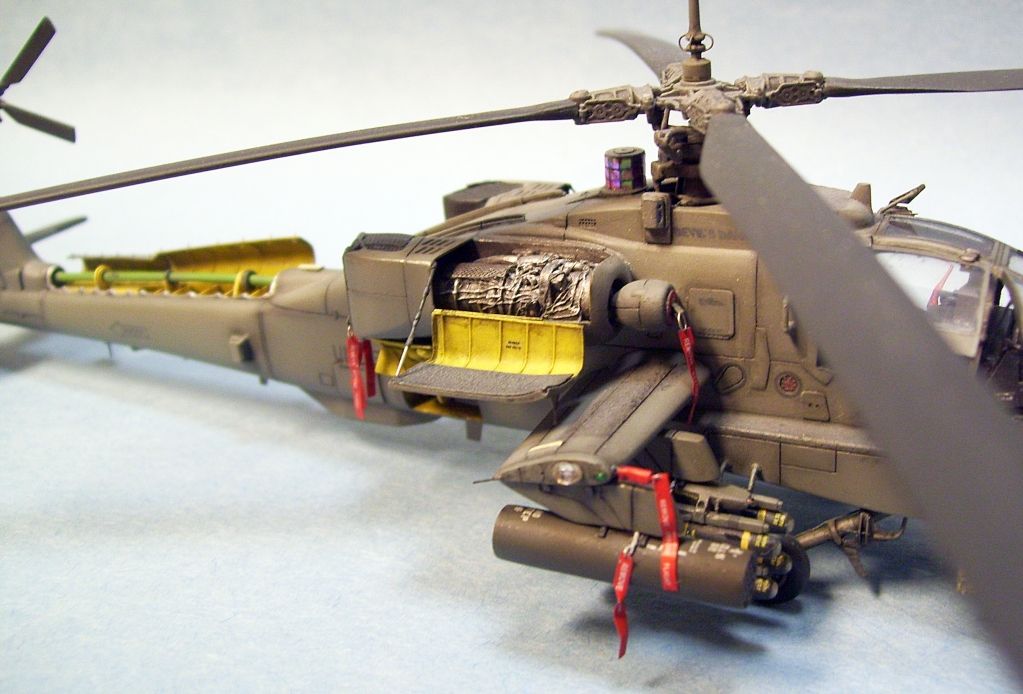
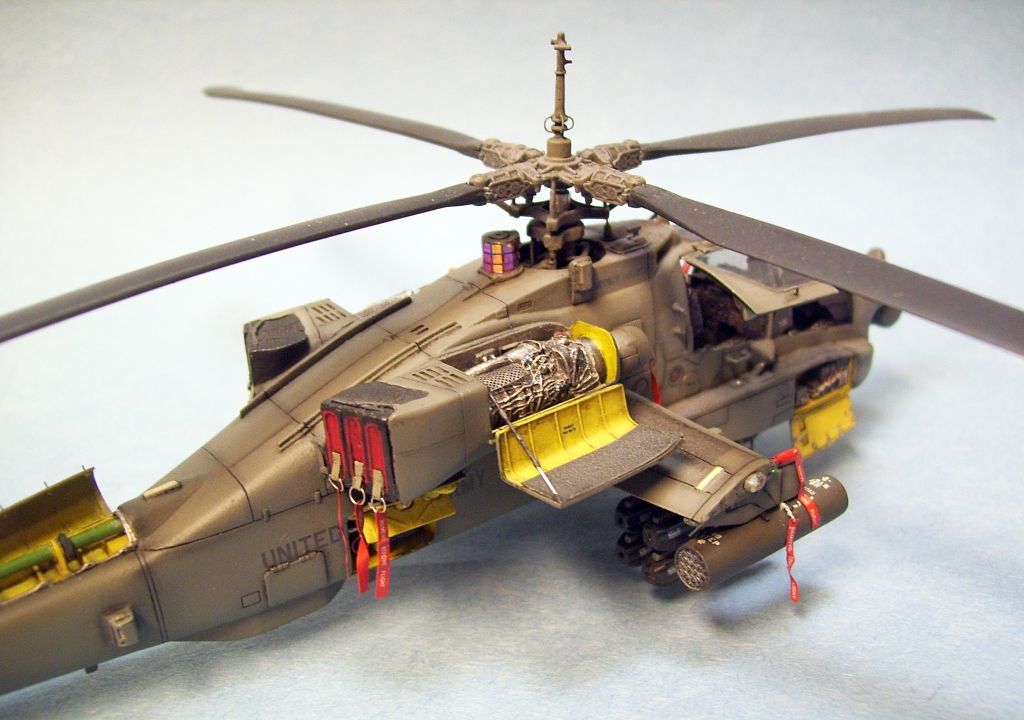
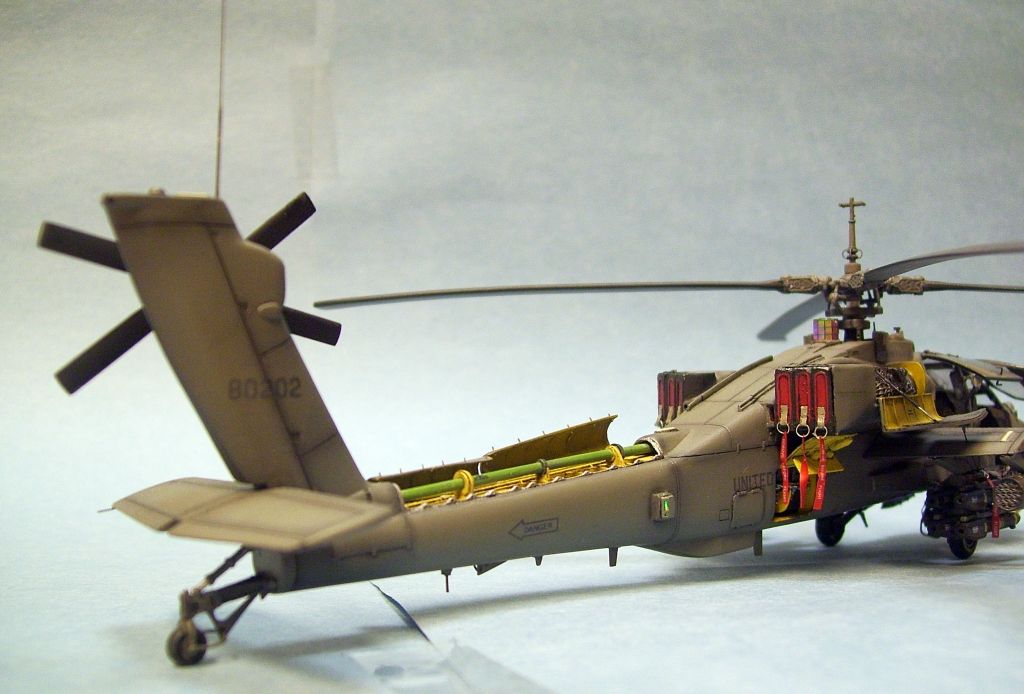
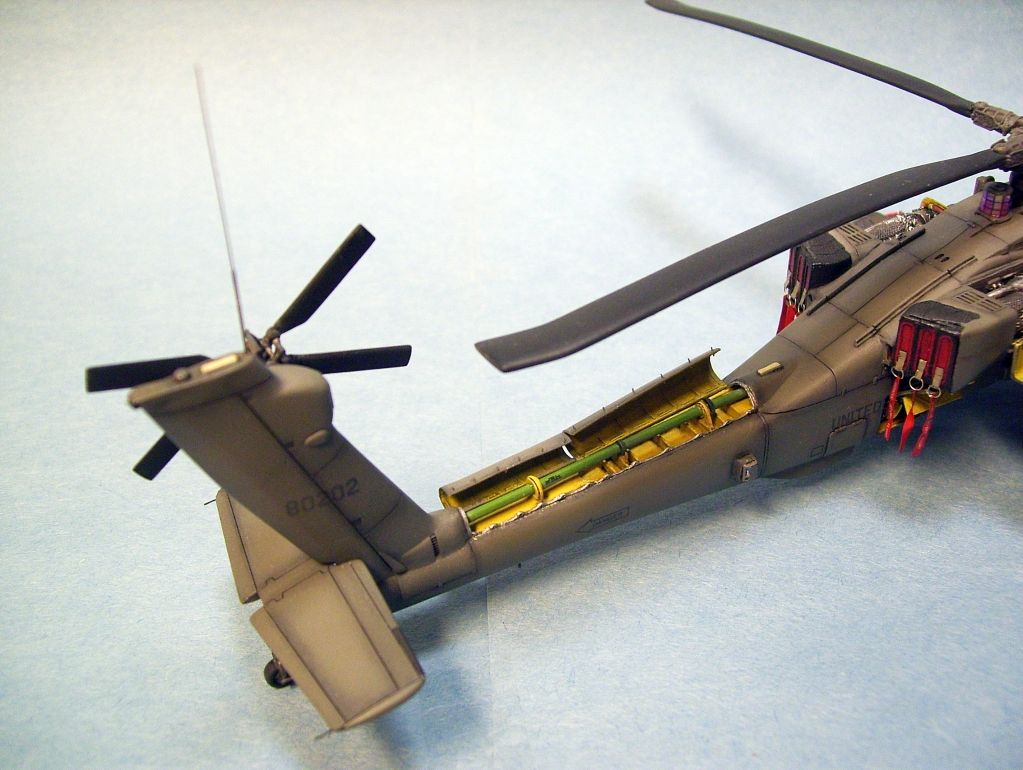
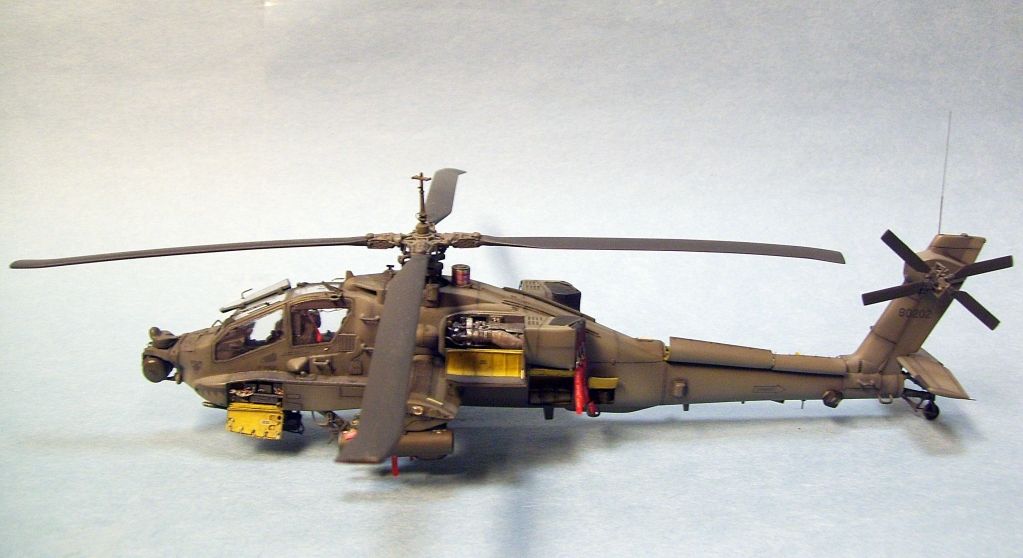
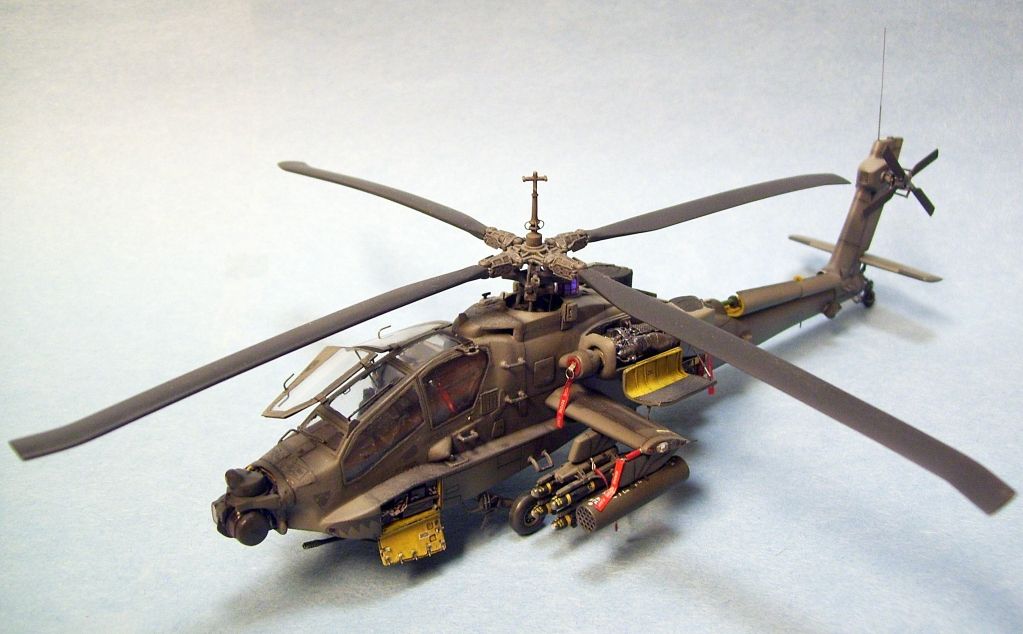
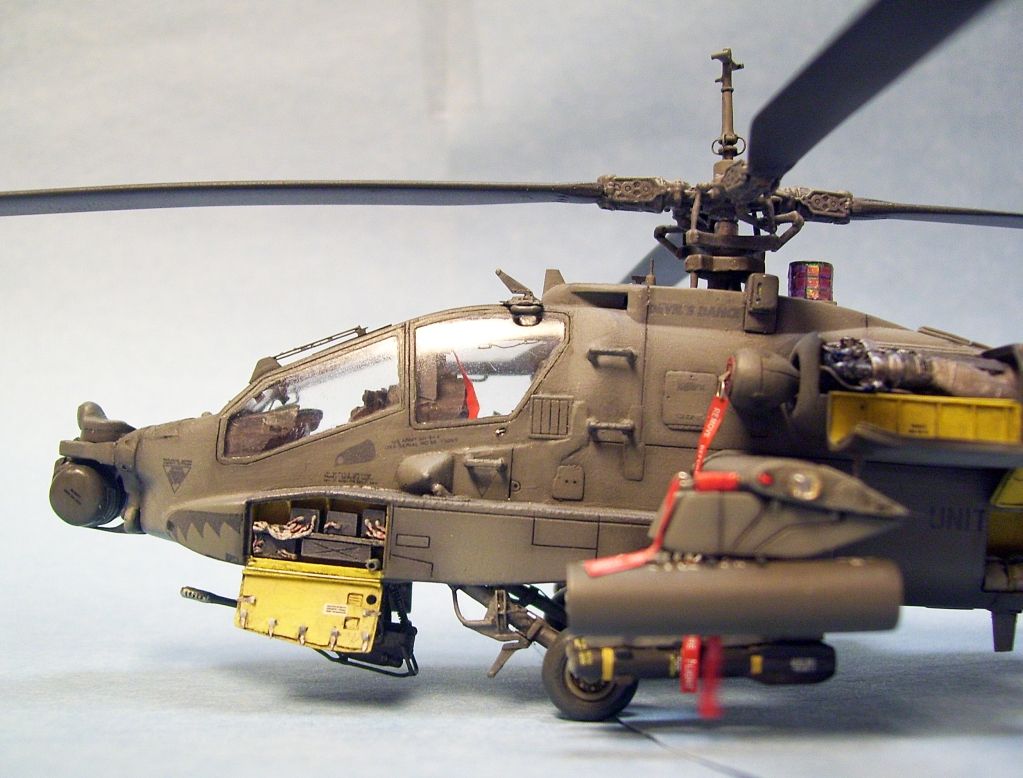
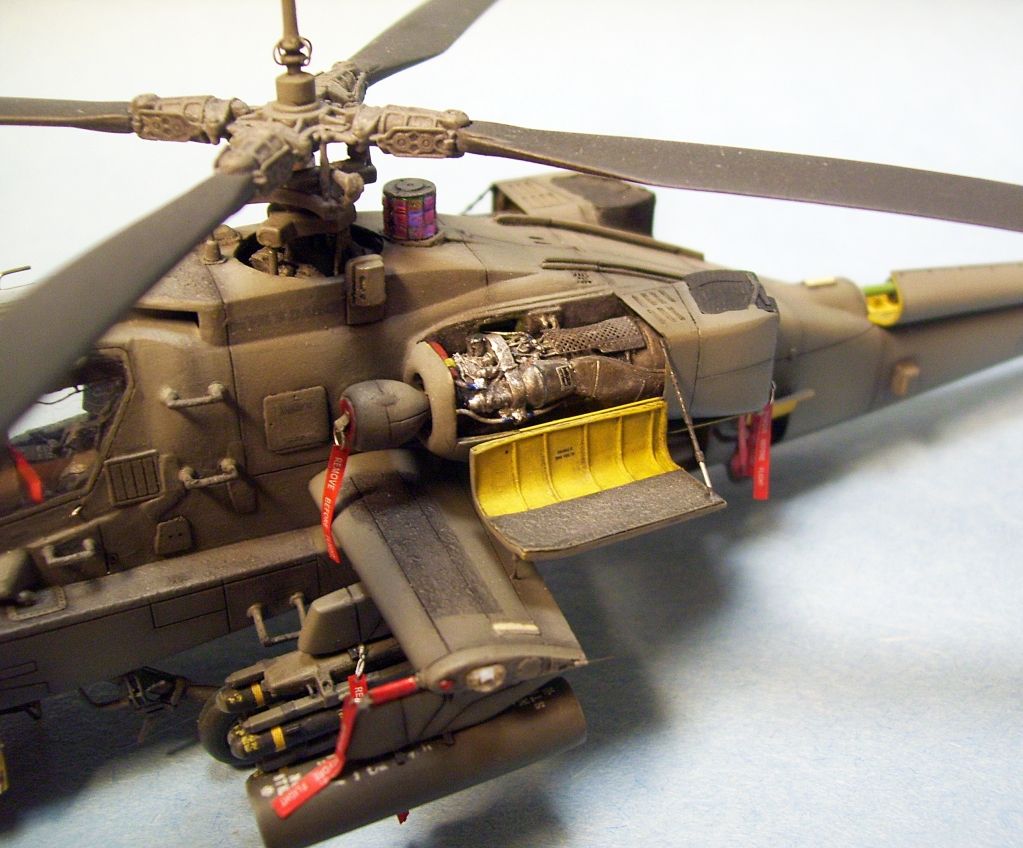
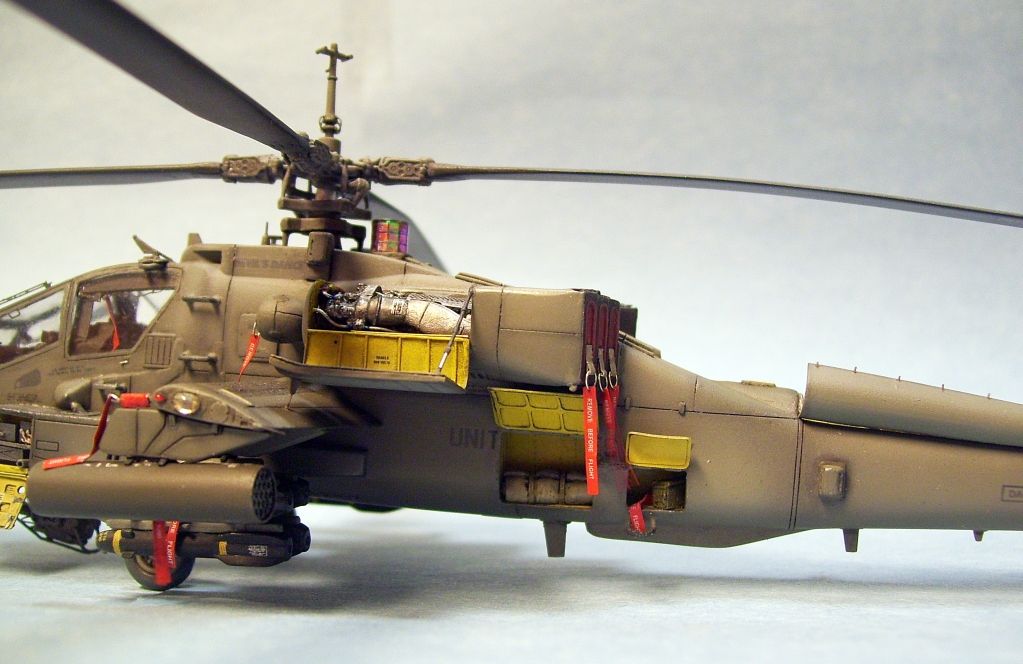
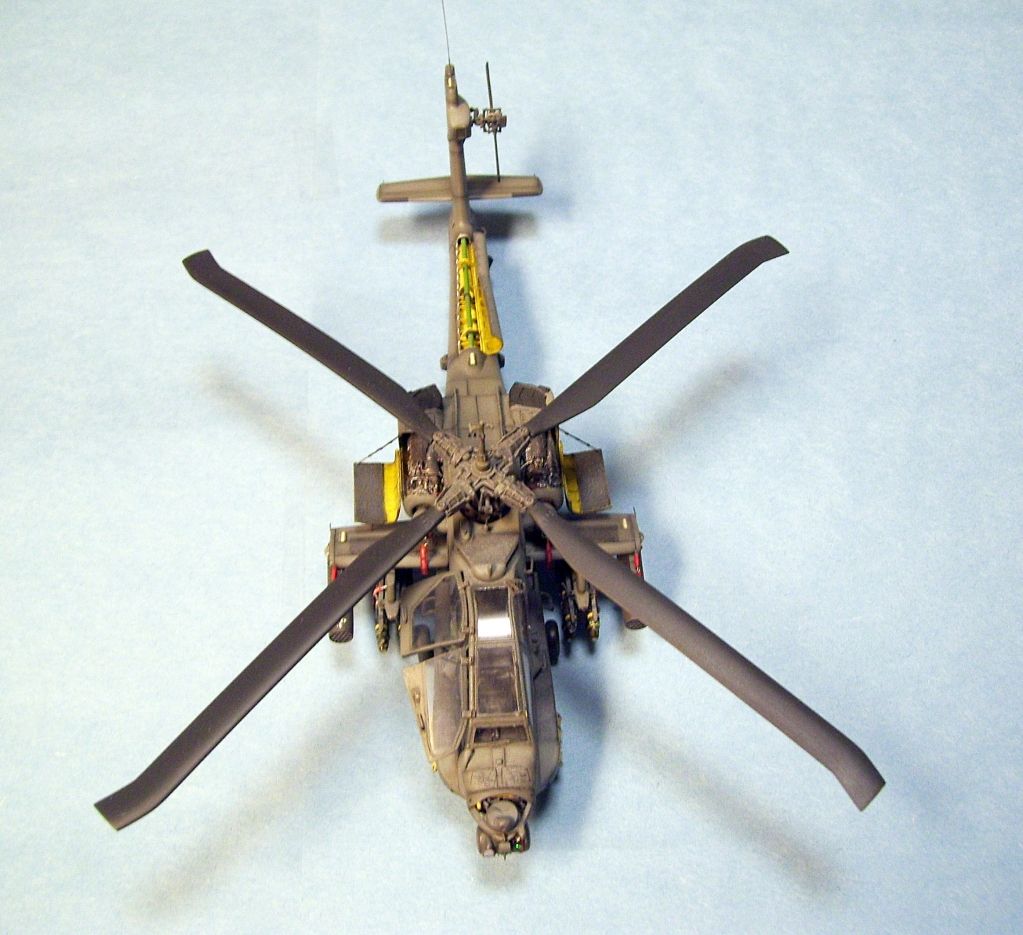
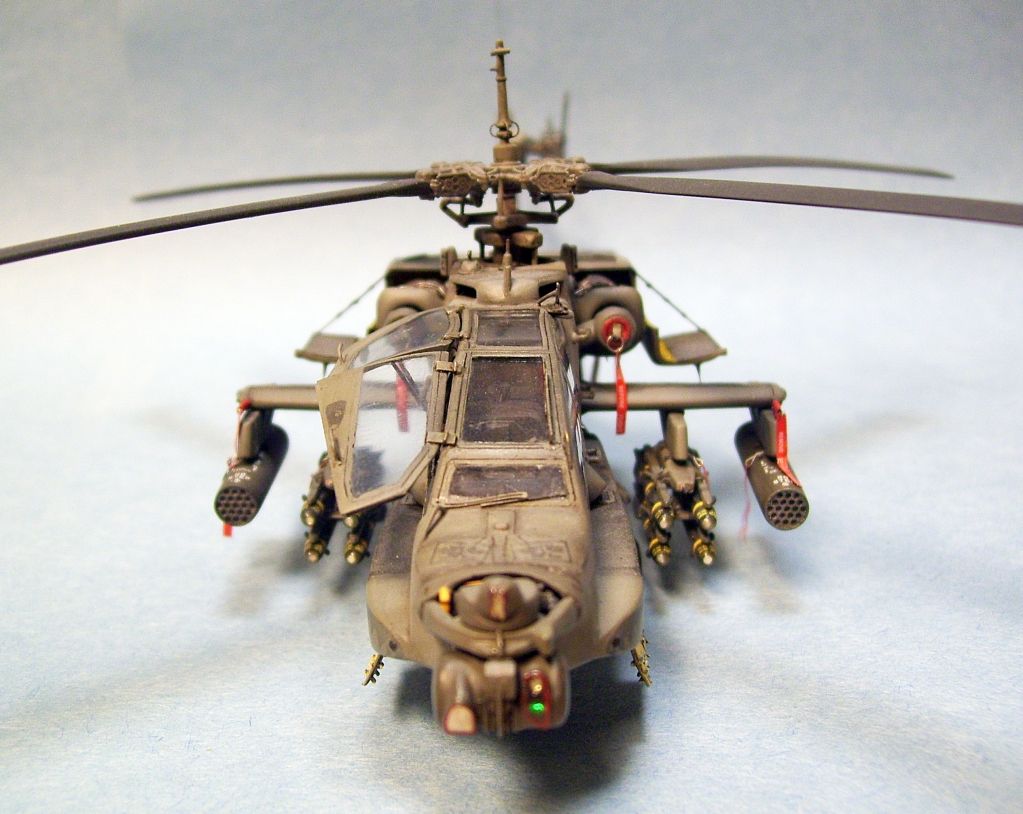
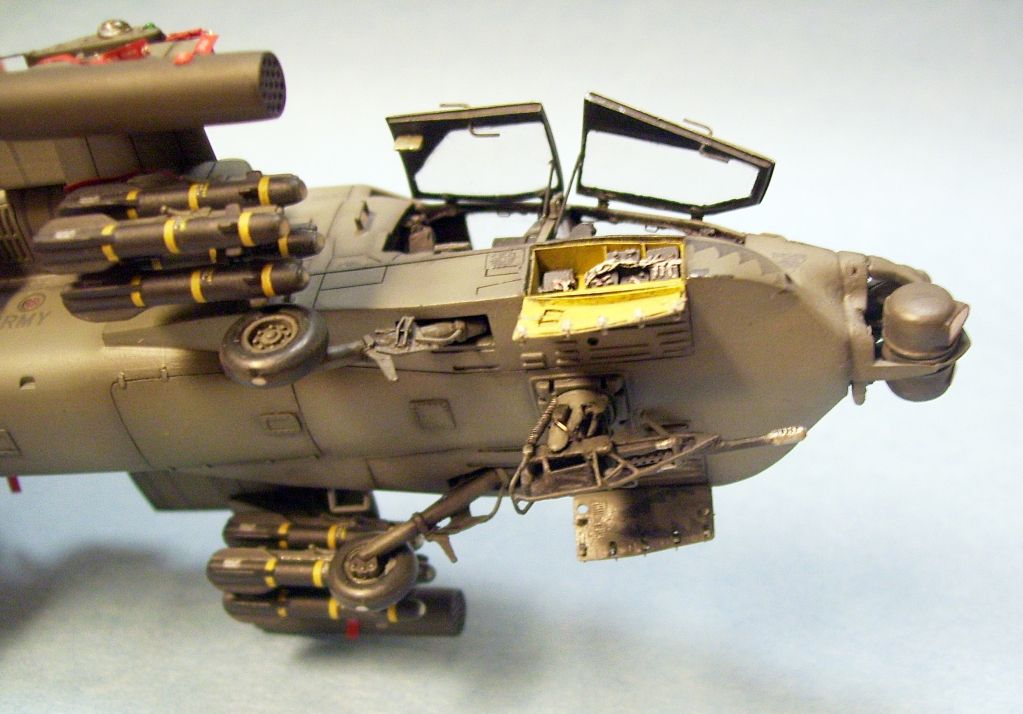
Finished this build up a couple of days ago. This particular build has taken a little over three years to build. It is comprised of parts from four 1/72 kits (2 Academy, 1 Hasegawa, and 1 HobbyBoss), after market sets from CMK & Eduards, and a total of 1200+ scratch built pieces. None of this would have been possible without the outstanding custom decals from a friend of mine Joseph Osborn, or the invaluable technical advice and reference material from Jon Bernstein, Tony Morgan, and the US Army. So I’ll shut up now and post the photos. Please let me know if you all have any suggestions or corrections.
Thank you all so much for the outstanding feedback.
Thanks for the question Stikpusher.
I made the “Disco Ball” by sanding the Eduards PE piece until all of the silver coating was removed and the brass was revealed completely. Next I polished the brass with a piece of fine sandpaper to give it a high shine look, and sprayed a coat of Model Master Acrylic Clear Red over it. I Let this dry for a day or so. I then cut a piece of clear Mylar film, which was purchased at Hobby Lobby, to fit over the PE piece. Make this a little bigger than the piece to be covered, this will allow you to handle it better. I brushed a coat of future over the PE piece and lay the Mylar over it while it is still wet. Gently press this down and let it set for a while.
After this was dry I used a new #11 blade and scored the recesses between each of the lenses on the disco ball. After this was done I brushed another coat of future over it,and let this dry. Finally I trimmed all excess Mylar, folded the piece to shape, and covered it one more time with future. You may have a lense pop off here or there, if this happens just cut a piece of Mylar to the correct size and reattach it with future.
I hope this answers your question and please feel free to ask more.
Superlatives abound on this example you’ve done! Awesome work. I did a 1/48th scale example, starting with that really bad Revell kit and adding a TON of extra details to it, and didn’t produce ANYTHING close to what you’ve done here. Very, very nice craftsmanship!
EXQUISITE! Want to eventually do the same to my 1:48. Will be happy if it comes out half as nice. Just can’t find the tail rotor shaft bay detail and a couple of the smaller compartments in my scale.
Thank you all for the excellent feedback and comments, it means a lot.
Centerdeck2,
The non-skid was done with Mr. Surfacer 500. First what I do is mask off the area to be treated. Second use a stiff short bristle brush and “dab” the Mr. Surfacer onto the area. Work the area a little until you have the texture you are looking for, (A small note here, work a little section at a time, Mr. Surfacer does not take long to set up). While it is still somewhat wet you can rescribe your panel lines by just running a sawing needle down the existing panel line. Finally paint the area once it is dry and your done. The nice thing about using Mr. Surfacer for this is that if you don’t like it ,or you mess up, you can just sand it off without a problem. Give it a try, it’s pretty easy and the results are pretty convincing.
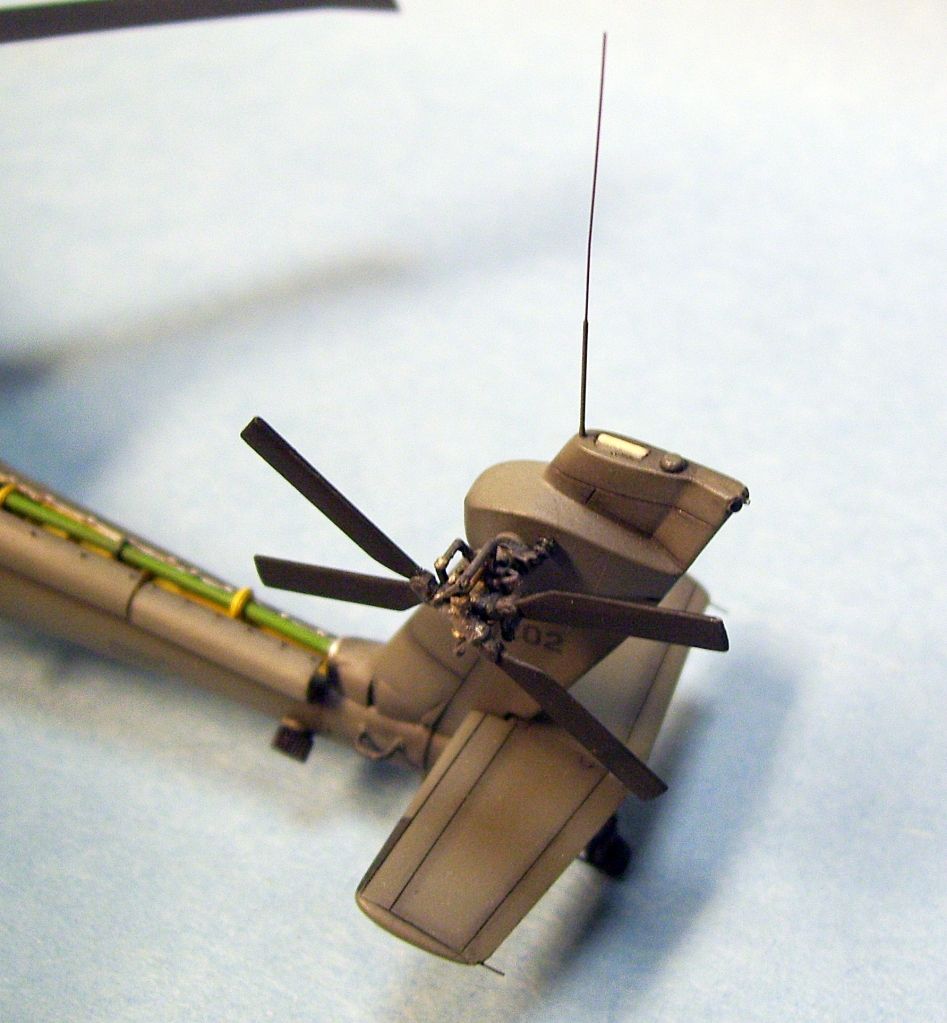
The tail rotor was for me the most challenging. The challenge was to represent the actual assembly and its major parts, but not to over do it and make it to busy. The next challenge I faced was getting everything to fit and scaled properly. In the end it took three weeks and 56 scratch built pieces to get it just right, but I feel it was worth it.
That’s amazing Dave! I had to sign up for an account just to post and tell you that. I was a Blue Max member and 202 was there with me when I was serving. It “belonged” to a very good friend. When we deployed to Bosnia we had custom head cushion covers made and I found this picture taken 12 years ago of 202. I thought you would like to see it. I don’t know if I have any other pictures, but drop me a line sometime if you want.

 Wow!!! Lots of how did you do that questions… so I will start with one. How did you do the “disco ball” countermeasure device?