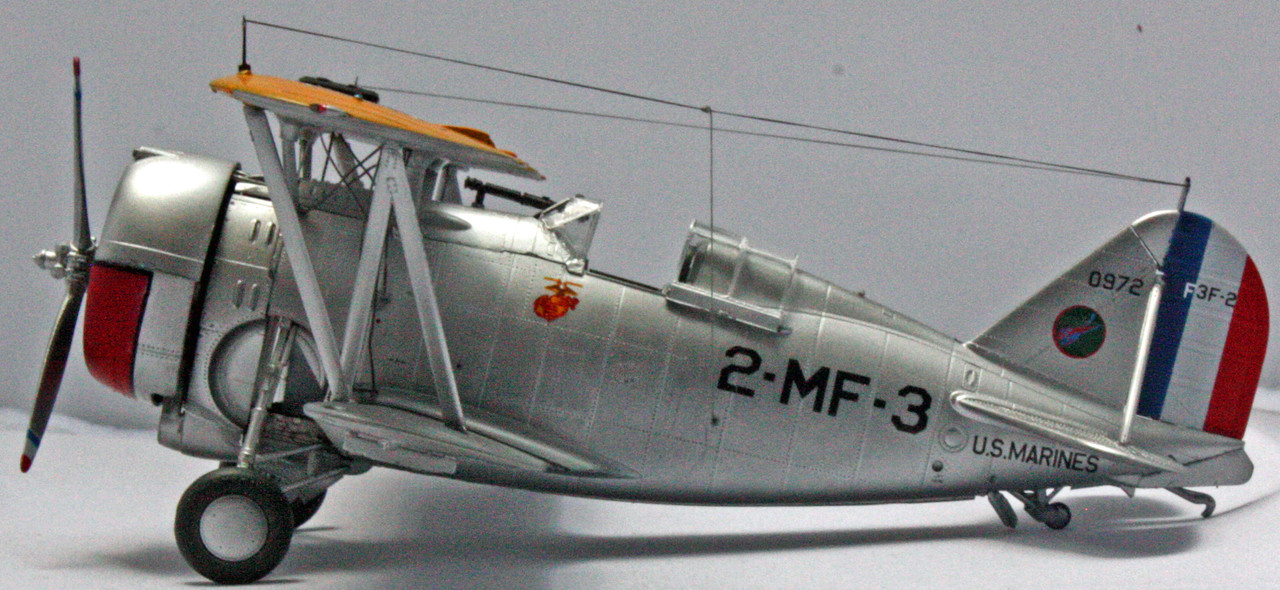
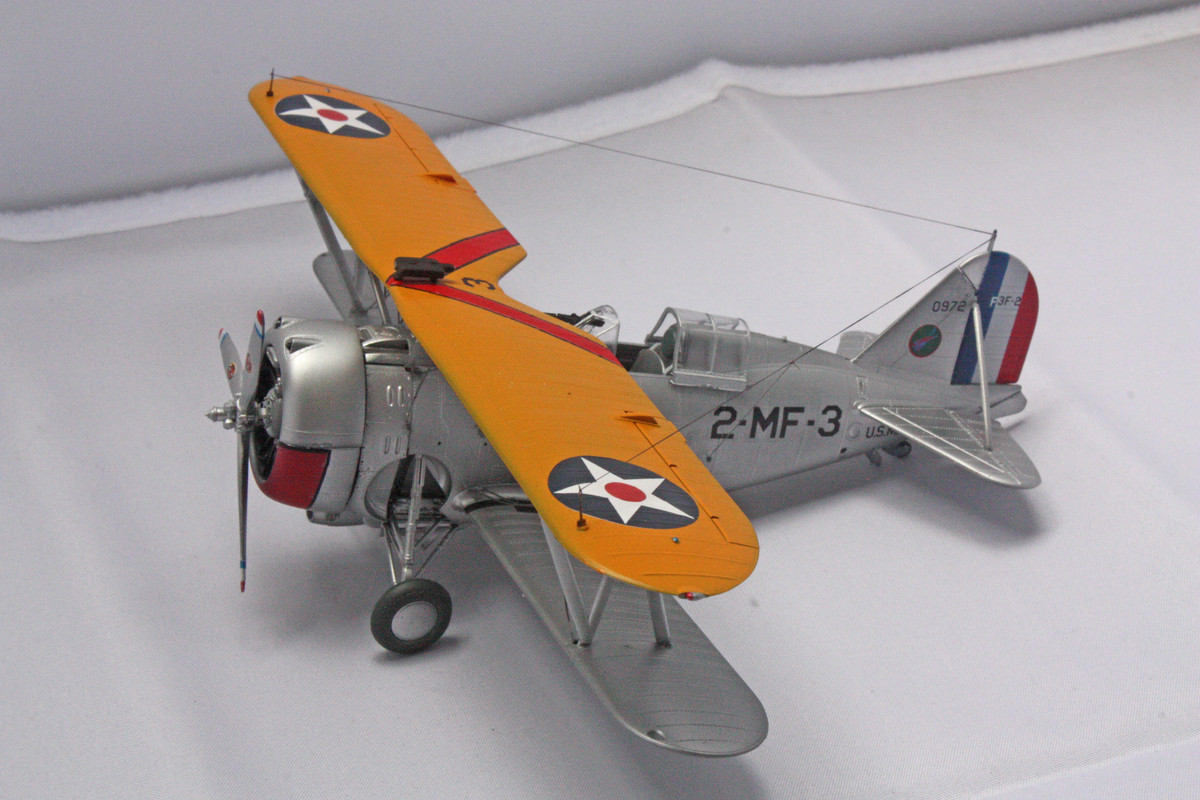
Accurate Miniatures F3F-2 Flying Barrel is completed

Here is my latest.

For the record, I was a big fan of the Accurate Miniatures kits, and wish they were still around. I built several of their kits (B-25B, Yak, Stormovik twice, Avenger, Vindicator, and still have another Avenger and a Dauntless in the stash). The level of detail included OOB is decent relative to the price. You could certainly augment with PE and resin sets, but IMO OOB these kits look just fine detail-wise and fit-wise.

Having said that, this particular release is not likely one I’ll ever tackle again. First, and to be fair, it is a diminuitive bi-plane, but the fact that it is a bi-plane is not why I’m saying this. There are a couple of construction gotcha’s that one should be aware of prior to putting this one on the bench.

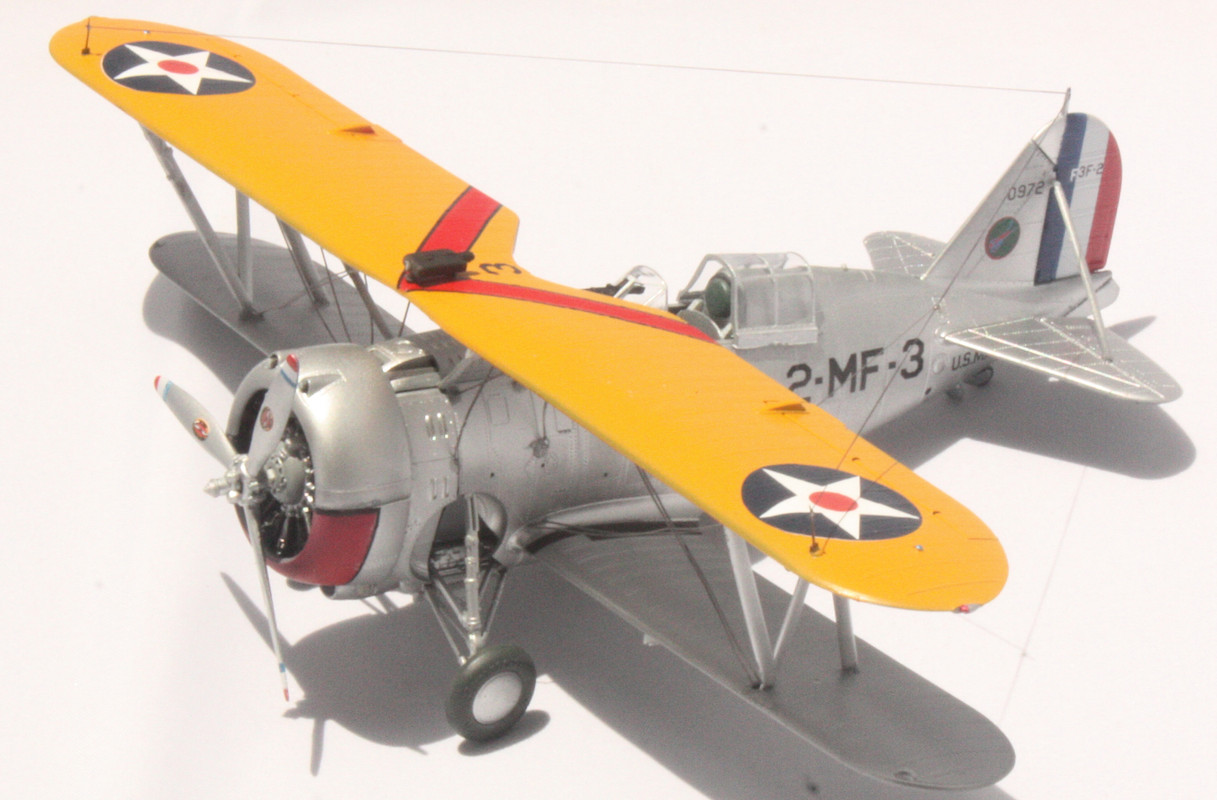
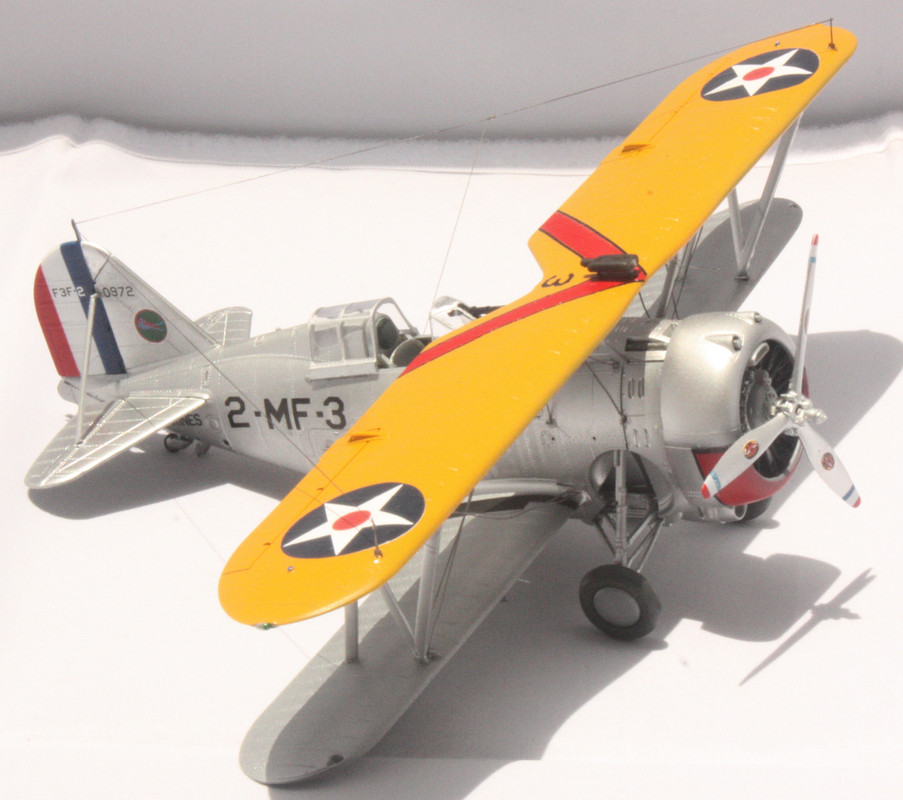
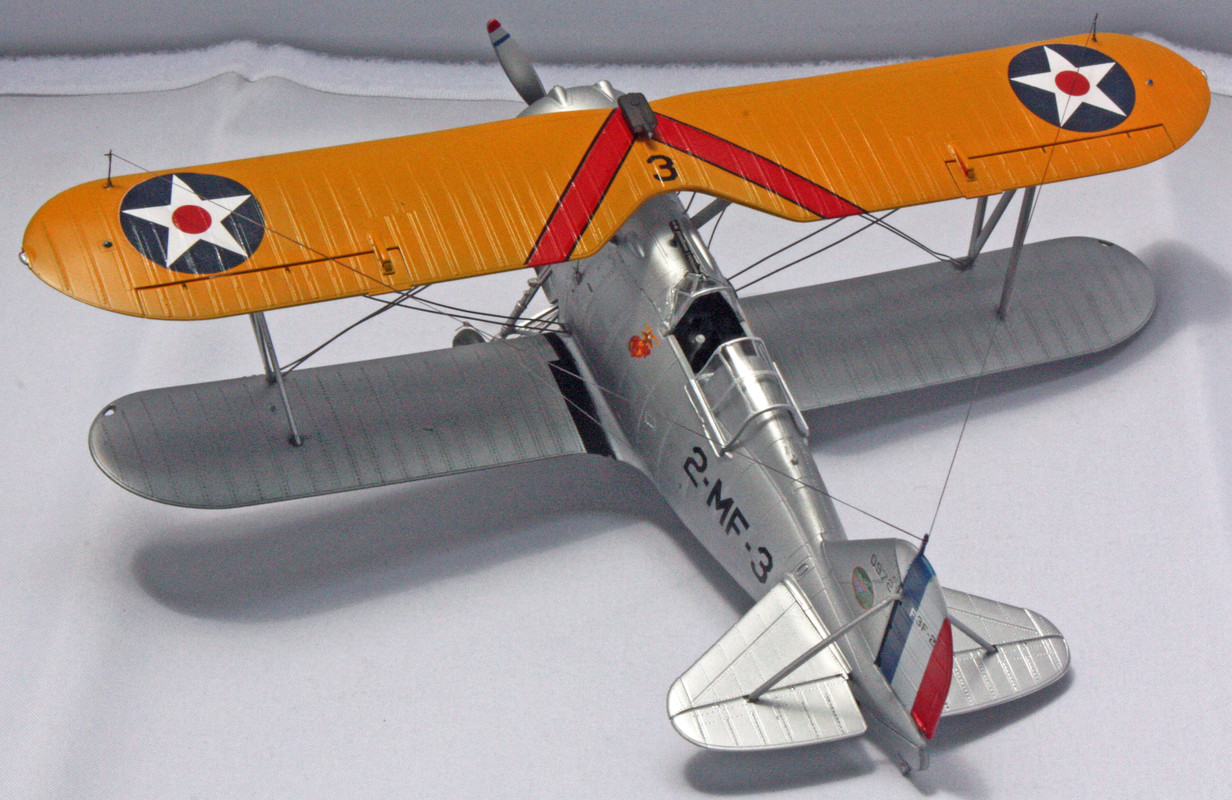
First - the landing gear struts attach in an unconventional fashion. The attachment points are not clear, either by evaluating the plastic directly or interpreting the instruction booklet. After the fact, I found a blog referencing this issue; had I known about this problem, I likely would have avoided the big cluster-f**** that I have in this completed build. I didn’t get one of the struts aligned to match the other, and consequently my barrel sits noticeably askew. One strut is higher than the other. By the time I noticed this during construction, the struts had been in place for a day. I considered attempting a repair, but opted against it out of a concern of doing irreparable damage to the rather tiny parts.

Second - the underside gear doors mounting is very - I stress very - difficult. The instructions even reference this. You are to put it into the bay rear-side first, swivel it around and – somehow – position it properly. The instructions do state that it will seem that it is never going to fit into position (my experience) but go on to advise the builder to take their time, be careful, and “it will fit”. Uh, yeah, right. I was never going to get those doors into position without breaking the gear parts that you have to squeeze these doors in around. I ended up shaving off bits of the doors themselves to finally get them installed. And you can’t see what I shaved off on the finished build.

Third - the kit includes a wonderful fret of PE (not brass as is typically the case, but perhaps aluminum). Here is another point where the instructions advise the builder to take their time. I did just that, but still ended up with guide wires that simply don’t look right. These metal parts had some rigidity to them, perhaps too much, but ended up twisting a bit during installation. I did manage to get them installed, but they don’t look like they should on a real bi-plane. There is not enough tautness in them as I managed to get them into place. This is probably my fault alone, as I’ve seen photos of this kit where the builder did a fantastic job in this area.

I painted with AK Interactive Xtreme metal aluminum, steel, and burnt metal, as well as Mr. Color orange-yellow, Tamiya lacquers white, black, red, yellow, and blue, Vallejo tire black, and other colors in the cockpit or the engine - neutral gray and field green.

Next up - Polar Lights’ 1/350 Klingon K’tinga with lights.

Troubles or not, she turend out beautifully! Thanks for the heads up on things to watch out for on this kit!

Great build. I have this one as well. Looking forward to building her. Excellent example to follow.

BK

Wow!!! Looks fantastic! [t$t] [t$t] [t$t]

Stay Safe.

Jim [cptn]

Aggieman,

First off, that kit turned out great! I’ve always like those yellow winged birds from between the wars. I have this kit in my stash along with the two old Monogram 1/32 kits too. Like you, I miss the Accurate Miniatures’ kits. They were great kits and usually priced reasonably too. So many kits, so little time!

tjs

Nice job Stephen. I had this one in the stash but sold it ages ago - fear of bi-planes lol. Turned out really nice

Looks great!

Love those Golden Age aircraft.

I also have this kit in my stash. Came from HL. I’m hesitant to build it because of the rigging. I remember doing all that on Camels and Spads, etc., as a kit, and not looking forward to it. That DOES look like a nice kit, though.

Looks great!

Despite your problems, that’s a great-looking model! Thank you for sharing the blow-by-blow build! It appears to be impossible for model manufacturers to design kits in which all parts fit and make sense and the instructions result in understanding rather than confusion.

Bob

Was about to post exactly this.
Beautiful work.

“I didn’t get one of the struts aligned to match the other, and consequently my barrel sits noticeably askew. One strut is higher than the other. By the time I noticed this during construction, the struts had been in place for a day. I considered attempting a repair, but opted against it out of a concern of doing irreparable damage to the rather tiny parts.”

So do what I (try) to do when a construction gotcha’ manifests itself in this manner - just don’t look at that particular view! [:D]

Seriously, though, you ended up with a good looking biplane there. 99% of the people who look at it won’t even notice, they will be agog at the excellent paint job you applied to that inter-war bird.

Thank you stik!

Thank you Brandon! Good luck on your own build of this kit.

Thanks Jim!

Thanks Tom!

I also have two of those old Monogram kits - one is the Gulfhawk version, the other is the Navy fighter. I also have one of those from a repop back around the year 2000 hanging on the ceiling of my workshop.

Thank you John!

This bi-plane is actually pretty easy to build, relatively speaking. The cabanes are molded into the fuselage, which helps immensely with setting that upper wing as opposed to experiences we’ve probably all had trying to build a Roden biplane, for instance. The problem I had on this one was more with the PE rigging than actually getting the wings properly aligned.

Thanks Missileman! I also love the look of the Golden Age aircraft. Love the yellow wings.

Thanks a bunch!

I’m pretty sure I also acquired this kit at Hobby Lobby. Unlike most biplane kits, this one includes rigid steel PE as the rigging. I really don’t know why I had so much trouble with it - probably because I installed it out of order as per the instructions, maybe. Don’t let that dissuade you from building your kit, as it really is a great little kit.

Thanks Eugene!