I built this one maybe 12 or 13 years ago. Look it over real good and tell me what I could have done better. But, go a little easy on me. Remember, I’ve only built a handful of armor models.[:D]


I built this one maybe 12 or 13 years ago. Look it over real good and tell me what I could have done better. But, go a little easy on me. Remember, I’ve only built a handful of armor models.[:D]
Honestly there is just about nothing I could say to improve this except for one minor detail, and that I would add some smoke pigments in the exhaust area. Other than that you did a super job!
Brian
Thanks, Brian. Your comments are encouraging to me. I agree about the exhaust area. I normally don’t go back and rework or enhance any of my finished models but in this case I may just do that. A little bit of soot would definitely add to the realism.
Jim
OK I’ll go along with the soot idea.
But the only thing I can see  that could be “enhanced” is the soldier’s arm needs to be on something. Must get tired just holding it out there.
Boy,is that “much ado about nothing” geesh
p.s. Great job.
Yeah. I was trying to get him to prop his arm on that sandbag but he was having none of it. He can be quite stubborn sometimes.[whstl]
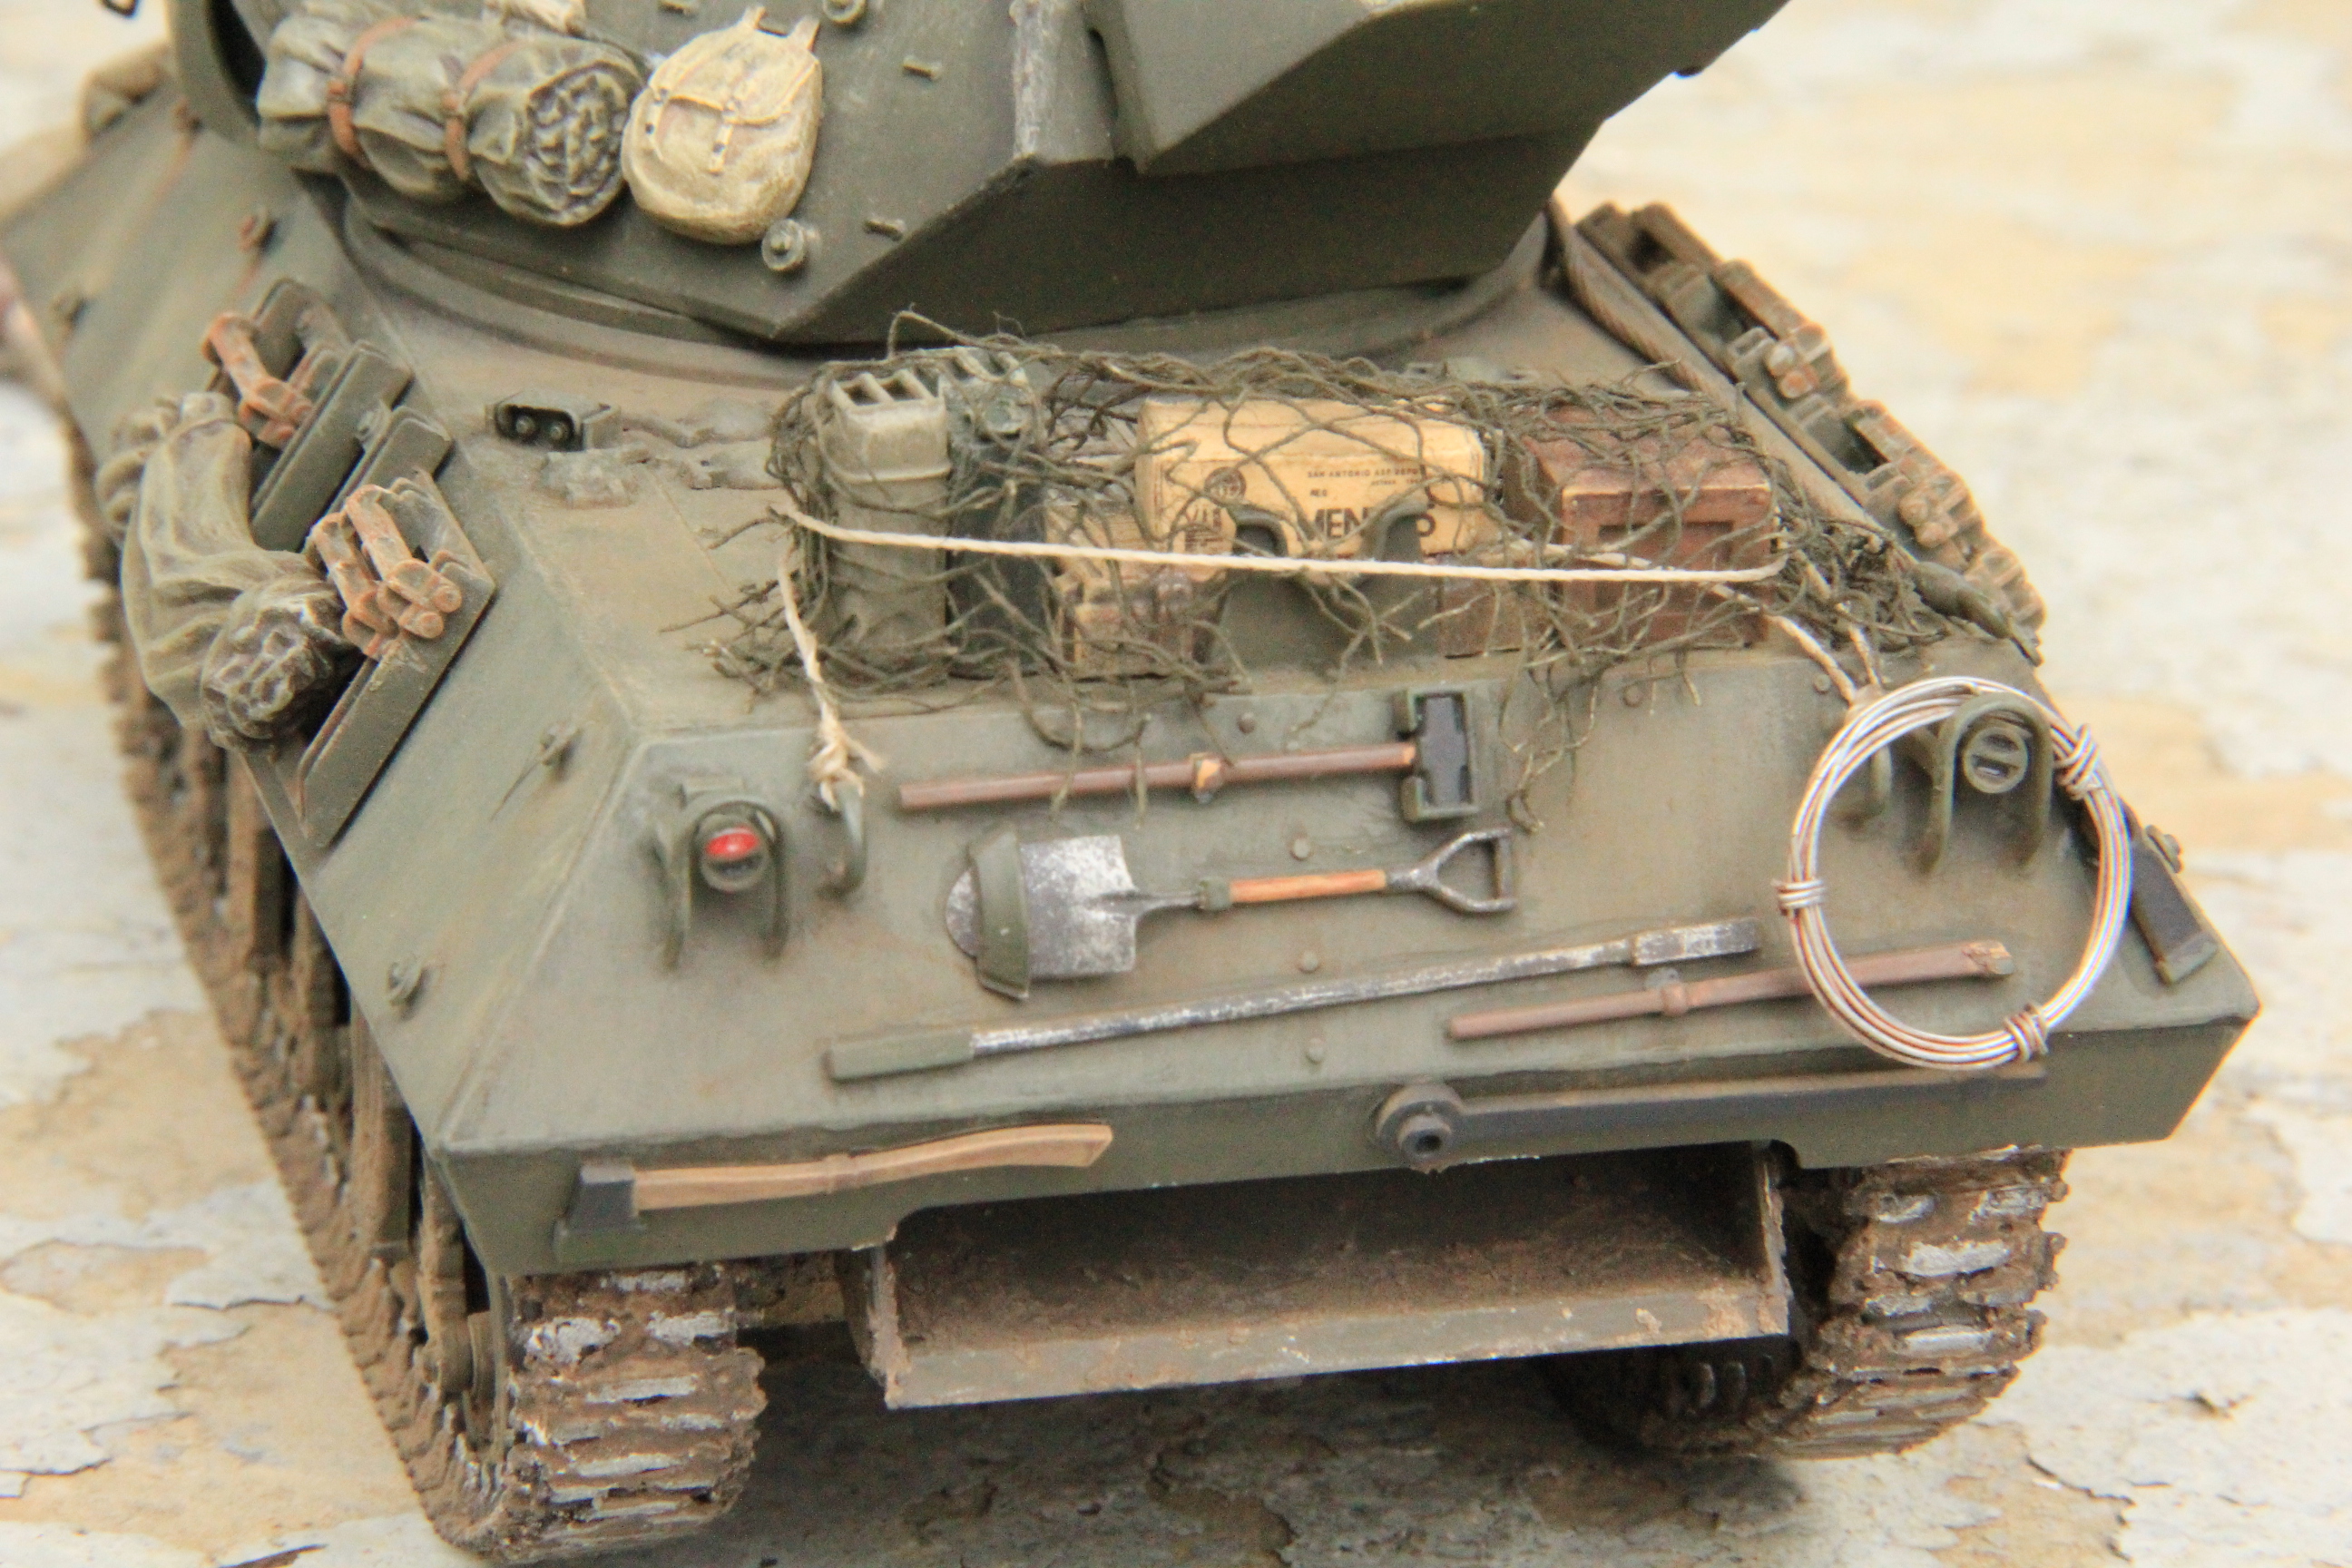
I see a few small things that are not yet mentioned- overall I think it is a dang good build but since you are looking for critiques of feedback… 1) the tail light on the right side is canted- watch out for small things like that on the next one; 2) stowage- on the rear deck those lines should be taught to show tension of actually holding something in place and the camo net would be best placed over all that… on the turret the musette bag and e-tool are “free floating”- there is no tie down point for the bag’s straps and the e tool is just placed there on top of the rolled tarp.
Catching the little things like that will make a good build into a great build.
I think it looks good overall. One thing you could change is the angle of the open hatches. If you look at photos of real M10s and M36s, they splay to the front in a peculiar fashion. It’s unmistakable. Do a google search
Jim it’s a very impressive build. Thanks for bringing it.
Stikpusher, I see what you mean by the taillight. I don’t know if that was something I missed during the build or if I noticed it and thought it was no big deal. It’s quite possible I noticed it after the glue set up and didn’t want to risk messing everything up trying to correct it. Who knows? That was a long time ago. The netting around the stowage didn’t come out the way I intended. I was trying to get the taught lines but was unsuccessful. I used the only thing I had to replicate netting which was gauze. I loosened it up so it would look less like gauze and more like netting. It’s the one glaring imperfection that catches my eye every time I look at it. The free floating musette bag does look a little odd now that you mention it. As far as the entrenching tool, I was trying to place it in a spot where it would appear to be pretty secure without being tied down. I guess all that stuff needs to be tied down in some way. Thanks for the critique. The mistakes I make on one is how I learn to make the next one better.
Roy, the hatches do angle to the front a little if that’s what you are referring to. Maybe they aren’t as prominent on the model as they are on the real thing. I’ll have to research that again. I actually detailed the model very similar to an actual World War II photo of one in a book I have. It’s very similar right down to the sandbags and the log hanging in the front. I’ll definitely google some photos of the hatches though. I’m not going to correct this one but it will be good to know for future builds. Thanks for the feedback, Roy.
I got nuthin! No complaints at all! It looks fabulous.
Thanks, doog. I’ve always been very pleased with how well it turned out.
Looks pretty durn good to me! Love the dirt/mud/weathering. I built the AFV Club M10 some years back and wish it turned out half as well as yours.
Thanks, Gamera. Getting praise for my models from people who never build them is okay but it sure means a lot when I get that praise…and the constructive criticism…from all you guys who have model building in your blood like me.
Jim, I would be more than happy to have that build, “as is”, on my shelf in my collection today. Of course that would eliminate the fun of the build, but… Keep sharing your work here with us sir. Between this and that King Tiger, you obviously have a knack for Armor.What’s next?
Thanks, stikpusher. I don’t know what is next as far as armor or military goes. I can hear Tamiya’s Marder III M calling my name. I ordered and received extra ammo for it and it would be a little bit of a refreshing change from your usual tank model. Also, I have a Sturmtiger…which is my avatar…that I built prior to the M10. I added lots of detail including an engine, mechanic figures, tools, work table and other stuff. It really needs to be displayed as a diorama. I’ll have to take some more photos of it when I have another cloudy day.
That’s a sweet looking build. Can’t wait to se more of your armour.
Jim, I have done some outdoor photography of my models on sunny days in the shade. The shady side of the house can work in place of cloud cover. Look around your home and you just might find the perfect spot out of direct sunlight.
And that Marder kit sounds like a great choice
Stikpusher, I hadn’t thought about the shade. I may try that later with my Sturmtiger model as well as the M10 and the King Tiger models. That may provide a more natural setting than my front porch.
Thanks, Bish. Everyone’s comments are really making me anxious to start another tank.