DM,
Great idea, I have used shish kabob skewers then cut the wood down and placed it in a dremel which worked to a point. It would not work on all road wheels.
This is something I will try. Thanks for the inspiration!
DM,
Great idea, I have used shish kabob skewers then cut the wood down and placed it in a dremel which worked to a point. It would not work on all road wheels.
This is something I will try. Thanks for the inspiration!
!http://forums.vinagames.org/images/smilies/spying-smiley-emoticon.gifAw Geezze…
 Watching TV will never be the same.
!https://www.420magazine.com/forums/images/smilies/high-five.gif
Thanks guys
Hey DM, Quite a production, both report and project, big fun, carry on! I’m following this one!
Max
Your wheel turning is a useful technique.
!https://media.giphy.com/media/iK5To6qPhsxSo/giphy.gif
!http://nebula.wsimg.com/e176008698c21a86cb4d5e17f5a0f9e5?AccessKeyId=09D041FD1B92F9AE6B9B&disposition=0&alloworigin=1
Next up is a little bit of information about the special turret for this particular vehicle.
The kit turret was the standard Porsche turret, but incorrect in many ways for the VK version of the Tiger II.
!http://www.sherv.net/cm/emoticons/yellow-hd/silly-face-smiley-emoticon.gifUnless I’ve missed it, I haven’t seen a built plastic kit of this model anywhere with the proper turret modifications added.
!http://www.netanimations.net/Moving-animated-eyes-finger-pointing-down.gif
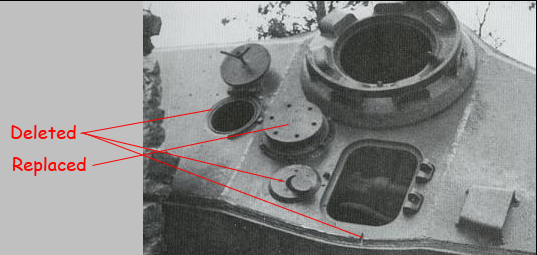
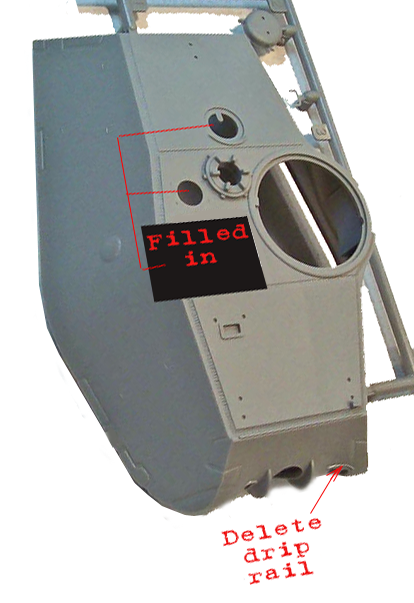
The turret mods
1 This turret was specifically designed by Krupp for this vehicle (actually, all the Tiger II turrets were built by Krupp while the HULLS were built by Henschel).
2 The kit front and aft turret roof plates are the production series Tiger II 40mm plates. The turrets were originally built with 25mm thick front and aft roof plates as found on the V1 - V3 Tiger II prototypes and the three VK45.02 (P) vehicles. With the exception of a cut out on the front edge of the armor plate creating a splash guard these plates sat flush with the turret front and side armor plates and left a 15mm step up to the 40mm center turret roof plate.
3 There is a thin square deflector bar that sits across on top edge of the turrets front armor plate splash guard I removed.
4 The forward blade sight mounted on the front left side of the turret roof was deleted.
5 The cover for the spent cartridge rounds ejection port along with the curved rain guard welded to the rear turret roof was removed and the hole filled.
6 The center 40mm turret roof plate that houses both the commander’s cupola, loaders hatch and ventilation fan housing needs to have the close defense weapon removed and the hole filled as well as the drain channel to the right of the loader’s hatch. I made the armored cover for the ventilator as the kit only supplies you with the water tight ventilator cover.
7 The commander’s cupola was not welded to the turret roof. It was bolted down to the roof and sat in a shallow farrow cut out on the 40mm center turret roof.
8 Use the commander’s cupola without the drain channels.
9 Removed the 4 large rivets on the hinges of the loader’s hatch cover as these were not present on any of these vehicles. Only when used on the Tiger I.
10 Deleted the 3 sockets for the jig boom on the turret roof.
11 The rain guards over both the binocular gun sight and machine gun opening on the turret front plate were removed.
12 The handle on the outside of the rear turret hatch is not used.
13 Added two conical bolts just in front of the hole for the commander’s viewing port on the left side of the turret. Also added a flat circular plug and welding around the plug for the commander’s viewing port in the curved area of the turret. A decision had been made to plug this hatch.
!http://i20.photobucket.com/albums/b232/gluetank/Porsche%20VK4502%20Vorne/Tank%20buildup/unpainted%20Porsche%20turret/original%20turret_zpscwawhkys.png
!http://www.netanimations.net/more-finger104.GIF
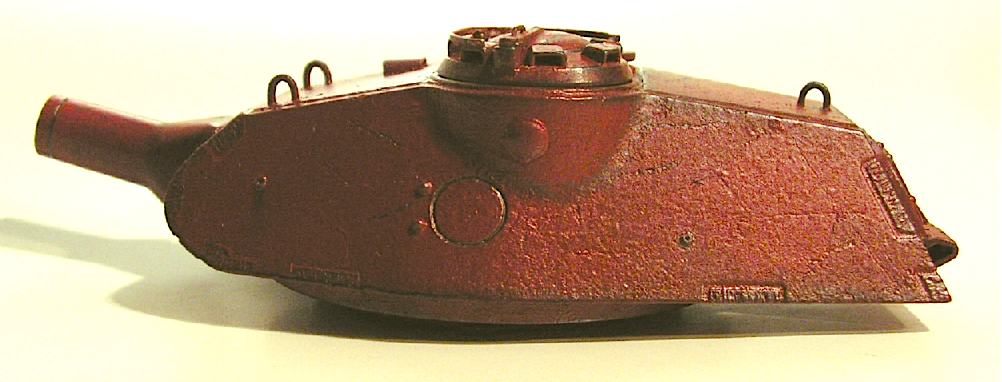
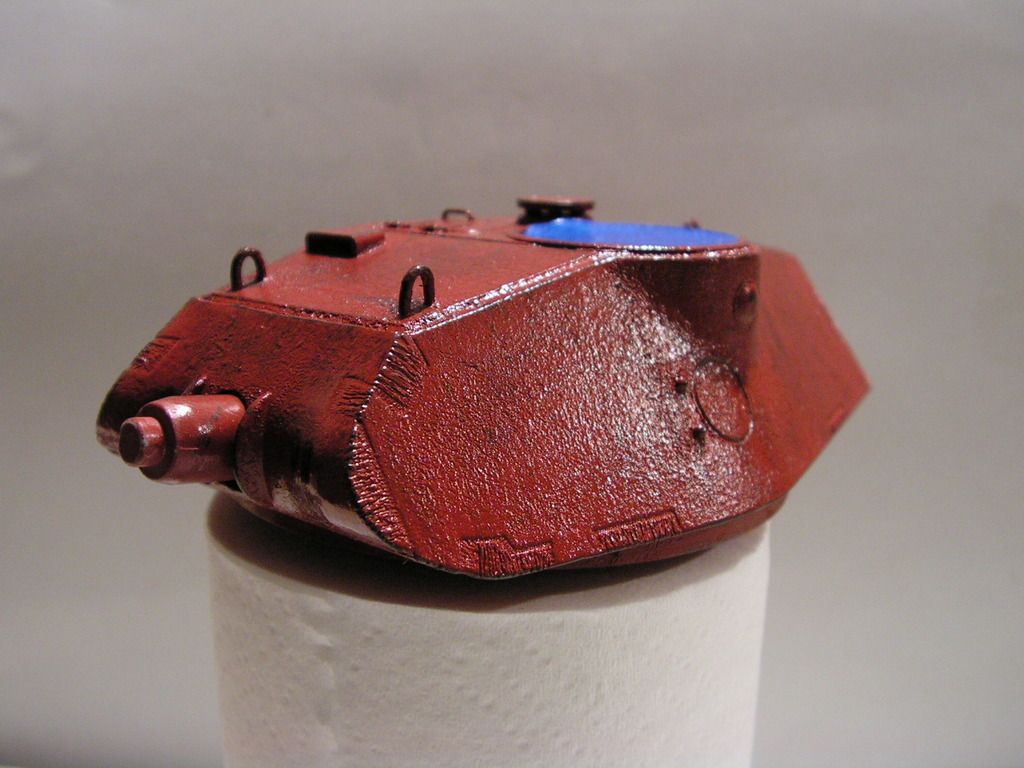
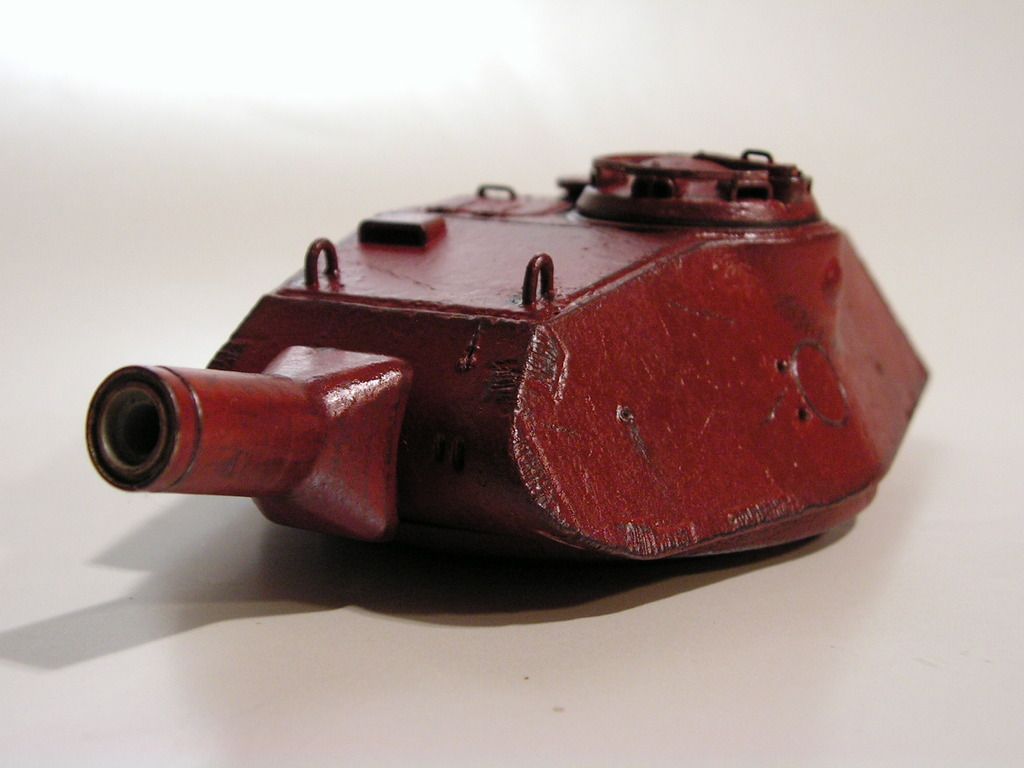
Here is the primered turret with the corrections completed and a gloss overcoat (the gloss will promote better results with the hairspray/chipping).
…and a !http://castletv.net/wp-content/forumuploads/mutha_nite/2014/01/bf-birddancingsmiley-1.giffrontal view.
!http://vignette4.wikia.nocookie.net/elderscrolls/images/f/fe/Кузнец_Daggerfall.gif/revision/latest?cb=20120916071627&path-prefix=ru
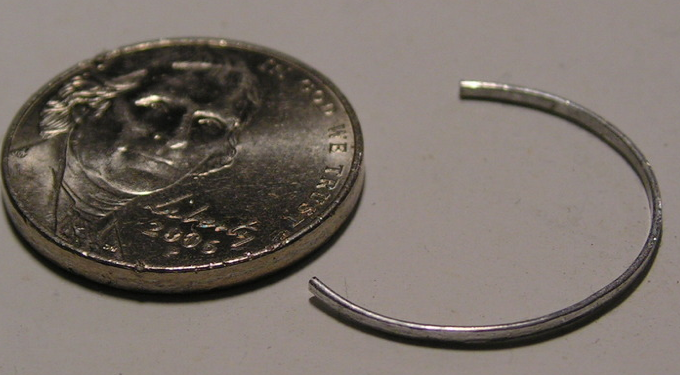
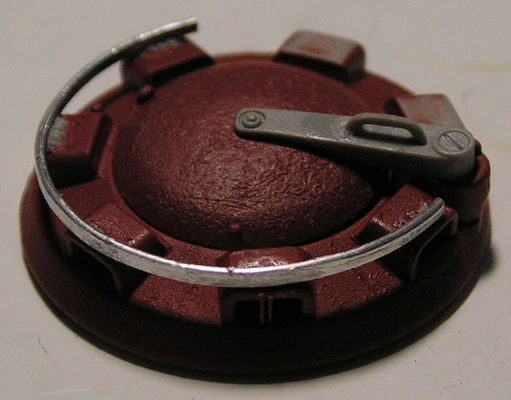
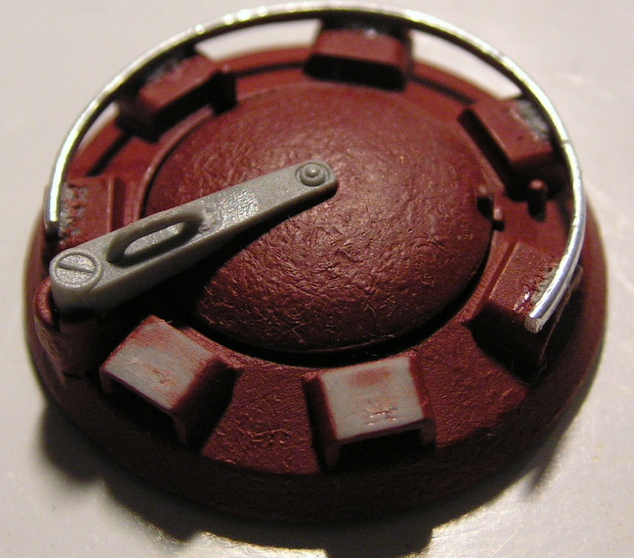
Here’s what you can do witha piece of aluminum wire and a nickel to form it around.
!http://i20.photobucket.com/albums/b232/gluetank/Porsche%20VK4502%20Vorne/Tank%20buildup/unpainted%20Porsche%20turret/nickel_zpsh2kzizzo.png
The metal gun track looks more realistic when the paint is worn/chipped away.
!http://i20.photobucket.com/albums/b232/gluetank/Porsche%20VK4502%20Vorne/Tank%20buildup/unpainted%20Porsche%20turret/cupola_zpsusuuycjm.png
Yeah, I put the track on wrong the first time…had to move it over two blocks ccw to make it right.
That doof’ll never show anyway.
Added a few small arms impact damage and shrapnel scratches… I’m going to tone 'em all down a bit 'mo later on.
![]() More of the same.
More of the same.
Can’t find no seams here…all turned out well, primer coming up next…
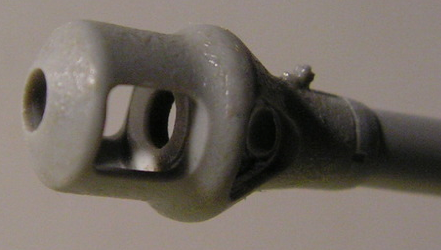
Muzzle, primer red… barrel, dark grayish black.
Time to go to bed…
!http://www.sherv.net/cm/emoticons/sleep/sleepy-smiley-face.gif
!http://i20.photobucket.com/albums/b232/gluetank/Animated/Disastermastermotion-3.gif
Save
Save
Save
Oh gee, I had no idea all those little hatches should have been deleted or altered. Again, nice work!
What a cool trick with the nickle. Keep up the great work.
Hey Gamera,
just wait 'til I get to the listing for the hull.
I’m mixing a lot of good !http://www.sherv.net/cm/emoticons/toilet/cleaning-the-toilet.gifin with this project.
Stay tuned…
!http://i20.photobucket.com/albums/b232/gluetank/Animated/Disastermastermotion-3.gif
Ohhhhhhh, you make me feel guilty just building 'em straight outta the box… [:$]
[:D]
Eric,
Thanks for the approval! Guess you could also call it a “Cheap Trick” too.
That was just my five cents worth.
Don’t use one of these. Might not work. !http://www.wooden-nickel.com/images/nickel-f.png
It’s good to see another one of the 'ol timers here…
…looks like most everyone else has moved on.
!http://i20.photobucket.com/albums/b232/gluetank/Animated/Disastermastermotion-3.gif
Well, a lot of people like to build 'em “outt’a the box”.
Personally I find it extremely rewarding to get “outt’a the rut”, be creative and push my limits in all ways - not to mention getting more !http://www.eupodiatamatando.com/wp-content/uploads/2007/09/gun2.gifbang for my buck.
!http://i20.photobucket.com/albums/b232/gluetank/Animated/Disastermastermotion-3.gif
[Y] That metal gun track hammered into shape around a nickel. Next level s[:#] right there.
Thanks SprueOne,
now stand back !http://nyfalls.com/board/images/smilies/Zombie2.gifwhilst I take it up several more notches.
!https://encrypted-tbn3.gstatic.com/images?q=tbn:ANd9GcRb5VuHlA2fZPO2_CASUXx2wVtFBSisgEE-CW32S8qKlInpdd09aQ
Well,
I’m back at the keyboard.
heh !http://i717.photobucket.com/albums/ww173/prestonjjrtr/Smileys%20Holidays/Halloween/music31.gifheh
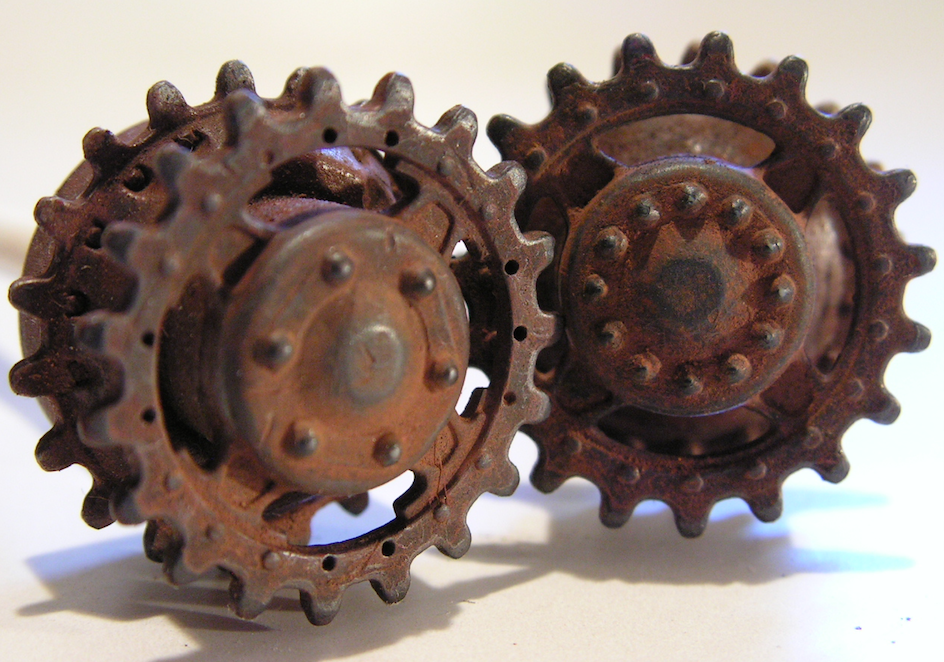
Next, some wheel and track madness.
Took the wheels off my wheel jig, stuck 'em on a stick and painted them up a bit…
just gott’a LӦV!http://john16and12.com/love.gifVE that “freshly worn” steel look.
!http://i20.photobucket.com/albums/b232/gluetank/Porsche%20VK4502%20Vorne/tracks%20-%20wheels/Inner-outer%20roadwheel_zpsvkksaa1p.png!http://i20.photobucket.com/albums/b232/gluetank/Porsche%20VK4502%20Vorne/tracks%20-%20wheels/1_zpsssxfileh.png
Next time I’m going to paint 'em on that jig I made while spinning them with the drill…
That should be interesting.
I put the drive wheels on some chopsticks and then went to town with a matching finish.
A little more touch up needed here.
Then a bit of metallic wear.
Hang on to your pants for this… !http://www.alien-earth.com/images/smileys/chuckle.gif
!http://smileys.emoticonsonly.com/emoticons/p/pants_falling_down-2158.gif
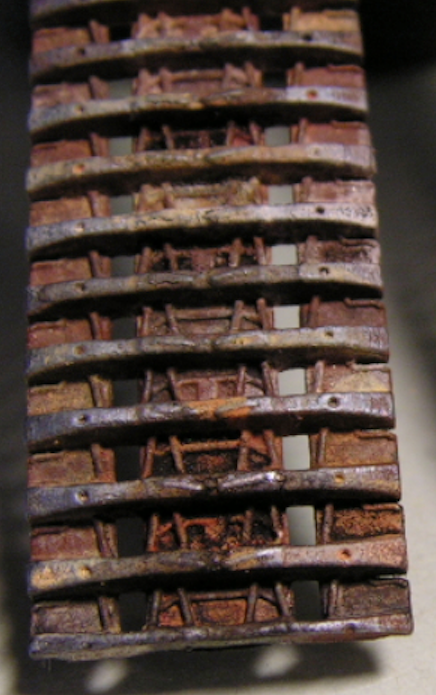
You’ve got to carefully texture and then drill these holes out while they’re still reinforced on the sprue, otherwise they’ll just !https://encrypted-tbn0.gstatic.com/images?q=tbn:ANd9GcSaIPxI0XXgRHx36MjKghB8ah-SKbwwegbdC7Mgac1cN0izVoTp_wflex, bend and break.
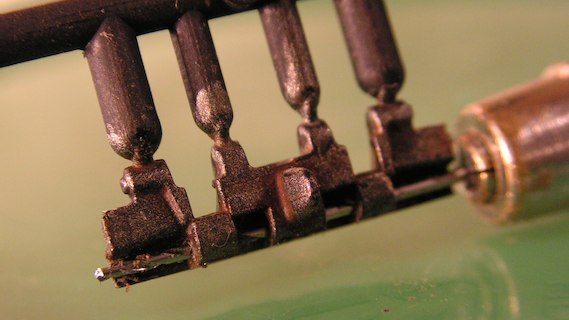
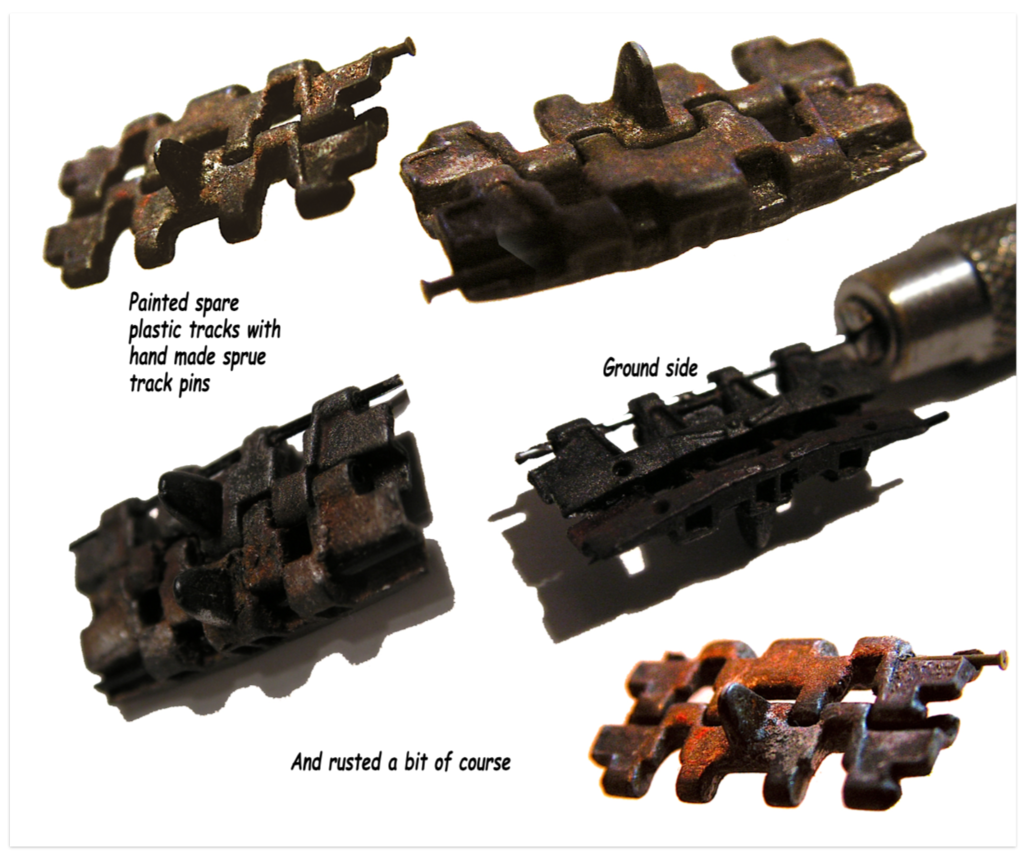
Next, I made me some track pins to fit… that’s what sprue-fruit is for.
!http://img03.deviantart.net/aae2/i/2006/168/a/3/do_the_chicken_dance__emoticon_by_yamibaku.gifGot to having so much fun, I made me up a bunch of 'em. !http://www.das-hamsterforum.de/wcf/images/smilies/panik.gif
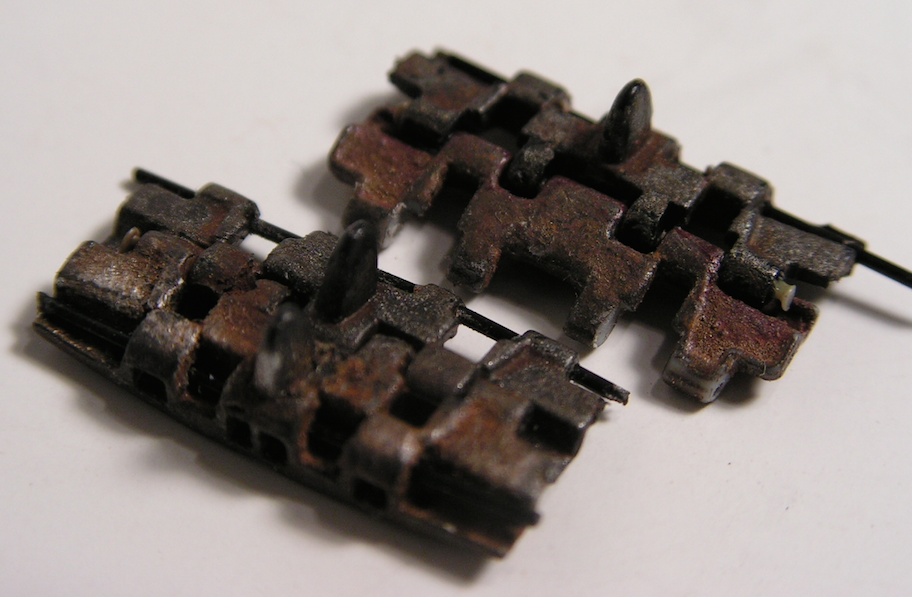
Here they are… in progress.
Not bad for plastic tracks eh?
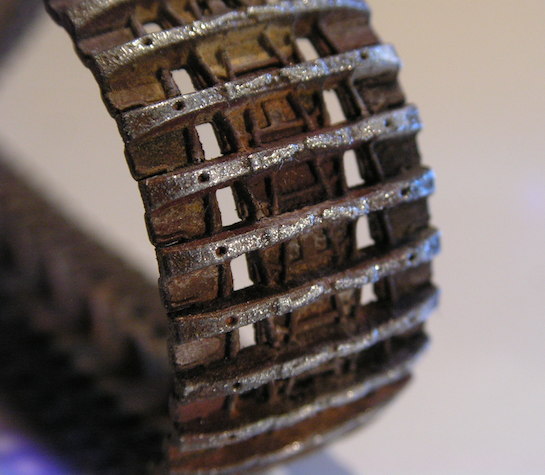
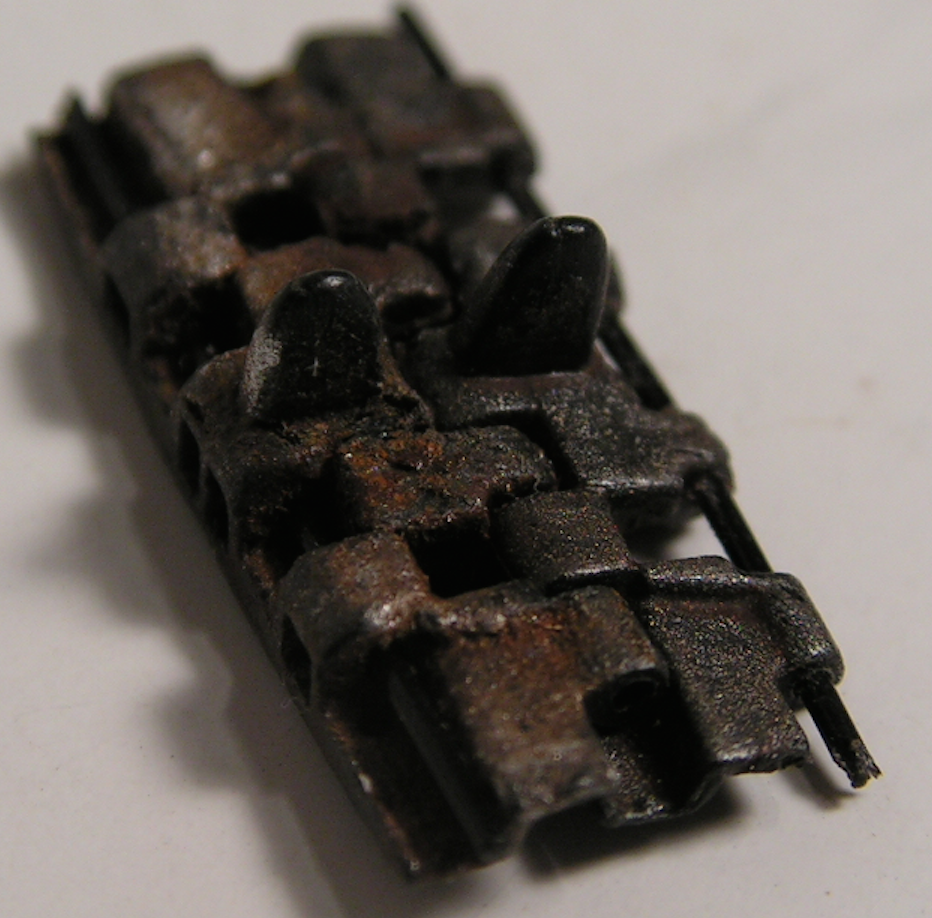
Here’s a closer look for 'ya. !http://www.kolobok.us/smiles/artists/big/Connie_twiddle-thumbs.gif
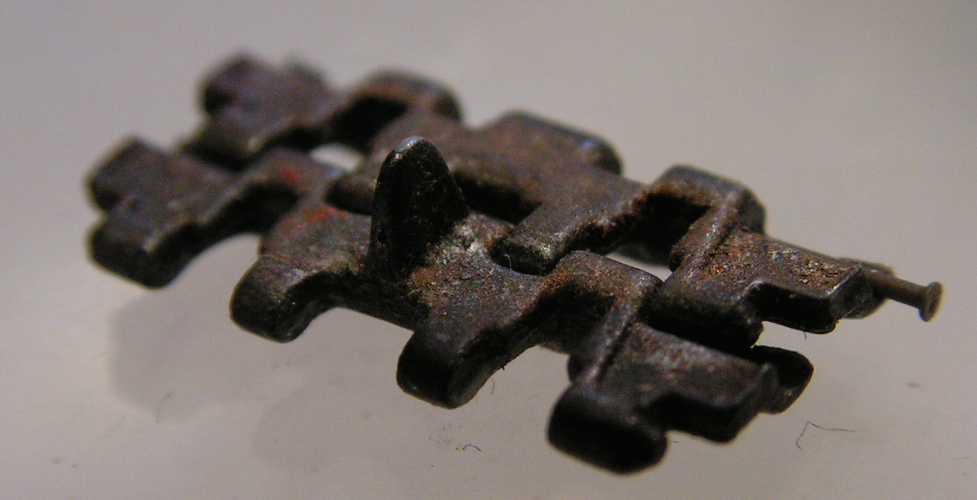
And even closer… !http://www.pferdeinfo-gifhorn.de/forum/images/smilies/smilie_sh_007.gif
Now !http://www.smiley-lol.com/smiley/asile/voix.gifTHAT’S a cast !http://emoticoner.com/files/emoticons/smileys/cast-smiley.giftrack… don’t 'ya think?
Those dudes will go on the track hangers located at the rear of the tank.
Special “tanks” to TIGERMAN (Eric) for providing me with those extra indie tracks.
Be on the lookout for updates possibly-- !http://www.4smileys.com/smileys/thinking-smileys/think_smiley_56.giflater this week.
Hope ya’ll enjoyed todays little parody !http://img.userboard.org/uploads/biss-in-die-ewigkeit/smilies/verbeugen.gif!http://i20.photobucket.com/albums/b232/gluetank/Animated/Disastermastermotion-3.gif
A little out of my price range but geeeze those metal track links are lovely!
Looking totally Metallic, Brah 
!http://foxtrotters.tripod.com/gtbull5.gif
Whoa there, Pod’na
Believe me… you!https://encrypted-tbn0.gstatic.com/images?q=tbn:ANd9GcSAHAC14nvhVHoM-MME29N14wNUln7phKKou7xVMem8C82HeWkl*CAN afford 'em*.
I put out a post/request a while back here titled “Cleats”.Those are just a few extra plastic kit tracks from an Elephant or a Ferdinand that Eric (Tigerman)
volunteered to send to me for this project.
The connecting pins are made from stretched sprue.
I thank you for your most flattering comment about them.
!http://www.picgifs.com/smileys/smileys-and-emoticons/thanks/smileys-thanks-771216.gif
Everyone is different, but if you can make tracks convincing, then why would you spend enough to buy another kit - just to buy fruils?
!http://www.picgifs.com/smileys/smileys-and-emoticons/money/smileys-money-702364.gif
!http://smileys.newbeginningsnetwork.com/piwigo/galleries/WORK_AND_STUDY/occupation/magician-smiley-emoticon.gifIt’s what I DID to them that makes 'em look like that.
I been doing this a long, long time now.
!http://i20.photobucket.com/albums/b232/gluetank/Animated/Disastermastermotion-3.gif
Ahhh, thanks DM! When you remarked about drilling them out I just assumed they were Fruils-my mistake!
Still, the comment still stands- they look fantastic!
That must have been some time ago, but I’m glad you put them to use. [B]
Well, not sure how i missed this one, clearly not been paying attention. Some lovely work tehre and great informative posts.

](http://dinarvets.com/forums/uploads/emoticons/default_bs.gif!%5Bhttp://i247.photobucket.com/albums/gg134/orphone/1420791d1304113905-uniland-sviluppi-indagini-preliminari-oldman_zps07kusx2t.gif~original%5D(http://i247.photobucket.com/albums/gg134/orphone/1420791d1304113905-uniland-sviluppi-indagini-preliminari-oldman_zps07kusx2t.gif%7Eoriginal))