I would have thought if the PzII was still operational by 1943 they would have been converted into Marder’s or Wespe. Thanks for posting this.
Happy Modeling
Mobious
2 Likes
Exactly! Or at the minimum had the turrets removed for use in fortifications and the running hulls used for drivers training schools.
1 Like
In both the 1944 and 1945 examples it’s still being used in a light tank / scouting role, the former being due to a shortage of the more modern and capable Panzer II Ausf L “Luchs” and in the latter the source identifies the vehicles coming from a Panzer Aufklarung Abteilung (Tank Scouting Battalion) but doesn’t identify the Panzer Division
Unfortunately self-propelled artillery and fixed emplacement conversions are just not able to perform that scouting role. In spite of obsolescence against other (unavailable) vehicles in the inventory, I’d still trust an older accountant with a calculator to do my taxes before a plumber with a computer…
1 Like
The scouting role had gone to the 8 wheel Sdkfz.234 or light half tracks of the Sdkfz. 250 series more and more, compared to the light Panzers, by 1944/45. If you look at the TO & E’s of the Panzer Ausklarungs Abteilungs of that era or Panzer Battalions, the role of the light tank was pretty much replaced by those new types.
3 Likes
It was not implied that an open top SPG would serve as a better scout vehicle. I was curious as to why these few remaining Pz II were not converted and upgunned.
Guess that better variants were already being utilized and it would have been a greater waste of materials to convert them.
2 Likes
@stikpusher …You’re right - Looking at a few of the TO&E’s, the light Panzers seem to feature very infrequently regardless of the year. As you say, it’s wheeled vehicles, halftracks, motorcycles and cars that are doing the heavy lifting.
@Mobious … No, I didn’t think you were implying that at all  Your instincts are probably correct in that these examples were pulled out of Tank Schools out of desperation, and a conscious decision made that the Wehrmacht needed them pressed into service as-is today more than they needed self-propelled artillery tomorrow.
1 Like
Painting - Completing Basecoats and A Tale of Two Panzer II F’s
Managed to squeeze in a couple of hours at the bench this weekend, putting basecoats down on tools, weapons and other fixings. Some of the photos reveal a few areas of sloppy brushwork that will need some tidying up that I didn’t see at the time…
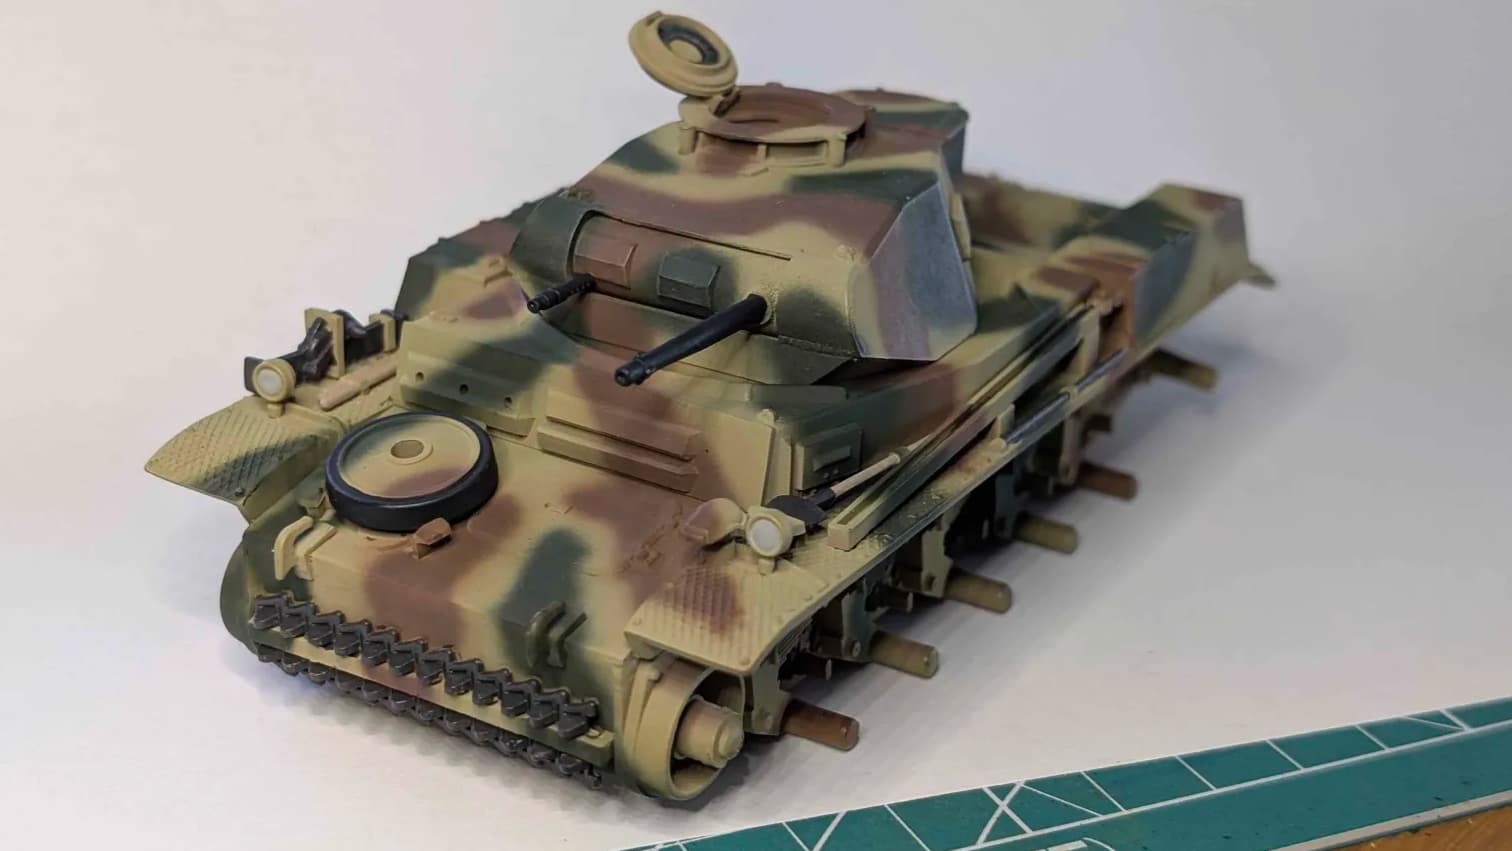
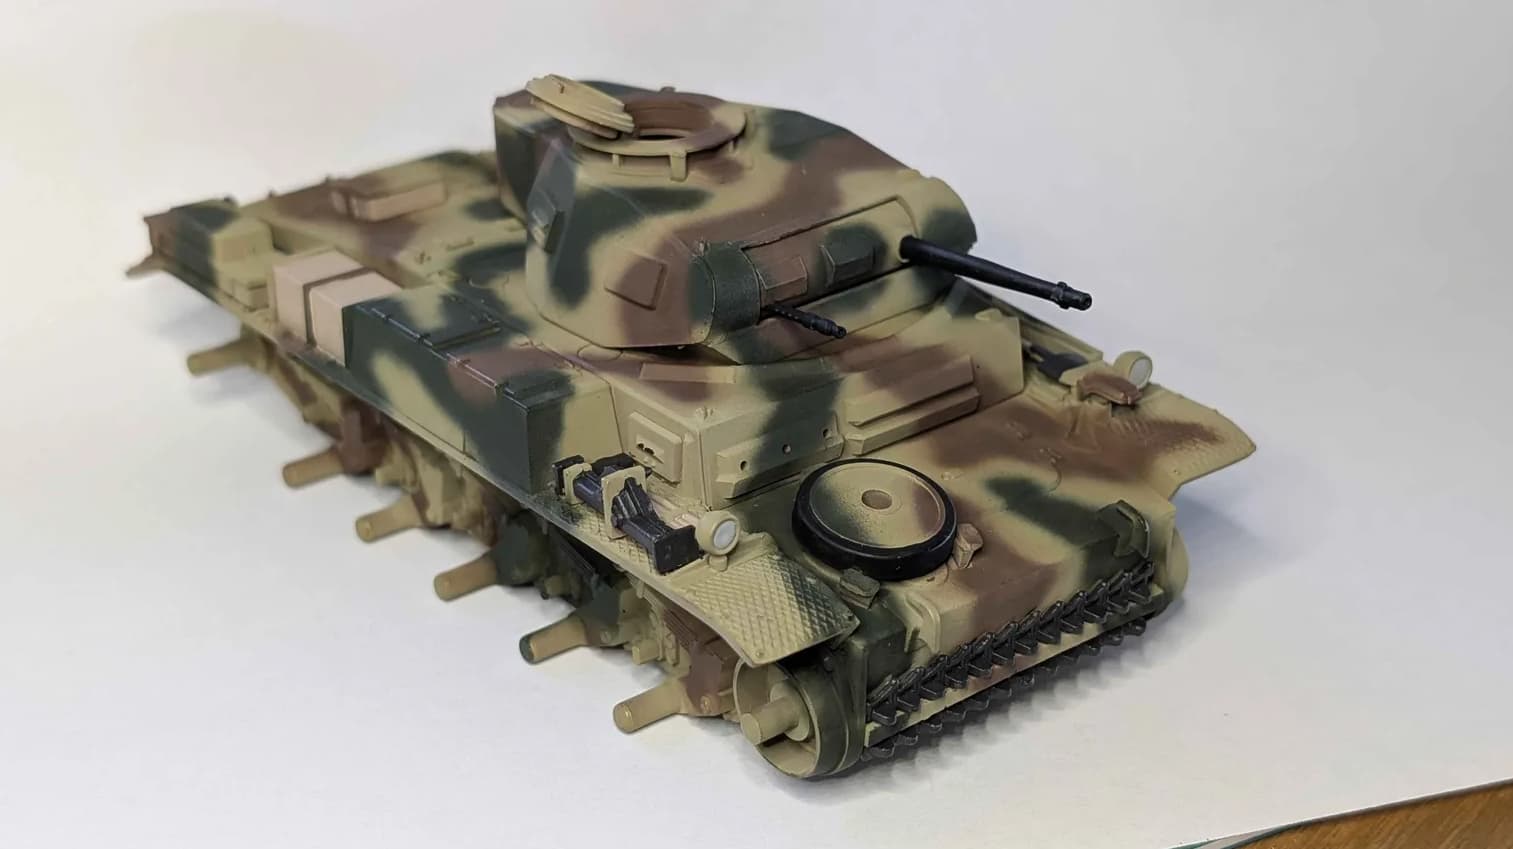
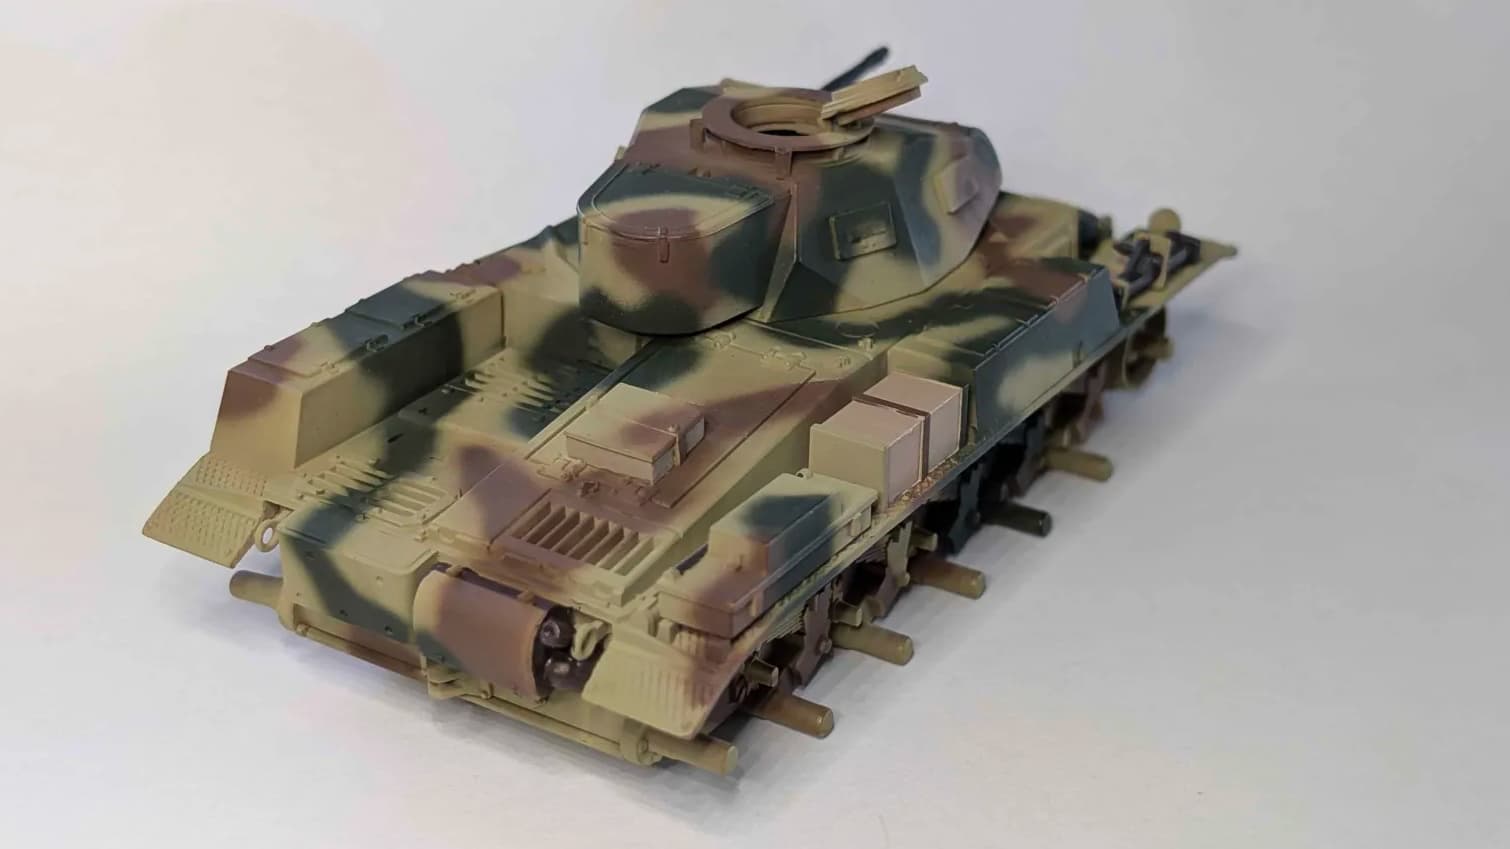
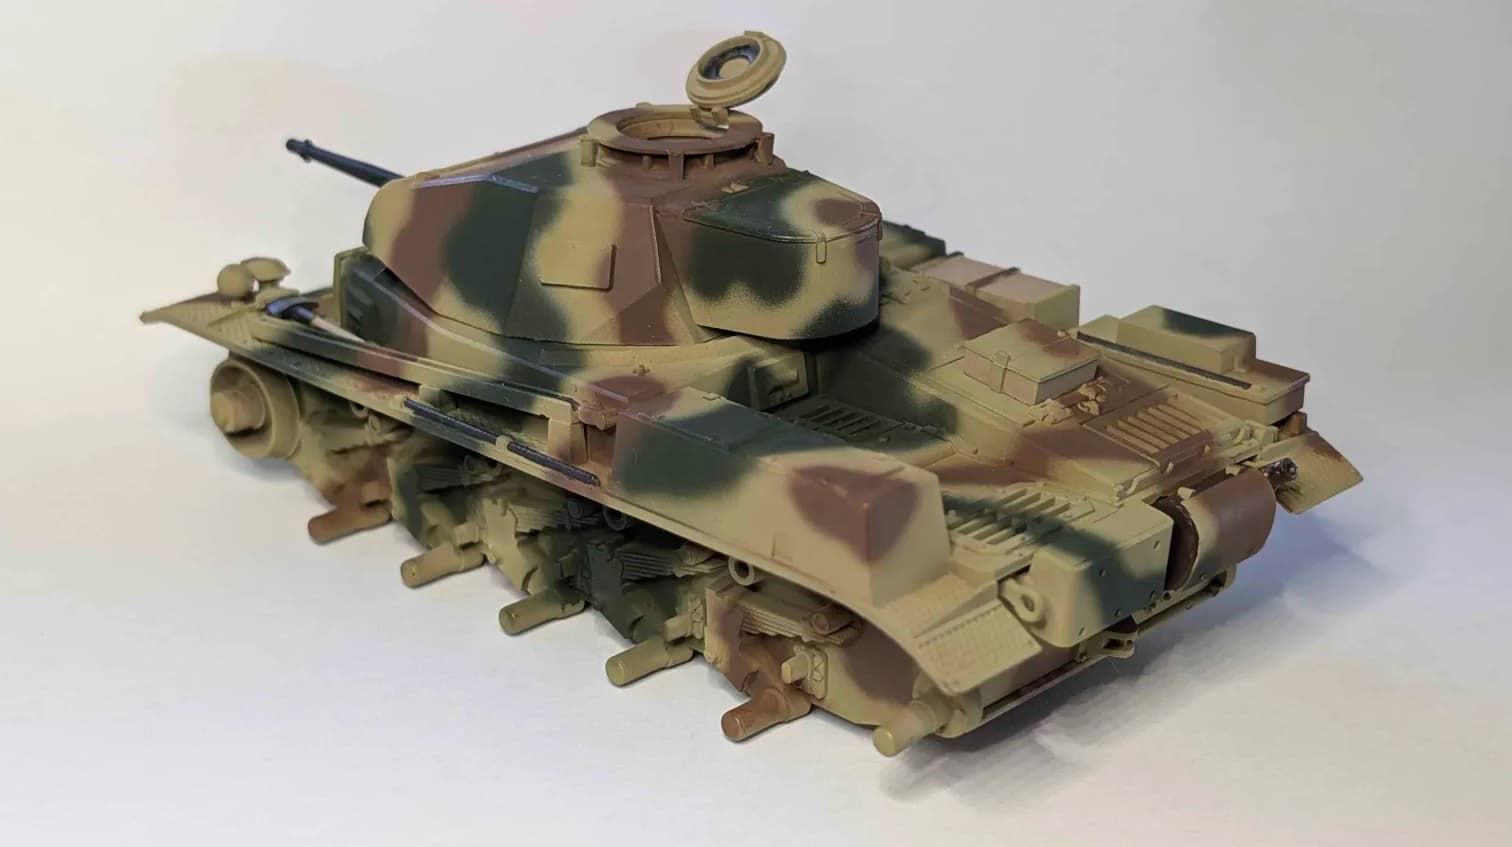
A bit of a rundown on the colours used, applied by brush painting:
- Tamiya XF-78 Wooden Deck Tan
- Shovel Handle
- Jack Handle
- Sledgehammer Handle
- Jacking Block
- Right-Side Crate
- Tamiya XF-80 Royal Light Grey
- Headlights
- Tamiya XF-84 Dark Iron
- Shovel Head
- Jack Body
- Spare Track
- Sledgehammer Head
- Antenna
- Other unidentified rods
- Tamiya XF-85 Rubber Black
- 2cm KwK38
- Coaxial MG-34
- Spare Wheel
Some additional attention was paid to the muffler, which was given a coat of a 1:1:1 mix of Tamiya’s X-34 Metallic Brown, XF-9 Hull Red and XF-84 Dark Iron
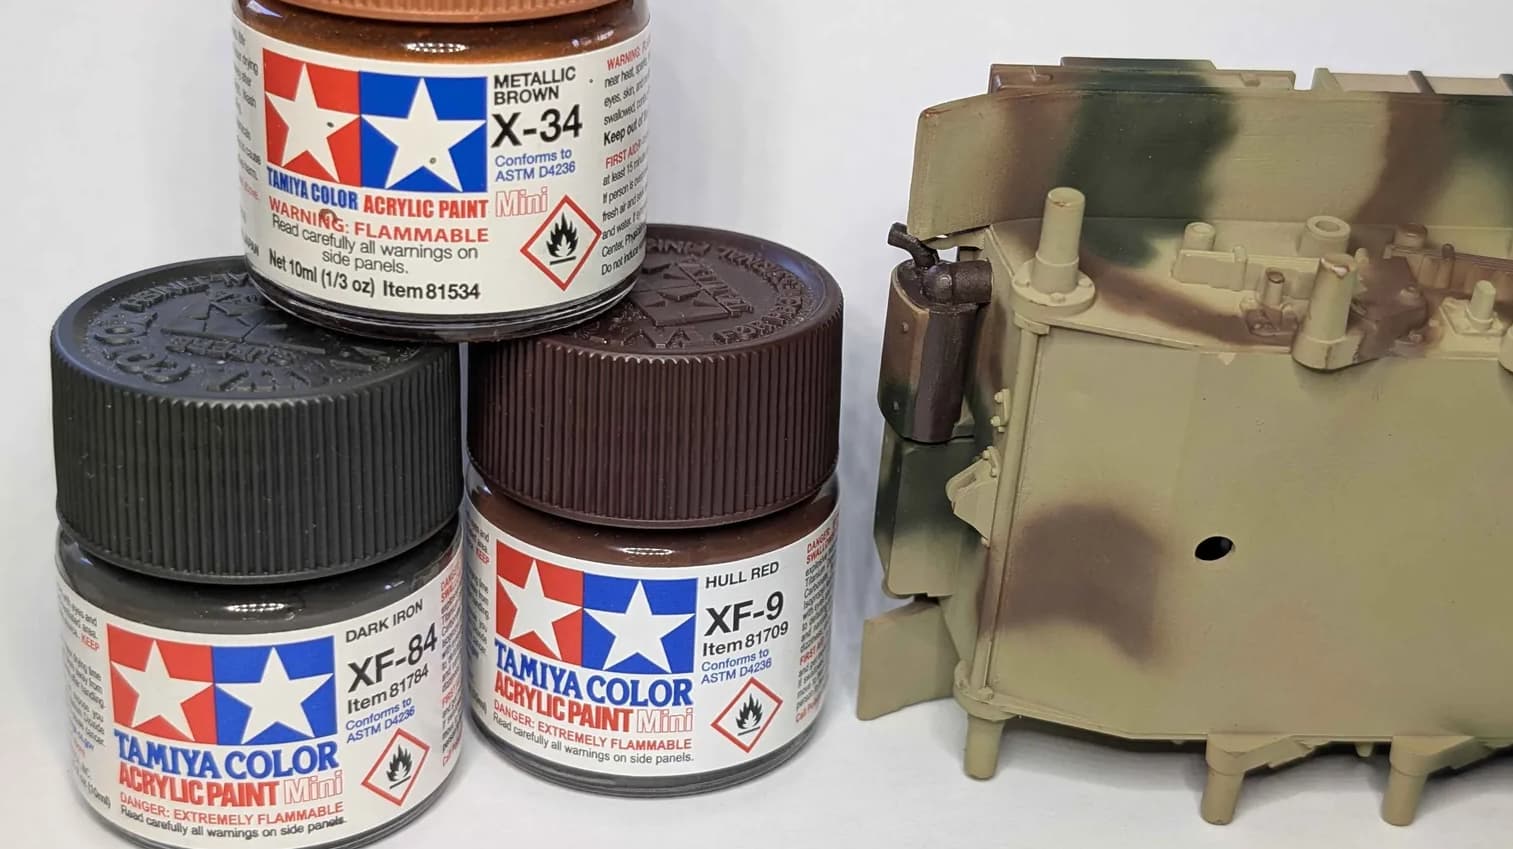
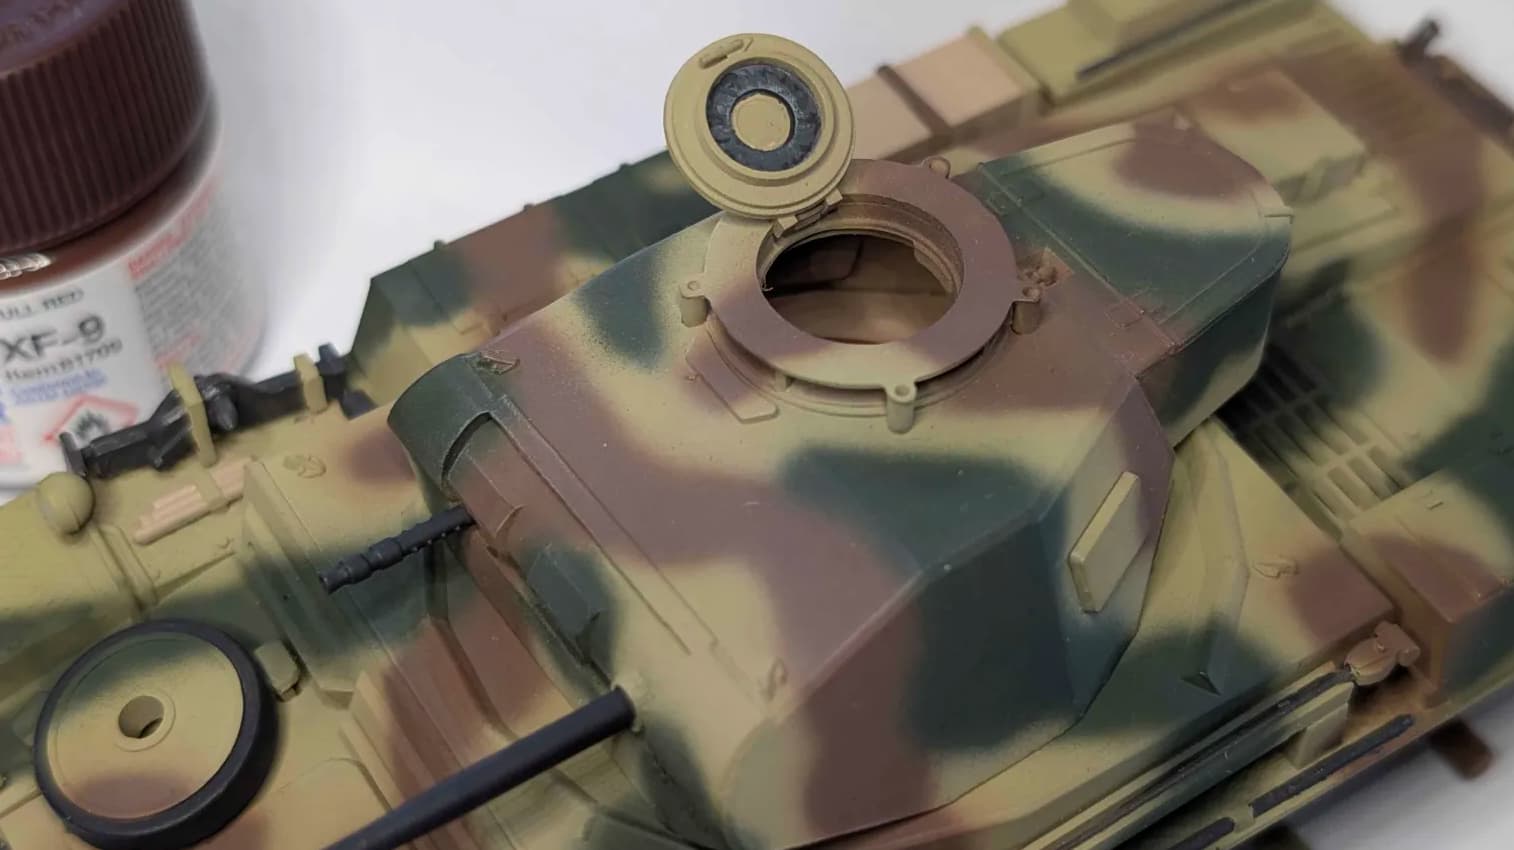
The head cushion on the inside of the commanders hatch was also based in Tamiya XF-85 Rubber Black, highlighting in progressively higher ratios of Tamiya XF-80 Royal Light Grey
The bustle box had always led me to believe this kit was based on the example displayed at Fort Benning, but some of the stowages simply don’t match. However the stowages do match the example at the Tank Museum Bovington.
Fort Benning’s example locates the jack over the right rear toolbox. Note the absence of the retaining bracket for the jacking block and the jerry can rack where Tamiya had moulded a large crate. I may fix this on my next go-around with this Paint Mule and replace with jerry cans.
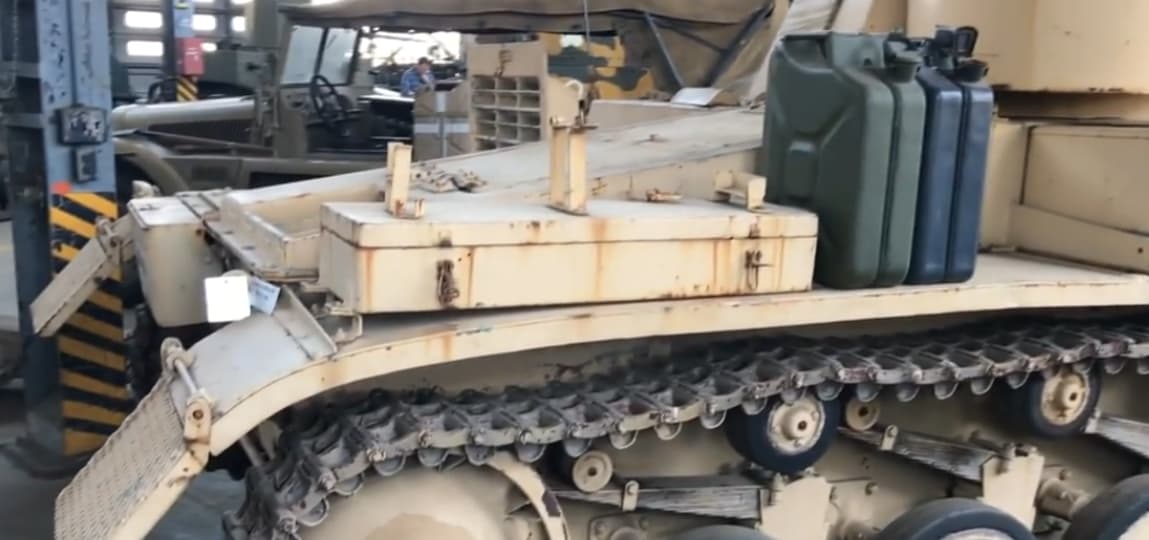
Tamiya’s kit resembles Bovington’s example more closely with respect to these stowages. Note the double-stacked toolboxes and retaining bracket for the jacking block. Tamiya had goofed a bit with their interpretation of the jacking block though, inferring either a retaining lid or large baseplate. This feature has a future date with a sanding stick…
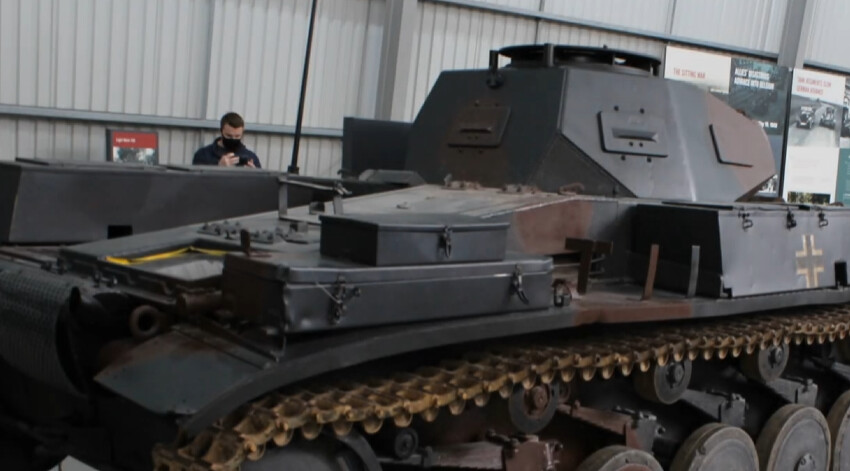
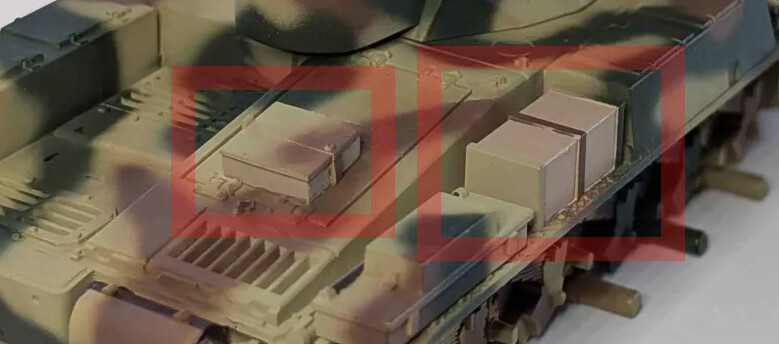
Note the position of the jack brackets on Bovintgon’s Panzer II Ausf F aligns more closely with Tamiya’s representation…
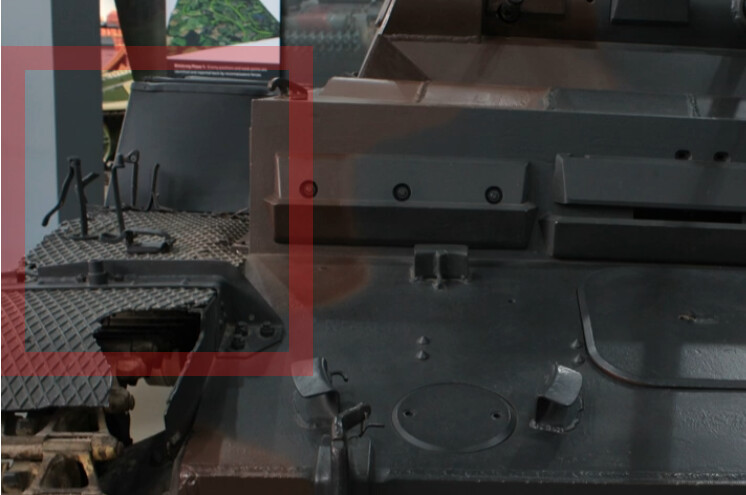
…as well as the large rear left stowage box, absent from the Fort Benning example possibly considered surplus to requirements by the crew given the bustle box…
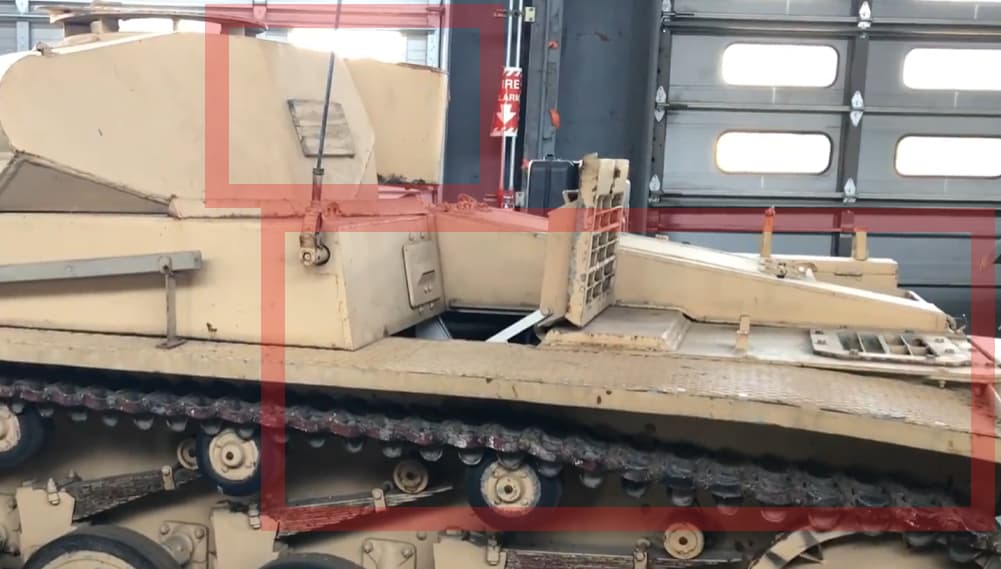
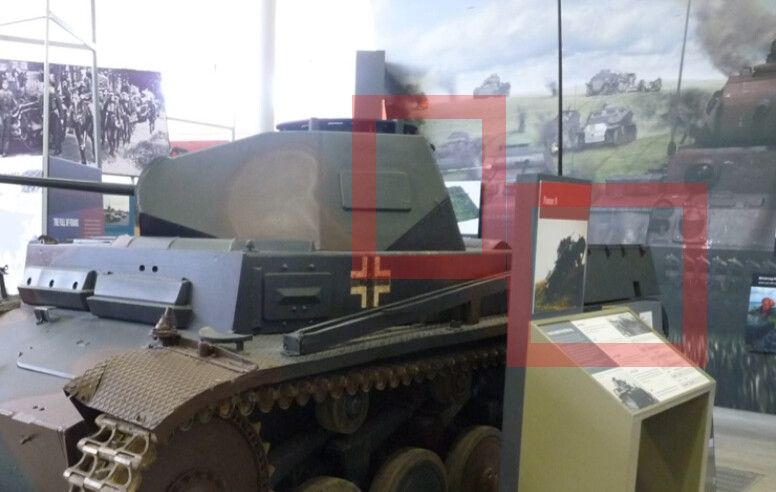
Image credits to
- Champion Scale Modelling for their coverage of the Bovington Panzer II Ausf F
- Sofilein for their coverage of the Fort Benning Panzer II Ausf F
Next steps, I’m going to try a technique I found on another forum to develop a more convincing wood grain on the jacking block, shovel handles and crate before masking off and spraying a clear dividing line between the two weathering / finishing techniques that I’m considering for my Panther Ausf G
4 Likes
Painting - Wooden it be nice… (Oil Paints to enhance Wooden Details)
Small update tonight folks, I wanted to try a technique to bring a bit more life to the wooden components, specifically the jacking block, tool handles and our mystery box that lives where the jerry cans should go…
In our last episode we had basecoated these elements in a lighter wood colour, specifically Tamiya XF-78 Wooden Deck Tan. This time around we applied a burnt umber oil paint thinned with low-odour turps over those wooden elements. With a straight and unidirectional brush motion I found that a wood-grain sort of look started to appear as the oil was pushed either side of the brush as it passed along. This was more difficult to achieve with the tool handles, but it was still able to create a nicer tonal variation than the flat paintjob.
We attempted to enhance this effect on the mystery crate, using a toothpick to “carve” lighter grains in the paint and then blotted with a Q-Tip to soften the finish.
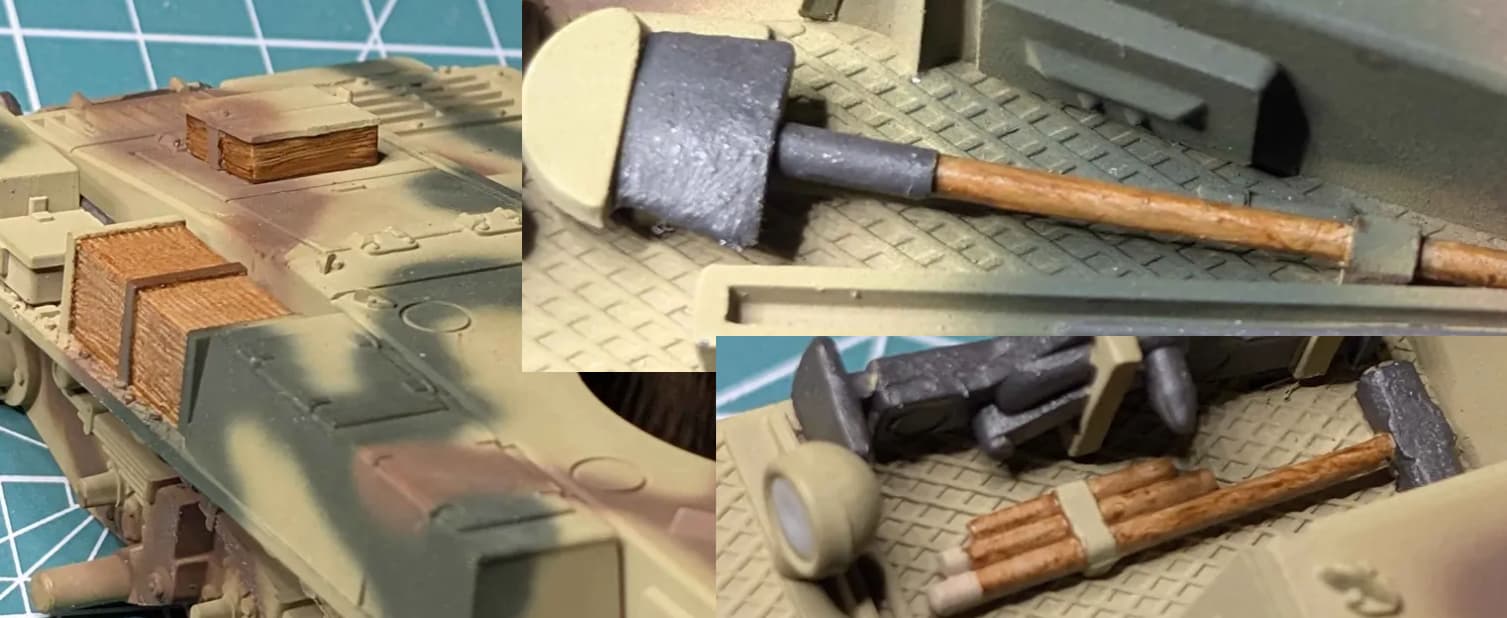
This weekend I’m hoping to start turning this Panzer Paint Mule into Dr. Jekyll and Mr. Hyde, although which is which shall remain to be seen…
3 Likes
Painting - A Line is Drawn… and a timely Oil Paint rookie error…
With two very differnet weathering and finishing schemes under consideration, we didn’t want to commit to two paint mules but also didn’t want to paint the two schemes sequentially. So with two schemes on the same model we wanted to ensure a proper delineation between schemes, masking off a 3-4mm wide line from bow to stern and spraying in Tamiya XF-1 Flat Black.
Of all places, this was a suggestion brought up by ChatGPT when we were developing a suitable camouflague pattern in an earlier step.
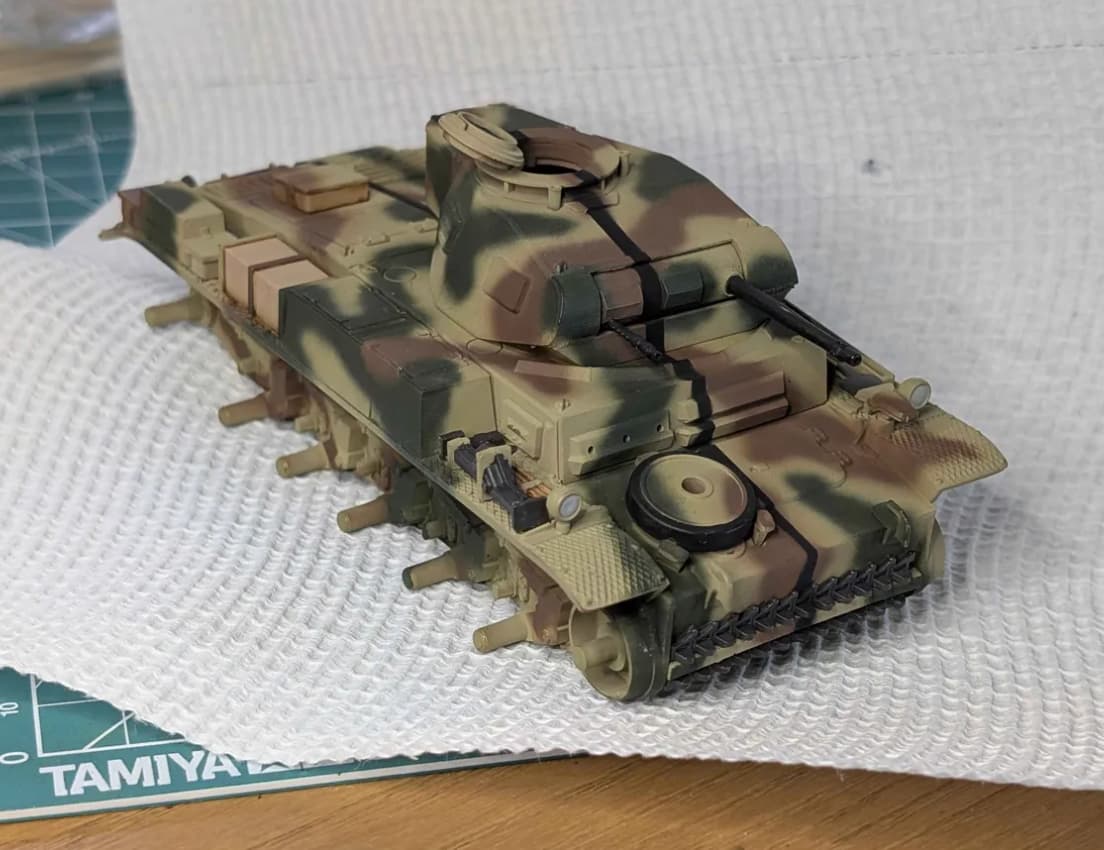
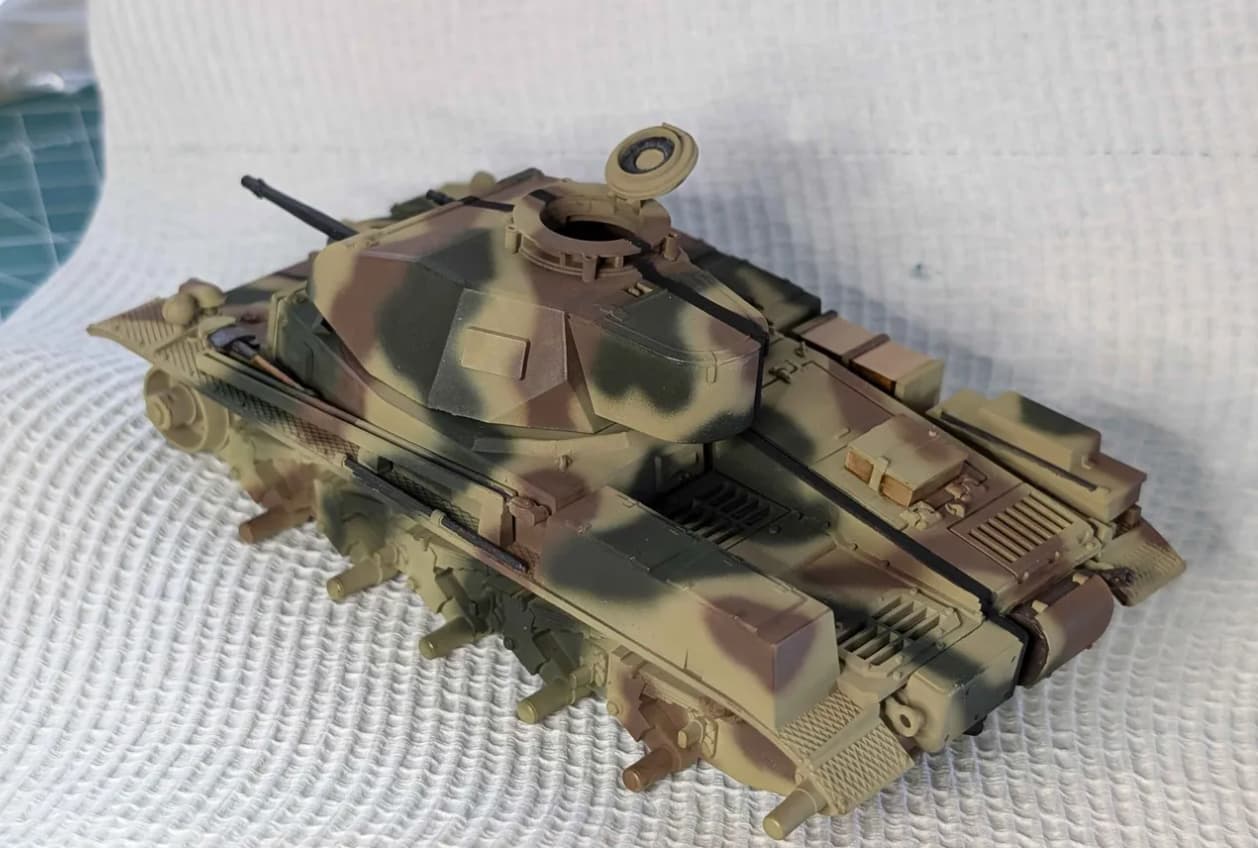
With its rather assymetrical construction, Panzer II was not the easiest tank on which to attempt a longitudinal bisection for the purposes of Paint Mulery, with one of our schemes under consideration looking like it’ll get the lions share of the offset turret.
Unfortunately the process of masking and unmasking disturbed also some of the oil paints that we’d applied last night. Bit of a rookie error on my part, as I see they probably need several days to cure after application. This was good to know before properly getting started on the weathering, as the two techniques under consideration use differential steps of oil based, acrylic and powder products. It also means I’ll need to manage expectations that bench time may require one or two side projects particularly while the oils are doing their thing…
2 Likes
Weathering - Dark Iron Chipping (Workbench Hobbies)
It’s been a hot minute since I worked on the Tamiya 1:35 Panzer II Ausf F “Paint Mule” but we finally started our first phase of the weathering experiment, properly entering uncharted territory with this build!
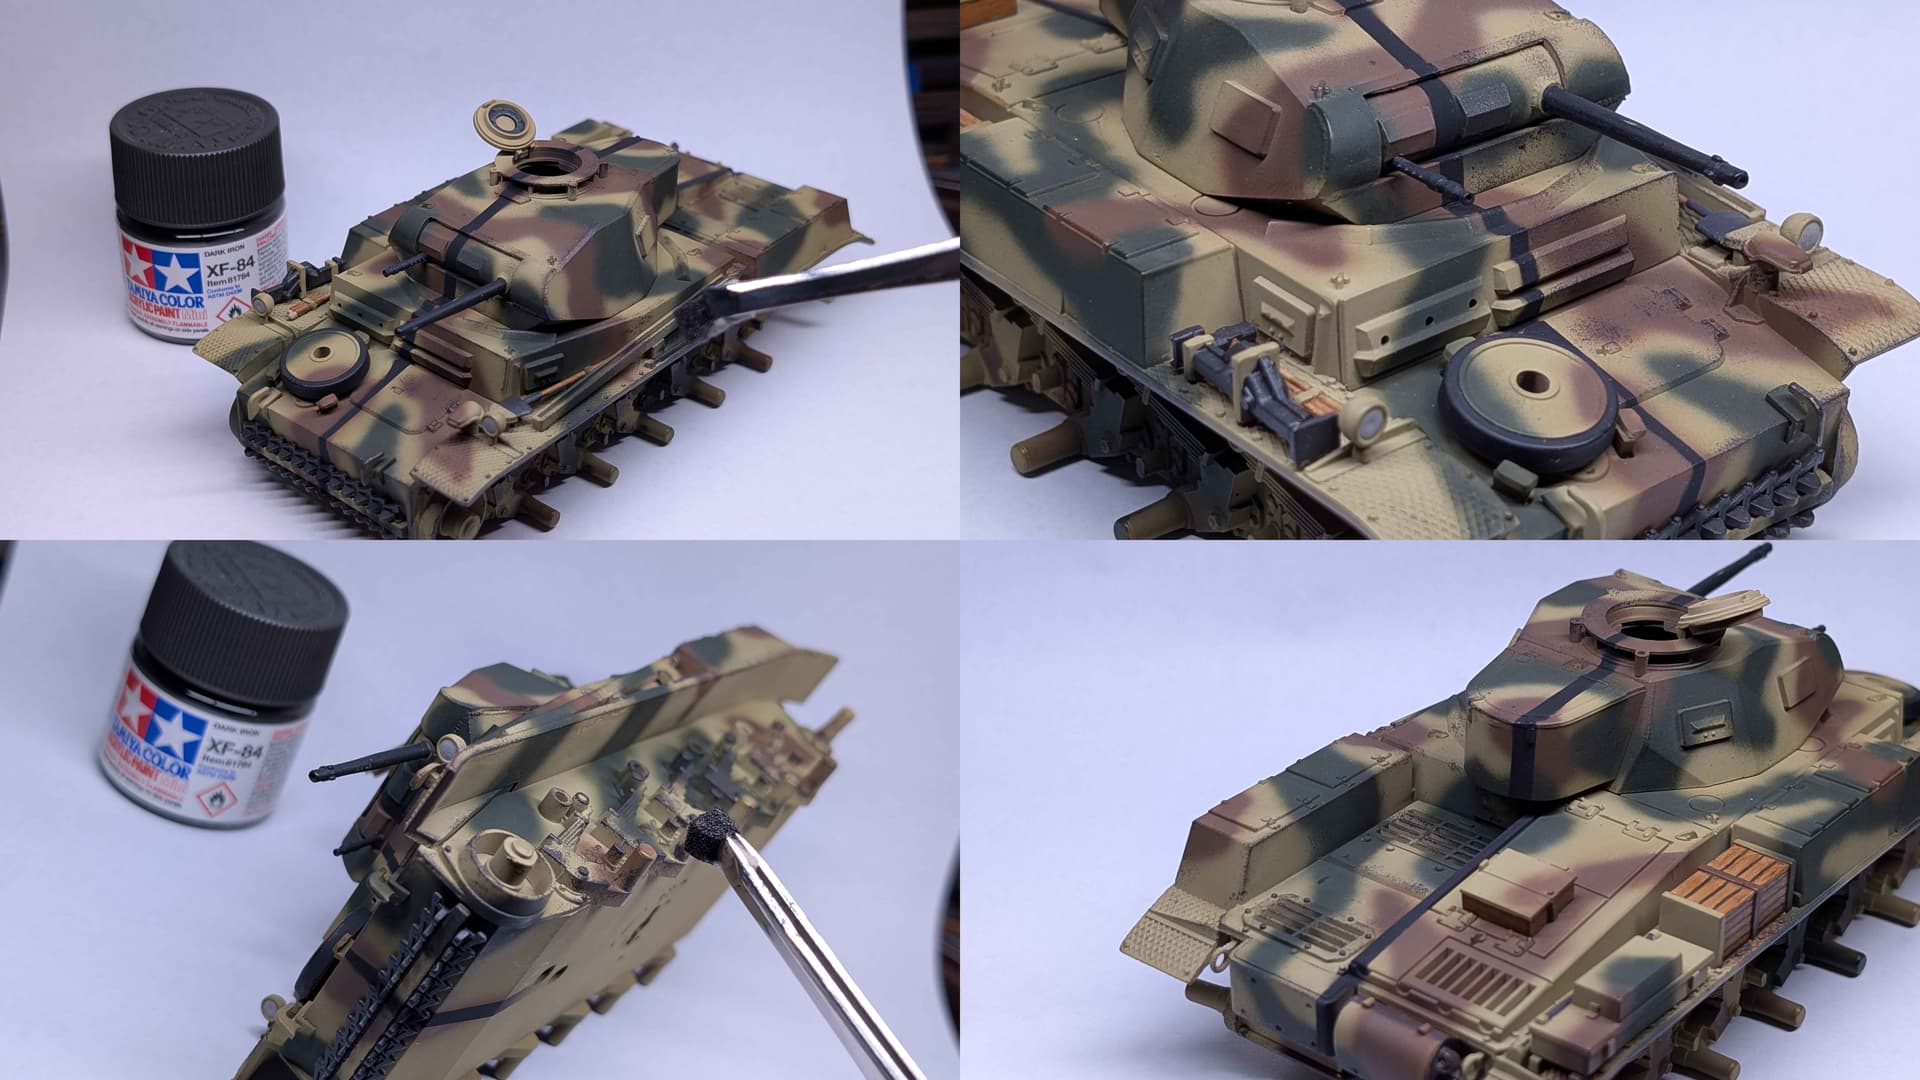
At this stage of the build, Workbench Hobbies adds some subtle chipping, doing so with a sponge application of Tamiya XF-84 Dark Iron. Like their tutorial goes, we’ve tried to focus on leading edges, grab handles and where more metal-on-metal contact might be expected. There’s some poetic license being used here, as this is more an exercise in adding volume rather than authentically replicating chipping
In this case we’ve used our trusty self-closing tweezers and the backing side of a block of sanding foam, which has allowed us to be a bit more controlled in our application. We’ve made no attempt to thin the paint, but the sticky Tamiya paint seems to behave well at a straight-from-the-jar consistentcy. I’m quite liking this effect, which has been quite easy to achieve…
Oh, and we fixed up that crate on the right side that I goofed with earlier… This time around we’d added a few straight-ish black lines to provide an illusion of planking before reapplying the burnt umber oil
2 Likes
This made me laugh because I just did almost exactly the same thing a couple of days ago.
I needed something to experiment on before I risked a new masking technique on a nearly finished F-86, so I pulled an old A-4 out of my Bucket of Doom, slapped it together in about an hour and turned it into a paint mule.

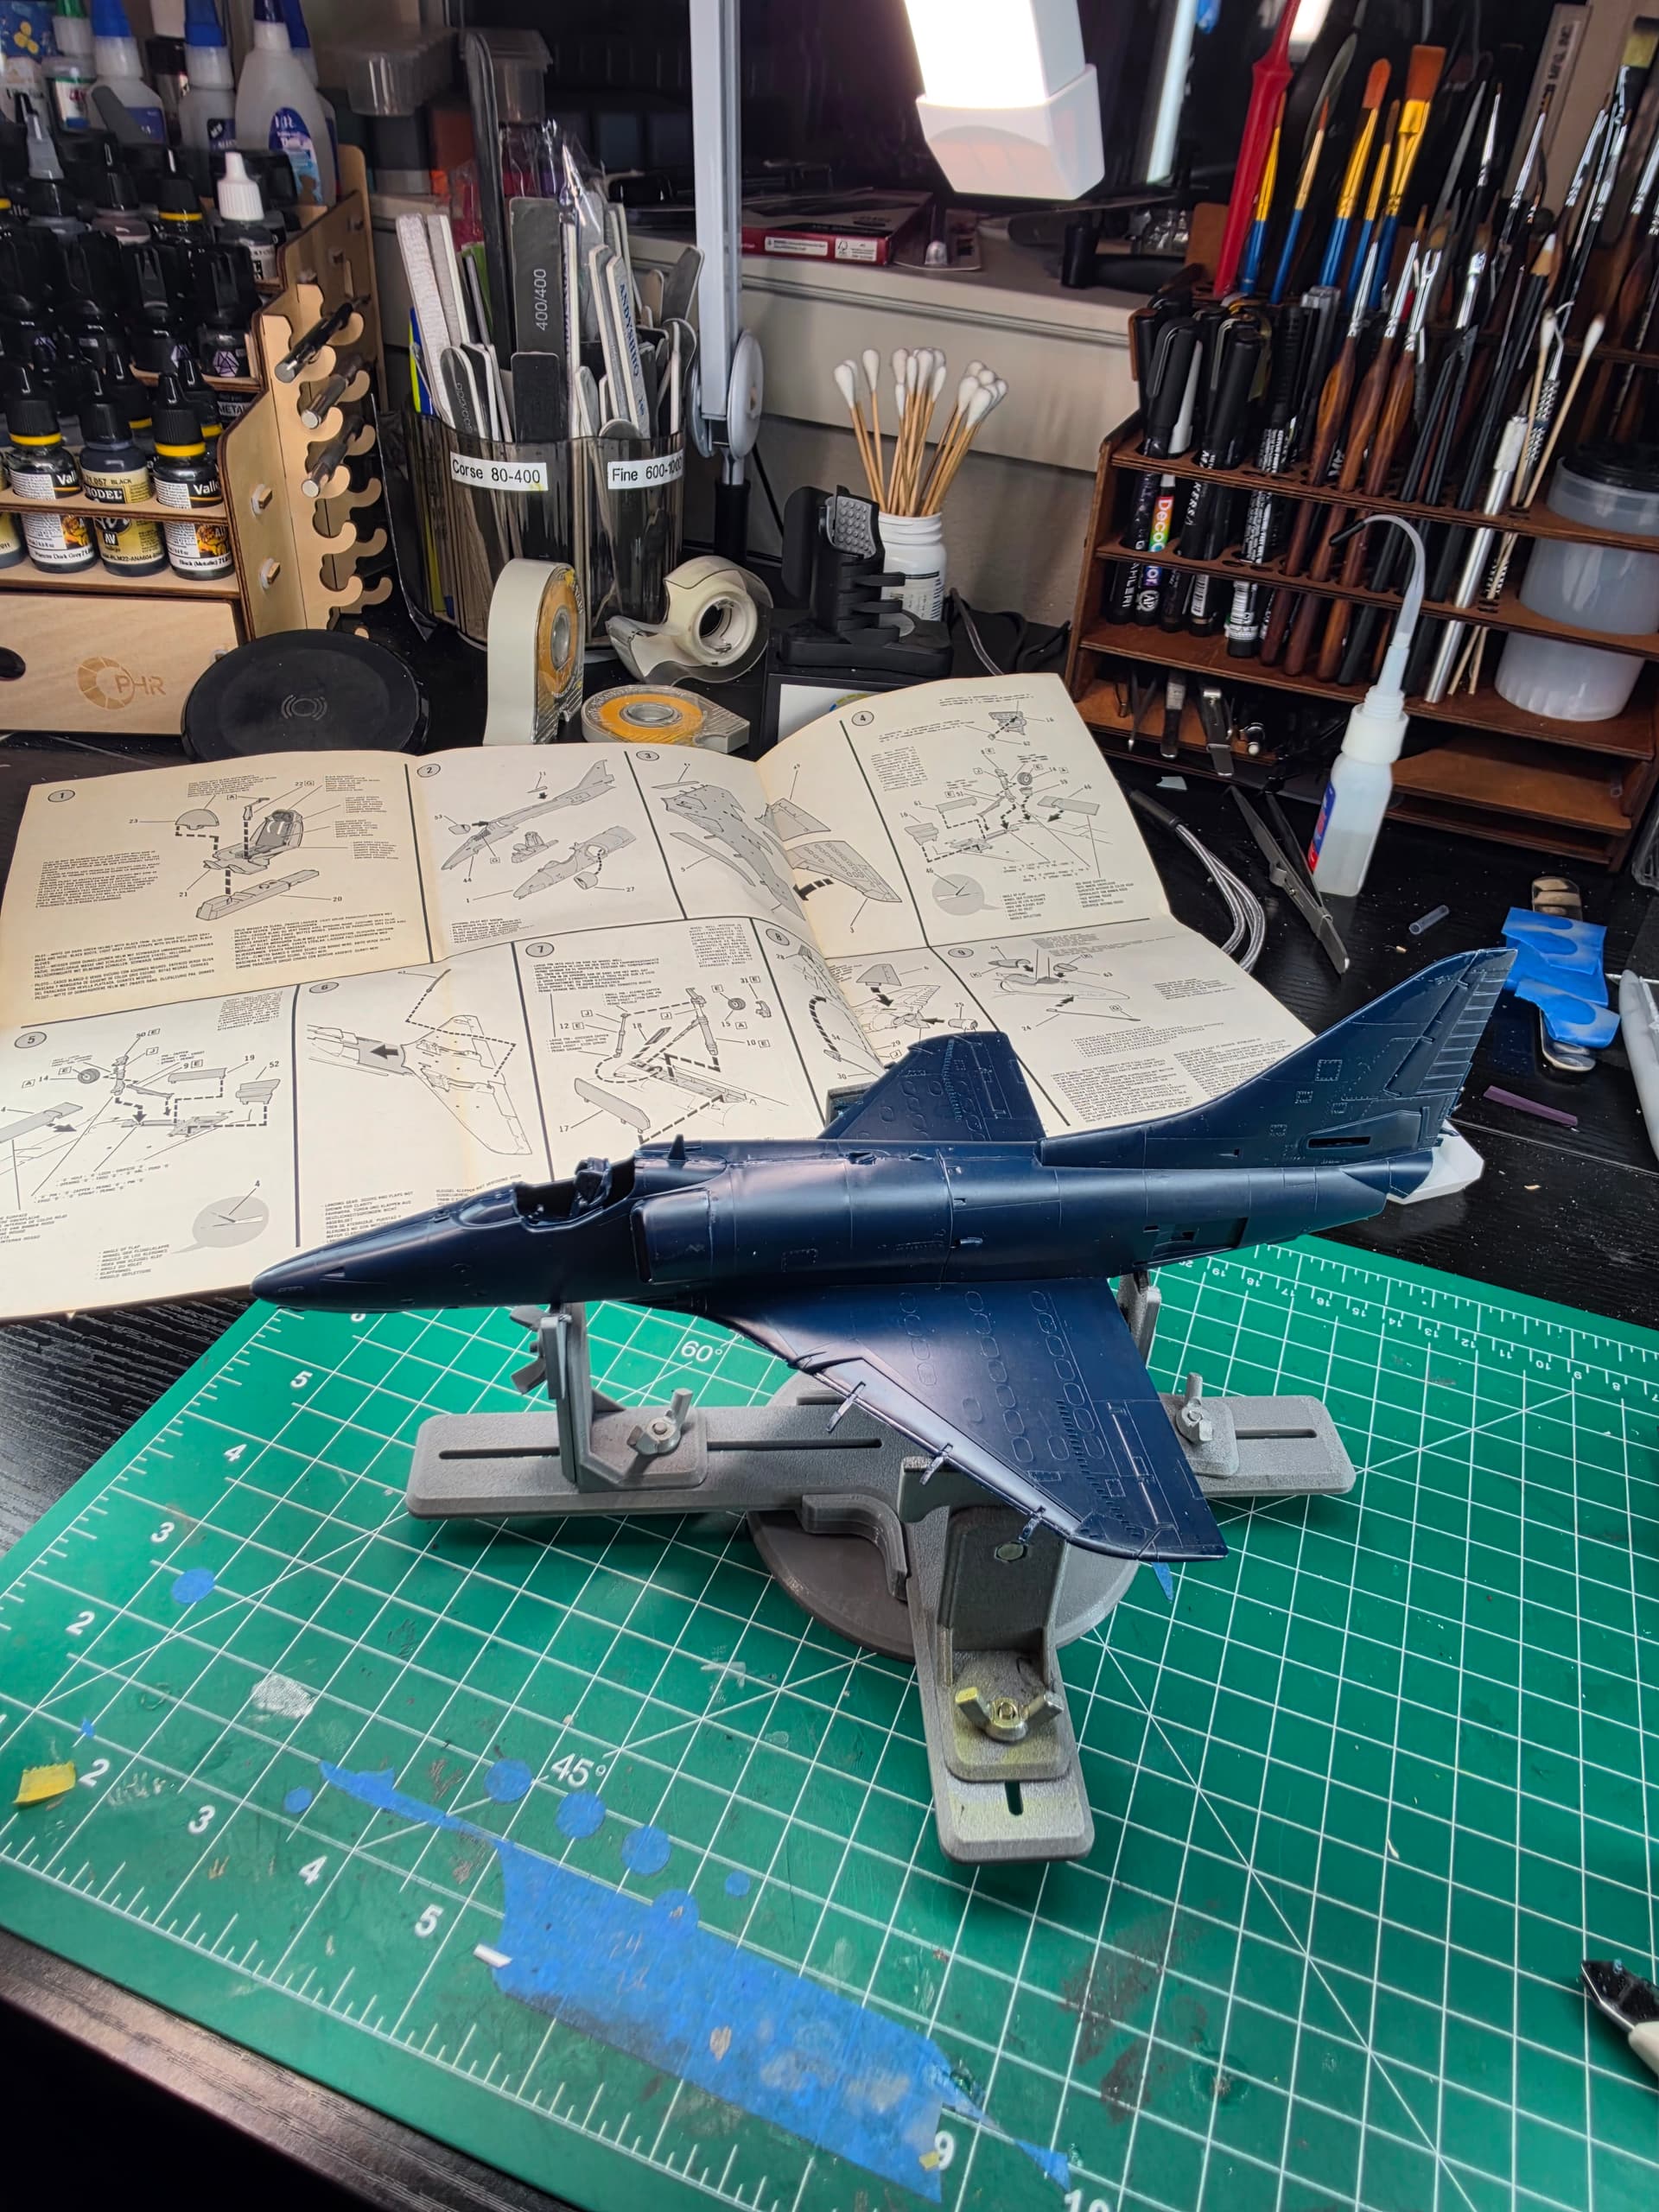
Now I’m looking at what you’re doing and realizing I may have found a whole new career for that poor A-4. 
I really like the idea of having a model around where you can try things, screw them up, strip them off and try again without worrying about ruining anything important. I’ll definitely be following along with your experiments.
3 Likes
I’ve come to the conclusion that every modeler needs a kit that must suffer these indignities, as utterly disrespectful to the kit it might feel. We need only find the strength to do it 
In hingsight though, I wish I’d just ponied up for the texture pads (see my opening post), as I’m finding all sorts of things I want to try along the way with parallel projects, but don’t want to ruin this particular kits vibe. Maybe there’s a suitable STL file out there that I can get printed locally so I don’t have to get dorked by international shipping…
With a couple of distinct schemes under consideration, there’s a benefit to having both on the one model in a “Harvey Twoface” style and this will become readily apparent with my next steps.
1 Like
I discovered that apparently building a test mule requires a different kind of discipline than actually building a model.
When I opened up this old A-4 to make mine, my instincts immediately kicked in and I wanted to actually build the thing. Clean this up, fix that seam, make sure everything fits right…and I finally realized if I kept doing that, I was going to spend way too much time building a model that was supposed to be nothing more than a tool.
So I forced myself to stop caring. I pulled out the Revell Contacta Professional instead of wasting my more expensive Tamiya Extra Thin on it, glued the major pieces together, and left the ugly seams alone. I just needed an airplane-shaped object that I could experiment on.
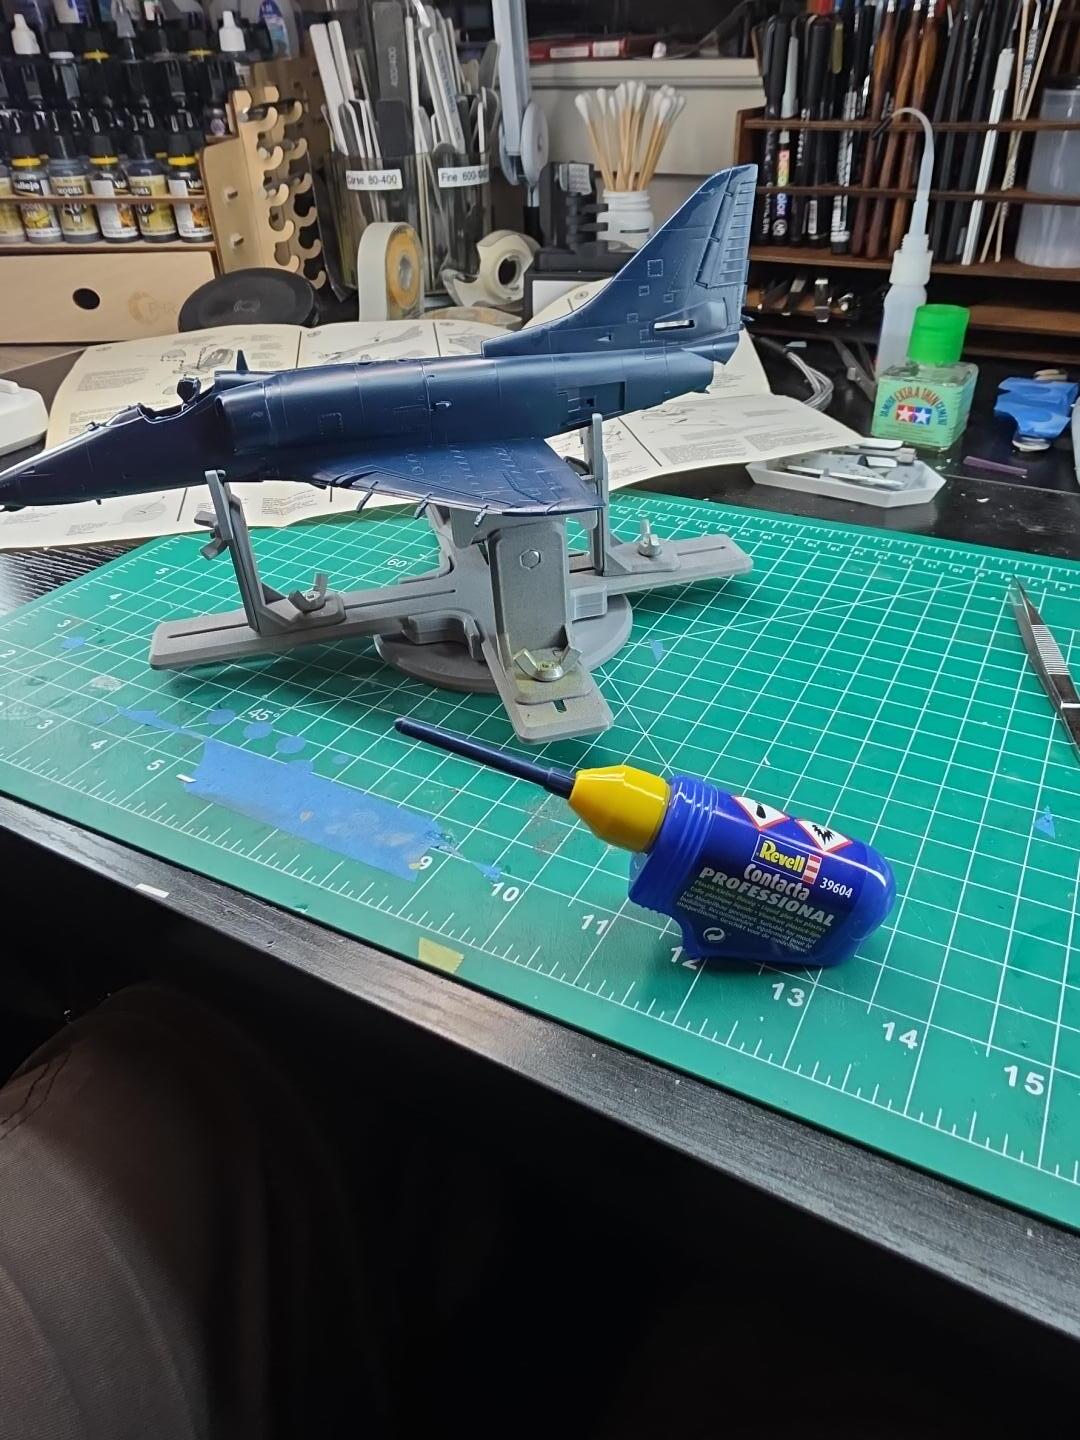
And I’m glad I did. Looking at some of these seams now, I’m reminded why I didn’t want to build this kit again in the first place. I’ve built another boxing of it before, and getting this thing right would have been a project all by itself.
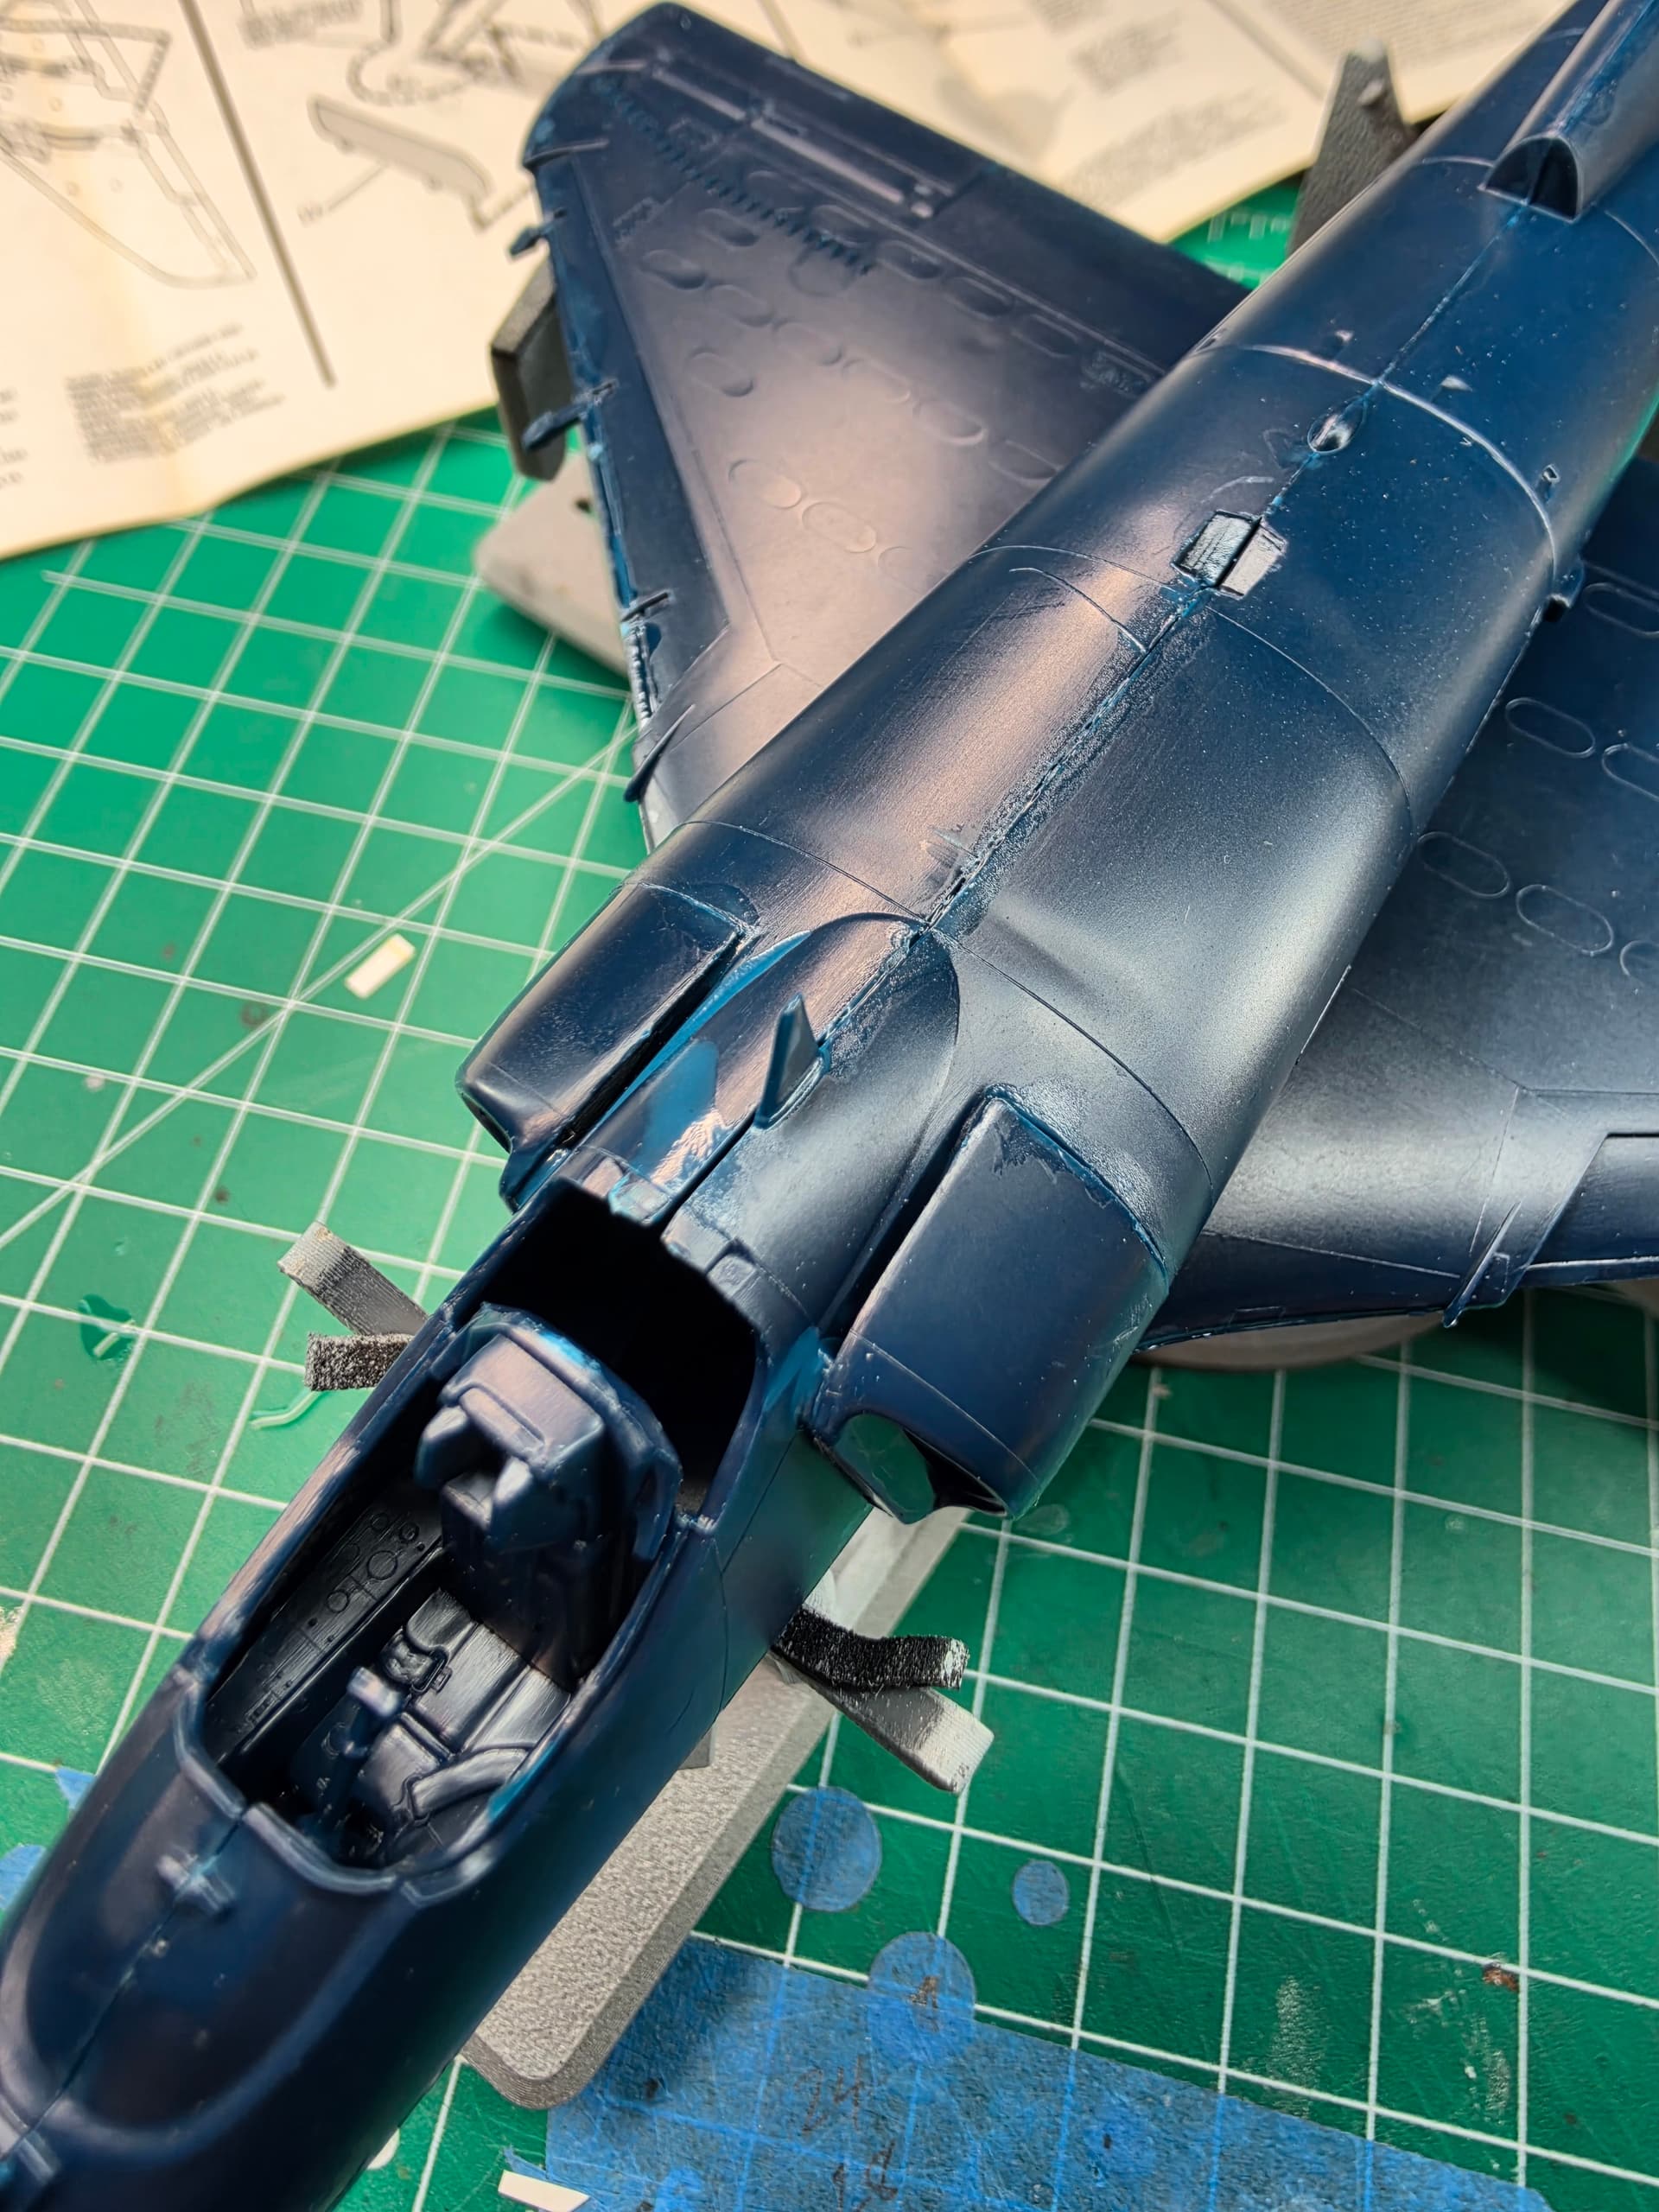
It’s surprisingly hard to deliberately build something badly when your instincts are telling you to fix everything!
1 Like
@RBaer on the other hand has no such discipline He’s in the process of building AND adding a tremendous amount of extra detail to not one, but TWO M1 Abrams in order to test the quality of some aftermarket track… Don’t get me wrong, his work is amazing, but we have very different definitions of “Test Mule” 
2 Likes
Yes we do! I got the A-4 primed tonight and it’s full of cracks and seems and disastrous looks and I really had to force myself not to care.
1 Like
@pr154 this Panzer is turning into one of the prettiest mules I’ve ever seen… seriously, that camo looks great. The chipping is really nice too – I like the note from Workbench Hobbies about how the Tamiya acrylics dry quick and get “sticky,” making for super fine sponge effects. I’ve found that acrylics that are meant for brush painting really want to flow, making sponge chipping quite risky.
1 Like
Thankyou kindly mate! Unfortunately I was still very much on a learning curve when I painted the Panther Ausf G that we’re muling for, so found myself painting the mule the way I should’ve painted the Panther I’m following one approach by Workbench and another by RelentlessStorm. Each achieve very different finishes, so it was important for the substrate to align to make an informed decision. I like Workbench and his encouragement to no overdo things, but there’s something about his models where finish up with a bit of a chalky look to them. Relentless makes some fairly advanced finishes look easy, but many are quite irreversible and I’m not sure how they’d go in the hands of an amateur until I try them out…
2 Likes
This is exactly what I’m beginning to understand about having a mule. I can watch somebody do something on YouTube and think, “Okay, I can do that,” but actually trying it myself is a completely different thing. Especially if it’s something that’s difficult or impossible to undo.
I like what you’re doing here because you’re not really trying to duplicate either approach. You’re figuring out which parts of each work for you. That’s pretty much what I’m hoping to do with my poor abused A-4.
1 Like
If you have any doubts between two schemes, the big black line down the centre is your friend. It’ll help you completely delineate one scheme from another. Aircraft are really good to do this on because they are generally symmetrical. Panzer II on the other hand, was not a good choice of paint mule because of its its asymmetrical construction. In hindsight I should have painted the black line dividing front and back rather than left and right.
2 Likes
Weathering - Colour Filter (RelentlesStorm)
Next steps were to test a couple of colour filters. These are intended to provide a subtle effect that ties the 3-colour camouflage scheme together and knocks out some of the starkness between the colours.
We started off with a Tamiya X-22 Clear Gloss varnish, which was allowed to settle through the week
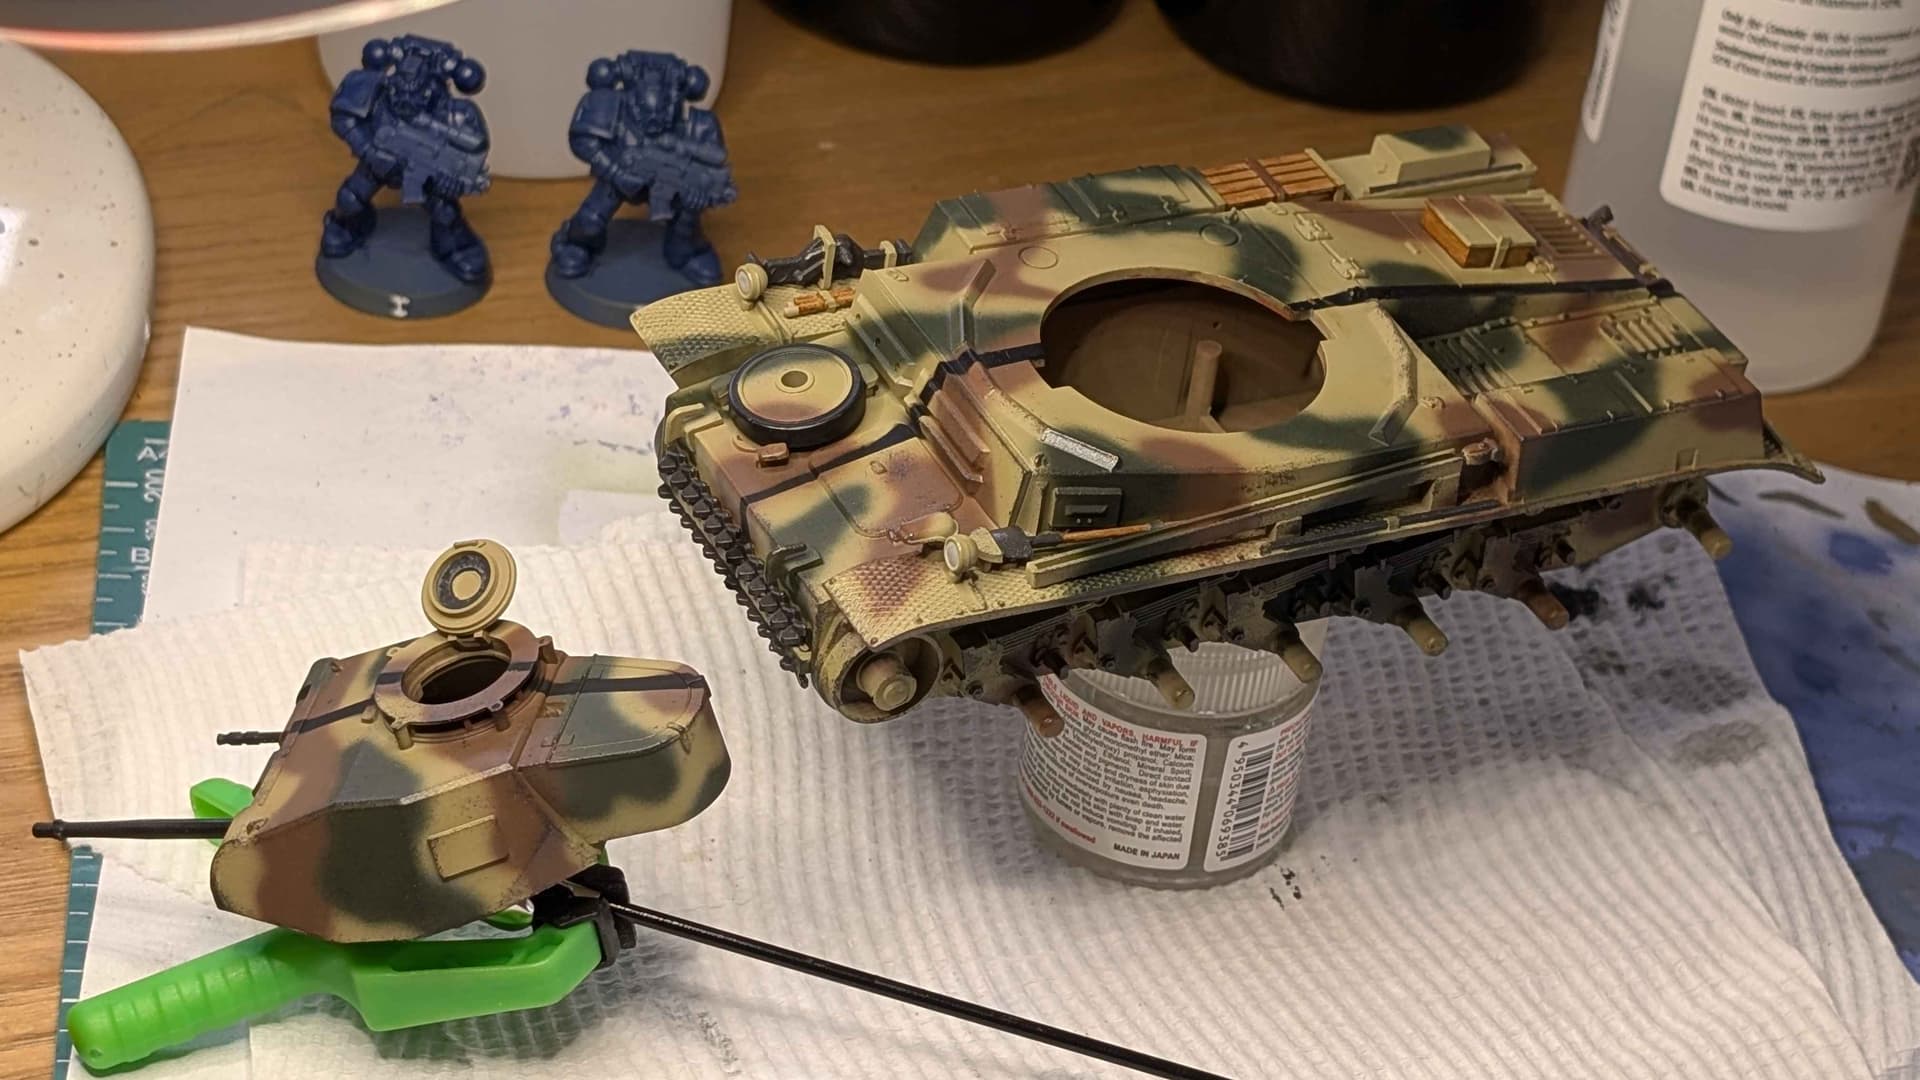
The other build we’re following is by RelentlesStorm, who follows up their gloss varnish with an all-over tan-coloured enamel wash. They’d used a pre-mixed AK product, while we mixed our own using a blend of Abteilung502 Raw Sienna Earth and Light Mud heavily diluted with mineral spirit.
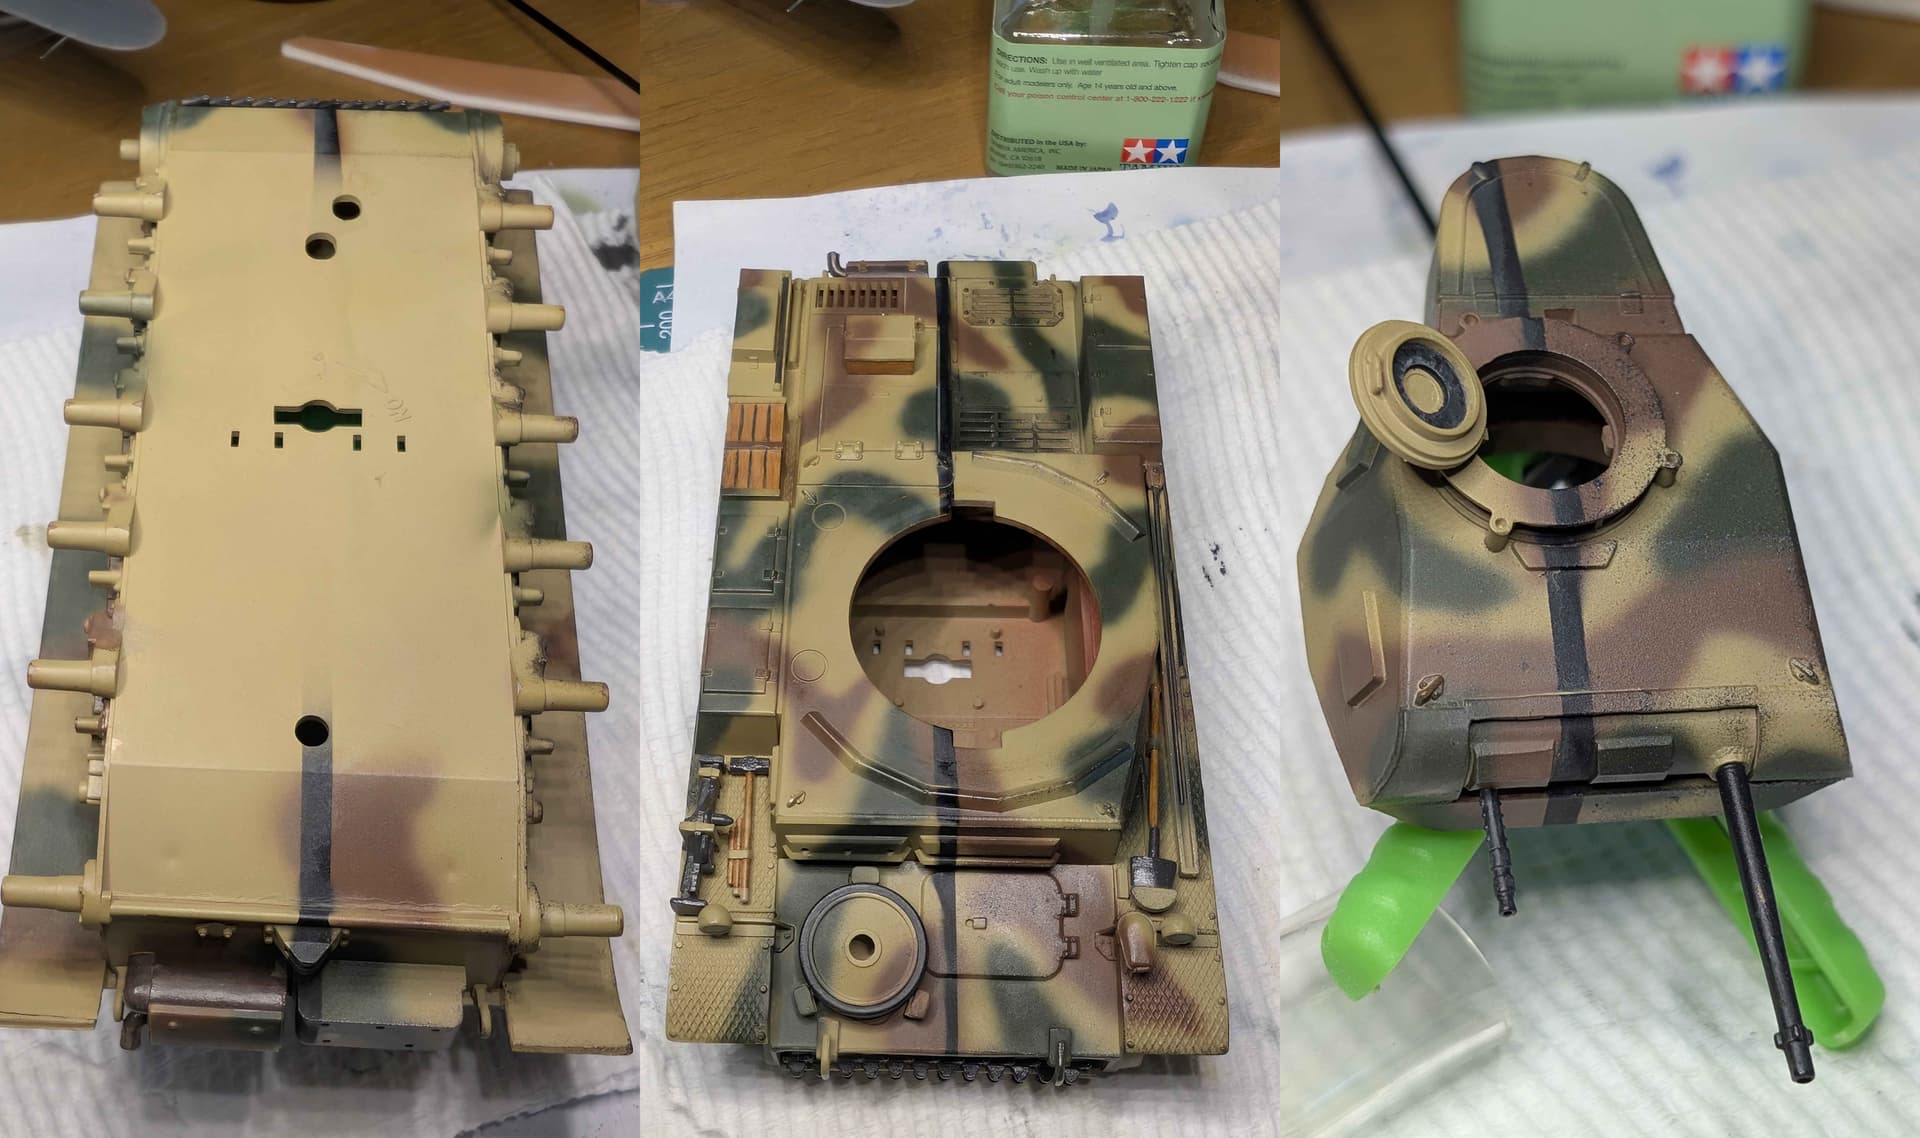
I’m not sure I’m sold on this effect yet, and I may well have gone a bit too dilute with my mineral spirit since the effects seems much more subtle than what RelentlesStorm was getting out of the bottle. That said, it’s a filter not a wash and it may well be doing its job without appearing too distinguishable over the dunkelgelb on our underside. What are your thoughts?
3 Likes