A long build of the BIG Airfix Spitfire Mk.IXc (1/23/2026 update)

Good morning everyone. Thanks for all the comments.

Here’s the latest step on the Spit - AK Real Color Azure Blue…you guessed it, lightened with white for fading - though it’s a bit hard to see in the photo.

This will be it for awhile…we’re hosting a two-day tournament for our youngest son’s basketball team this weekend. The Spitfire has been flat coated in preparation for masking the markings…and I’ll need at least a couple of days of uninterrupted bench time to perform that task. So…back to the hangar for the Spit. Just for awhile this time…not months like last time :grimacing:

Oddly enough, I never realized our living room was decorated in RAF Mediterranean camo! :rofl:

6 Likes

Hello everyone, Happy New Year! Thanks to some decent PTO time away, I was able to make significant progress on the big Spitfire. This is my first time using commercial paint masks, so it was a bit intimidating. I’ve masked and sprayed simple stuff before - Japanese markings for instance - but this is quite different, especially the stencils.

The One Man Army masks I selected for the stencils also included masks for the major national markings. I have them from the KitsWorld marking set for the individual airframe as well, but those are vinyl masks and I’m leery of them - I’ve had issues with that type of mask lifting in the past.

Anyway, I started with the easiest marking - the upper wing roundels. One Man Army recommends using “transfer tape” - basically cheap masking tape - as a “lifter” to get the masks off the sheet and onto the model without damage or distortion. I used a Sharpie to put alignment marks on the transfer tape and the mask to allow for further masking later in the process.

Another suggestion from One Man Army is to place a piece of tape on one corner of the mask to allow it to be free to easily lift after painting is complete.


Once placed on the model, you need to figure out a method of correctly aligning the mask on the other wing. In this case, one edge of the mask was aligned with a wing panel line. I marked the distance from the corner of the mask to the corner of the aileron, and used this to place the mask in the same position on the other wing.


The transfer tape is then used to lift off the inner portions of the mask. You may have to help the inside “rings” to stick to the transfer tape, either by harder burnishing or by lifting the edge of the mask to s tick to the tape.

Hope you enjoy this process - I did! More to come soon…

3 Likes

Greetings all…I have some time for a few more updates. Time to break out the airbrush - let the fun begin!

First step is primer, since the paint I’m using for the markings is MRP and it’s quite thin. Between each color in the process I will be priming using Tamiya XF-19 Sky Grey - the same paint I used to prime the entire model before painting the camo. I used a light gray as I wanted a bit duller color than a white undercoat would provide. Thin paint and low pressure are key – you don’t want to flood the masks with paint. The primer is just “hazed” into place. I used 12-15 psi for all marking painting.

Once the primer is on I waited 15 minutes before applying the first color, MRP-123 Marking Red. This is a nice, dull red color - I wanted to avoid the bright red I see in some decals. Again, an advantage of using masks - color to suite.

I waited another 15 minutes, then applied the mask for the “center dot” of the roundel. To do this, you use the transfer tape method again. Remember that we placed alignment marks on the mask and the transfer tape? Here’s where they come into play. First, I removed the outer ring mask from the transfer tape - the part that will be painted blue next.

Then I replaced the mask in the correct position by using the alignment marks. This was nerve wracking, but not hard. Make sure to thoroughly burnish the center mask in place so when the transfer tape is lifted, the mask stays in place. Make sure you cover all the exposed outer edges of the mask to avoid overspray.


Next, the Sky Grey primer was applied in a patchy, thin coat.

15 minutes later, MRP-124 Marking Blue is airbrushed in a loose, hazy pattern.

Aaaaannnnnddd…remove the masks. Voila! A perfectly registered roundel, in the colors and weathering to my taste.

Very cool - I wasn’t sure how this would go and whether I’d be able to pull this off. Turns out even my old eyes and ham fistedness can do it…it just took a lot of patience and care in alignment. The instructions provided by One Man Army supplemented with YouTube gave me confidence to try.

There will be more updates soon - I tried a different method on the more complicated underwing roundels - three color, those - so stay tuned. Hope you’re enjoying and/or learning along with me! Take care all…

4 Likes

Very cool @Chuckd, the camouflage on the plane looks really good IMO.

Well done. I’ve see the results of masking roundels but never a ‘demo’ like that. Thanks for that.

1 Like

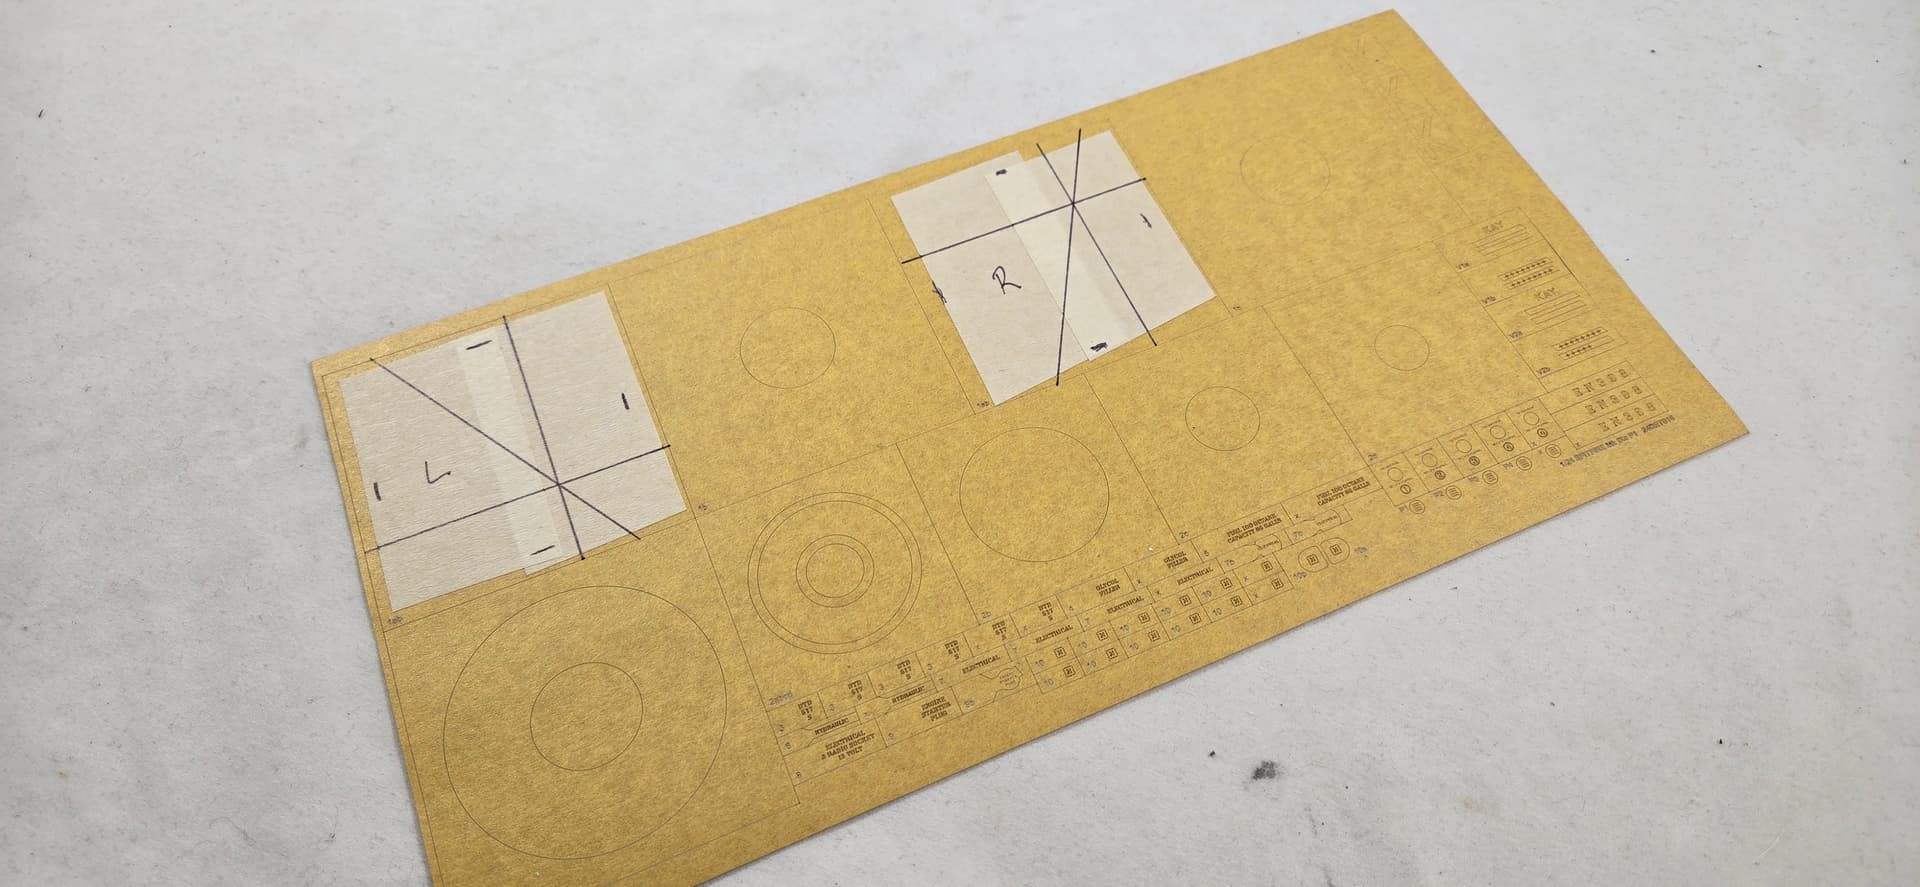
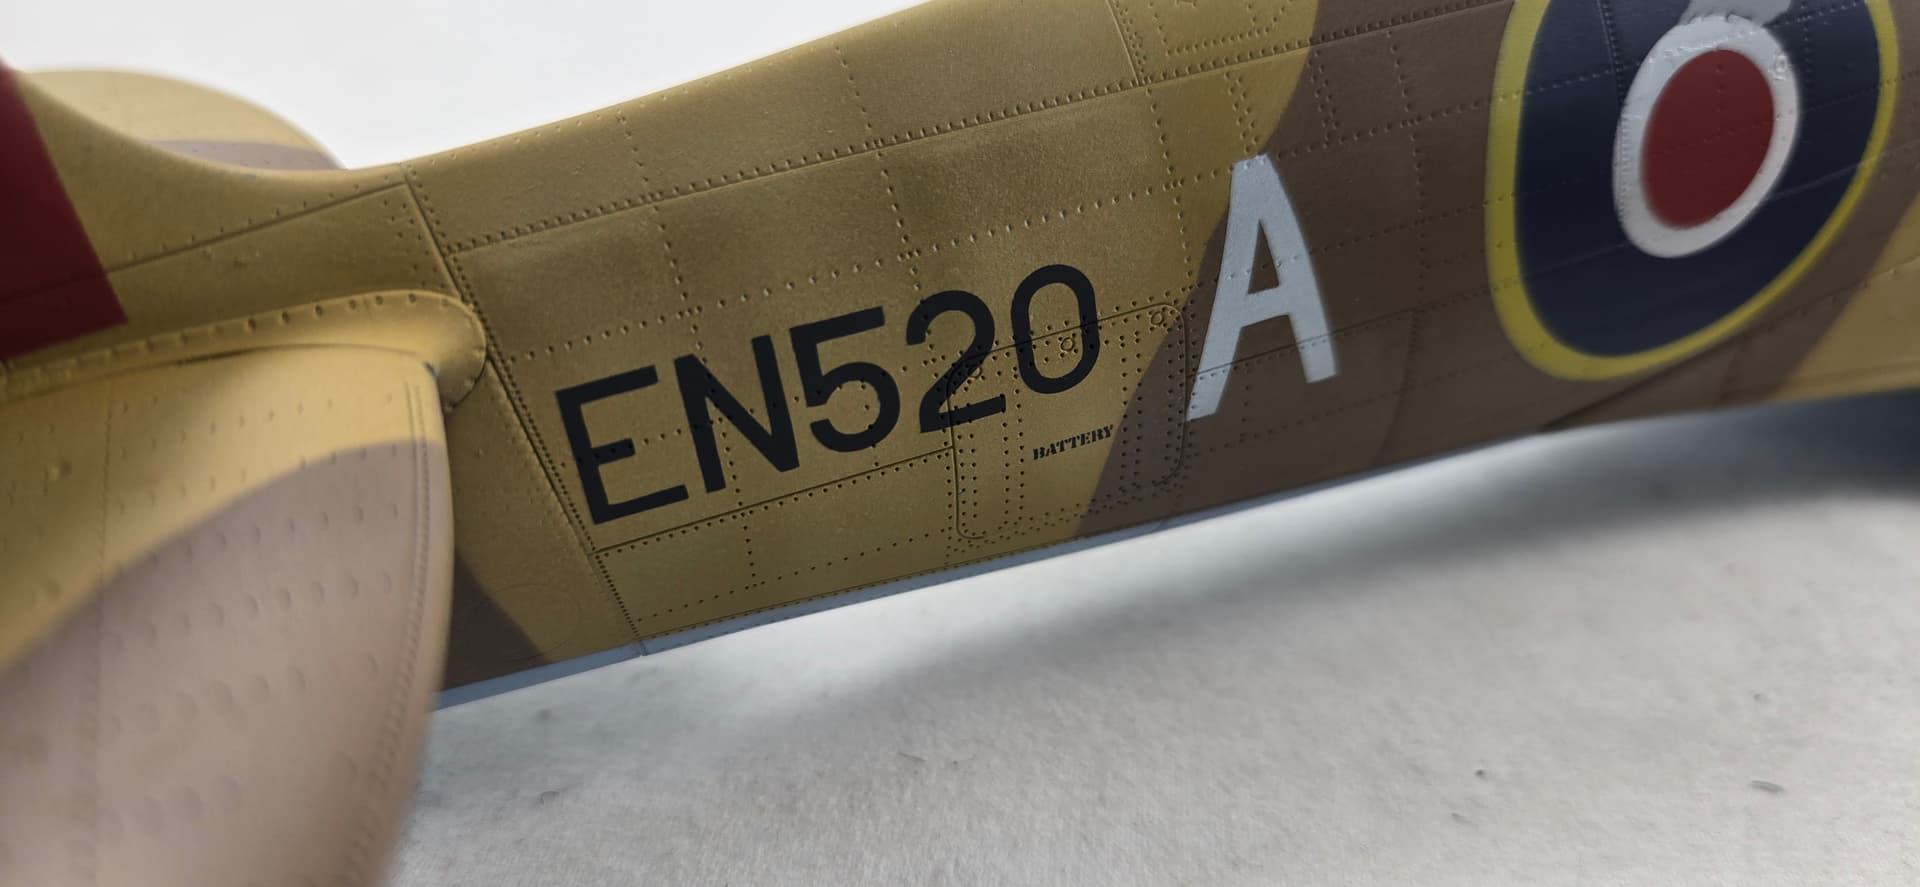
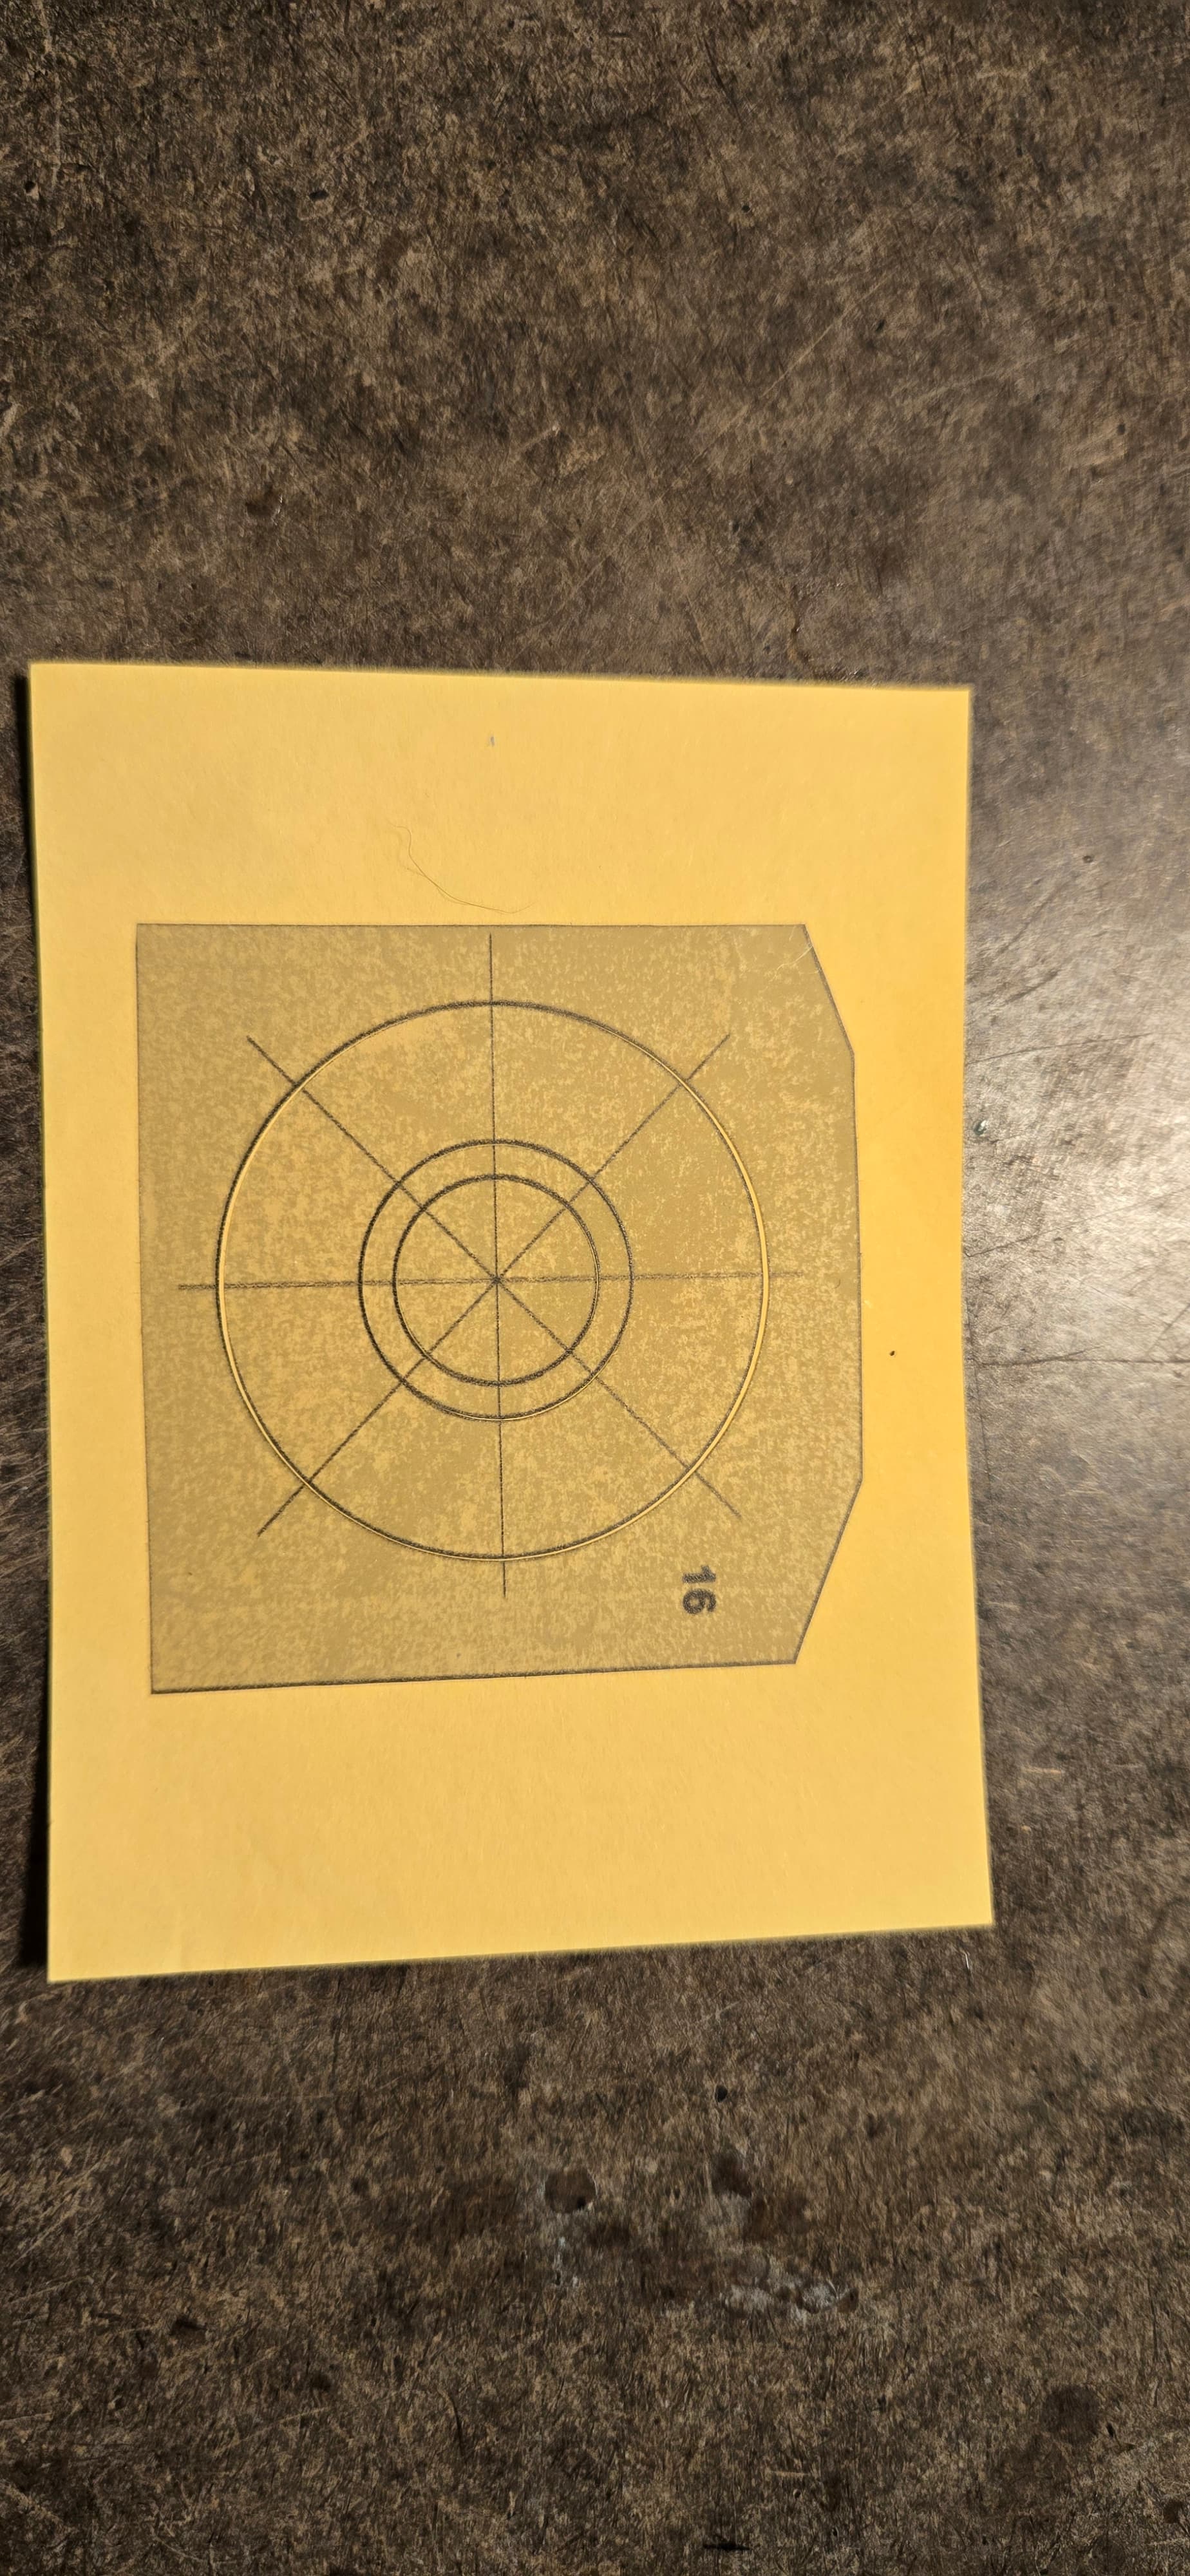
Hello folks - time for another update. I decided to try a different method for the underwing roundels, as they have more rings to deal with…and I wasn’t sure I could pull off the alignment mark trick for all three colors. Thankfully, One Man Army includes masks for the individual colors, as well as the single mask that includes all three rings. In this process, all that’s needed is a constant origin for the masks - because the individual “ring” masks are all cut from the same size outer square.

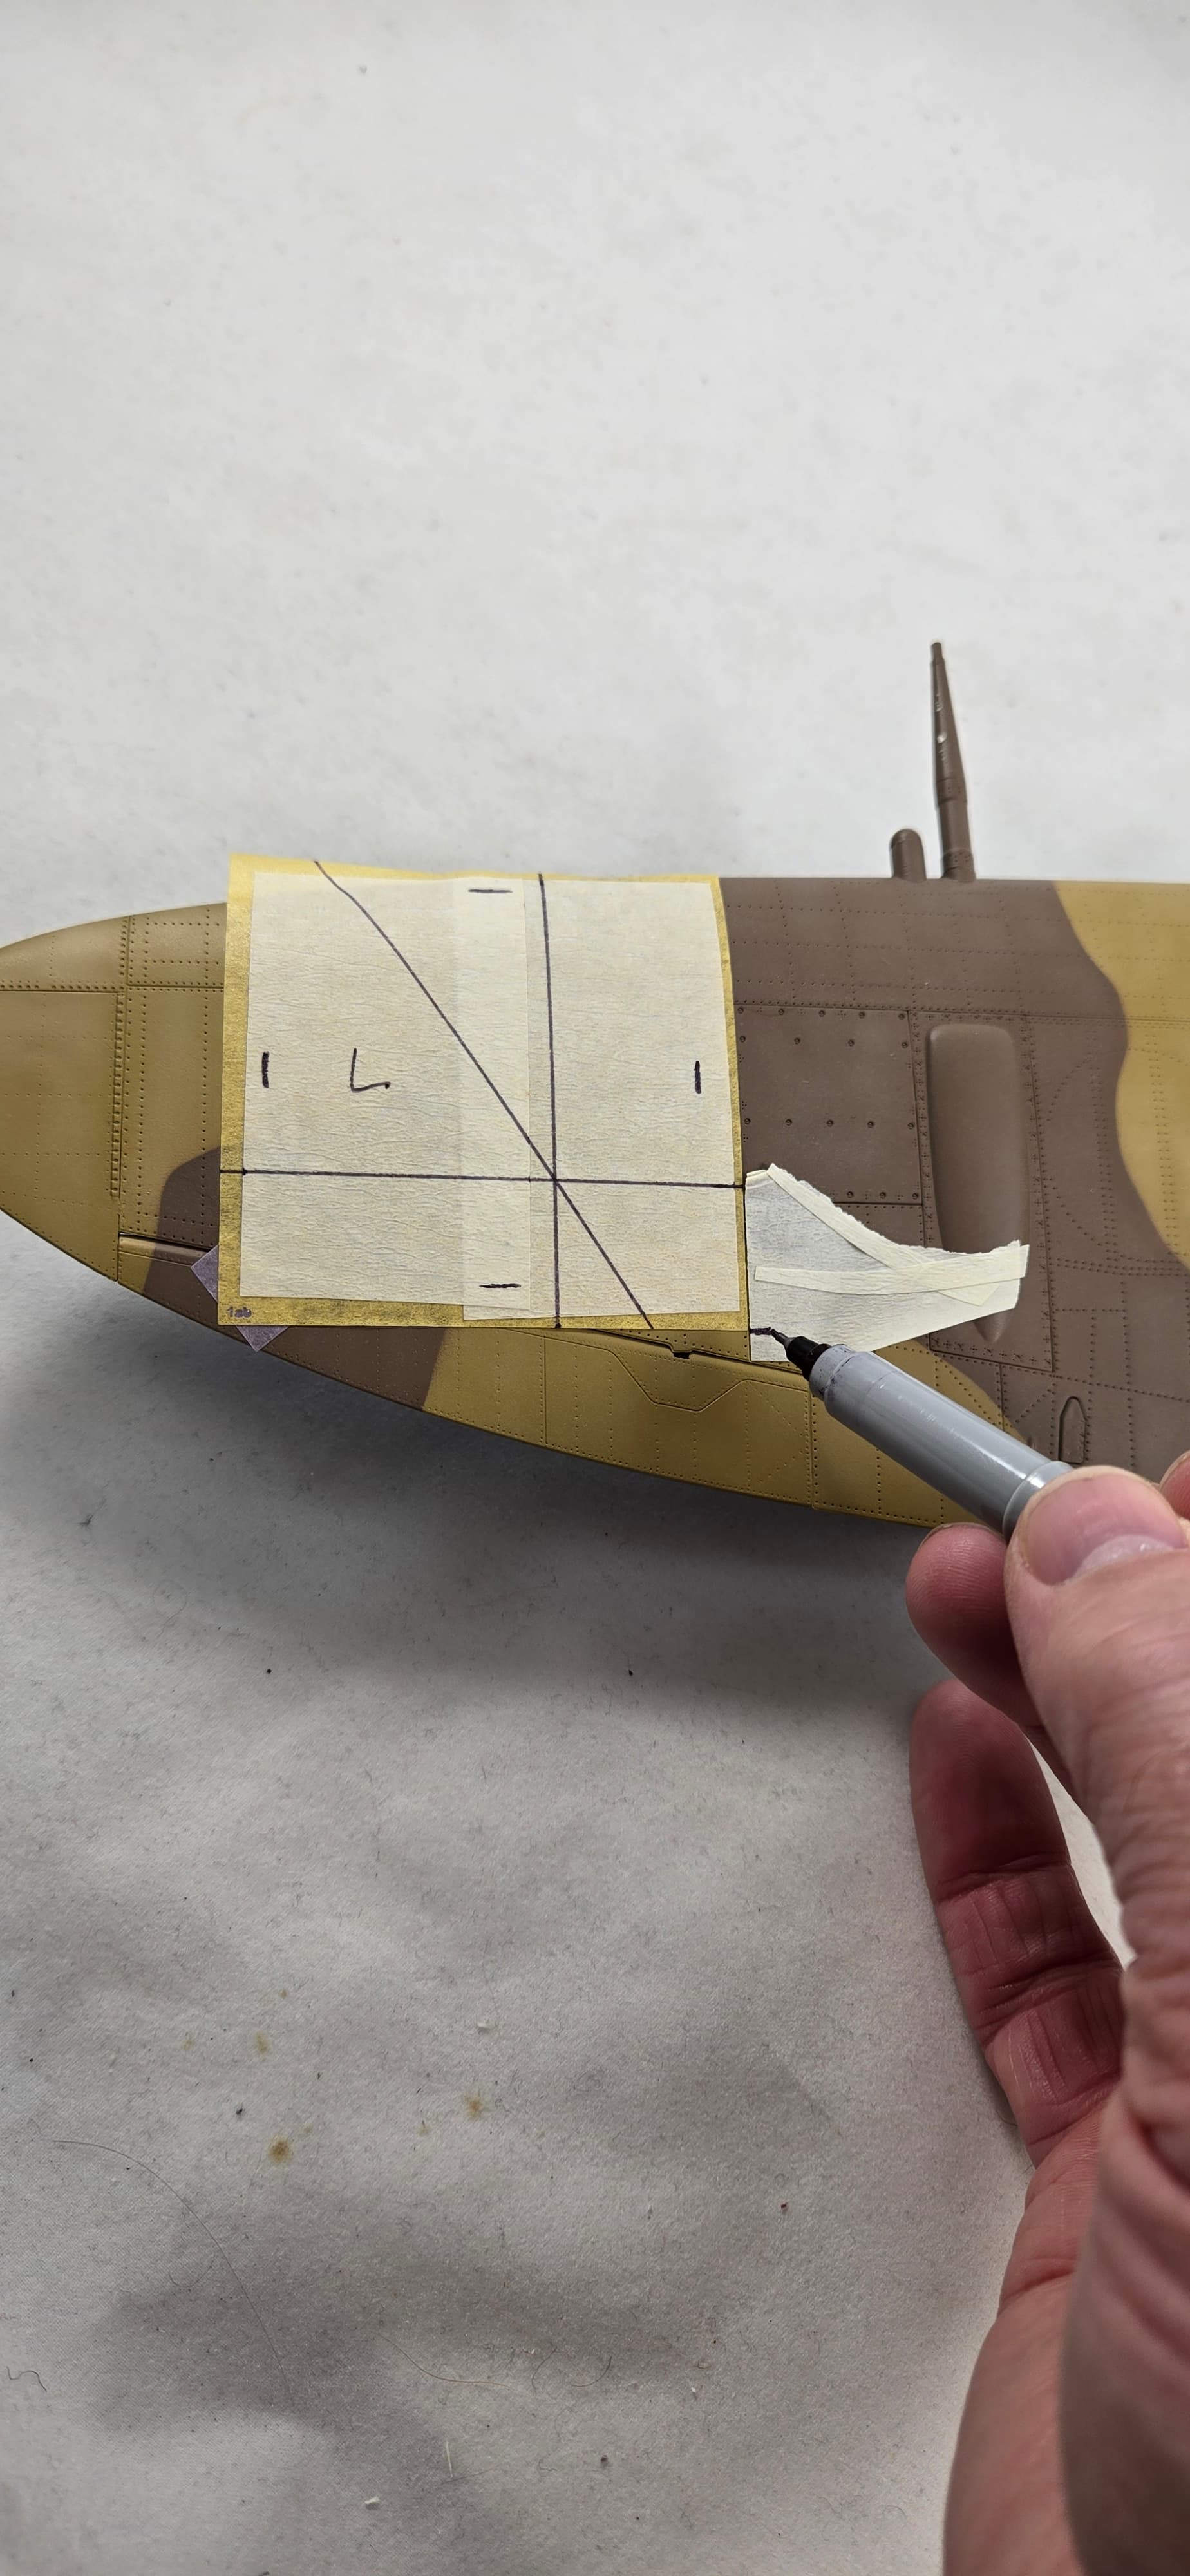
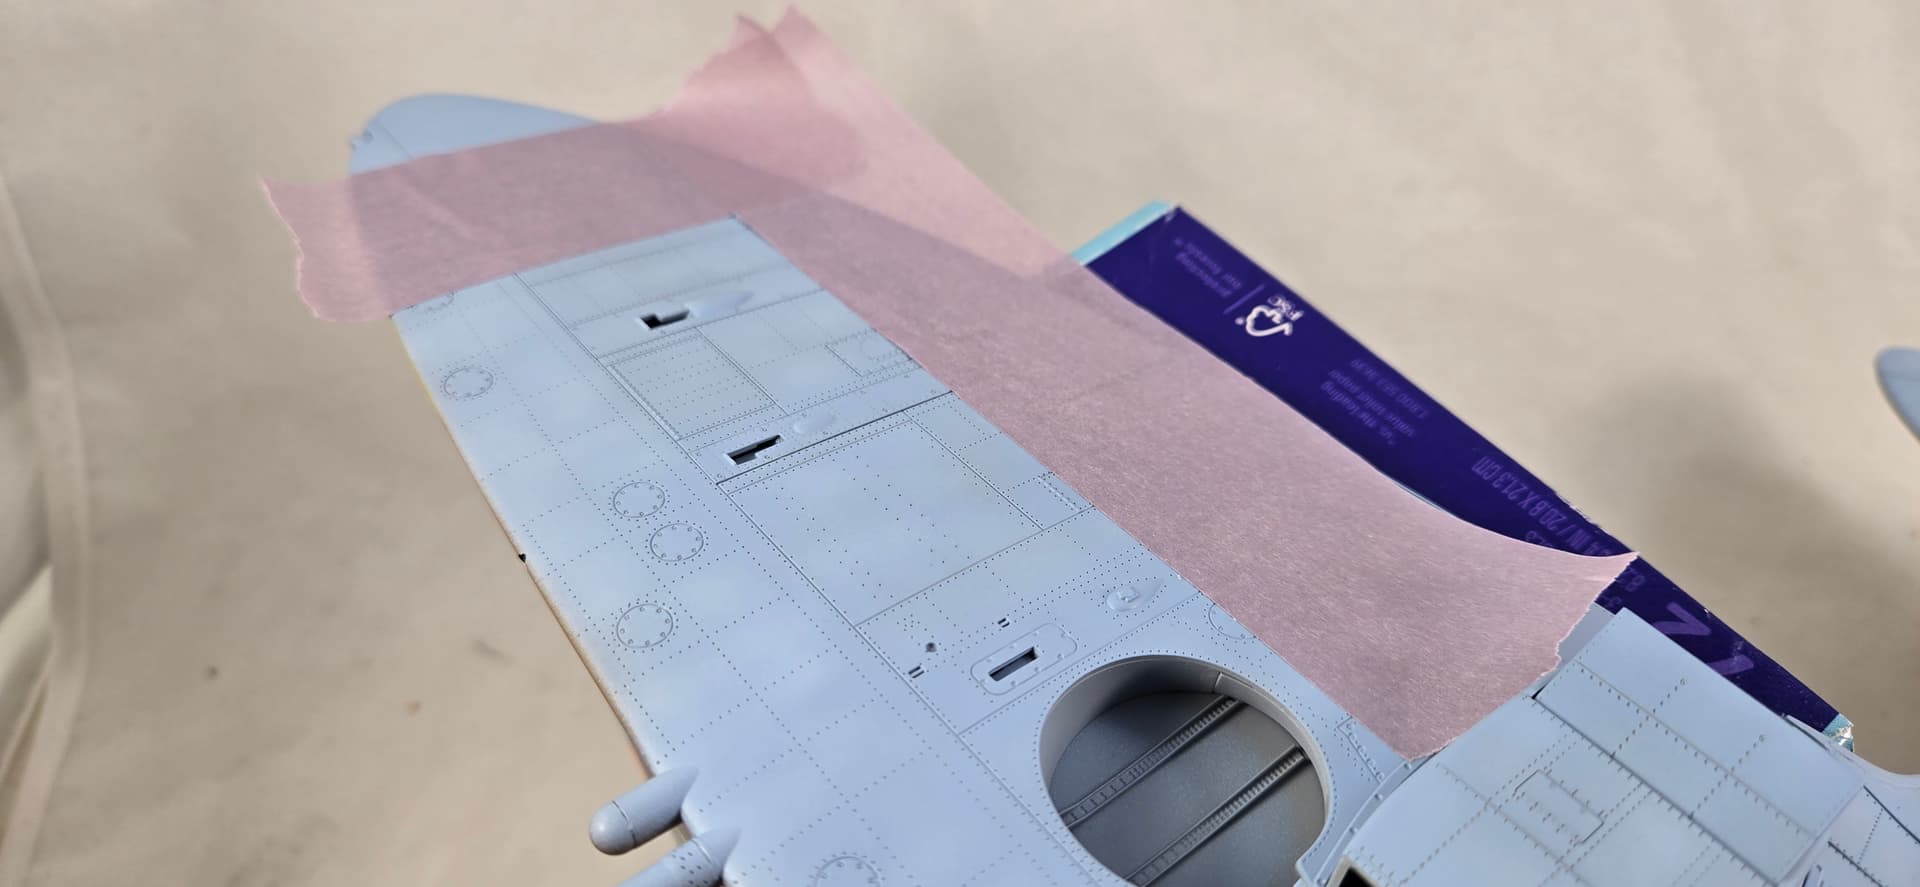
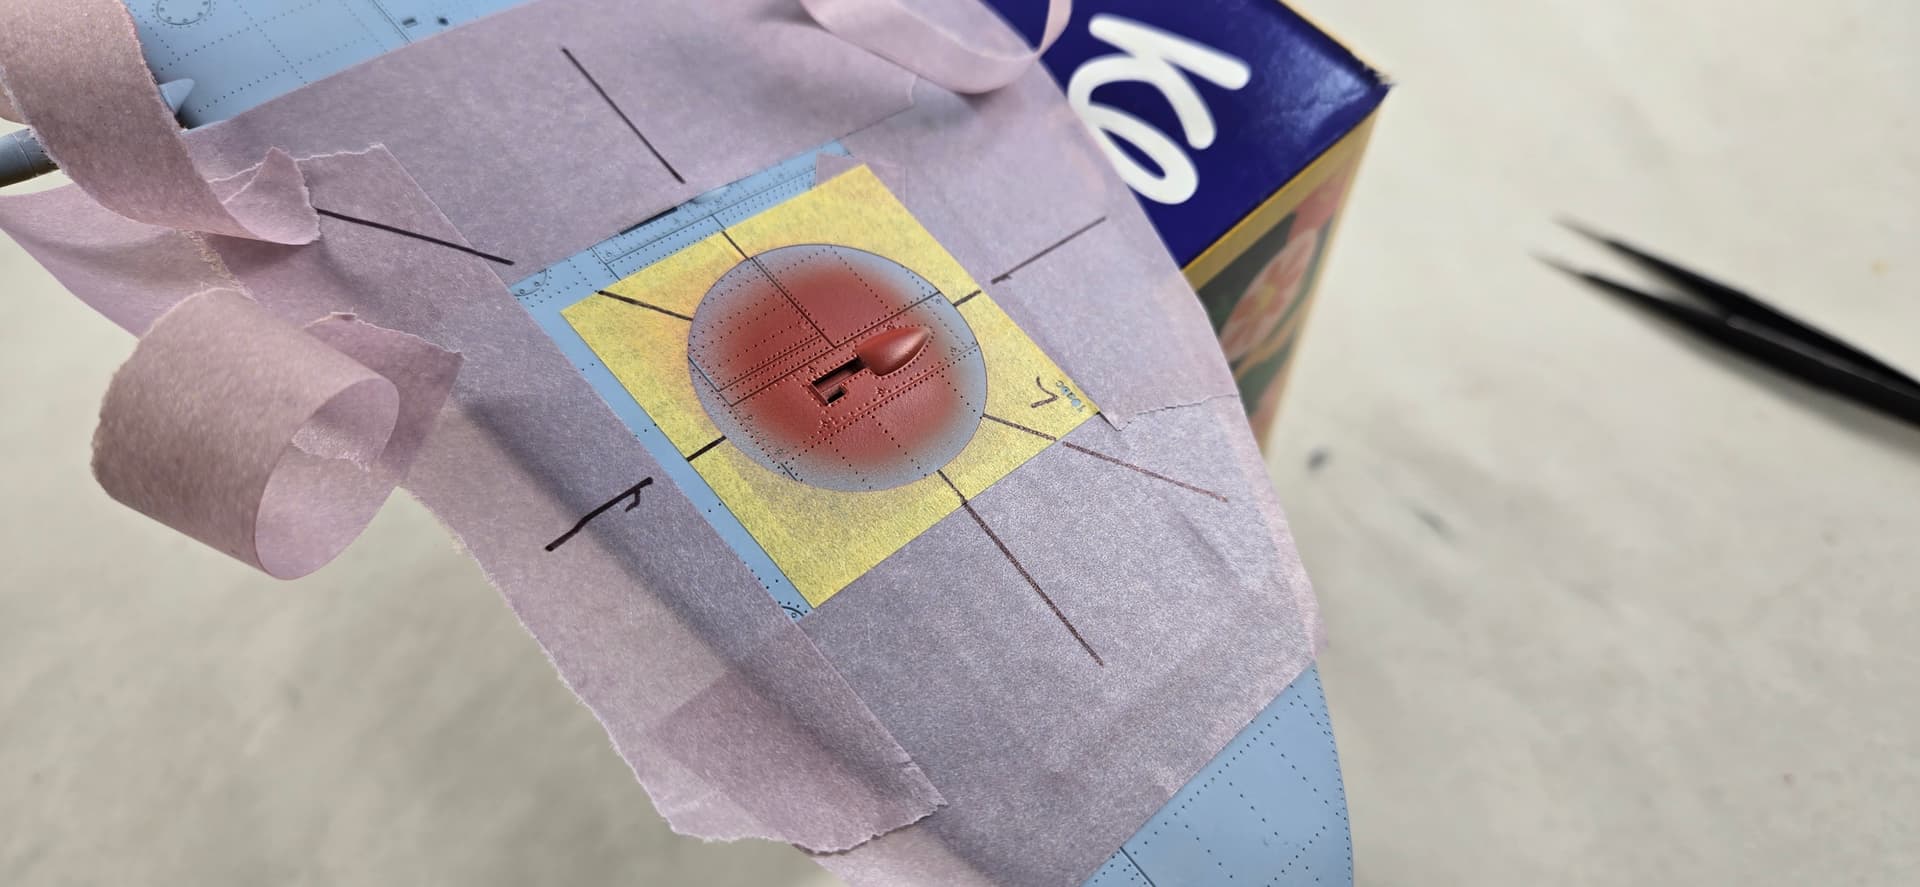
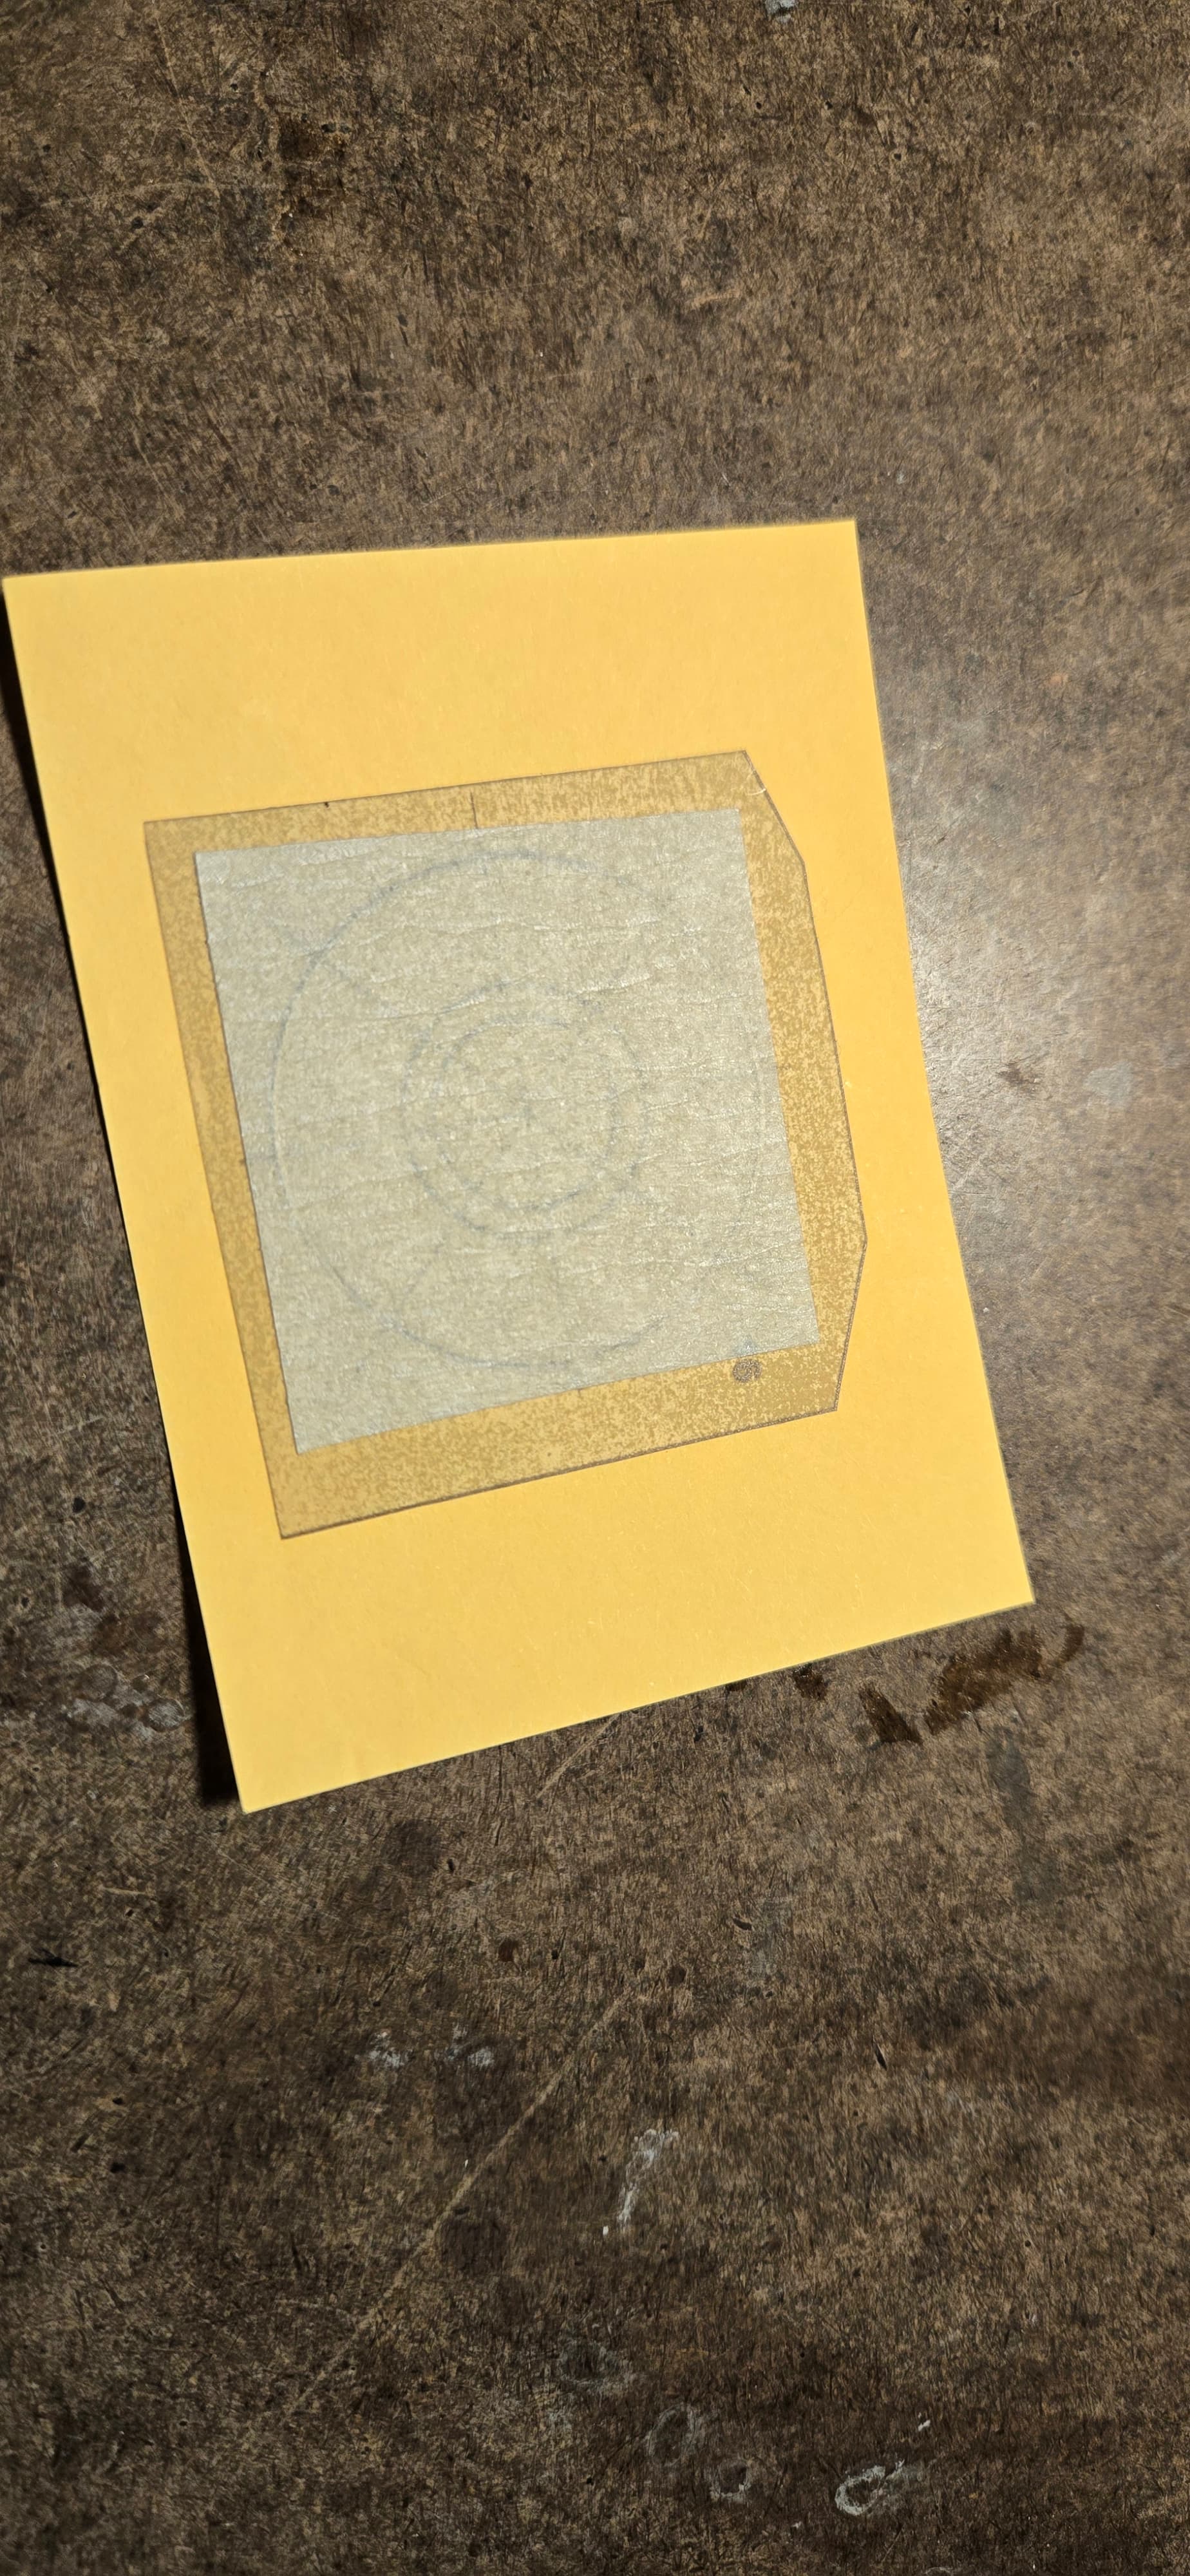
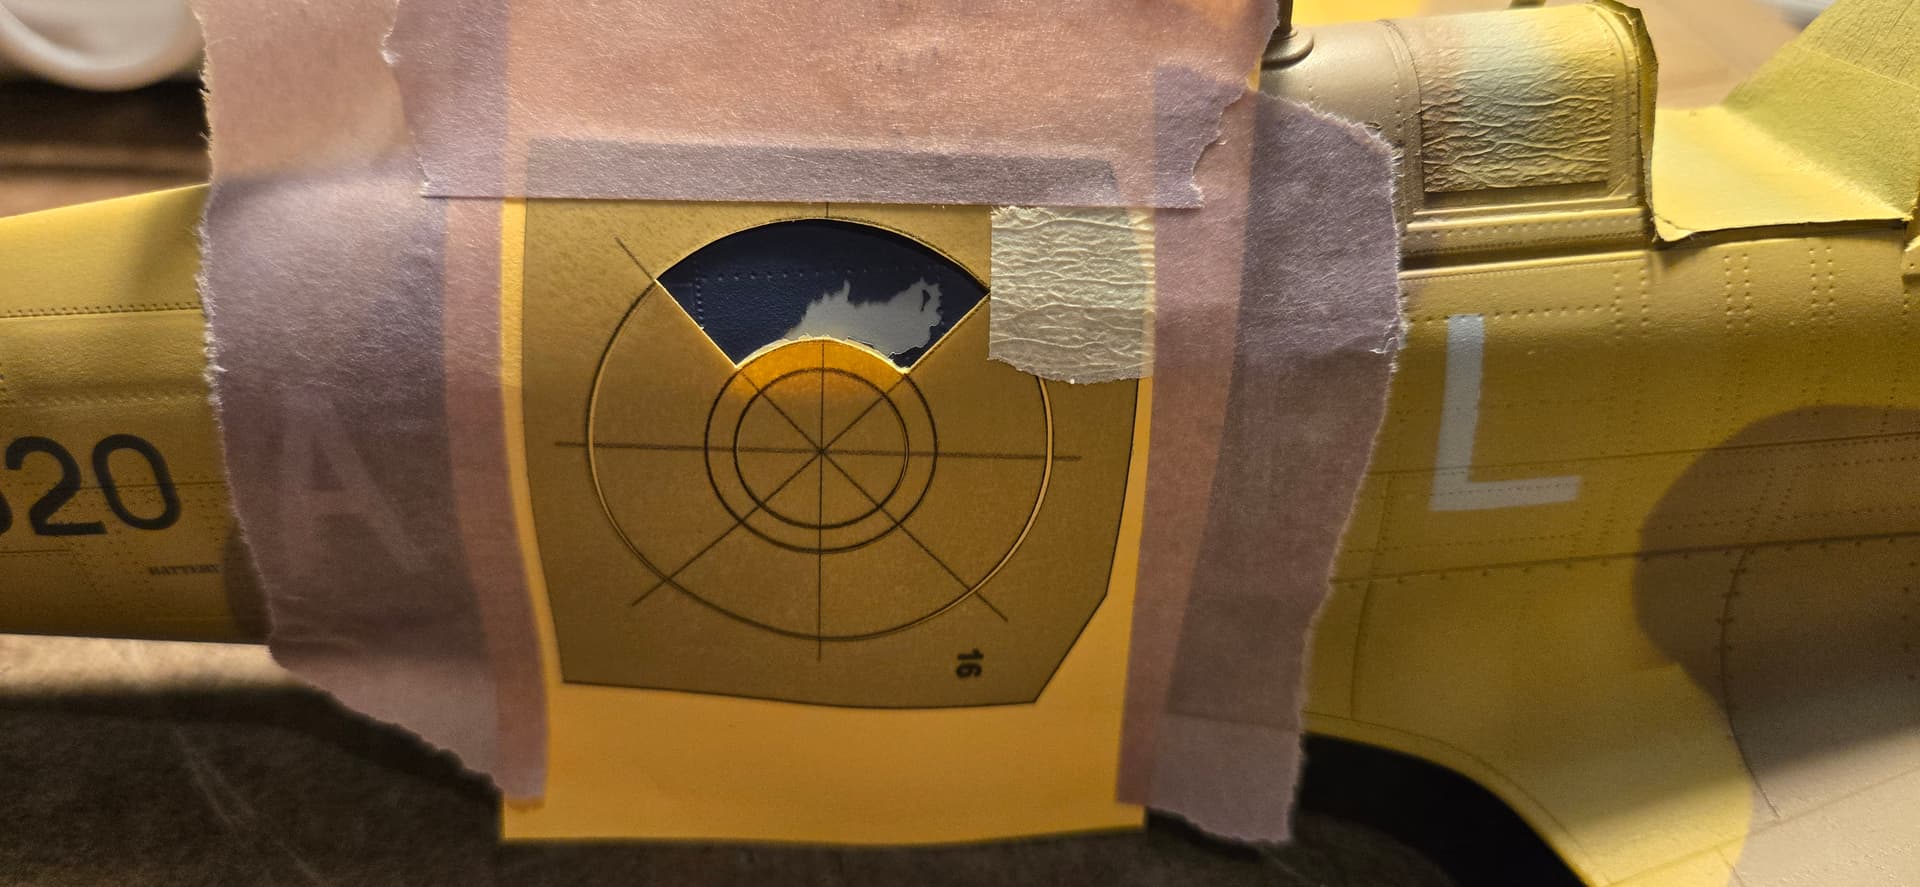
Hmmmm. Reading that seems confusing. Hopefully, the whole “a picture is worth a thousand words” will help here. The first step in this new - and I think easier - process is to create a 90 degree corner in the correct spot. I measured the distance from the edge of the mask to the edge of the roundel then transferred that to the correct spot near the wingtip with a strip of tape. Then I added a line of tape at right angles to that, measured off the back of the gear well.

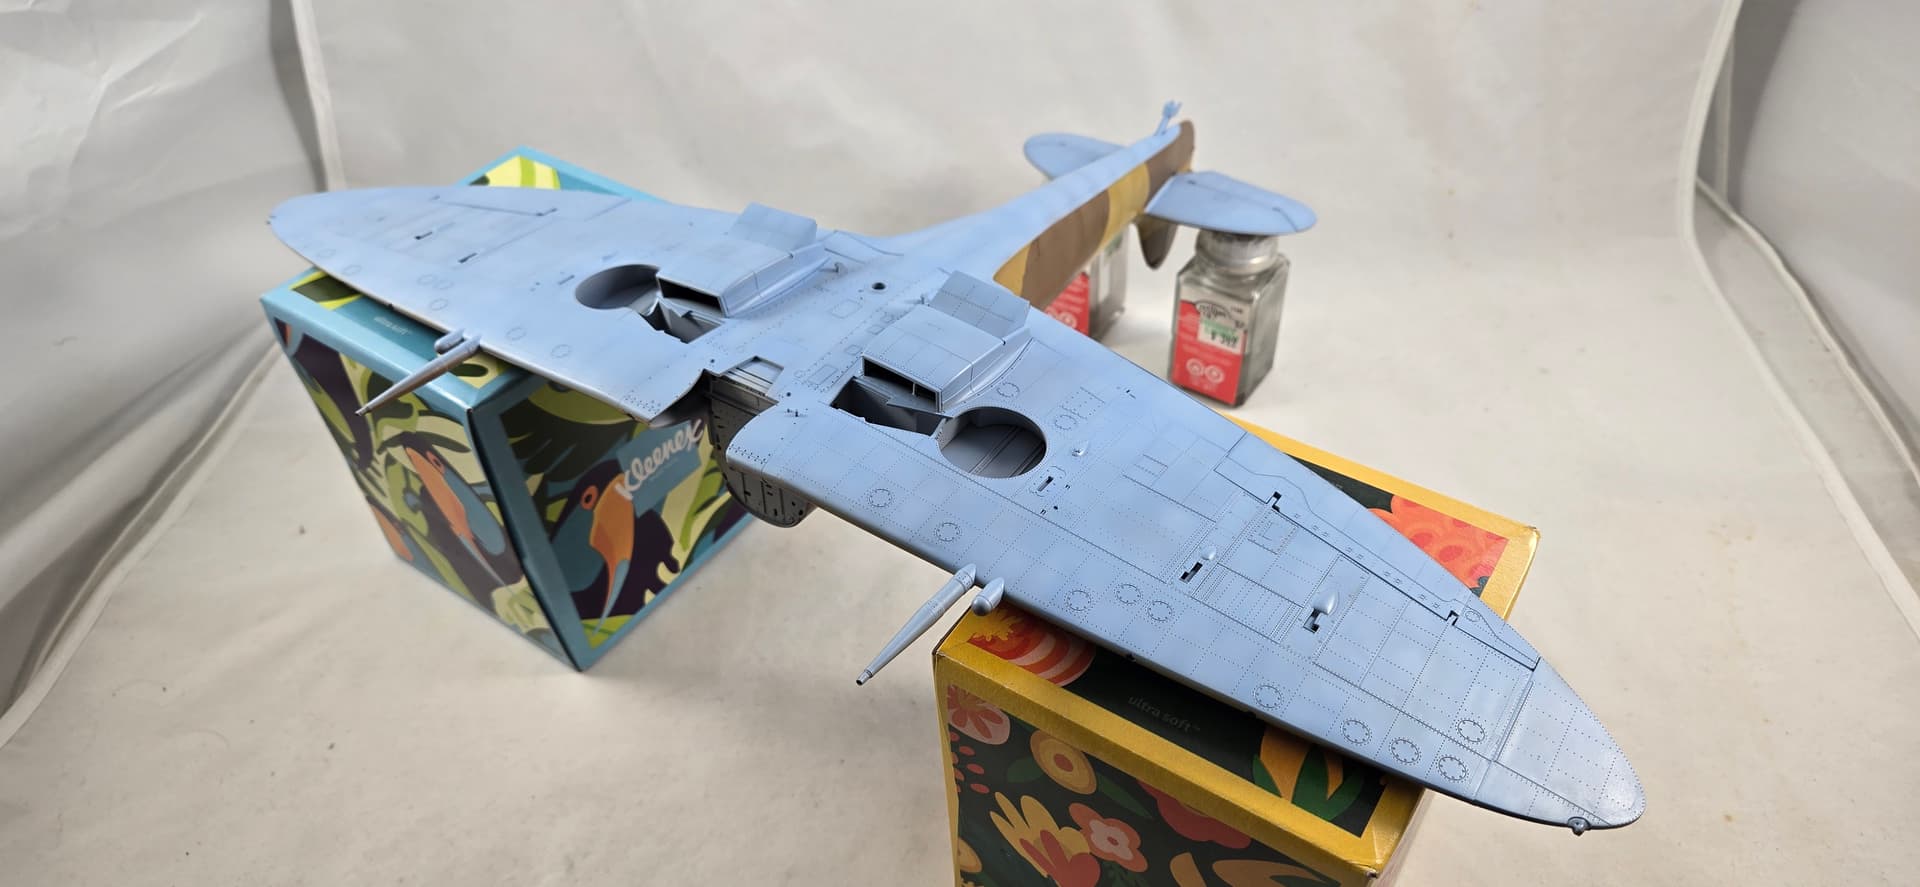
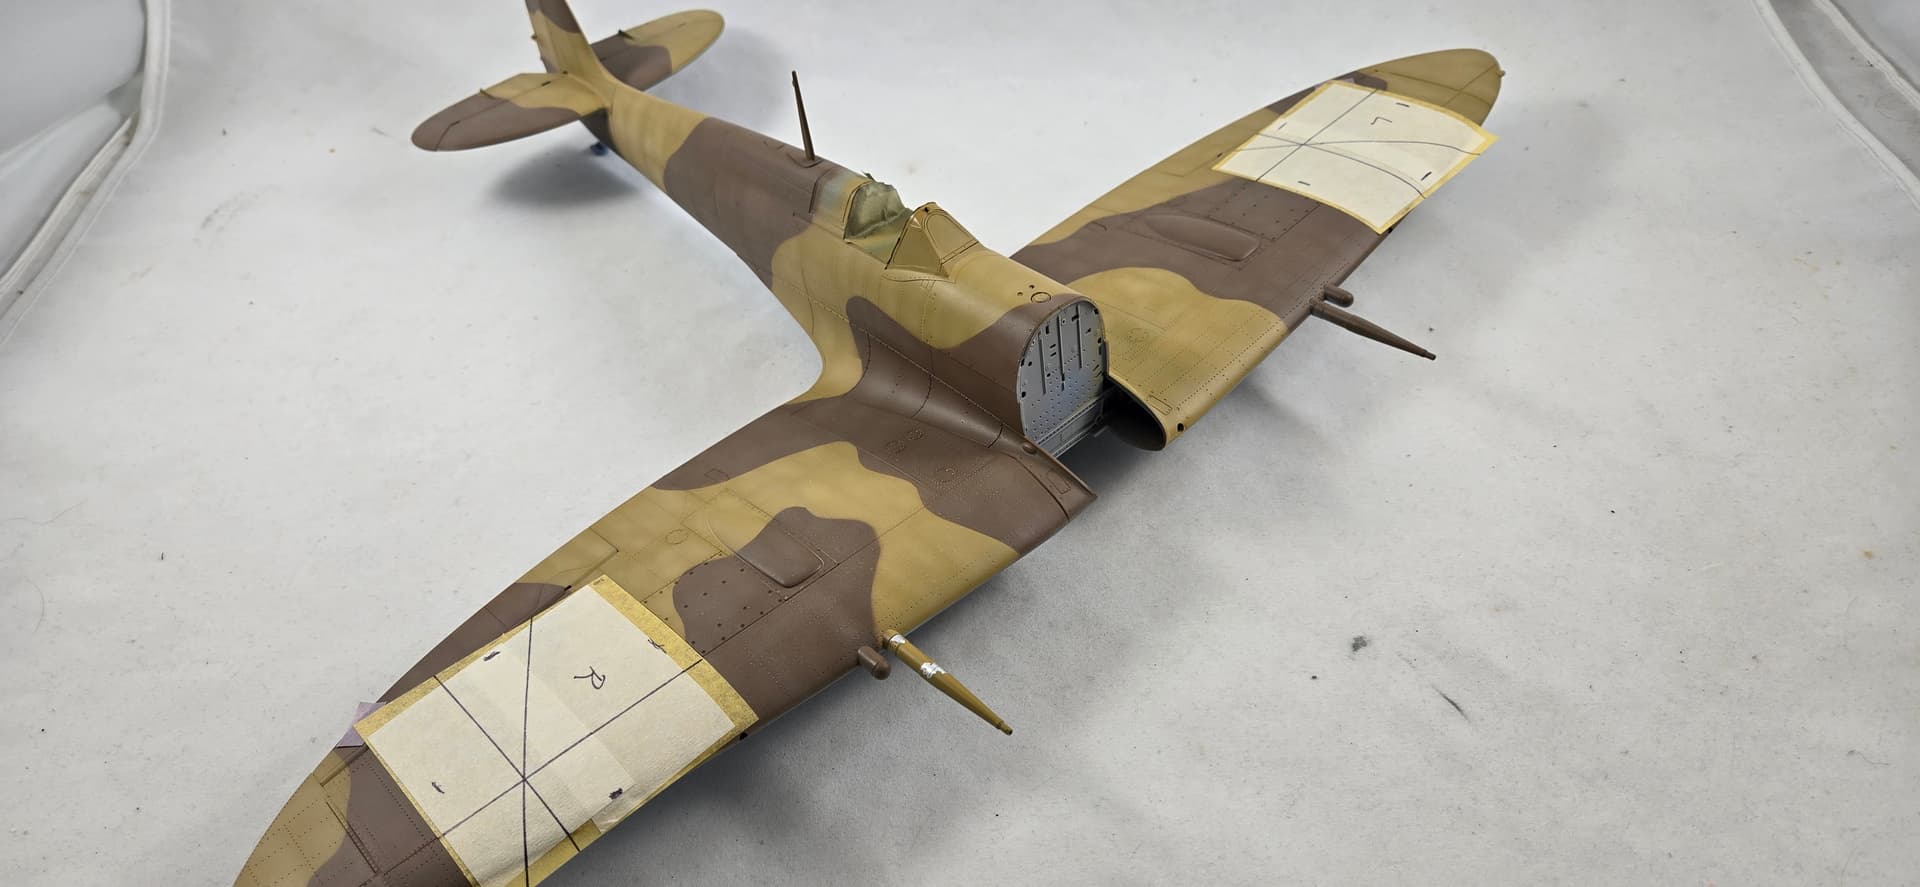
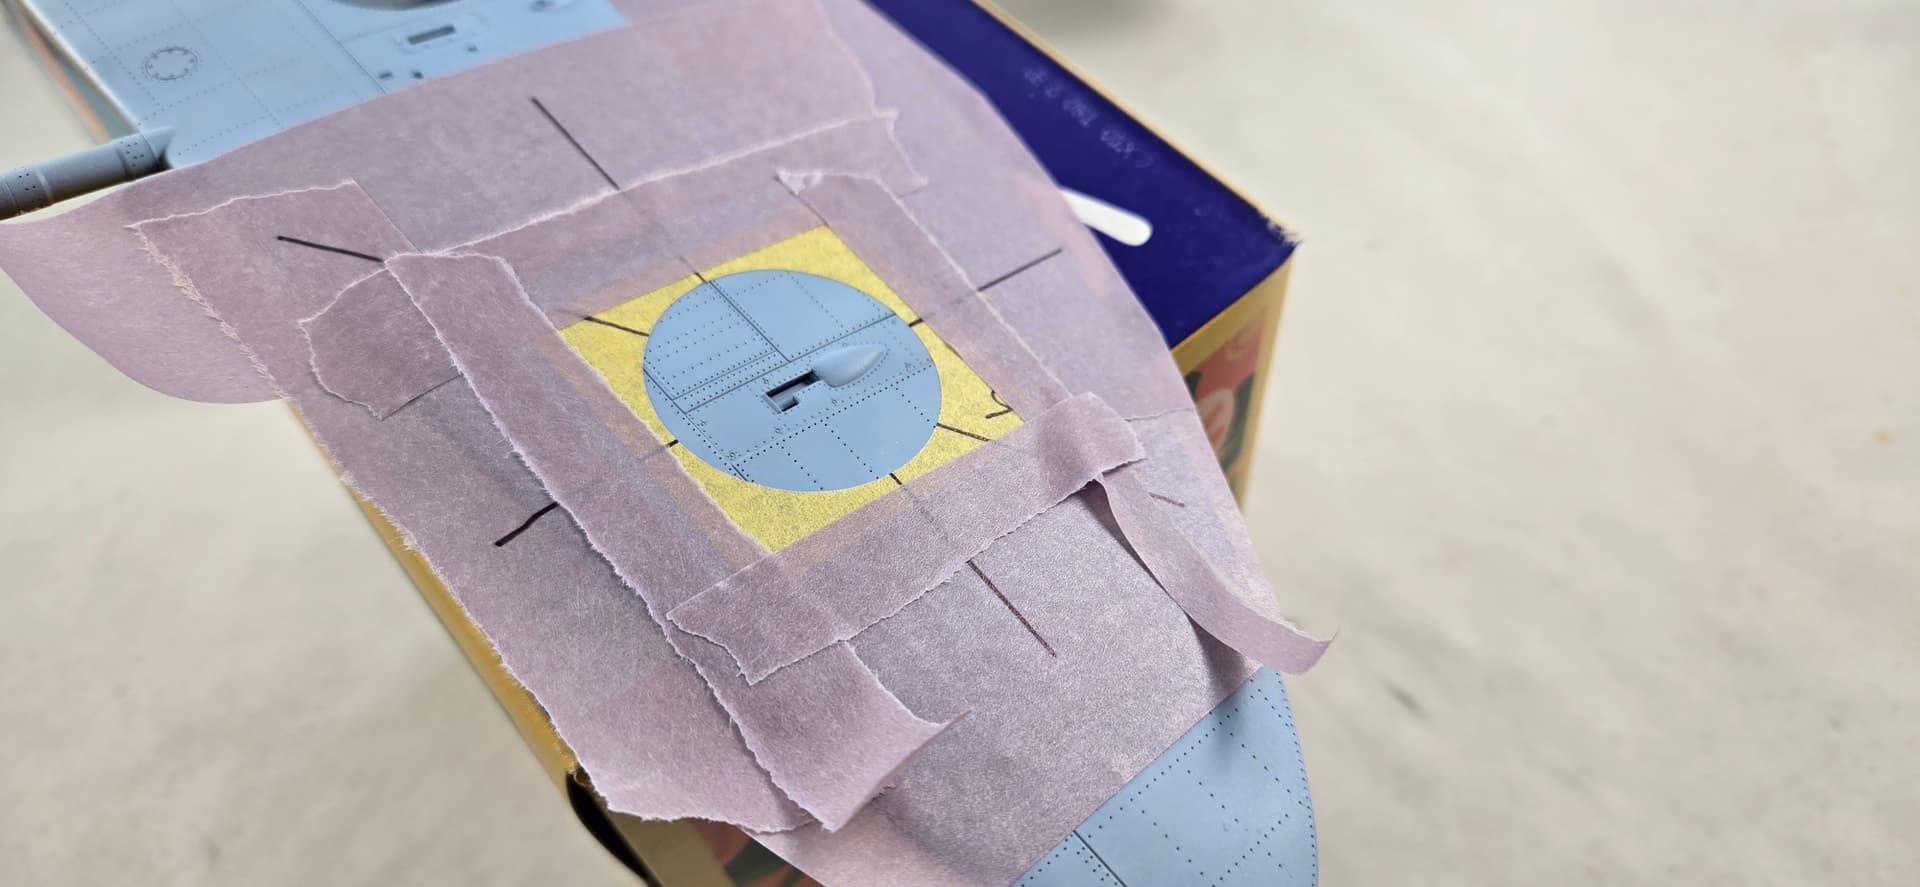
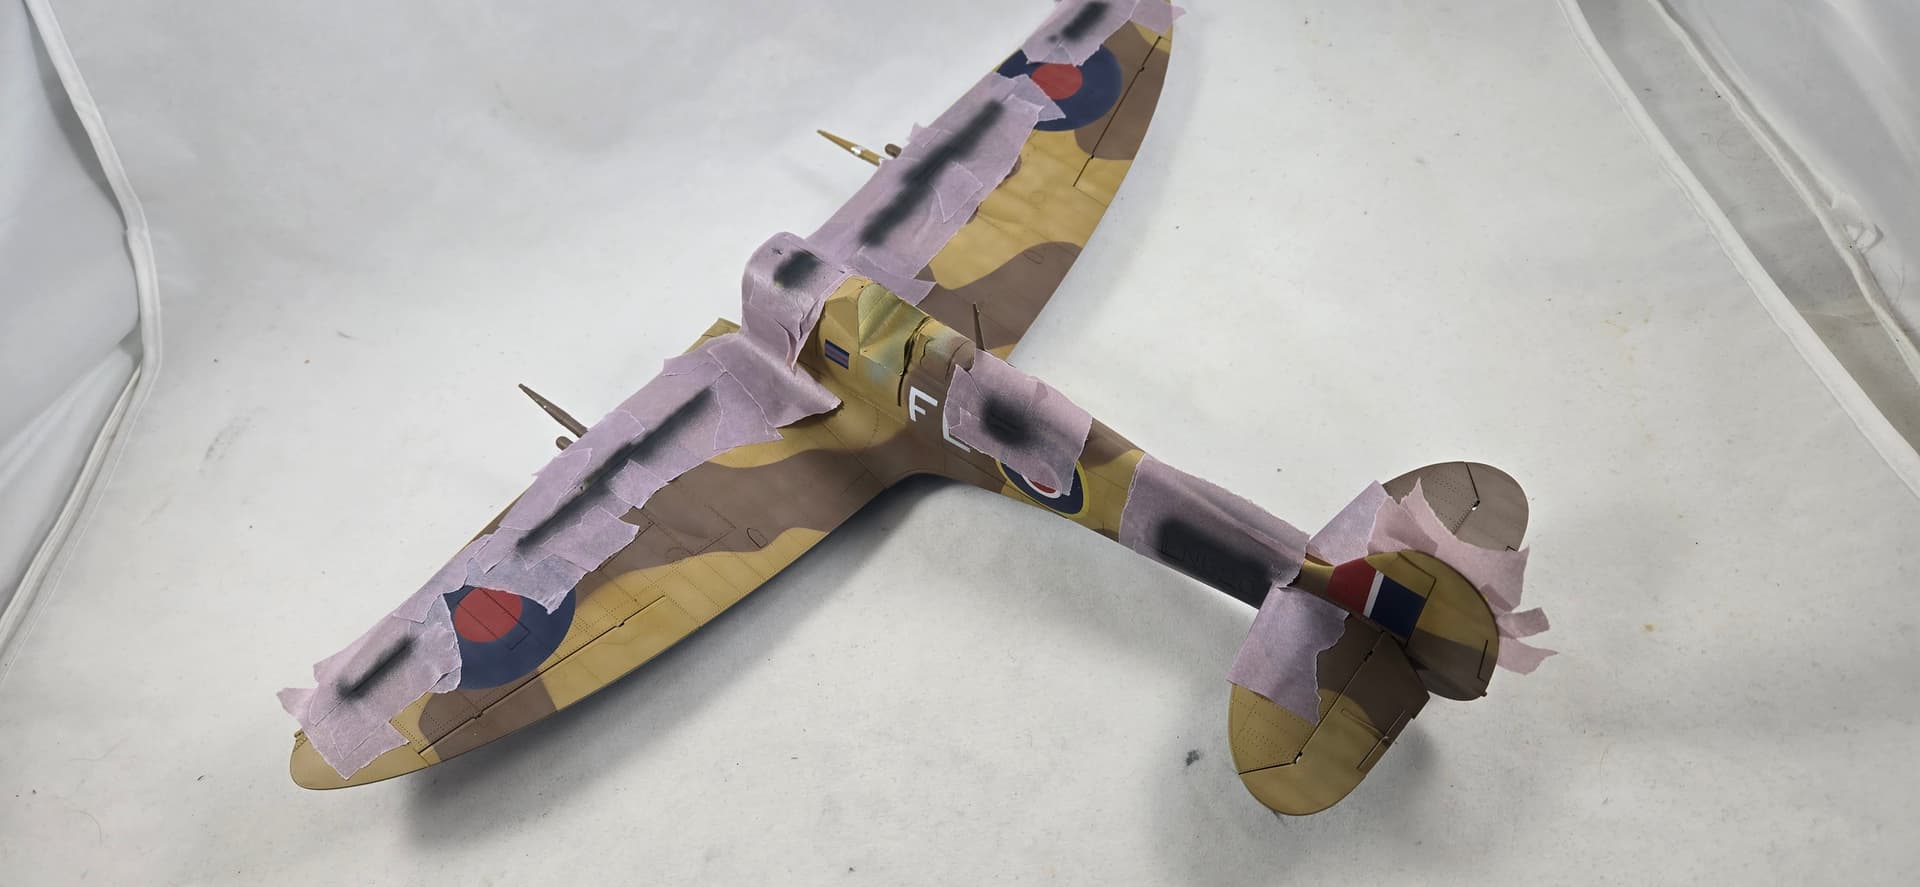
This same position was transferred to the other wing as well, and the corner of of the outer-most mask was placed in position aligned with the right angle tape pieces - the “blue ring mask”. This mask then stays in place for the entire painting process. I cheated and put alignment marks on just in case - don’t tell anyone :wink: Remember to tape over all four edges of the mask - these will have to be removed and replaced after each painting session.

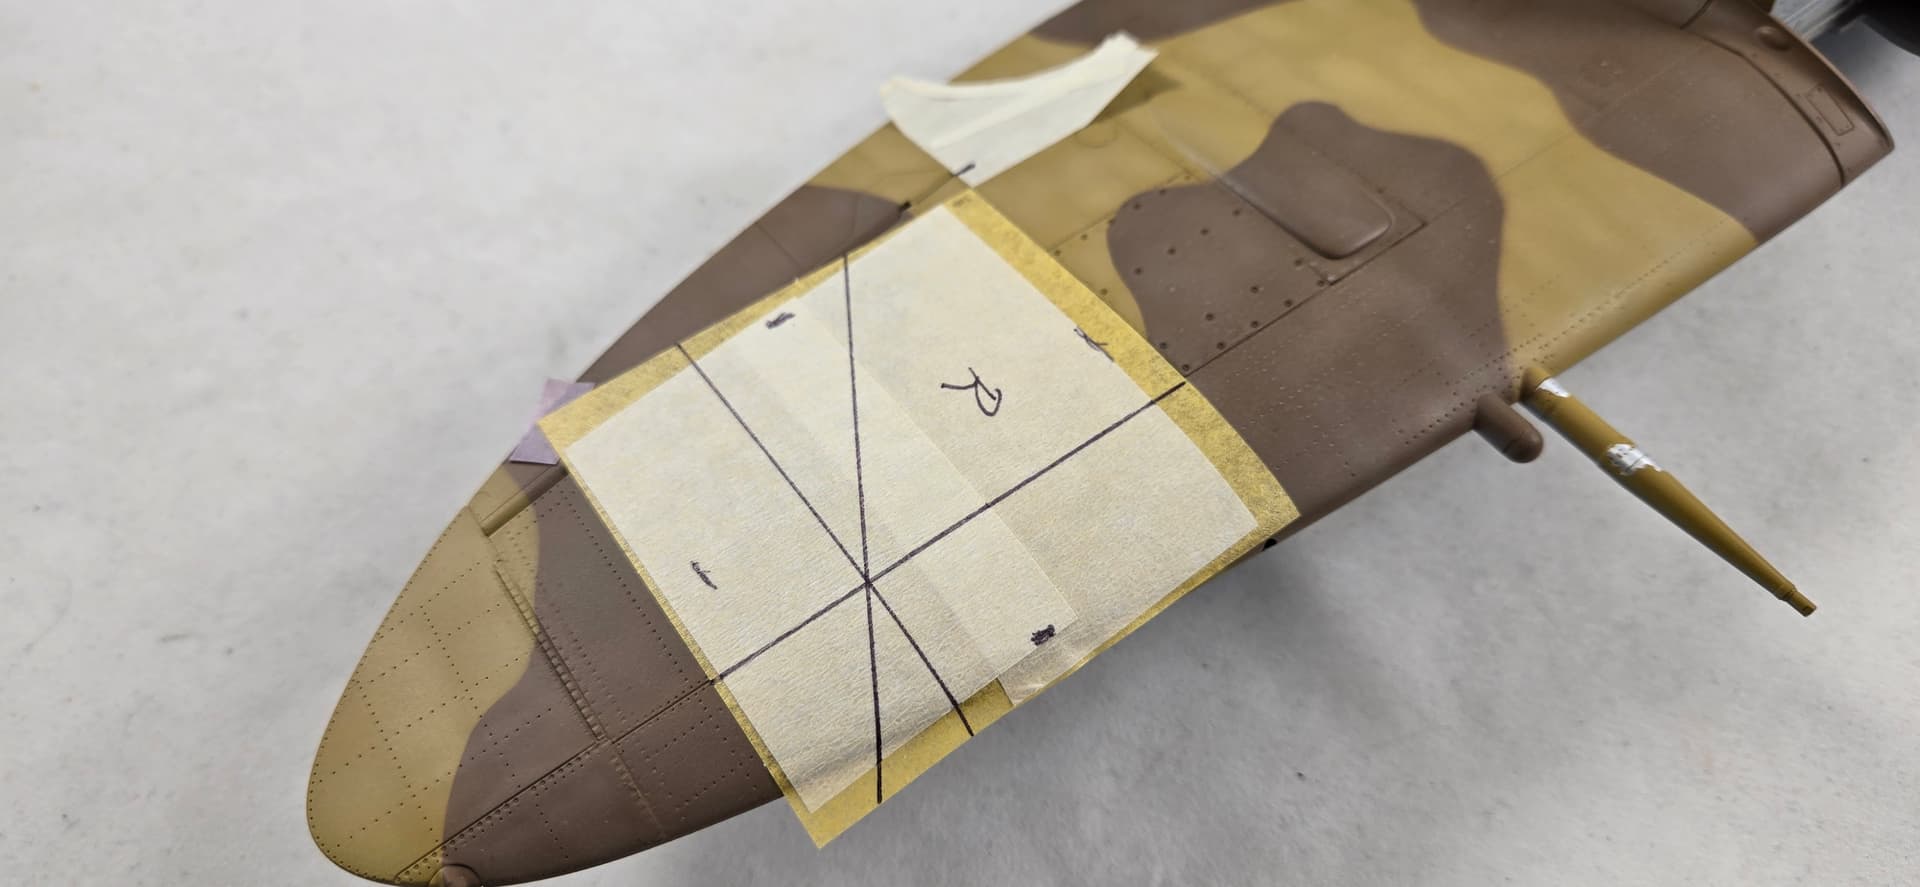
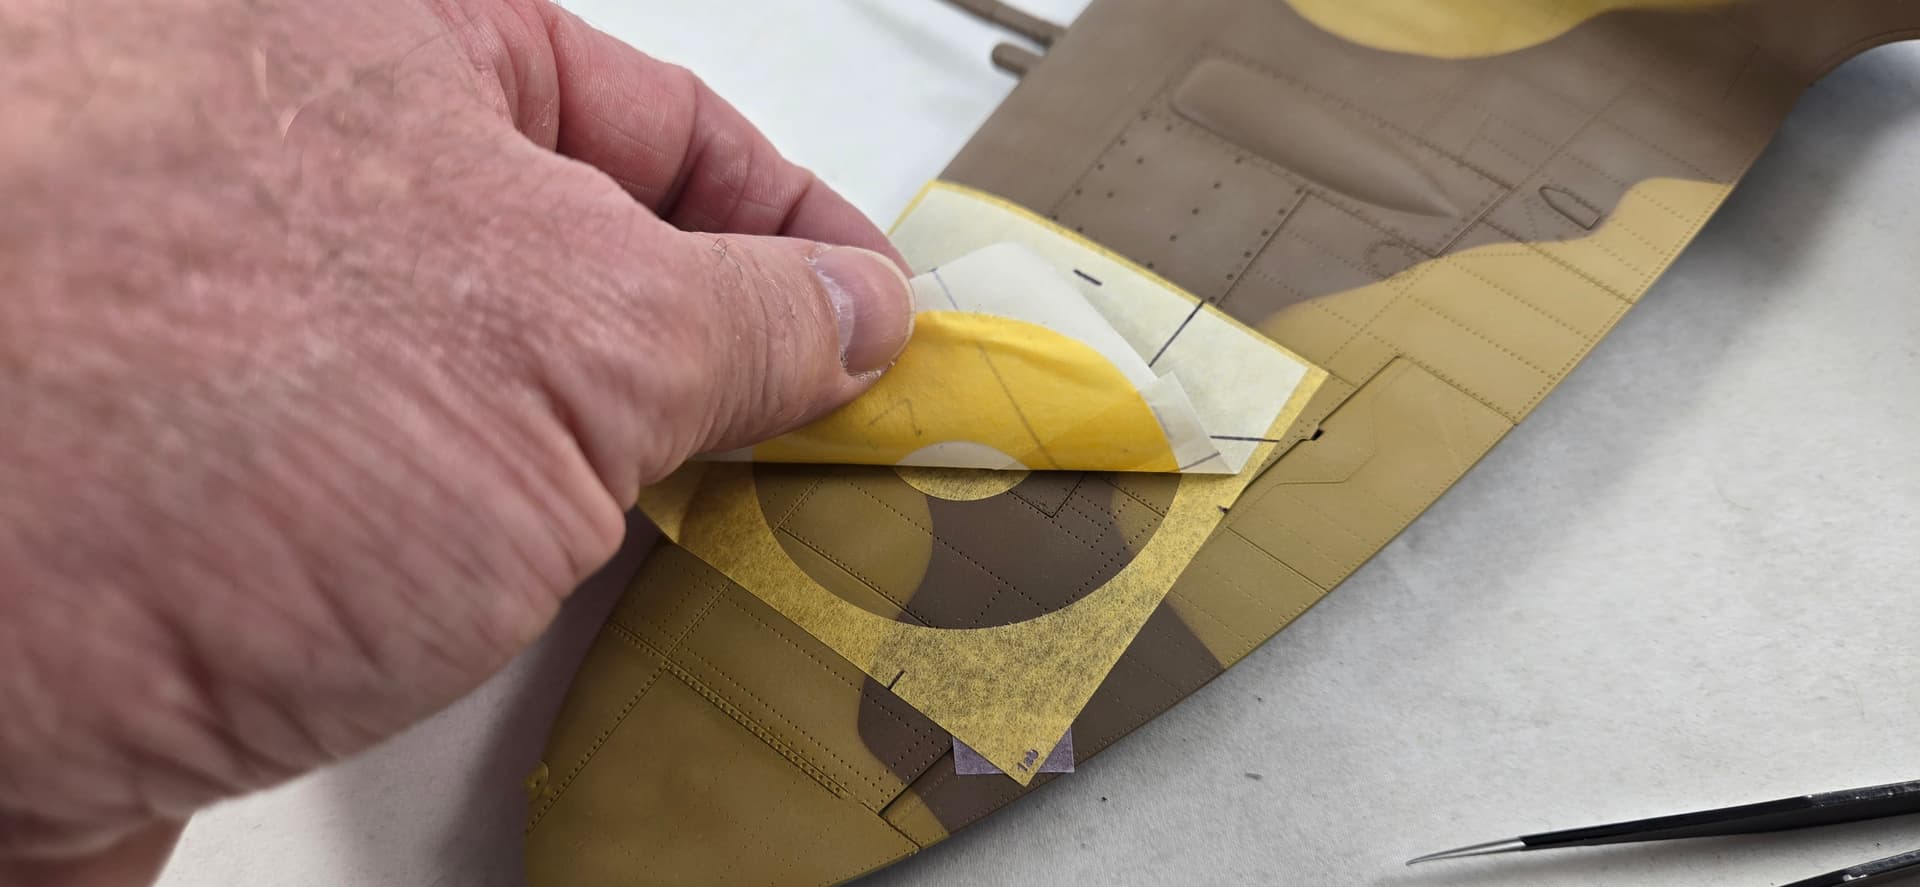
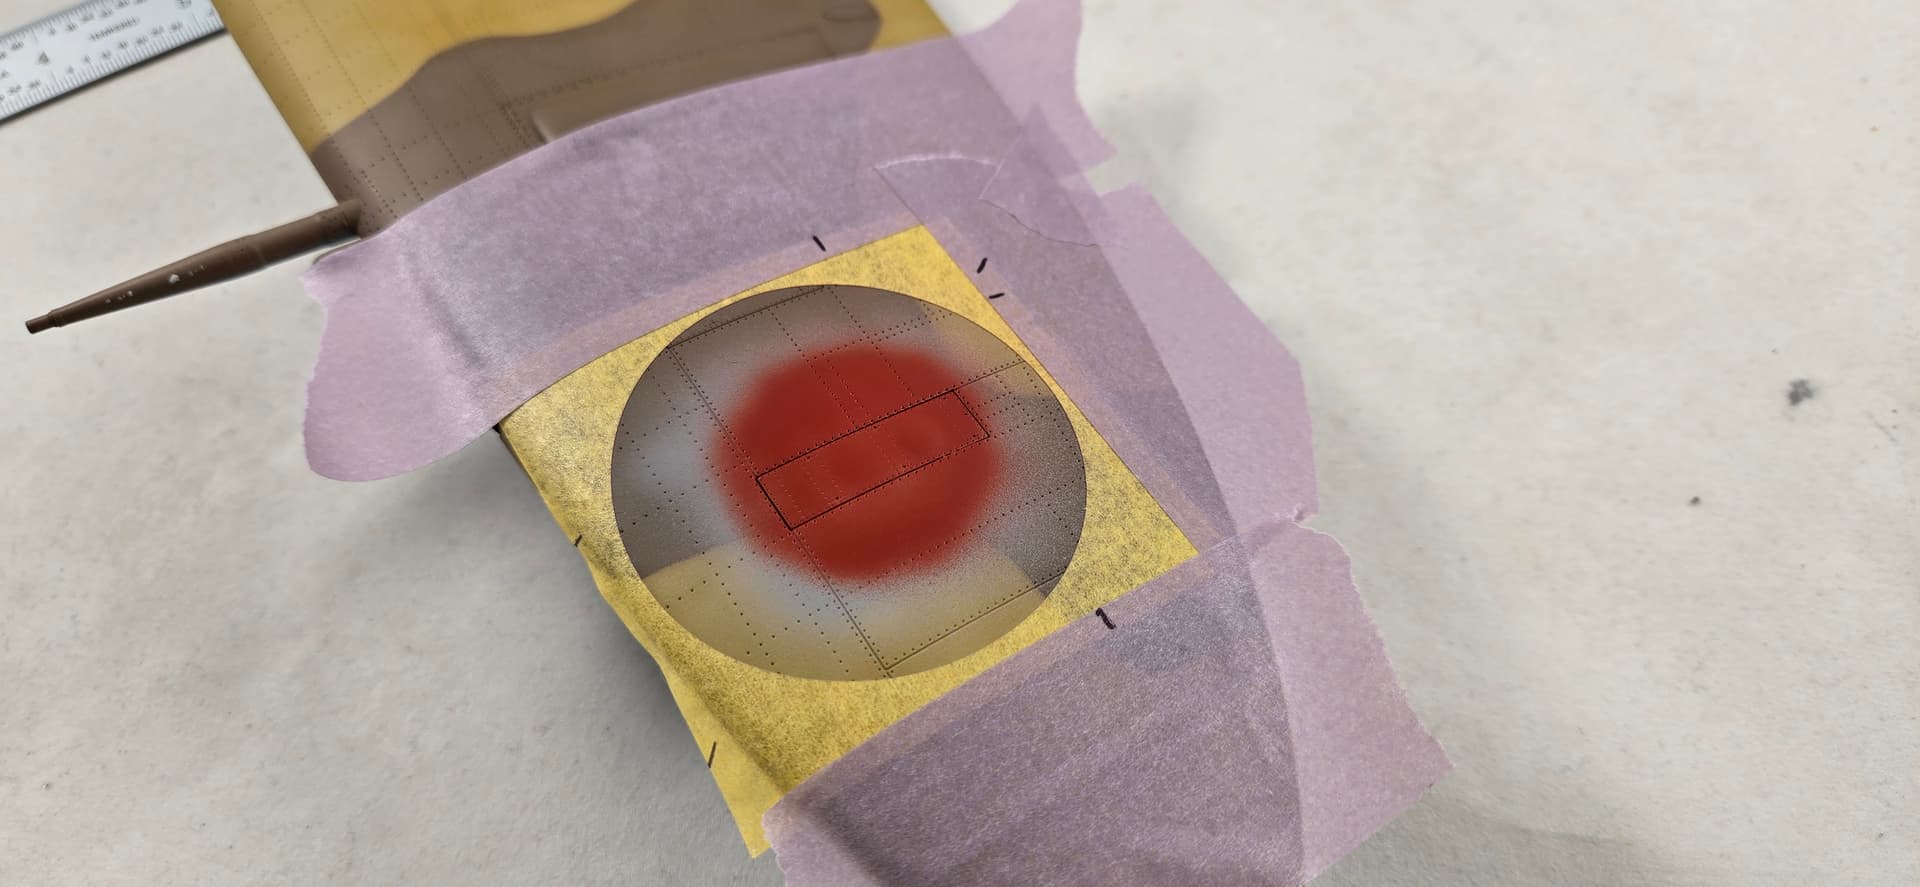
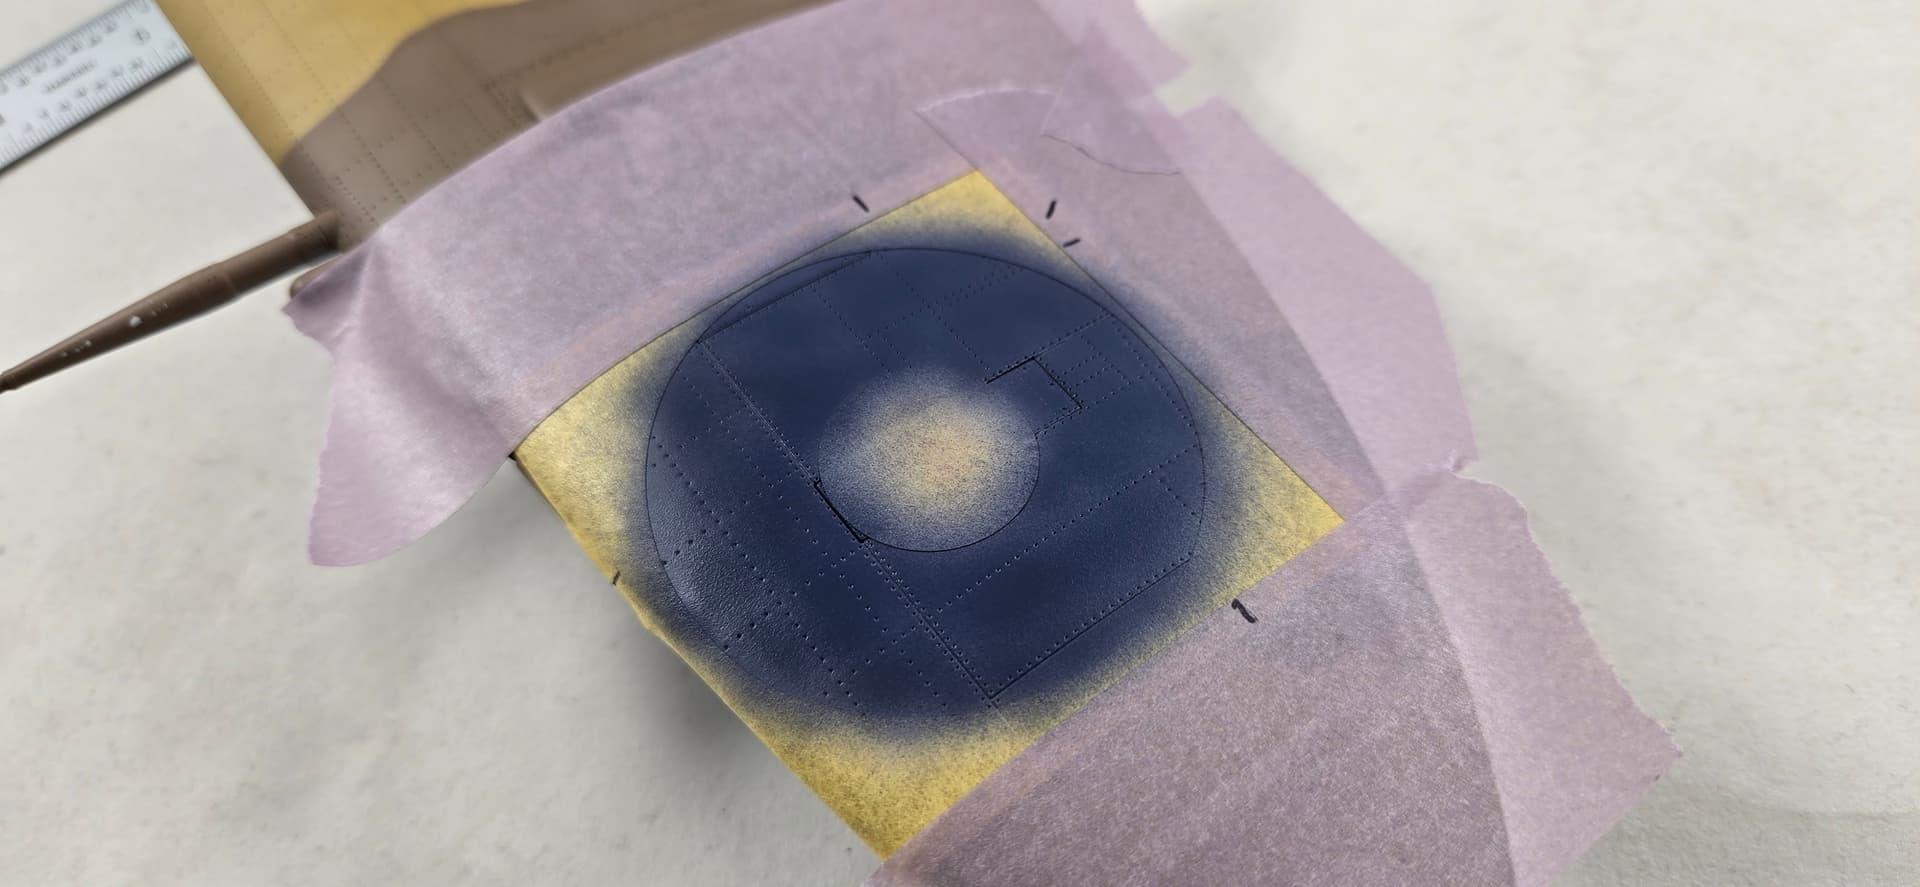
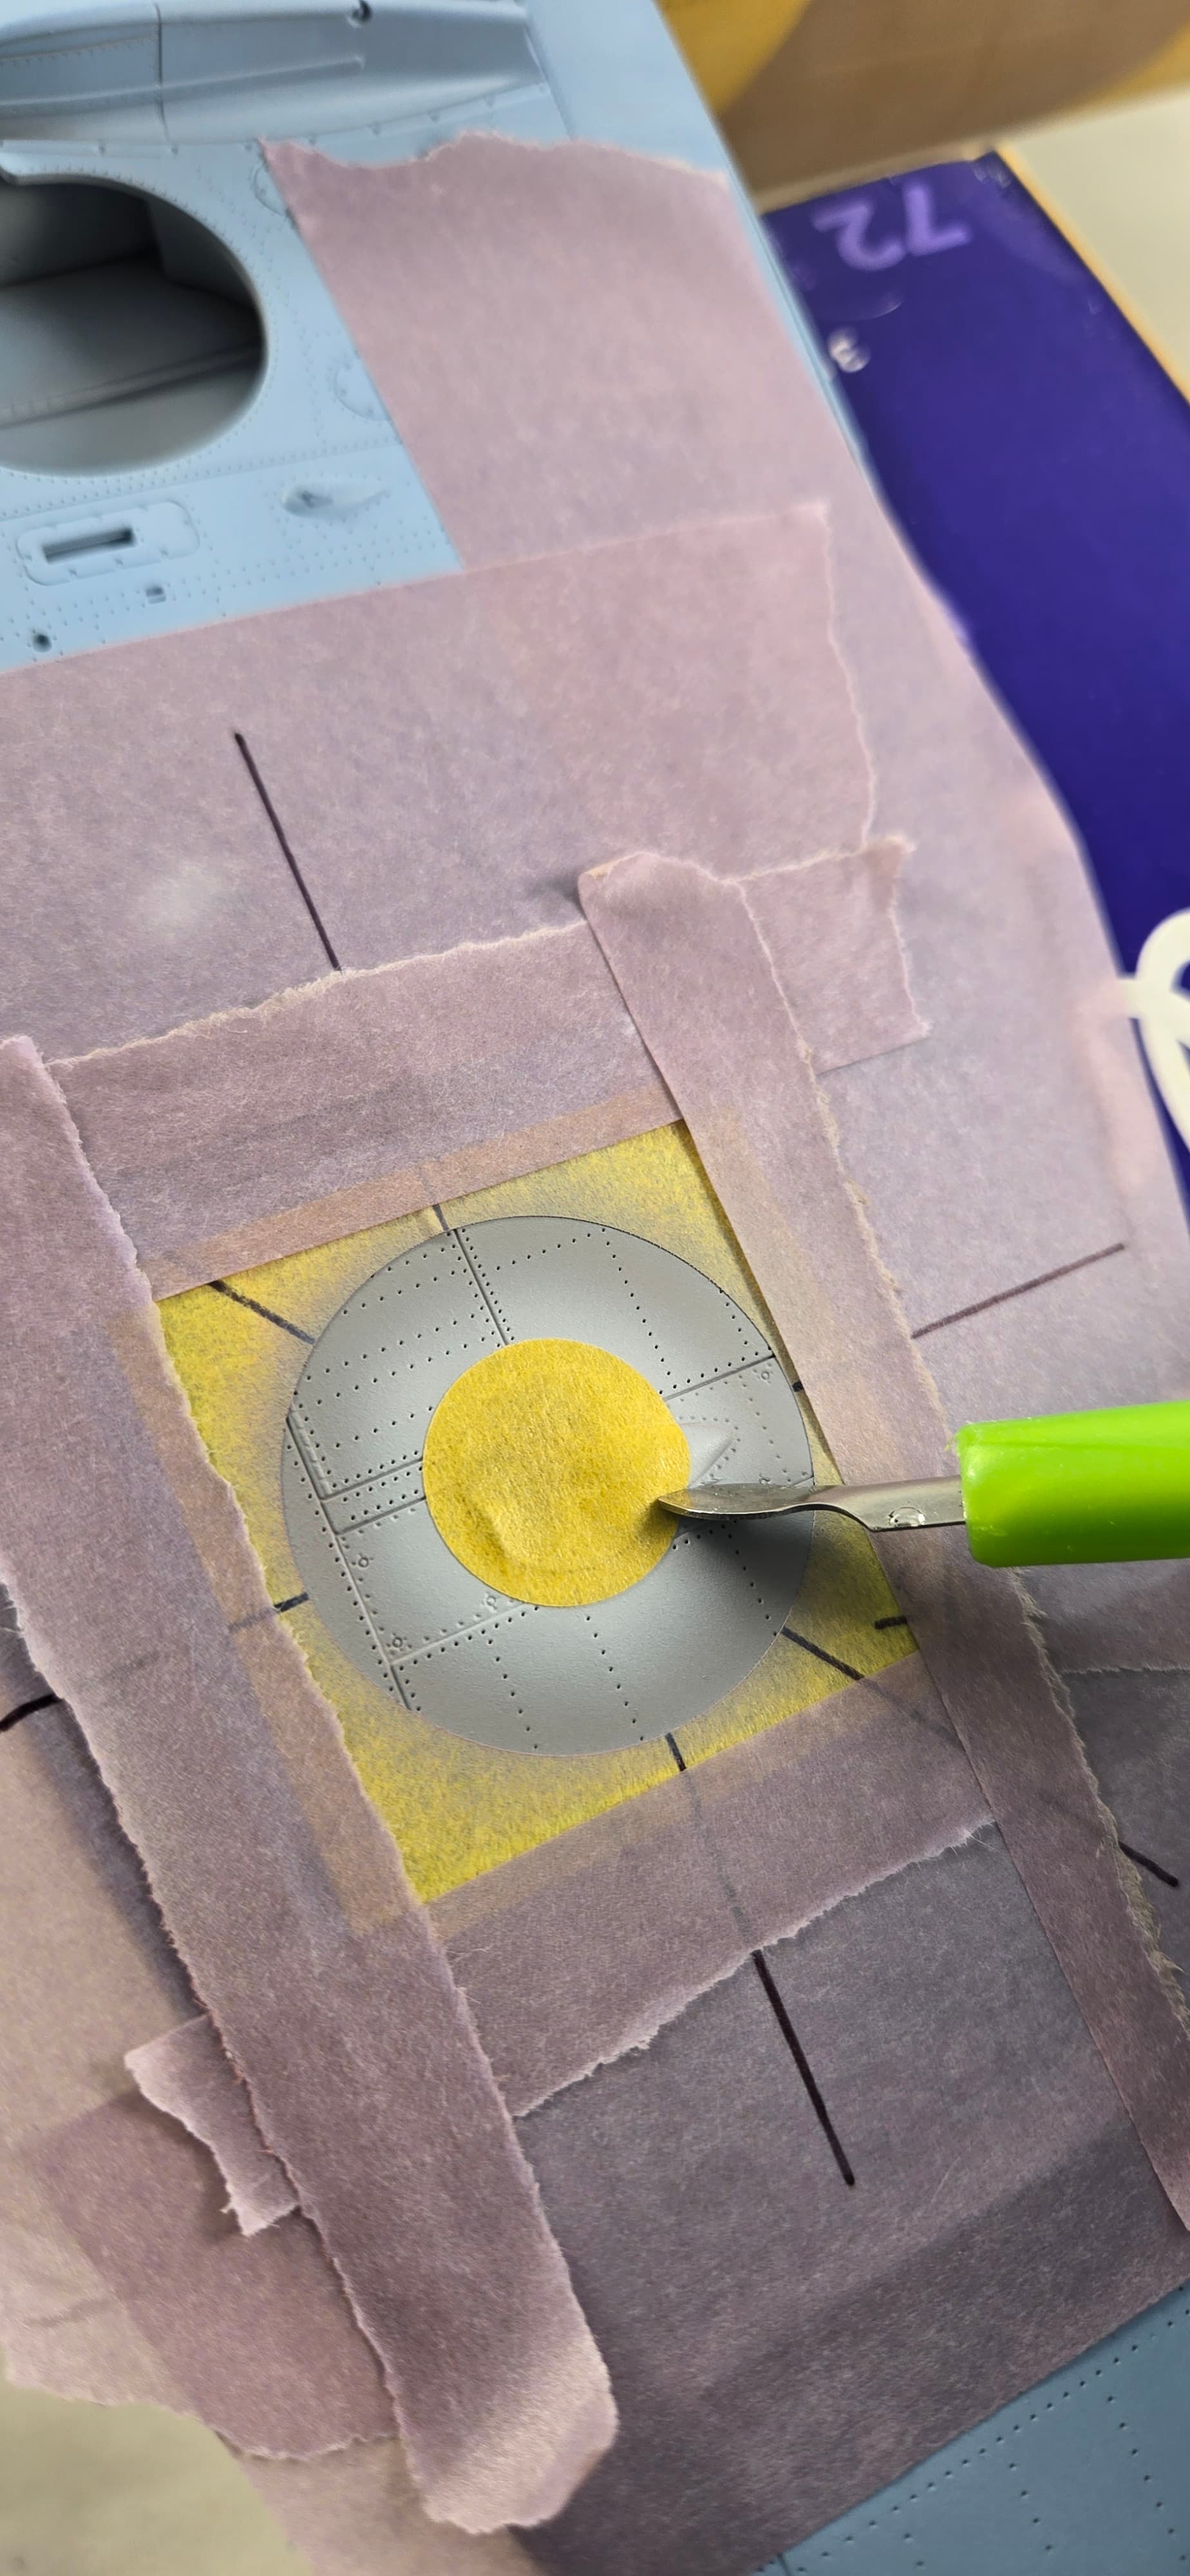
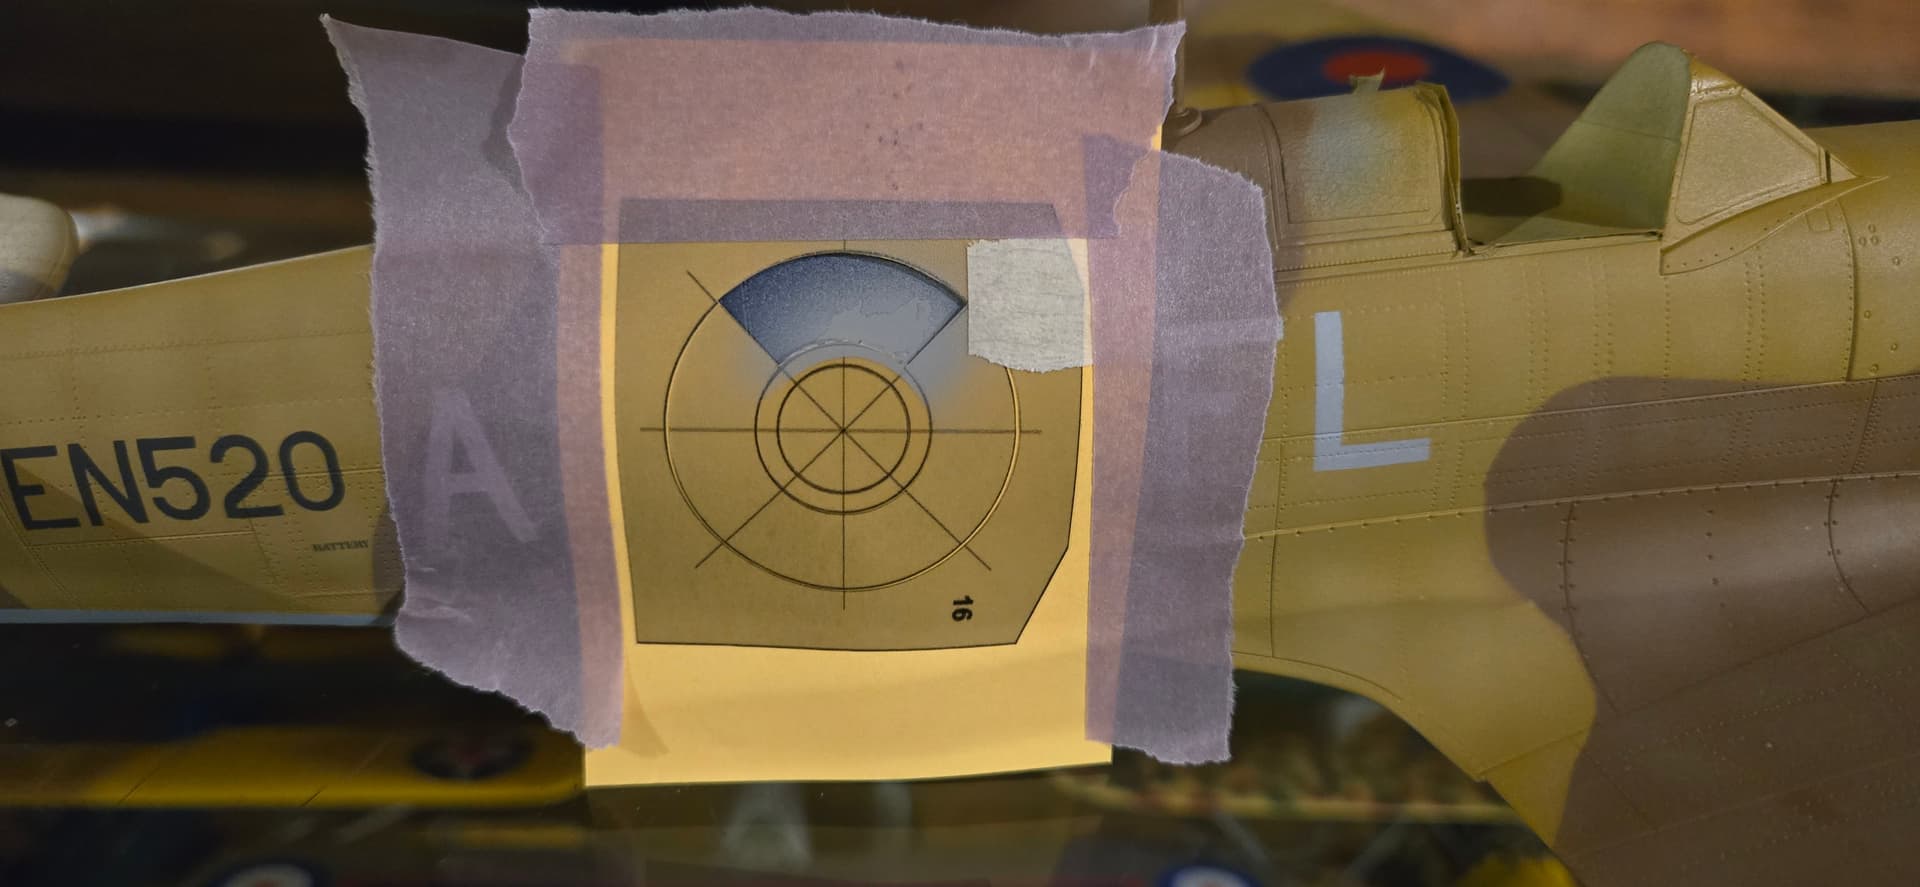
Like before, I primed with Tamiya Sky Grey, waited 15 minutes, then shot a thinned, patchy coat of MRP Marker Red at about 12 psi, then removed the edge masks. You can see the “corner alignment” process better in this picture. Each successive mask gets placed in the same corner.

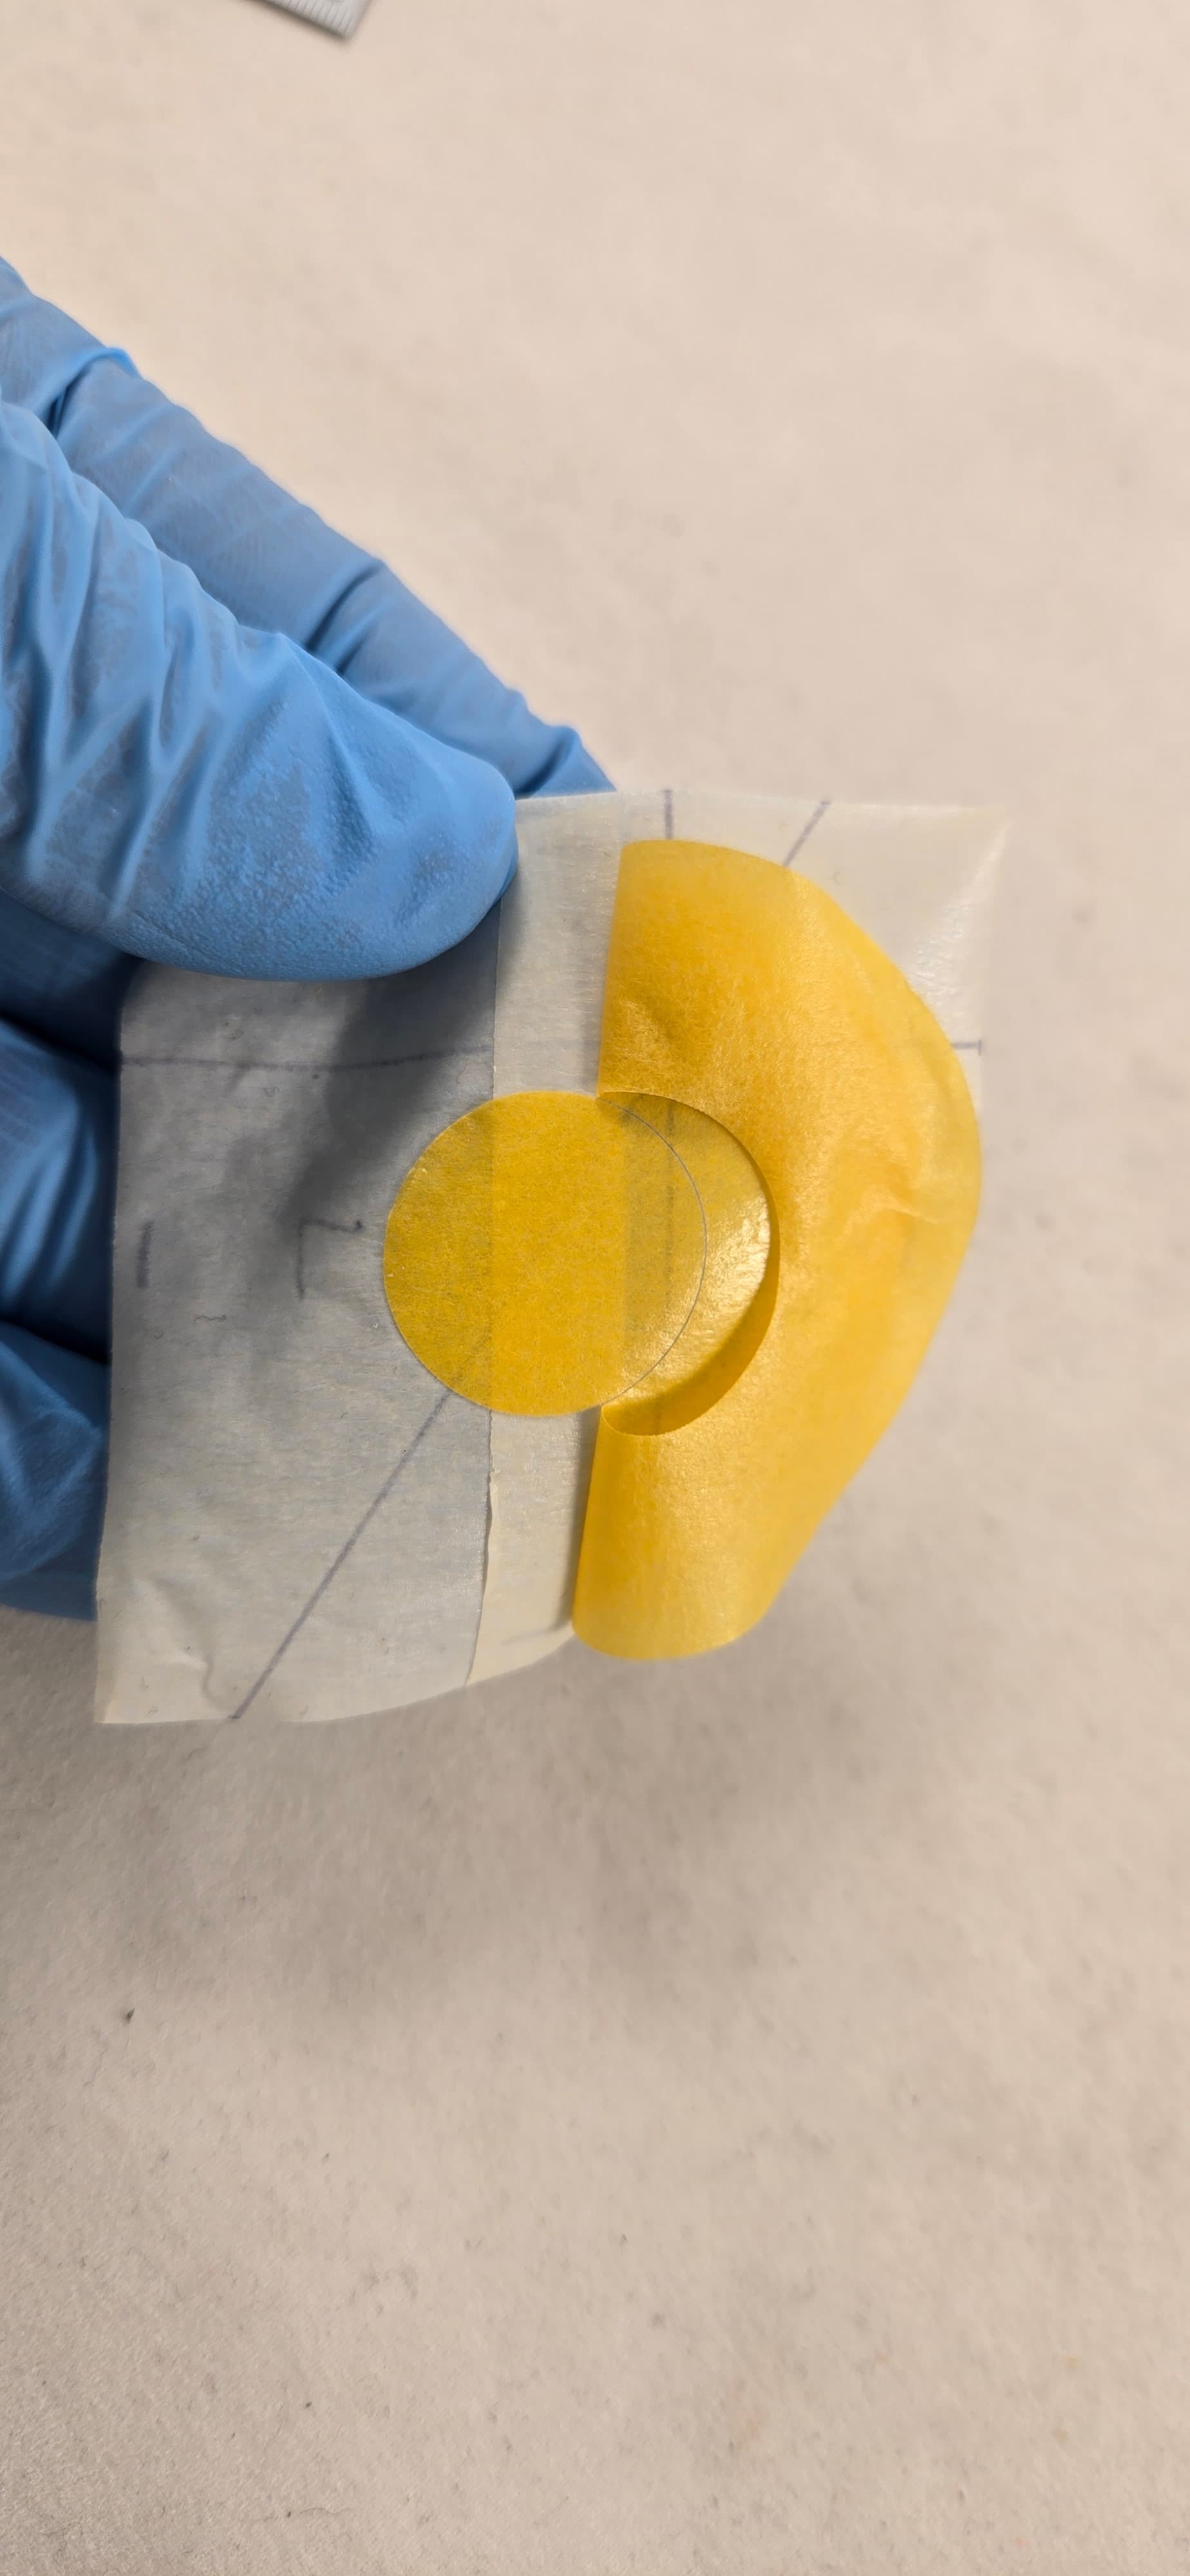
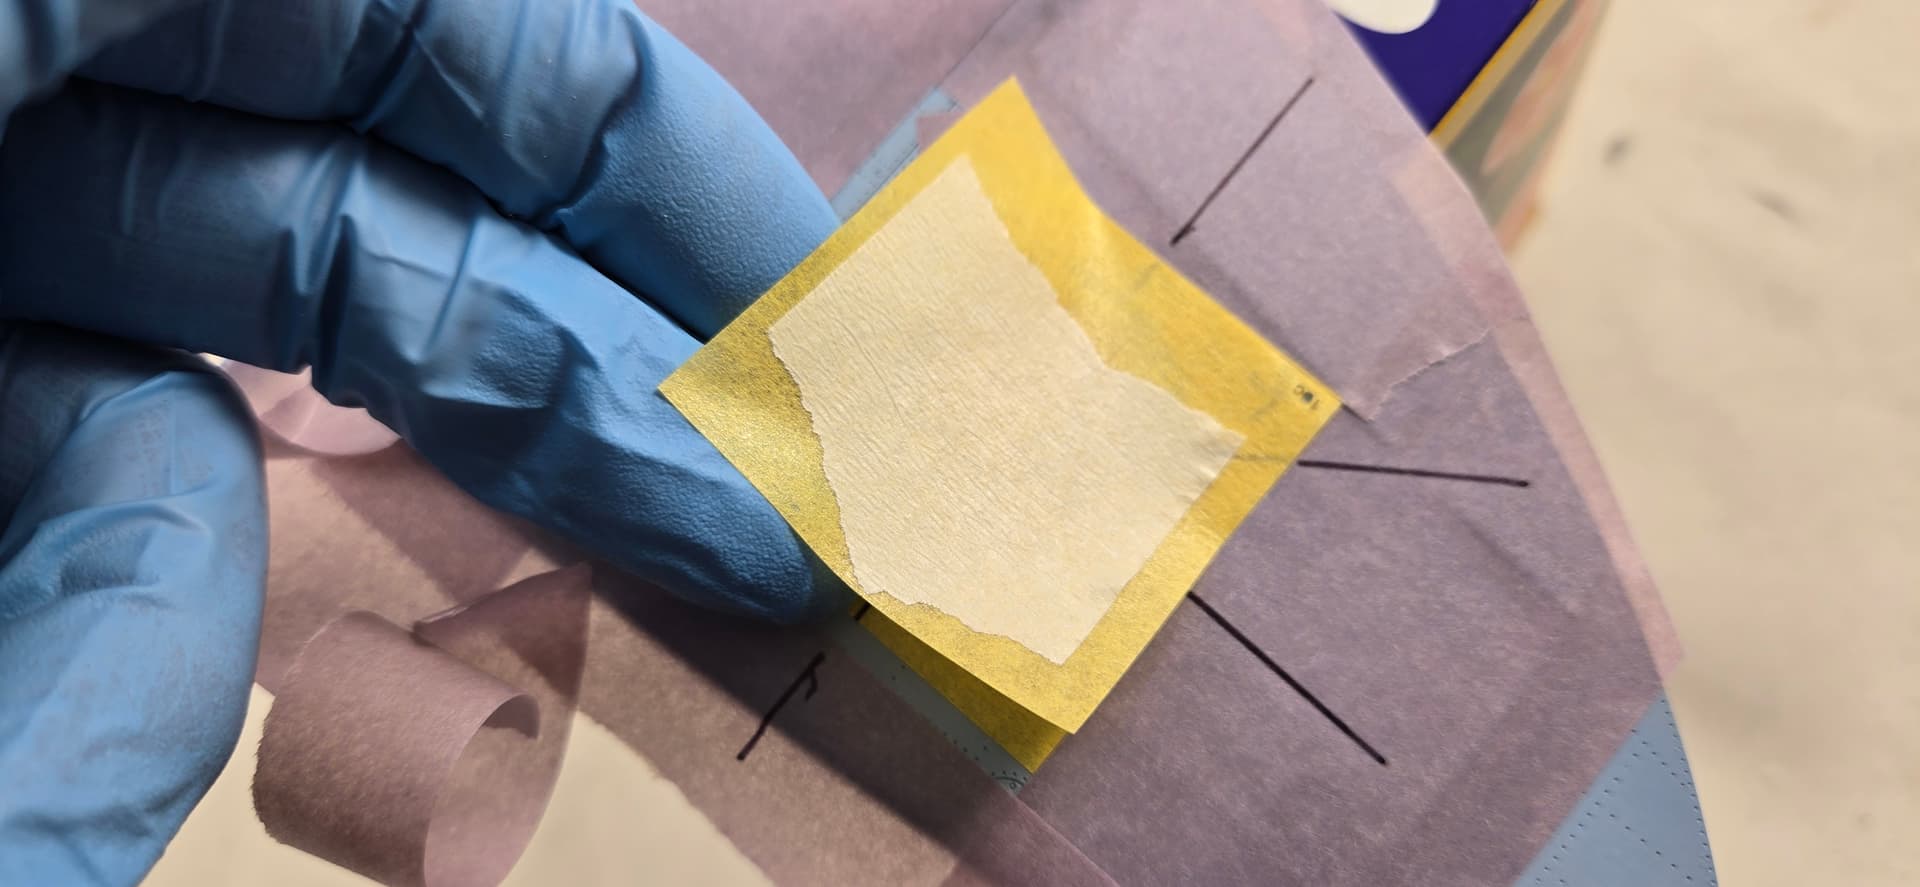
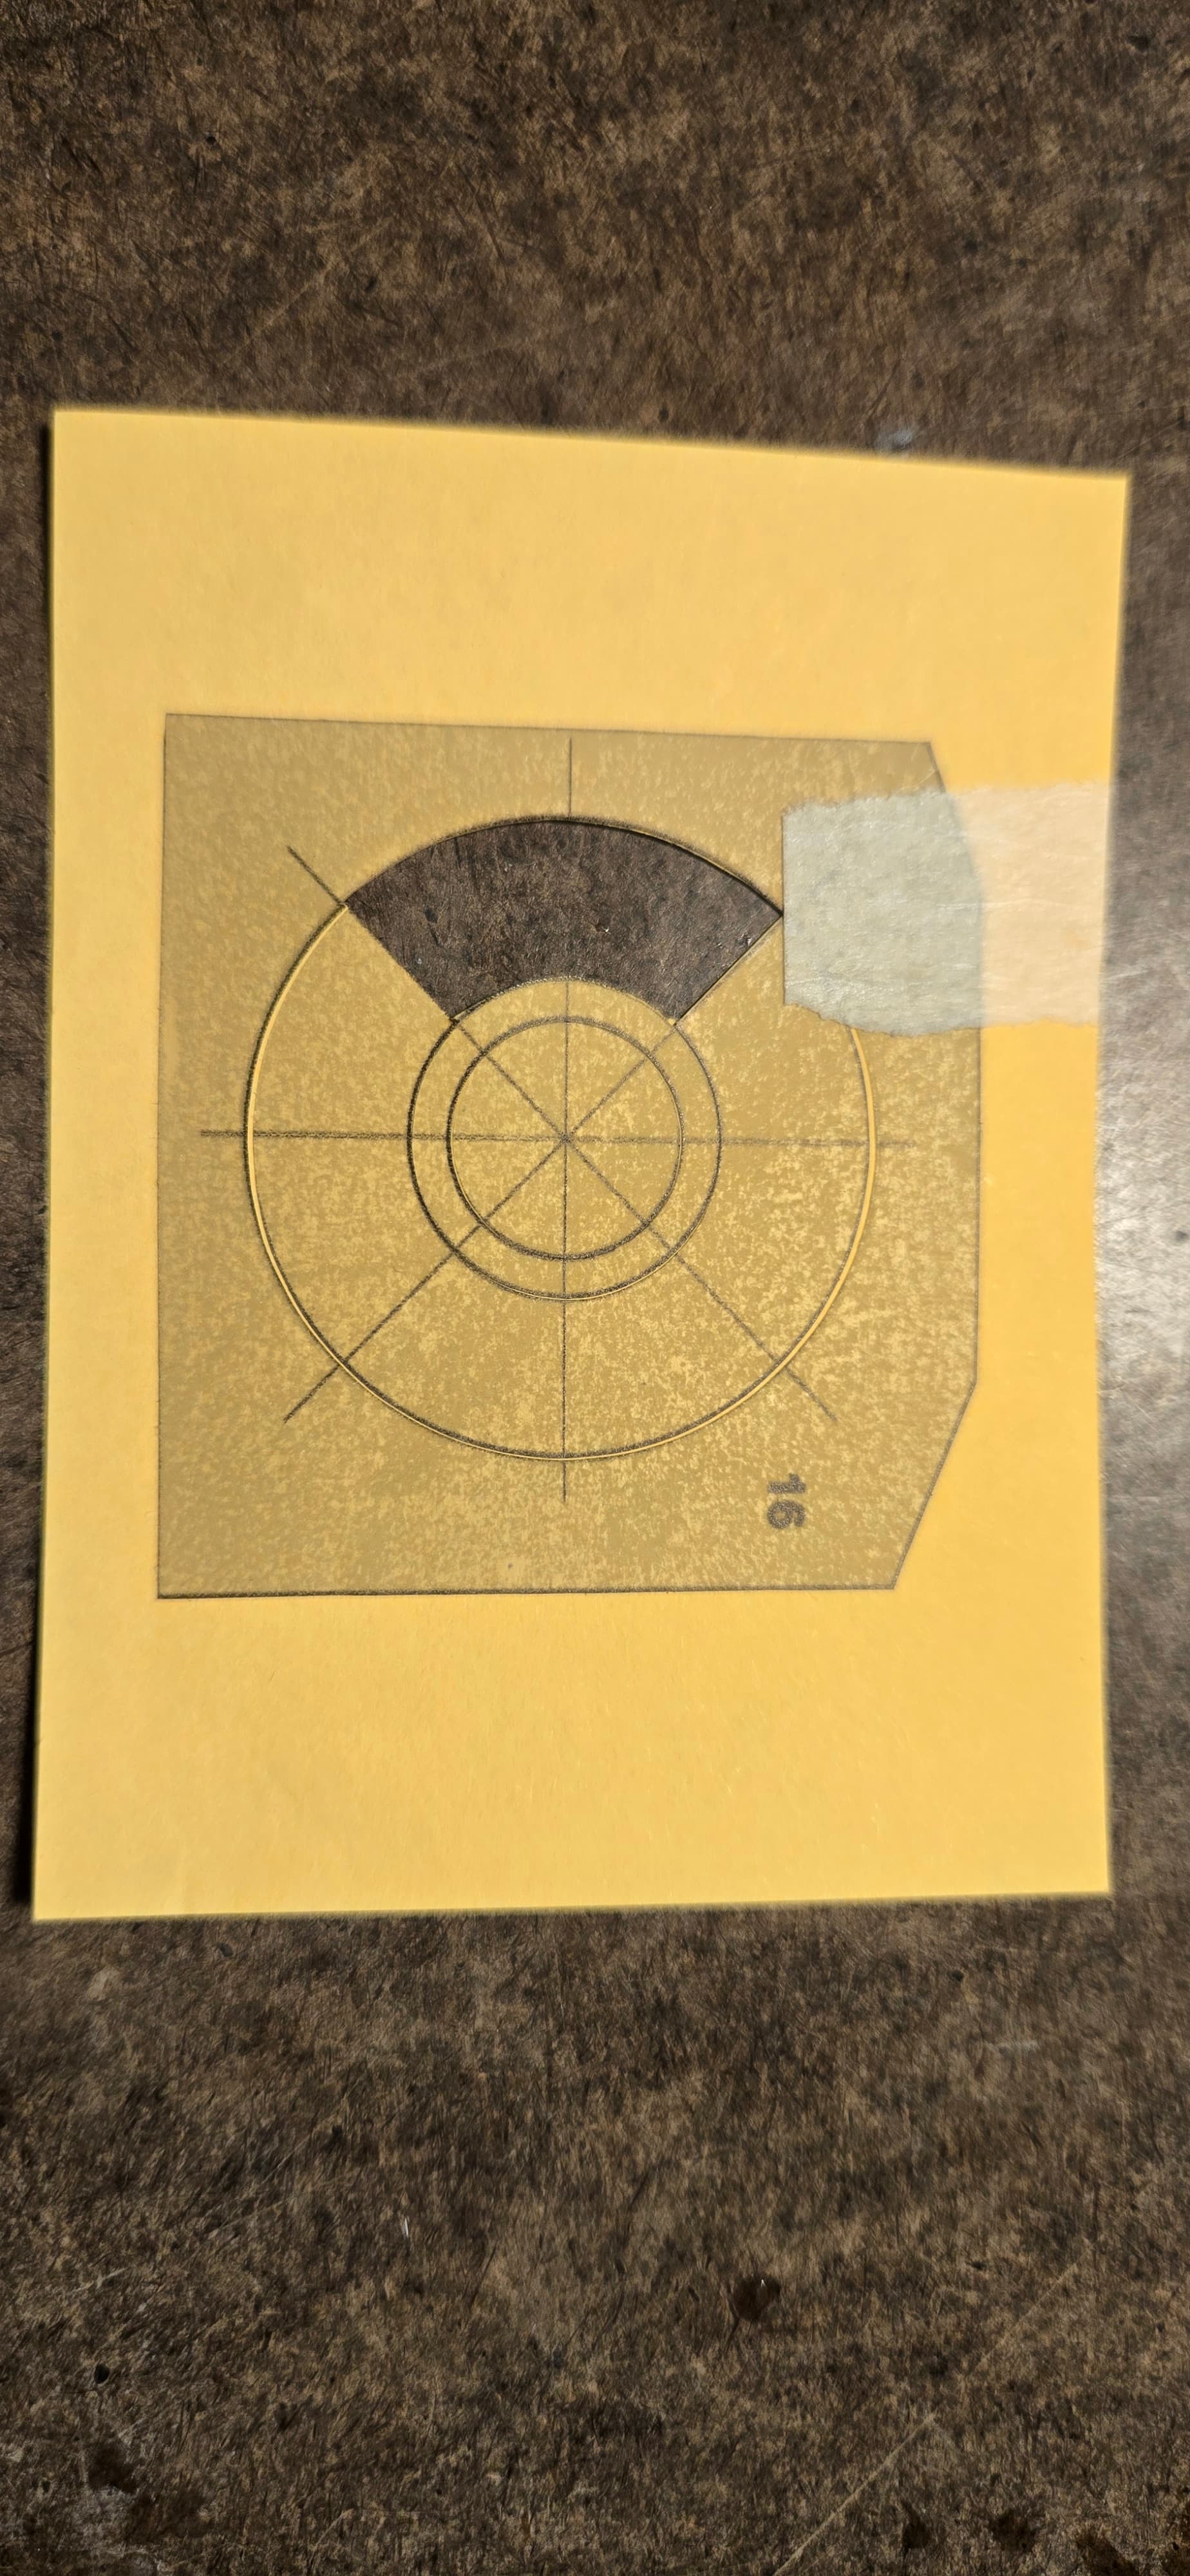
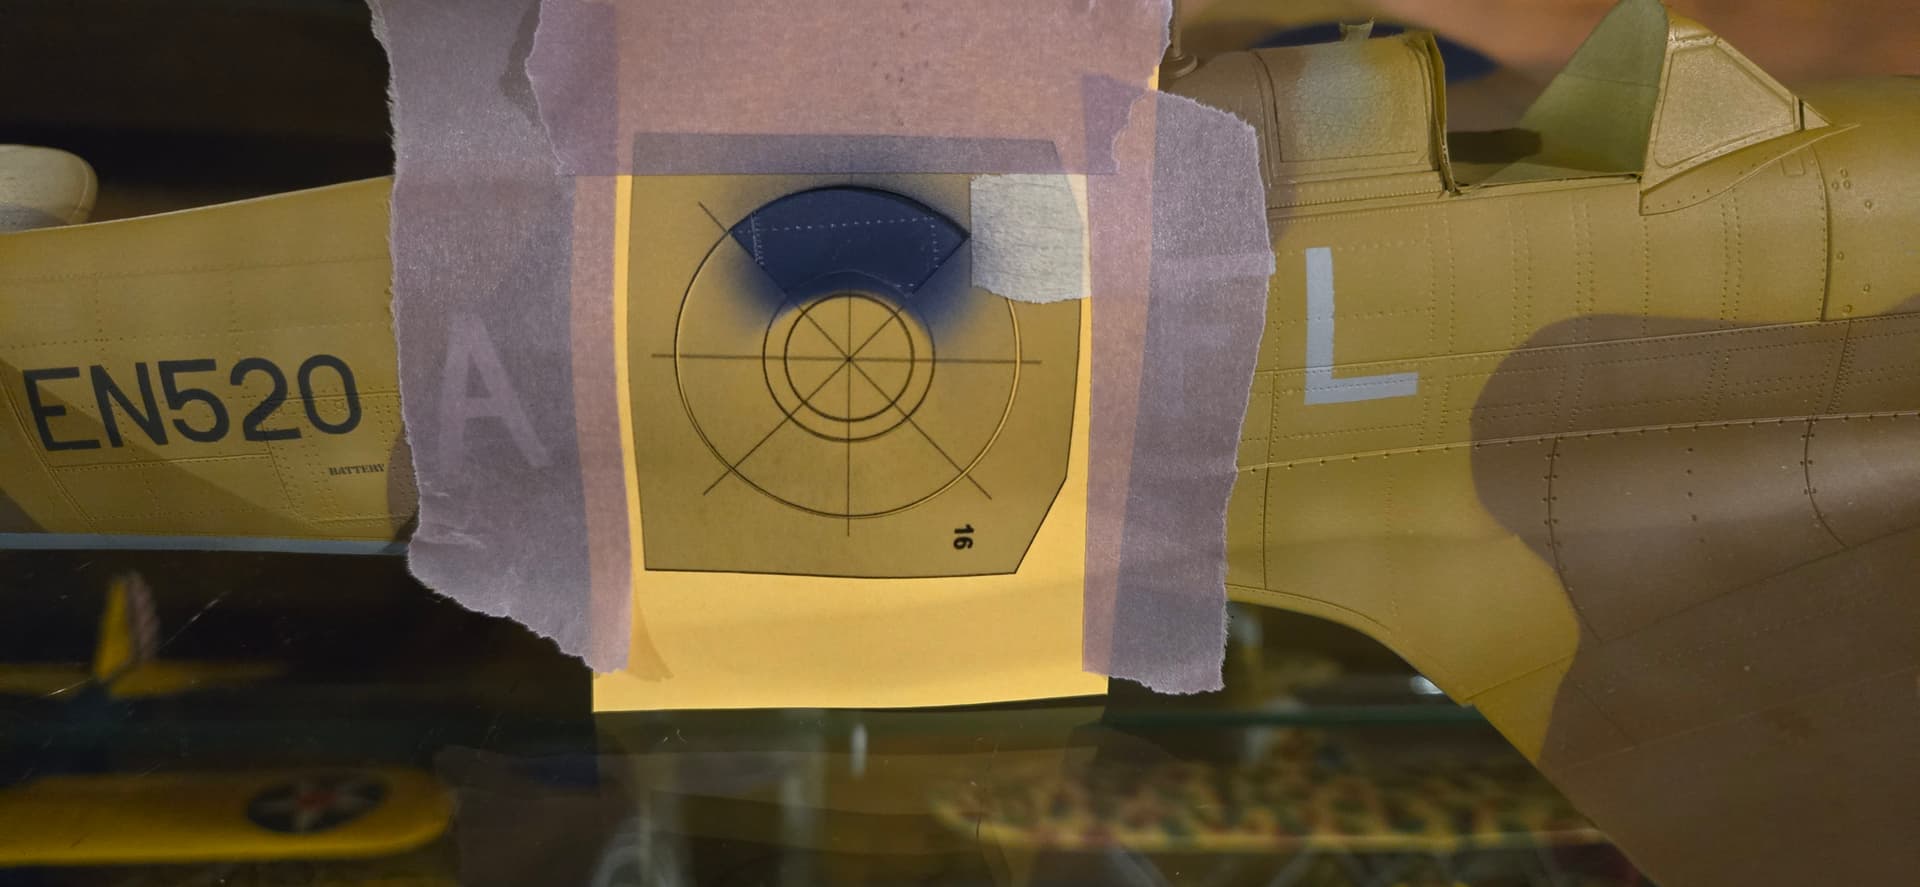
We still need to use the transfer tape method for this process. Select the “red ring mask” and cover the center red dot with the transfer tape. Place the “red ring mask” over the “blue ring mask” aligning the same corner, and thoroughly burnish down the center red dot.

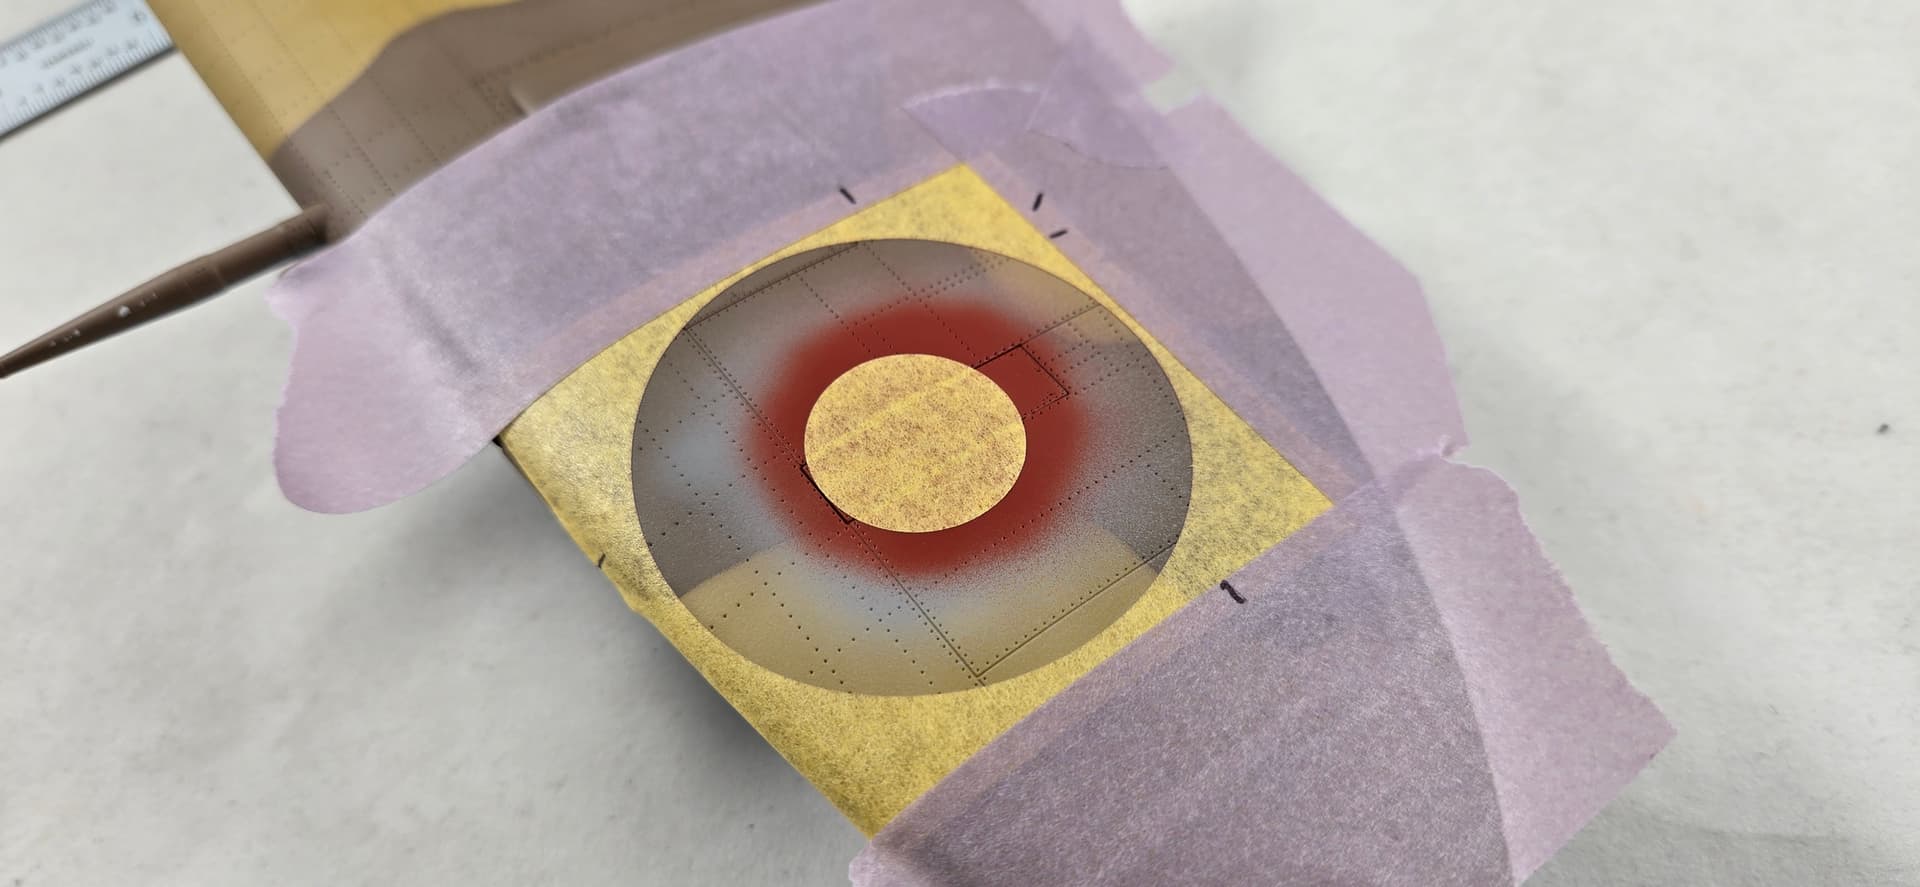
Pull off the “red ring mask” leaving the center dot and and re-tape all four exposed edges.

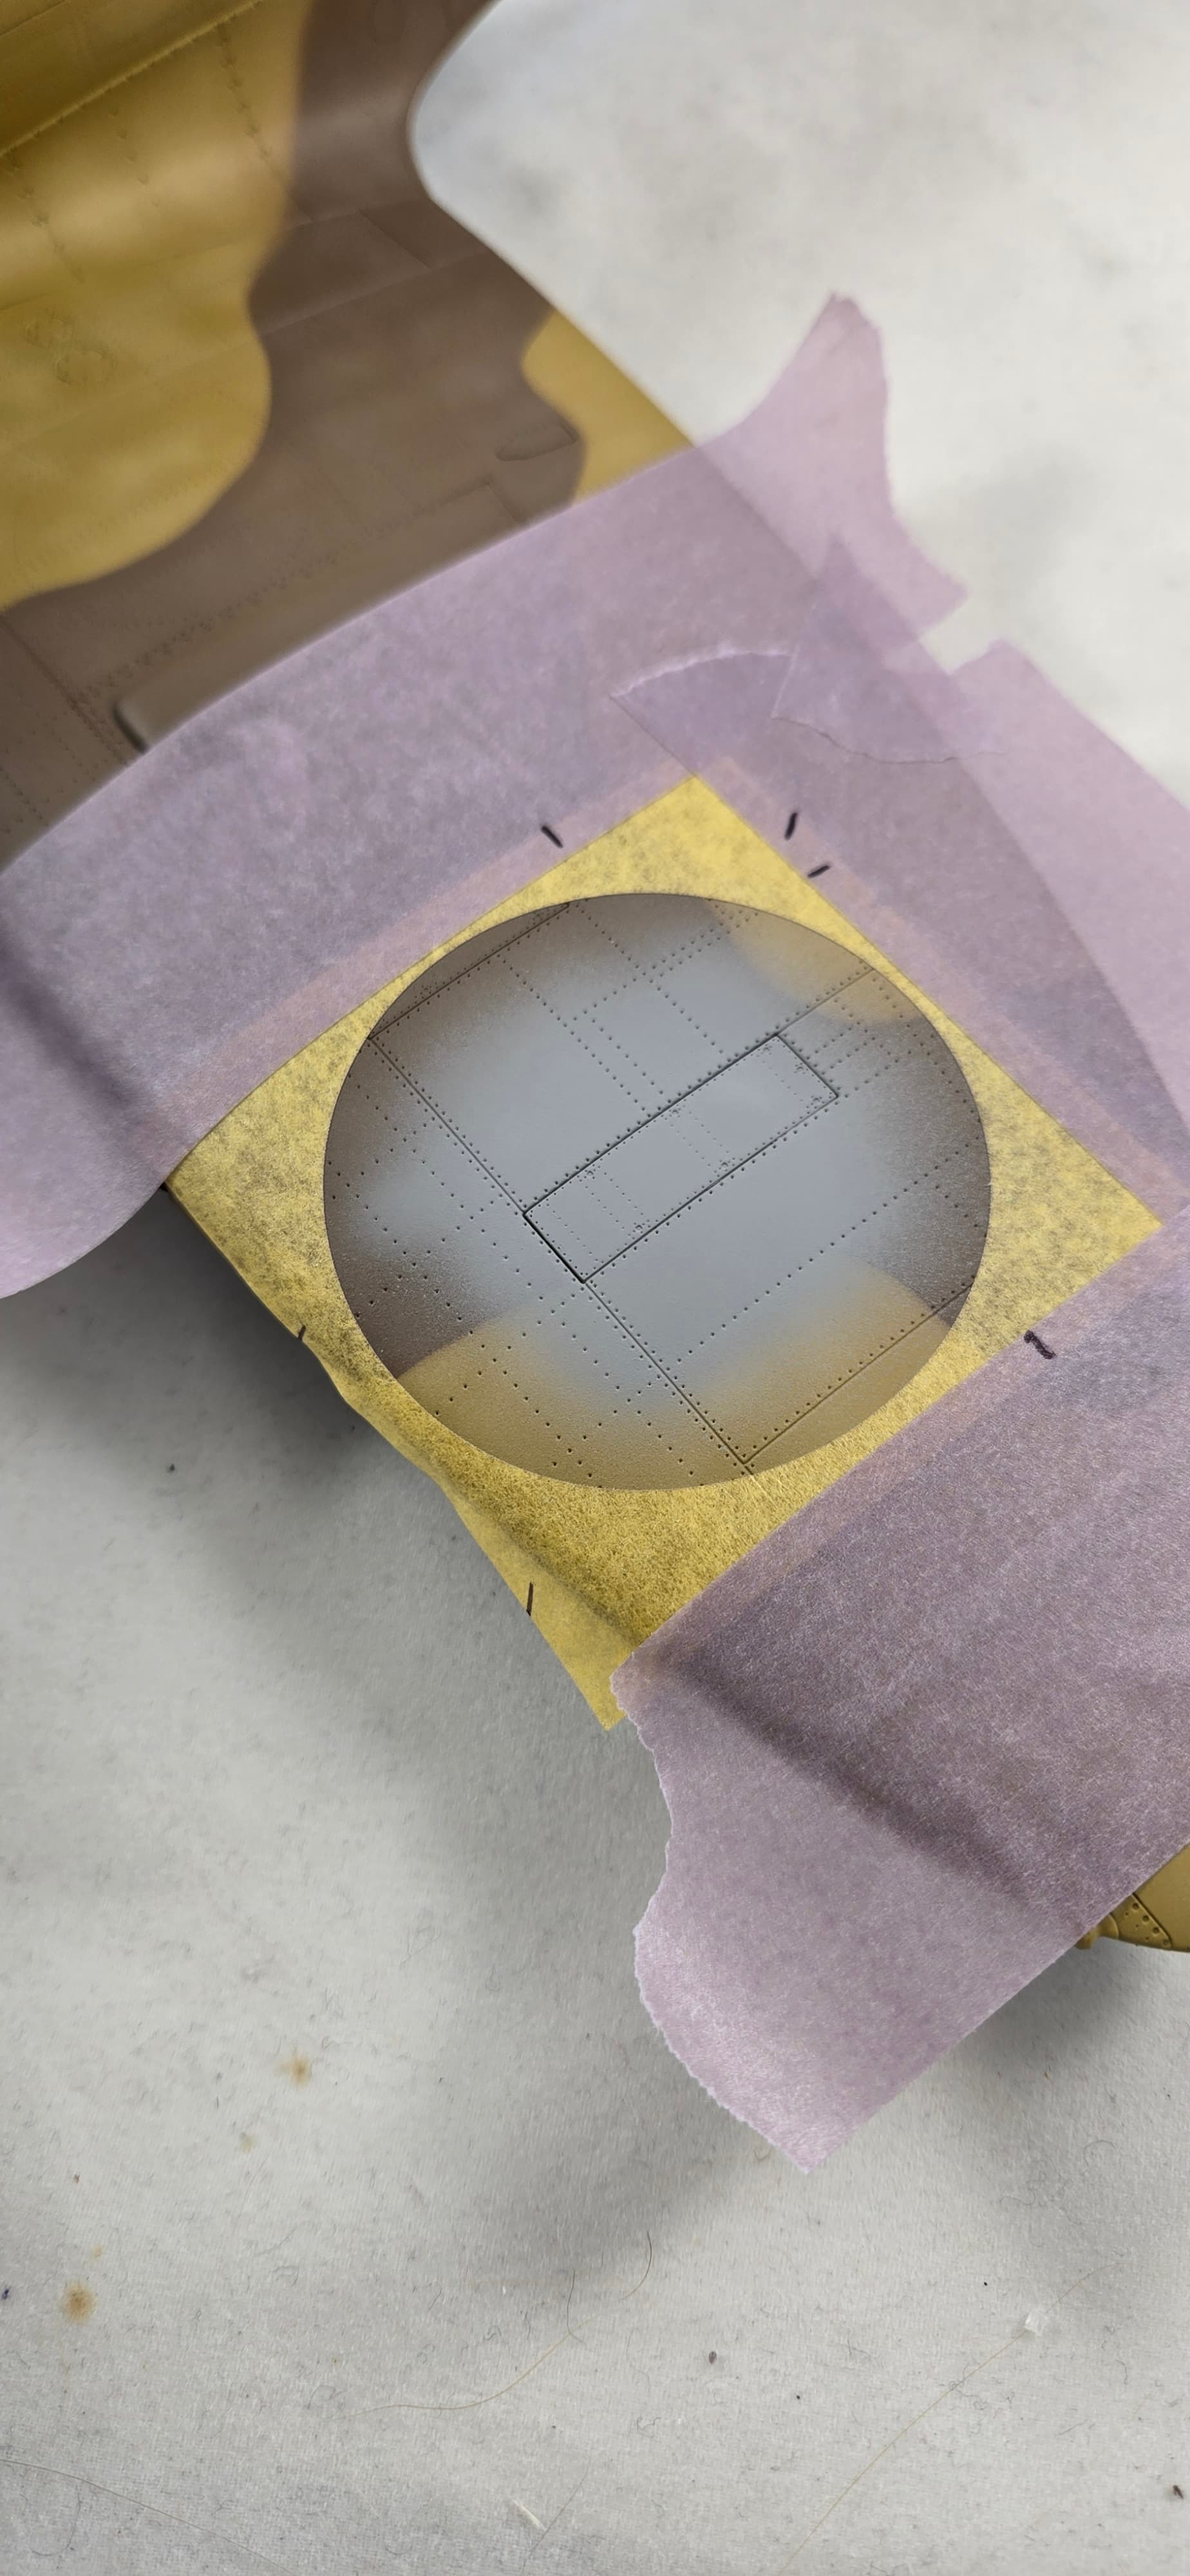
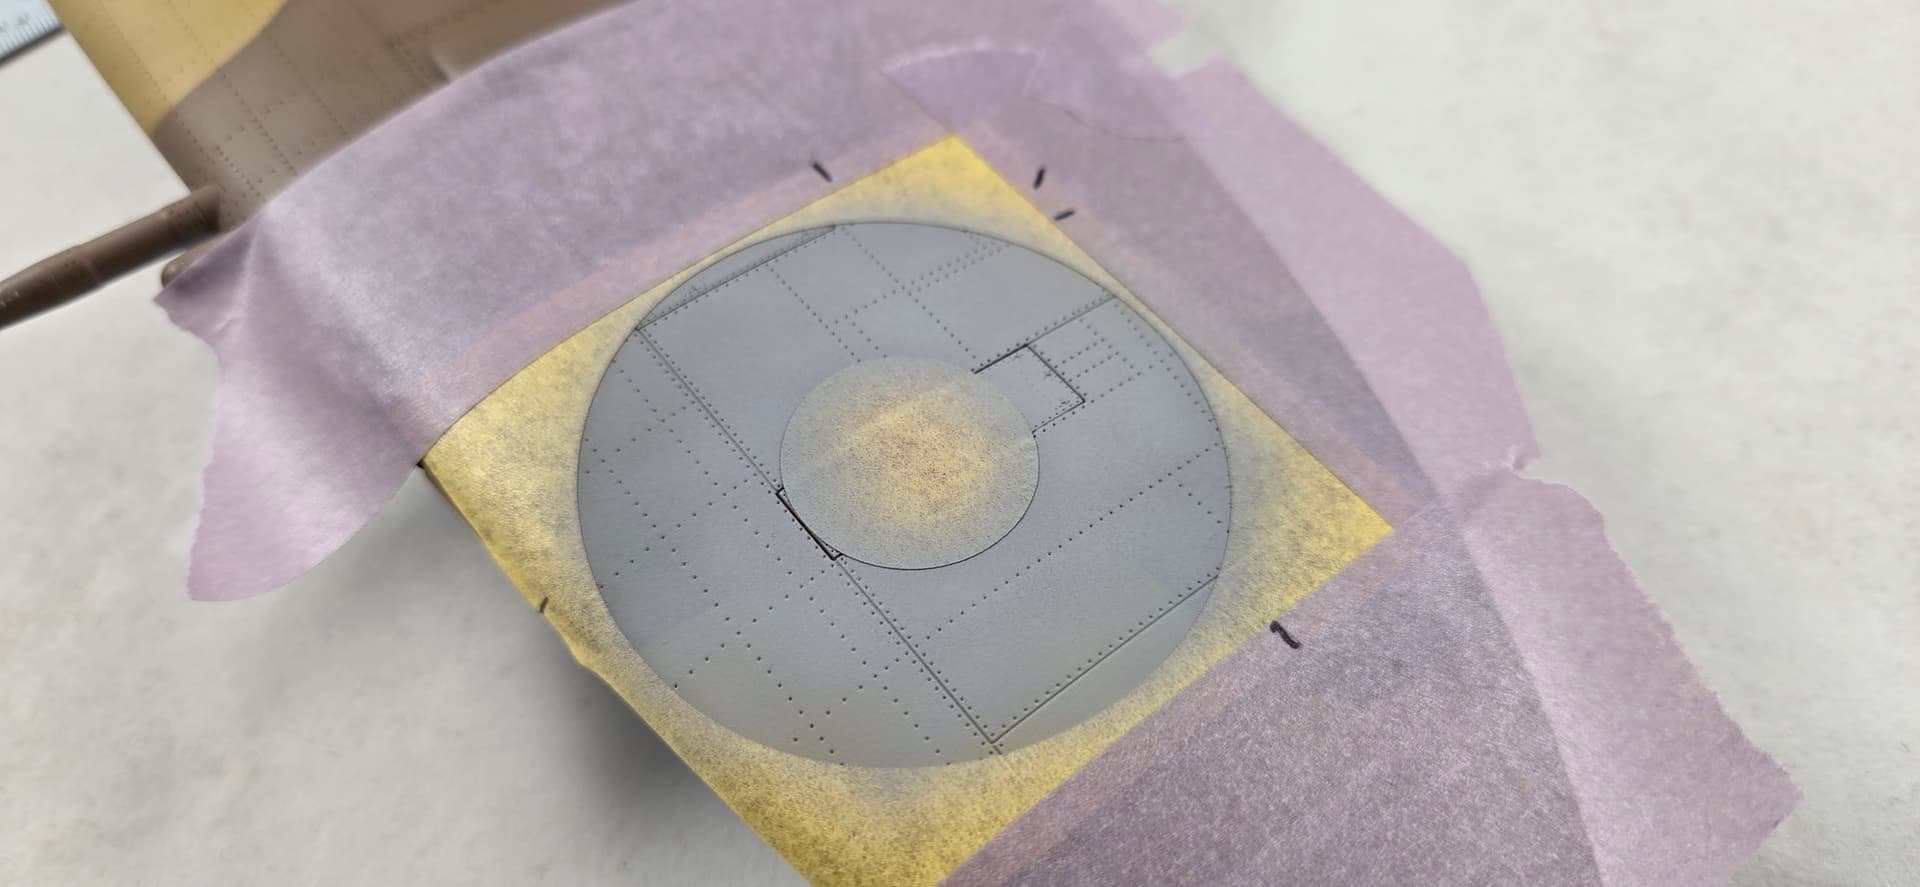
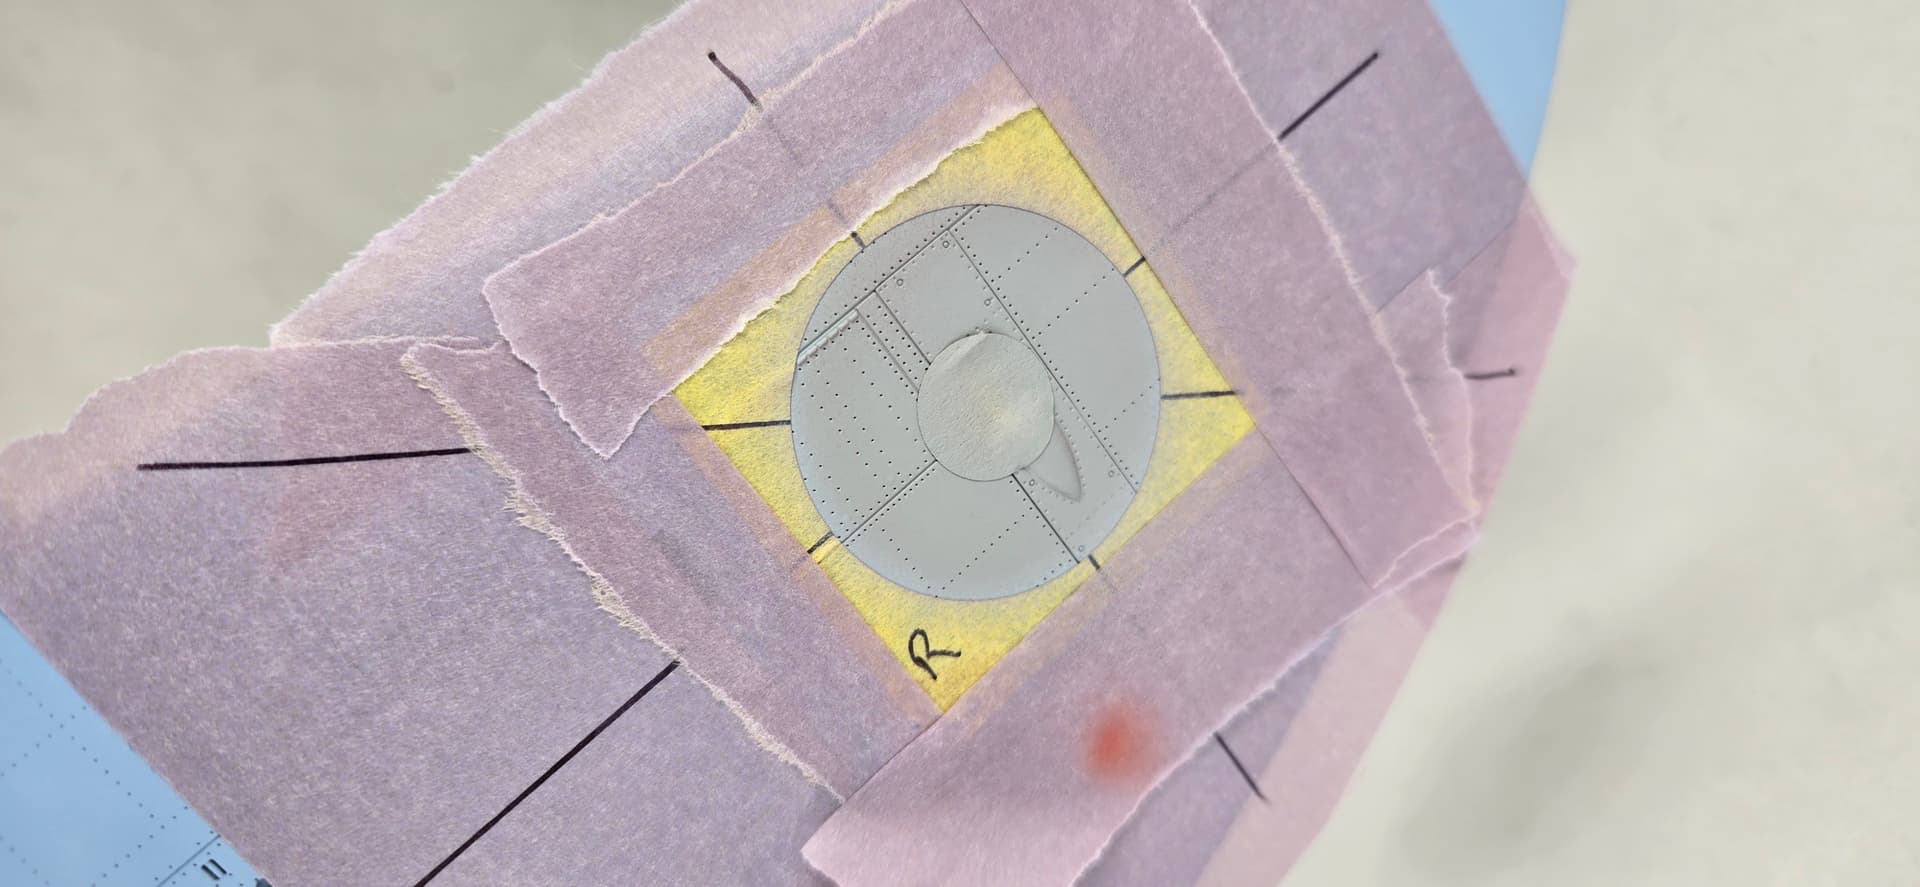
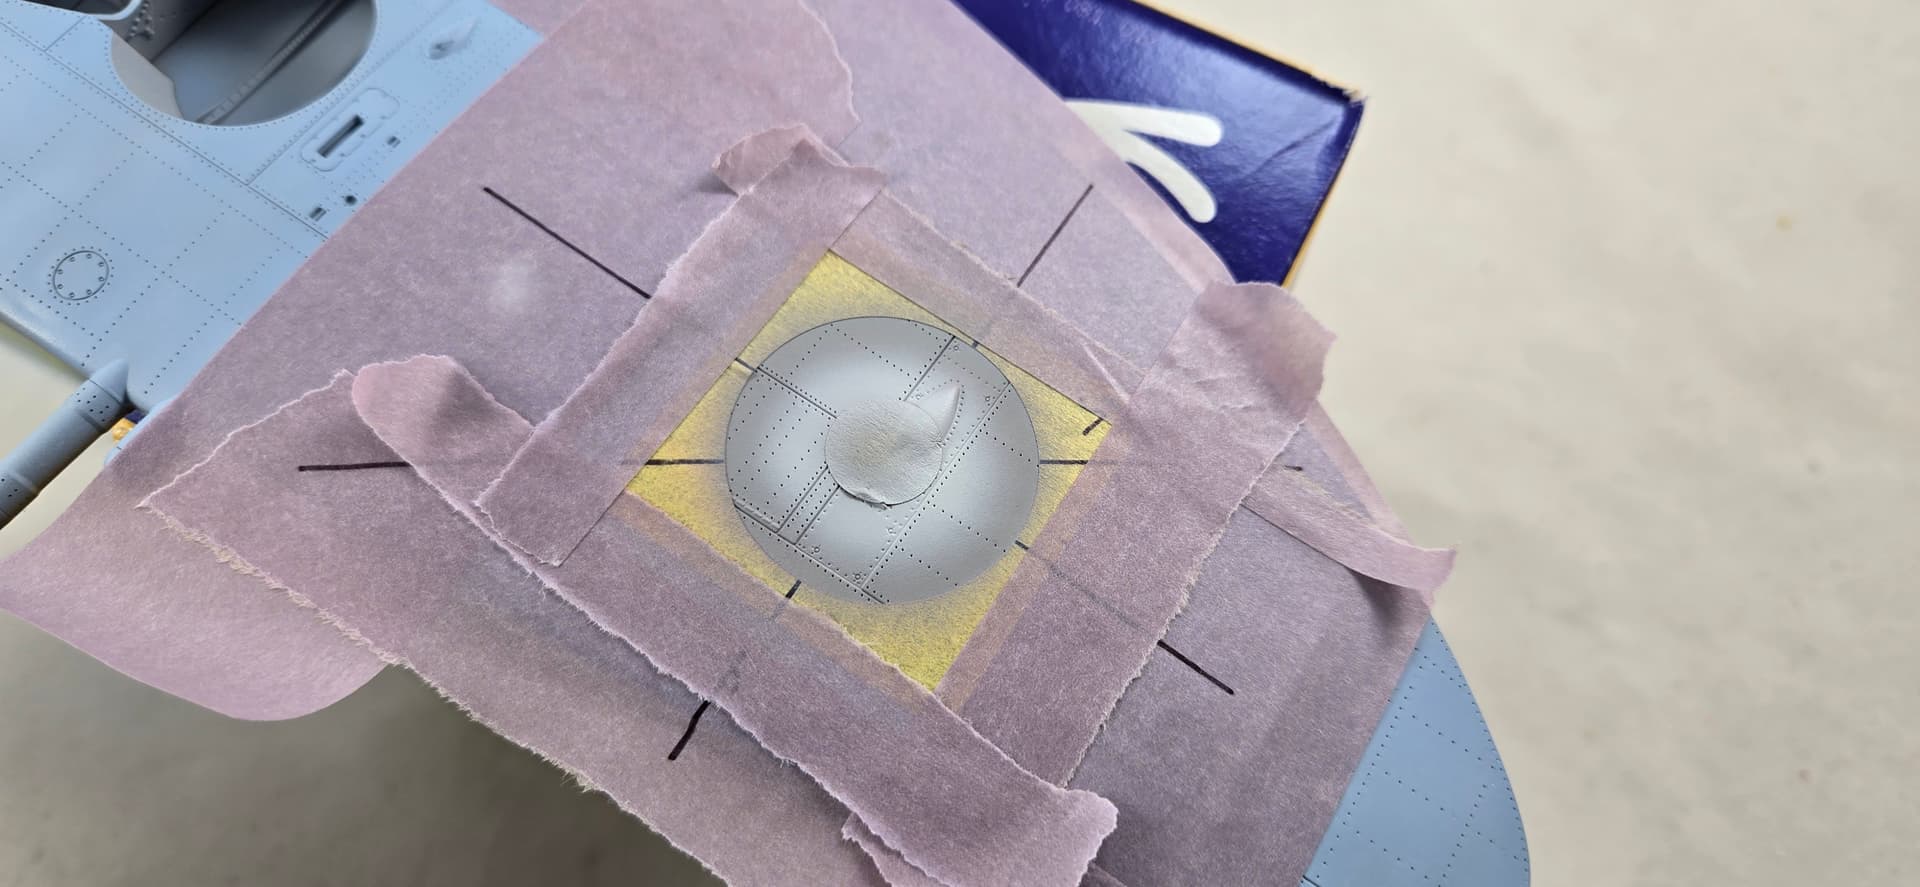
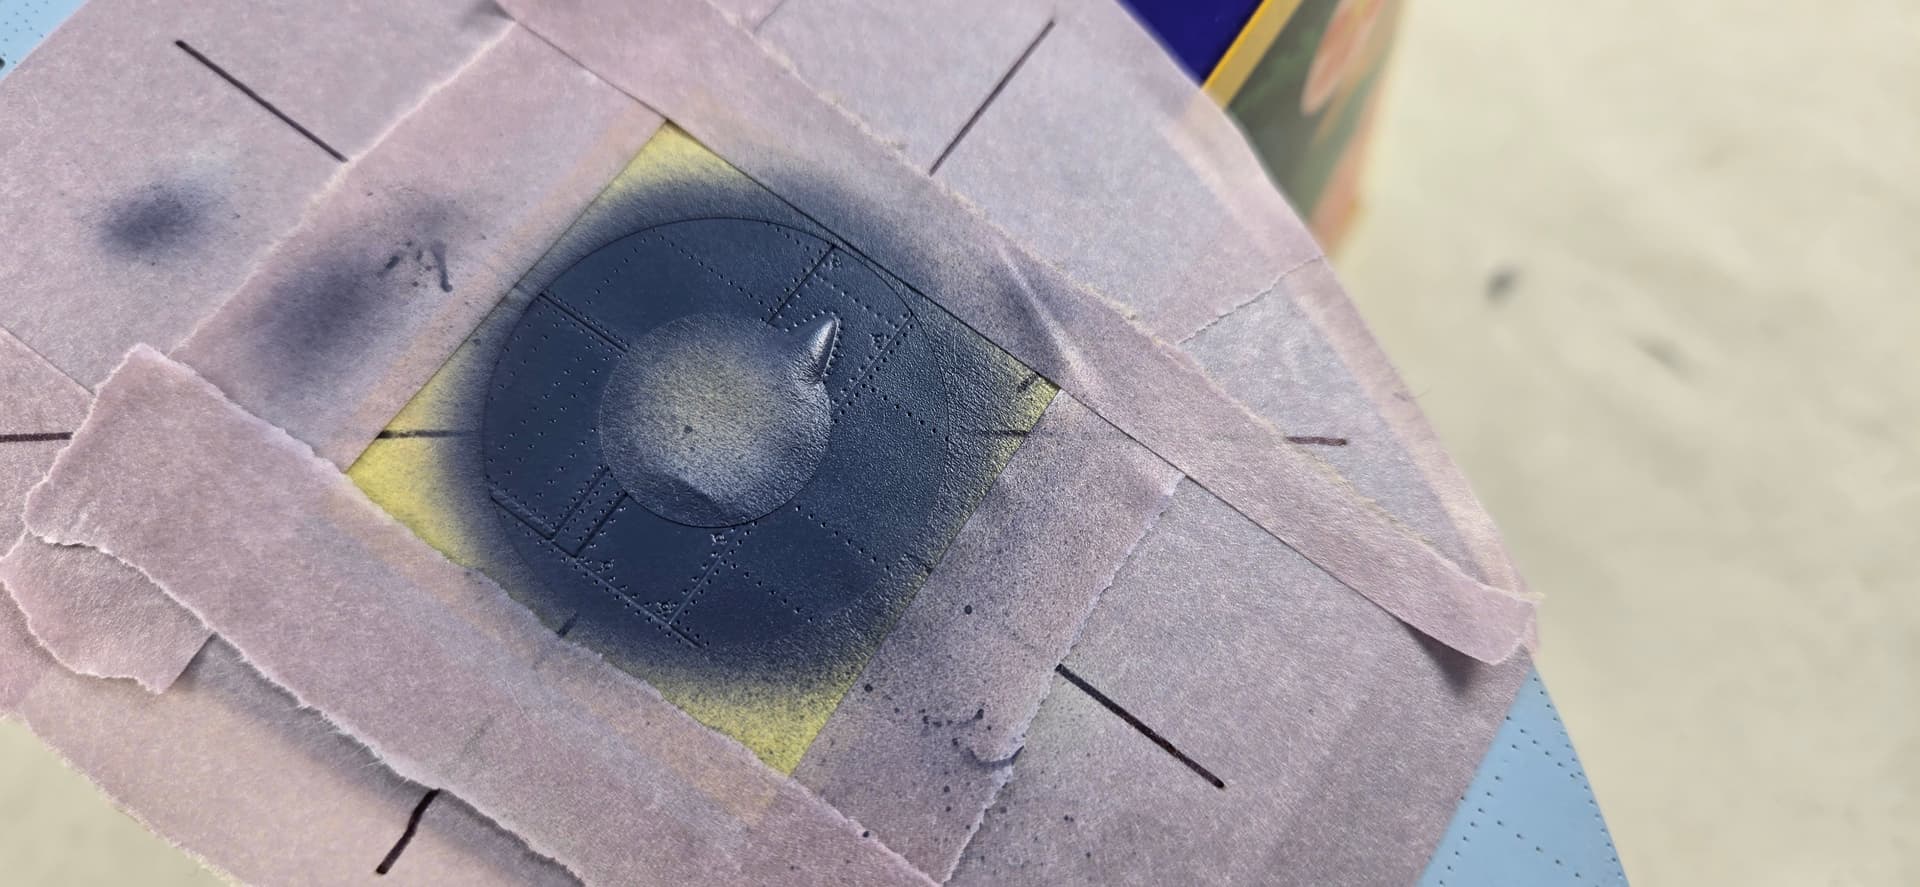
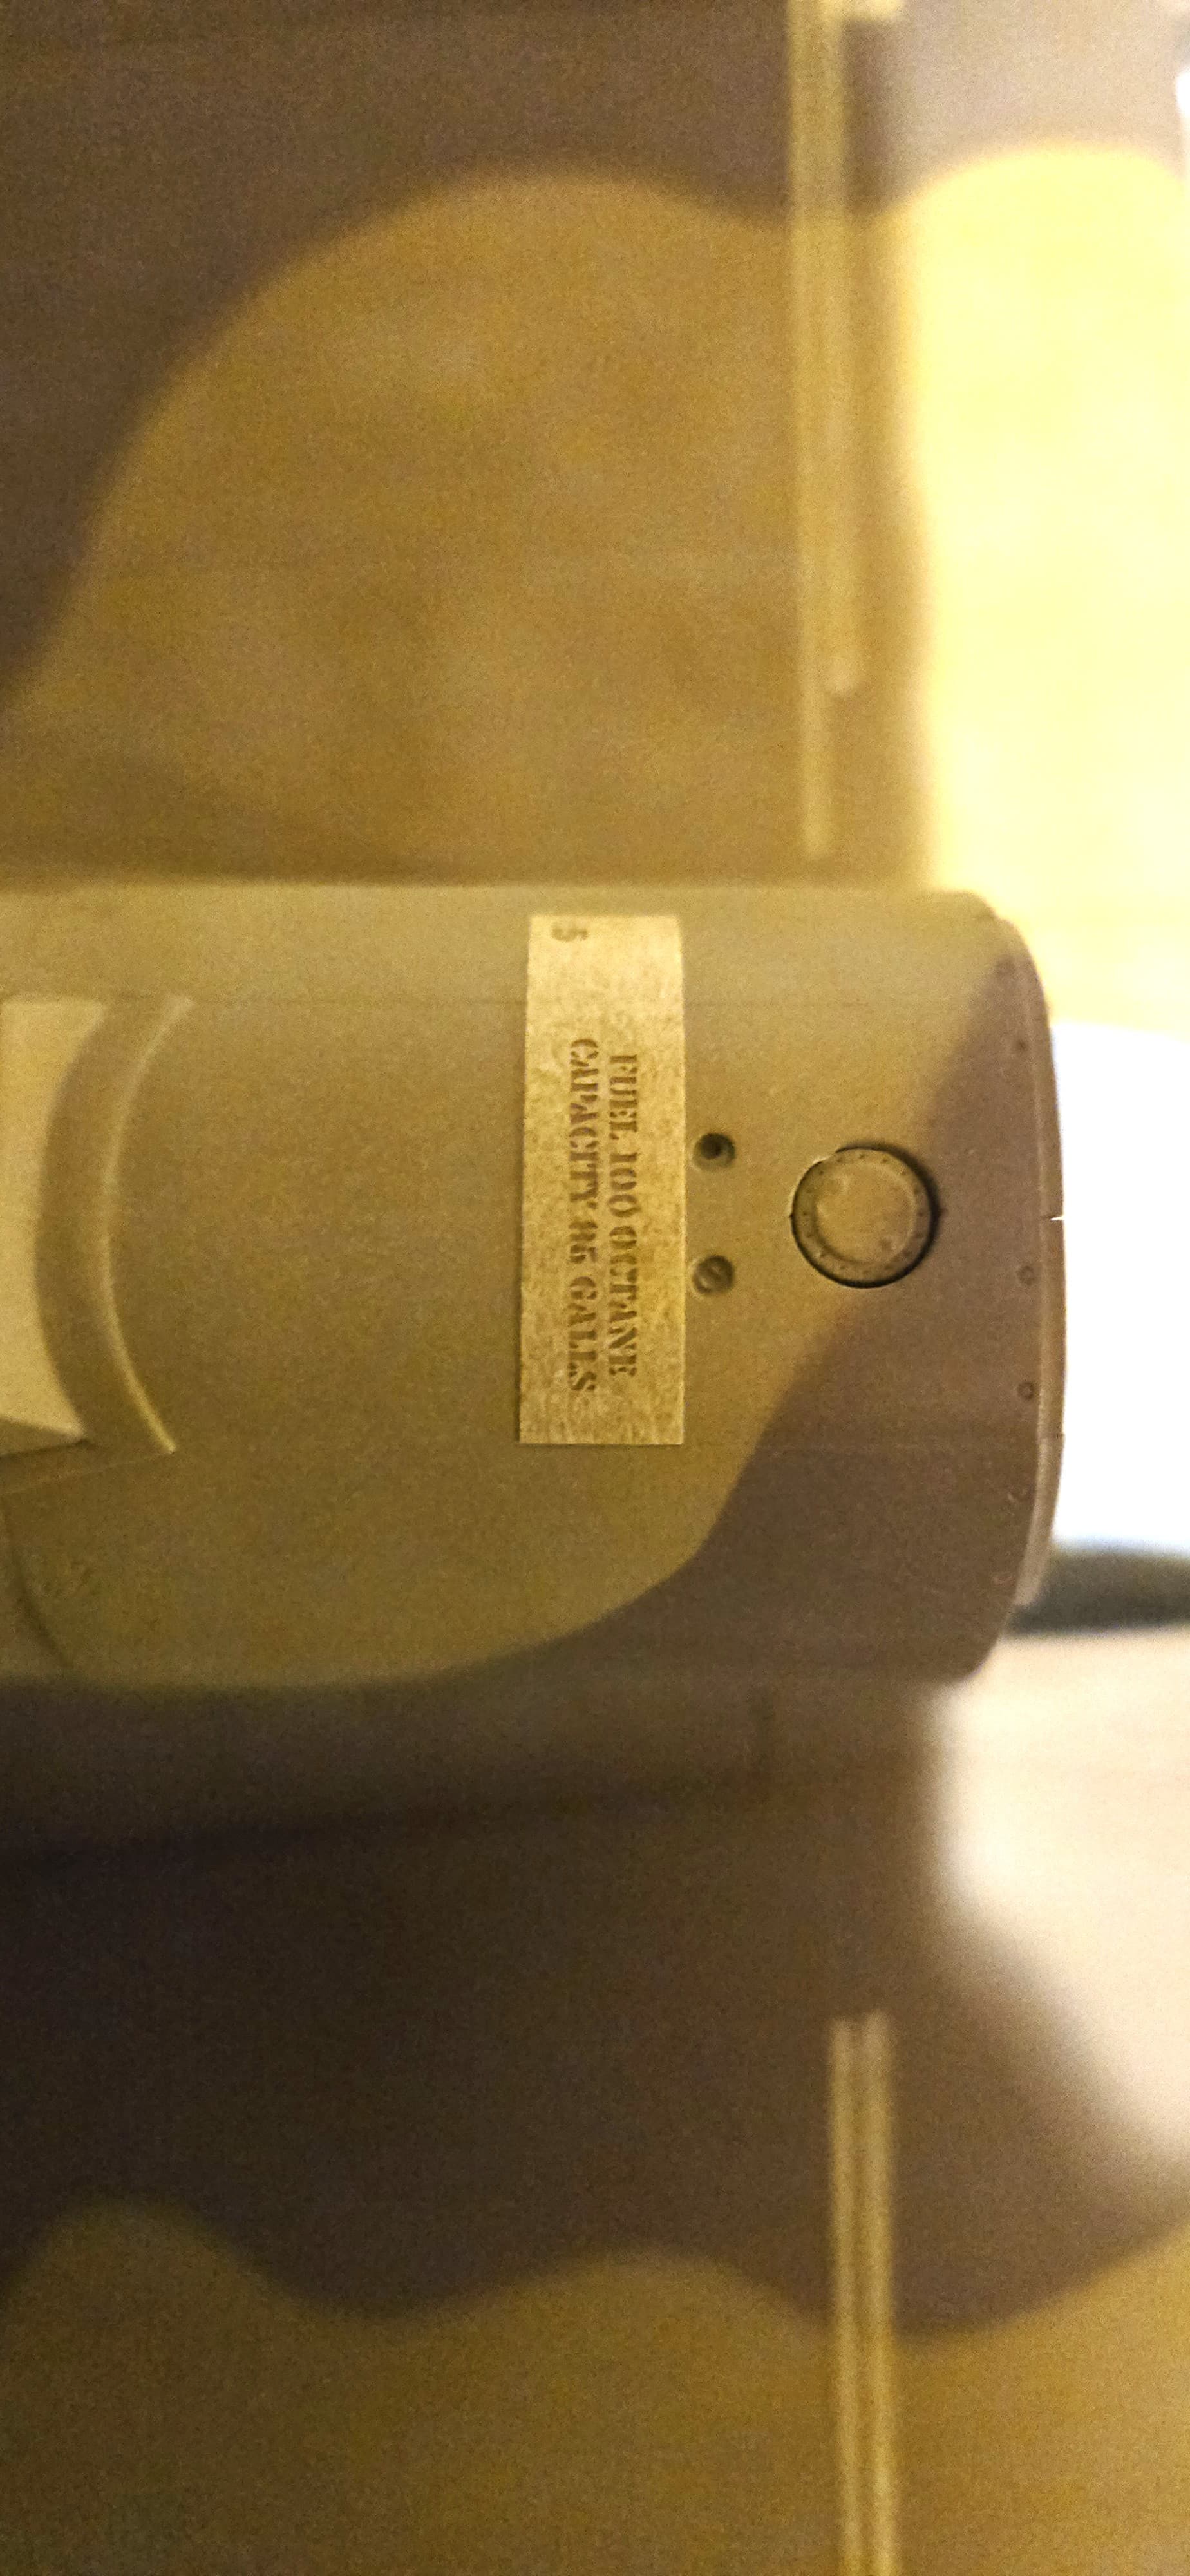
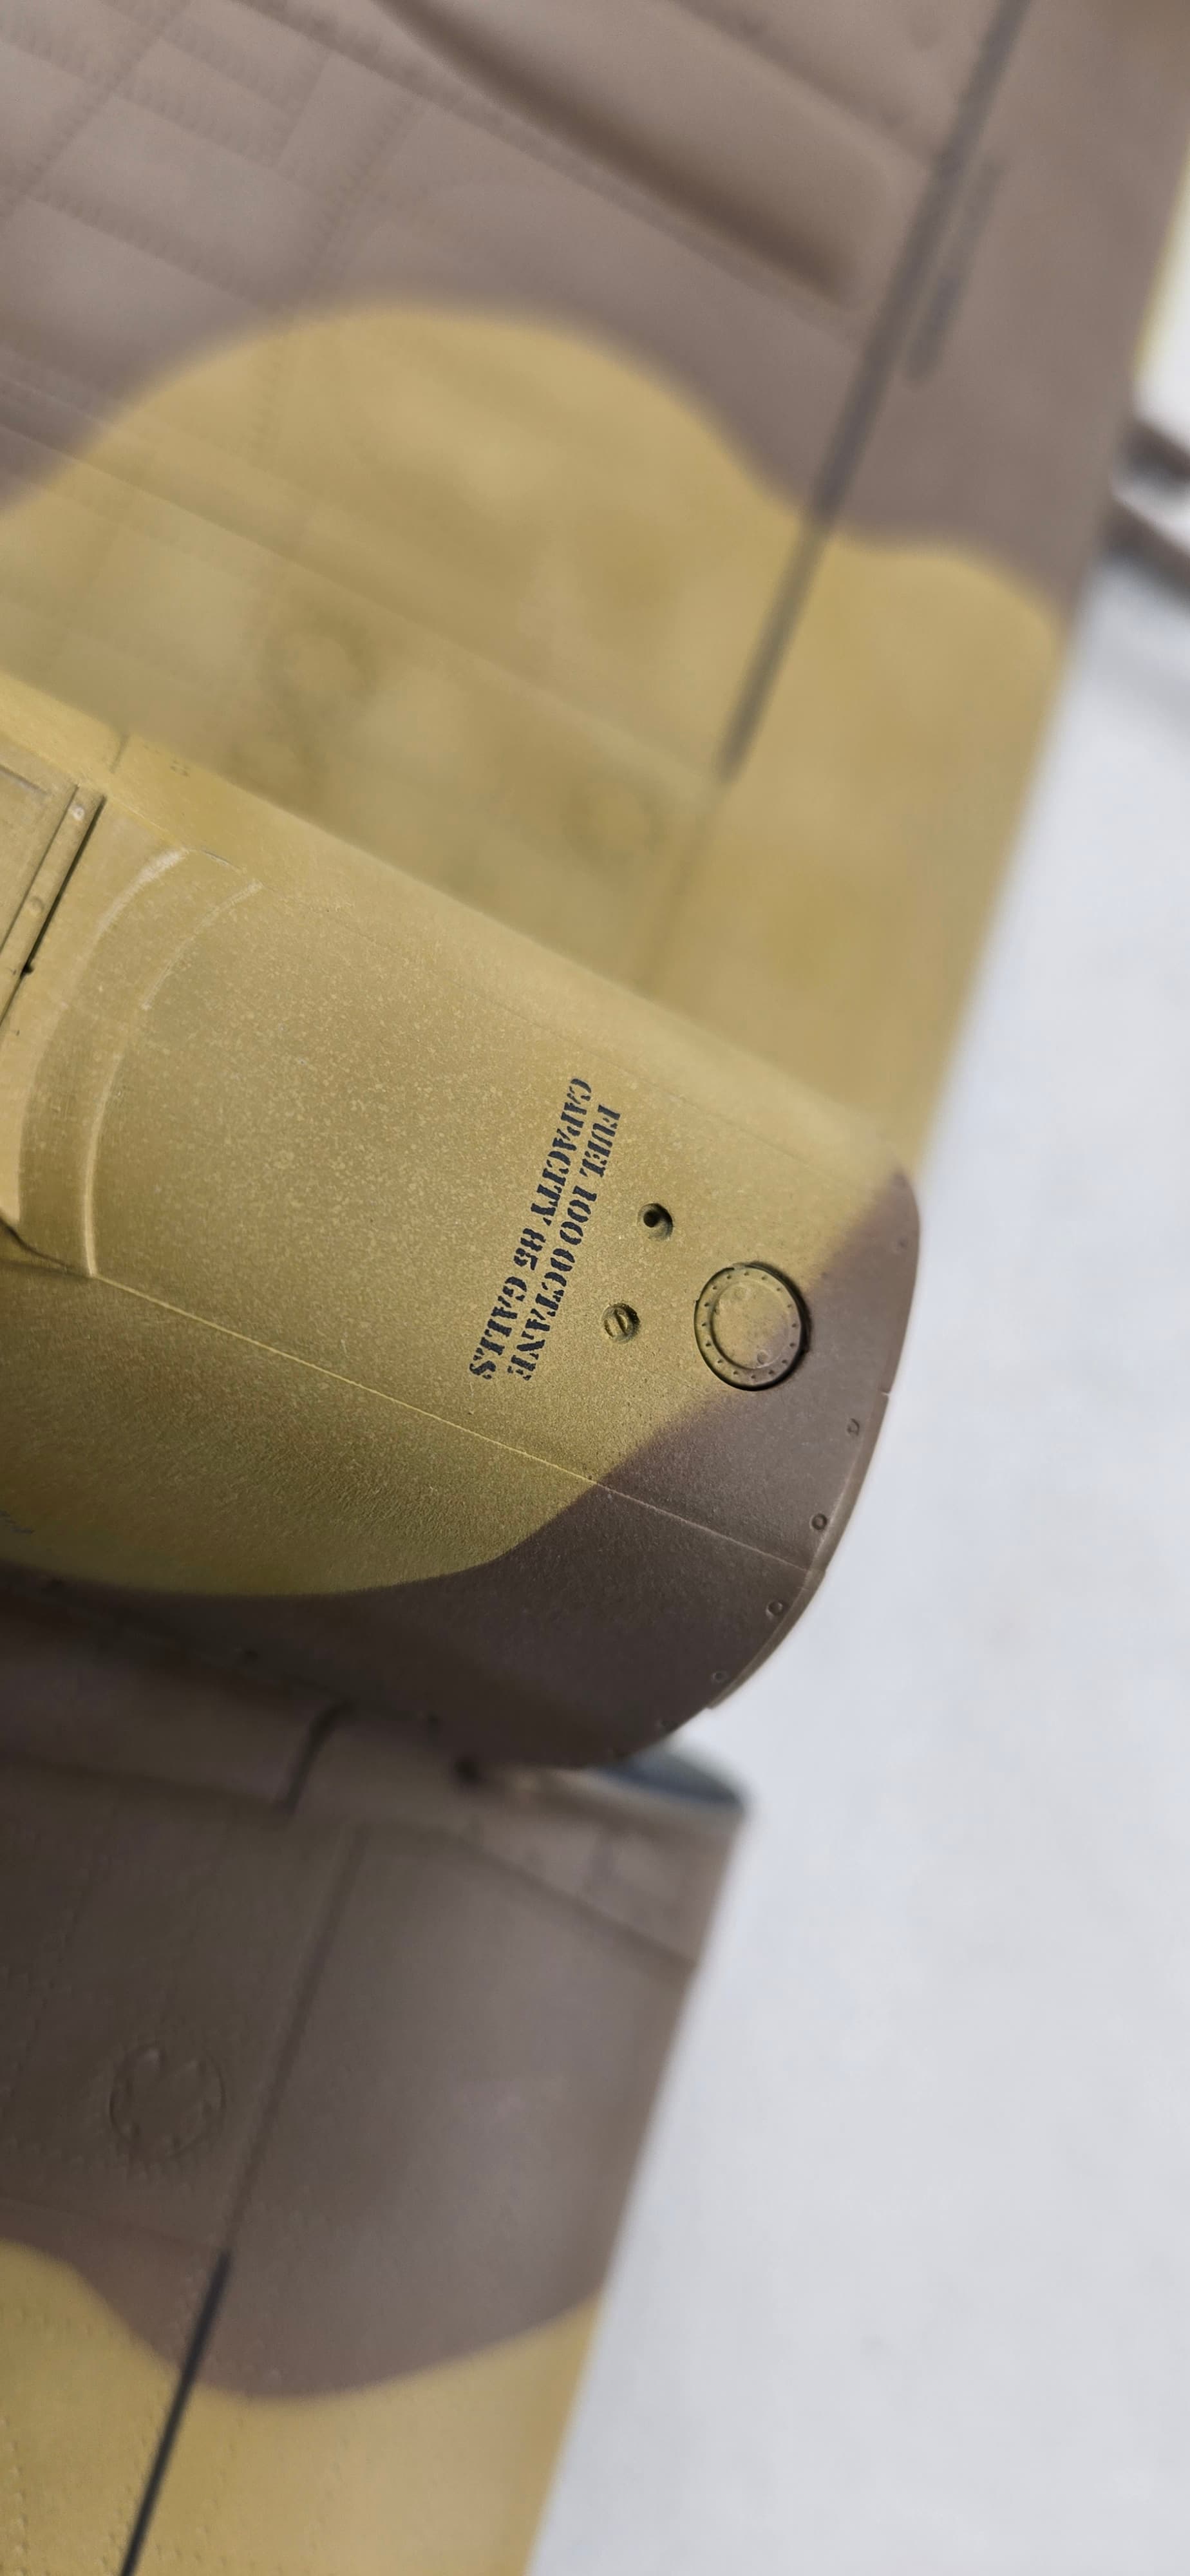
Prime and spray the white ring and then repeat the process using the “white ring mask” remembering to burnish down any edges that might not fully grab around details.


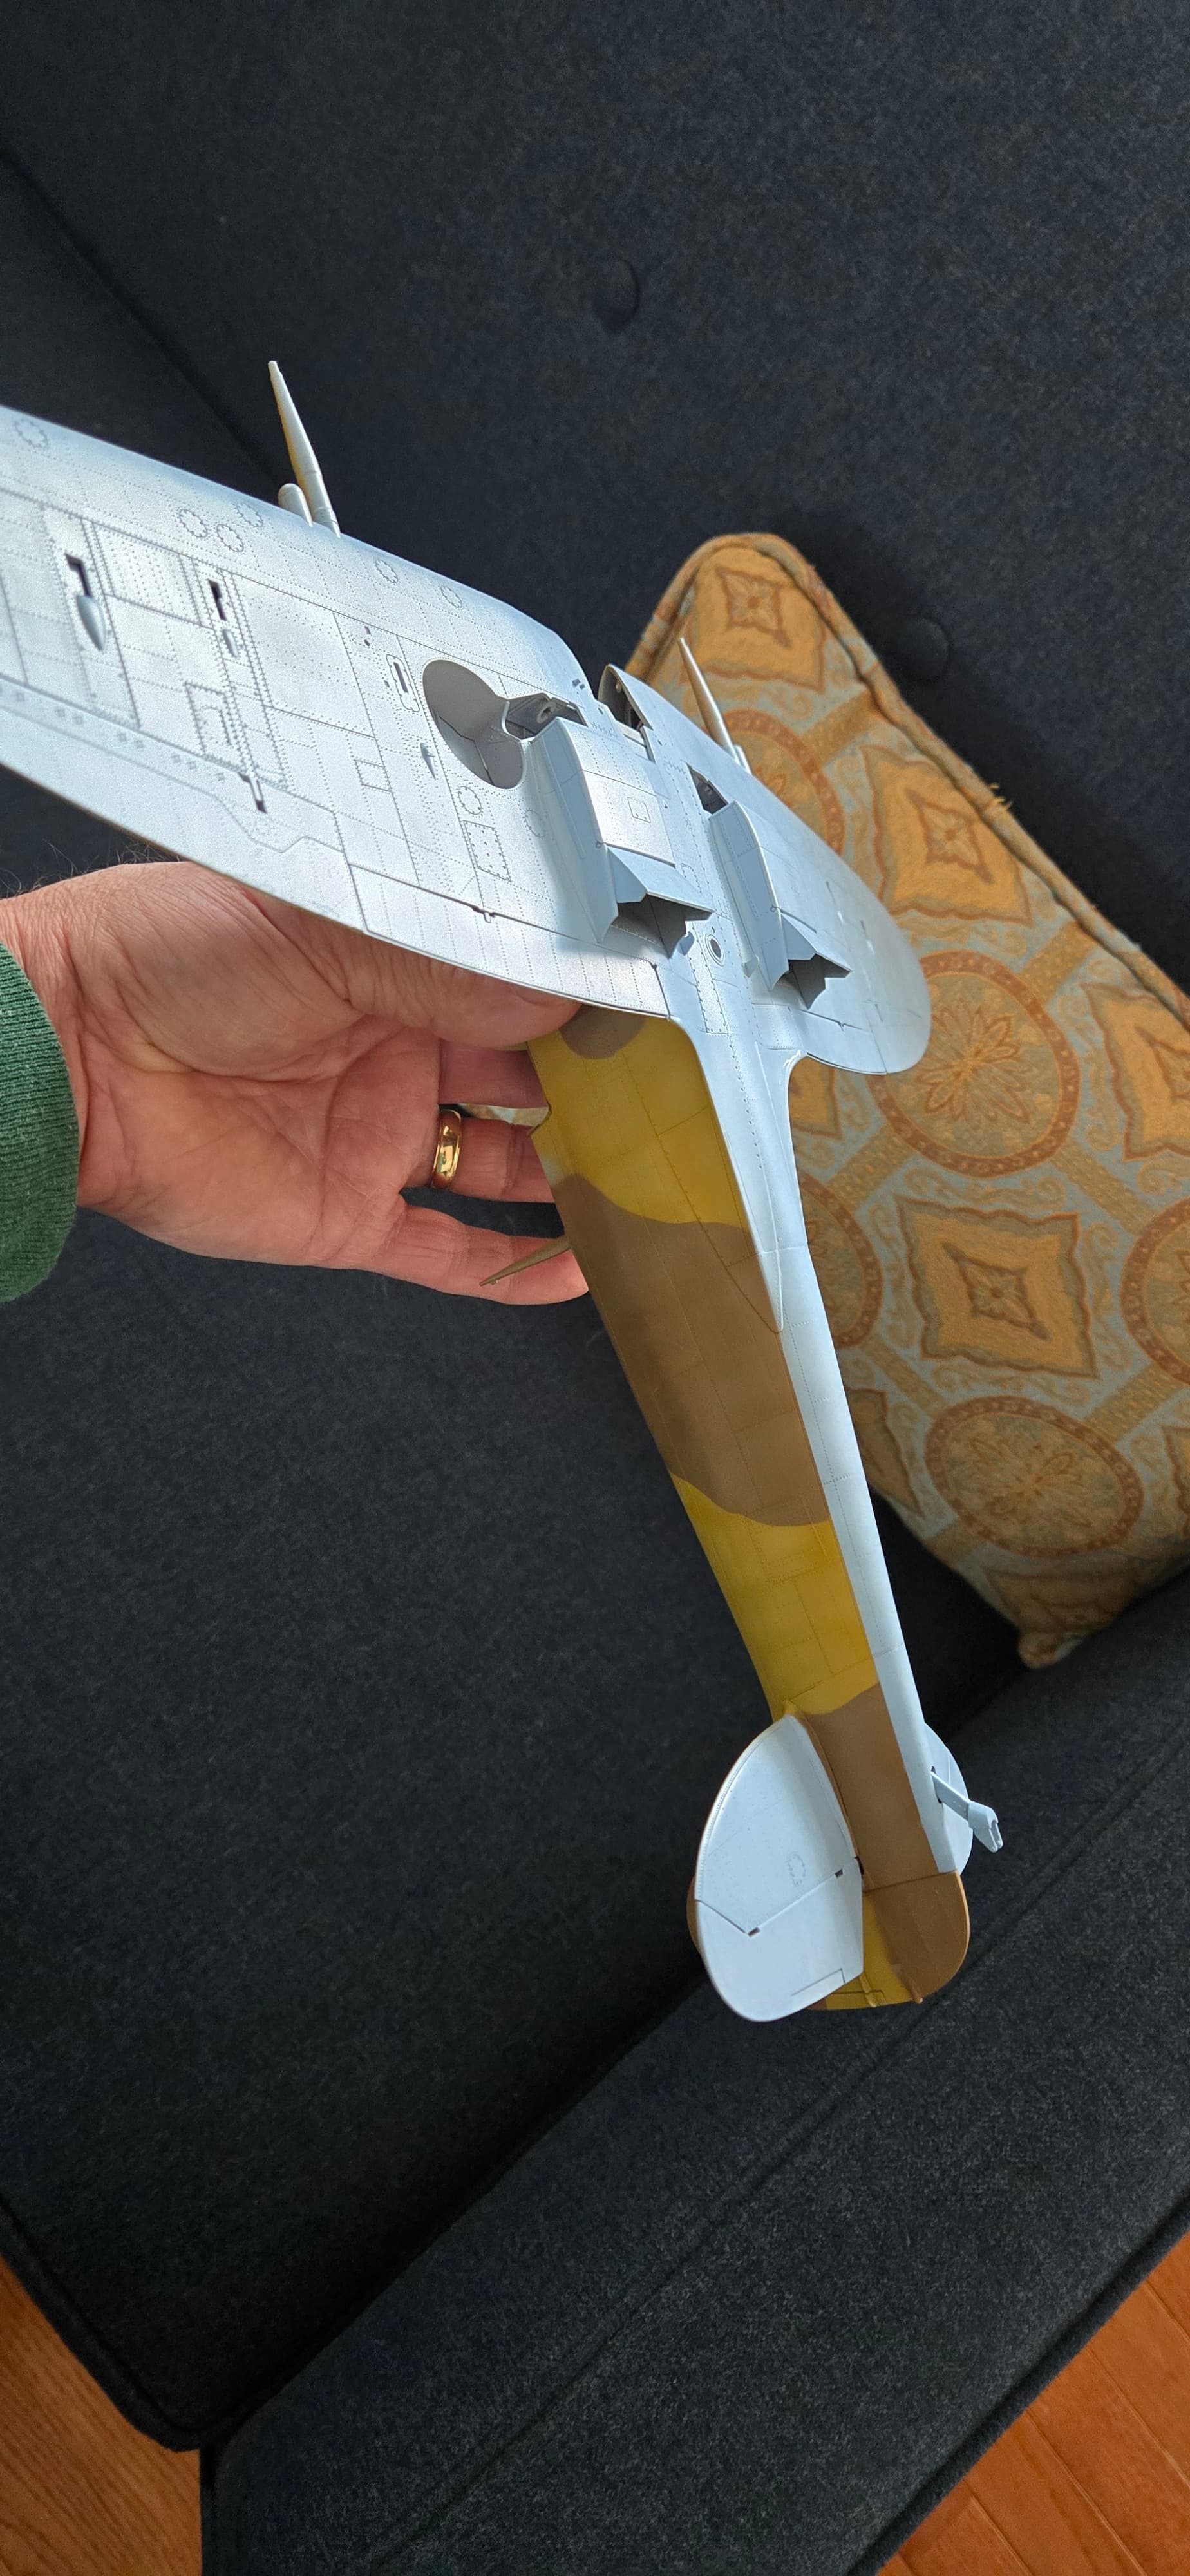
Finally, prime and spray the blue.

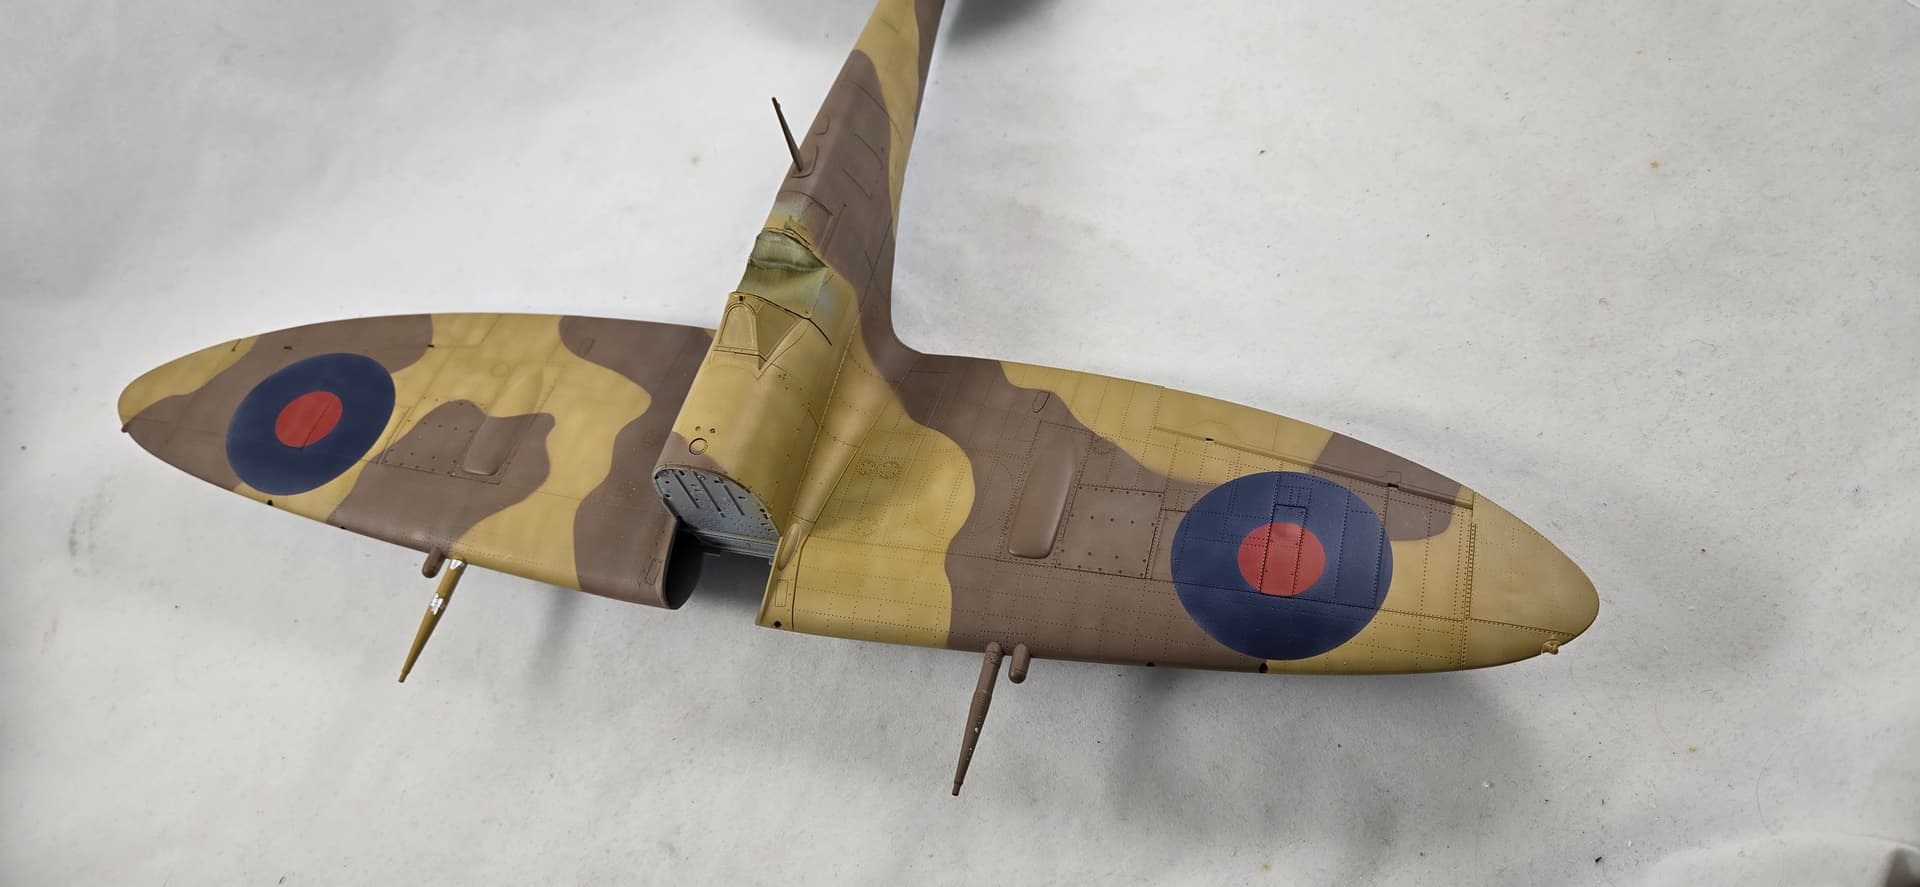
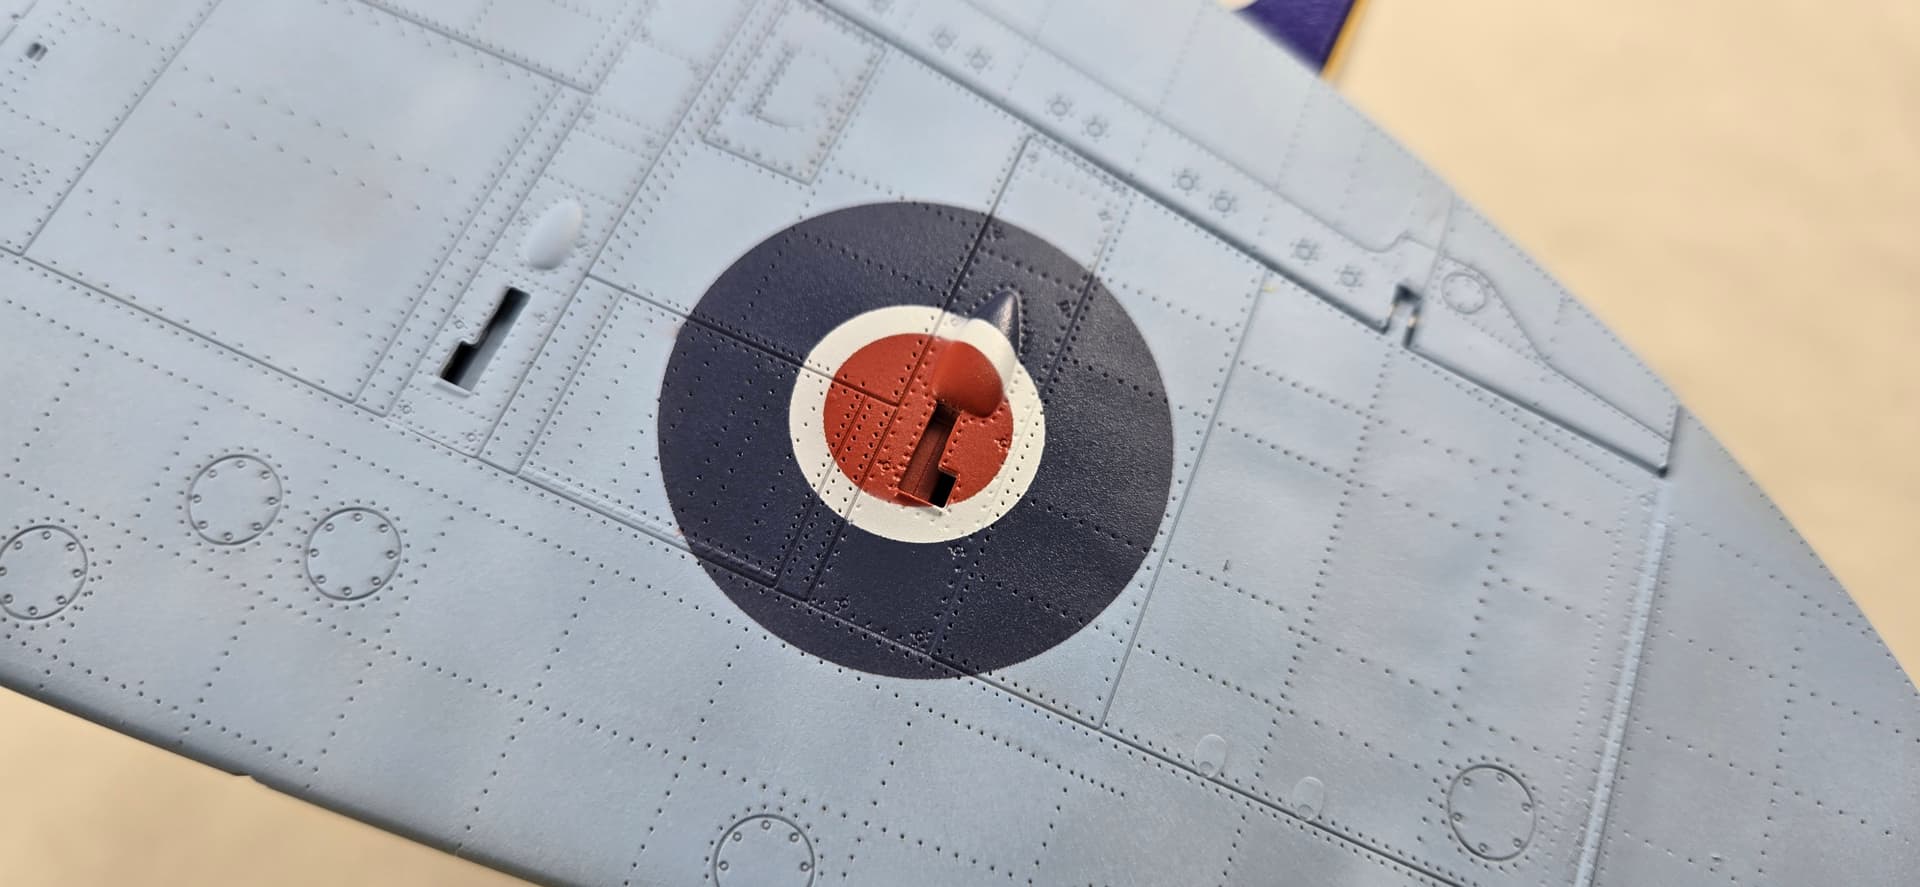
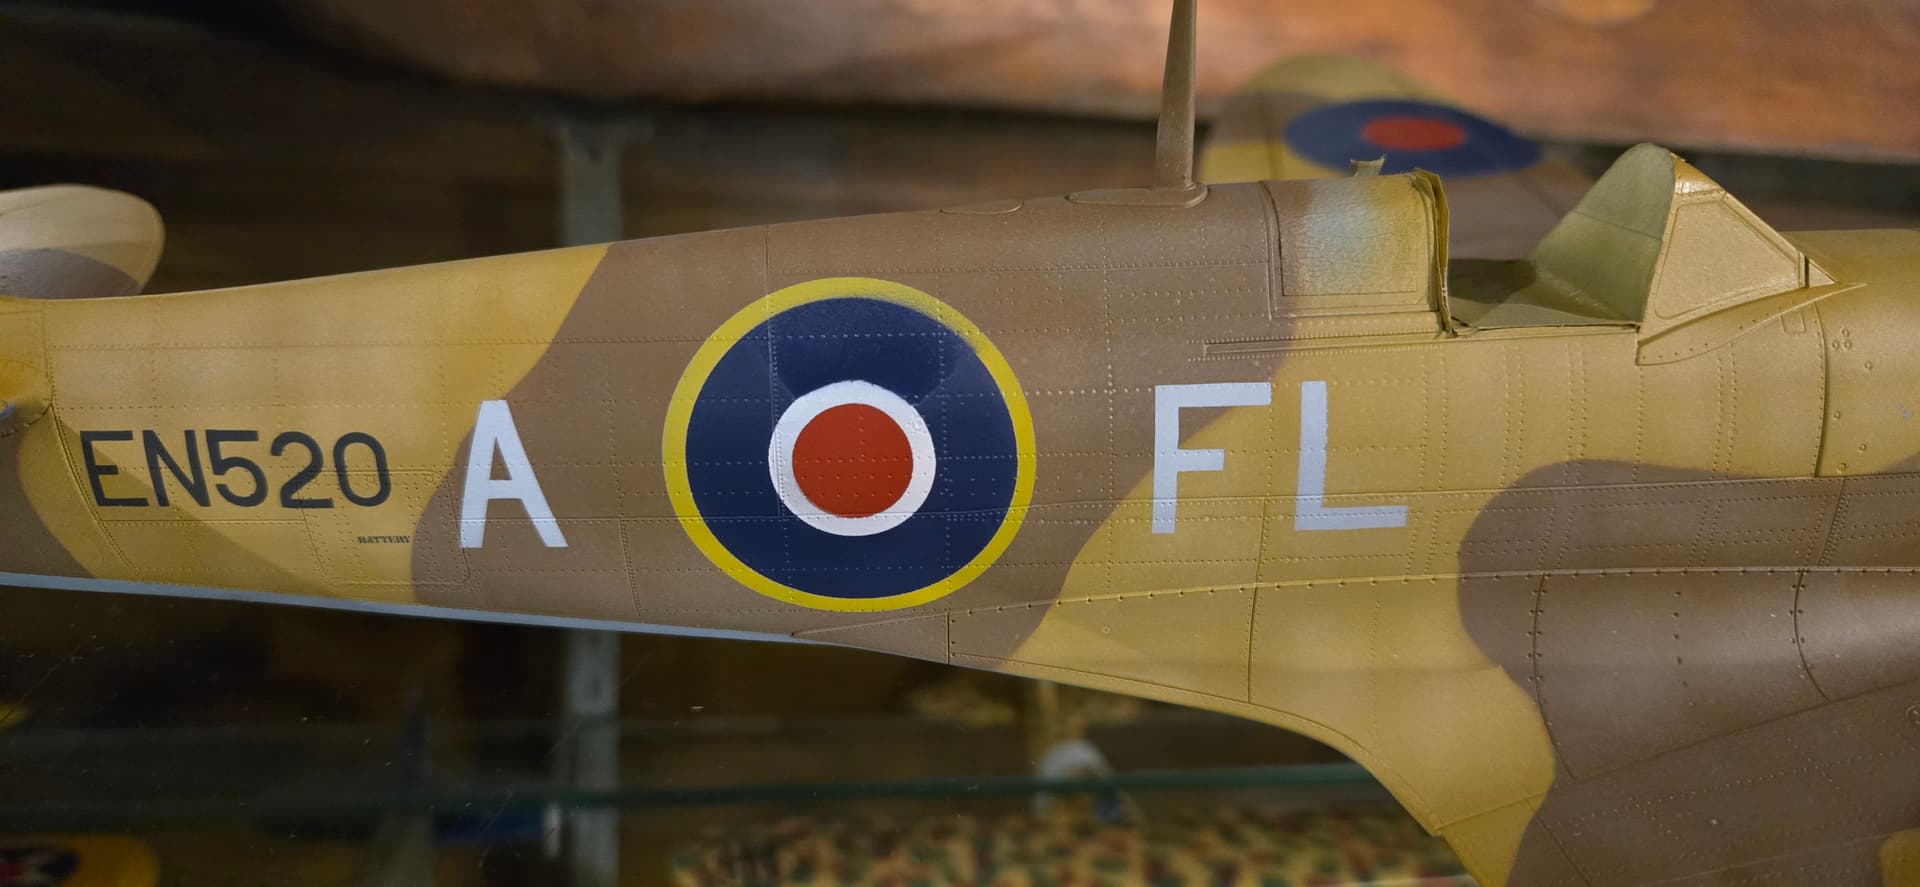
Then comes the scary fun part…carefully remove all the masking.

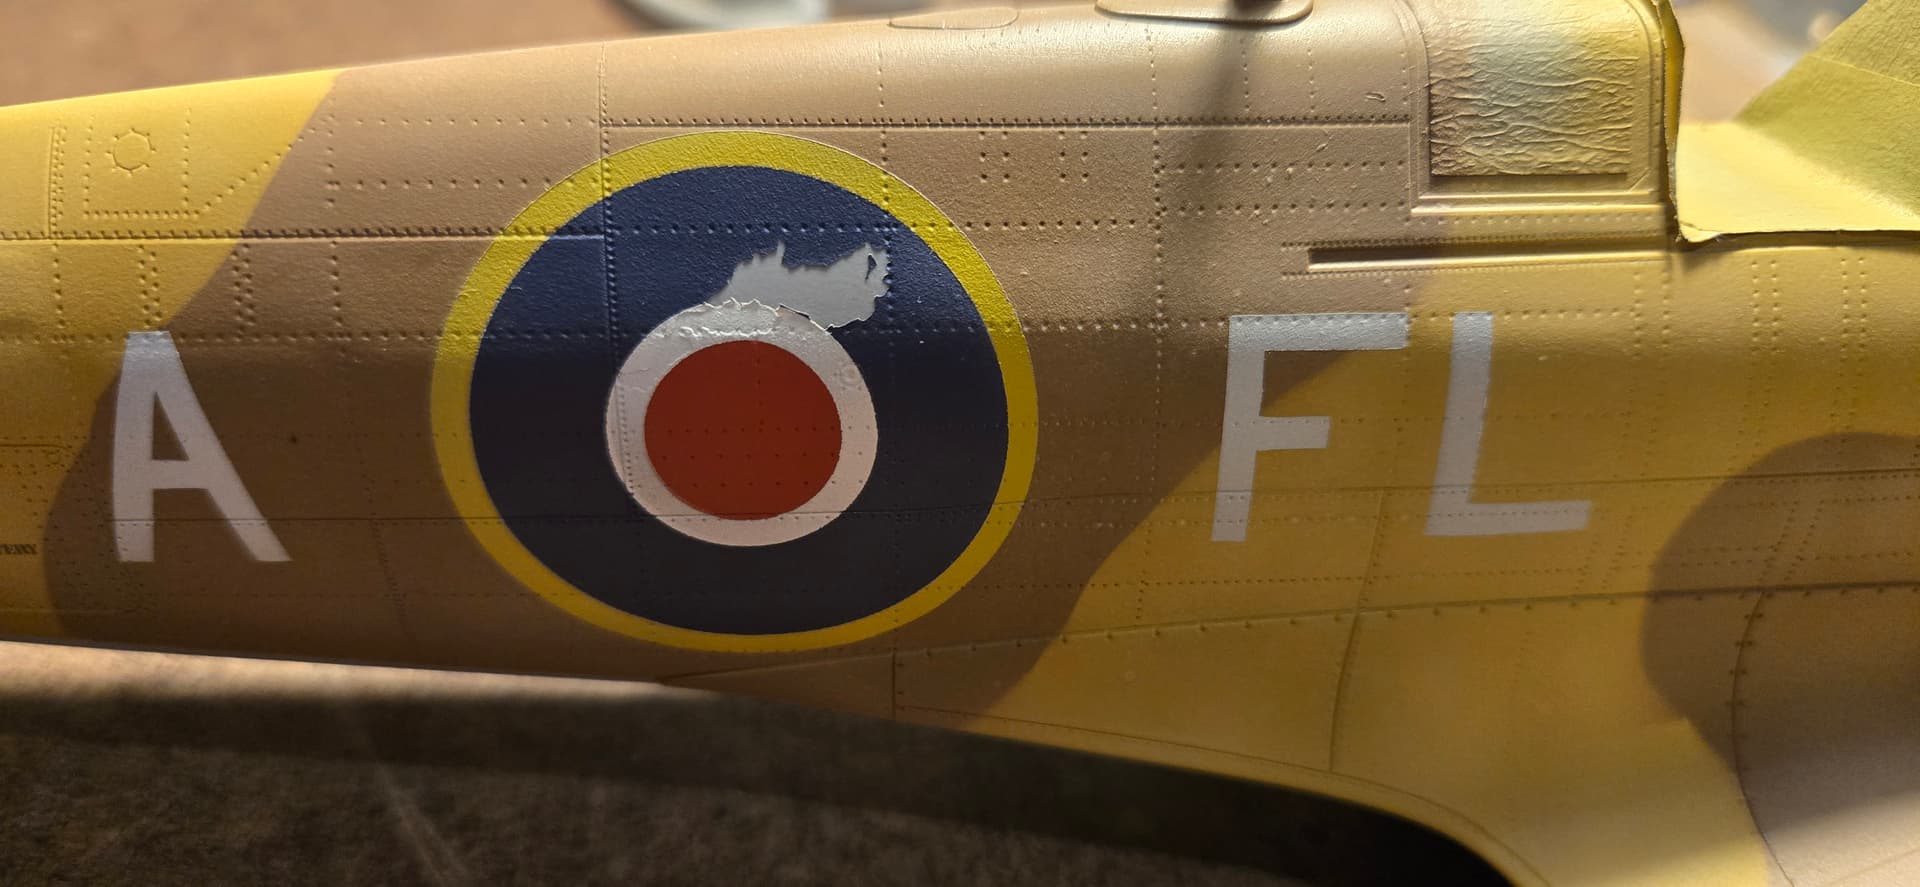
And again, a perfectly registered roundel. I think this method was a lot easier than trying to align marks that were getting painted over. I only had to carefully place the corner of the next successive mask in the right angle formed by the tape and align the two edges, and perfect alignment resulted.

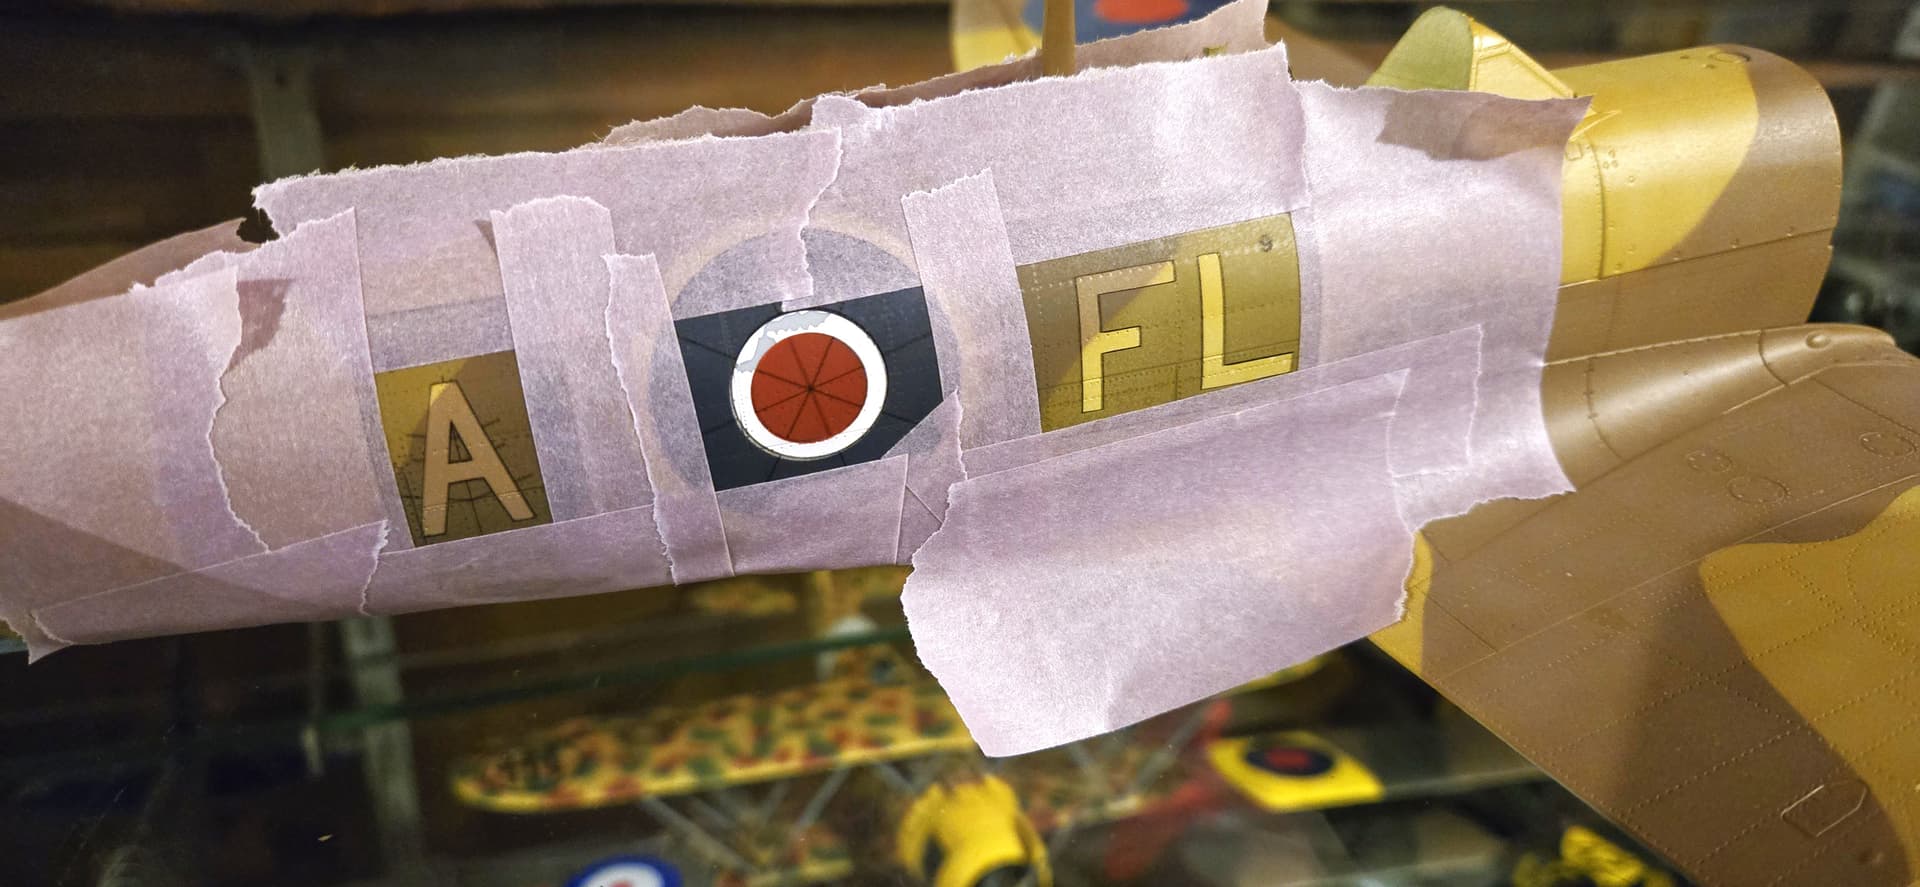
The 4-ring circus of the fuselage roundel is next, along with serial numbers, codes, and stencils…stay tuned! More to come…next week…

5 Likes

At that scale, you are going to have soo much great detail. I build 1:48 and the spit is so small I always thought I would have to do my first 1:32 to do it right. With this kit available, I’ll likely build it instead some day. (stay away from my stash Airfix!).

Going to be following along closely.

Great looking cockpit!

I’m going to save this for when I need to do this, came out beautifully.

Ooh those techniques for the roundels are giving le a headache haha. I plan on giving a try to painting the hinomaru on my zero instead of using the decals, and one single red circle is already making le sweat, let alone the idea of doing multiple circles with a shared center.
I’ll probably steal the lifting tape idea though, sounds like a genius move to avoid deformation.

Superb work all around! My father revealed he built 1/24 birds back in the days, but i’ve never seen them. Must be some pretty big stuff !

1 Like

Hello everyone - thanks for the comments and looking over my trial by stencil. Time for another update! I won’t bore everyone with a repeat of the steps to paint the fuselage roundels - suffice to say the “create a corner” method I described for the underwing roundels worked perfectly well for the fuselage as well, even with the extra ring involved.

Anyway, the next markings to paint were the squadron codes. These were included in the KitsWorld vinyl masks. As I mentioned, I have reservations about vinyl masks - but spoiler alert…these masks worked perfectly. Maybe these differ in some way - better adhesive, more flexible? - or more likely they just aren’t challenged by such severe curves as on a canopy. Whatever - I was very pleased with how they performed. Careful alignment and placement is again key, measuring from a fixed reference point on the model, including alignment with panel lines - whatever seems to work. Masks that require an “interior” - like the “A” in this picture- all have pre-printed alignment marks. Very handy! Once again, I primed the masks using Tamiya Sky Grey followed by a cloudy coat of MRP Insignia White.


Bah humbug…I did have this one instance of paint lifting off - I seem to have at least one of these every model I make, even with priming and clear coats. I’ll fix this later, after all the other masking and painting is complete so I don’t risk a repeat performance.

And now, the part I was so anxious to get to - stencil application. The One Man Army masks are incredible…have I mentioned that already? :wink: Also addressed at this time are the serial numbers, since they’re all black. Actually, don’t use black - too contrasty (if that’s a word). I used Tamiya German Grey. The stencils were placed in the appropriate spots on the airframe, paying close attention to alignment and position again. I noted from many, many pictures of Spitfires in the desert that there didn’t seem to be a full set of stencils visible. That makes sense as many would have been repainted in desert colors. As a result, I selected only those that seemed to make some operational sense…but who really knows which were present?


Once masks were positioned and overspray areas protected, I applied the grey and removed the masks


5 Likes

You’re putting a good amount of love into this big beast Chuck. I’ll be on board for the rest of this one.

1 Like

Hello everyone. Another quick update. From a previous picture you would have seen some damage to one fuselage roundel from the mask. The problem started when removing the mask for the white ring which took off a section of paint. I fixed the white ring by putting a spare mask back in place…removal of which promptly pulled up the blue. Seeing where this was headed, I decided to try something different. I had a spare “full roundel” mask from the KitsWorld set and used it to create a paper mask on a Post-It note with the adhesive removed. The first step was to get the entire vinyl mask safely positioned on the paper mask without distorting it – enter One Man Army’s “transfer tape” process.


Next, I cut out a section large enough to allow access to the damaged area of the blue ring – I used scissors to do this, so I placed a piece of tape over the side cut just in case any overspray was to try and get through.

Next, I carefully aligned the paper mask to the painted roundel, taping the edges down firmly against the model.

I held the center of the mask down with a fingernail tight against the fuselage as I sprayed. A quick mist of primer followed by roundel blue and the mask was removed, revealing a healed roundel. Phew!


That completes the painted markings portion of this adventure. Next up is finishing the engine and engine compartment, including cowling attachment. Hope you’ve enjoyed this adventure so far…stay tuned!

3 Likes