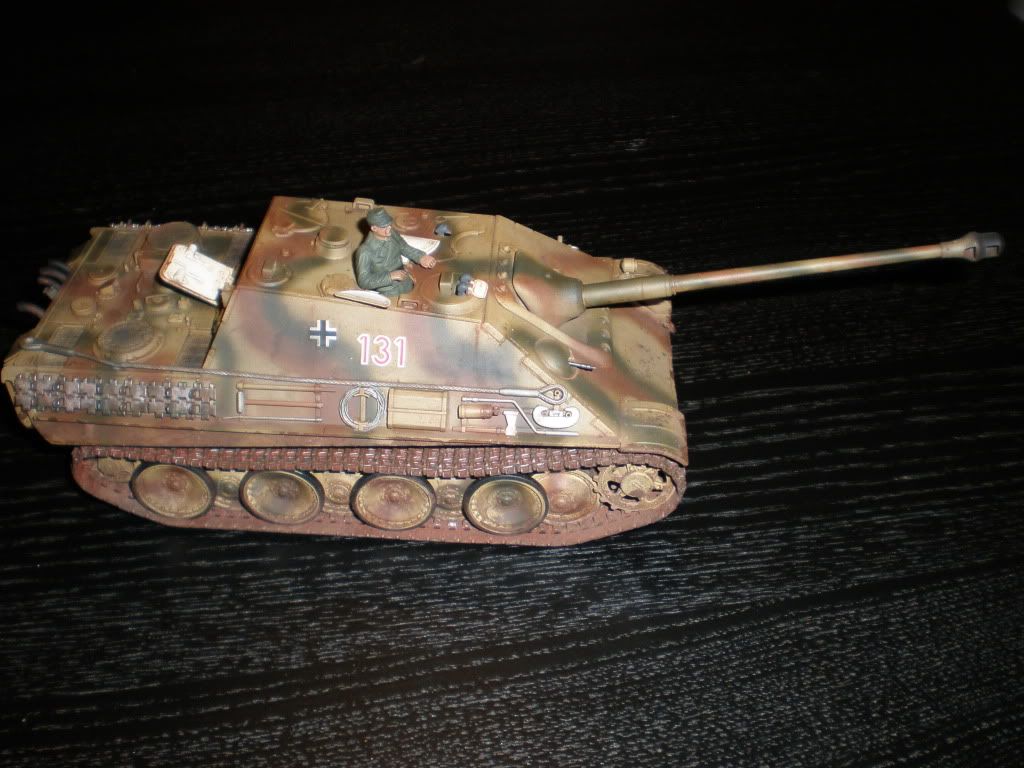
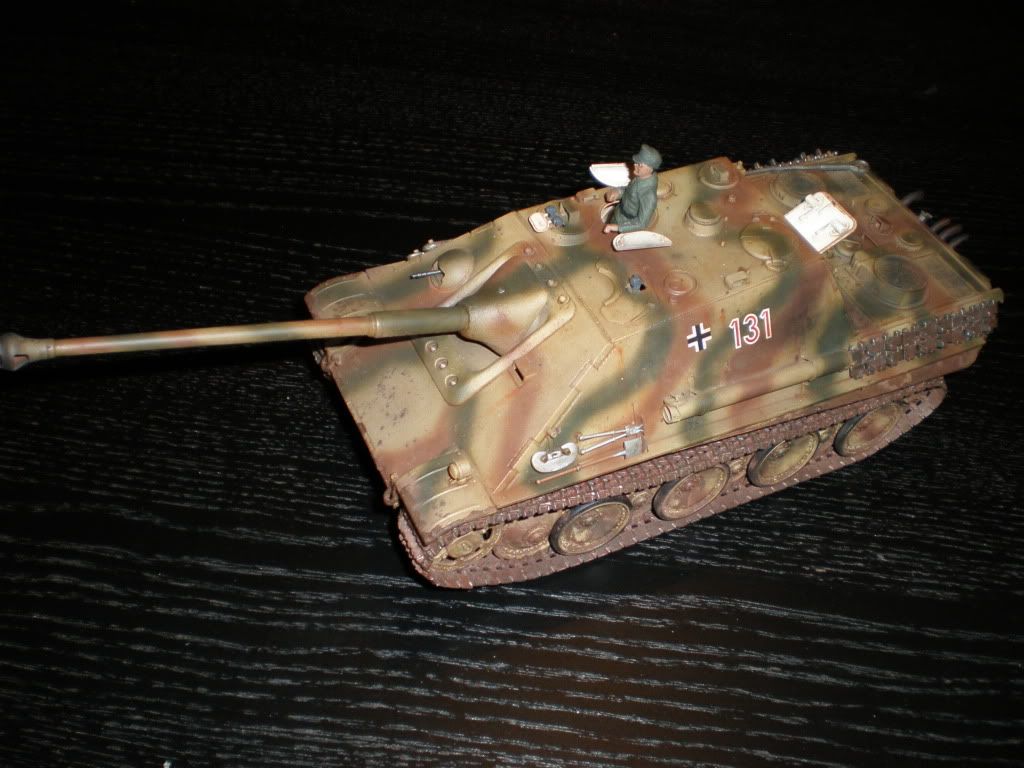
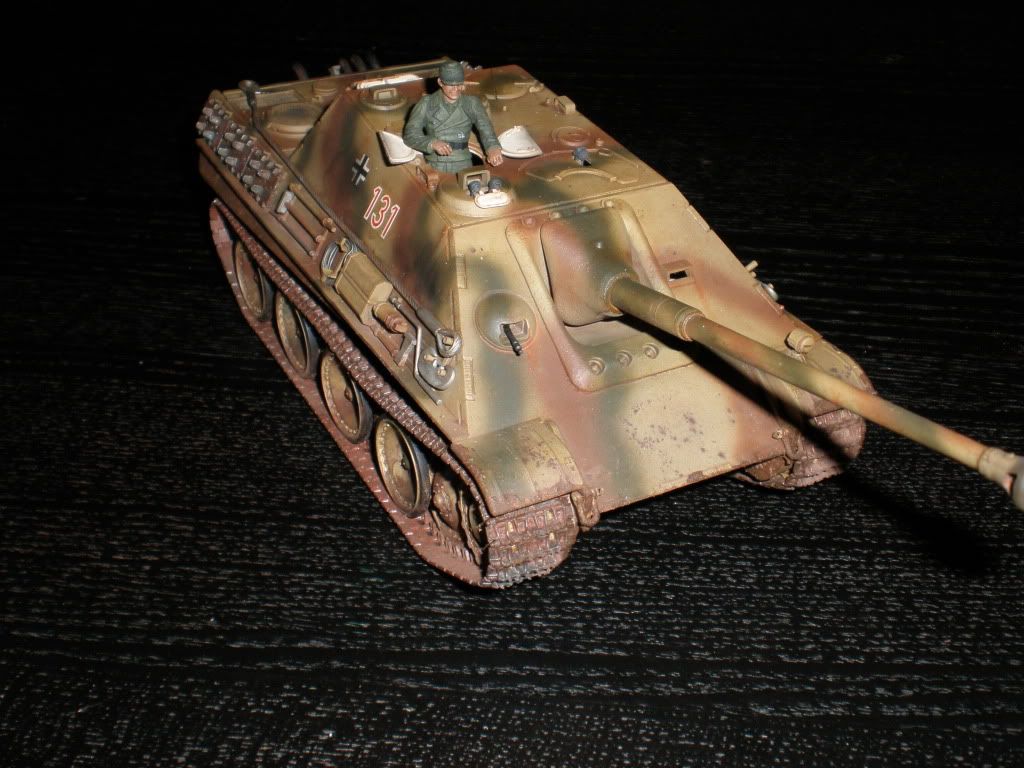
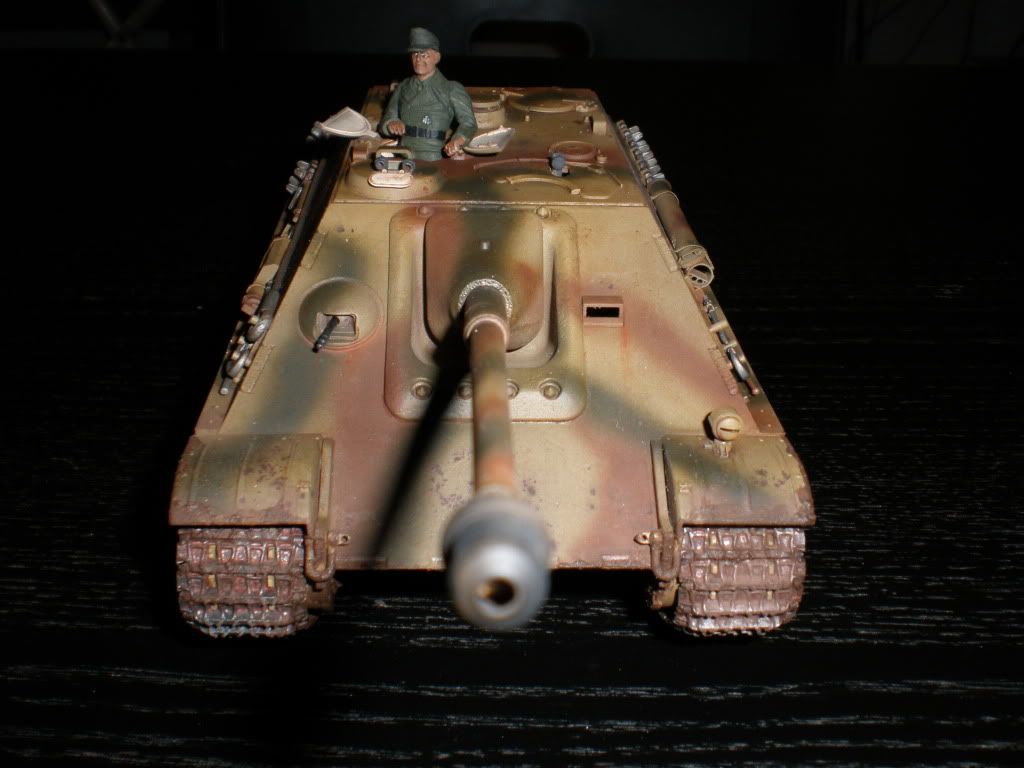
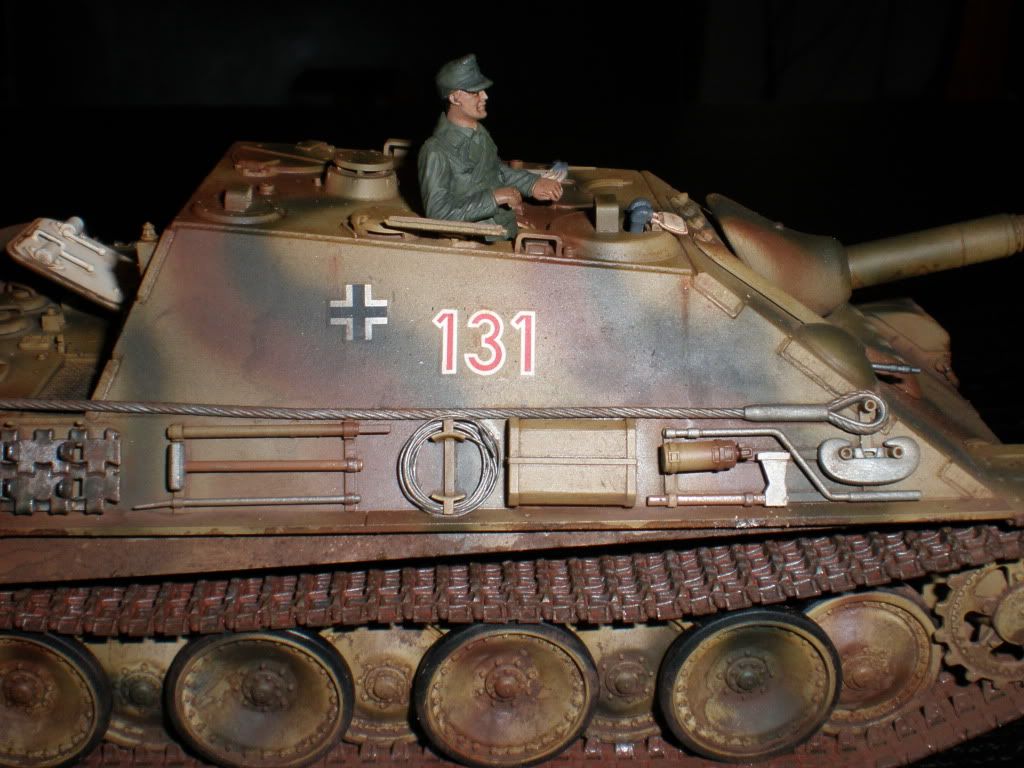
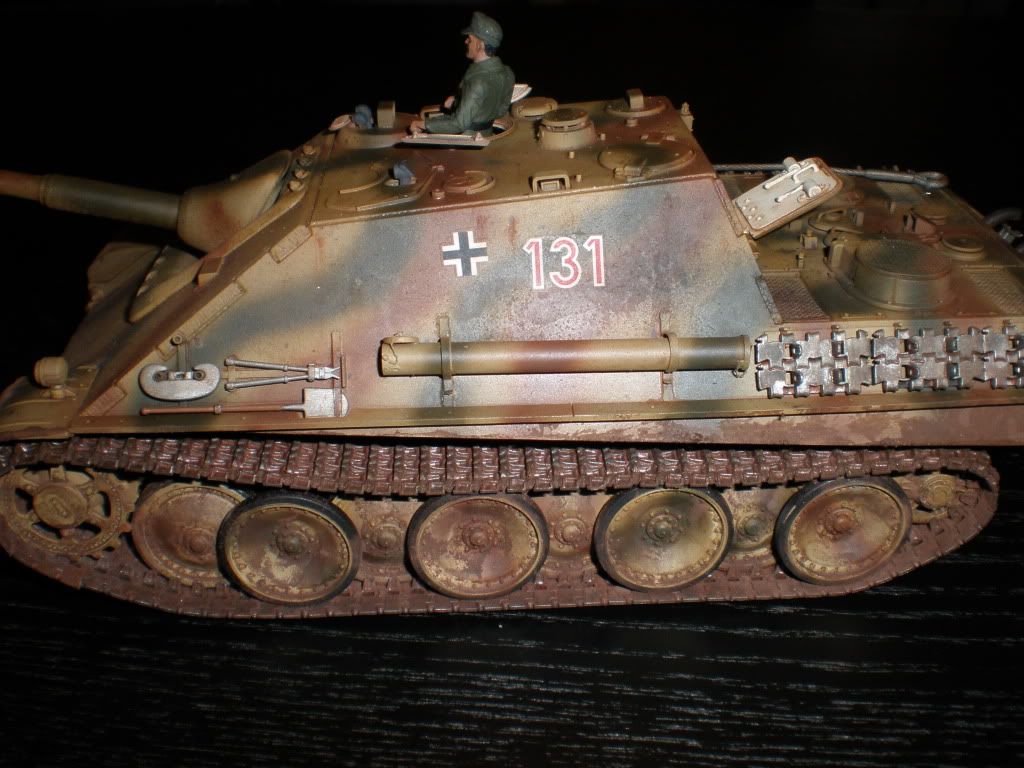
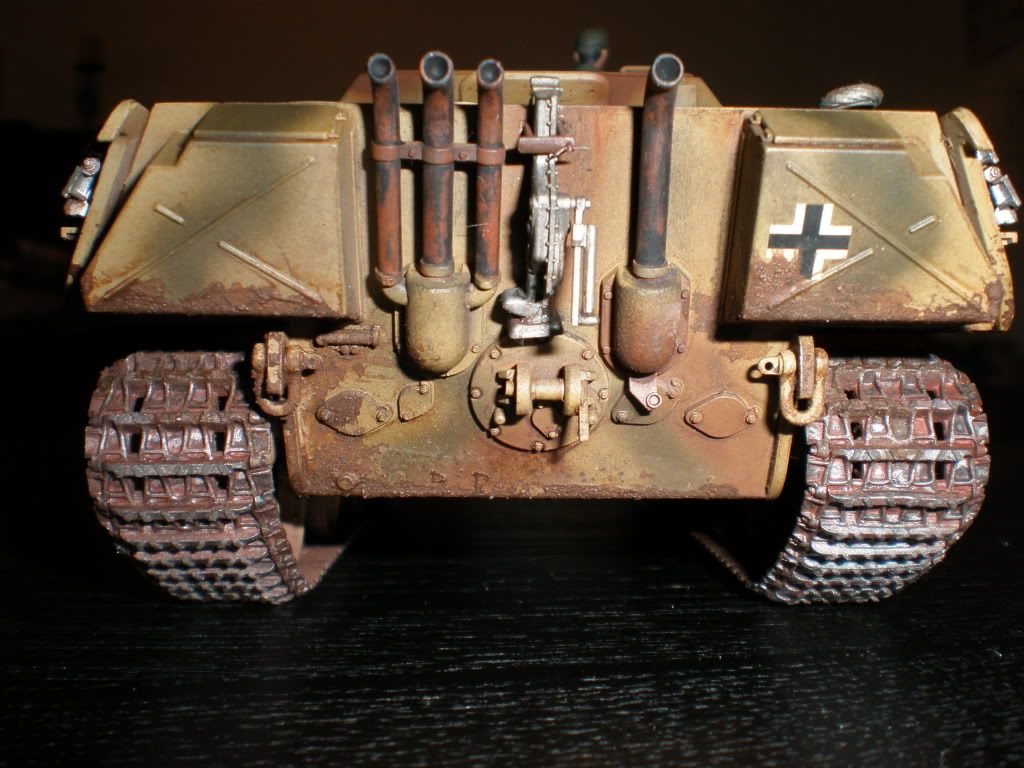
It’s been a while since my last post, but i feel it has been worth the wait. Recently completed is my 1/35 Tamiya Jagdpanther Late Version. with vinyl treads. The overall build was good except for some filler when joining the two halves together, both front & rear. All paints are acrylic unless stated. I undercoated with Tamiya, brown XF9, gave it a light salting and finished the camouflage with Tamiya XF60, XF61 and XF 64. Next I removed the salt to reveal some light rusting and did an all over with an oil wash of Burnt Siena.
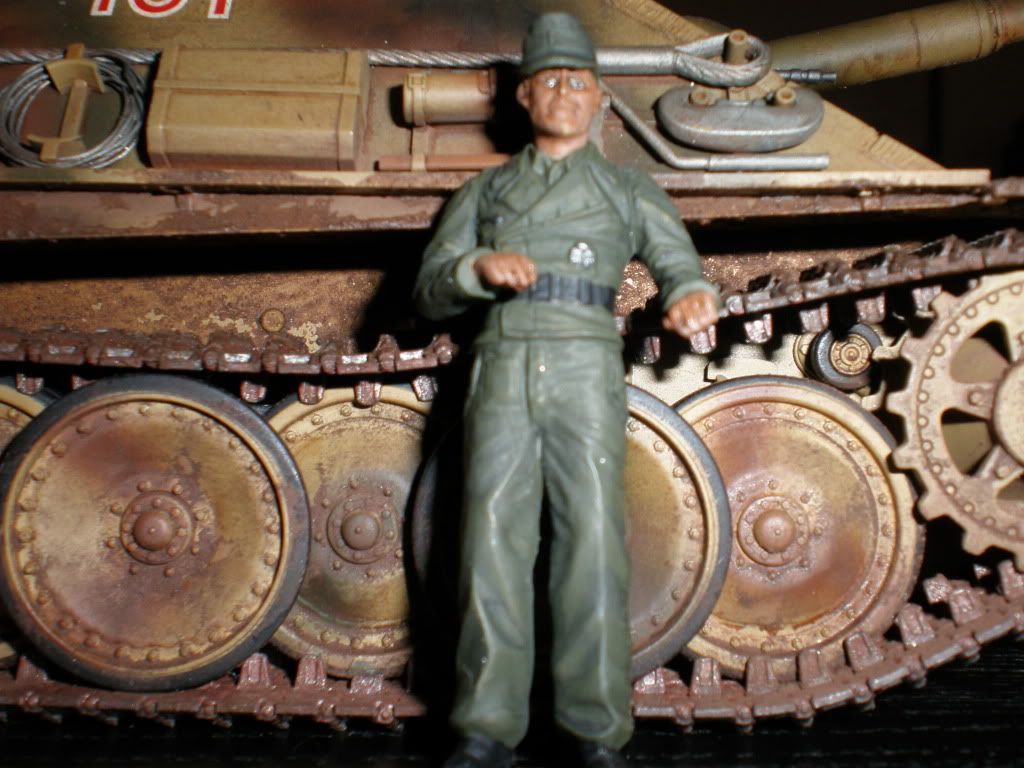
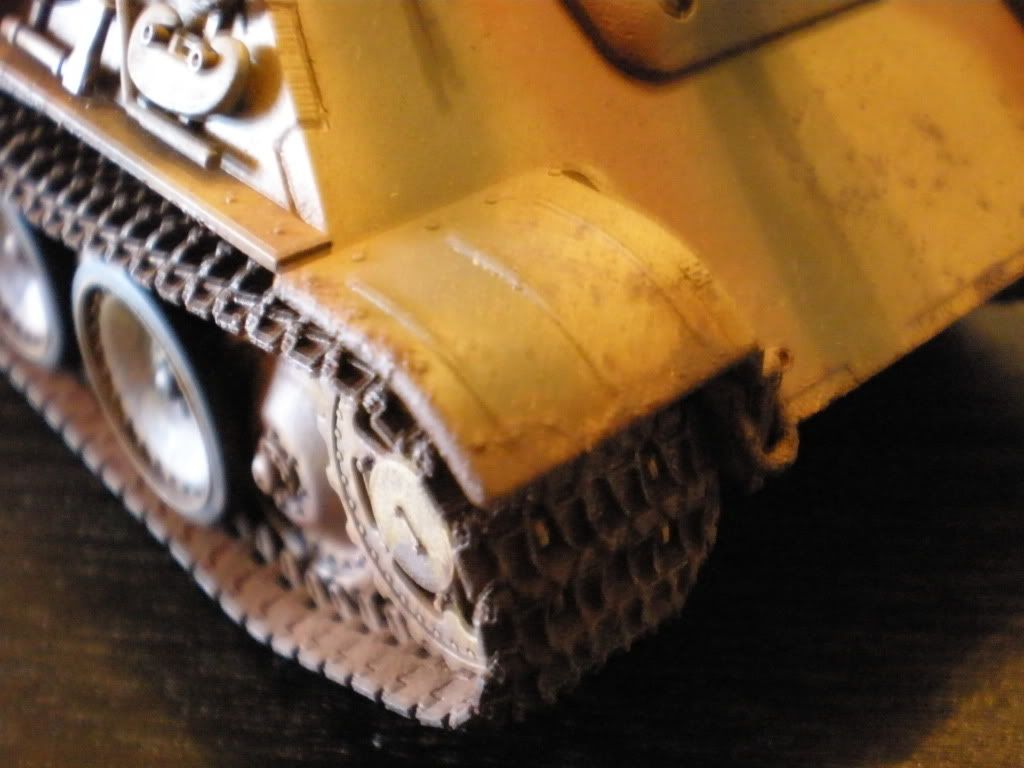
A first for me so I was a bit apprehensive, I added some weathering in the form of mud. For this I added back yard dirt (it’s summer here and I could scrape it quite fine) mixed with water and white glue. I thought it turned out ok, but tell me what you think. I added some further rust trails and finished with some Vallejo Carbon Black dusting. finally finished with a clear flat coat to keep everything from rubbing off. I also added the soldier, but I reckon I’ve buggered up the eyes. He looks pretty agro.
Aftermarket used - voyager barrel, aber photo etch grills and cleaning rod tube
I think you did a very credible job Leo. I really like the camo. I’m not much of a heavy weatherer, but yours seems not overdone.
A couple of observations:
The inner road-wheel rims should be metal as they are in contact with the guidehorns.
The muzzle shouldn’t be blackened.
For the cables and metal parts of tools, I do a basecoat of black and then drybrush in steel. This gives a deeper look and not so stark of a metal finish.
I also believe that the inside of the hatches shouldn’t be white, but hopefully someone can confirm or disprove my opinion.
The paint is really nice and your weathering is pretty spot-on as well.
If I could make some suggestions? The first wheel up there–the one right next to the sprocket? See that rim that makes contact with the inner track teeth? That should be metallic-color. As well as all the other alternate wheels on the inside. They contact the teeth and get worn on all Panther-type panzers.
Another thing that I like to do on Dark Yellow vehicles is to lightly drybrush the edges in metallic grey. It really brings out the edges and outline, and makes the tank look “heavy”!
Also, try to paint the whites of your figures’ eyes a little smaller. A small slit is better than an oval. Put a dot of black in the middle and it will look like an eye in 1/35. [:)]
it looks good,I do like the chipping and the worn paint,tail pipes look nice too,you can texture them a little bit by using Mr surfacer or coating them with liquid glue and then scuffing them up.
Also you might want to touch the high part of the tracks that contact the ground with steel to show wear.
If I may, when adding some metalic wear to the road wheels as has been mentioned, include the teeth on the drive psrockets. T-Man is correct, those white hatch interior scream. “HERE I AM!” They shoudl be the base camo color.
thanks for posting. One of the things that I enjoy about 1/35 AFV modeling is the close association our model places on form and function. From that, I would suggest you lay the rear hatch down or button it up – that thing would be about 100 lbs in actuality. Also, the two outside pipes on the rear left tail pipe assembly are intake pipes and not exhausts – they shouldn’t be rusty or sooty. This isn’t the most apparent info, I know. But that’s why it’s good to post pics on sites like this. Keep up the AFV modelling!
Everyone’s given you some good suggestions and for your 4th attempt at armor this one’s pretty good! [Y] Expanding on what Eric mentioned, on actual vehicles the metal portions were usually painted black and you would only see shiny steel in the form of scratches from use or around the edges. Look forward to seeing what you do for #5! [B]
I’ve been sitting here patiently reading everyone’s feedback and thank-you all. I love this forum because of you guys. This is the type of feedback that makes us improve our models and I have taken it all aboard and this will certainly show in my coming models. First thing though, I’m going to paint the inside hatches the base camo colour, and now that i look at it, you are right…it stands out like the proverbial. The reason for the heavier than usual weathering is because I’m planning a diorama in the near future and this was a bit of a test run for me. Although I was pleased with the results, I feel I will need to research alternative techniques further.
My next model will be the Trumpeter 1/35 Ariete as this is part of my club challenge. I’m also um-ming and erring over the Dragon pzkpfw III aus.M/N sd.kfz.141/2 or the Dragon M4A1(176mm)W operation Cobra, although the German WWII armor has seduced me with their striking camo schemes.