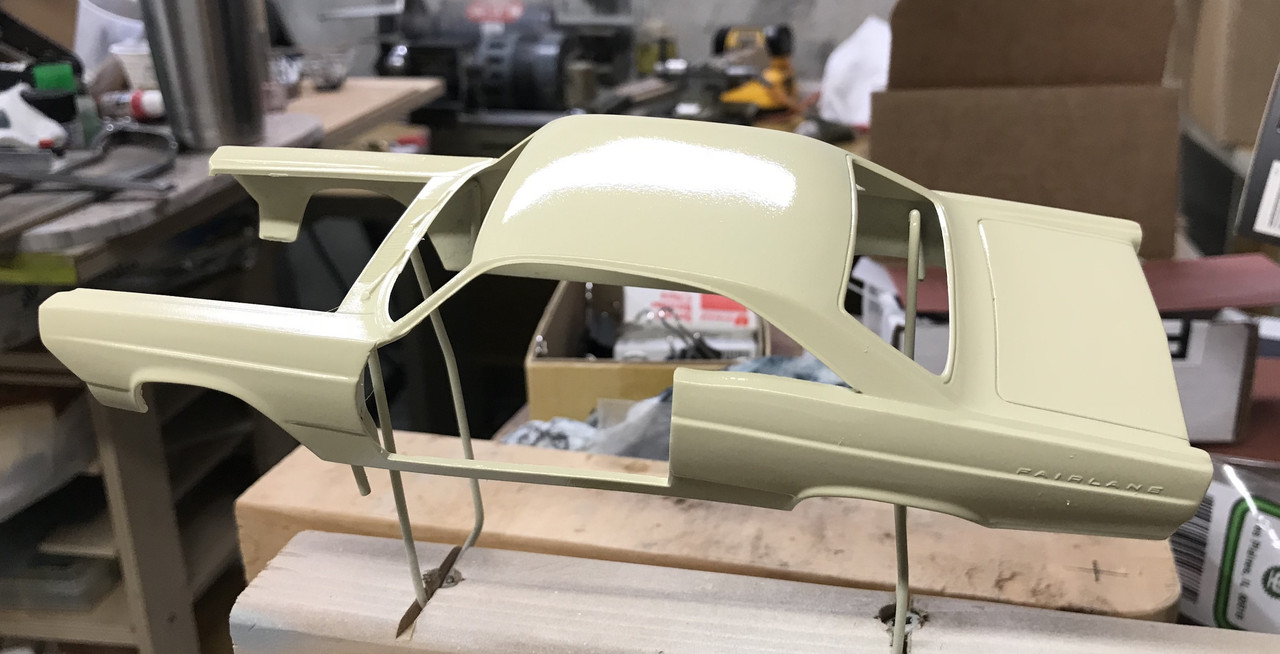
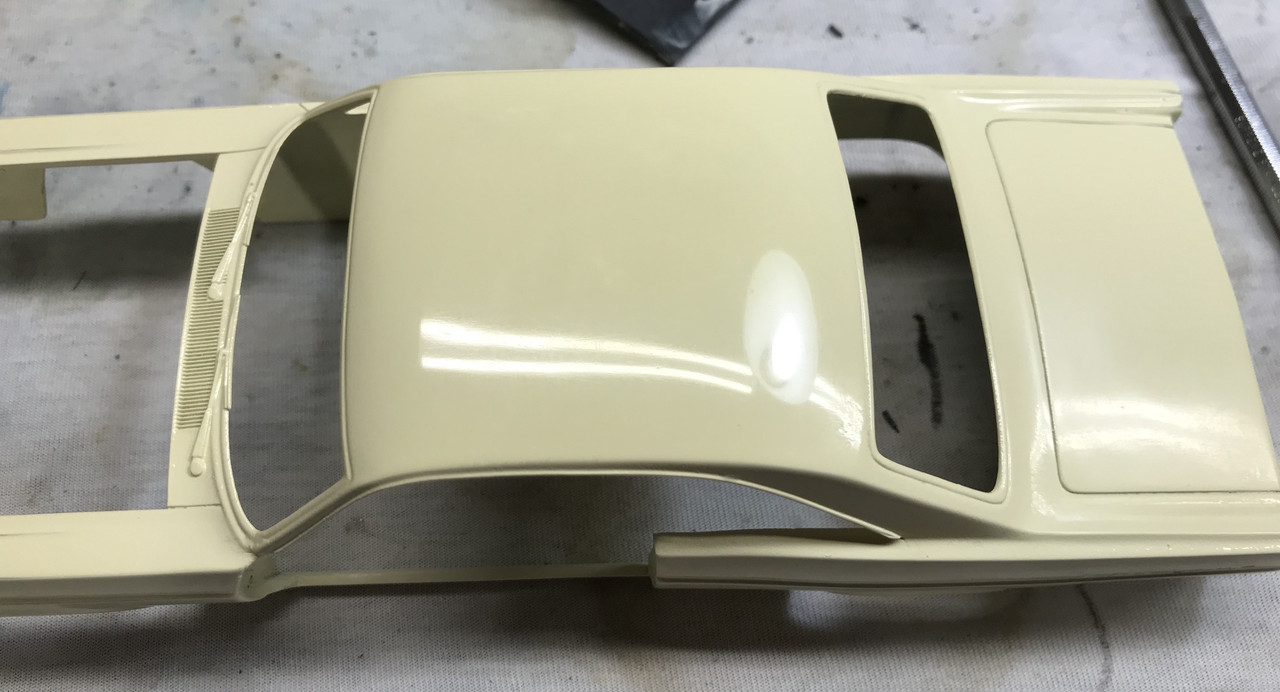
Hey gang… just got back from an 11 day trip to Philly and State College, PA and Spring has really arrived in Louisville, so the first thing I did today in the shop was to finish fine sanding the first coat and put on a second coat of light yellow. This time I was able to get pretty good flow outside (very light breeze, perfect temp) and it dried with little distortion. I’ll let it cure another week and then sand it again, this time using the finer grits and getting ready for the clear coat.
The epoxied broken windshield pillar is not very evident. It may impinge on the door closing, so I won’t pose it with the closed door. That joint with the piano wire reinforcement is stronger than the rest of the car.
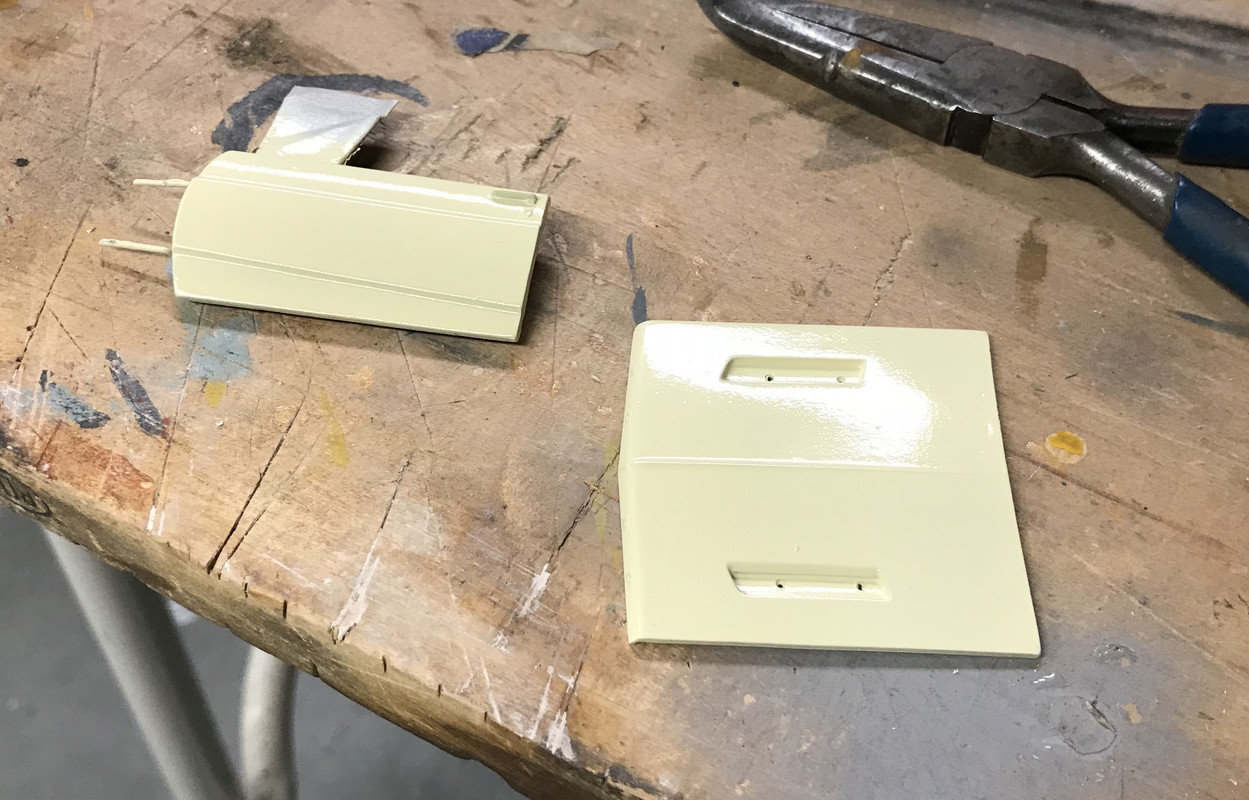
The door and hood also came out decently and will require little polishing.
In a week I’ll report again on how well it’s coming out. I don’t want to sand to much since I did sand into the primer layer on the first coat. Each spray layer introduces more chance for orange peel and runs.
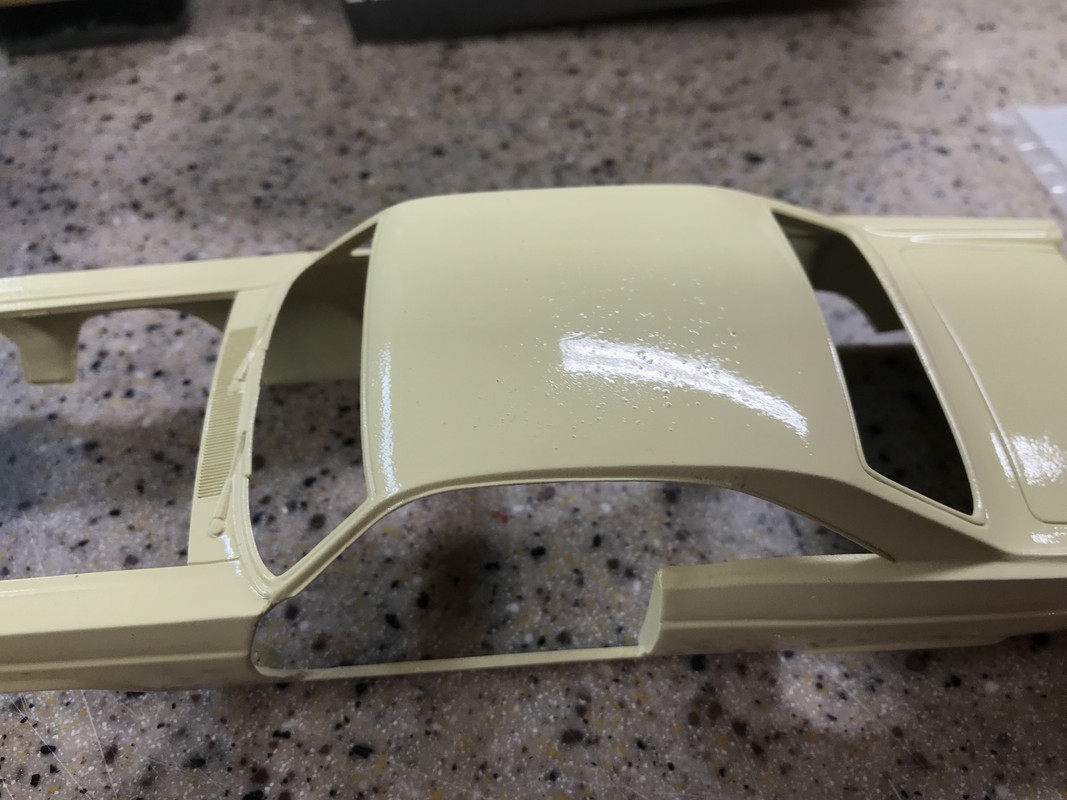
Another week, another coat of yellow, only this was a coat that maybe shouldn’t have been done. It was a comedy of errors and the results are very troubling. I polished the last coat with 4000 grit wet or dry Revell abrasive material, and it looked great, but I went through to primer in some high spots and needed to do another coat.
Again, I shot it outside. The can was getting empty and the nitrile glove tip of my right index finger was a bit loose and got into the spray stream resulting in big drops hitting the model, not a nice spray. Then the model popped out of the holding fixture and landed upside down (of course) on the lid of one of our big plastic trash container (my outside work stand), and then when I touched it to pick it back up again did further damage. Then to make matters worse, the paint picked up pollen. That’s right, POLLEN!
The result is a mess that needs to be significantly sanded to bring it back to where it was. I needed to find a way of not getting too deep on the ridges since I can see problems occuring over and over. I need a spray booth. It should come back… if not, I’ll have to buy more paint.
Personally, I like DOT 3 brake fluid. I’ve tried other methods and found them less than useful.
If you need to remove chrome plating, soak parts in chorine bleach.
I am repainting an AMC Javelin that I had previously done back in maybe 1969. Cleaned up well.
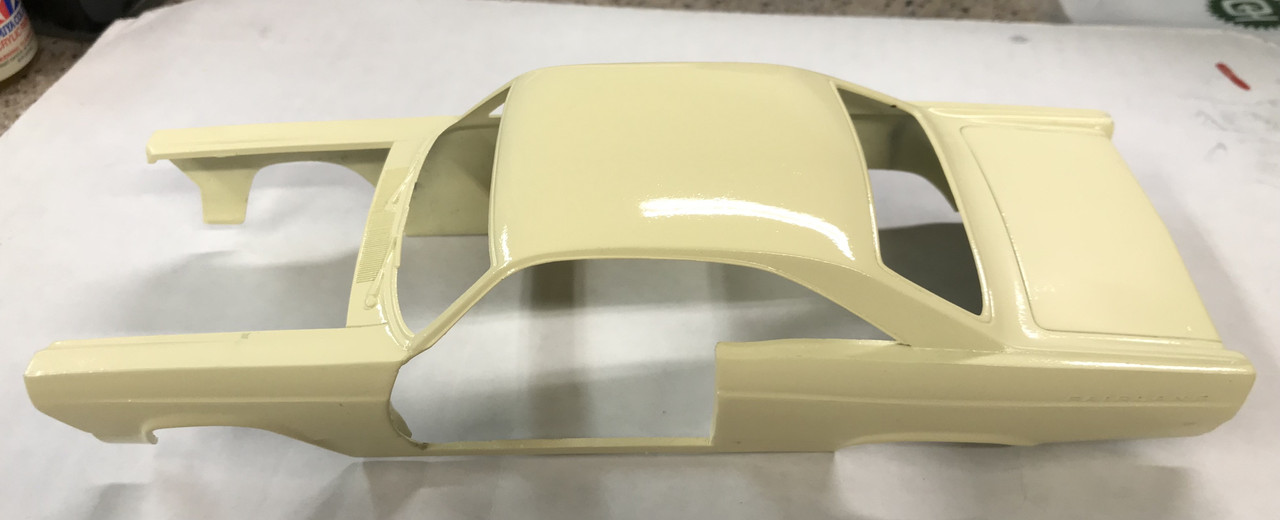
well… on one of those rare Saturday sessions I was able to save the GTA paint job. The 3rd coat was thick enough that I could sand the heck out of the roof and reduce all the embedded crap to a smooth surface. There were still small pieces in place that wouldn’t sand further without removing all the paint, but the surface was smooth. So I masked the rest of the model and just sprayed the roof again. This time in the basement with no pollen and very little orange peel. Results: we’re back in business. I also wet sanded the rest only this time I did it without the sanding block and was very careful around raised edges and didn’t expose any primer. Now I’m ready to finish sanding polishing and get ready to finish up this job. I also bought the clear coat, but frankly I’m a little squeamish in applying it. If the paint polishes well enough I’m going to leave it off.
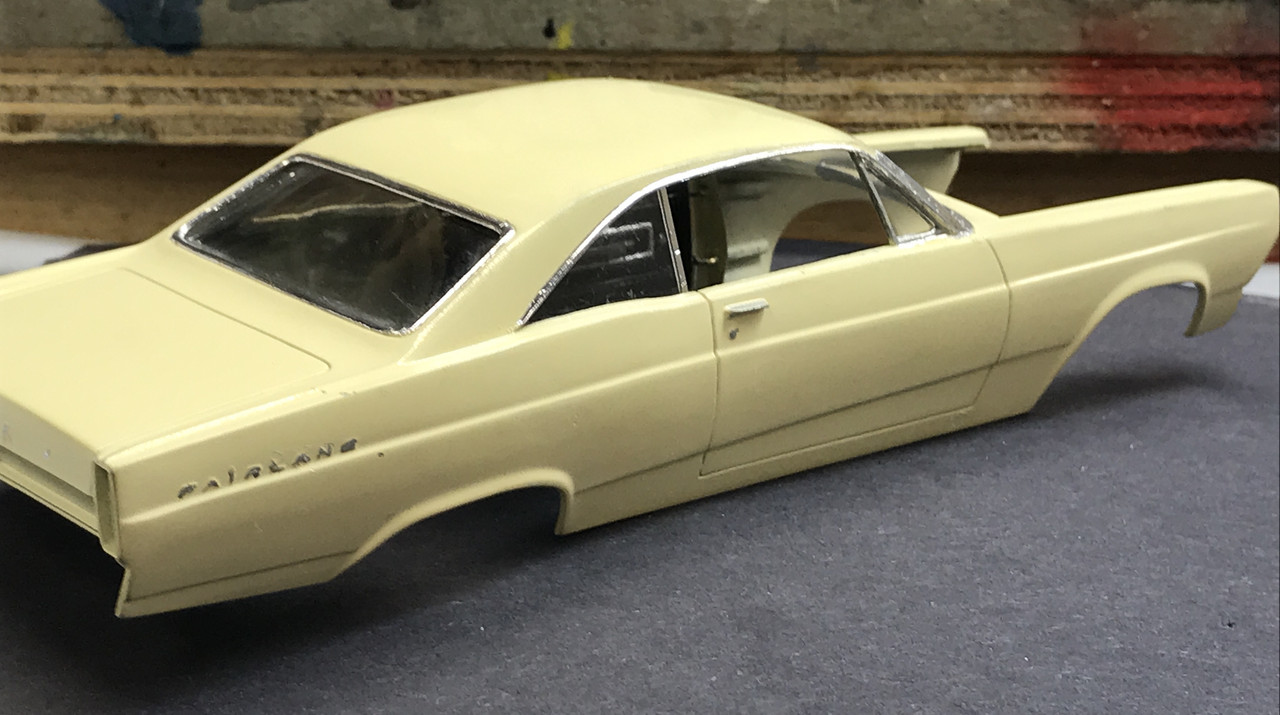
Finished the Essex yesterday, cleaned up a bit and got back to work on the Ford. Did the Revell polishing regimen starting with 3200 grit and progressing to 12,000. Got the roof nice and shiny and the sides too.
Unfortunately, I exposed some bare edges (doh!). I don’t want to have to paint anything again, so I’m going to live with it and possibly do a tad of touch up painting to cure the worst spots. I have to get a spray booth and I’m still working on the Commander to get her agreement.
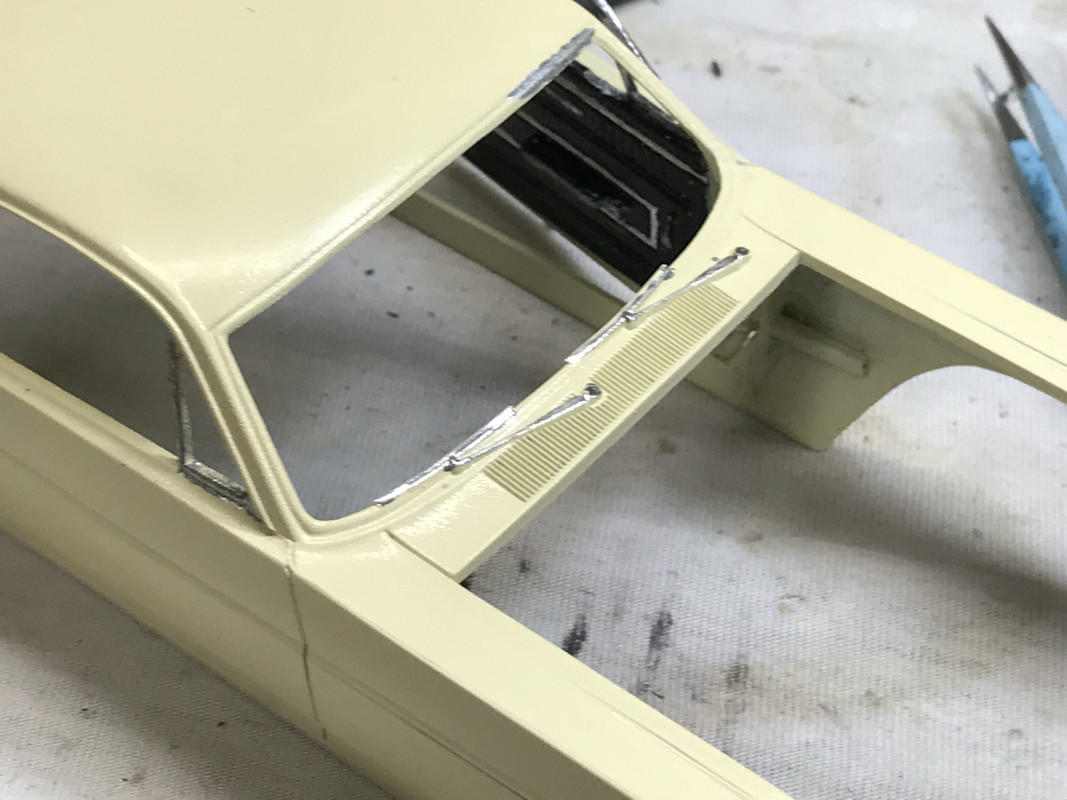
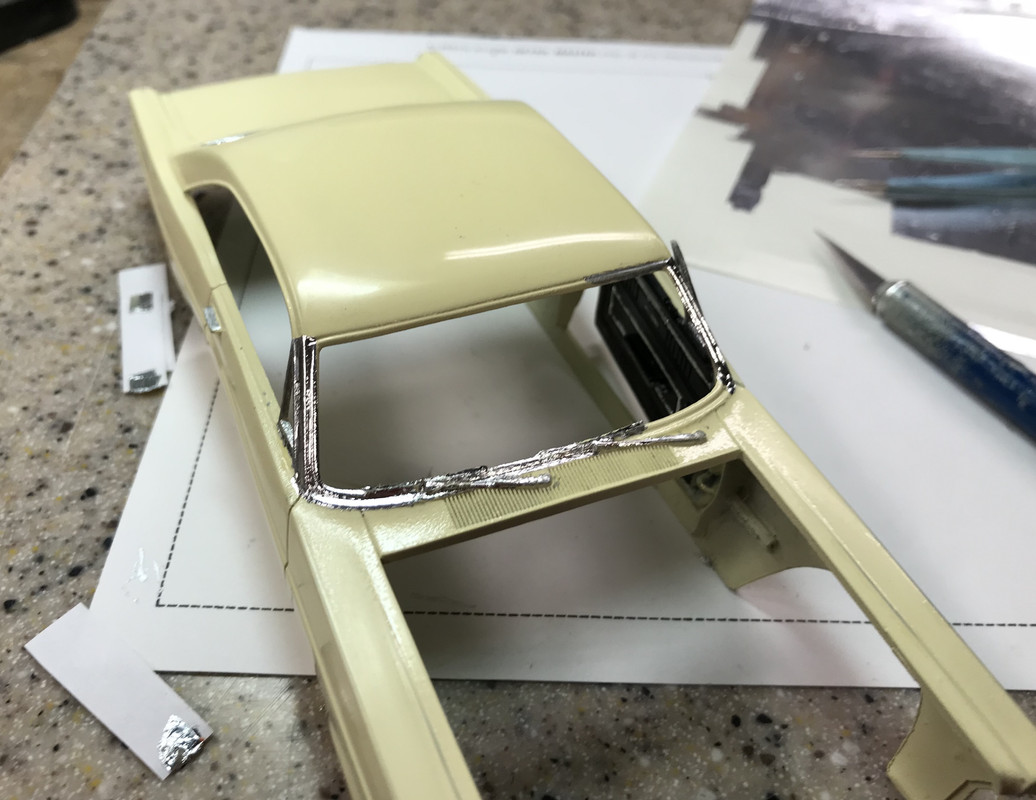
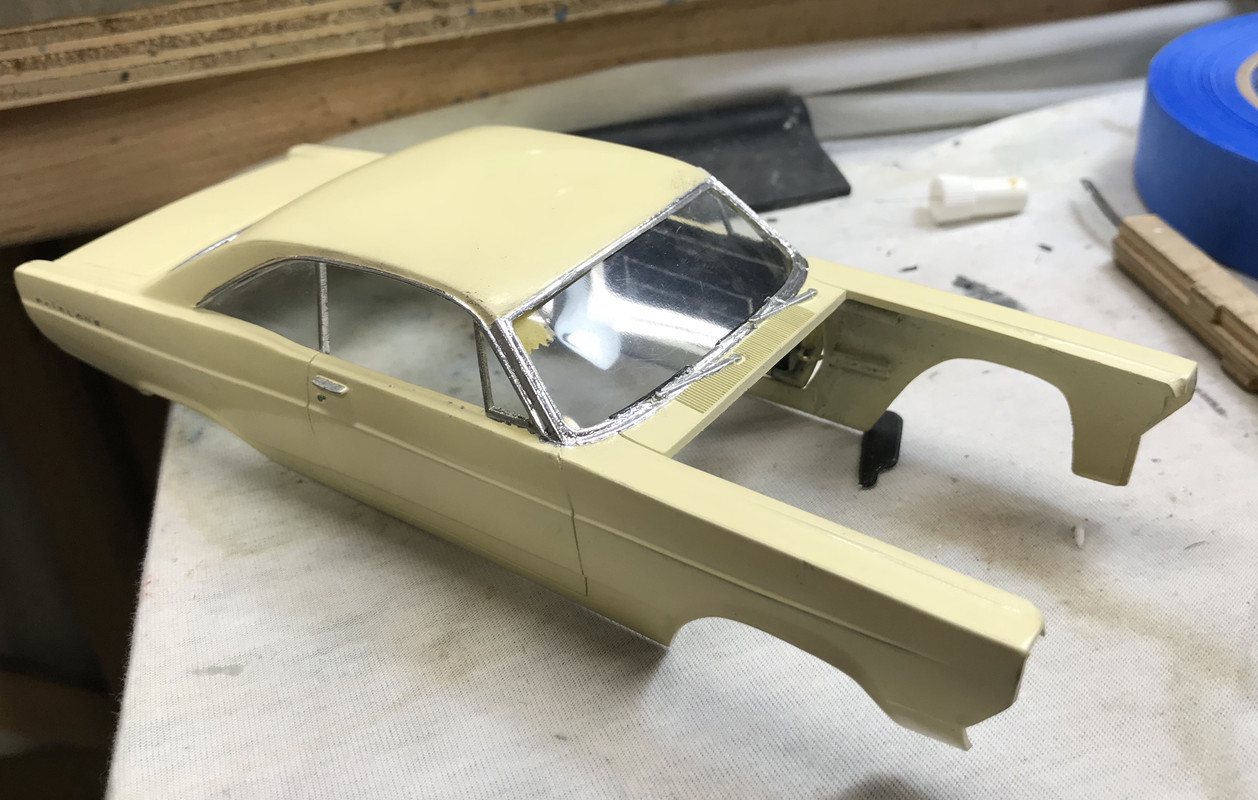
I used the Molotow chrome pen to paint the windshield wipers and tried a bit on the window trim, but decided that was not the best application for it, so I’m going to use Bare Metal Foil. Still have to paint the black wiper blades.
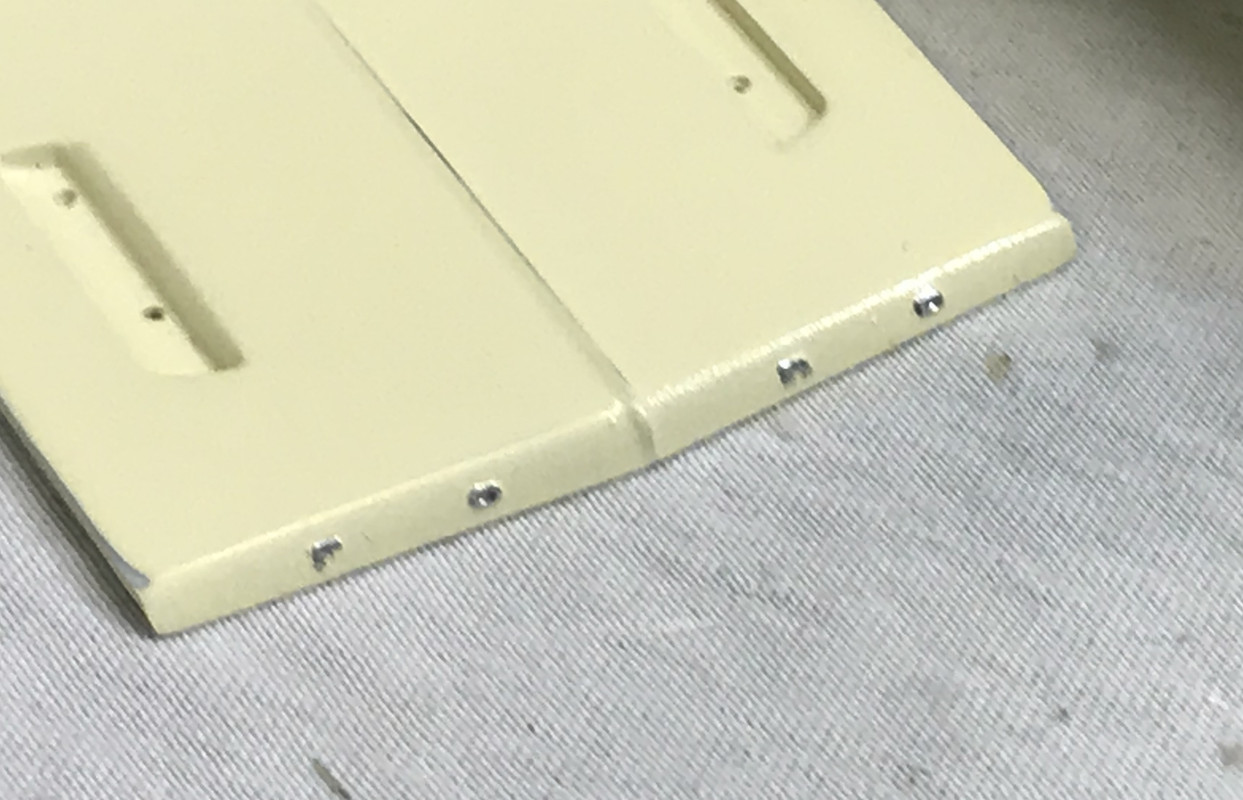
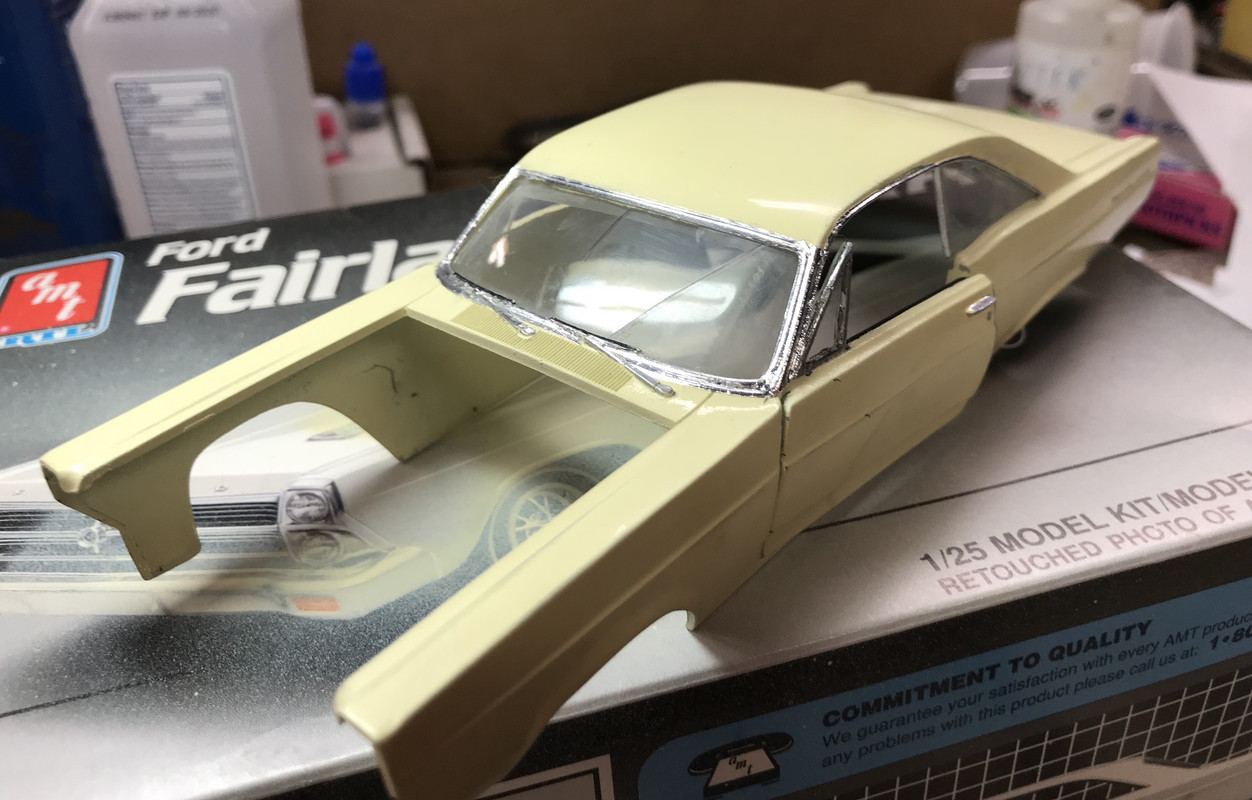
The Chrome Pen worked well for the Ford lettering on the hood. You can see the worn-through spots on the two corners. It really bugged me that I wore through since I was actually trying not too. Any secrets on doing this? It looks like I just got into the primer and the white plastic beneath. I also test fit the body onto the frame and installed the opening door. It will still look like a nice model. Actually, the paint on the real Ford in 1966 was considerably poorer than what I’m doing on the model.
I have a home maintenance chore (re-caulking the master bath) that will take me away from this model a little bit longer, but I will get to it soon.
Spent most of the day removing old caulking in our master bath and replacing it with new caulk, so I didn’t get in the shop until 3:00. I attempted to touch up the area where I wore through the paint. It was marginally successful. I then got to work adding adhesive foil to the window framing.
The back window was first and went very well since it was pretty simple. I finally learned (after reading the instructions) that you use little paper tabs at each end of the foil strip so you can hold onto it, keep it from curling, and keep it from sticking to itself. I also am using the tools they suggested: sharp #11 knife, fine tweezers, cotton swaps, and round tooth picks with the point dulled a bit.
The front window proved more difficult and I’m not yet done with it. Getting the foil around the wipers proved challenging. It would have been better if the wipers were a separate part and put on after chroming. Oh well… I checked my photo of my car and see that the chrome extends from the windshield all the way to the door opening, and up to where the windshield’s upper frame ends.
I painted the wipers flat black only to cover them over in foil, which I had to scrape away. After I’m all done I’ll go back and re-paint the wipers. Maybe the chrome will take peoples’ attention away from all the areas of bad paint. This car, unlike my ships, is not going to be a show-stopper. I will not be entering it in contests.
Good for you on the paint save Builder!! Paint stripping is my LAST option. Man you’re really giving this build the works and it’s looking the part with each update. Came in late on this one but will be here for the rest of the build.
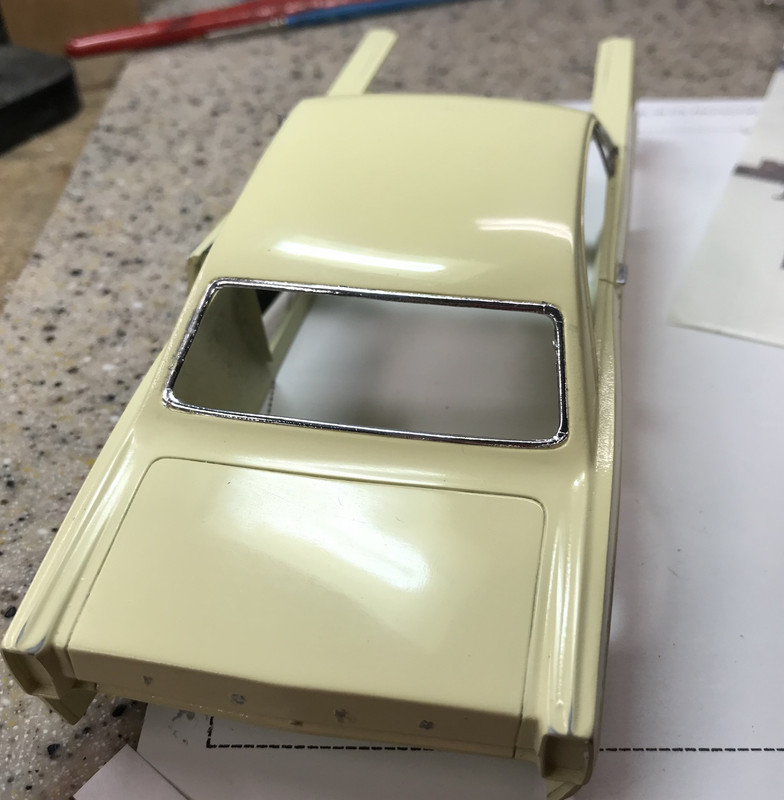
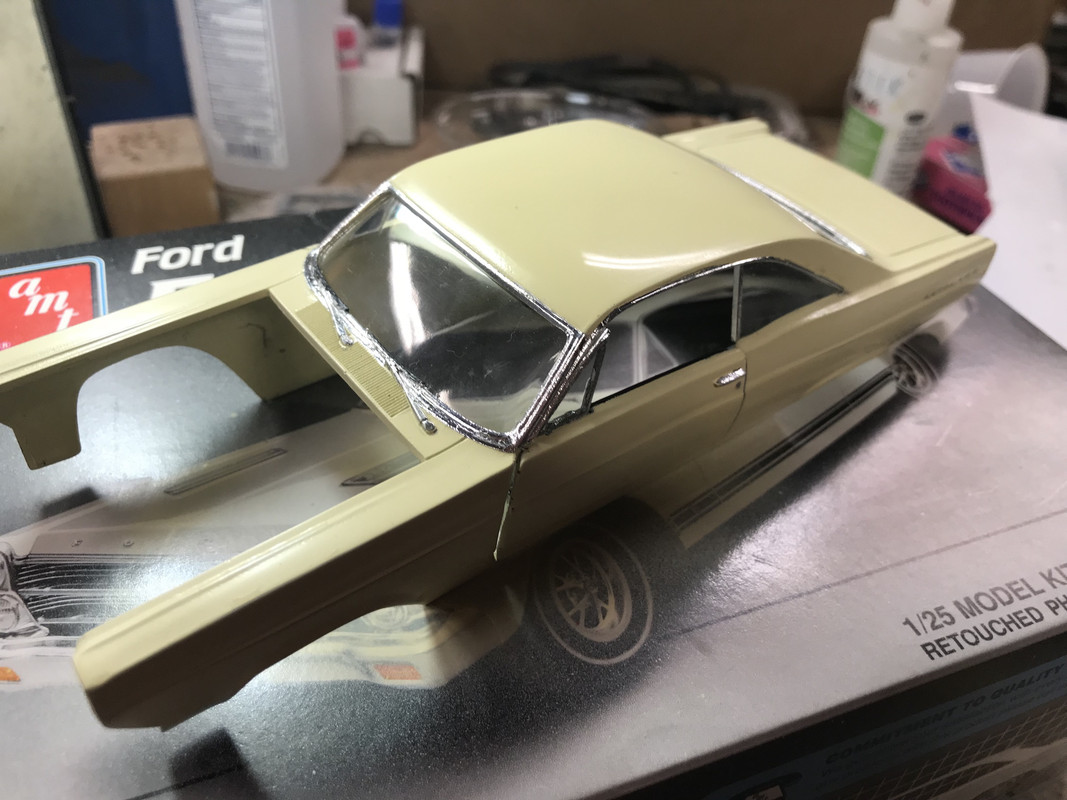
Happy Father’s Day! As a Father’s Day “present” I got clearance to work on the model on a Sunday. Maybe I shouldn’t have as you will see. I finished all the chrome trim with reasonable results since putting some foil trim on the back window forward edges to simulate the small frames on the hardtop coupe’s rear side windows.
I put in all the glazing using (what I thought) was a good idea. That good idea was Bondic. Since it cures by UV light, having it for clear windows means the Bondic can cure even behind the clear plastic. Furthermore, the uncured resin can be wiped off the “glass” since it doesn’t cure left alone. Great for clear parts… right?
I think it looks pretty good! It did… until the front window popped out. It seems that Bondic, while it cures hard, doesn’t actually stick very well to plastic or painted surfaces. it just simply let go. I was not happy. But it got worse… much, much worse.
I went back to plan B which was gel CA. I wanted it to cure fast since the window was under a bit of tension. So I shot it with a spray of accelerator. This particular accelerator attacked the clear plastic. It crazed the plastic. During this time, I had put masking tape on both sides of the windows since I was leaving finger prints and smudges. When I removed the tape, I find that I now have a cracked windshield! Broken clean through!
I polished out the crazed areas as much as possible and also did the side windows since their Bondic was letting go also and the accelerator did a number of them too. I’ve got a lot of hours in this body and what I left with is a cracked windshield. I can get away with it in the Commonwealth of Kentucky since this is one of those states that has NO state inspection. But I’m really bummed. It’s not a kit in current production so getting a replacement window is probably impossible. It wouldn’t have mattered if I didn’t work on it today since I was planning on using Bondic for some time now. Wish I had a do over, but I don’t. I’ll finish the model with the bad windshield. My real 66 wasn’t a very good car, but it, at least, it had a un-cracked windshield. I hope my model has comprehensive insurance.
I had to cut off the molded on vent window on the opening-door side and make a piece of 0.010" clear styrene since that molded window was no longer viable. It was very thick anyway.
Oh… and I found out today that I’m one of the 1/3 of people who’ve had chicken pox who gets shingles. I’m heading to 73, but my son had it last year and he’s 43. I’m waiting for the pharmacy to call and tell me my Valtrex scrip filled.
Could you take the windshield back off and use it to smash mold some of that clear thermoplastic to make a new windshield? Might be a good way to replace it. Put clay all over the back of it to reinforce it first I’d say.
Thanks for the sympathy! It’s really annoying, but livable. The anti-viral meds should help reduce duration and intensity…hopefully.
Making a new windshield is a good idea. I have all sorts of materials to make the mold. When you say “smash mold” are you referring to forming the styrene sheet without heating it? If I could control the amount of heating, I could soften it a bit. It’s really worth experimenting since the windshield can’t be any worse, and it detracts from the whole build. If I could make a male mold of the outer contours I could stretch form the windshield over the mold. RC aircraft guys do this all the time. If I had a vacuum former that would even be easier.
I could make a female impression of the outer surface in Sculpey, and then harden it and use it as a mold for the male counterpart which could be mounted on a wood block for support.
The thermal plastic does get heated to the point of being soft. A windshield would be small enough to be smash molded (as opposed to vacuum molded). The rest of it is exactly what I had in mind - make a mold, support it, drape warm clear thermal plastic on it, cut off the excess and install. Good luck! Let us know how it turns out.
First:
If you are looking for Shingles vaccine shot, you only want “Shingrix”! A lot of places won’t even sell the old shot anymore.
Second:
Do yourself a favor and use a glue specificly made for clear parts. There are a few out there. I use Testors Clear Plastic Glue & Window Maker (although the window maker means nothing big like you need). Years ago,I built a 1/4 scale visible 426 Hemi using this and it hasn’t fallen apart yet!
Yup! ShringRix is the one. My wife’s going to get it now and I’ve got to wait until this clears up before getting it. You can get shingles more than once.
Re: that windshield. I tried to get it out and, of course, the gel CA is holding like crazy. That crap never holds until you don’t want it too. It’s a corollary of Murphy’s Law I believe. I’m not going to wreck the car to try and remove the windshield. I’ll give it another shot another day using some tools, before I completely give up. My wife says I should turn it into a junker. She never liked that Ford which is why we traded it in a few months after we were married for the second worse car we’ve ever owned, an AMC Rambler Ambassador with their can’t-get-out-of-its-own-way straight six engine. I went from a 390 cu. in. hot rod to a total snoozer old man’s car in one jump. It was the stuff of culture shock. The Rambler had the annoying habit of not starting when it rained (or high humidity either). We traded that in a couple of years for a 1972 Olds Cutlass S and that was a very nice car that I ran for a long time.
I called Safelight and they came and installed a new windshield while the car was in the Mall parking lot. Or at least that’s how their commercials tell you they do it.
But really, I tried once again to get the windshield out and my persistence paid off. This time I milled out the cured CA that was holding the bad windshield in place and got it out without breaking anything else. I glued the cracked halves together so that I could handle it and cleaned up the surface.
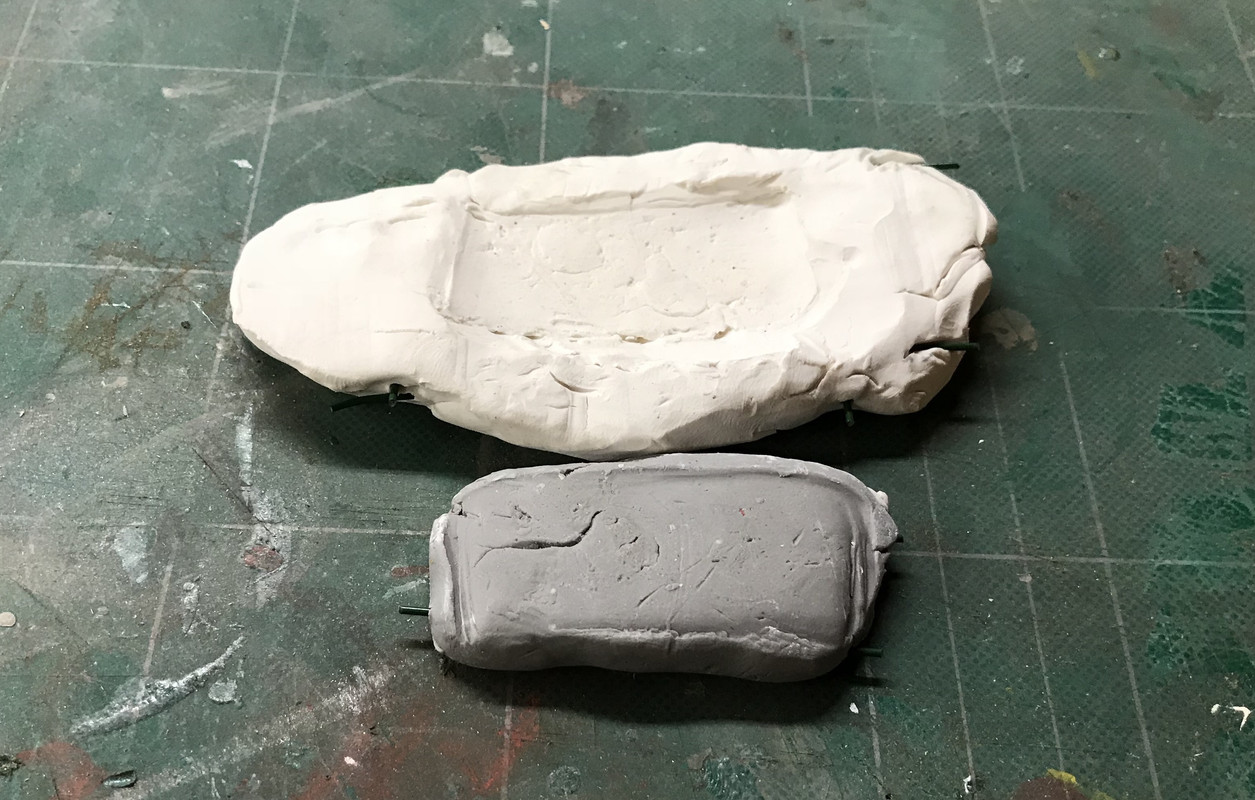
Then, as advised, made a female mold impression of it using standard Sculpey, and made a male pusher out of Super Sculpey (a big tougher). I reinforced both halves with some floral wire and fired them in the toaster over at 275° F for 20 minutes.
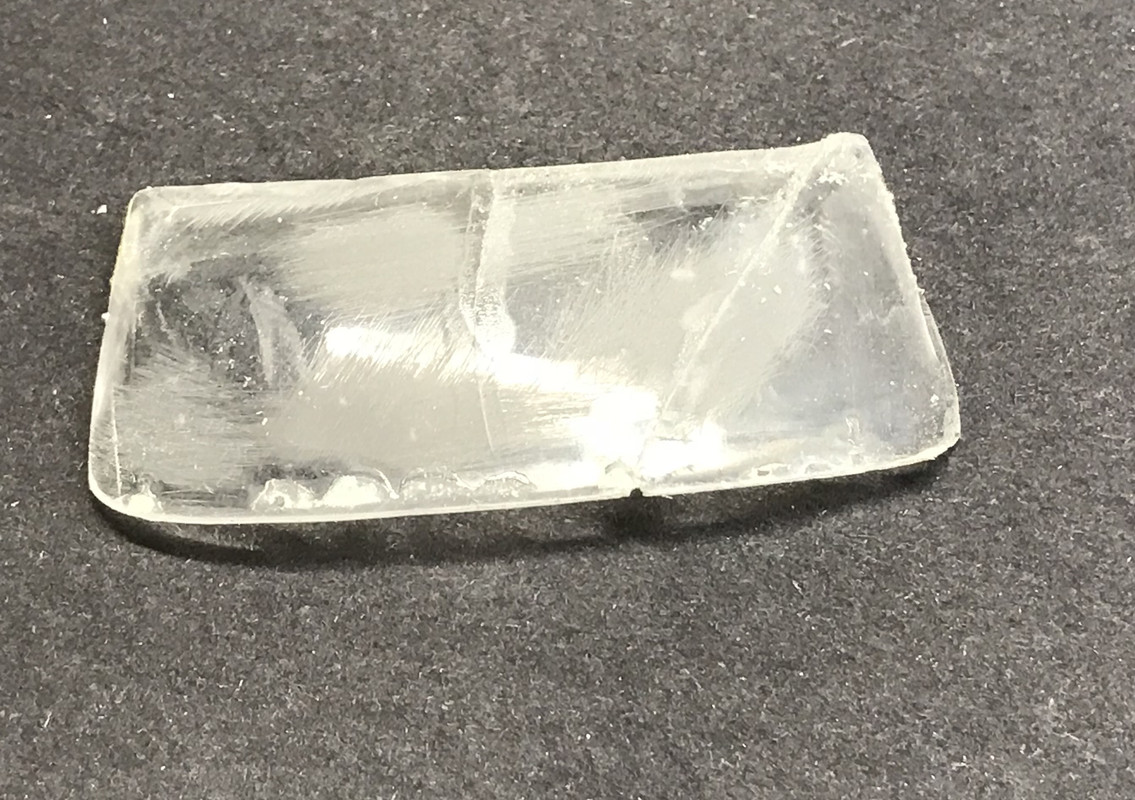
They aren’t pretty and don’ have to be. They just have to impart the shape since the plastic’s not going to be hot enough to flow into the imperfections. I then cut out some 0.010" clear styrene sheet laid it on top and heated it with a Topflite Hot Air Gun (used for putting on Monokote RC airplane skin) until the plastic started to deform and then smashed it down with the male component. First time was a charm and after trimming, the window fit pretty well.
It was just a little distorted in one corner so I tried two more times to make a better one, and they got worse and worse, so I used the first one. I you heat it for a fraction of a minute too long, the plastic deforms uncontrolably and can’t be used. I used G-S Hypo Cement to glue it in. I had trimmed off the molded vent-a-pane passenger side window so I was just dealing with the windshield. I made those small windows as separate styrene pieces.
It came out so well that I ripped out the damaged rear side windows and made them out of the same styrene sheet. Now the car has much better optical glass and I started fitting the body to the chassis in earnest.
I found some interference between the hinge tubes inside the body and the firewall on the chassis so I used the carbide router bit in the Dremel Flexishaft and made some relief cuts. I also found interference in the same area where the inner door hinge framing that I put on the body, to block off the space next to the fender wells. It was too wide and was also holding the body away from the chassis. In this case I was able to trim it with the Xacto. The chassis is now fitting as it should and will be glued to the body next session.
So… special thanks go out to Lon Cray for the idea and inspiration to make my own windshield. I would have never given that a thought were it not for my followers making great suggestions.
Woohoo! I’m so glad that worked. I’ve only ever made little tiny 1/350 aircraft canopies with smash molding but I figured it would work for this too. Happy to help; happier that your model looks so gorgeous.