Here is the first step for the diorama: A Tokheim 39 gas pump 100% scratch build (1/16) Everything is scratch build. No resin parts or whatever. The logos and the display are also self made. I draw them on my computer and printed them out in scale.
It’s not finished yet. I just put it together with tape for the pictures. I still have to do some weathering and rust effect on it. As it will be standing close to the junk Chevy, it can not stay this way. I know it hurst a little as it look great now, but… I’ll do it!
Thanks for taking the time & effort to post for us, it really is appreciated!
I have a Revell 1/24 scale Nomad station wagon kit…[N] Never in my lifetime have I seen such a poorly molded lump of plastic, yet I would like to build it for a theme prize for a contest next May. I will make a note of this thread for reference.
@ SuppressionFire: I’m glad you like my work! Thank you! I know what you mean. It’s the same with this kit although it is a 1/16 scale. One of my worst kits ever. 50% of the time I’m working on details that actually should be there, specially in such a big scale! And I’n not talking about the door panels and that stuff, but really basic things such as engine parts or other basic details. This is my last “bad” kit. It’s half fun.
Hmm, after the last few posts, it sounds like Revell could possibly need to re-tool some molds.
I’m O.K. with the detail I get from Revell kits, and suplementing them with my own scratch-built stuff, but that may be in part due to Revell being one of the few manufacturers I can afford most of the time.
Of course, those mold seems do go pretty deep, and it takes a good amount of sanding to get rid of them (as well as the molded details in some cases[bnghead])
At Model Junkyard, the work you do is nice indeed.
I got an idea which would fit right up your line of work-- Ever play, or seen played, the X-Box 360 game “Fallout 3”? Well, it’s time frame and story line is, in 2077 there was a nuclear holocaust. The game is set 200 years later, in 2277.
The kicker is-- everything is retro–looks like it came right out of the 1950s, and ALL of it is rusty and beat up. You name it, all the cars, trucks, buses, mailboxes, vending machines, even an aircraft carrier in the Potomac River that has holes rusted through the flight deck which you can see daylight through when your character is on the hangar deck. (By the way, the carrier resembles an Essex class, and all the aircraft look like F-80 shooting stars which were some of our first jet aircraft after WWII)
It would be neat to see a diorama from you with that theme in mind. Yeah I know-[snofftpc]
@Railfan: that’s right, the details on this kit are miserable…
@kustommodeler1: It’s actually not so out of topic. That’s what I do… junk cars and junk stuff. I have another topic about a junkyard diorama . My brother and I will be building a huge Junkyard Diorama. We where thinking about including some more stuff than only cars, for example a WWI airplane such as Mustang P51-D and vietnam war helicopters like the Huey UH-1…
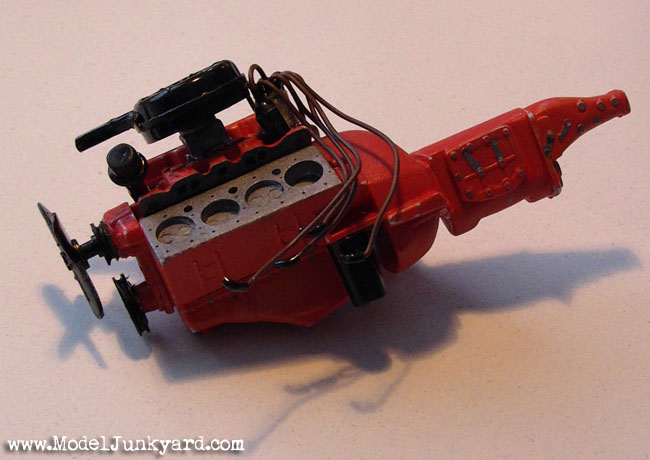
Back to the Chevy. I’ve been working on more details for my Chevy the last days.
Here you see the original firewall and a picture of a real firewall printed on scale.
The difference is so huge I decided to make it completely new… while doing that I actually realized that I had to make the whole engine compartment new.
So here you have pictures of the firewall. I’ll post pictures of the complete engine compartment as soon as it’s ready.
Exelent work scratch-building the firewall.[Y] I definate don’t think I would be able to do something like that, and have it work out to look remotely good.
Some great work here–one suggestion, if I may? It would be great and very instructive to the enthusiastic followers of this thread if you would post the “hows” of how you are completing your model here. For instance, what techniques did you use to make the molded-look of the firewall?
I also have a passion for old, rusted cars–here are some examples of my models–enjoy!
If you look at these work blogs, you’ll see what I mean about showing your methods. It really helps people to see what you’re actually doing. Pass along the knowledge! [:D]