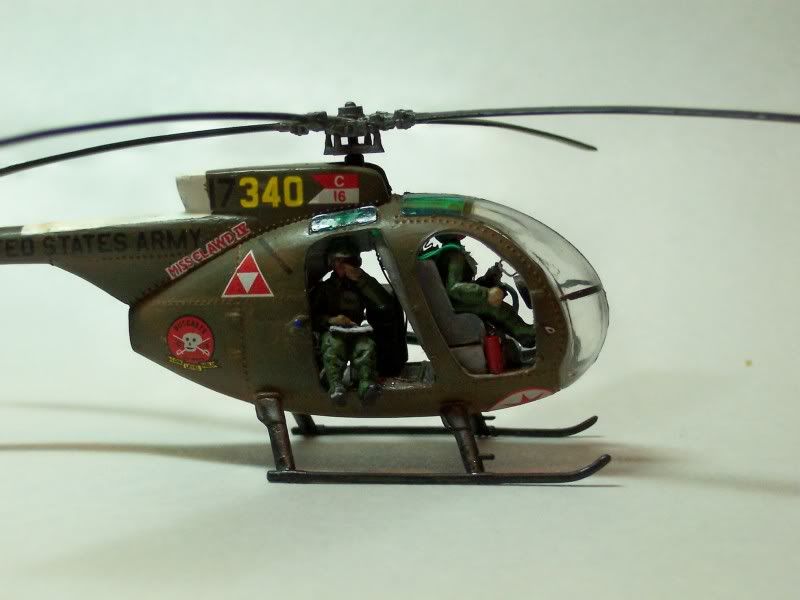
This is the Italeri 1/72 scale OH-6A Cayuse done up in Hugh Mill’s ride “Miss Clawd IV”
I was so upset at this model, and still am about what happened. When I was putting the final semi-gloss coat of clear on it, this thing just tumbled down into a box of sprues. When I picked up up, the right front part of the landing skid that sticks out in front was broken off again! Naturally, because I was almost done, the part that broke off DISAPPEARED!!! I searched everywhere for hours, even using a nylon-filtered vacuum to try and find the missing part, but of COURSE, it is nowhere to be found! All that had to happen was for the model to dry, then remove the masks, and it would have been DONE!! But NO! I’m apparently not allowed to finish a model since this kind of thing happens to me all the time! This whole situation is so STUPIDLY AVOIDABLE and should never have even HAPPENED!!! So, after long hours of searching, cussing and furious beating on the rug, I went to my Japanese OH-6 and broke off the front part of the one landing skid on that helicopter that always breaks, and I re-glued that part to “Miss Clawd IV” JUST so I can call it done! Now I have an incomplete Japanese OH-6 but at least this one is done.
Oh, yeah, I did try the stretched sprue technique to try and fix this but didn’t succeed. It was easier to just break off the landing skid on the Japanese one.
For ONCE! I’d like to finish a model without having to resort to damaging another one!
“Miss Clawd IV” is finished. She is only about four inches long from the front of her perspex to her tail. My apologies for the long angry rant. Thanks for looking and tolerating my rant.
Thanks Aaron! You’re the first one to post so far. I’m glad you like it.
Yeah, I’m looking into getting some of that evergreen rod to see if I can repair the other one. I might even try again with some semi-stretched sprue. I agree about the luck, that last statement is my saying!
Nice looking Loach. Besides the frustrations of a broken skid, were there any other build problems you encountered with you OH-6? I’ve heard the windscreen is a real pain to put on. What say you?
Thanks Ray. Actually, the windscreen wasn’t that bad. I was able to bend the forward framing of the fuselage a bit to get it to fit on the sides, and the rest actually fit pretty well after a little judicious filing/sanding to shape. My main problems was in the fitting of the side windows. I could not for the life of me seem to make them flush on the outside. They still aren’t flush, but they are better than they were, and it is barely noticeable. Other than that, there are no0 real issues with this kit. One thing to watch for when gluing the fuselage: make sure the tail boom is lined up right. It’s easy to pull that off true when pressing everything together to seal the joints. I actually had a great time building this little guy, all the way until that stupidly avoidable incident at the end.
You can go back and look again, now that you’ve replaced the broken piece and mutilated another model to do it, the other piece will now magically show up. It happens to me all the time.
Nice build. It is indeed without doubt, bloody small. I finished one off earlier this year, and my eyes have just about recovered. However, it’s a great little kit. Ray, …yes the front canopy was a B!!! to put on, but soak it enough times in Future and you should be able to super glue it in OK, but dry fit it a few times just to be sure. Duke , you managed the canopy pretty well there, much better than my effort. What coour did you use for the OD. It looks just right.
Randie, Gino, Subfixer, thank you7 for the comments. I appreciate them all. Subfixer, I agree, the missing piece will probably be laying right on top of my workbench! LOL!
Thanks Rich! Your’s looks great as well. I like how you put crew in yours, and I admire that you to got to keep the other doors off on the starboard side. I took one look at my fuselage half with the idea of removing the doors and chickened out. The OD I used was Testor’s Model Master Olive Drab sprayed on with an airbrush.