I wanted to build an aircraft flying frequently over my home, and as it happened Caracal made a decal sheet showing exactly what I wanted:
I specifically mean the second option - Polish Air Ambulance.
I have this build going for quite a long time now - but in the meantime there was a move, job change and other things so I decided to post now the build got some momentum again.
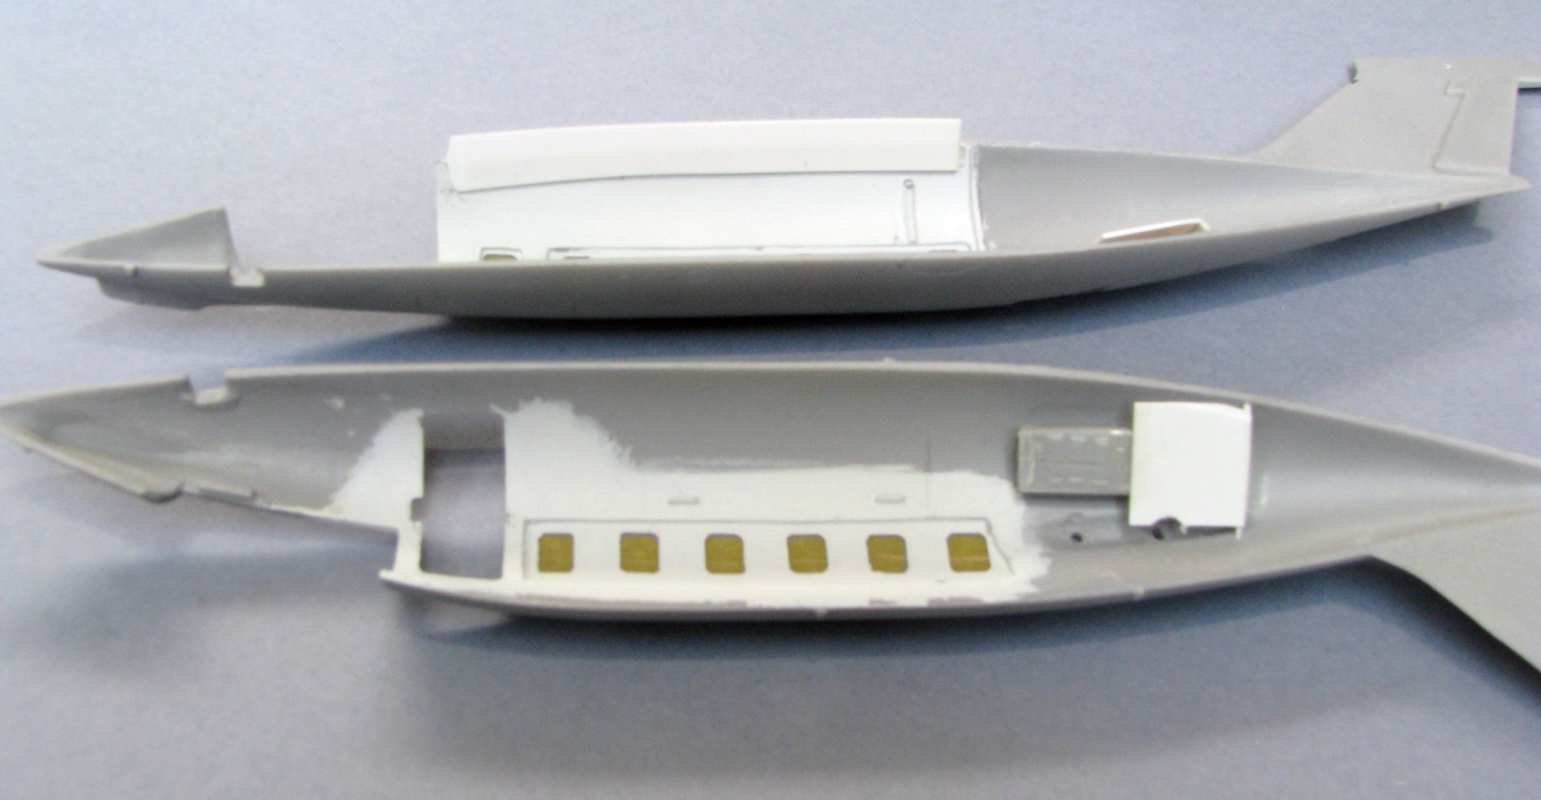
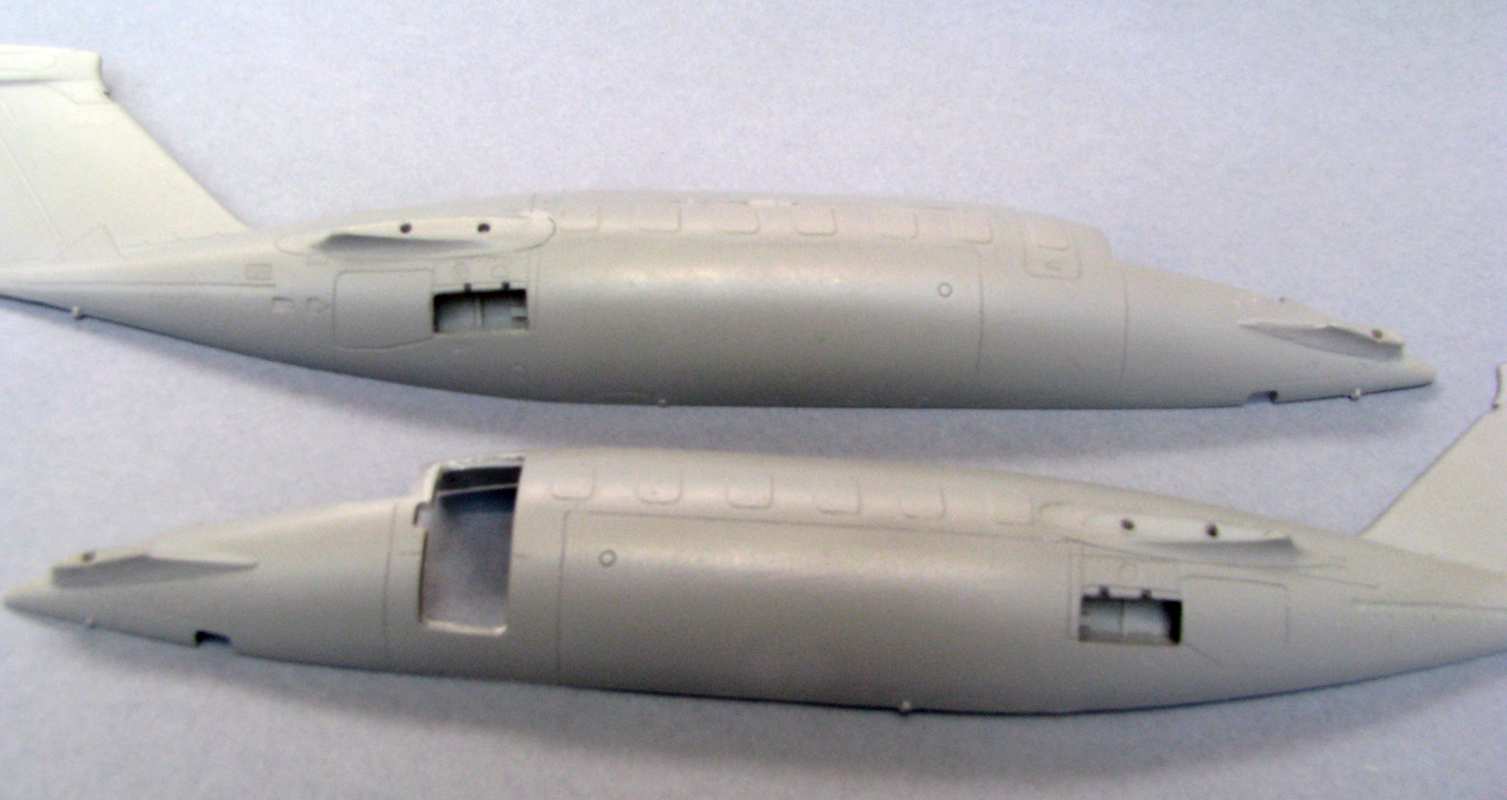
I started with the hull halves. I decided the windows aren’t going to fit, so I cut out two elongated openings, one in each hull side and put a bent clear sheet i every of them. Then I filled and sanded the joints and put appropriate masks on them. Here’s how it looks like now:
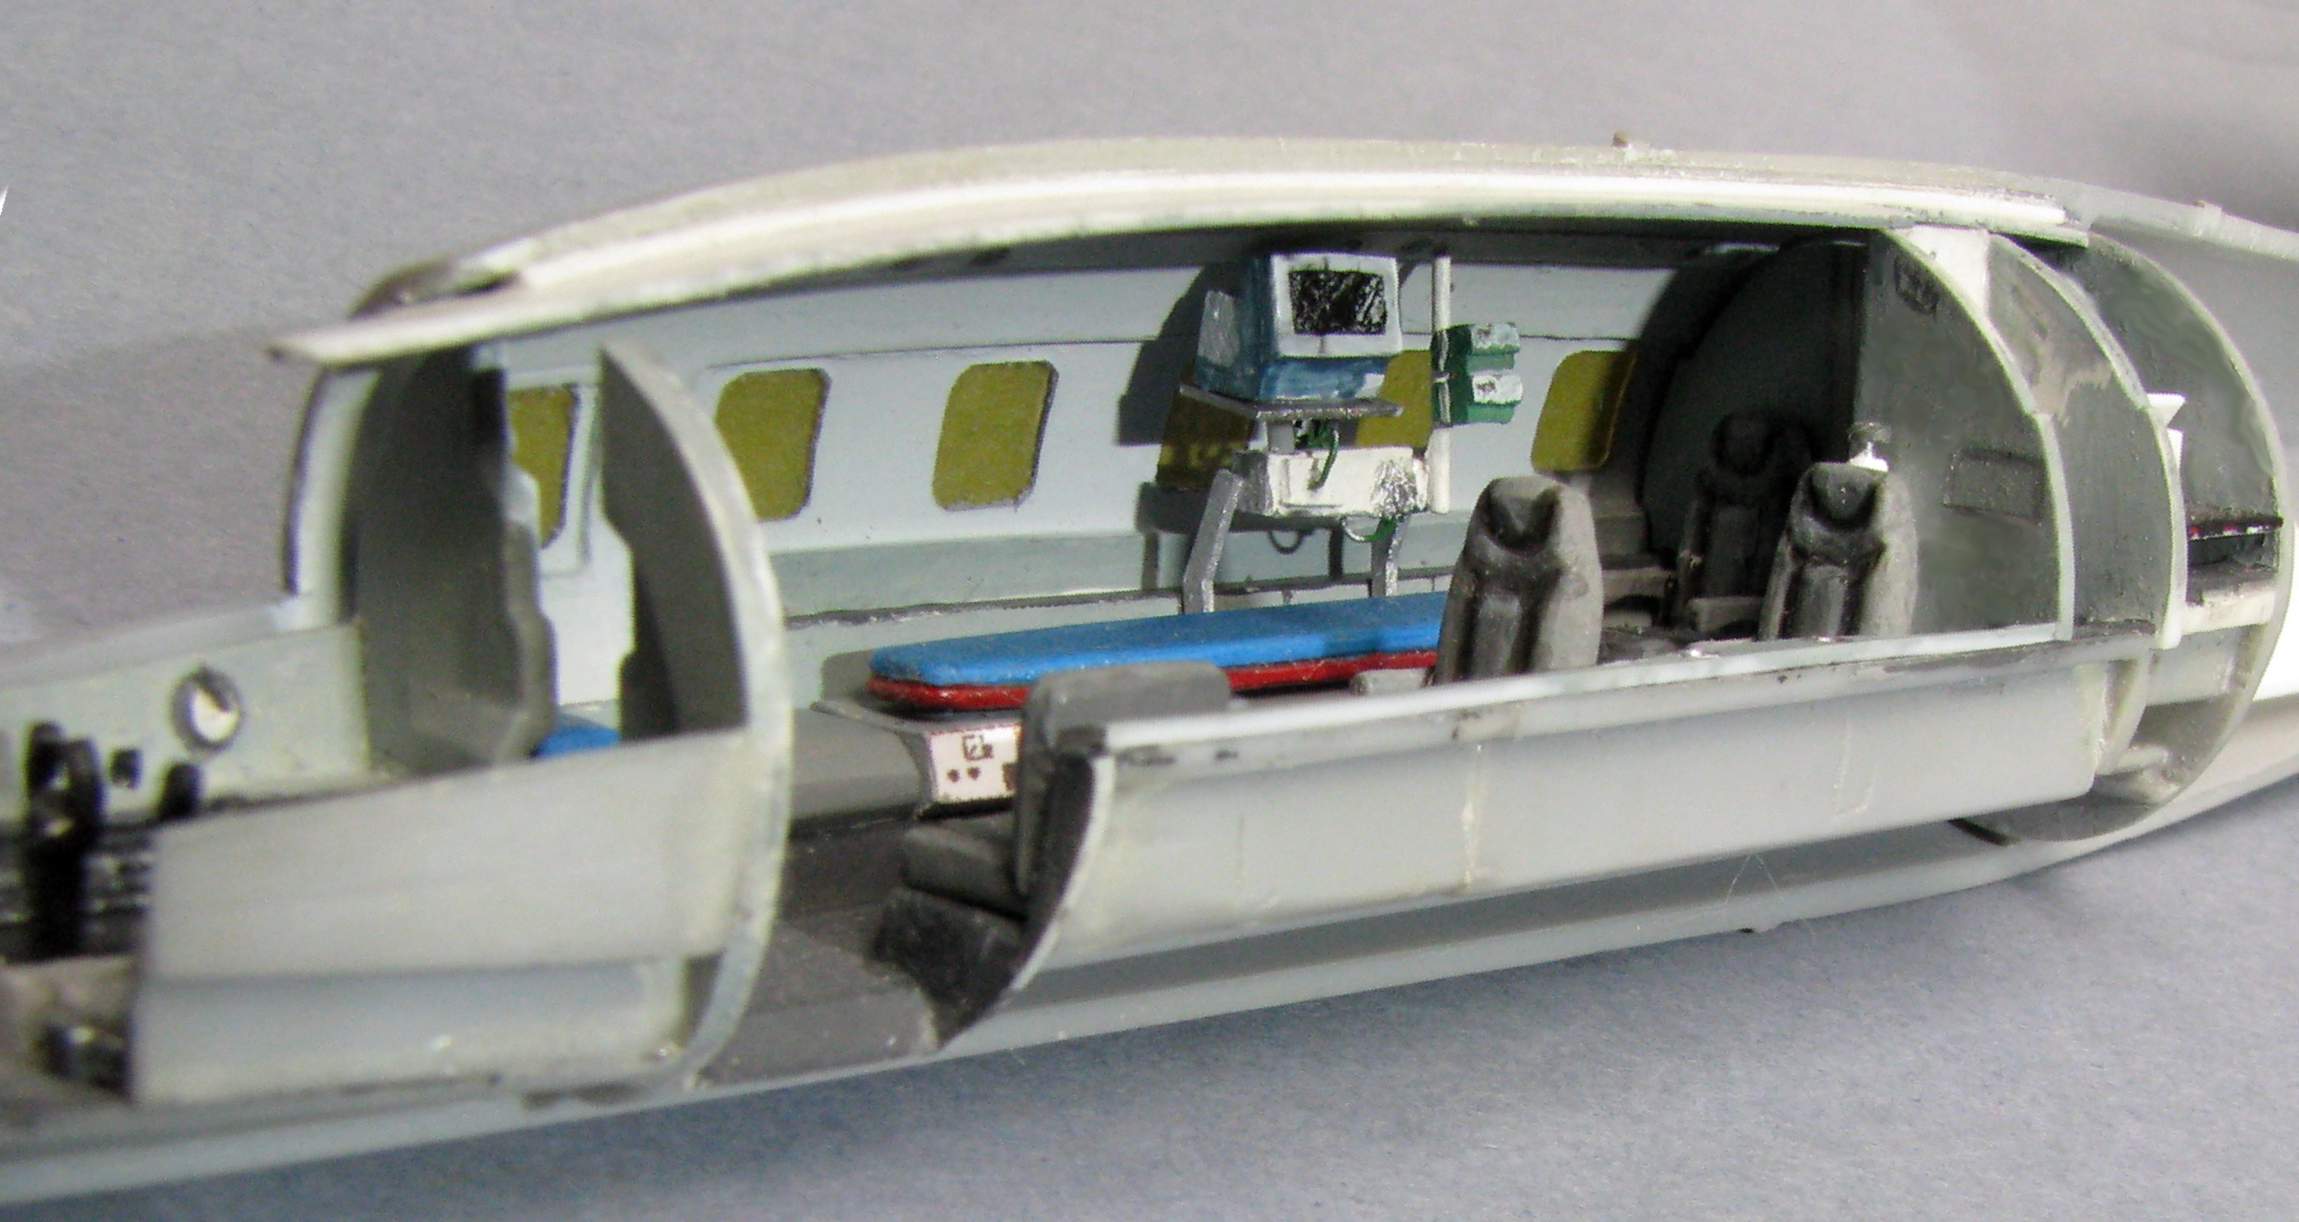
I also started to work on the cabin interior and I had to convert it to an air ambulance variant:
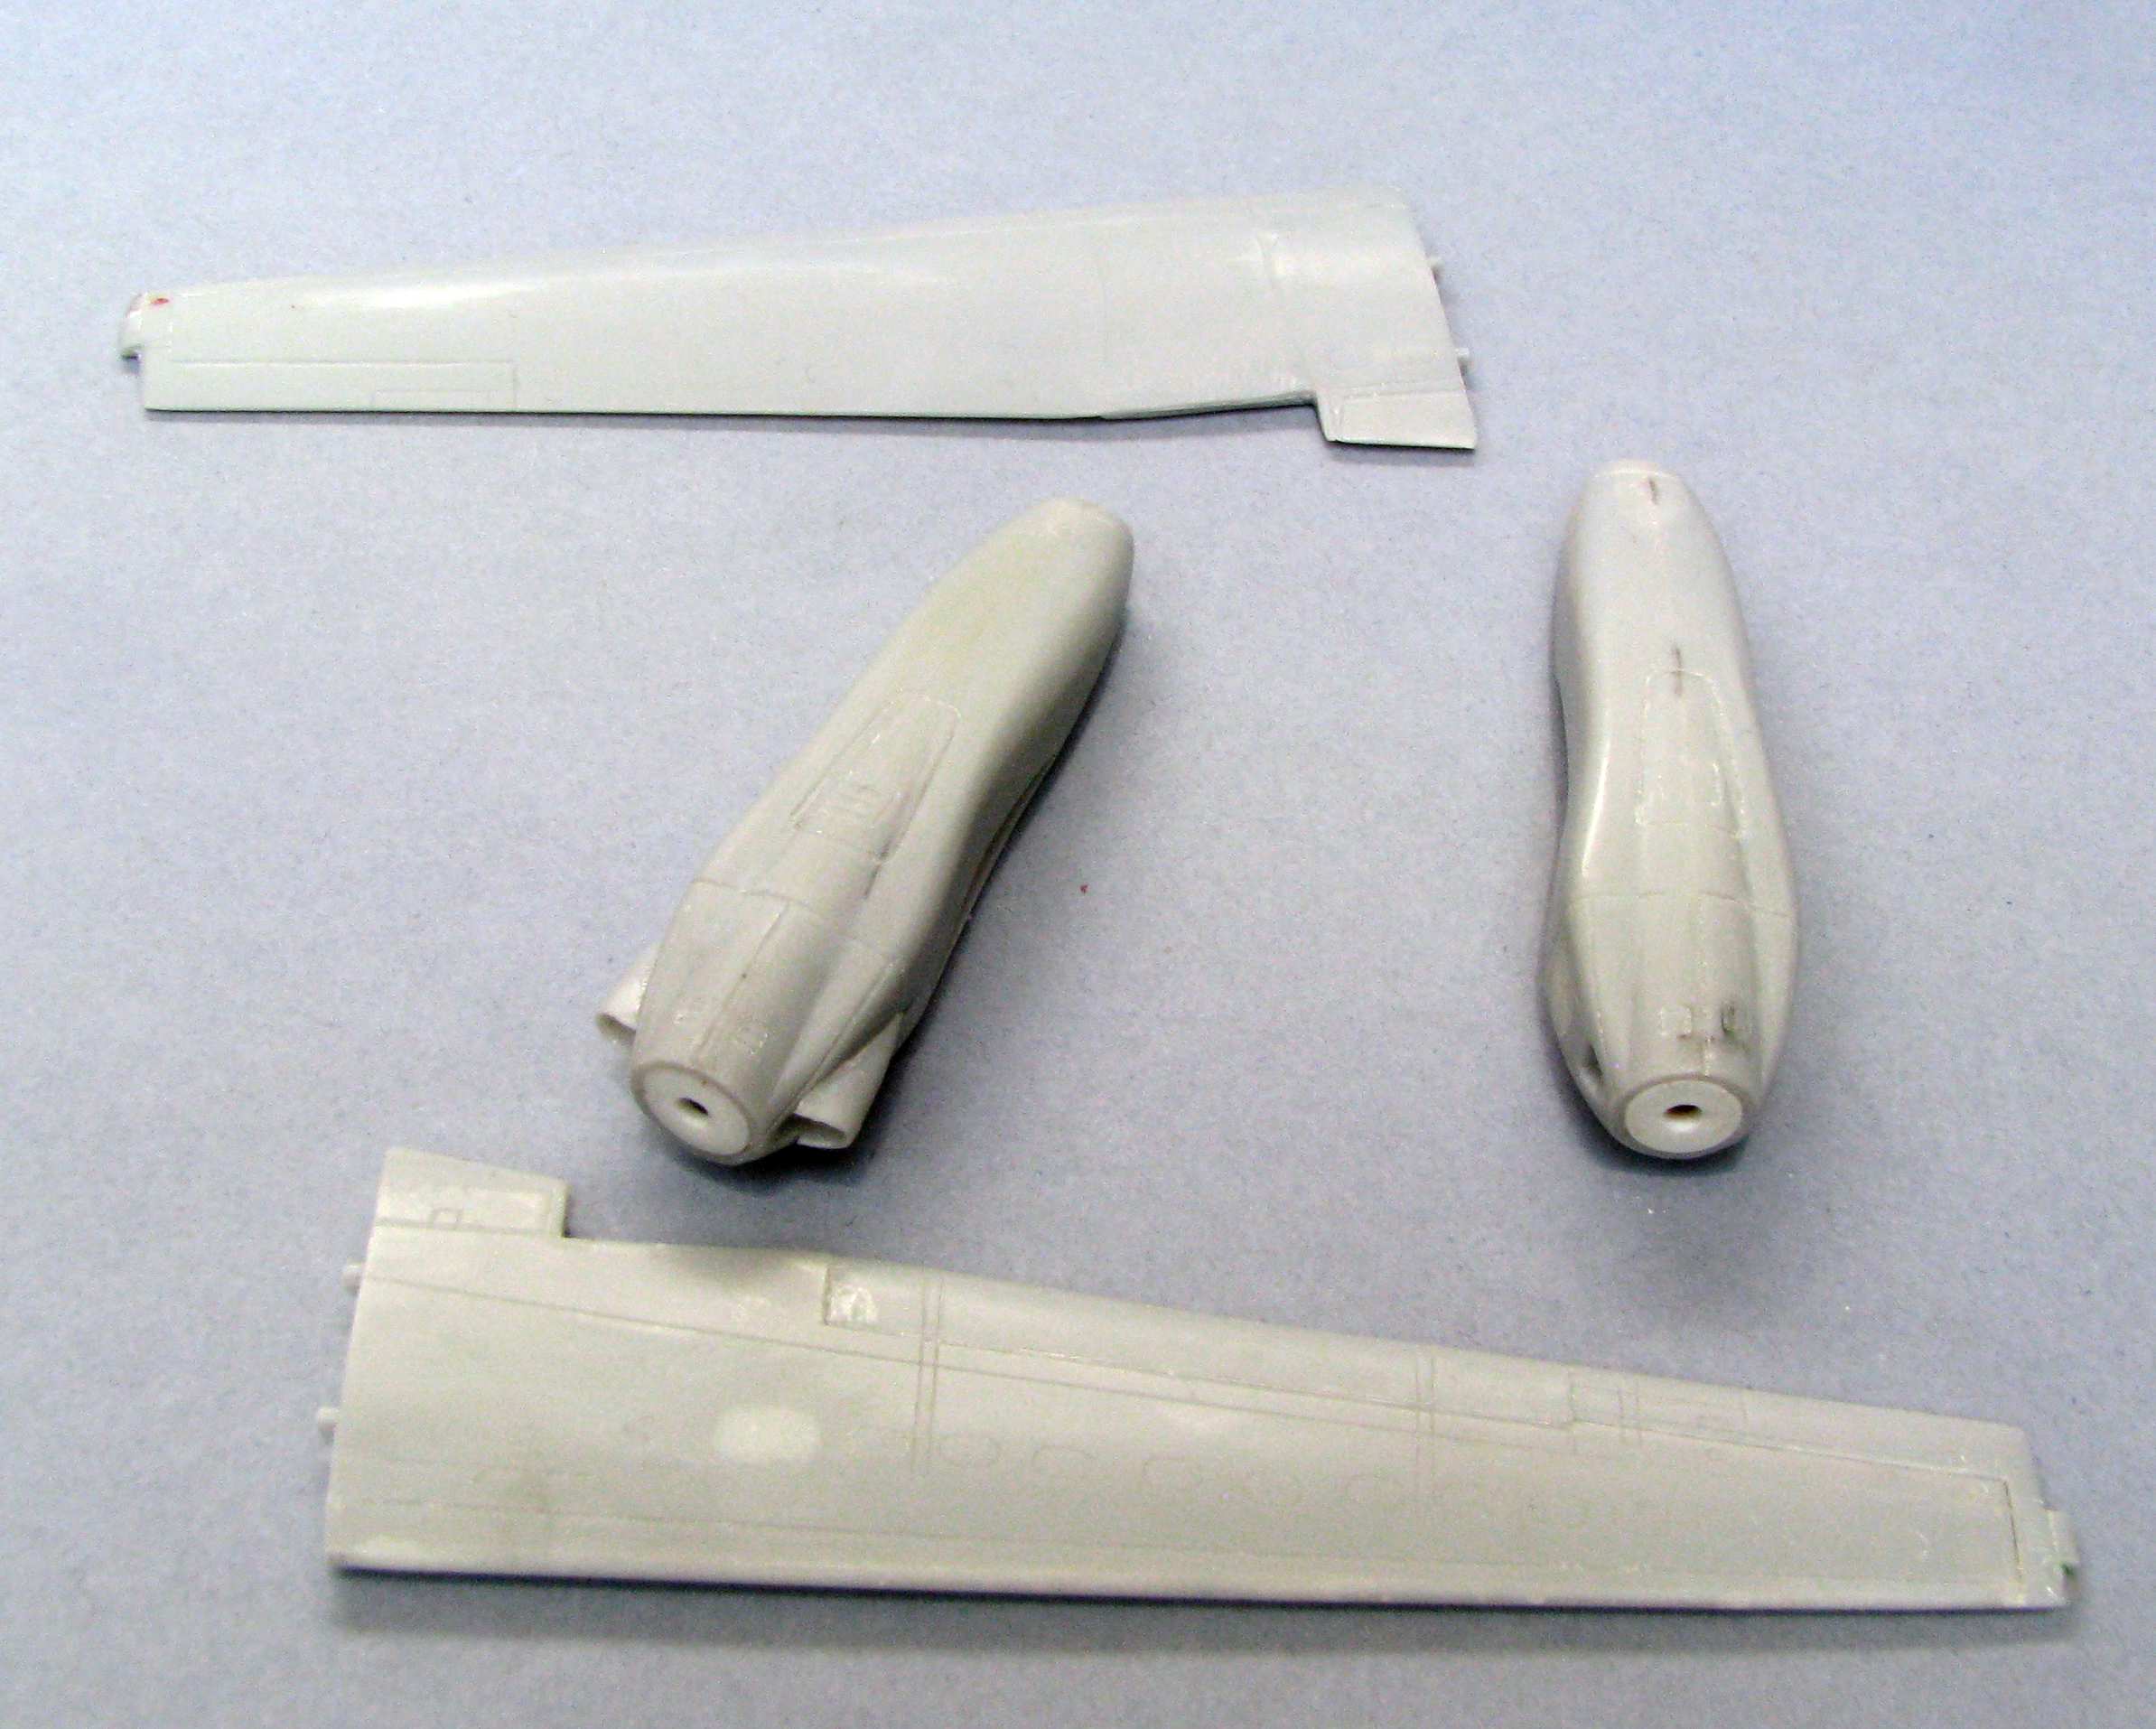
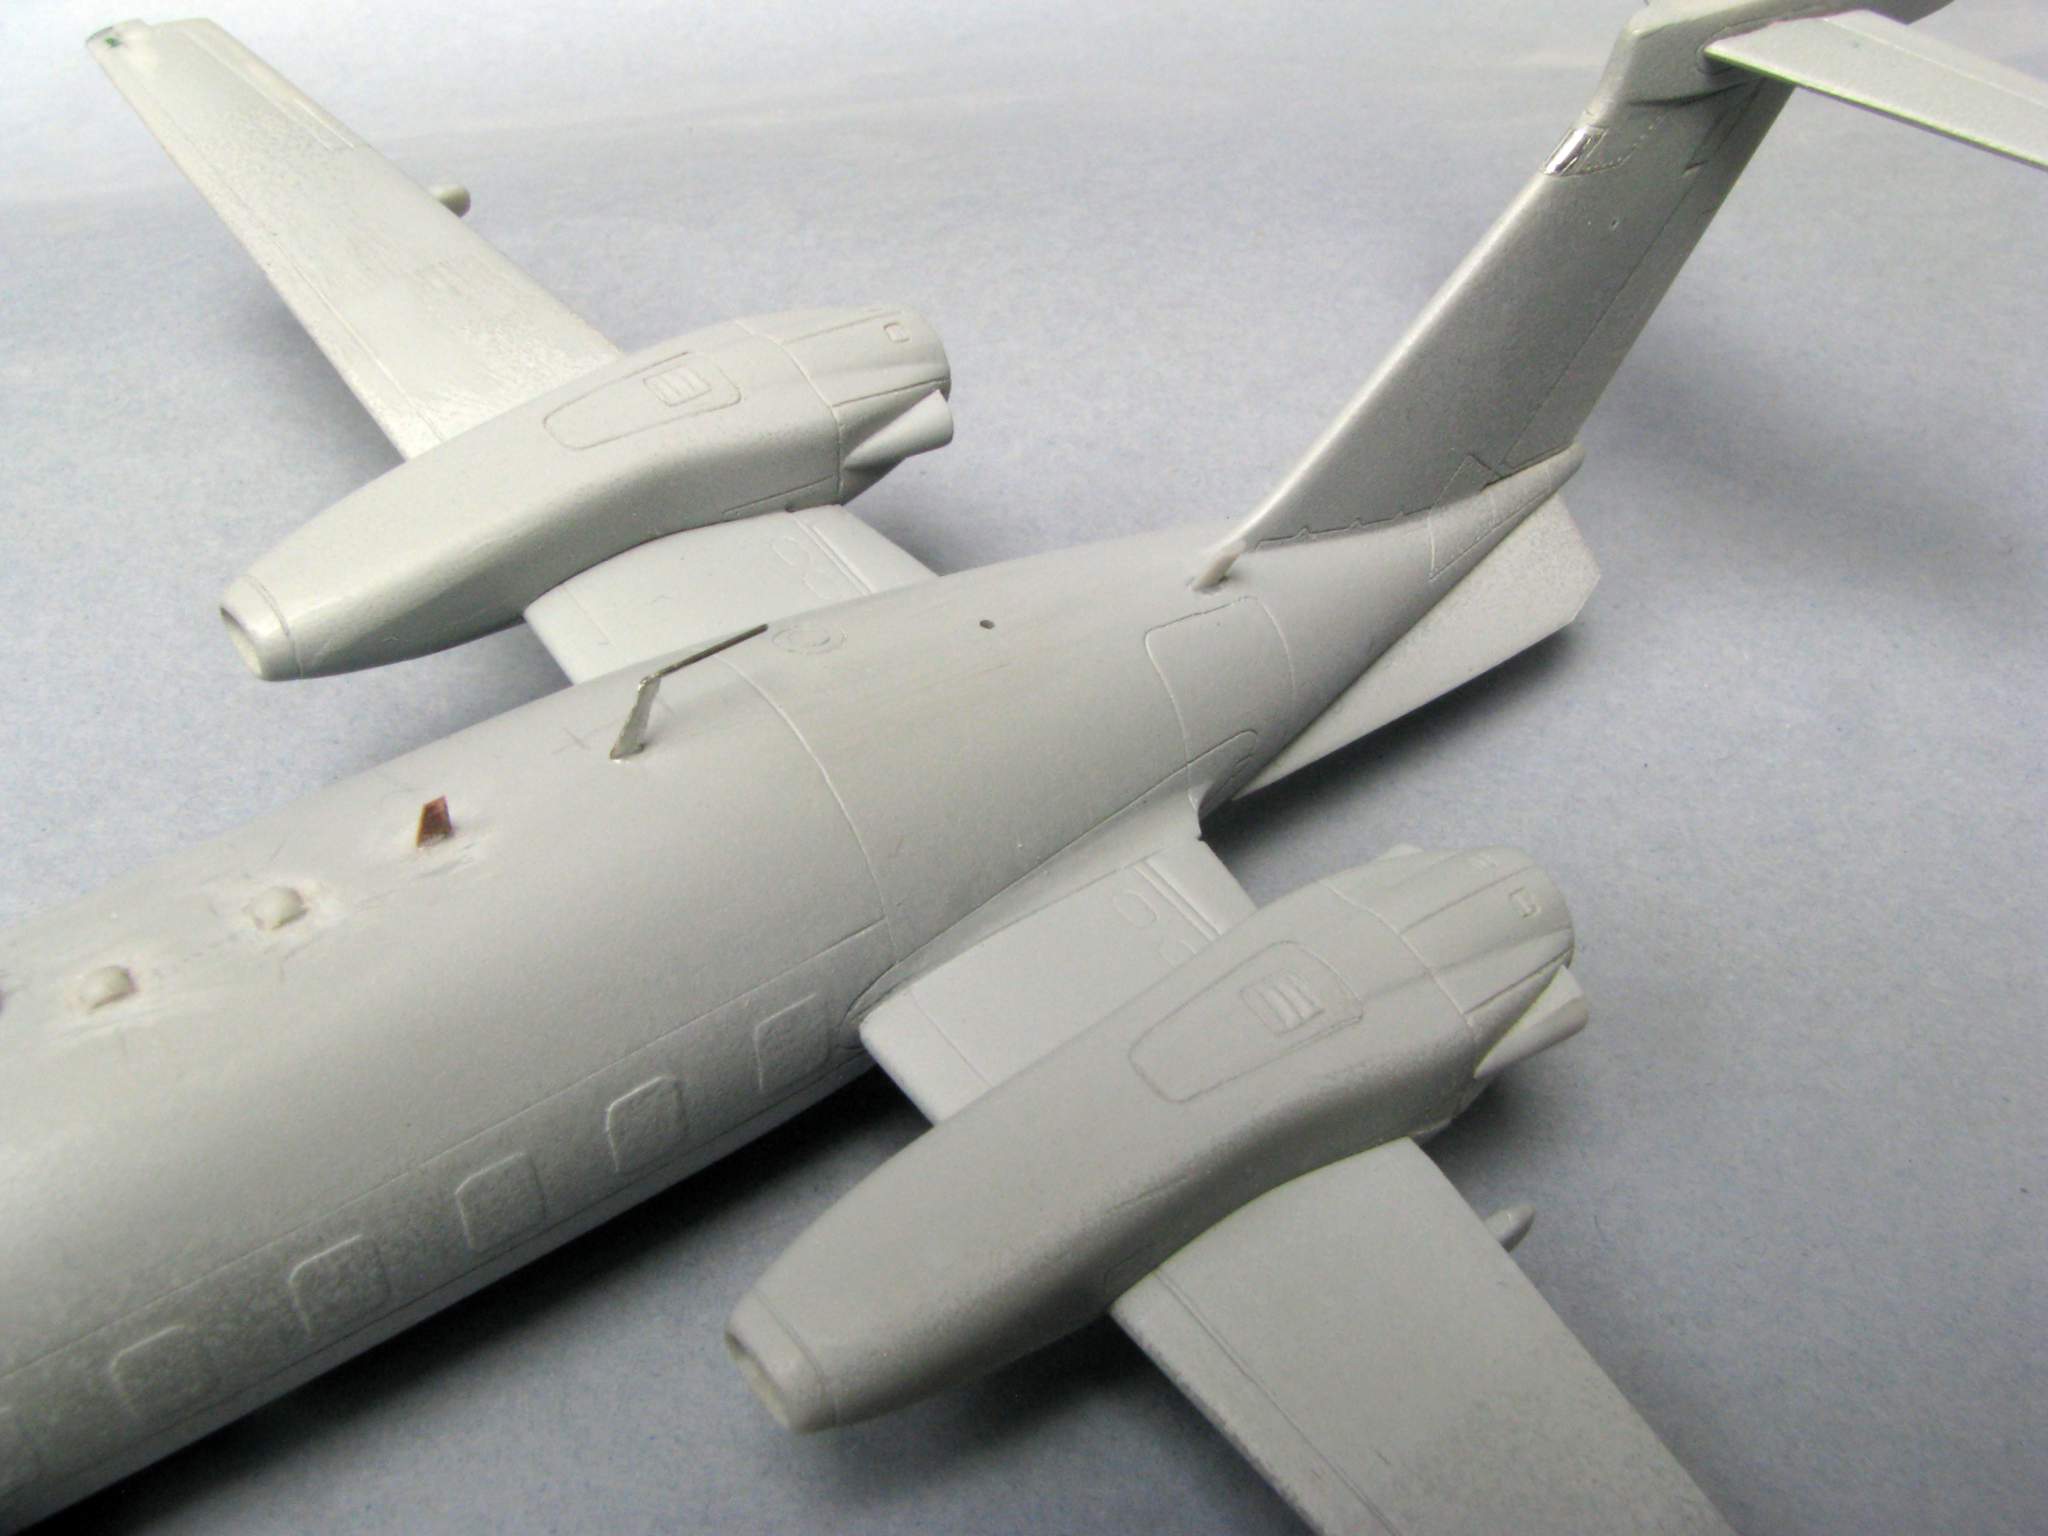
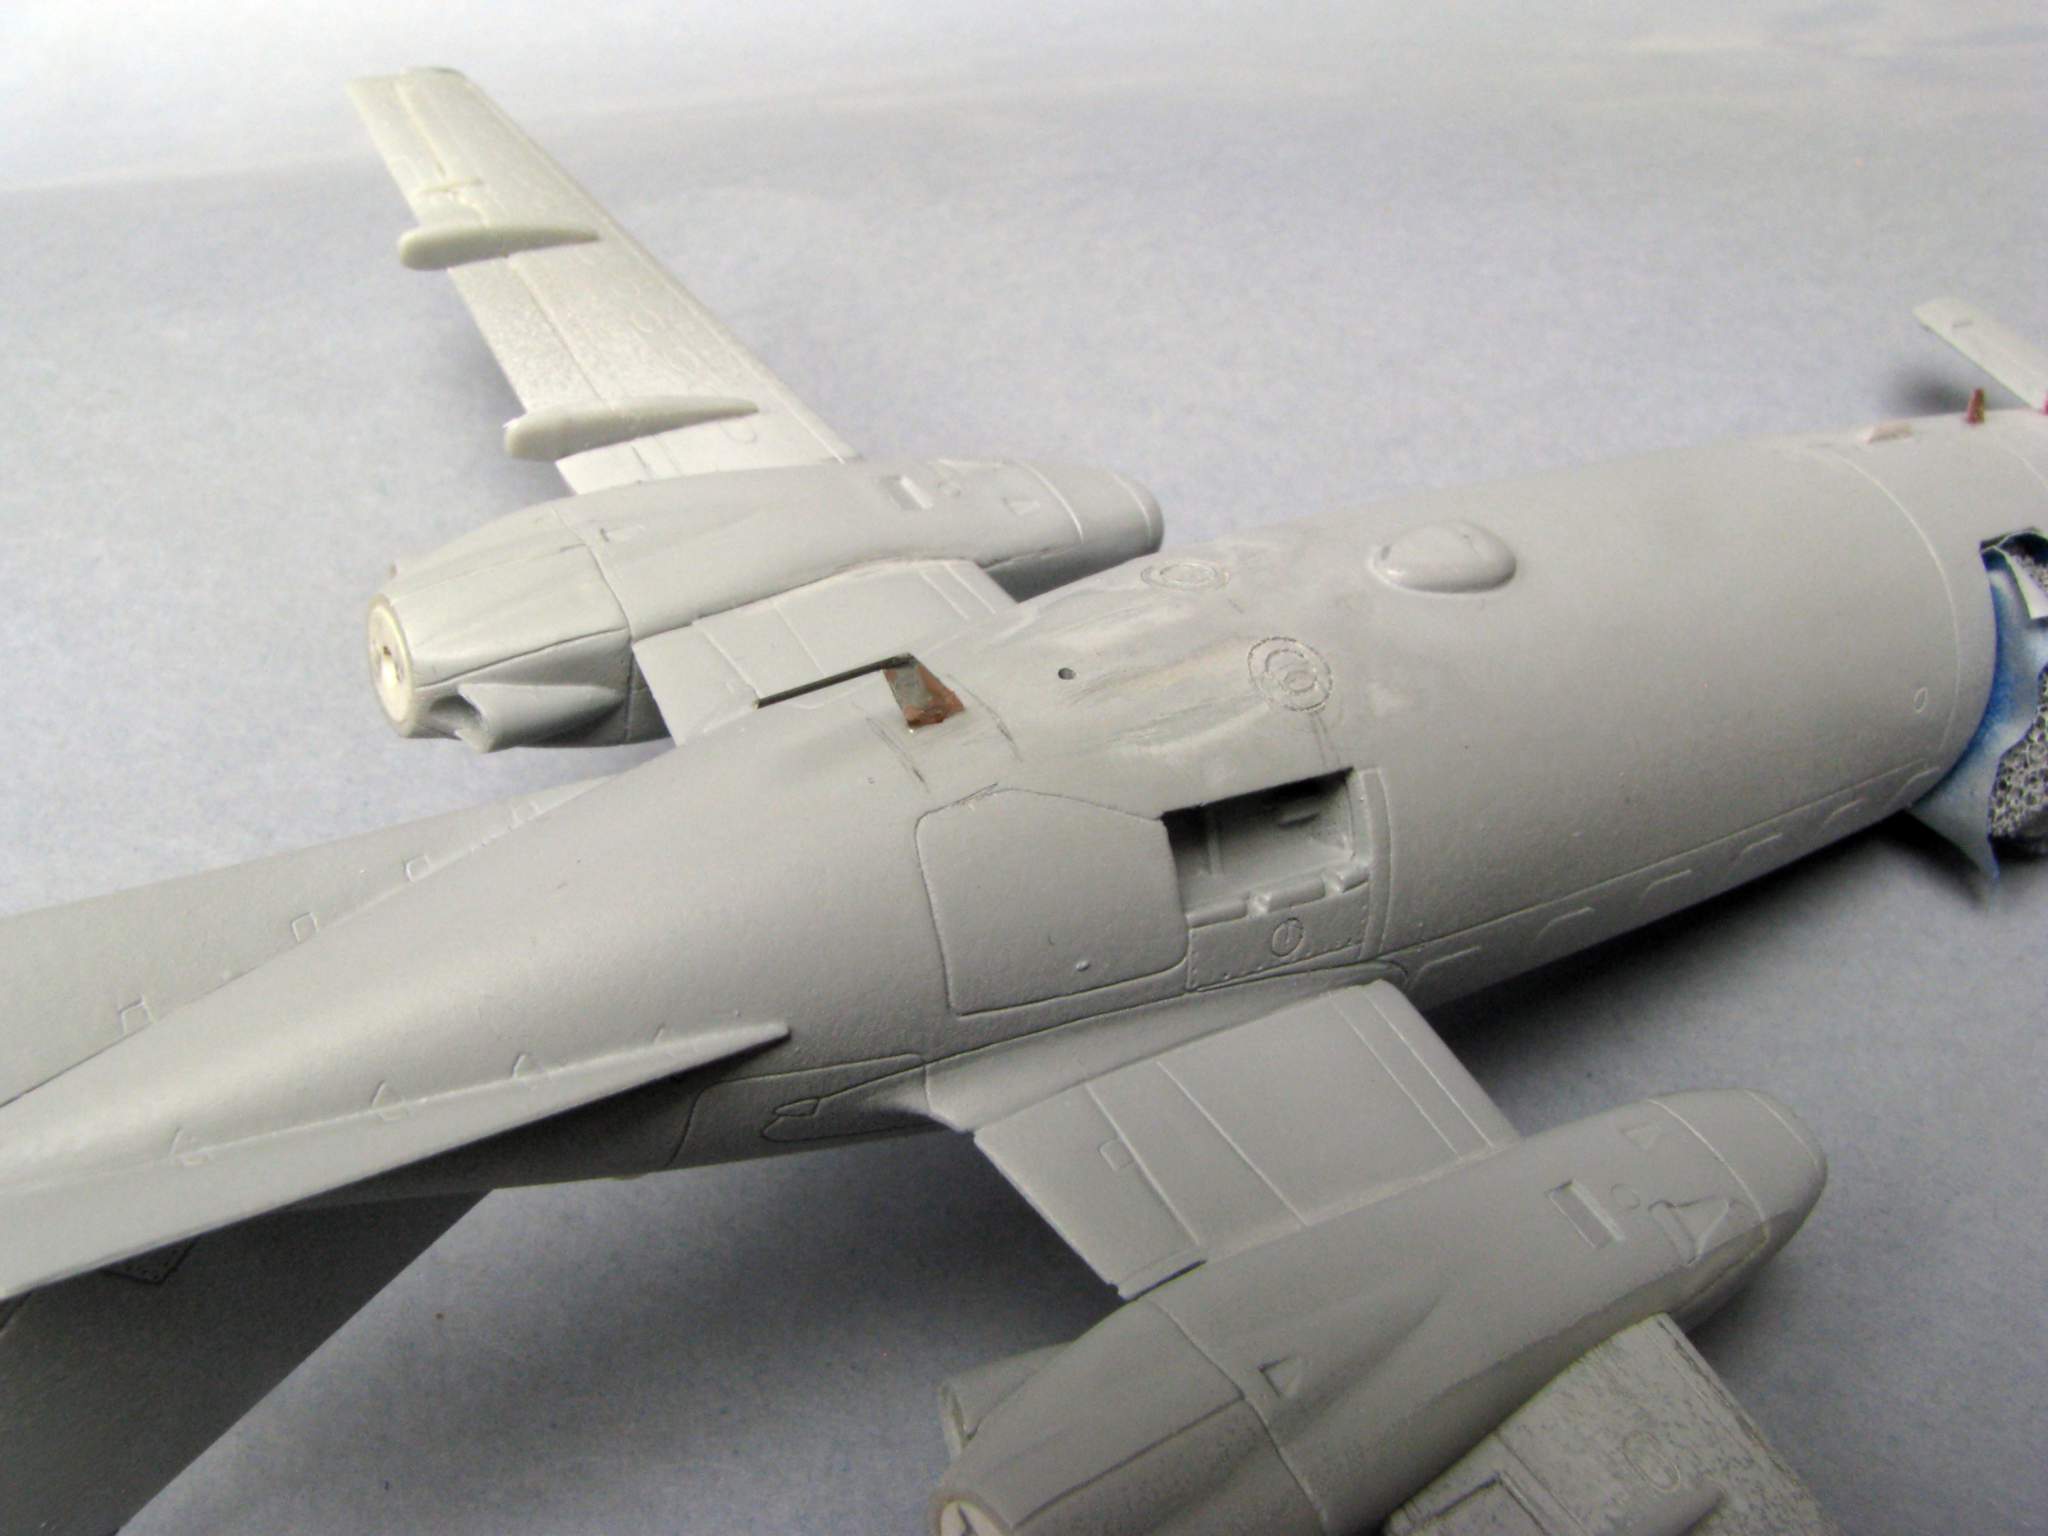
One more area where this kit is showing it’s short-runneness badly are the engines. I already rescribed some of the panel lines:
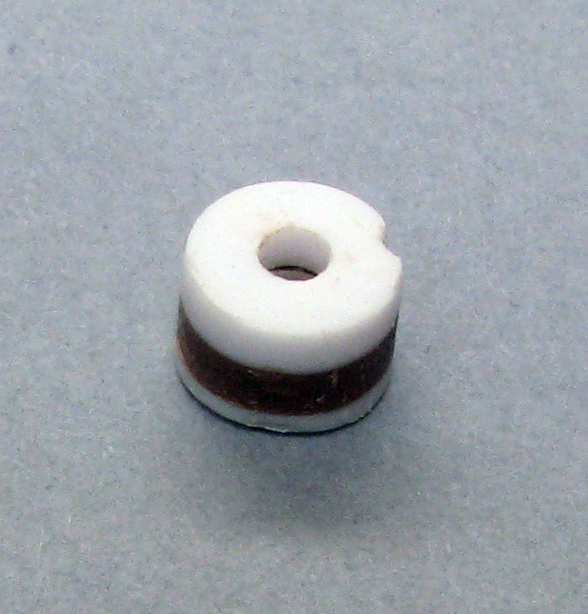
I have also modified the propeller bearings by installing custom made poly-cap “casettes” to get an option of painting the propellers separatetely and installing them at the very end. Here’s how such a “casette” looks like - there’s a poly-cap inside, just like in a Hasegawa kit!
The Avanti is a really weird looking airplane. Great to see you tackling this kit! I look forward to seeing your window solution upon completion. I have read people mask off the exterior and fill the openings with UV cure resin. I have a bunch of oddball civilian aircraft kits, including the Avanti, and will give it a try.
Real G - I didn’t have that resin, but I did have that transparent sheet (Vivak). I think it turned out all right, but I will know for sure when I remove the masks.
Don - I just checked the shops arond here, but the Avanti is sold out… The last one was for sale end of January. But there’s one for trade&swap on scalemates:
That’s a cool looking airplane. Will be fun to see it come together and painted. When I was in New Guinea, my Mom and I flew on a 1970’s era Piaggio. As a kid, I thought the rear facing engines were great.
I found the kit on Amazon, it arrived already. Gazing through box, it looks like a great kit.
I am a big canard fan. Was building a Vari-Eze till my wife learned what the engine cost! Sold kit for more than I paid for it, so came out okay. Met Burt Rutan three or four times.
Space Ranger - unfortunately I don’t have the photos, but I started with a fret of unused poly-caps - I believe they came from a Sherman tank model. I also took an unguided rocket launcher pod off a 1:72 Matchbox Cobra clone for a tube and some styrene sheet. Using a battery powered drill for a lathe I cut the tube (ex-launcher) square, then glued a piece of styrene sheet, and after the glue dried still using the “lathe” I drilled the first hole and sanded the styrene face round, flush with the tube. Then I cut a slice of the tube together with the styrene sheet face, put one poly-cap inside and glued on anotherpiece of sheet styrene. Again, using my “lathe” I drilled another hole and sanded the second styrene face round after the glue dried. I hope this description gives you some idea…
Don - I’m glad you were able to buy your kit, I have the feeling the are slowly getting rare… Looking forward to your build!
And my build is going on slow. I got a bunch of photos of the ambulance interior from my Polish colleagues and I tried to show some details of the interior hoping that at least a bit of it would be visible through the windows… Here’s what I got so far:
Now I’m concentrating on the other side of the aisle, the one with the stretchers. I want to wrap up the hull and do some construction and painting at last!
A zombie thread reporting from the shelf of doom here! Let’s see if I’ll be successful respawning this one on the third time!
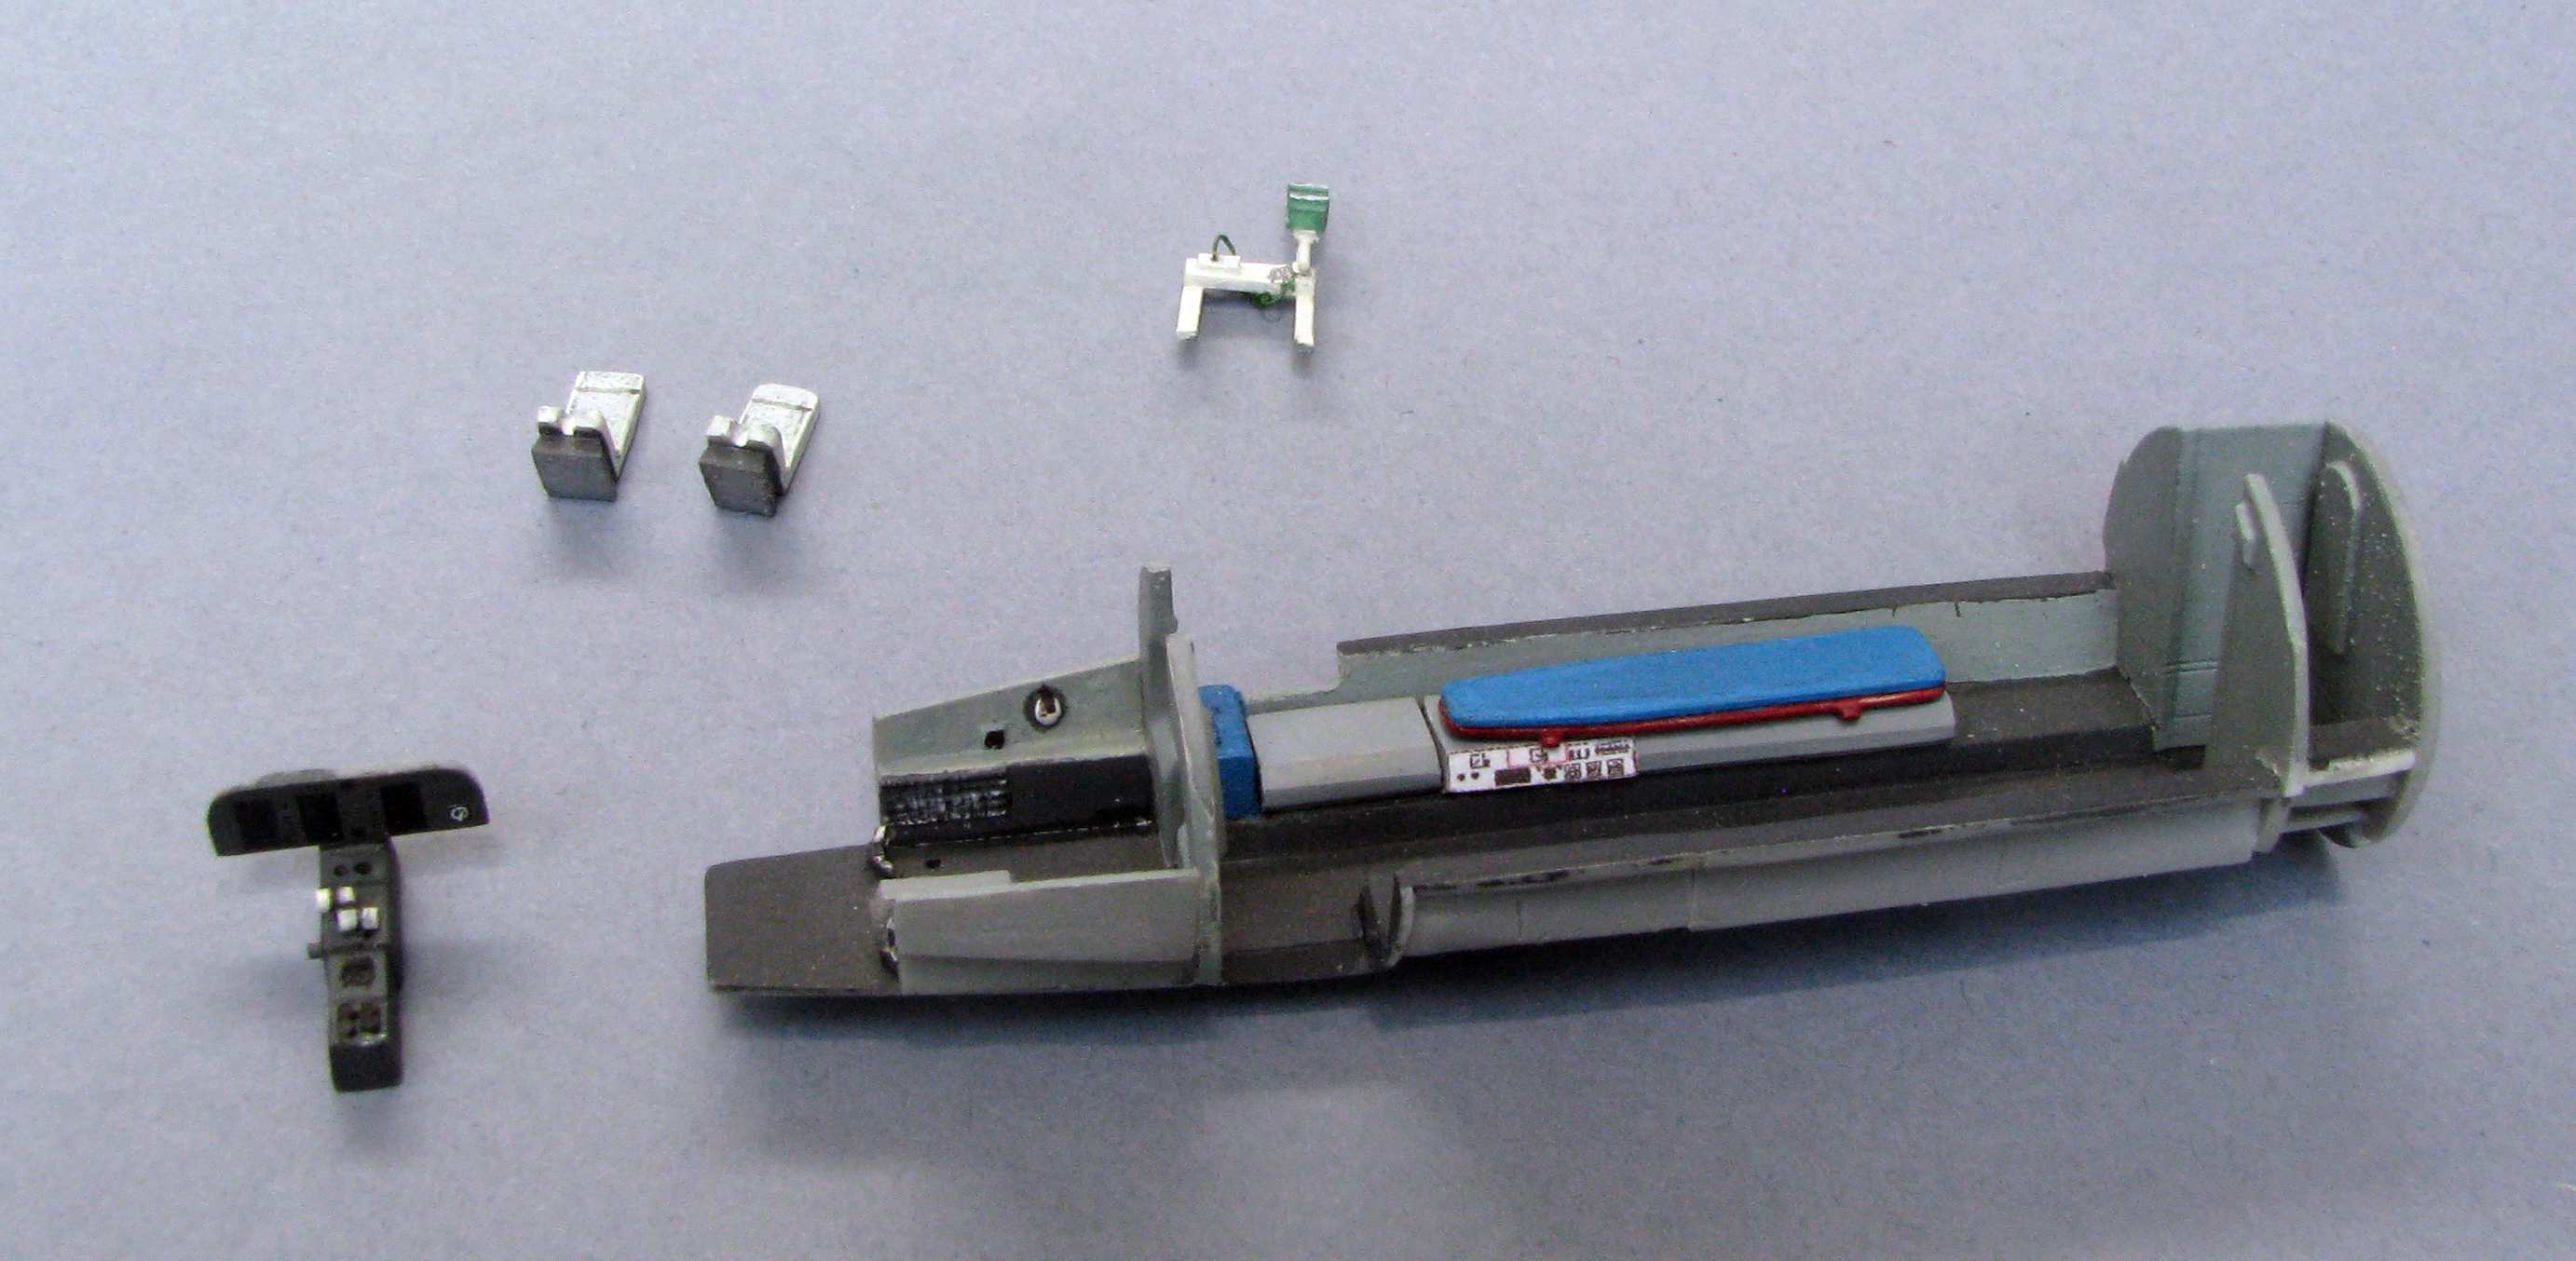
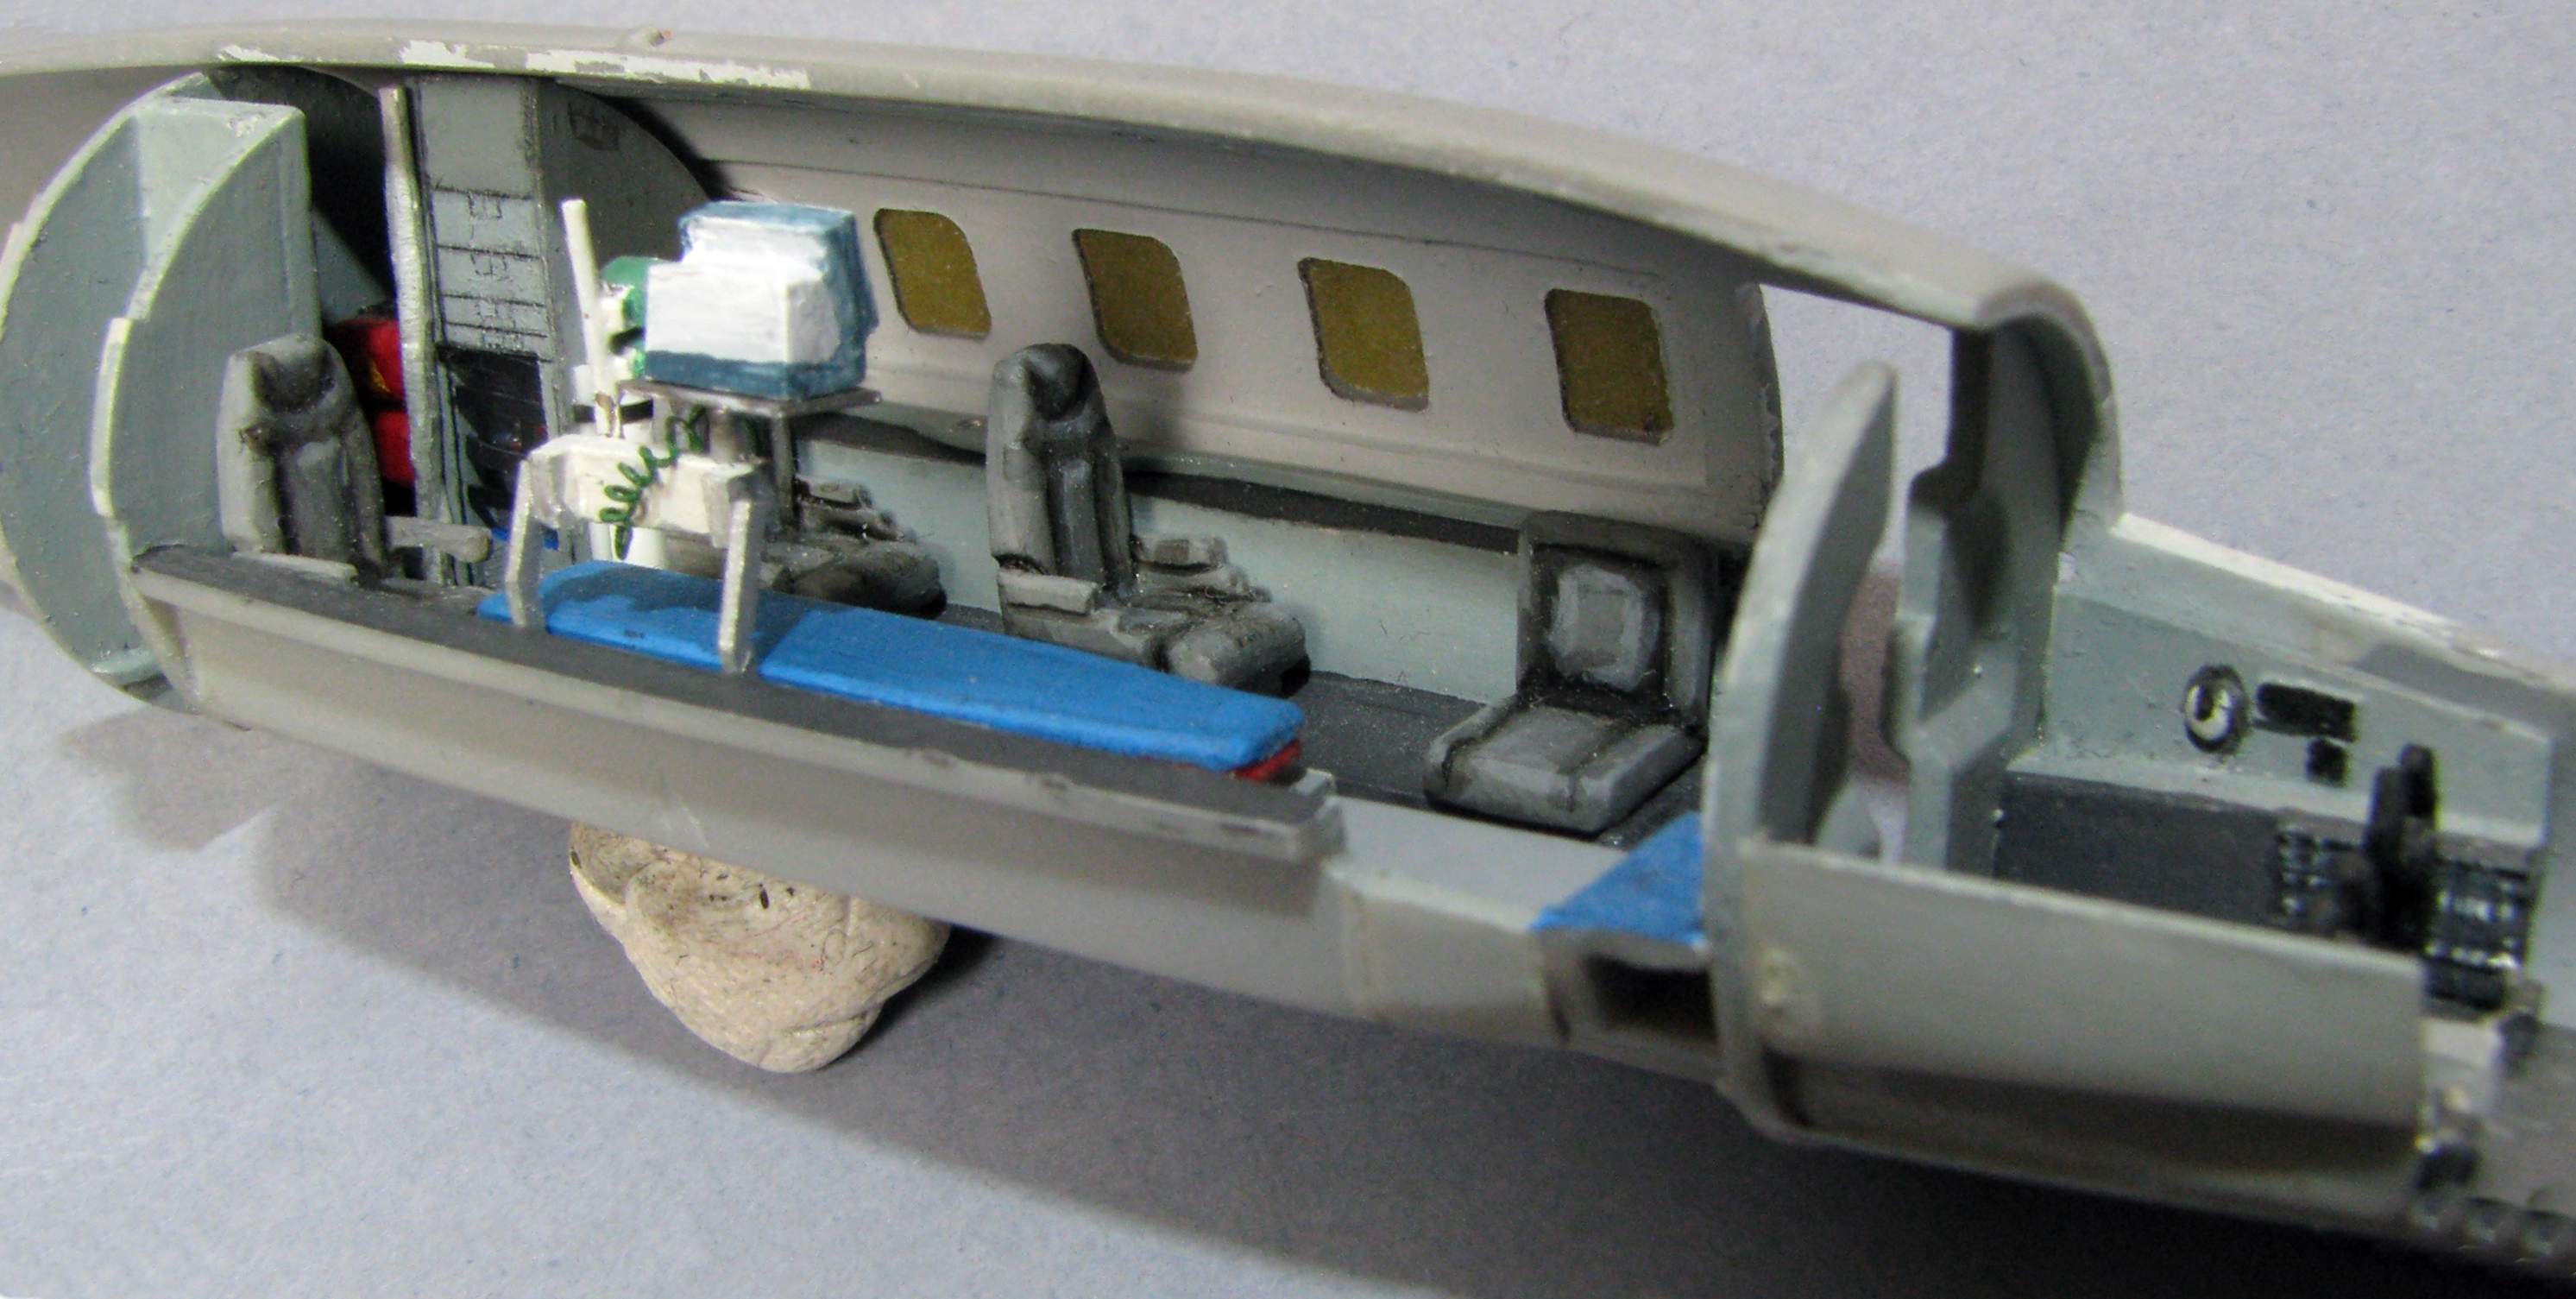
I kinda got hung up on making the interior for this one, but recently something clicked and I say I have it finished. Currently the interior looks like this:
I think I’ll close up the hull now and equip the cockpit before installing the windshield.
Pawel, I love zombie threads. And I love what you have done with the Piaggio’s interior! I hope some of your meticulous work will be visible after the fuselage is closed up.
Fantastic interior. Pictures will provide proof of how detailed she is once sealed up. Great modelling subject. Wouldn’t mind adding one to my collection.
Thanks a lot for your comments and sorry it took me so long to answer.
Real G - thanks a lot for your kind words! I have modified the original kit to have the cabin door open, this will hopefully leave something to be seen.
PhilliePhan79 - Thanks a lot! Like I wrote, she wont be sealed up 100% tight, but it might be that some things will only be seen in the photos…
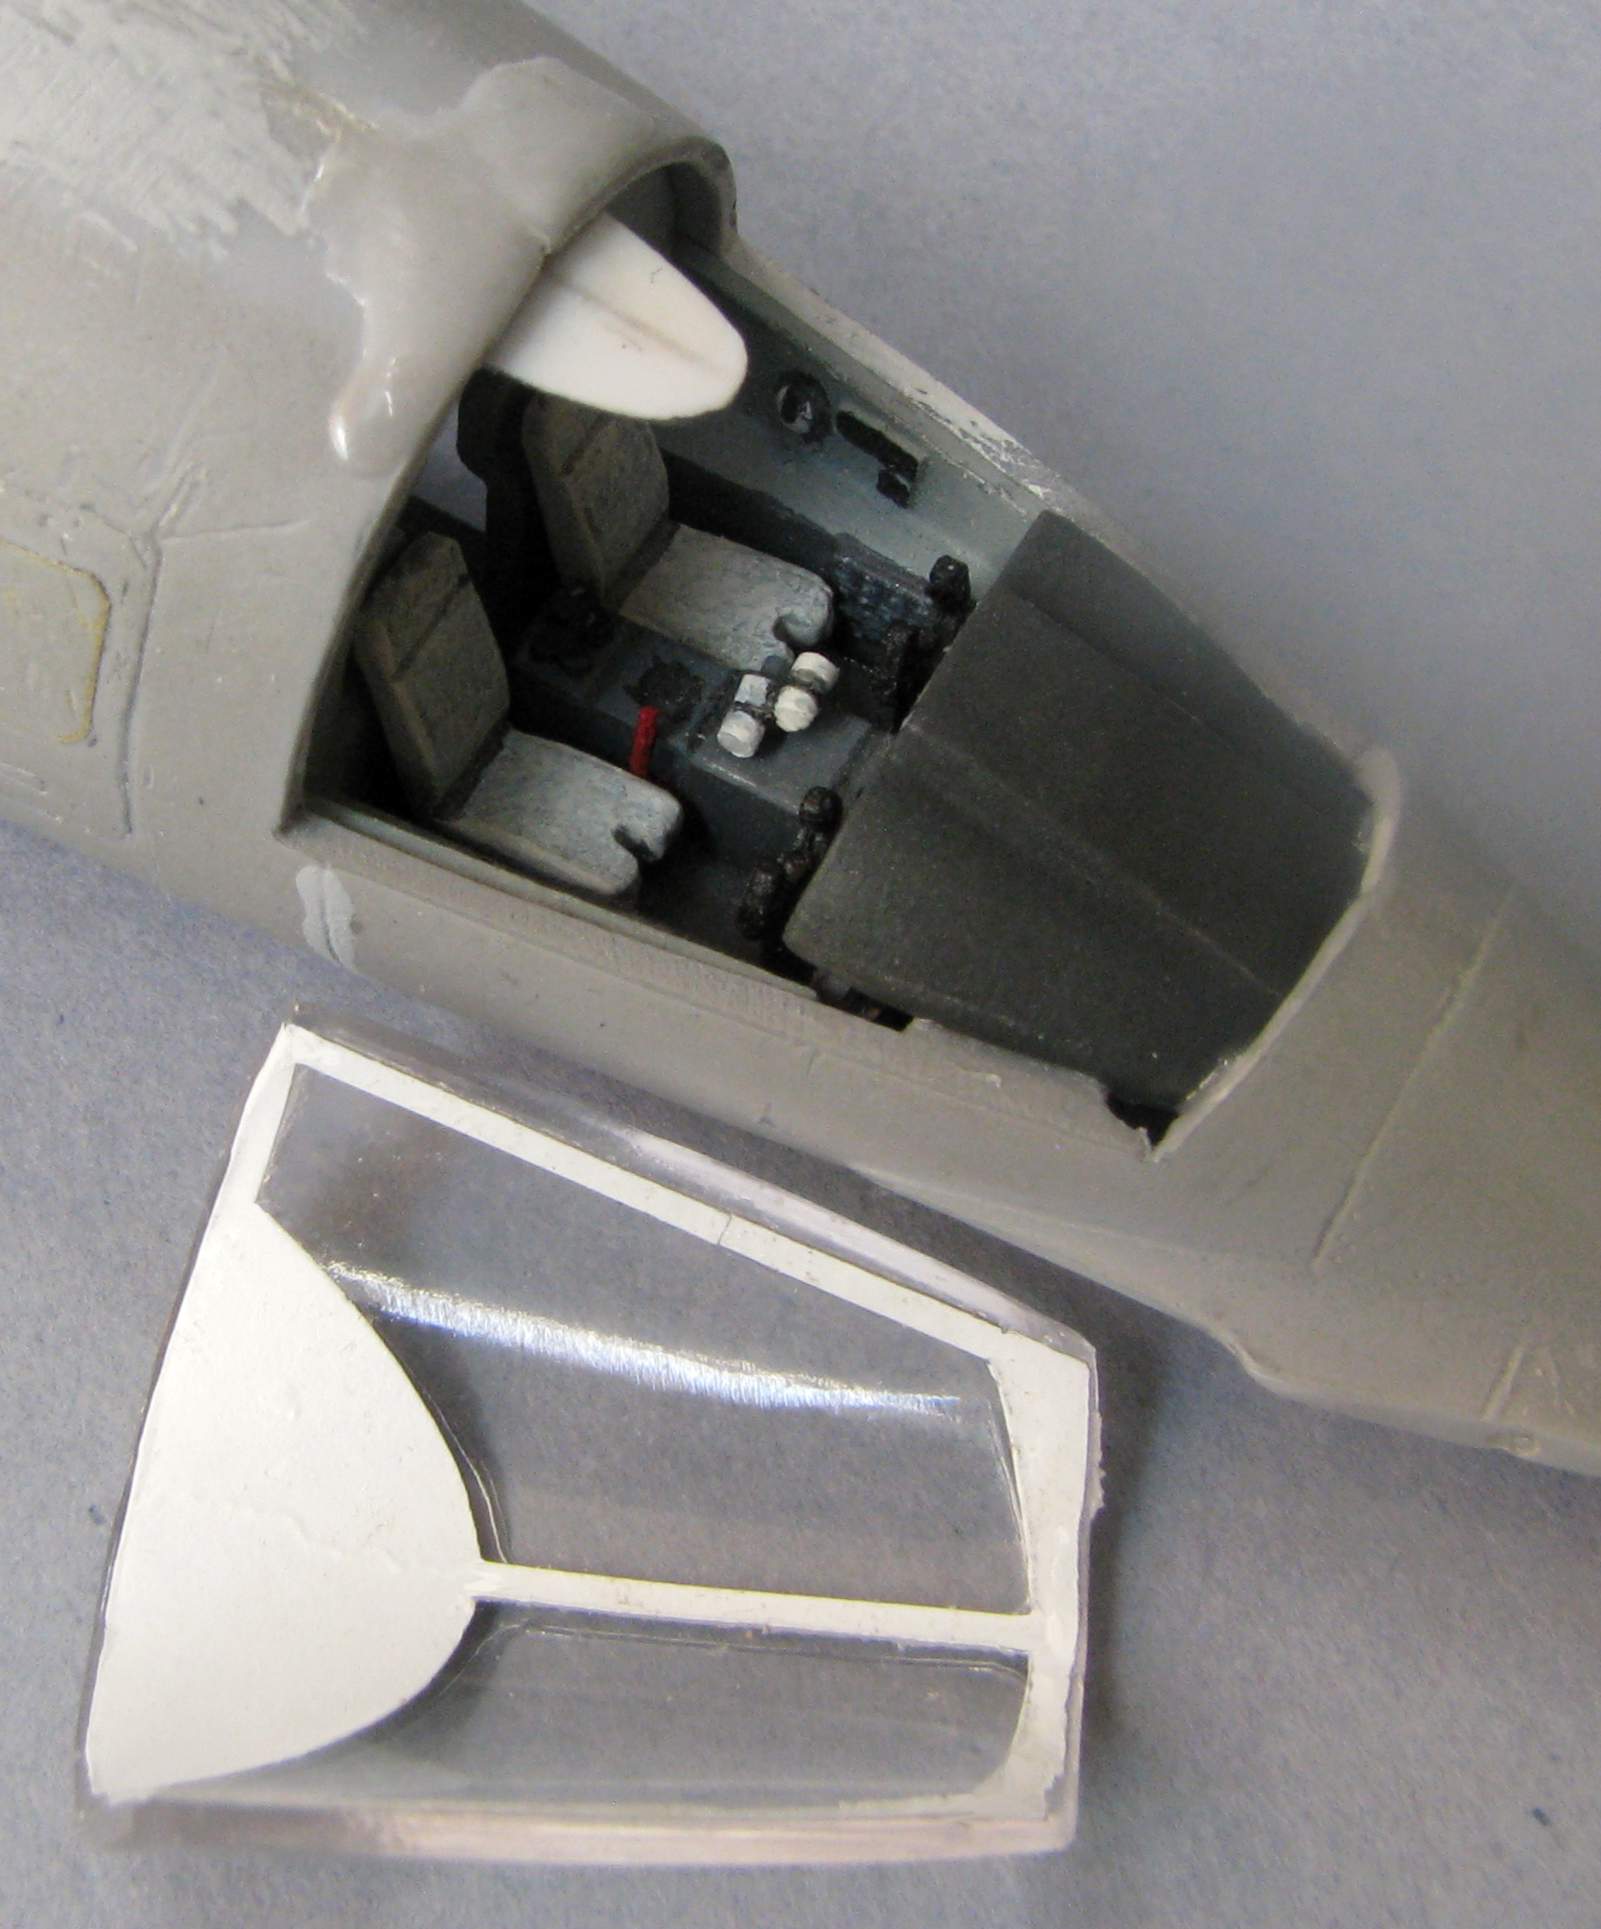
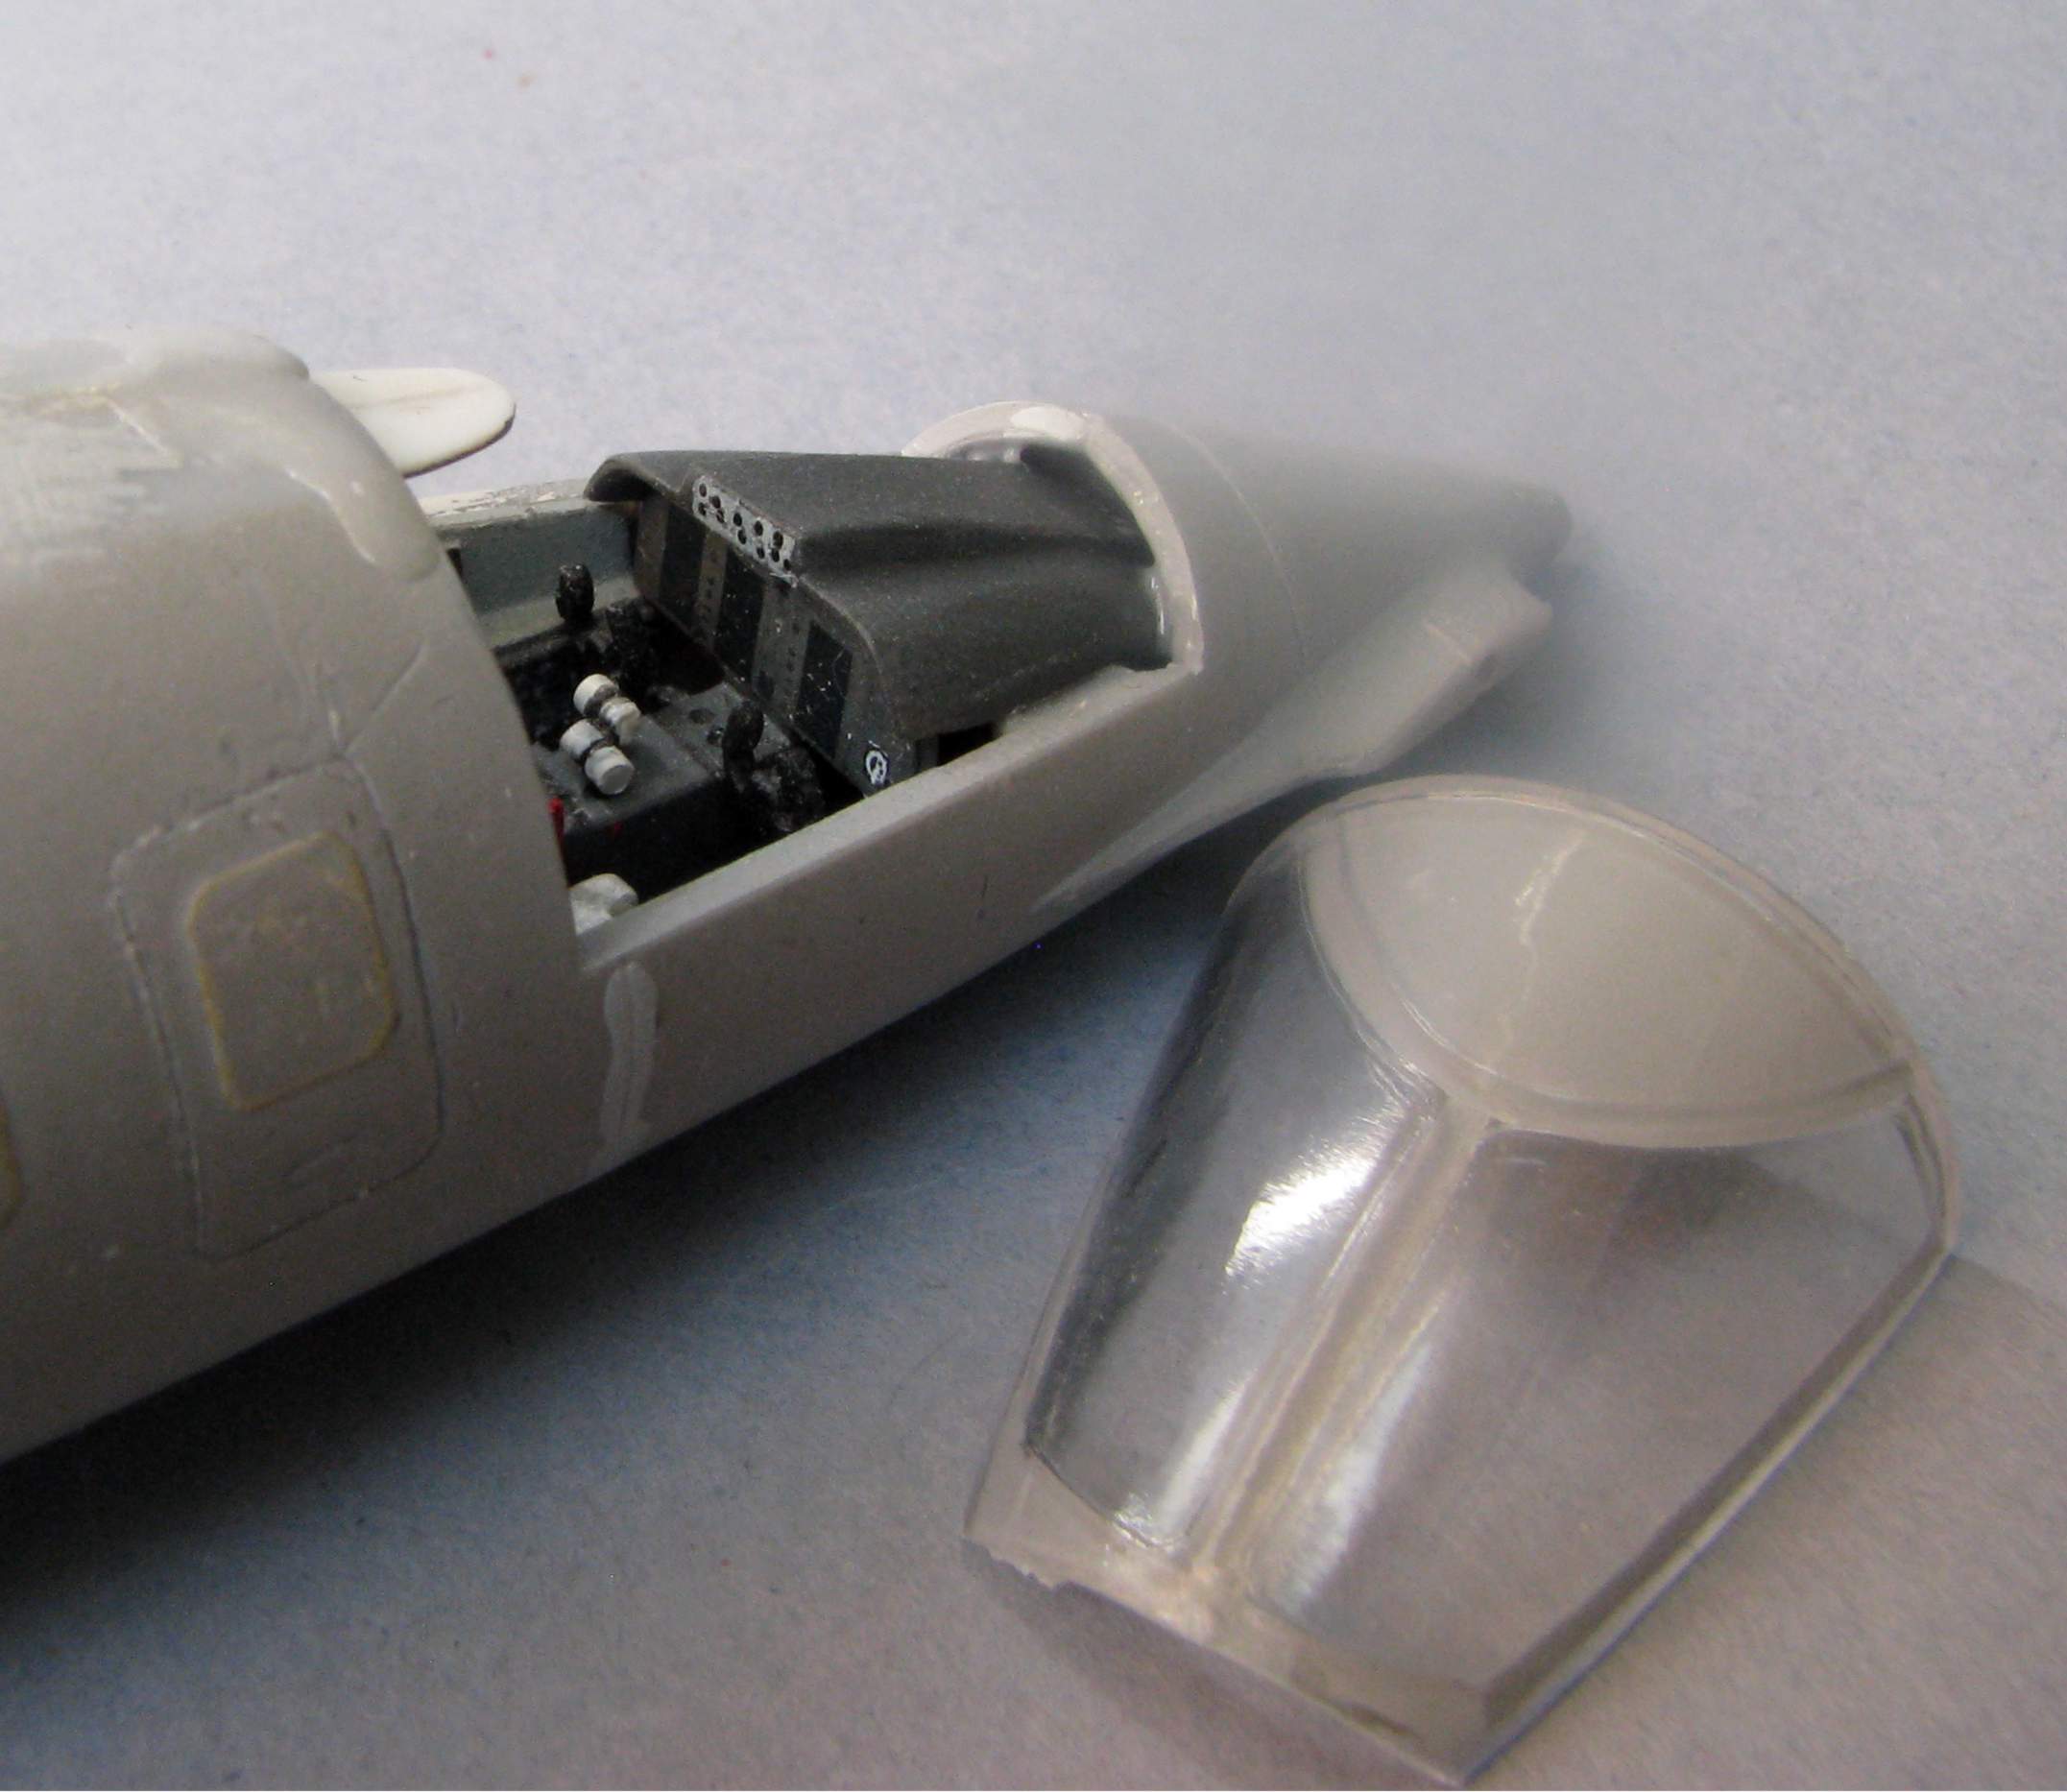
And in the meantime I finally glued the fuselage halves, equipped the cockpit and prepared the cockpit glass to be installed. For this I dressed the insides of the glass with custom made dcecals. The decals were essentially made by spraying Tamiya primer, first grey, then white on decal paper, then cutting out the shapes and applying them to the insides of the glass. Here’s how it looks like:
Now I’m going to install the glass, and fill and sand everything…
I acknowledge that some of the interior won’t be visible, but in order not to hide it completely I started with a major surgery to replace the original cabin windows and I opened up the side door to let some light in.
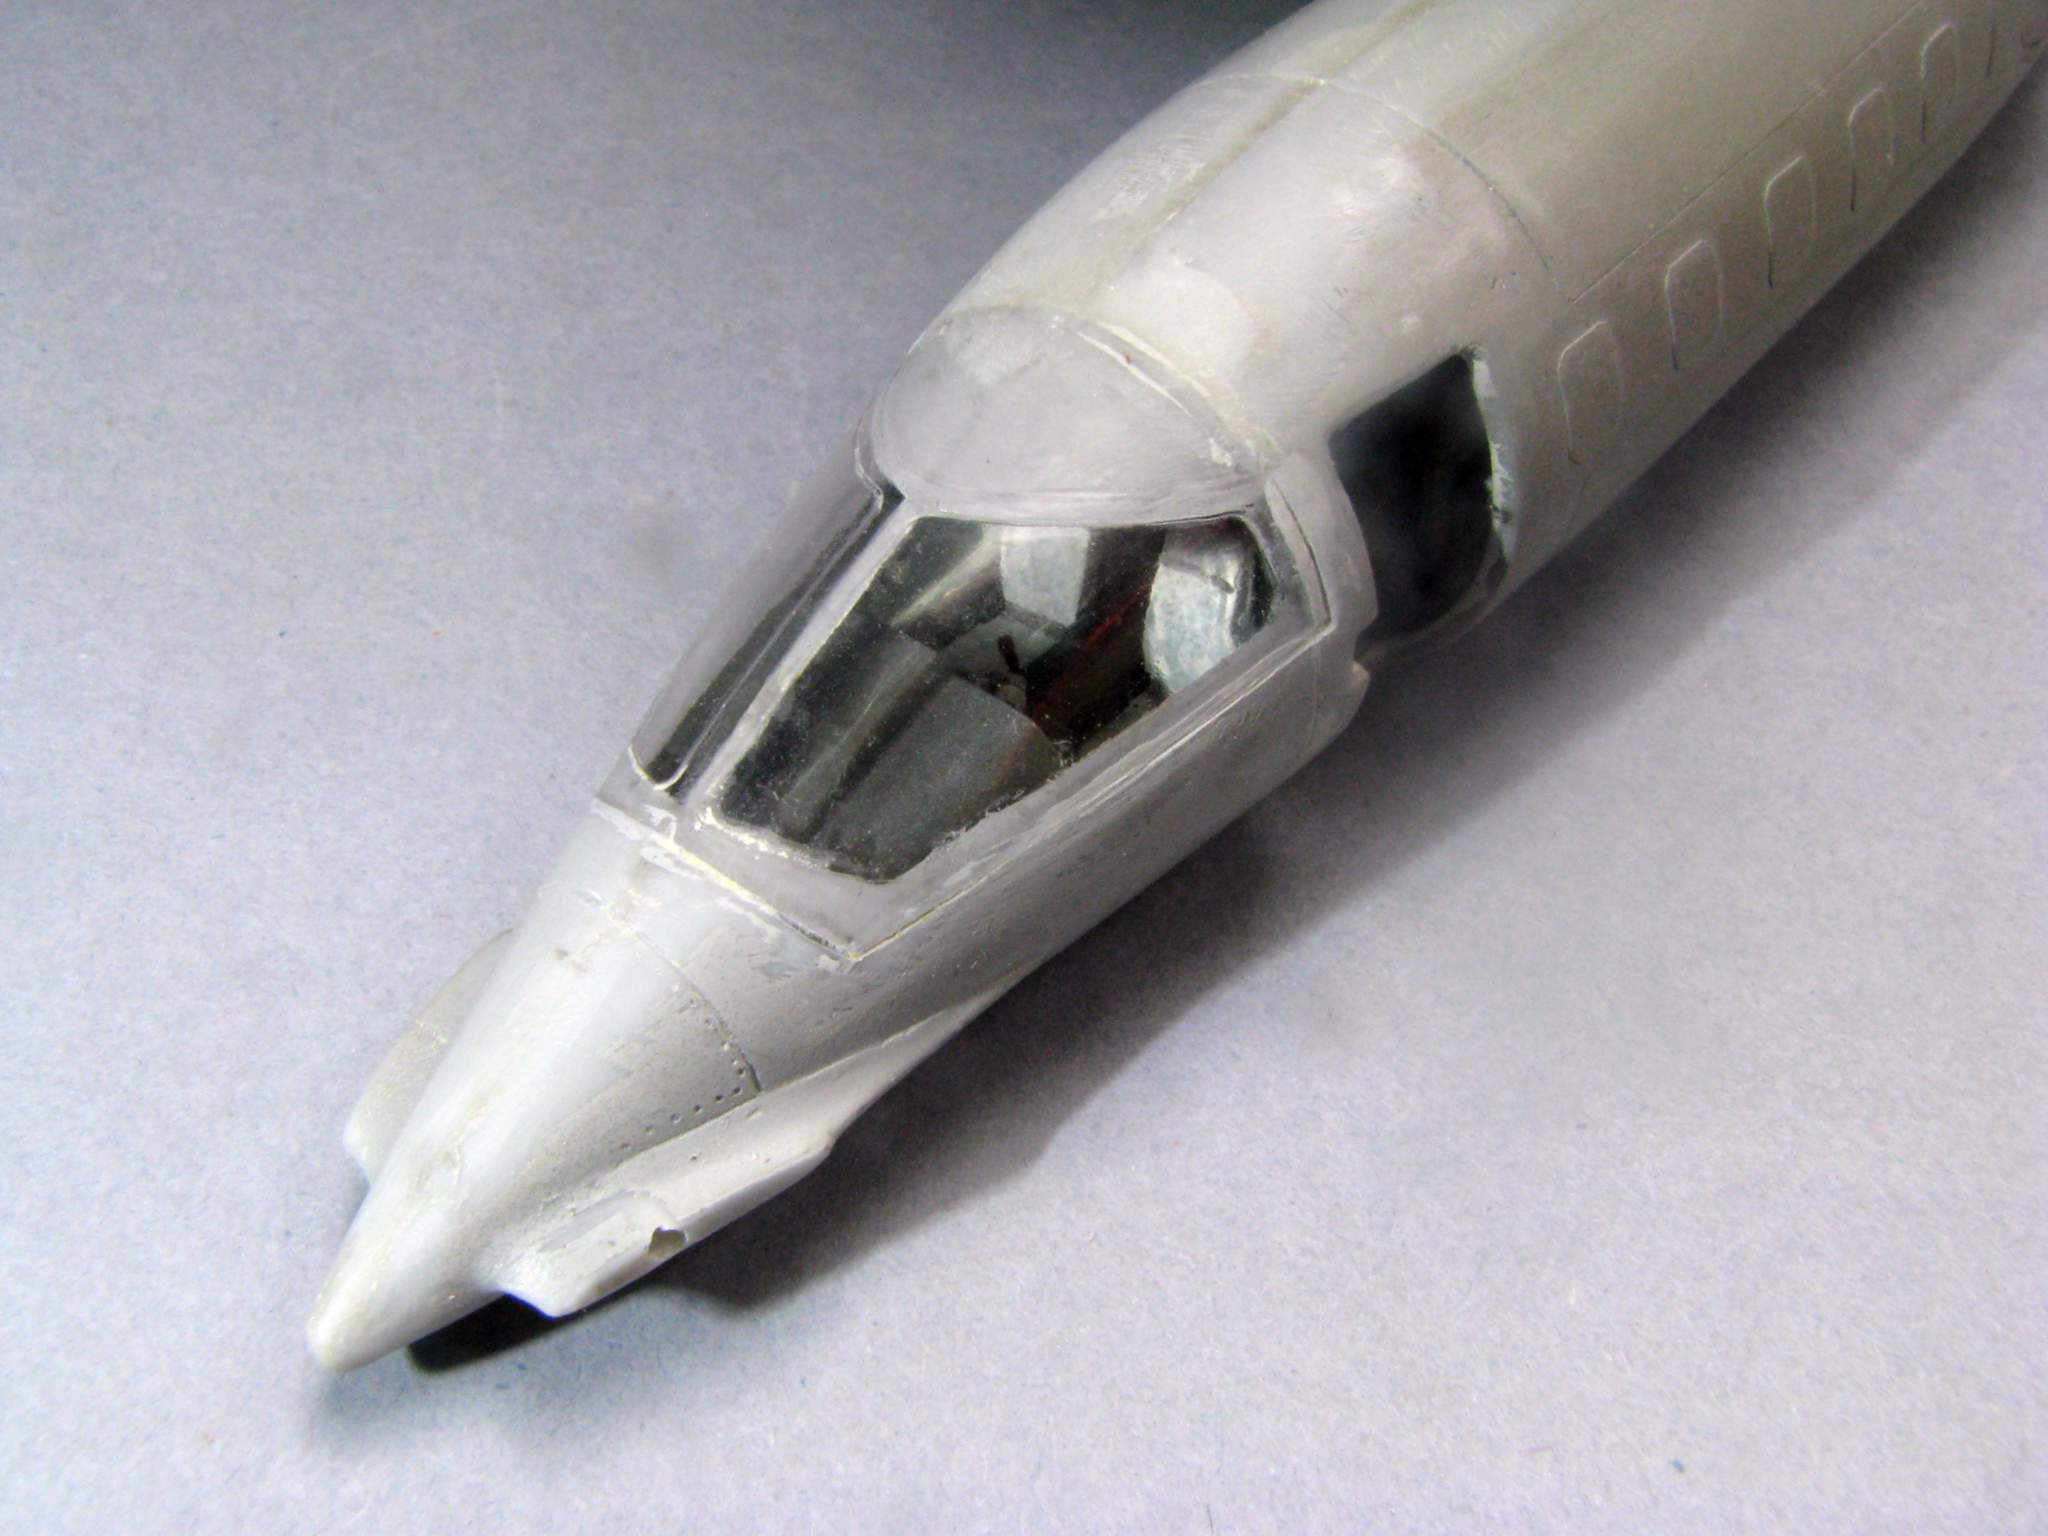
I have installed the cockpit glass and that gives me some hope:
Now I’ll mask the glass and we’ll see the end results after I take the masks off again…
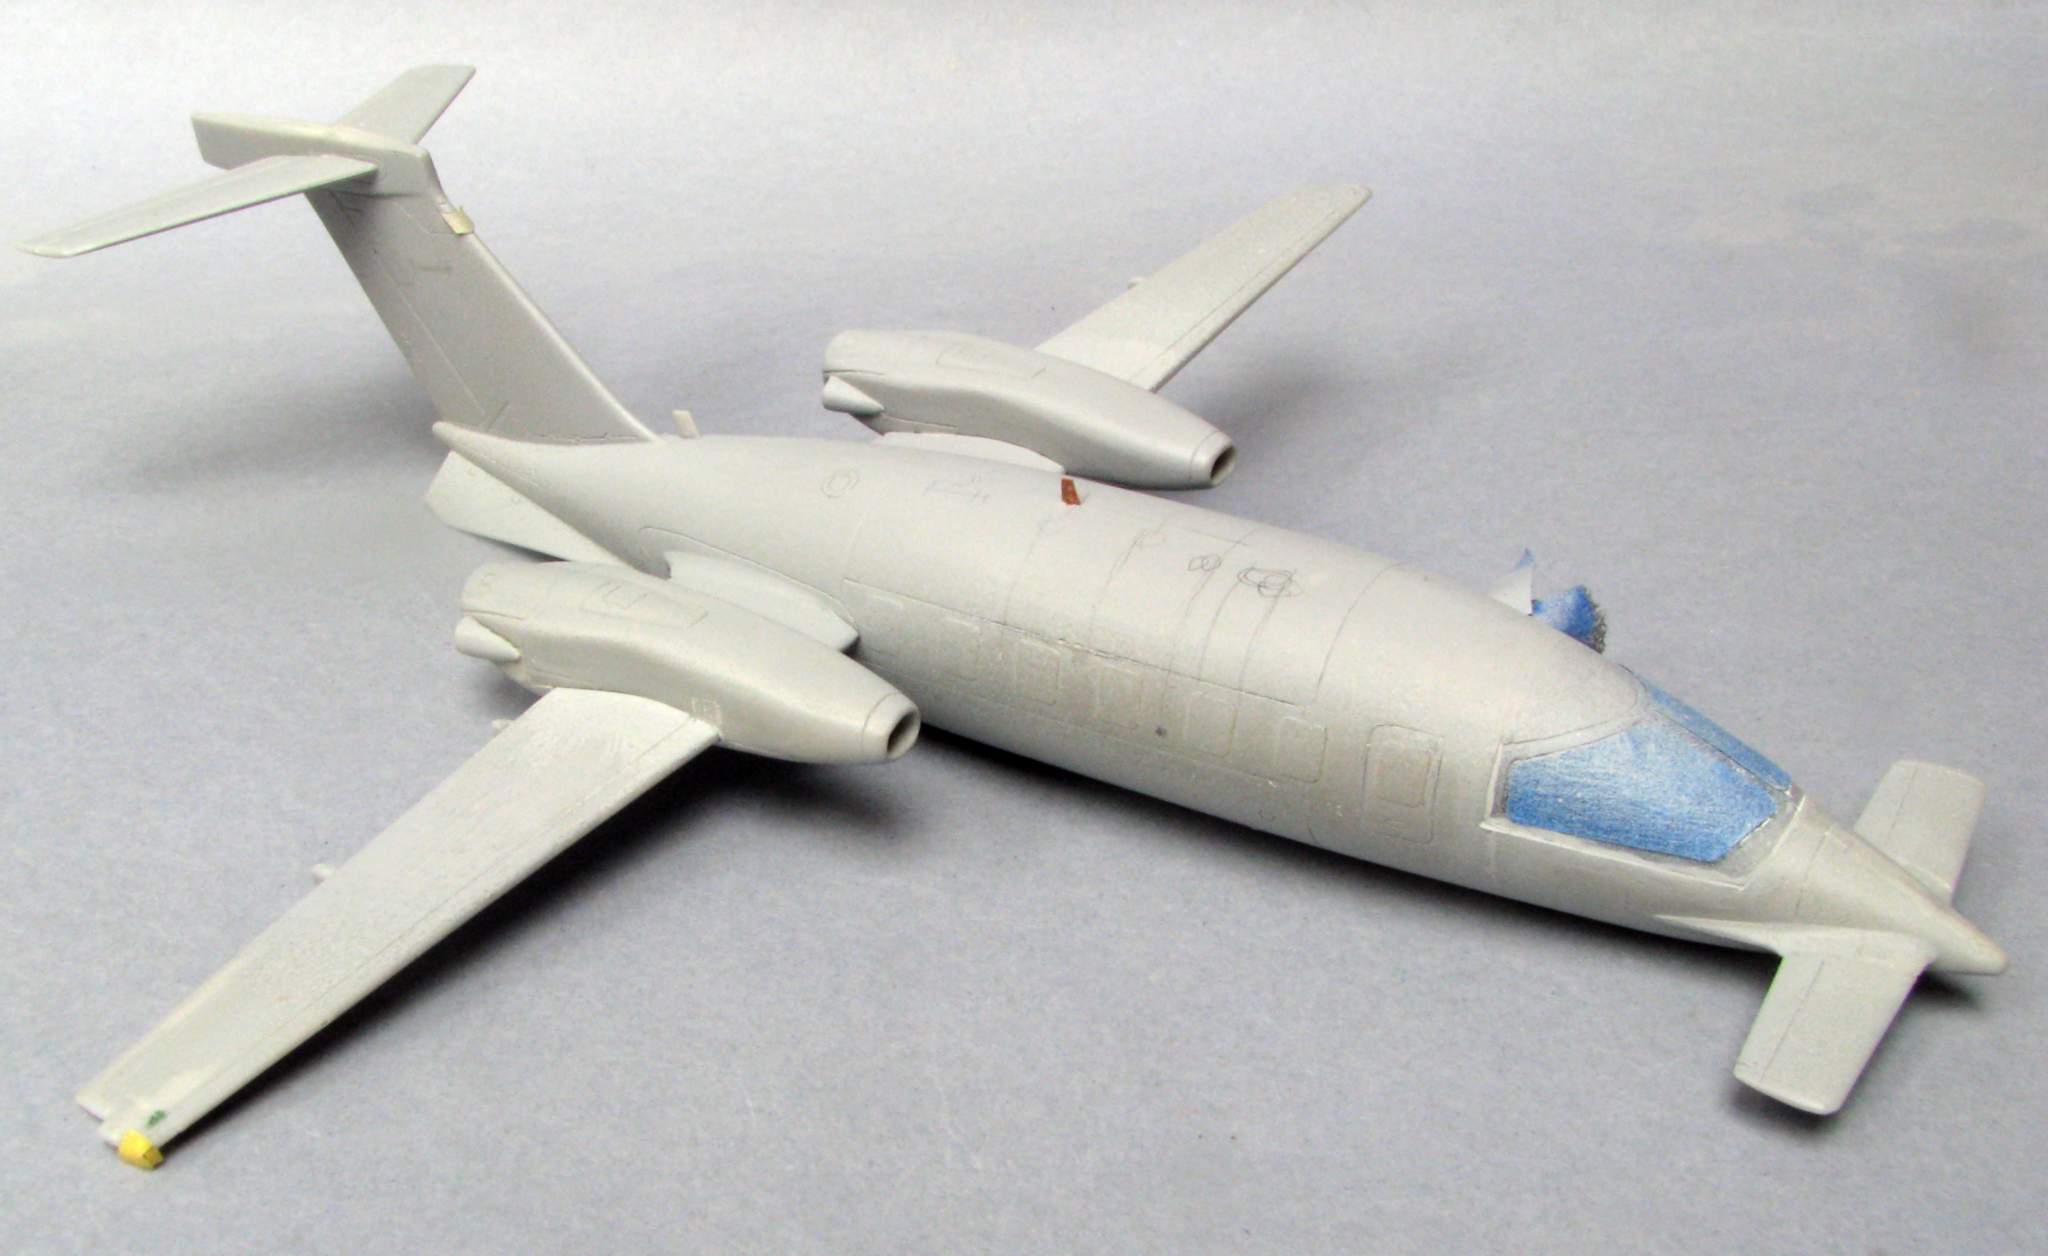
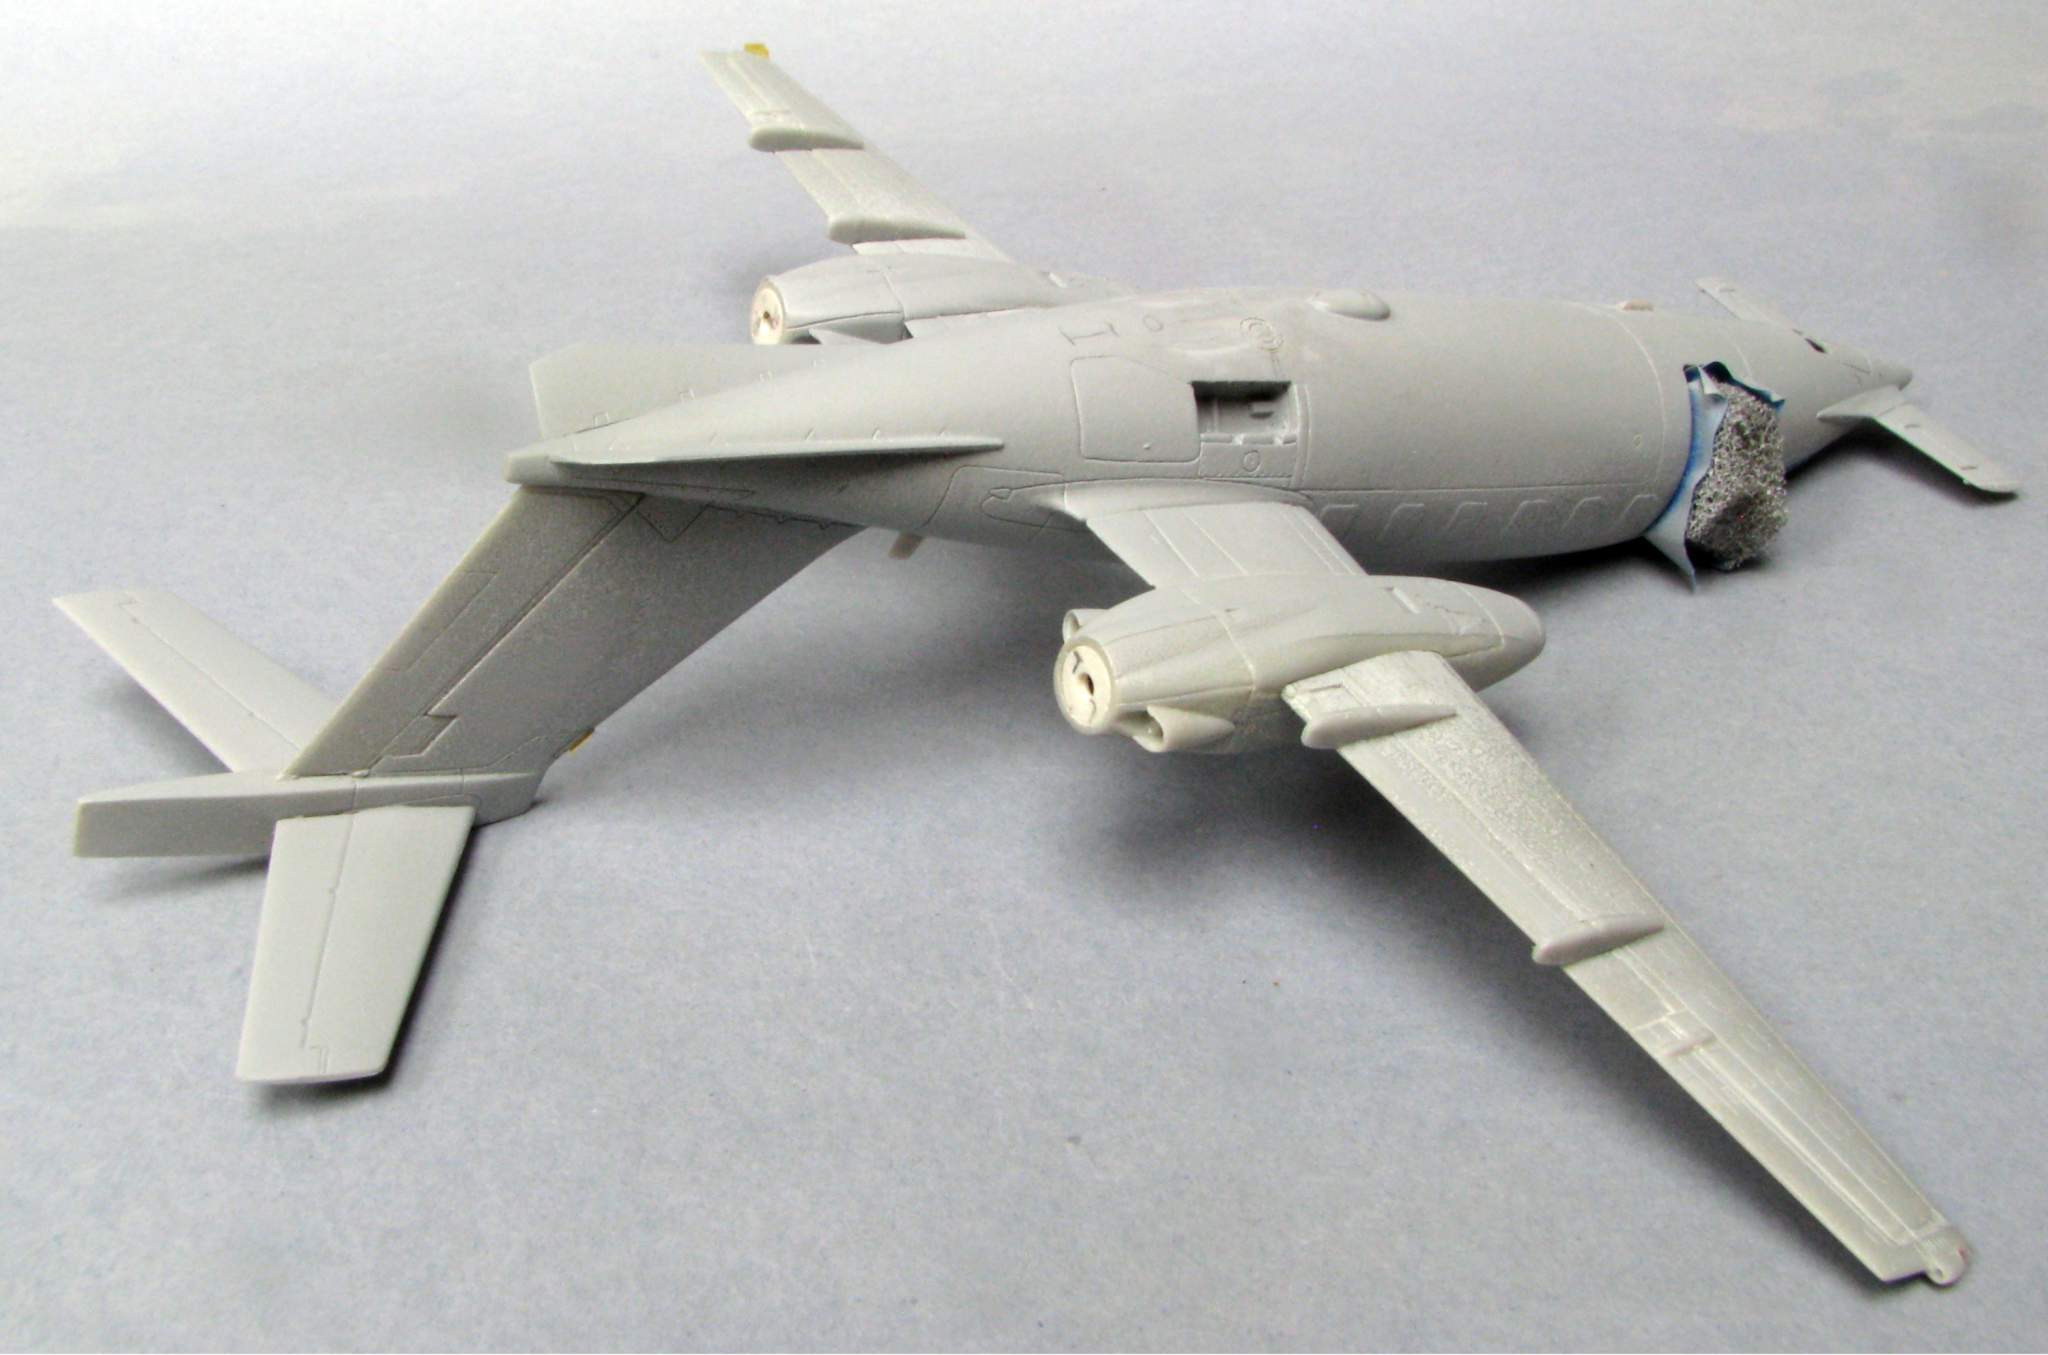
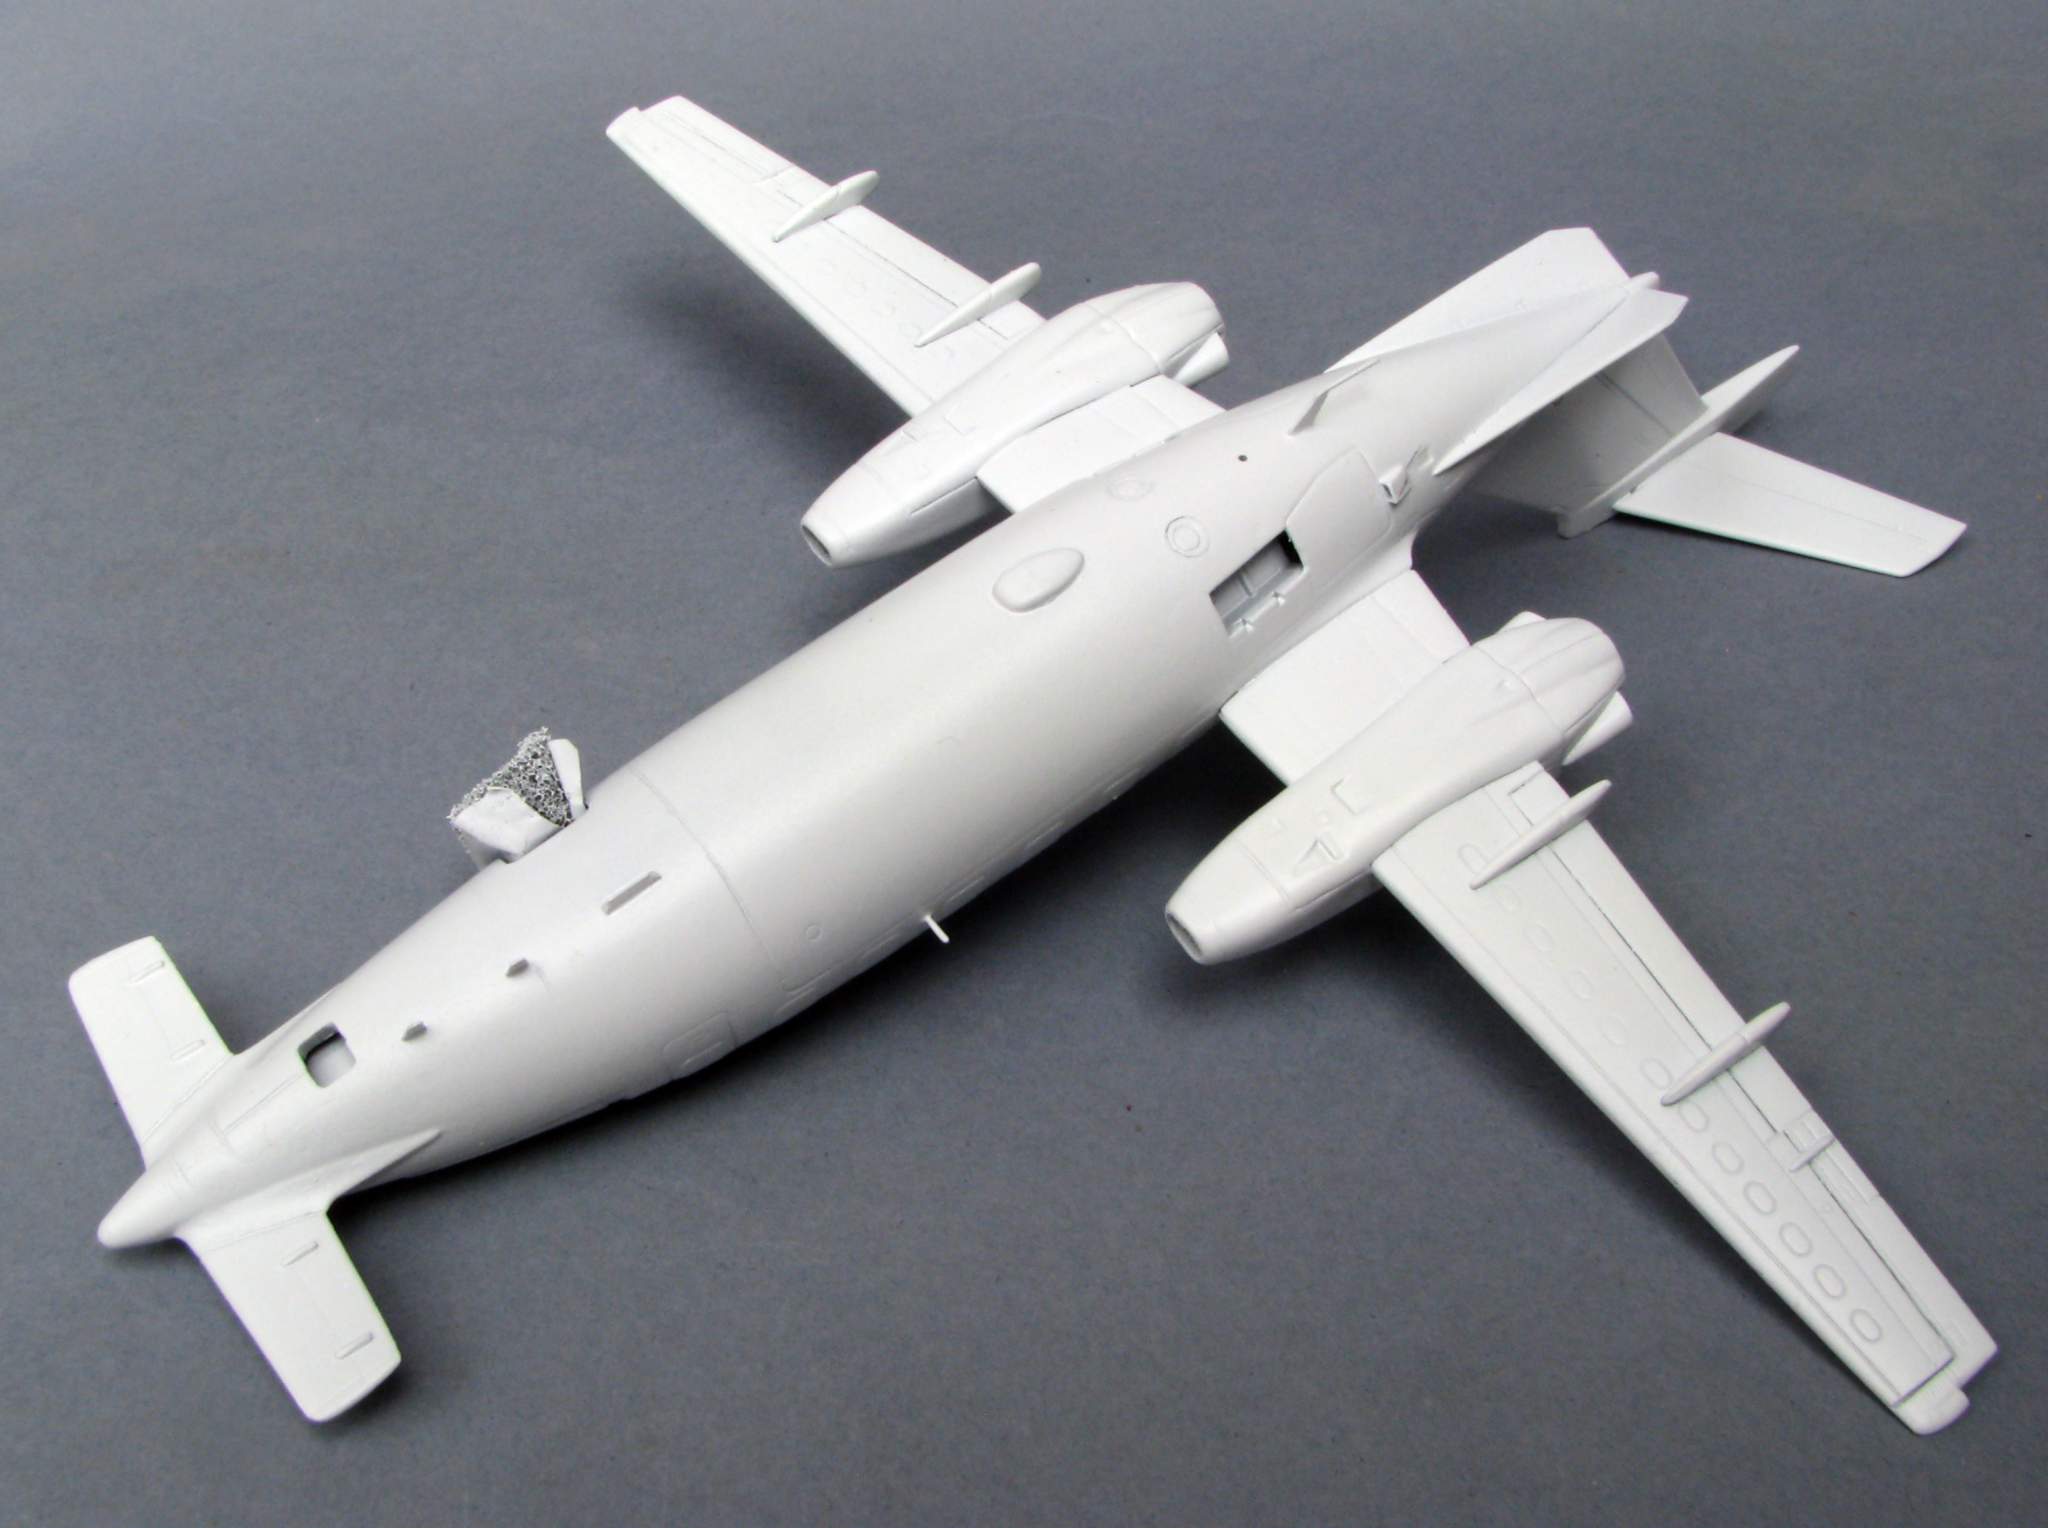
This build is going SLOOW even for my standards… But anyway I have an update here. I finished building the engines, thinned the trailing edge of the wings and had to do some rescribing, and then I tried to put everything together. Here’s how my model looks right now:
Now I’m working on mounting the details that stand a chance of surviving the painting and I hope to paint everything white - Tamiya Spray primer is planned for that.
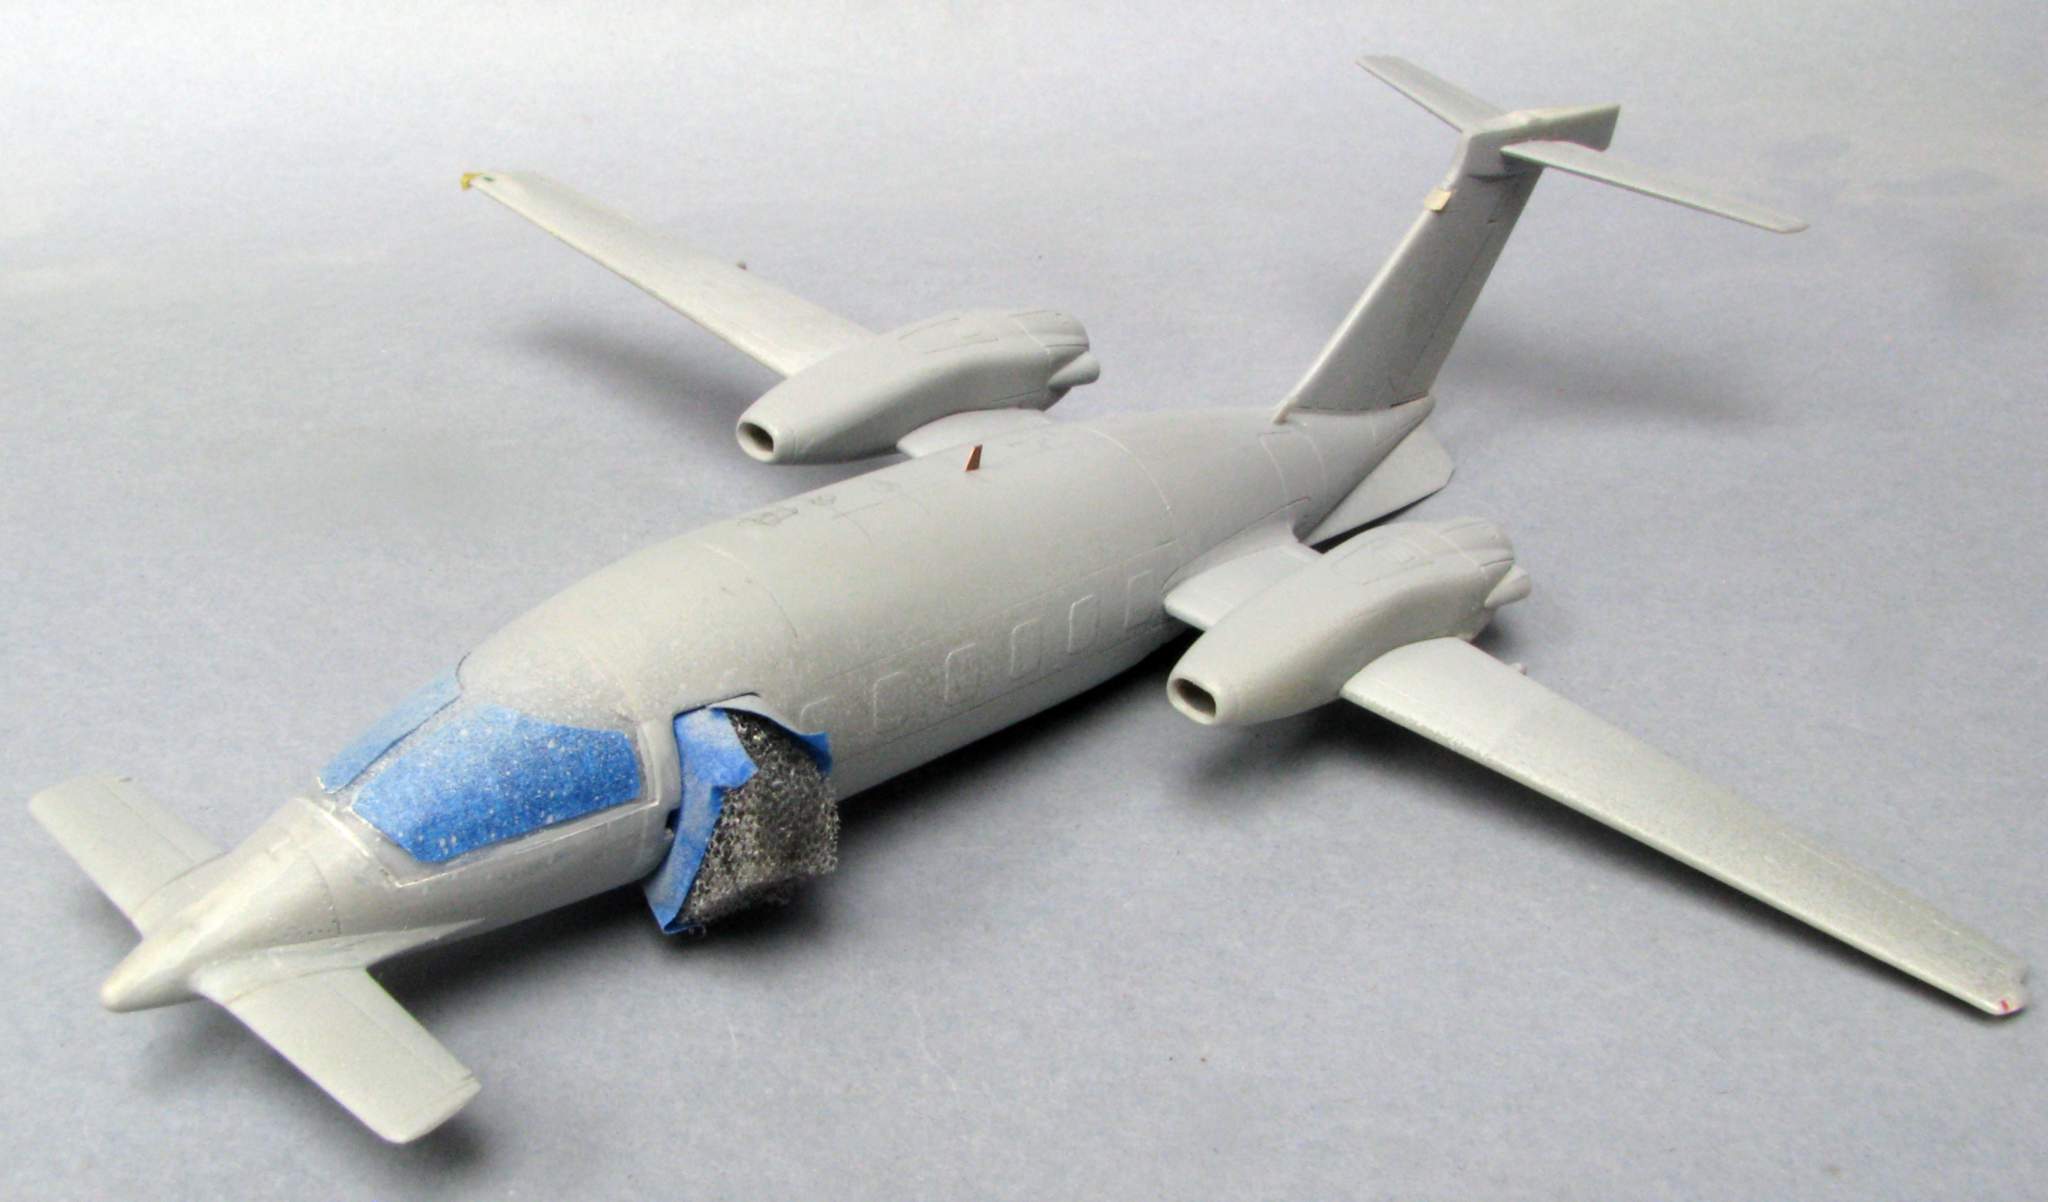
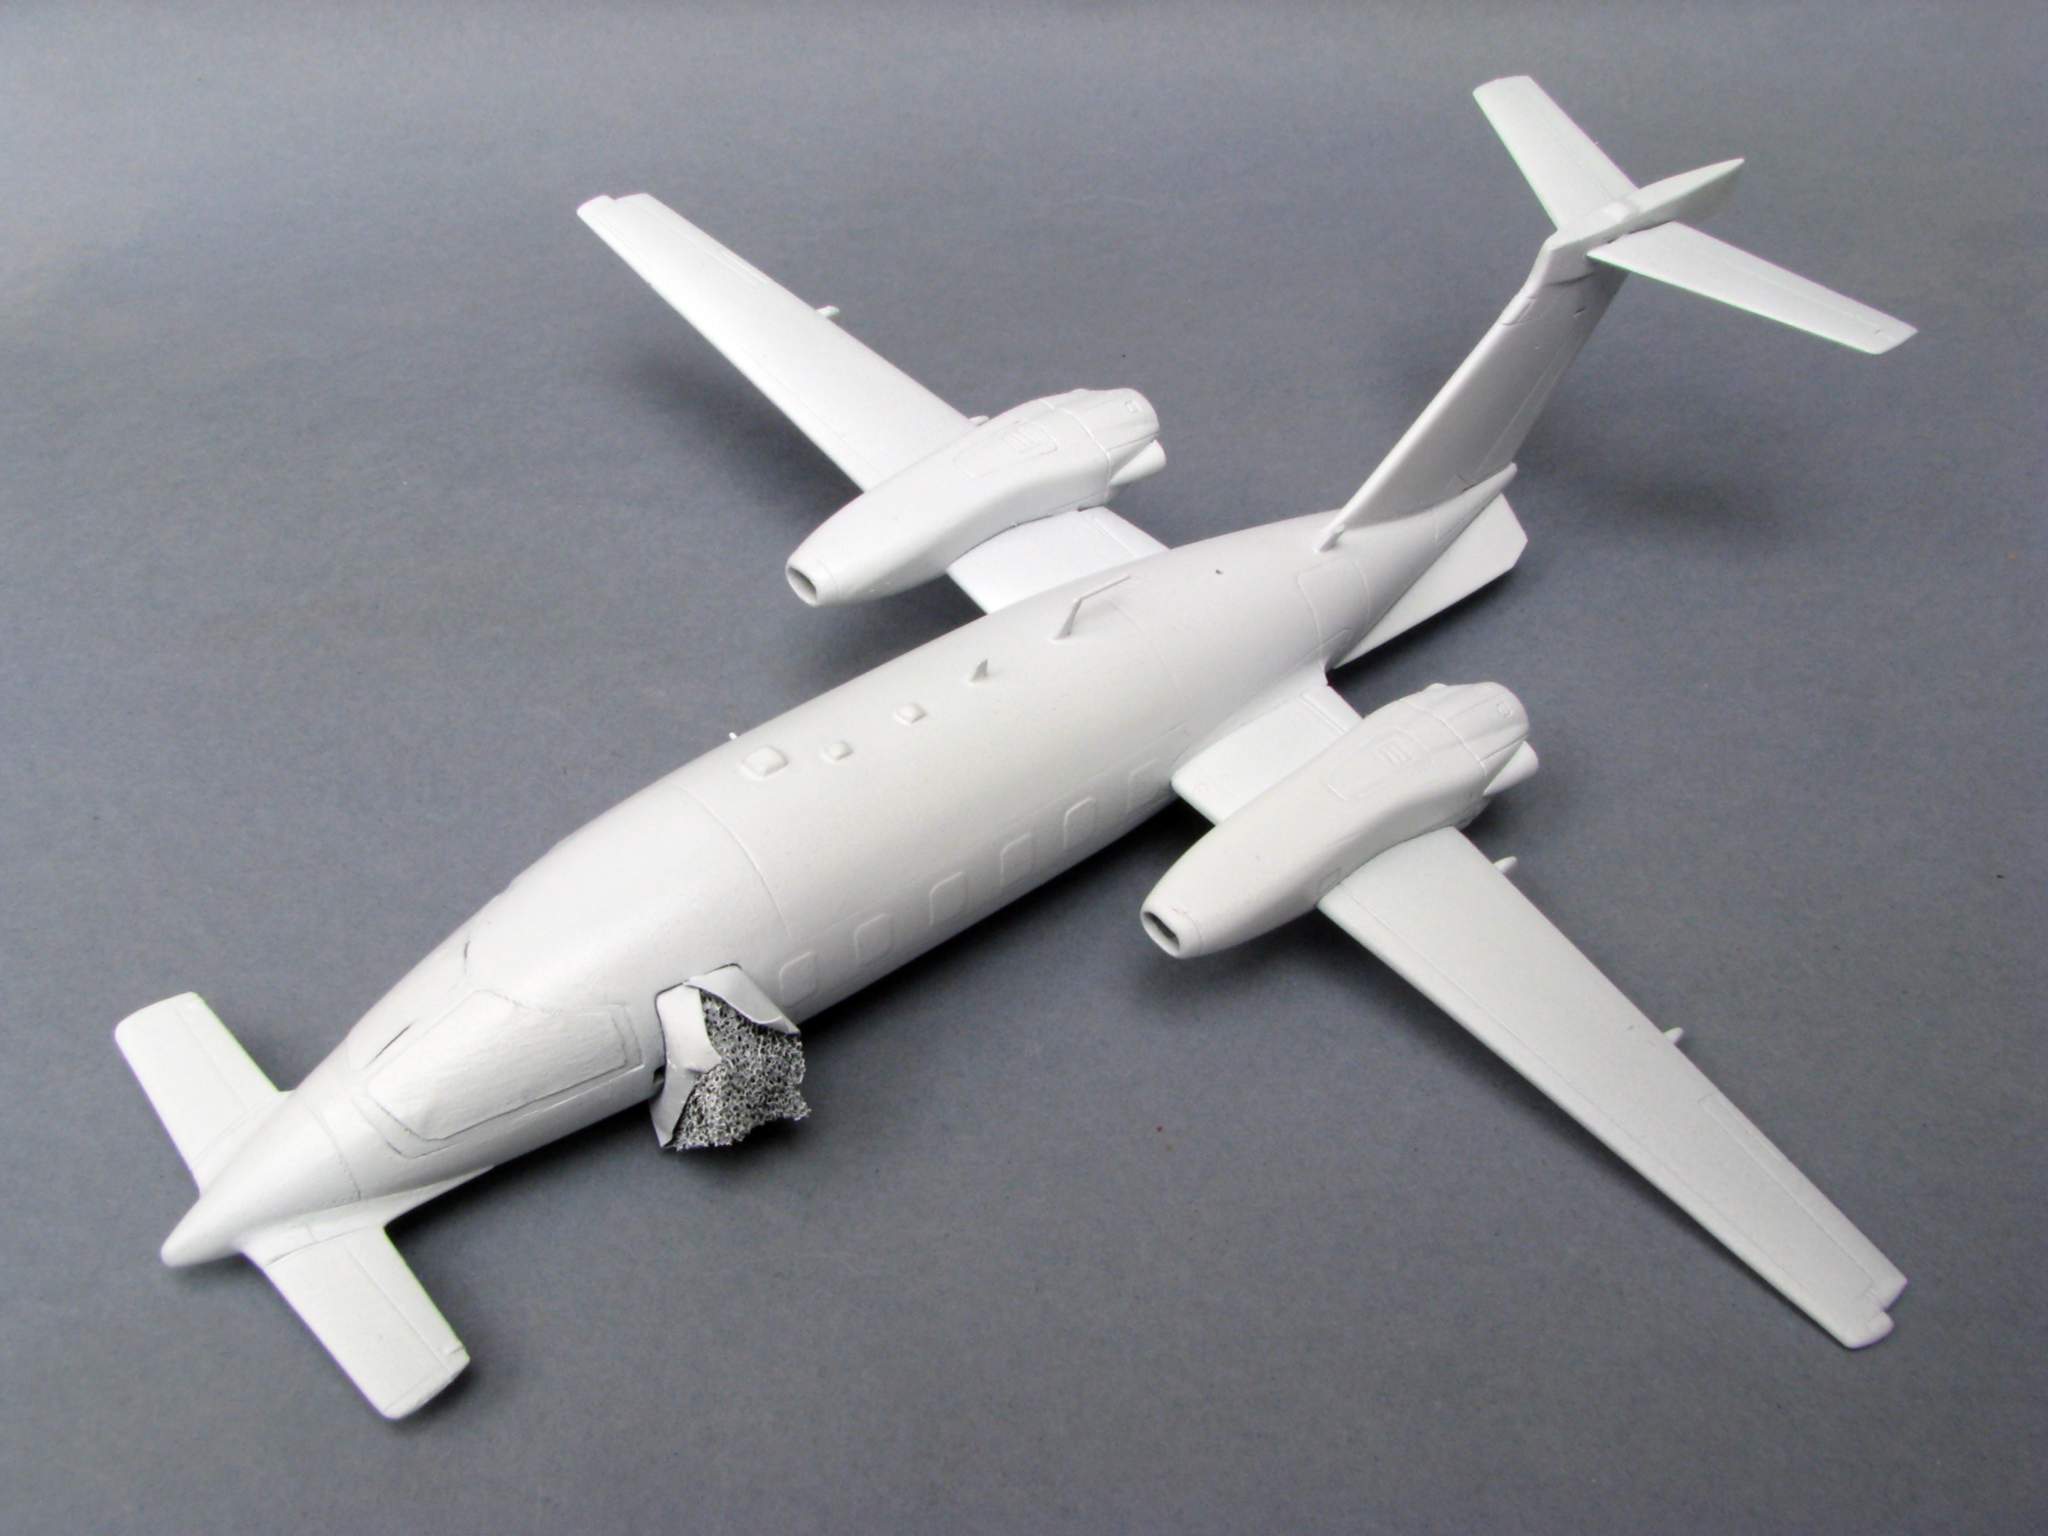
Another small update - here are some photos showing the first passes with the gray Tamiya primer and some antennae made out of copper and guitar string. Those antennae are anchored in a hole drilled in the hull, to give them a chance to with stand painting:
Then I sprayed some white Tamiya primer. Now my main white coat looks like this:
Now I’m working on painting the propellers and painting the tail red - I’m looking for a shade of red to match the Caracal decals, the painted and decaled areas have to have a smooth, preferably invisible transition.
Hi pawel, Only catching this one now, interesting change to the usual aircraft that we see (that I love by the way). Glad you reconcidered closing up your detailed interior completely.