1/6th scale Early Production M4 Sherman

Thanks Guys, One advantage about working in this scale is that a lot of the small details that are too small to be replicated or are ignored in smaller scales are more noticeable and are easier to scratch build.

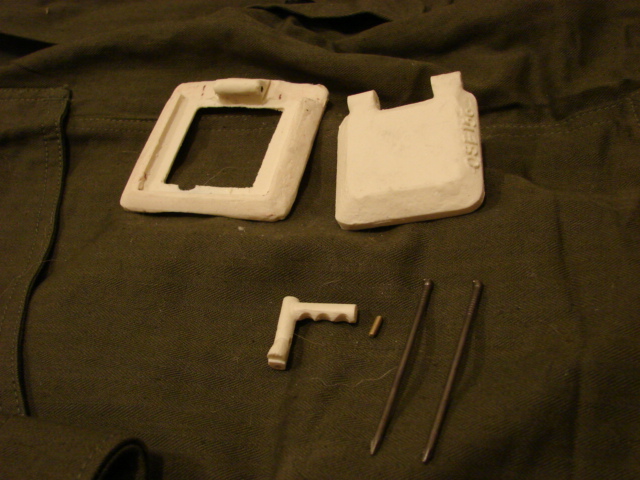
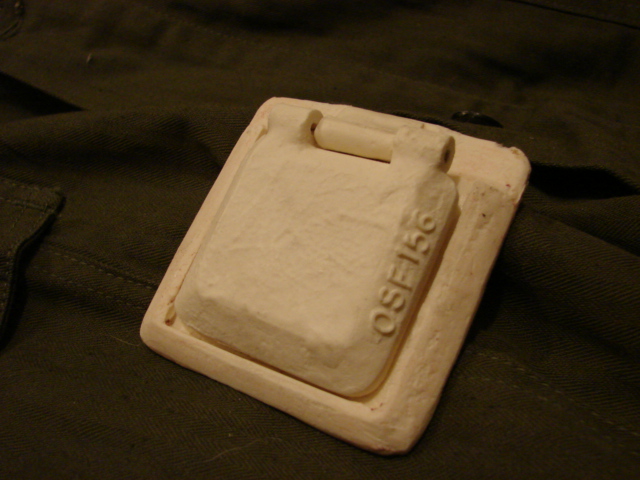
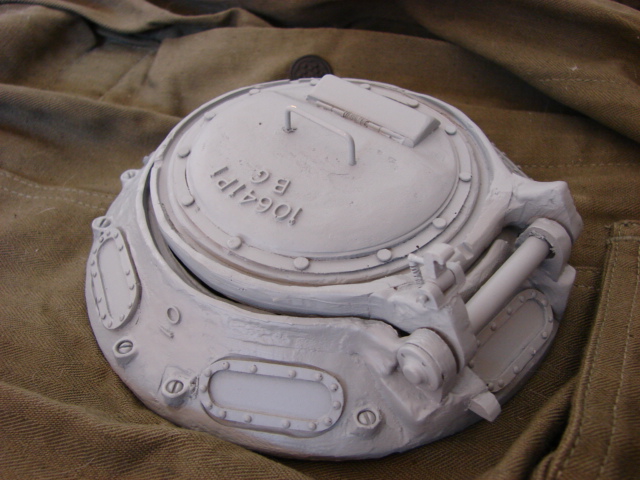
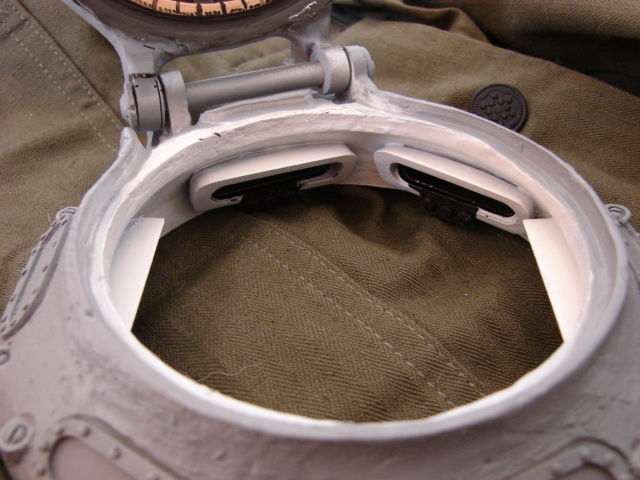
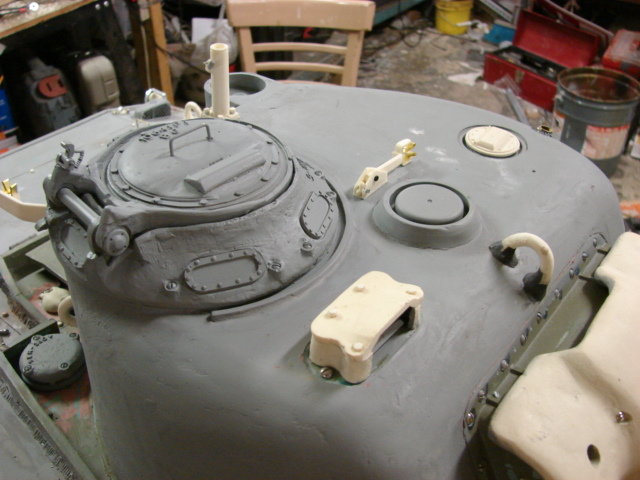
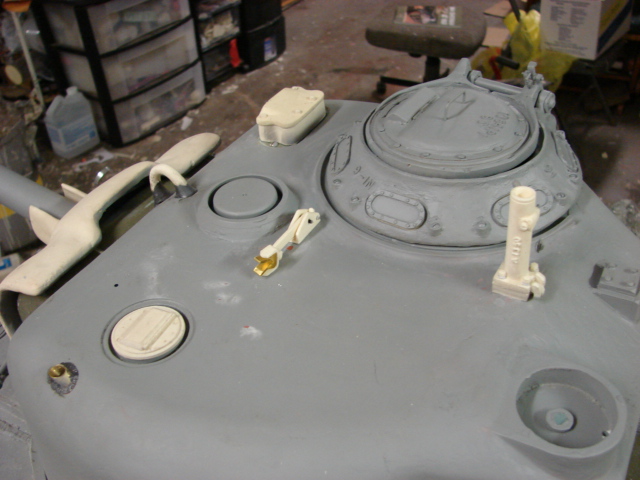
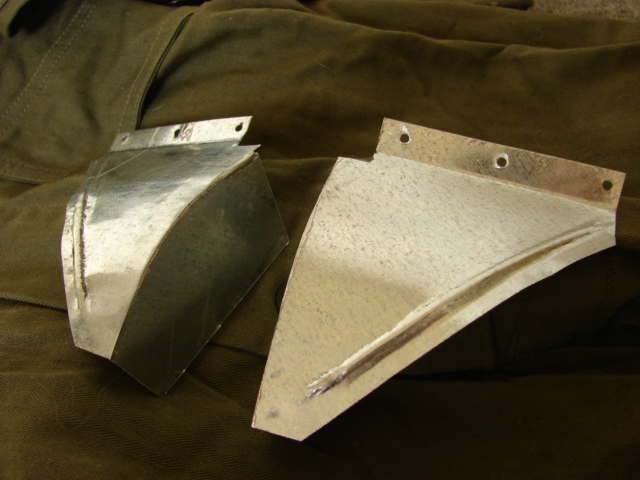
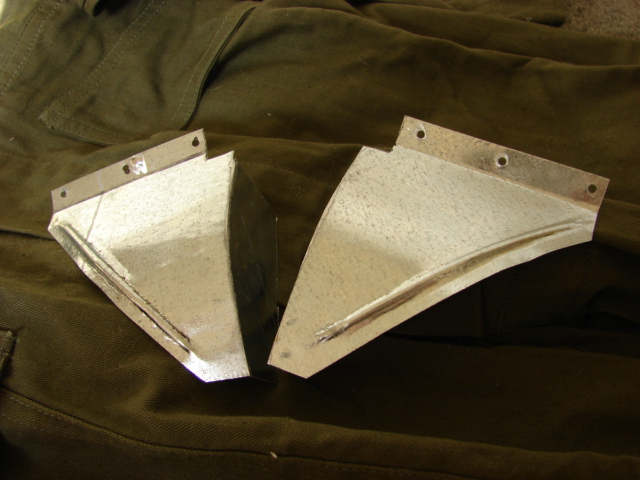
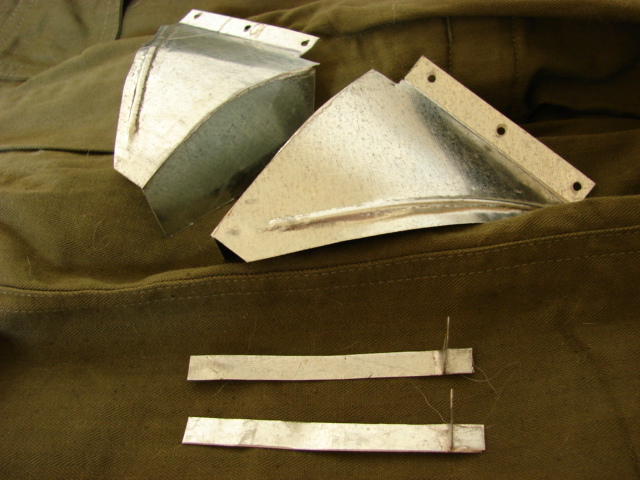
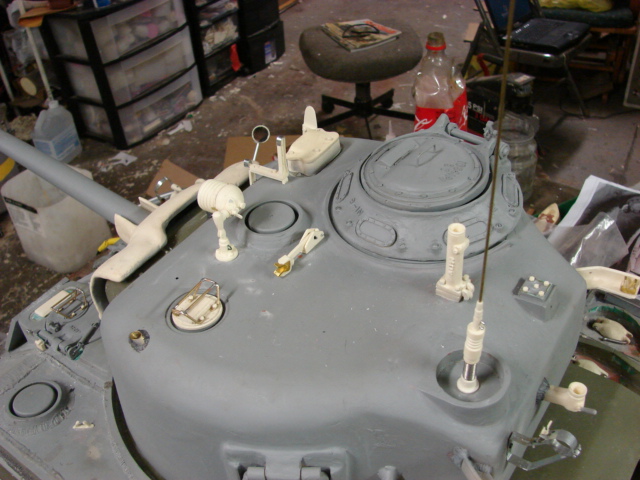
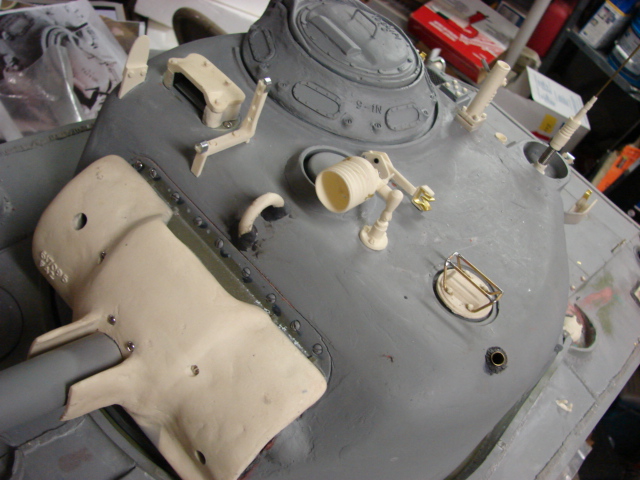
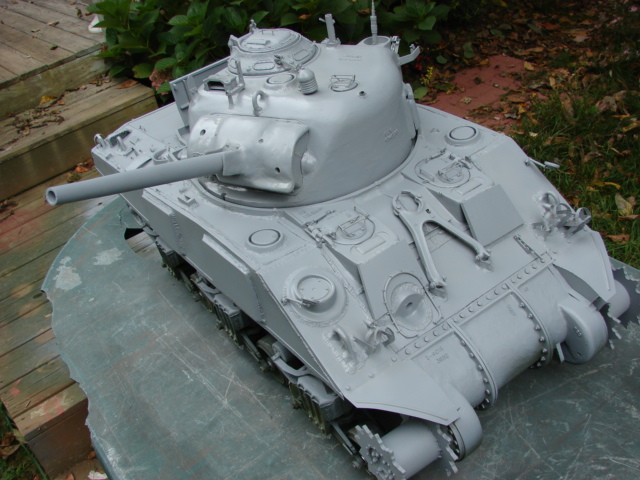
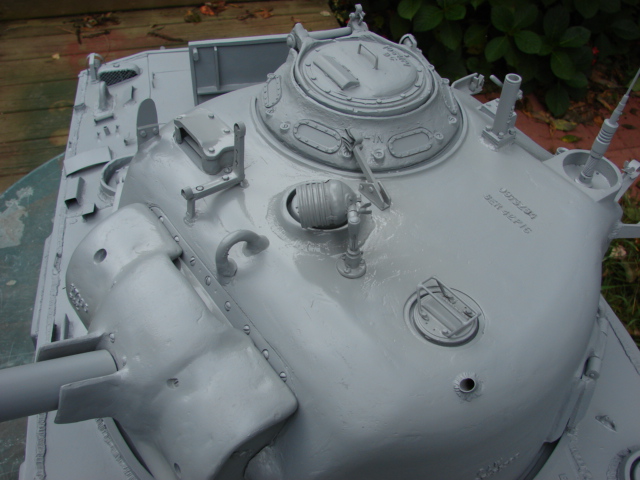
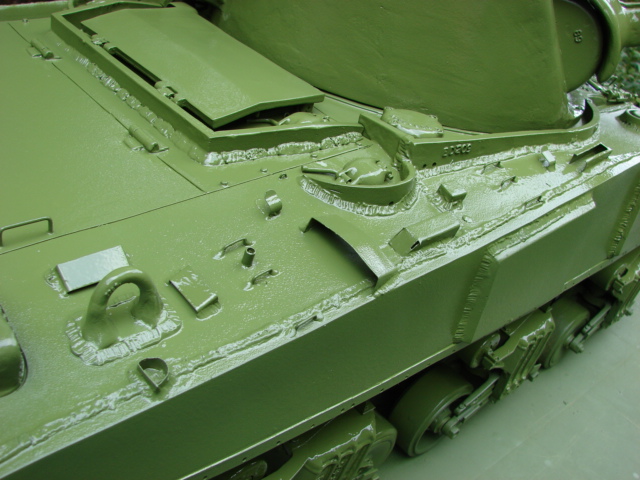
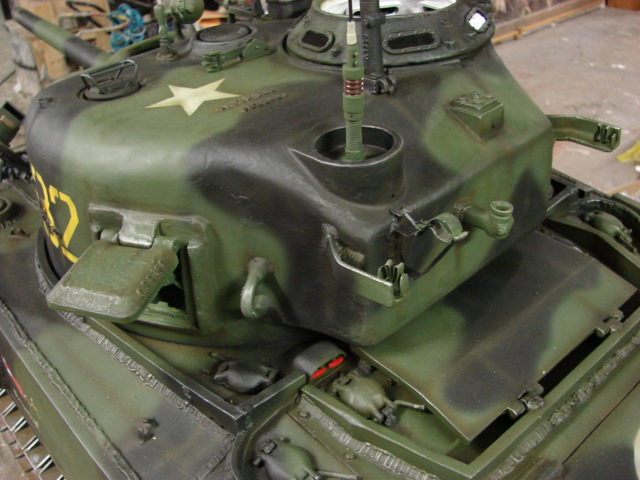
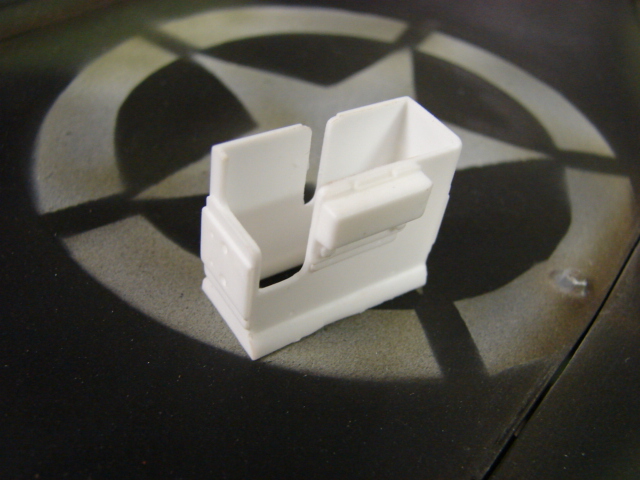
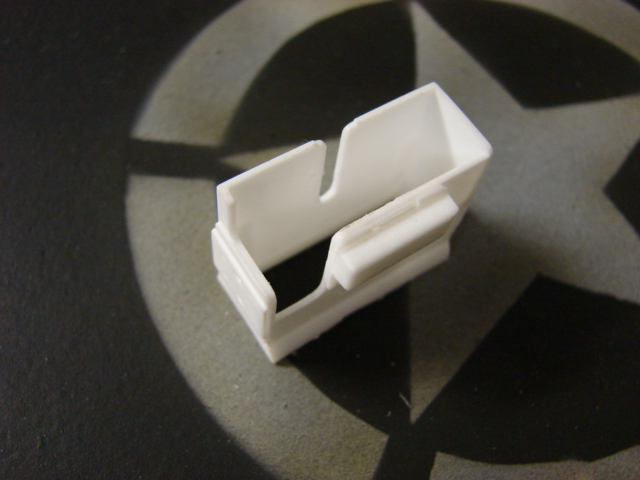
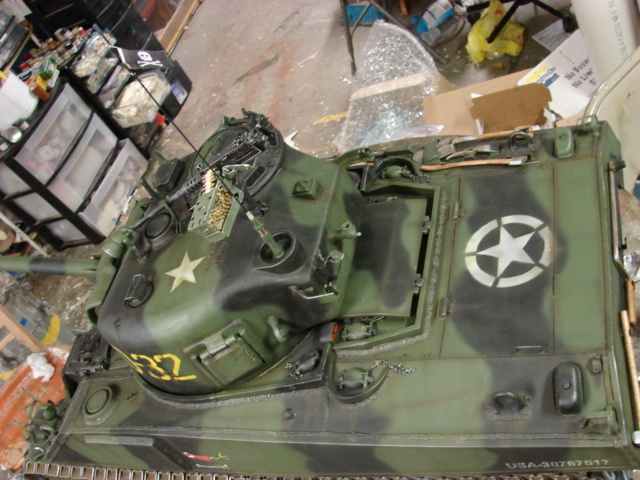
I have completed the last parts for the hatches and they have been added to the product line.http://www.eastcoastarmory.com/ustankparts.htm

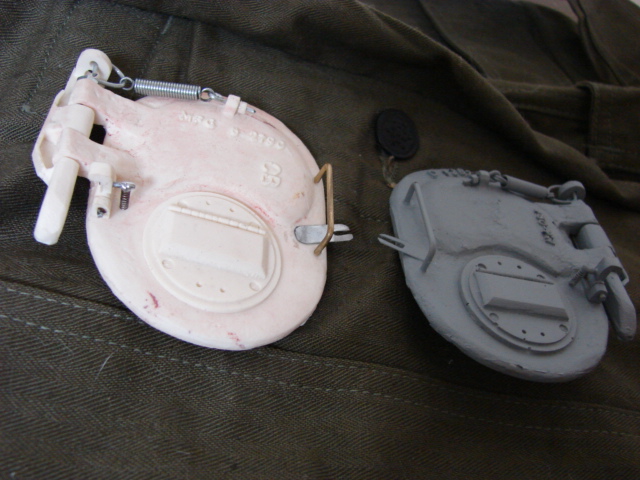
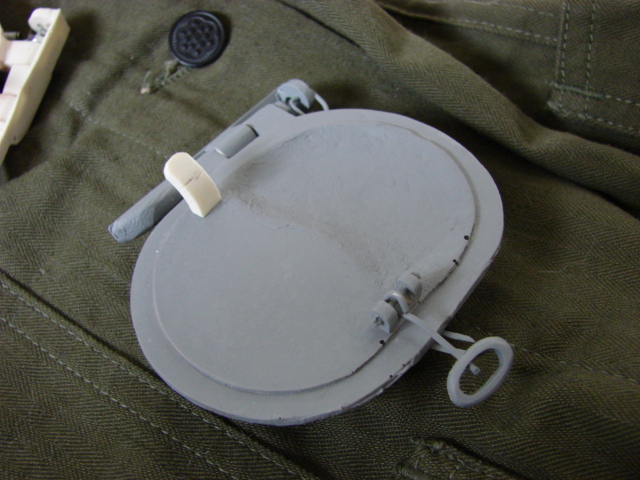
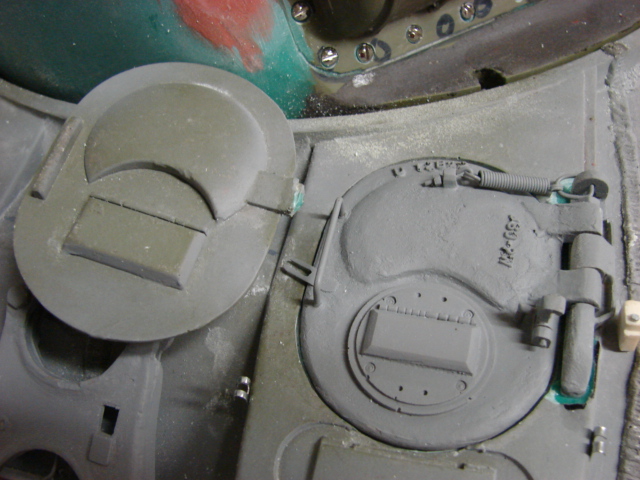
All of the components that are included with my older hatch upgrade kit have been included and molded into these hatches. The hatches also come with pre assembled spring loaded hatch retaining latches. The hatches don’t come with the bottom portion of the periscope. A superb set can be purchased through Panzerwerks, and Armorpax.

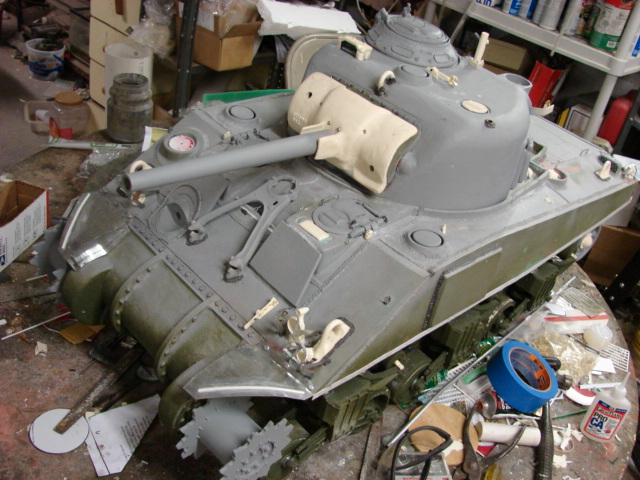
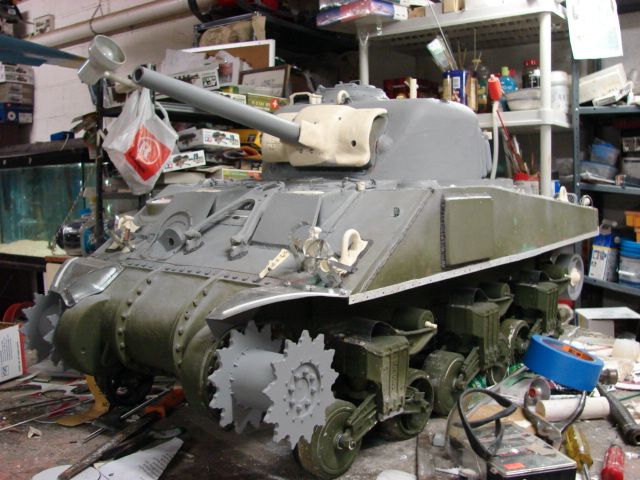
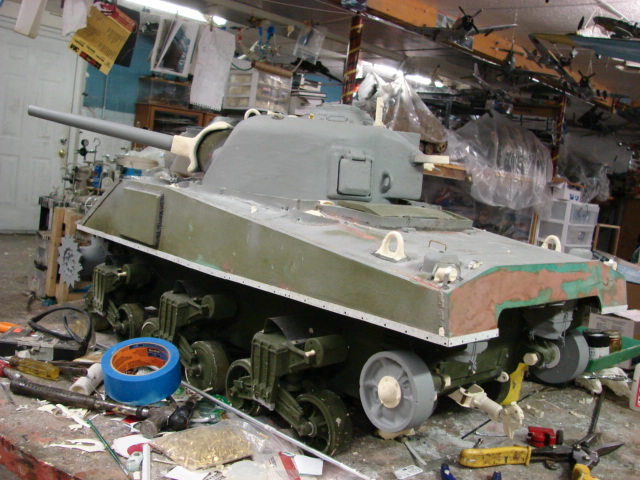
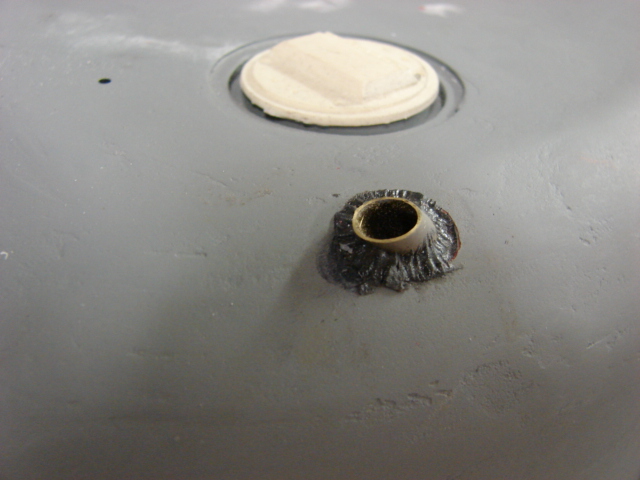
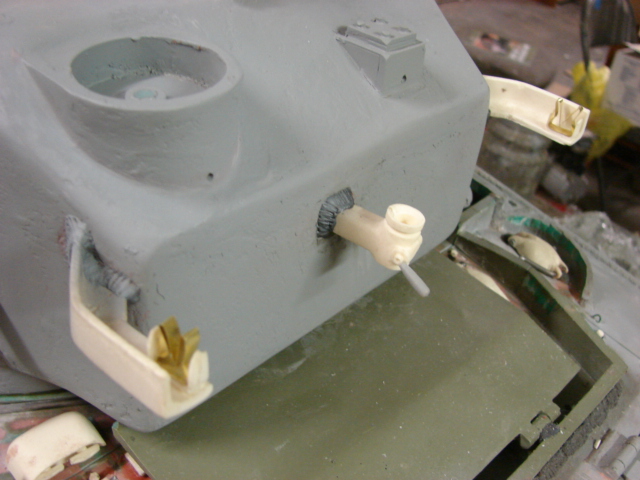
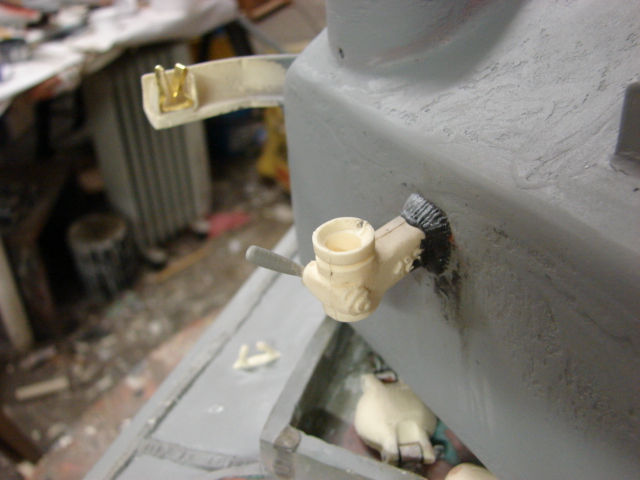
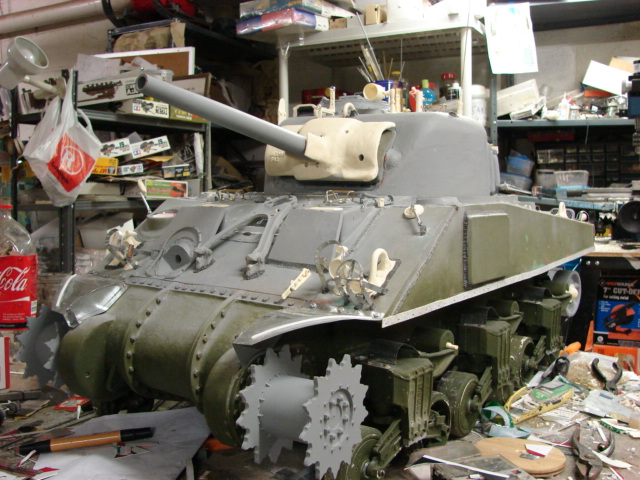
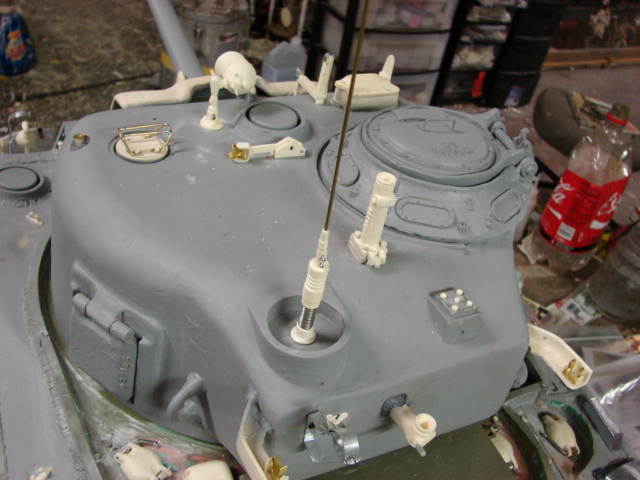
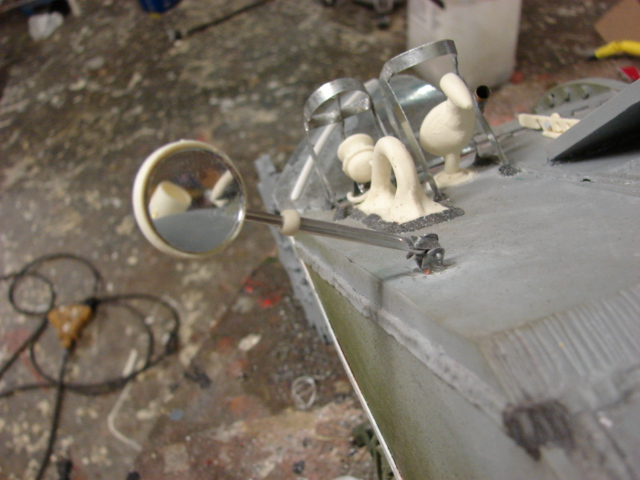
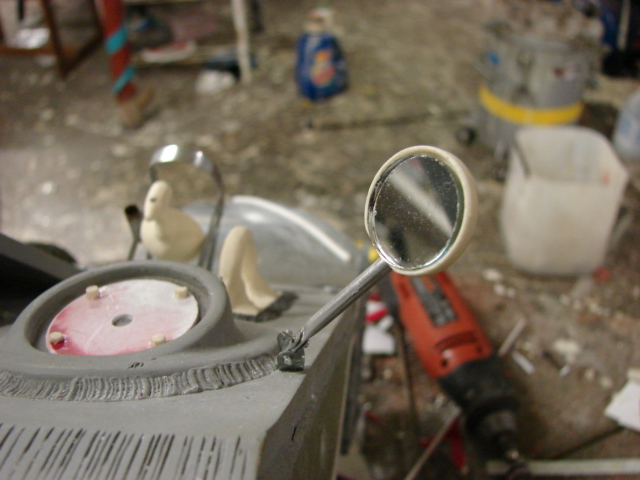
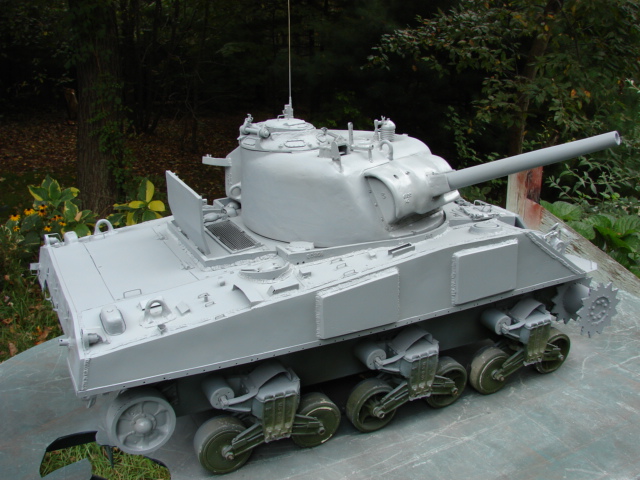
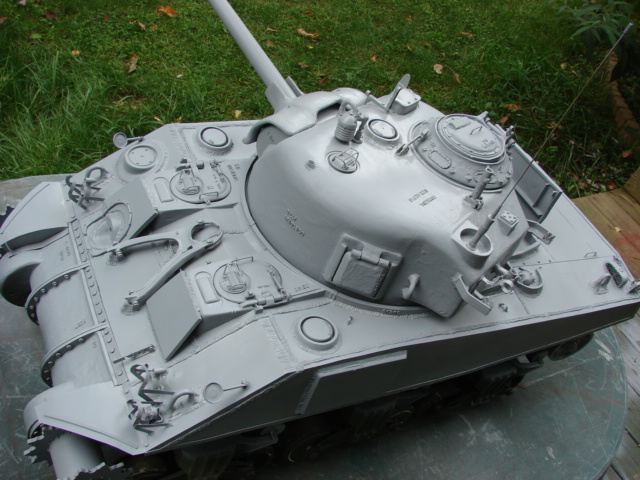
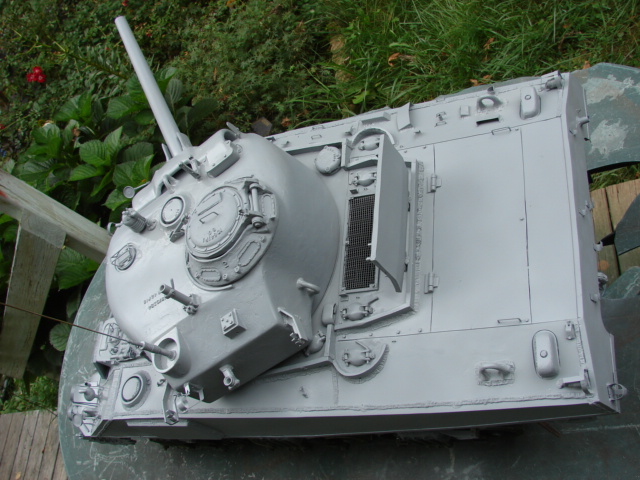
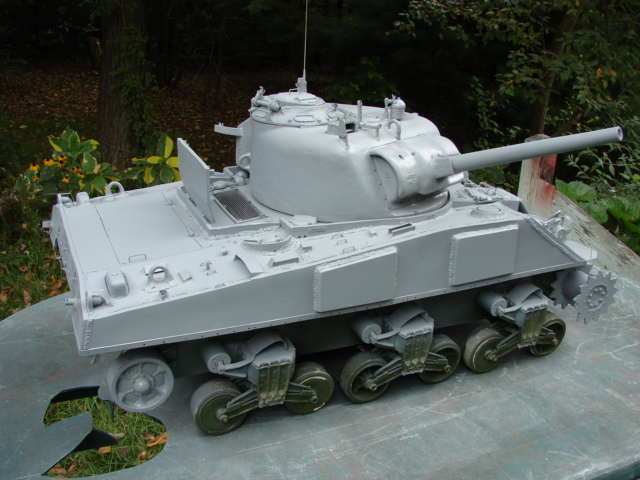
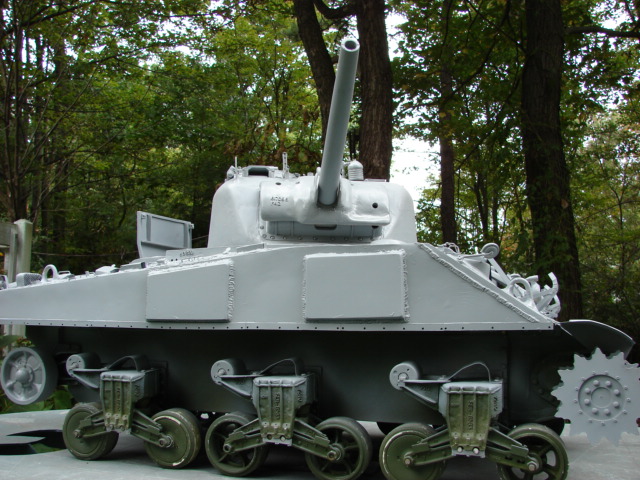
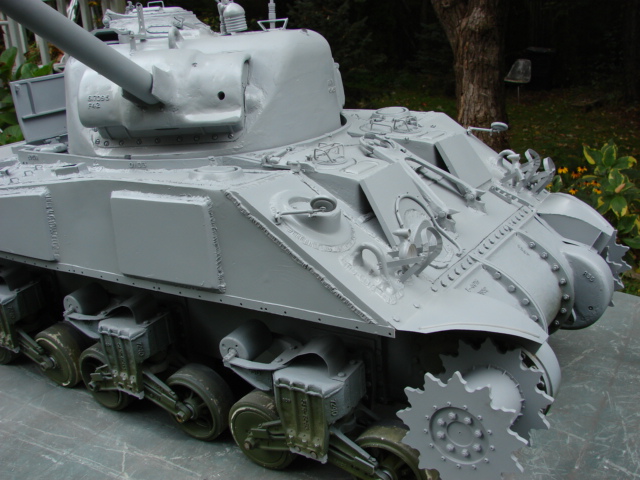
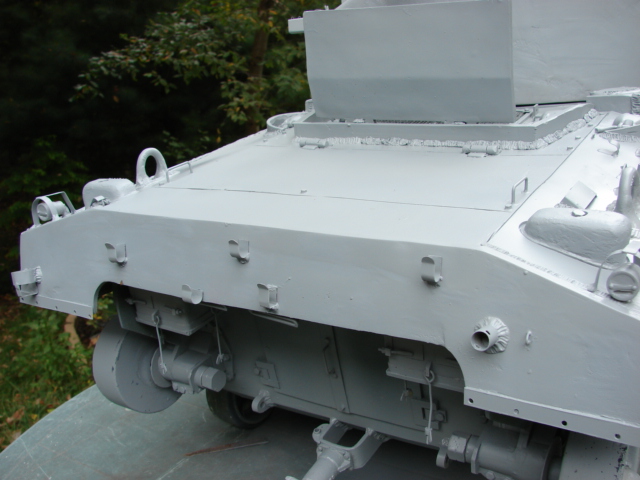
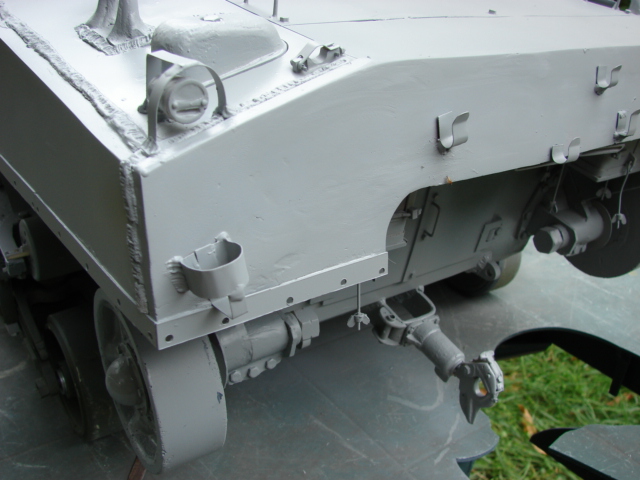
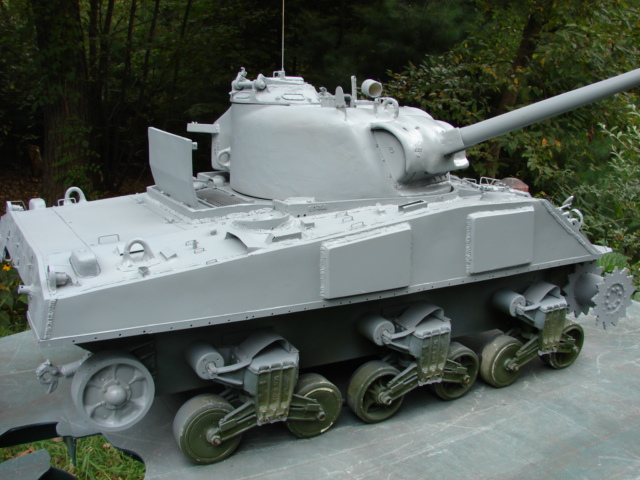
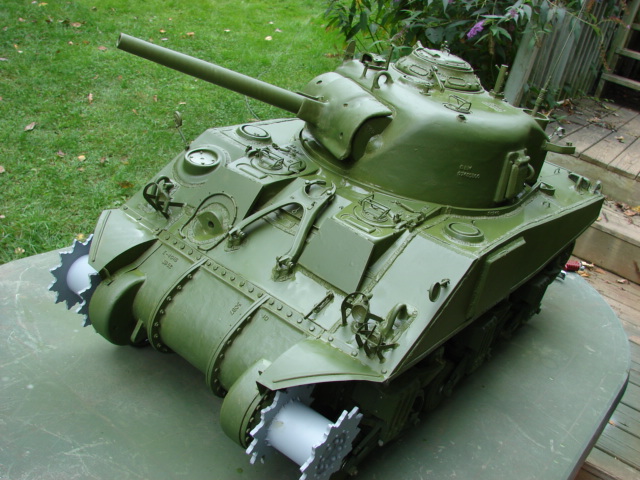
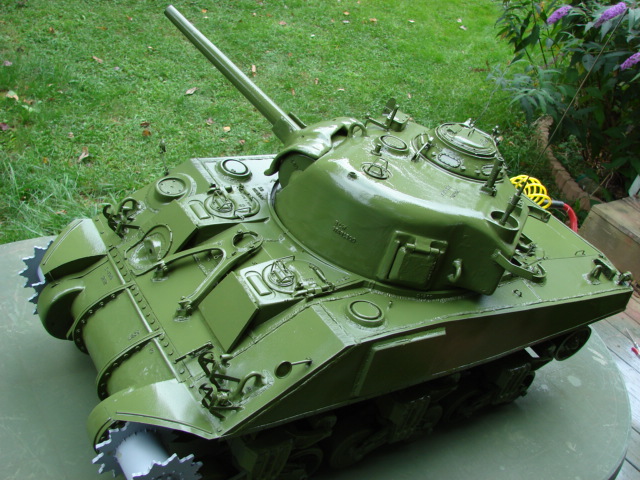
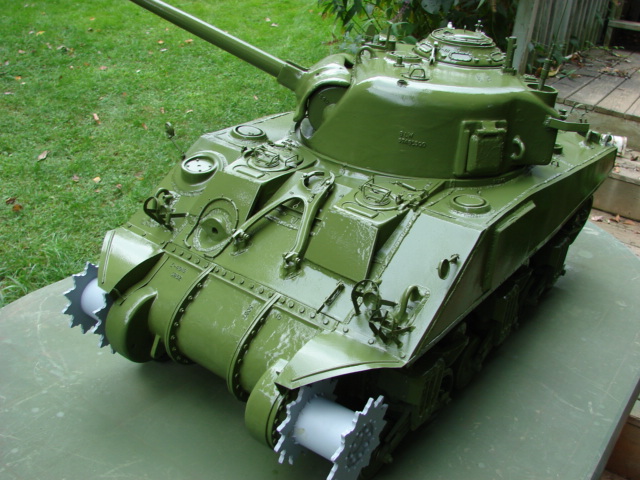
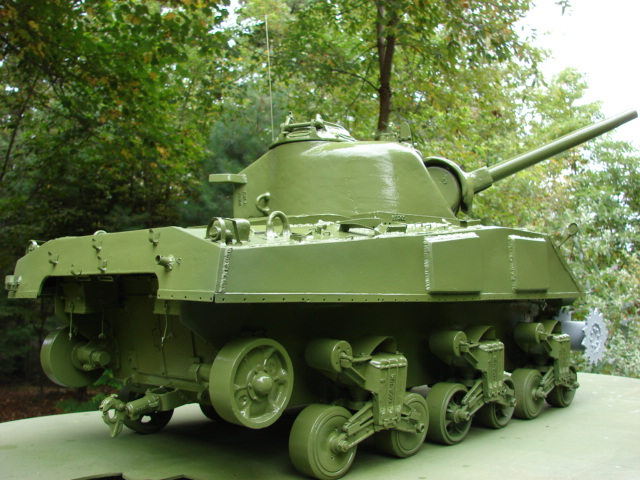
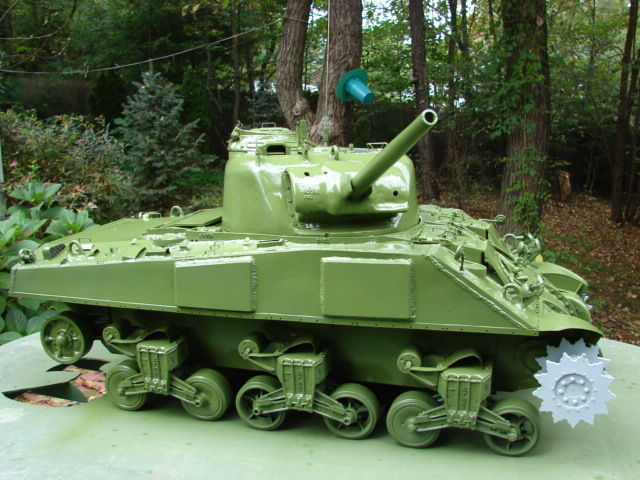
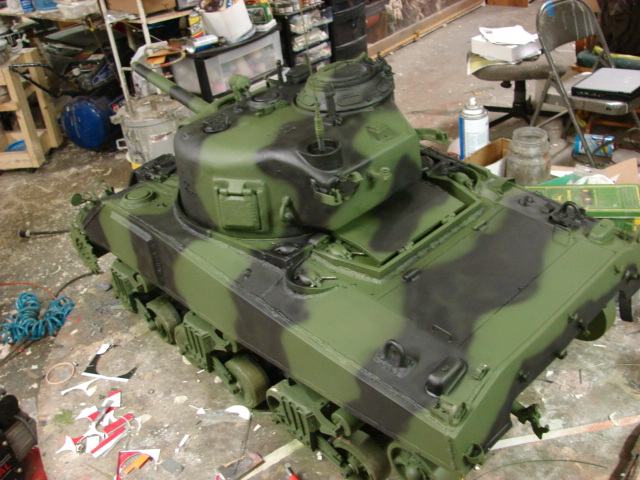
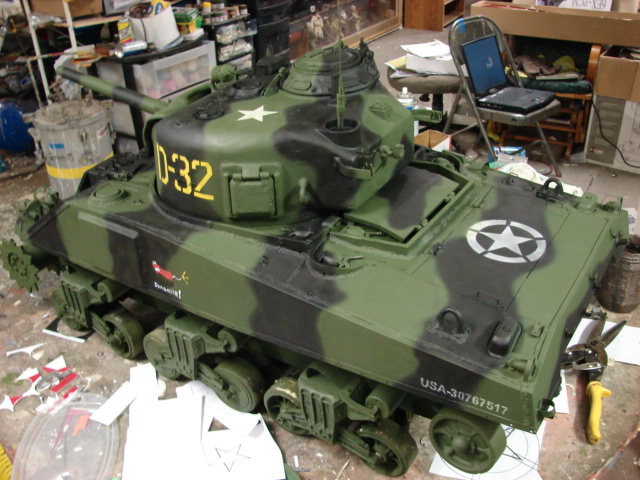
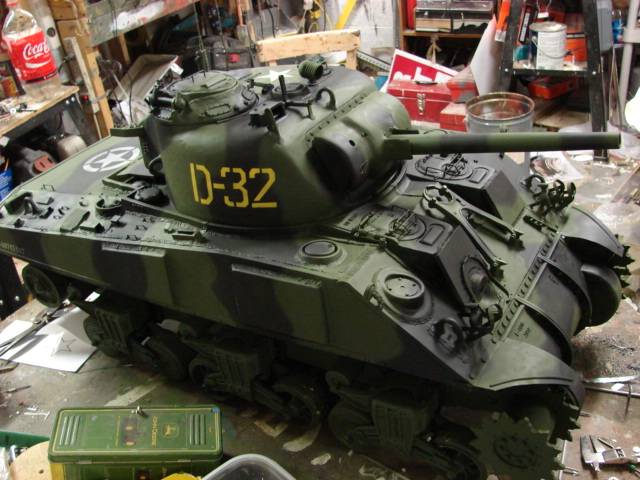
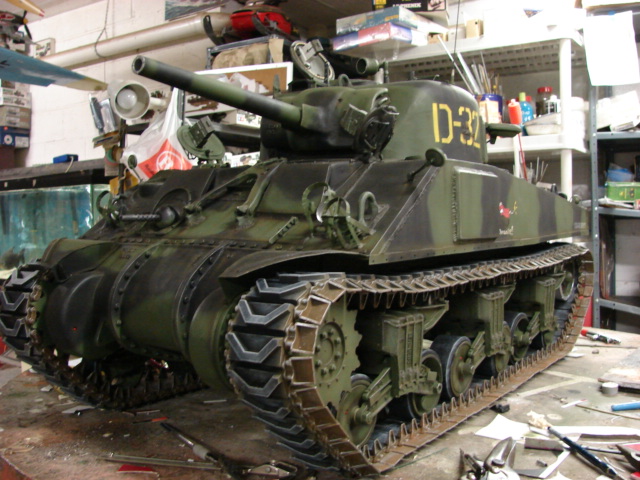
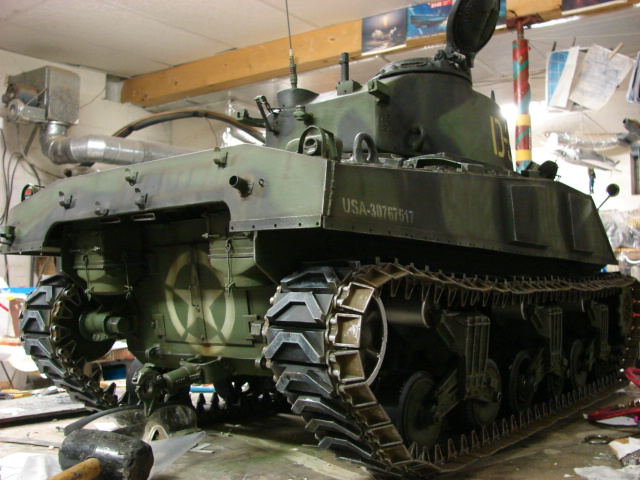
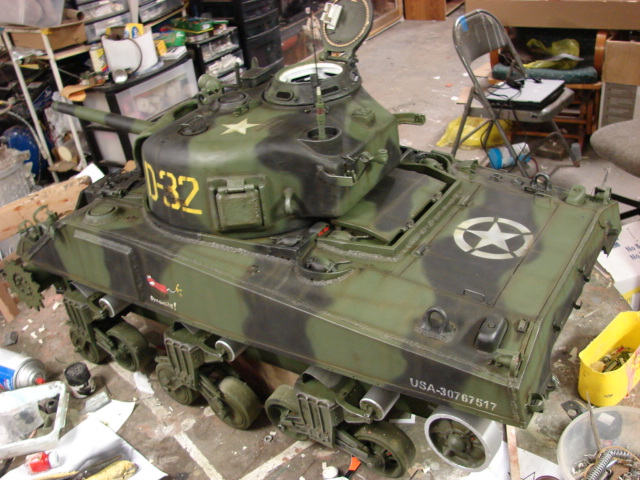
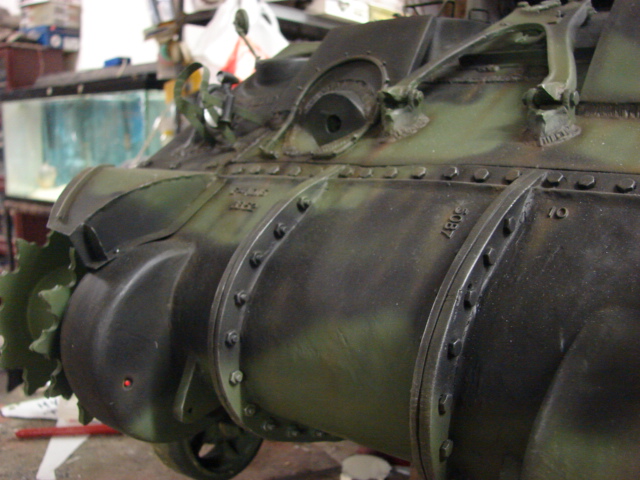
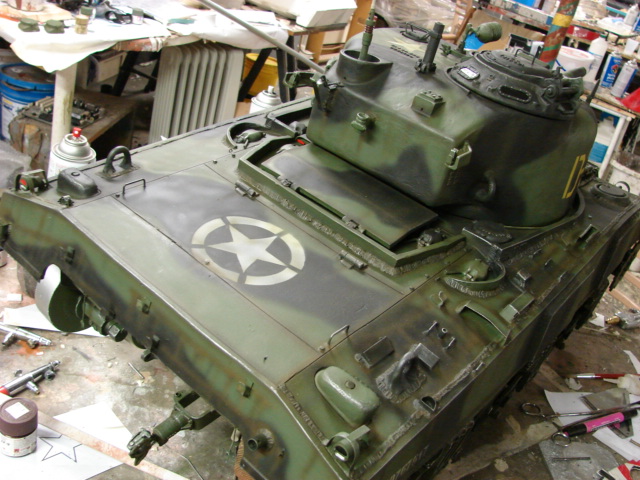
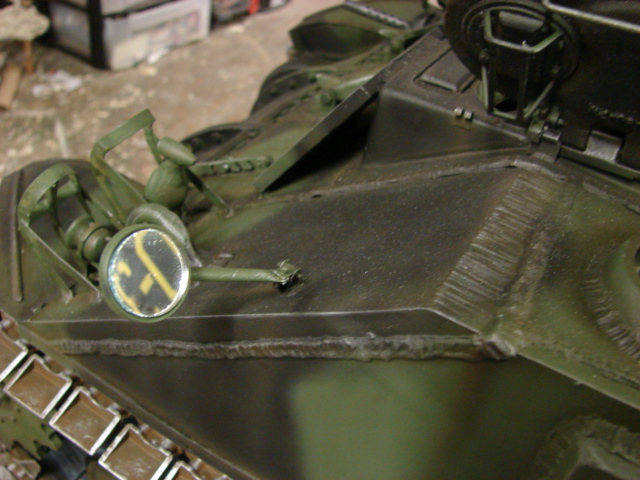
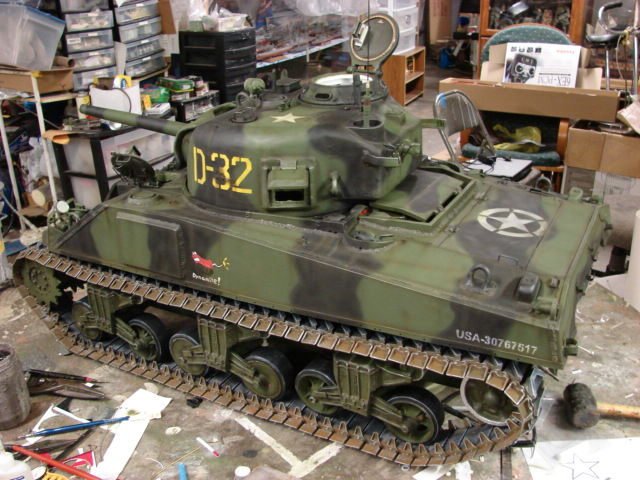
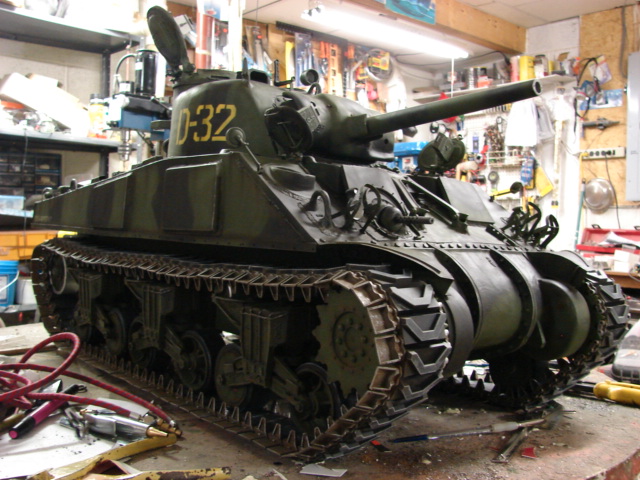
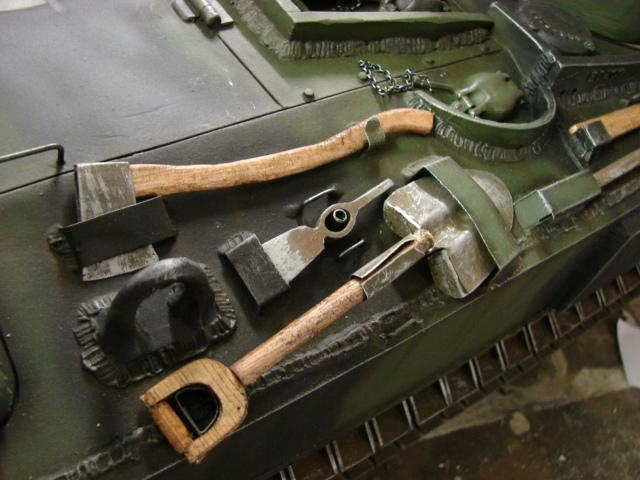
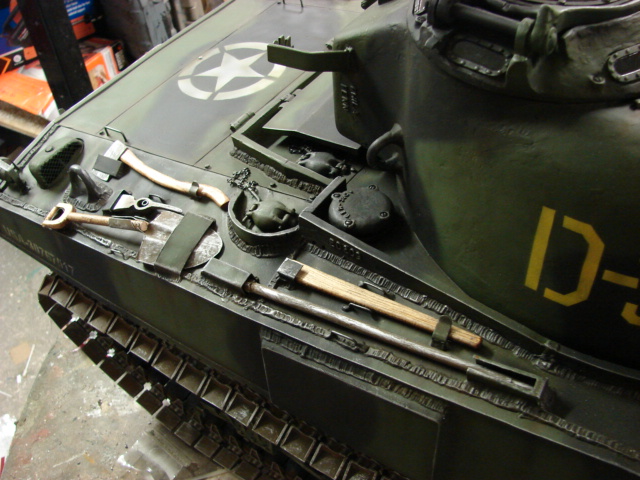
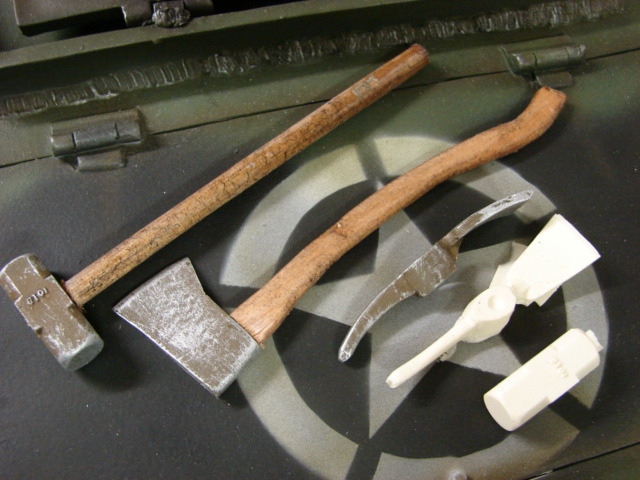
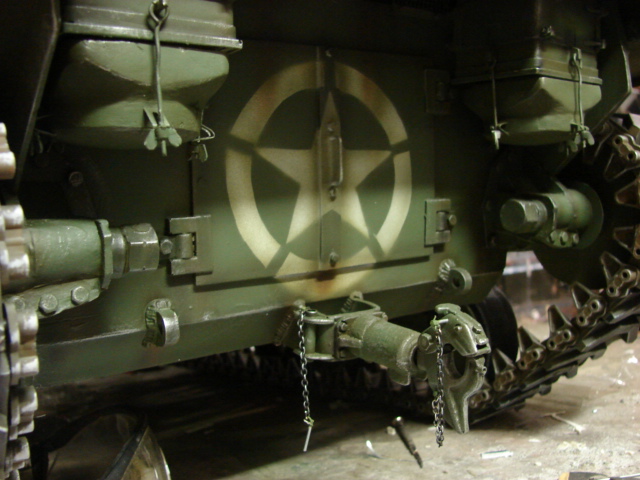
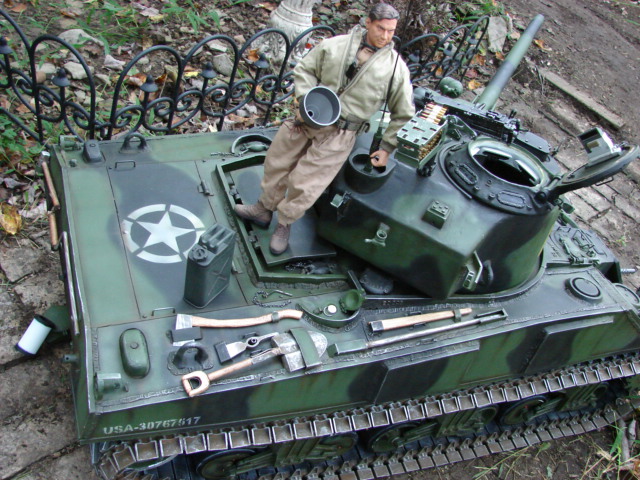
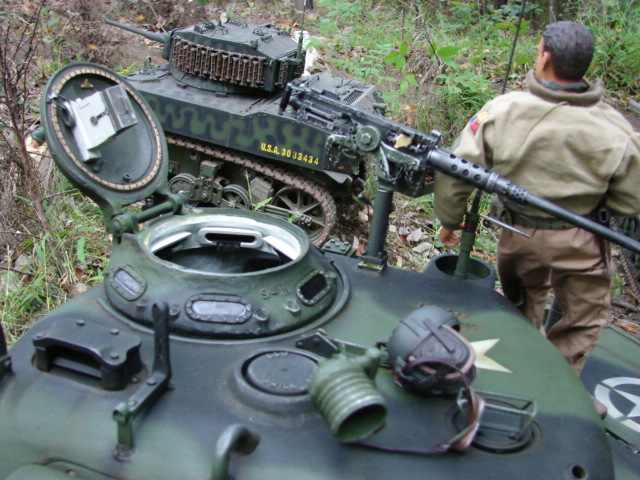
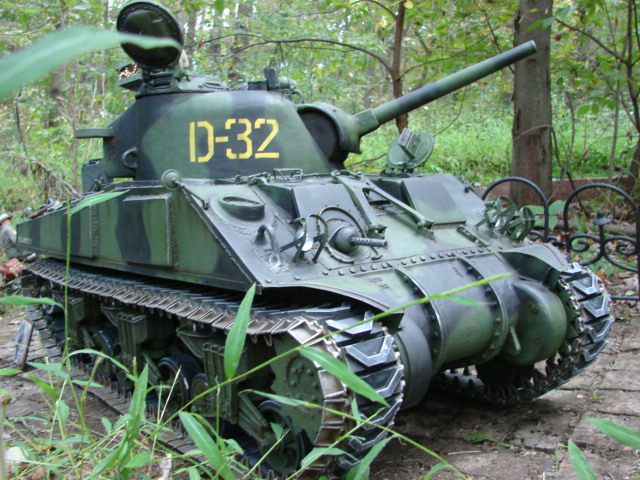
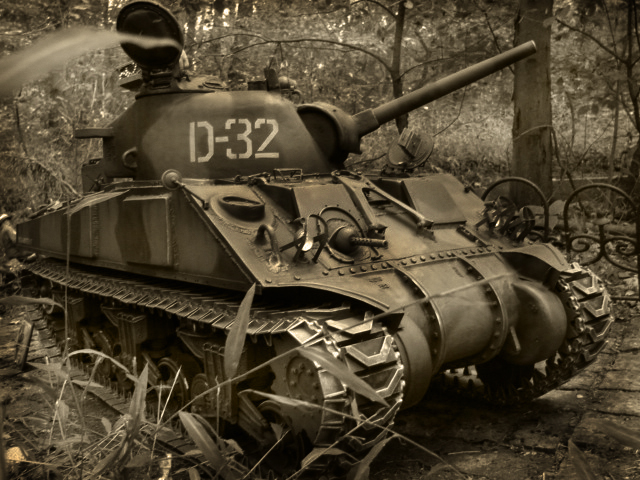
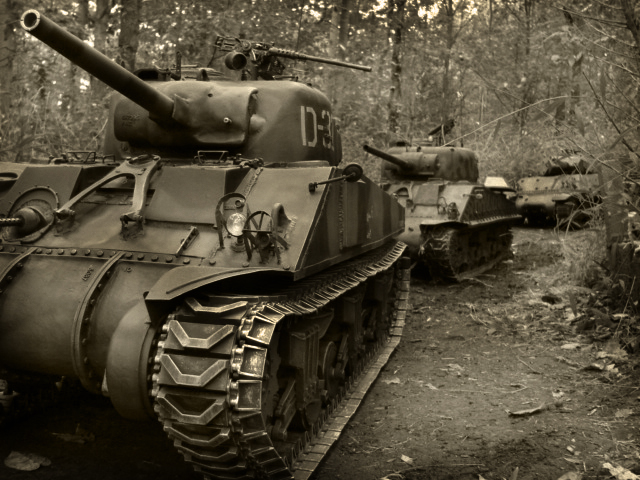
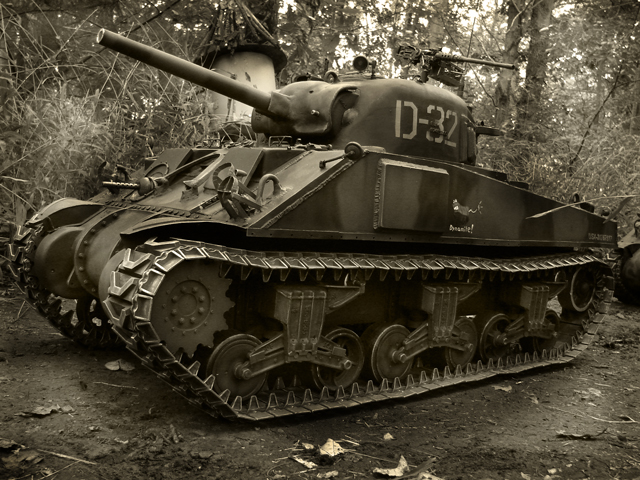
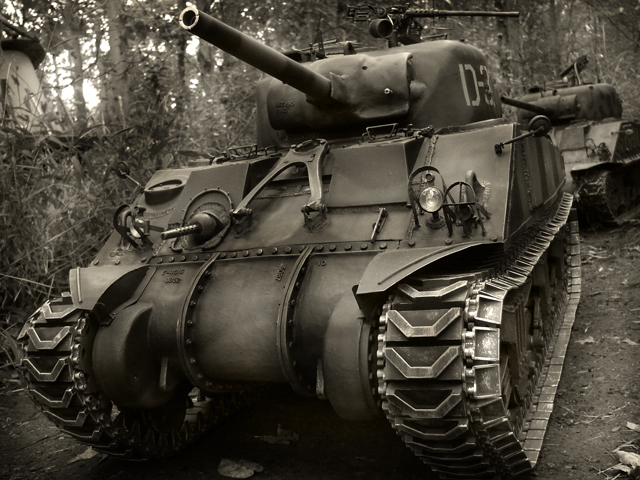
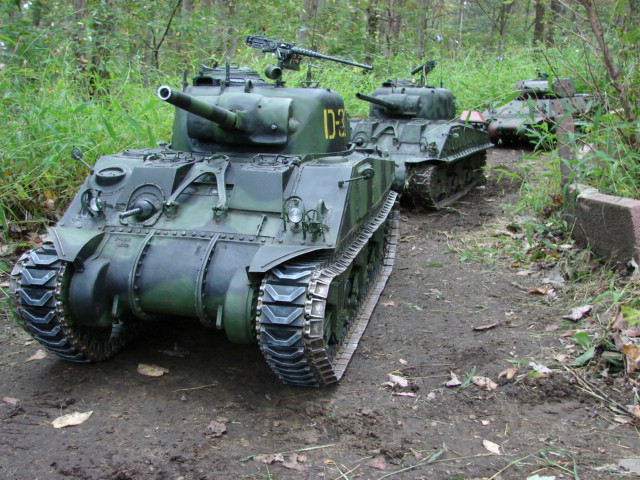
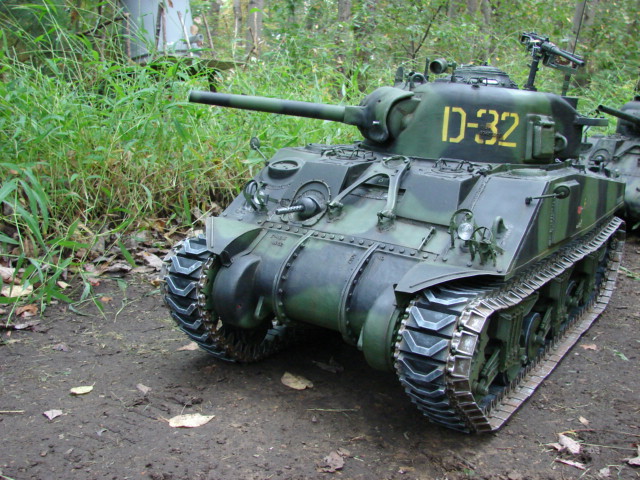
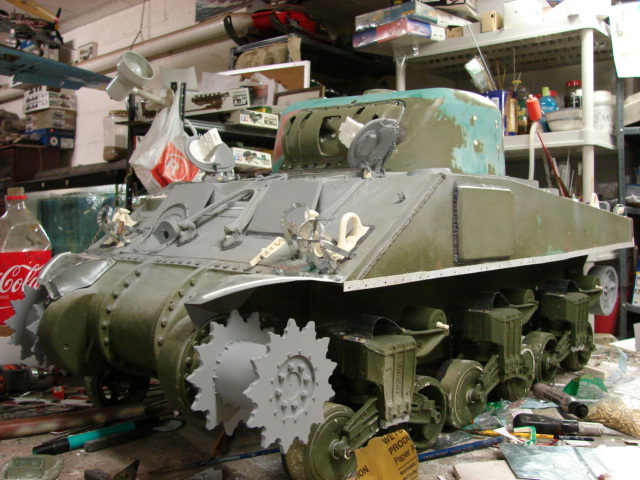
The tank’s lower hull is mostly complete. All that needs to be added to complete the lower hull are the tool mounts, cast numbers, and side view mirrors.

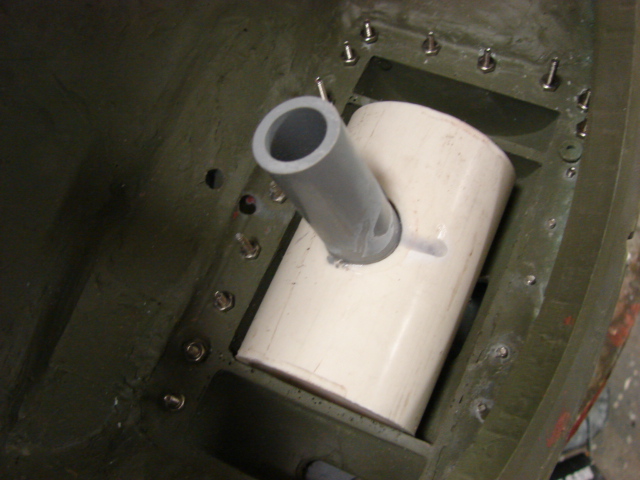
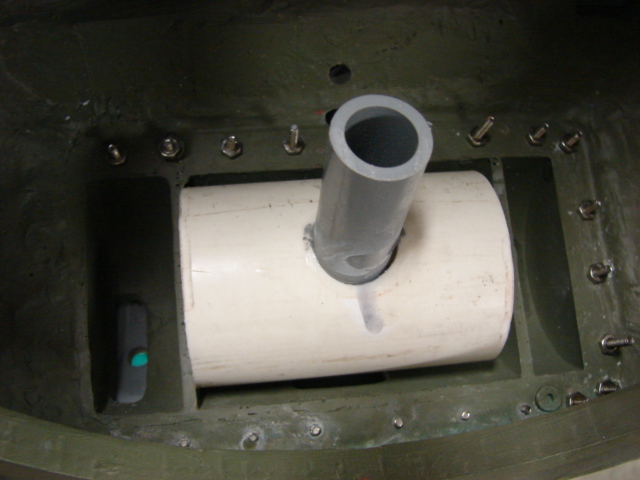
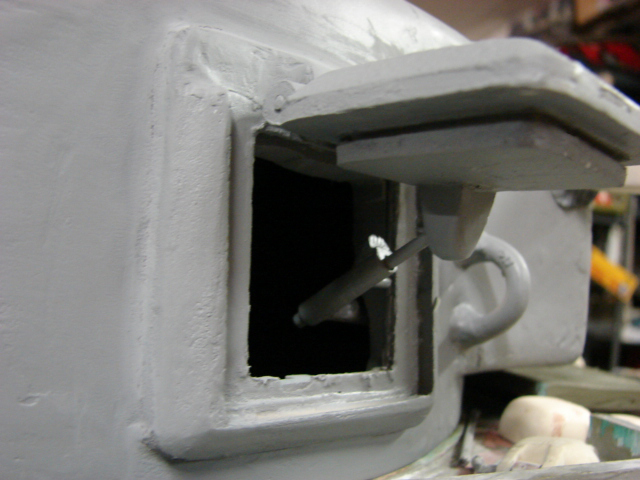
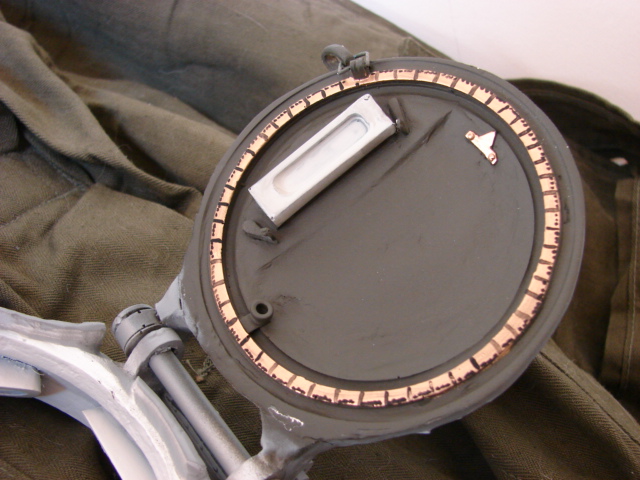
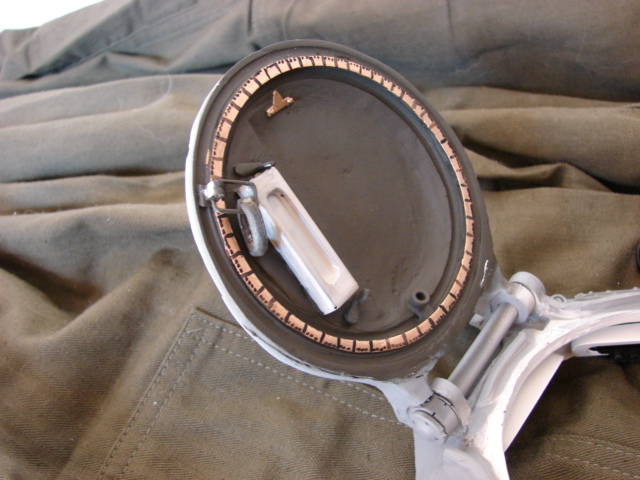
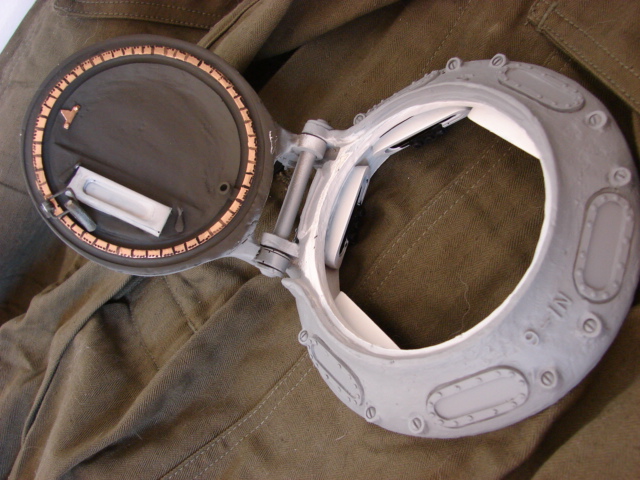
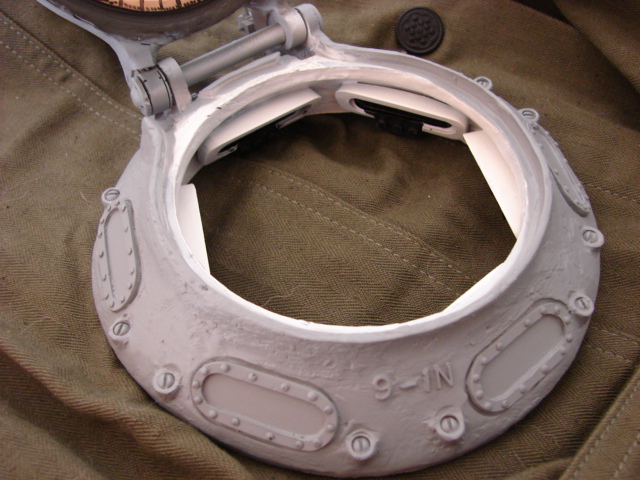
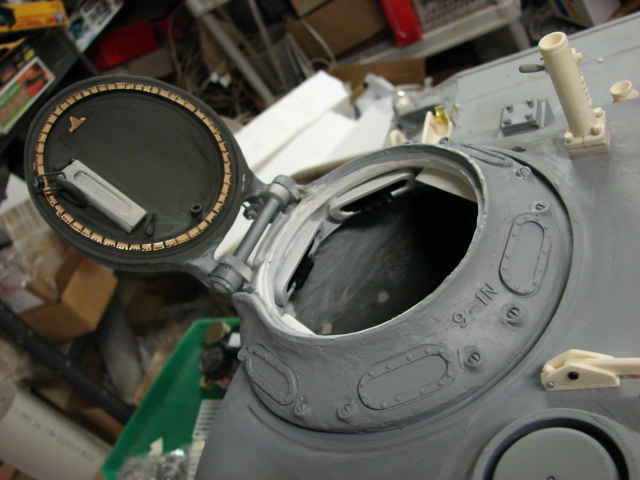
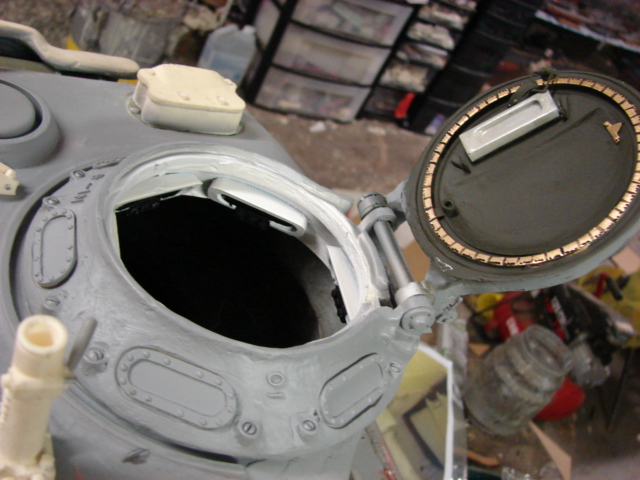
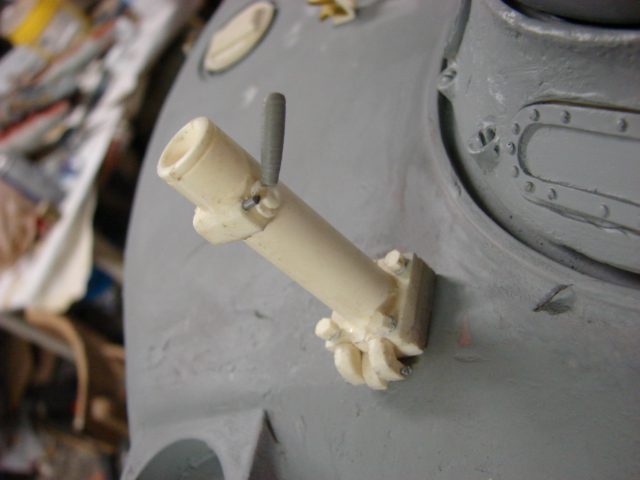
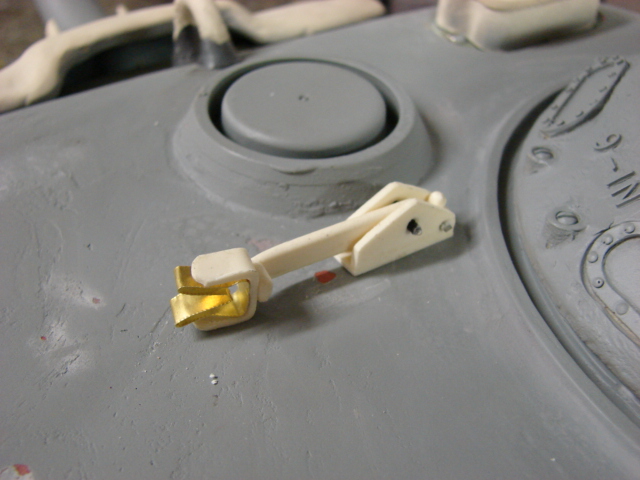
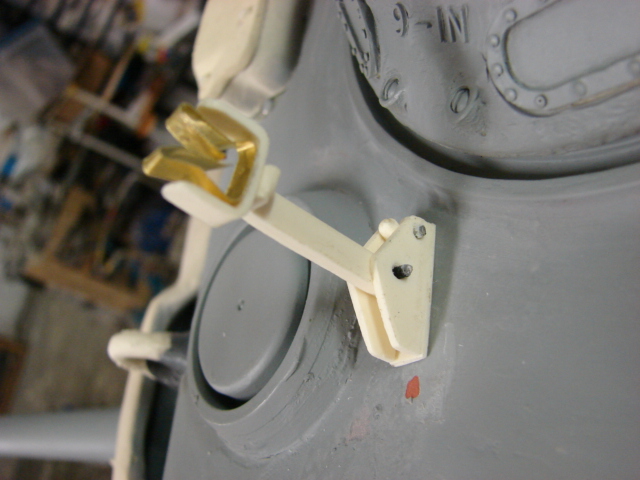
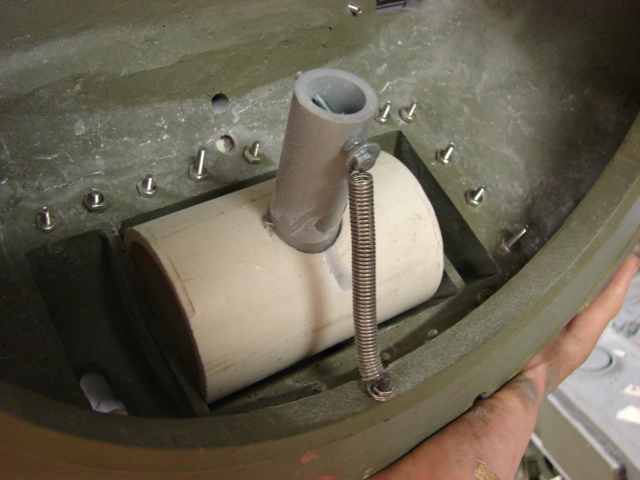
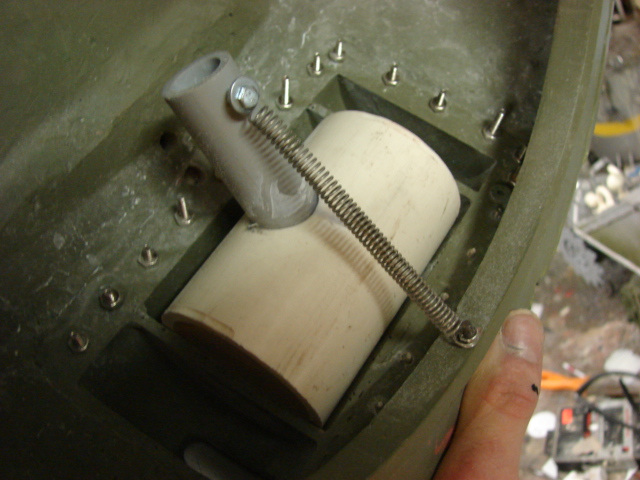
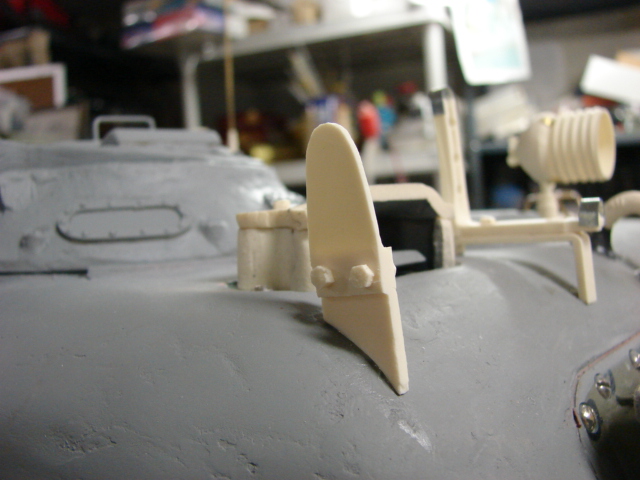
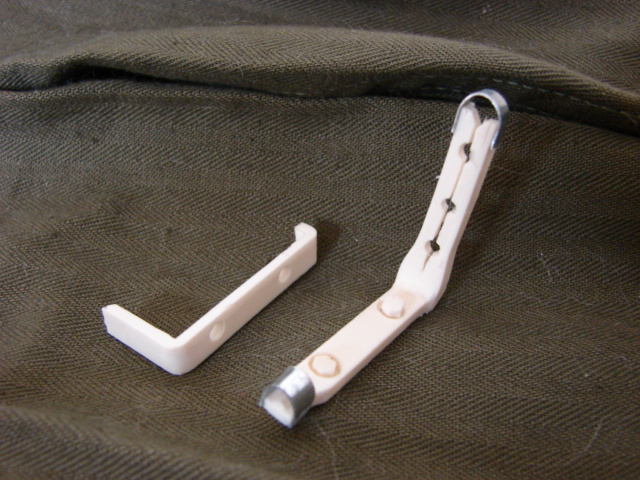
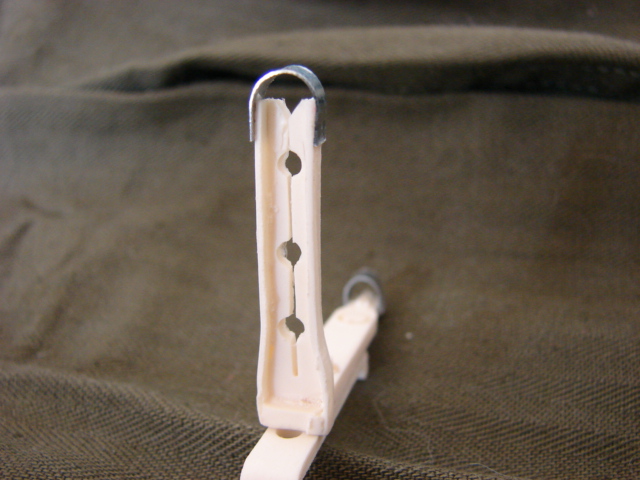
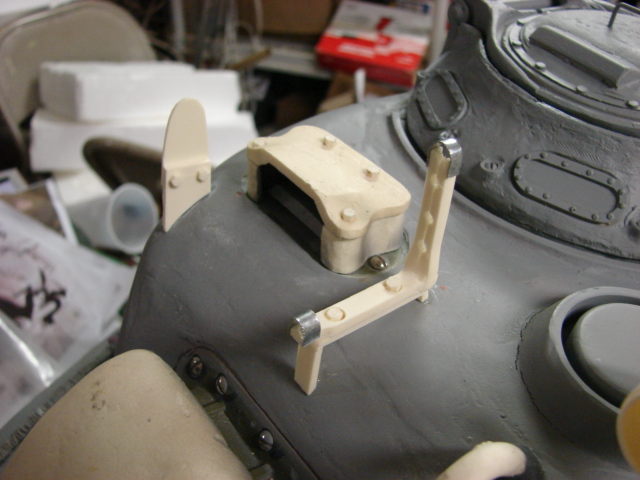
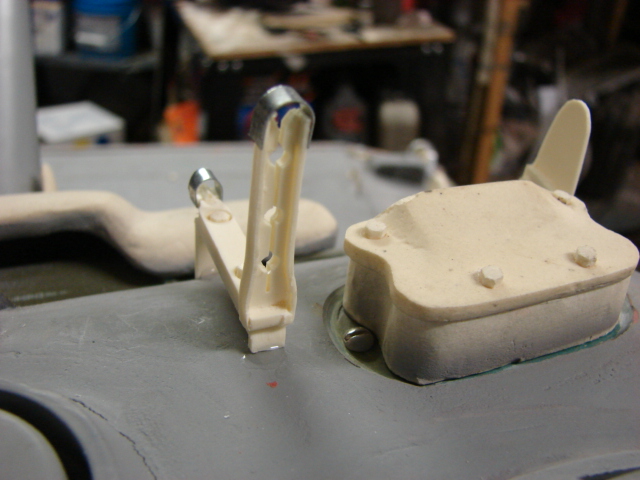
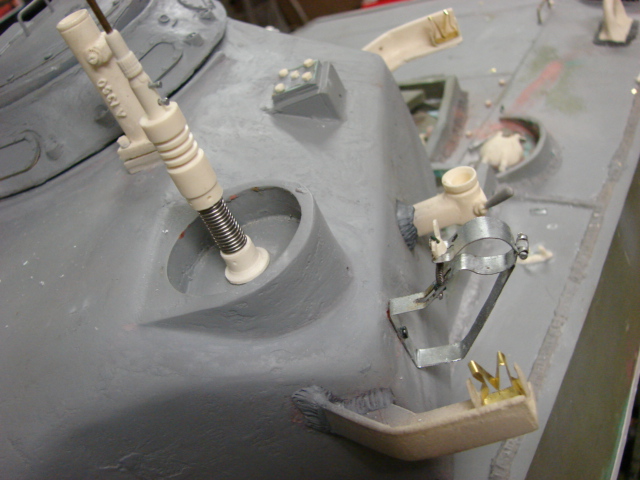
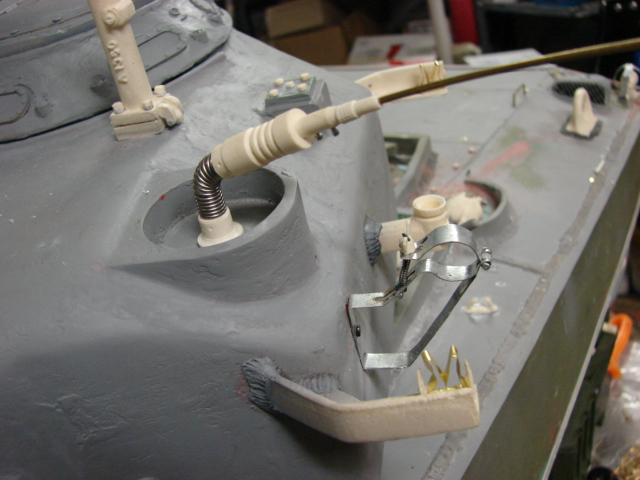
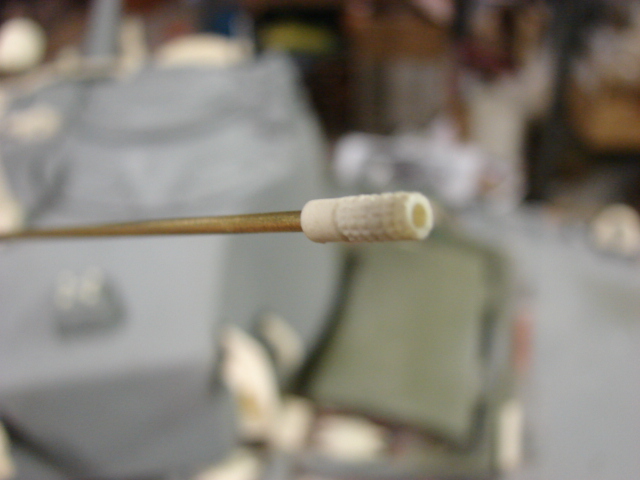
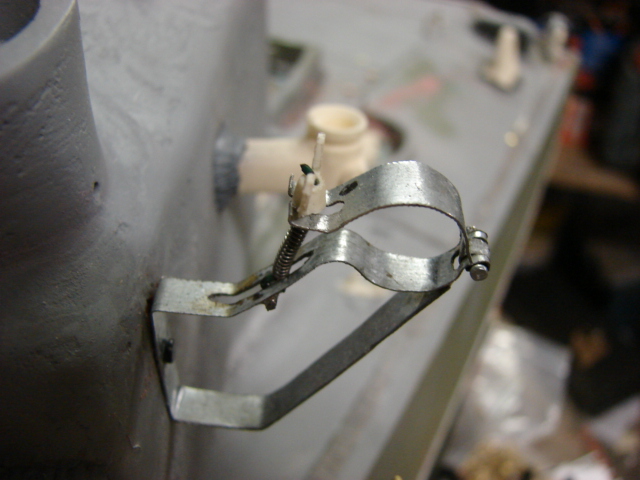
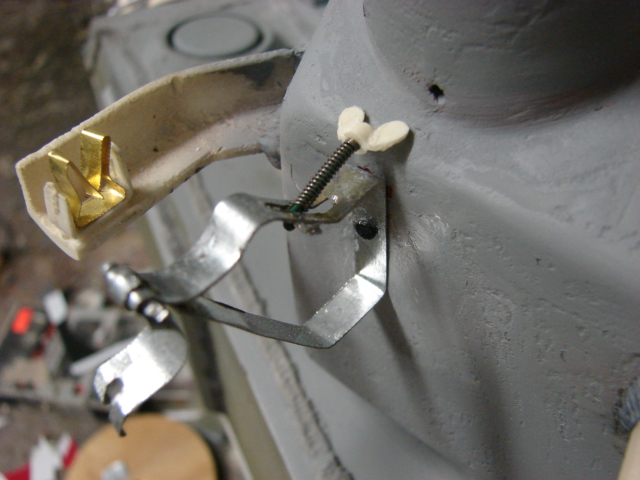
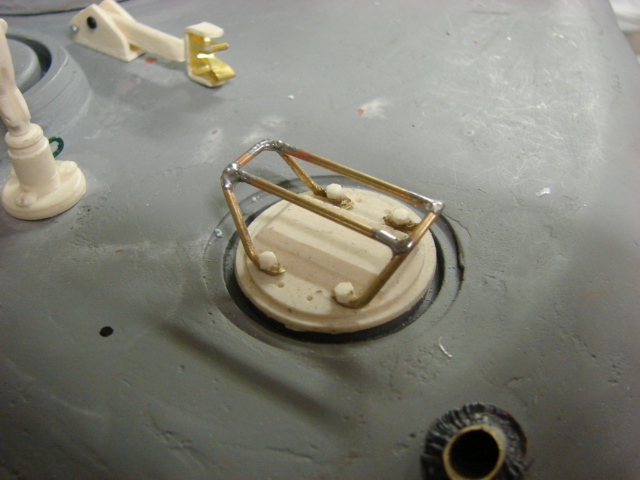
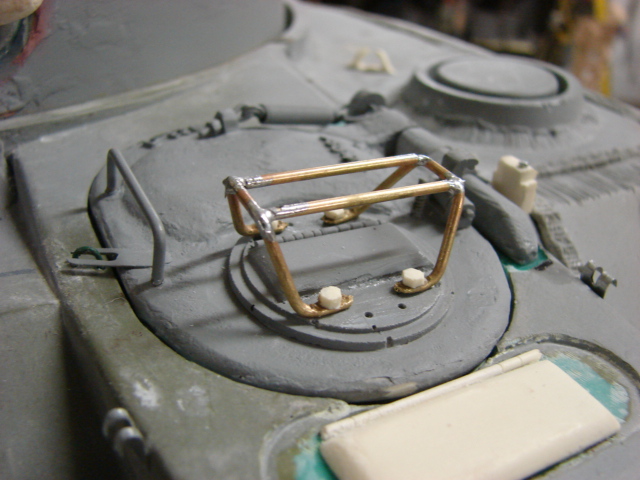
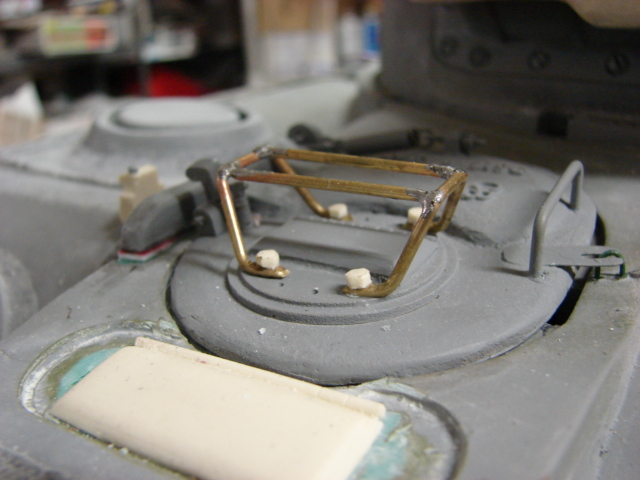
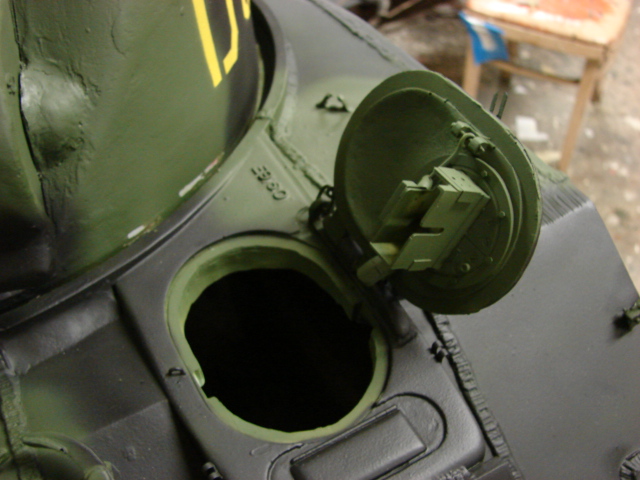
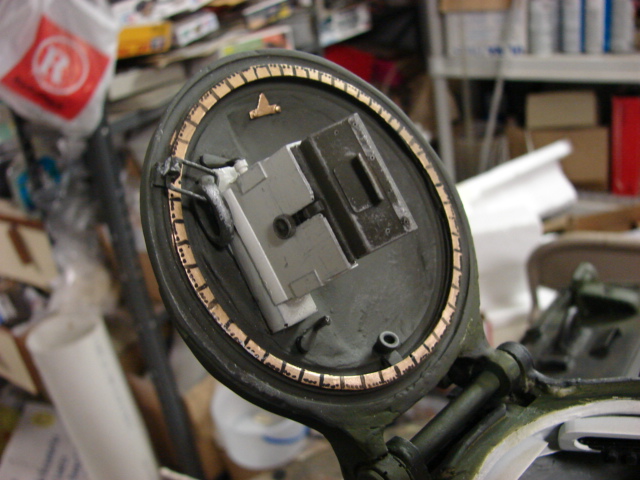
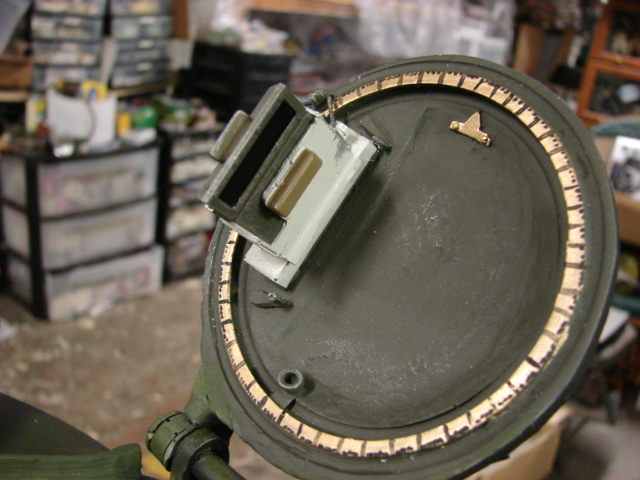
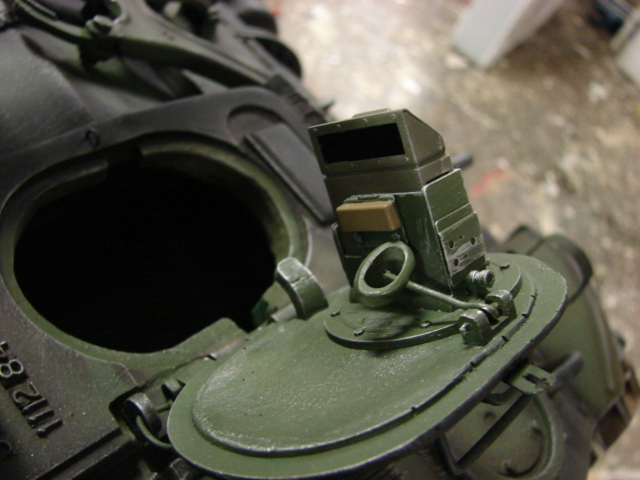
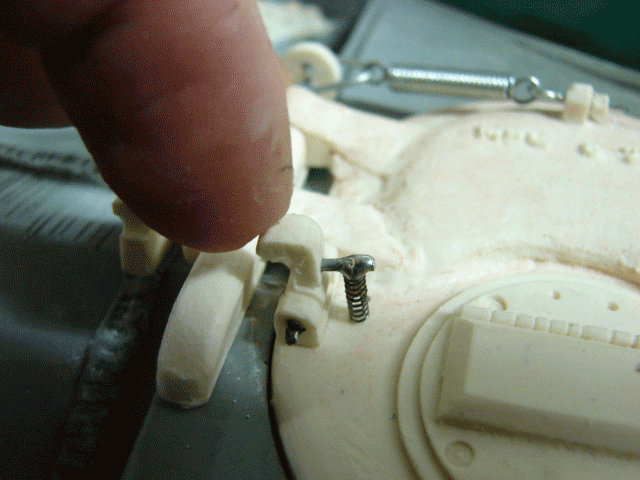
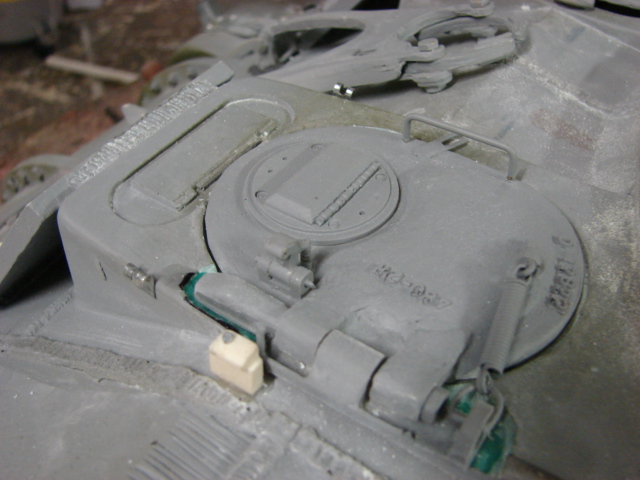
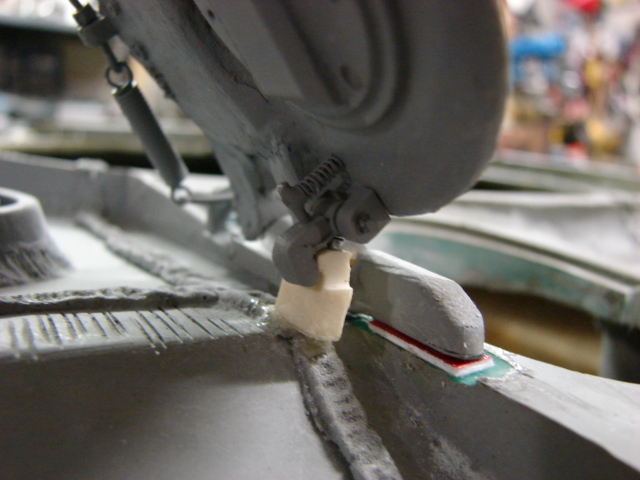
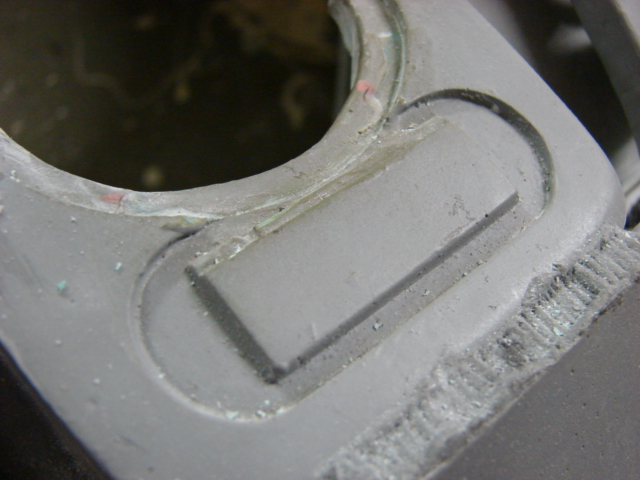
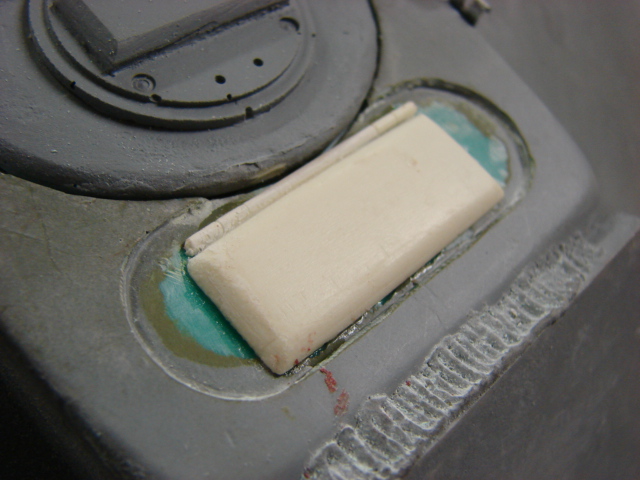
To install the hatches some modifications were made to the tank’s hatch wells. Slots were cut into the wells for the hatch handle, and the counter spring arm. Panzerwerk US periscope bottoms were added to the hatch, and mounts for the pad lock and foul weather driving hood were also added.

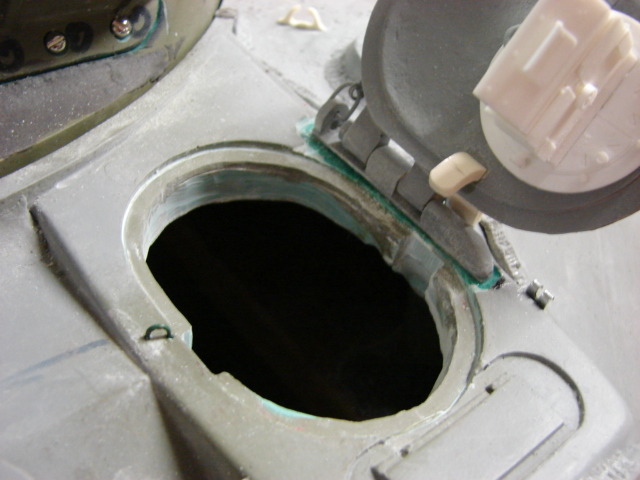
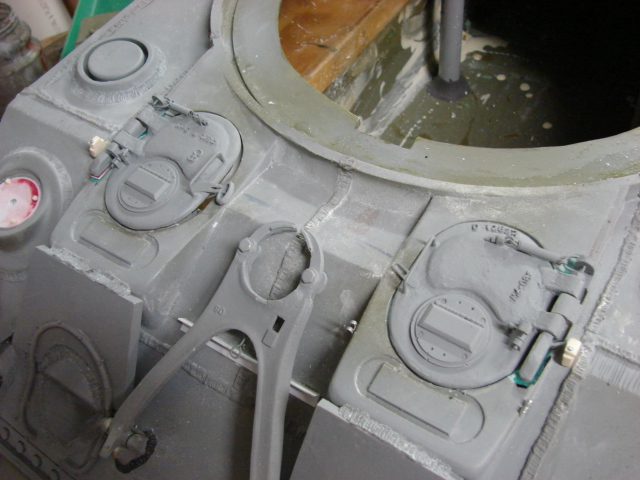
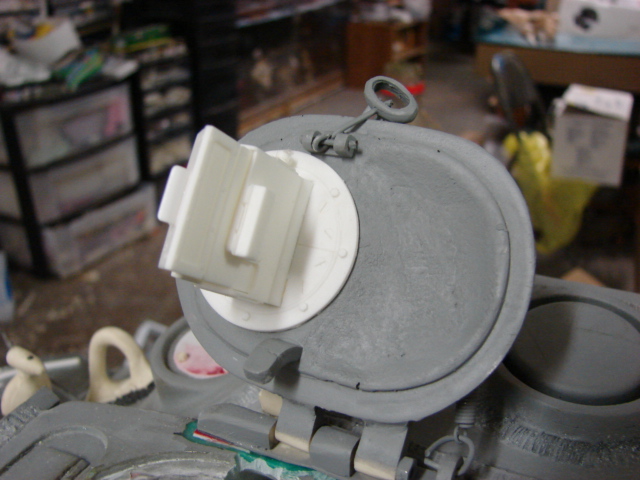
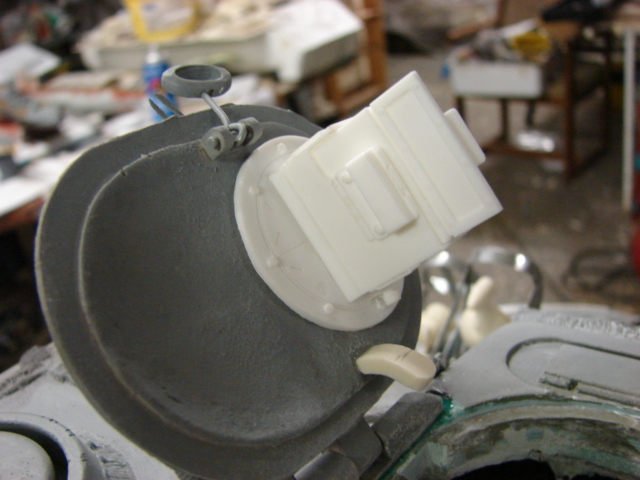
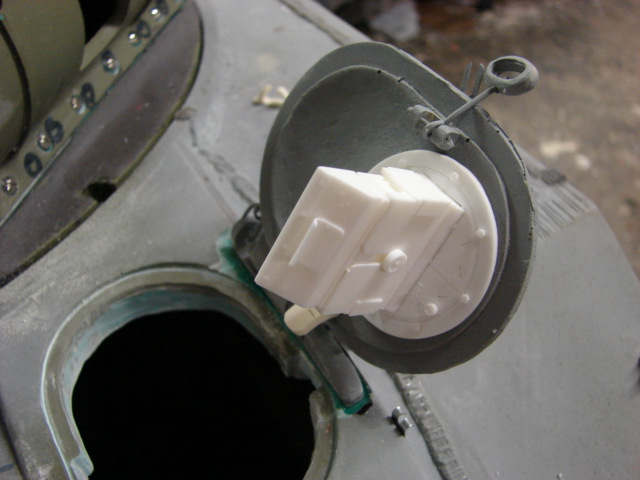
The spring hatch retaining latches are functional and actually lock the hatch in place.

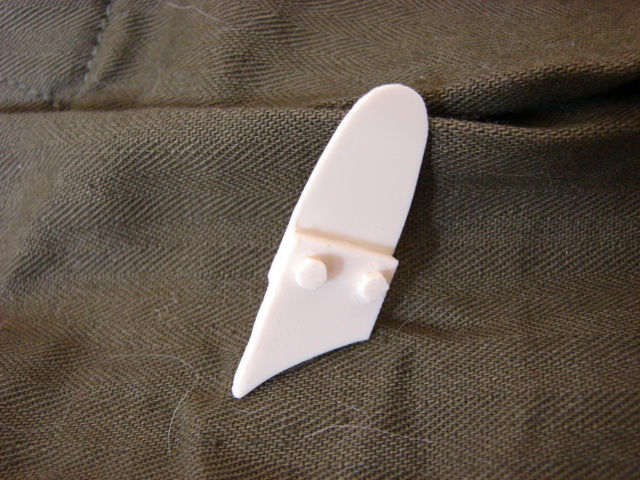
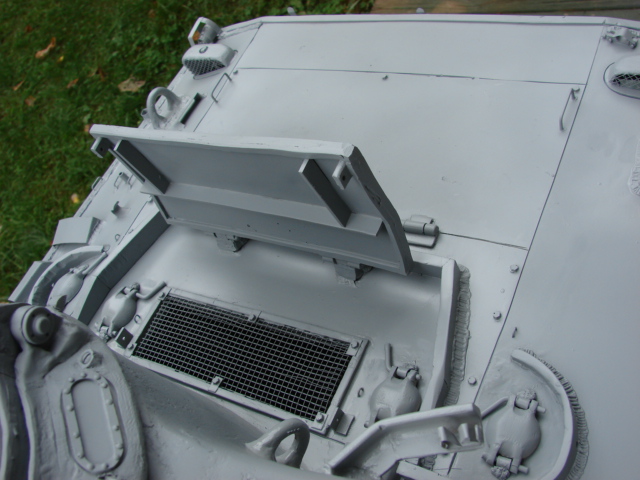
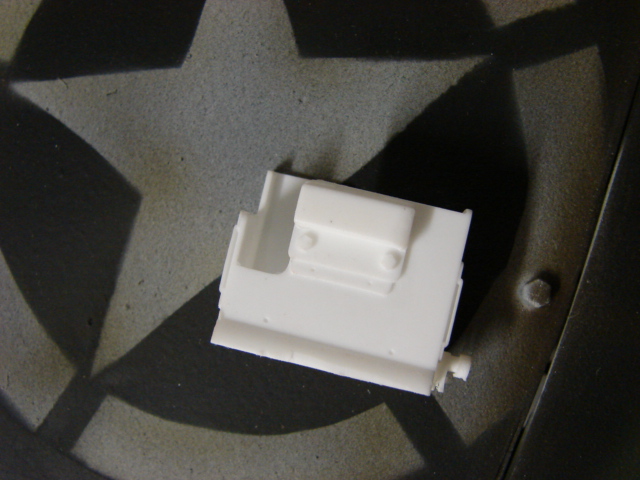
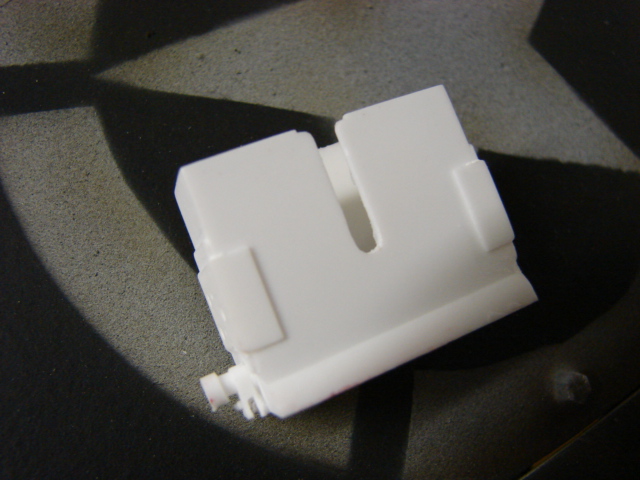
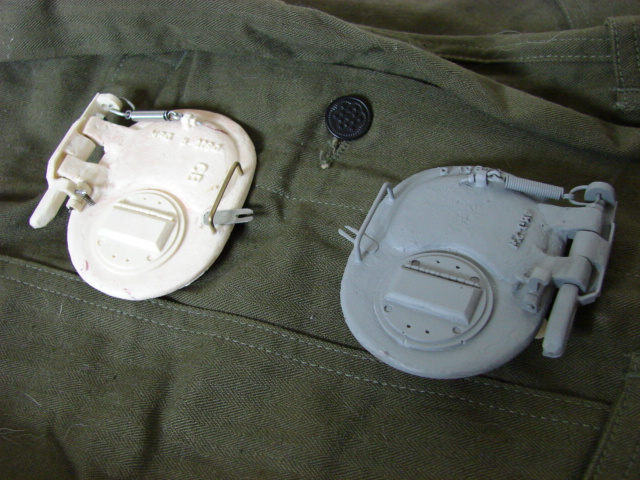
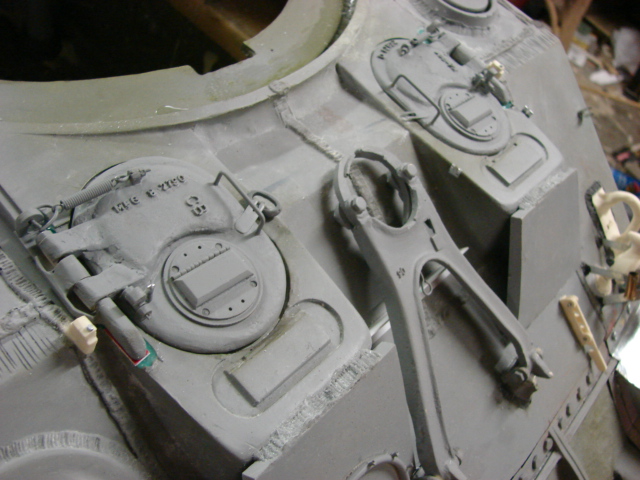
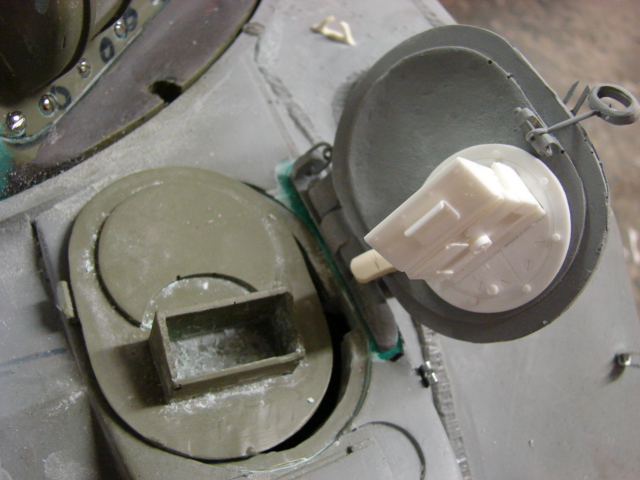
Here is the new hatch compared with the original kit supplied version

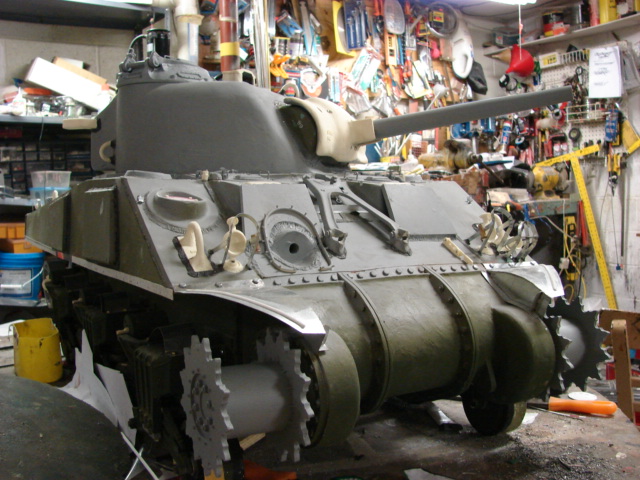
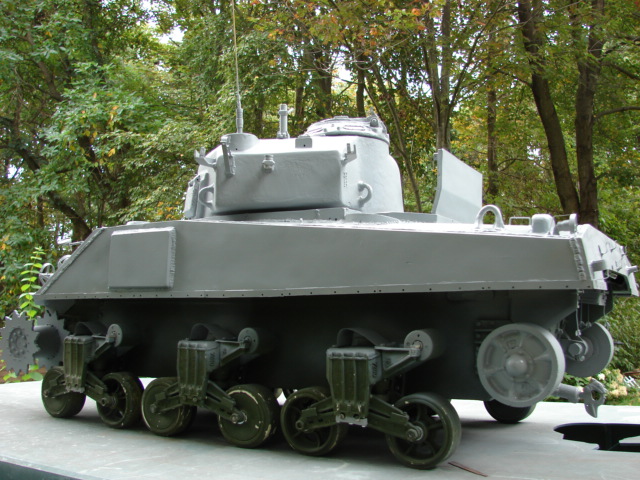
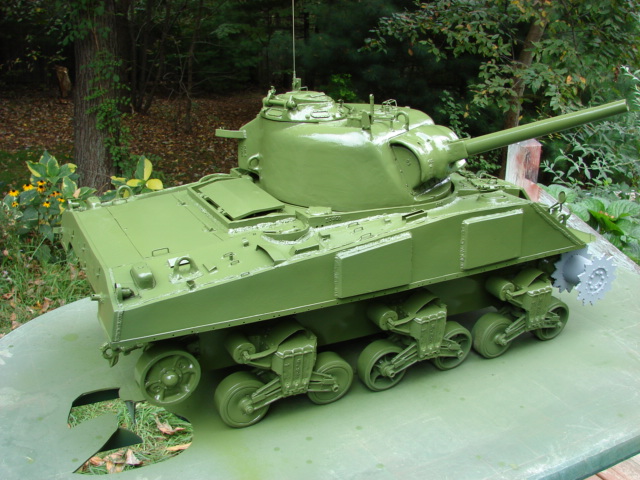
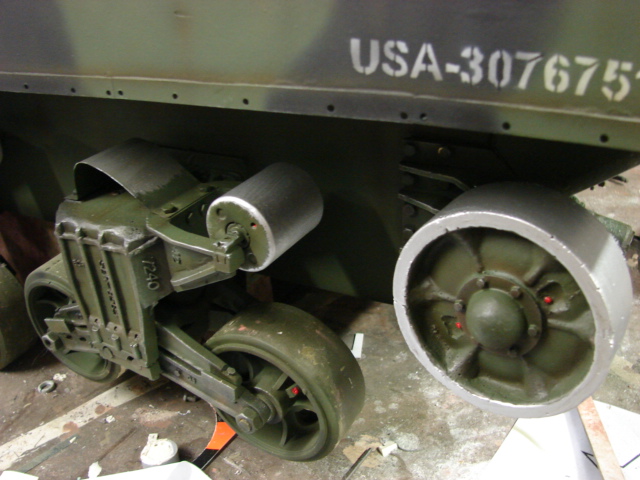
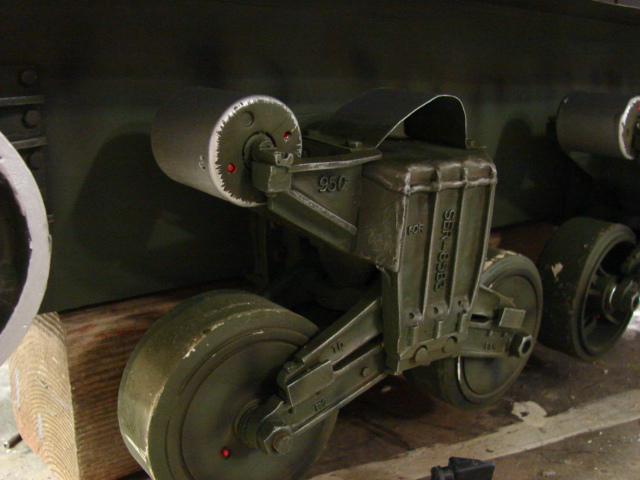
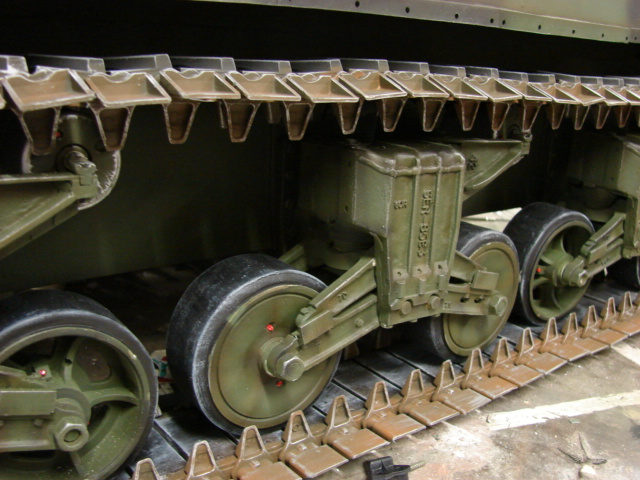
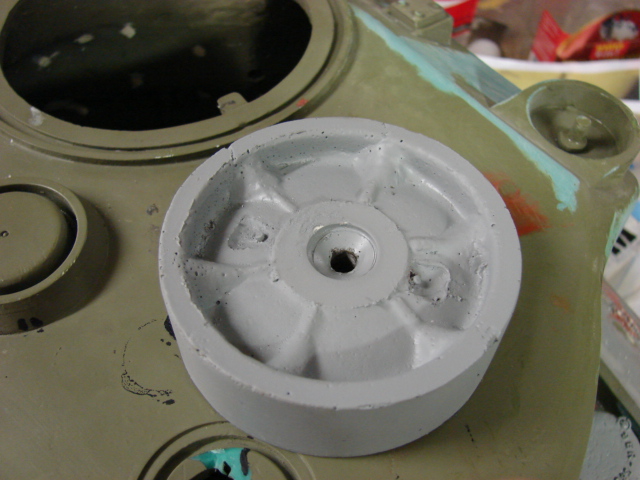
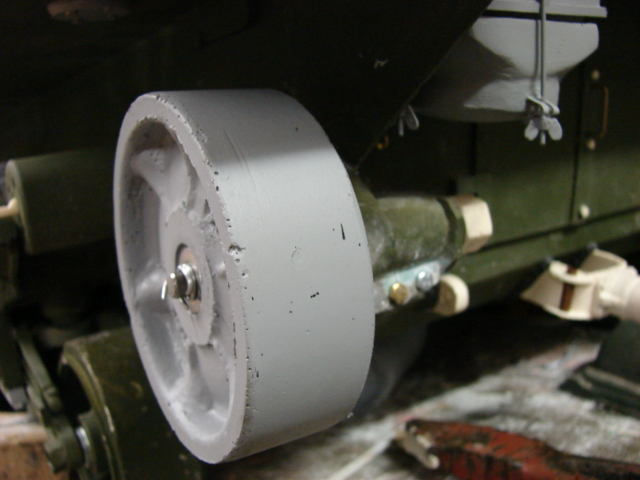
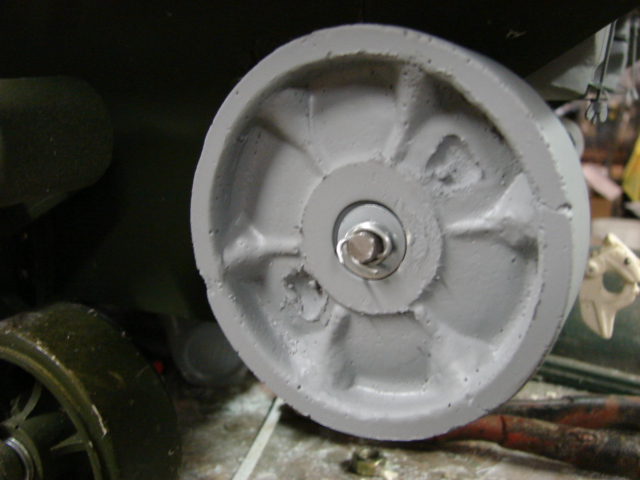
I also installed the tank’s rear idler wheels. The original kit supplied idler wheels were a solid cast resin wheel, with nice molded in detailing. When I acquired the tank hull the running gear was not supplied so alternative wheels were used. For the replacement wheels I used a set of Hollow Rotomoled VVSS idler wheels from Plastic Panzers. The wheels were reworked and modified to fit onto the viper idler mounts.

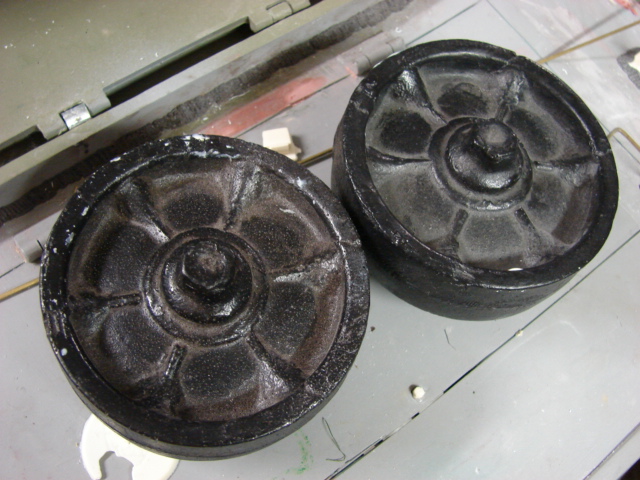
To solidify the wheels I filled them in with casting resin. Now that the wheels are solid I can begin to machine them.

The molded in hub caps were removed and Grease plug inlets were milled into the wheel. Replacement hub caps will be added shortly.

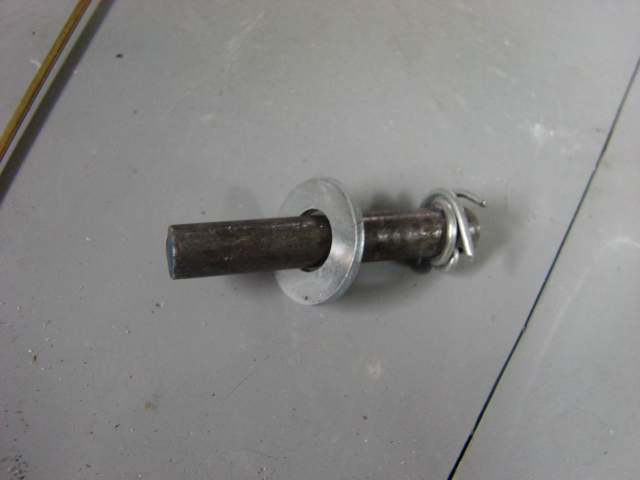
Like on the drive sprocket I had to modify the viper wheel Axel, by drilling out the threaded hole to 1/4 of an inch.

The new Axel was made out of a 1/4 steel rod. The rod had a hole drilled into it and a lock pin and washer were added. This keeps the licked to the Axel, but also allows it to spin freely.

On the tank’s front driver’s hood I replaced the molded in bow periscopes with a set of my resin ones.

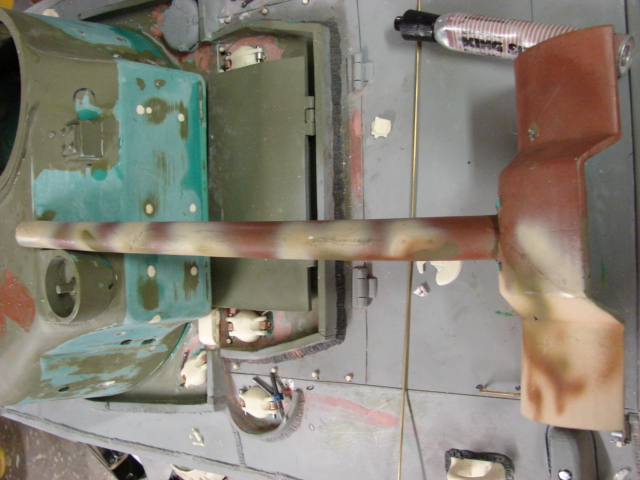
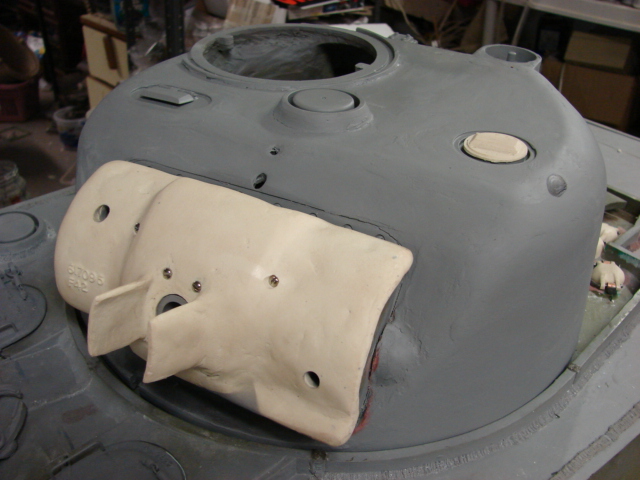
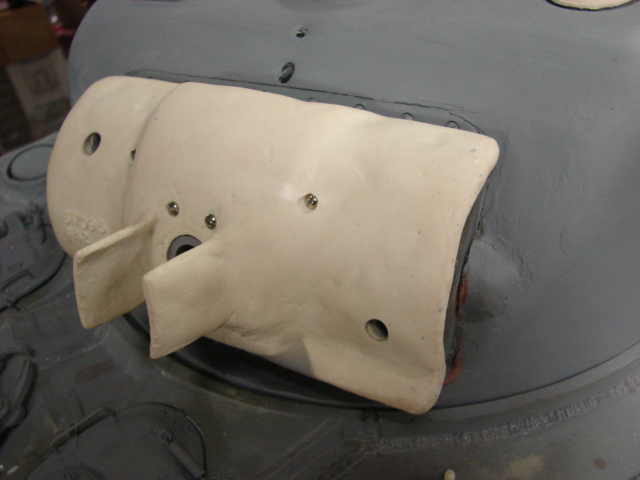
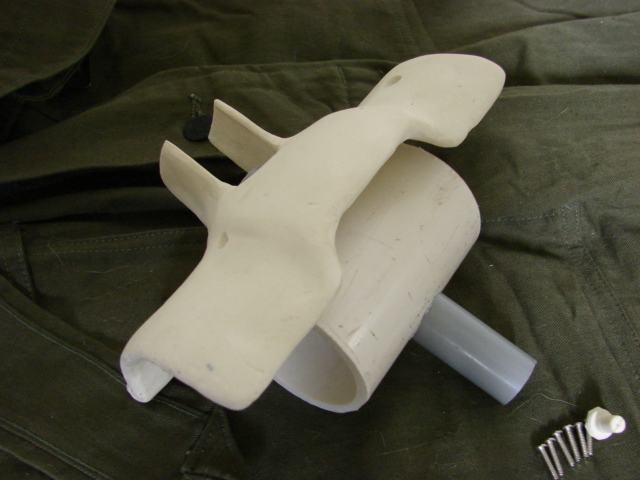
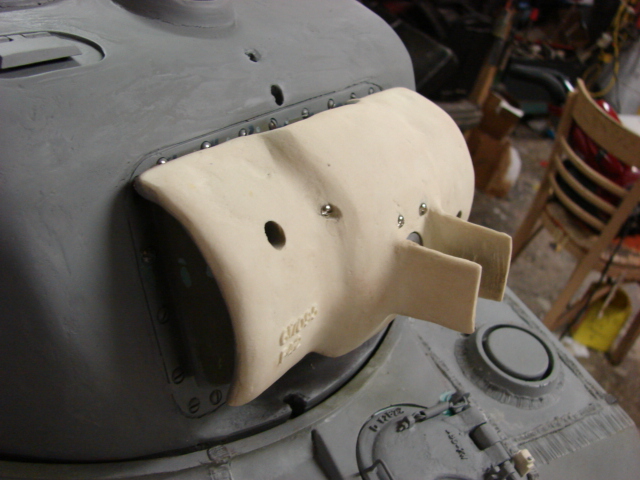
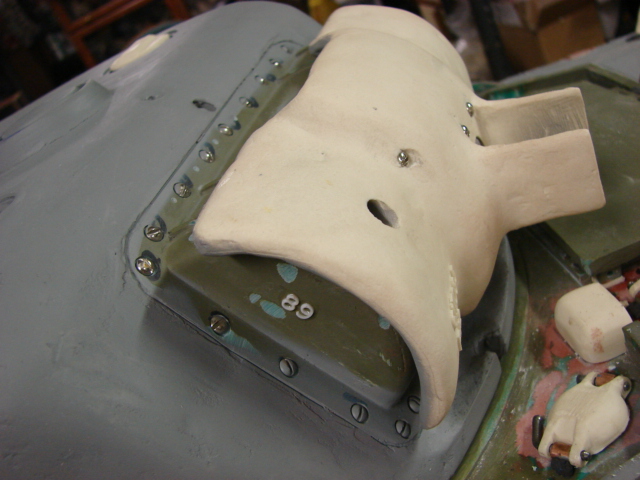
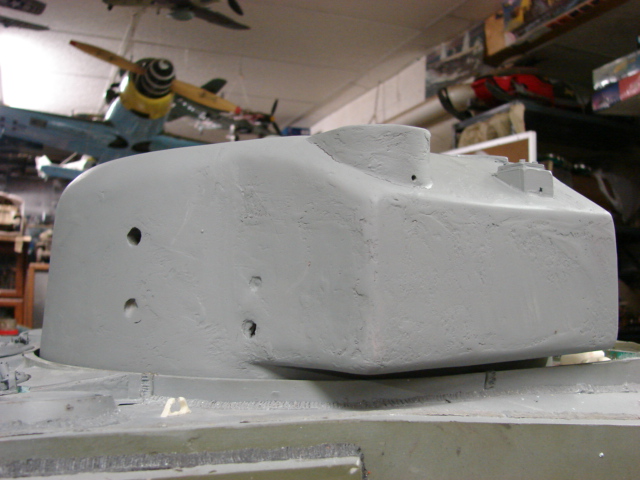
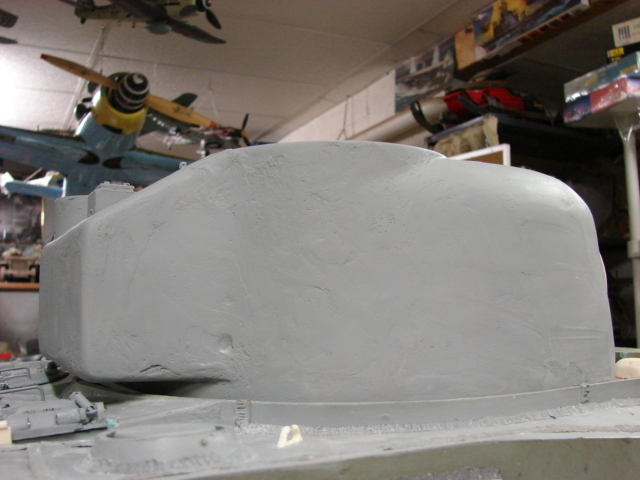
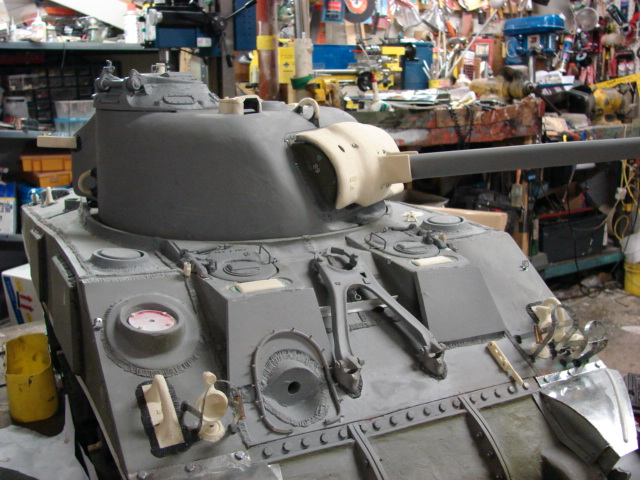
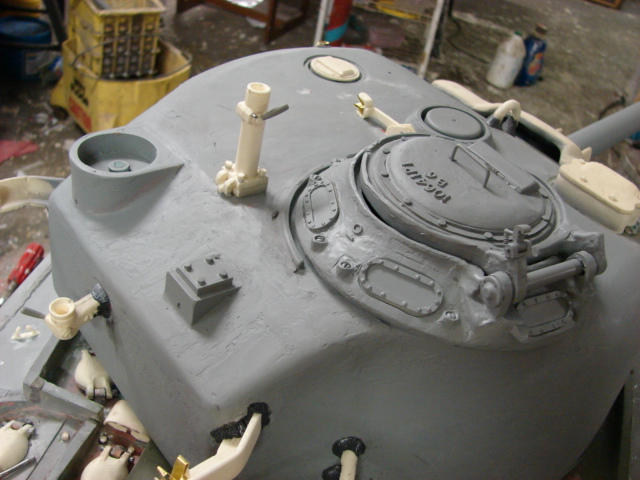
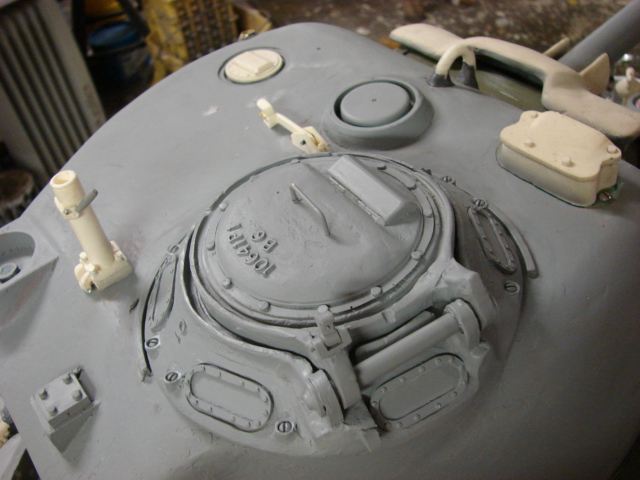
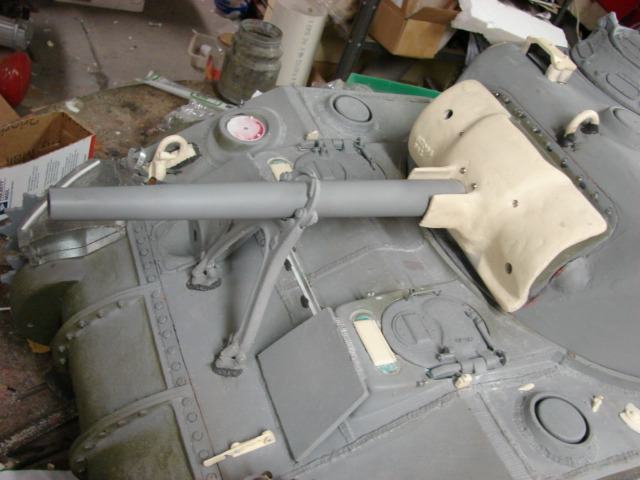
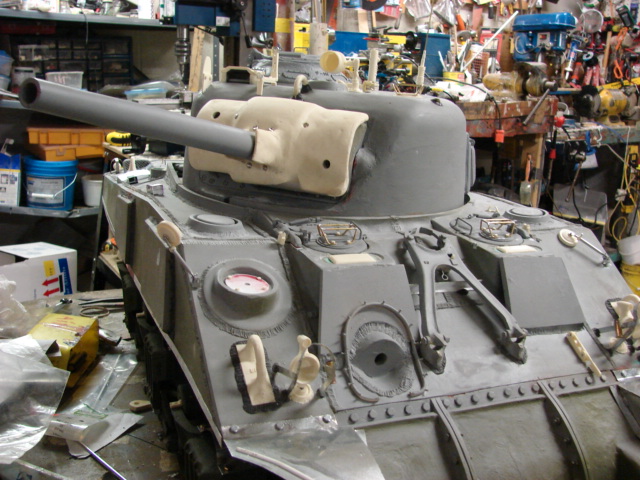
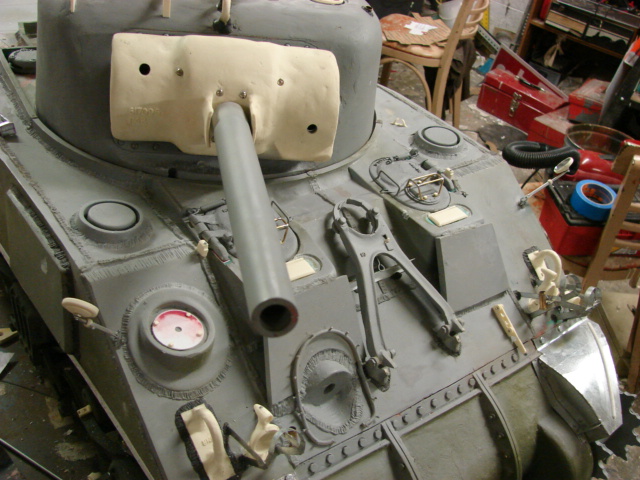
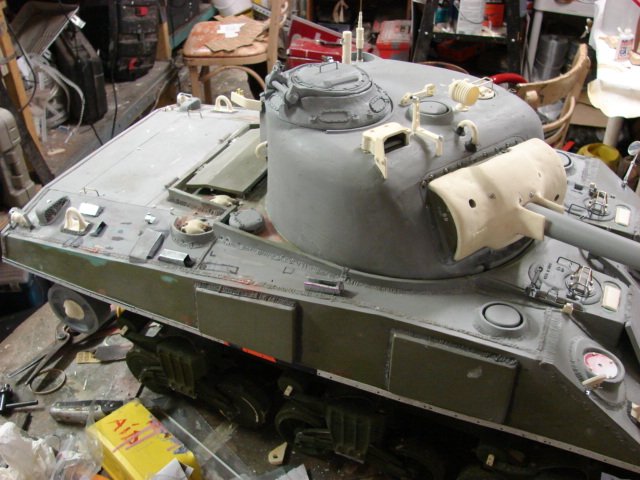
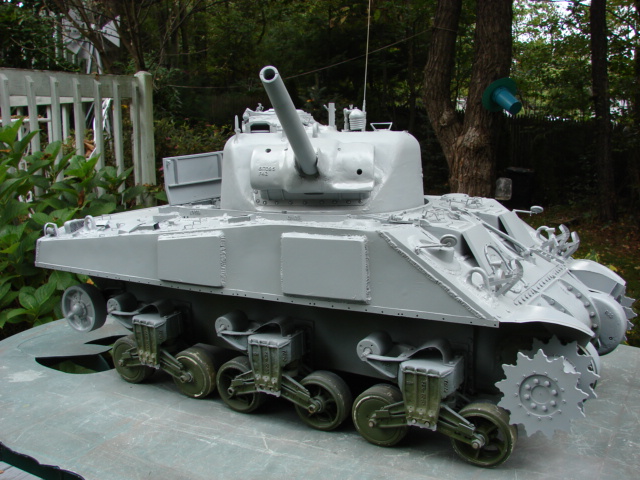
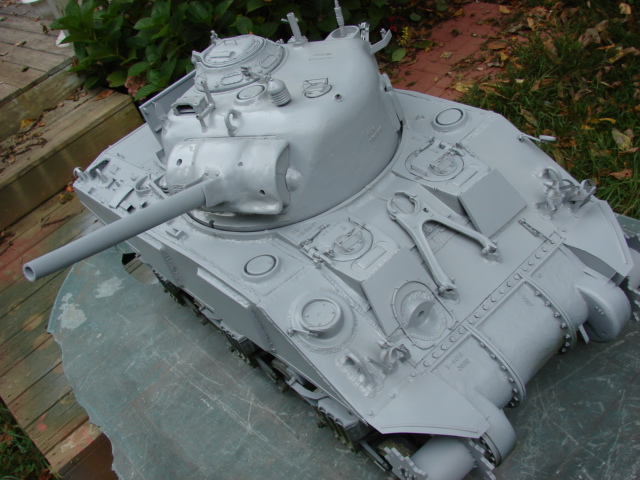
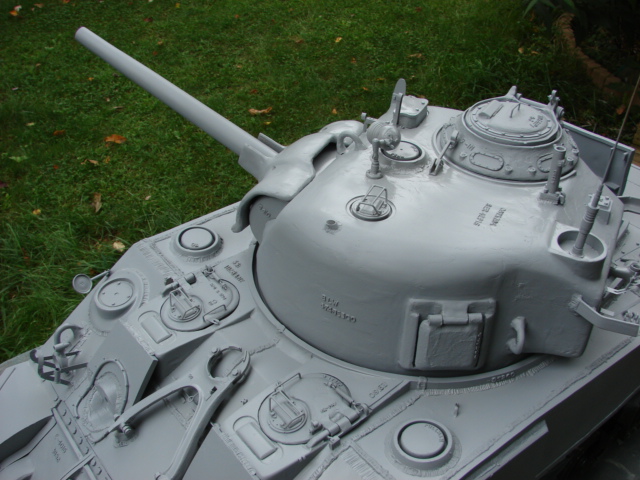
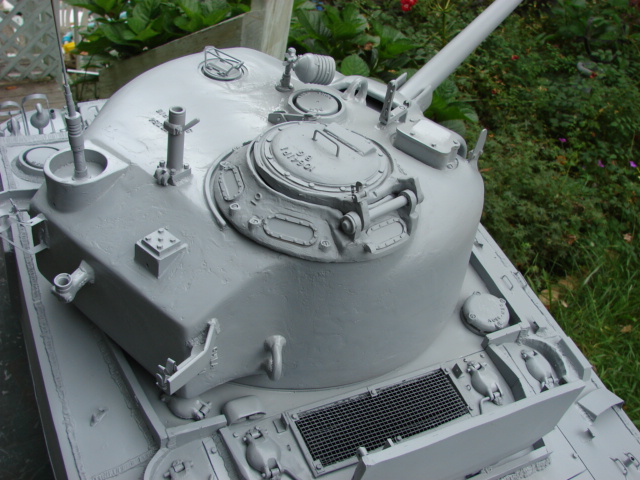
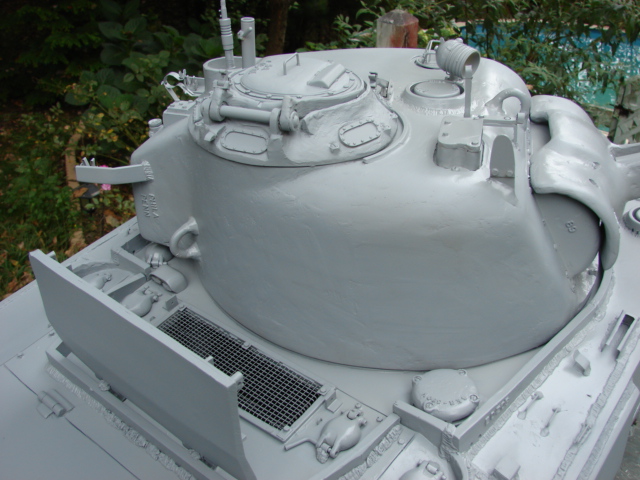
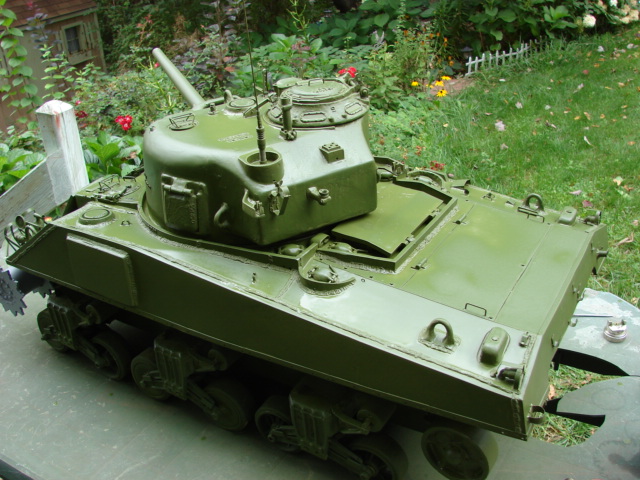
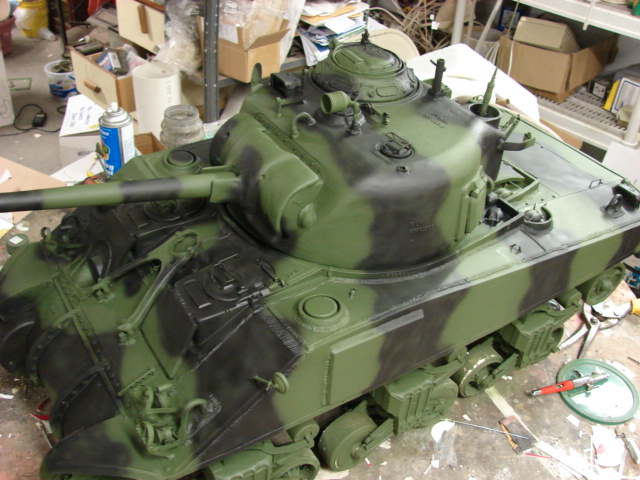
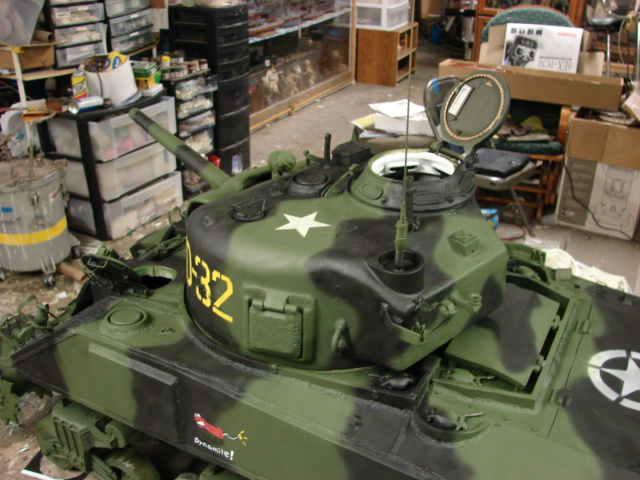
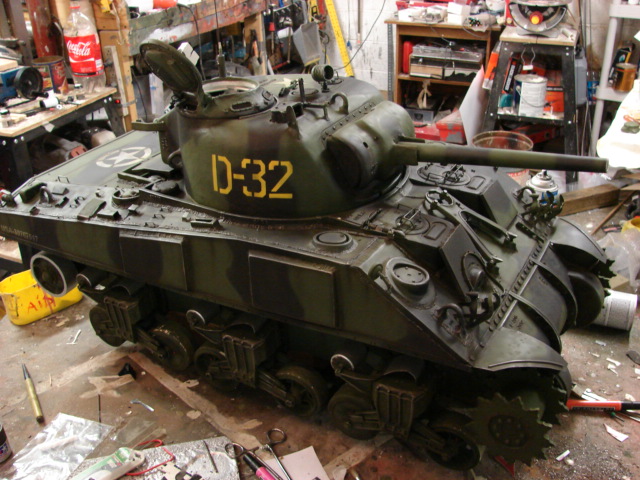
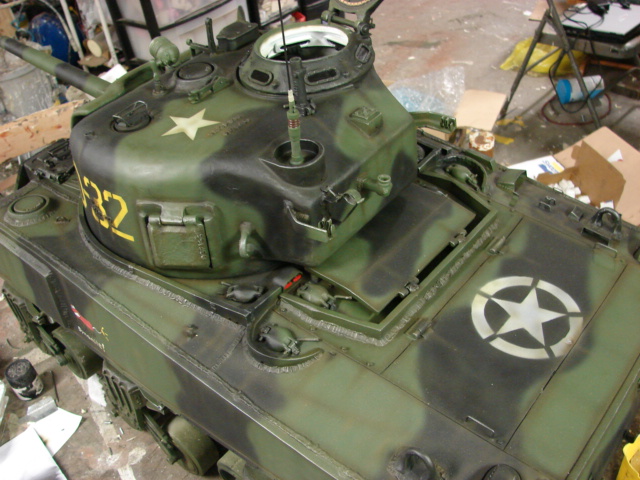
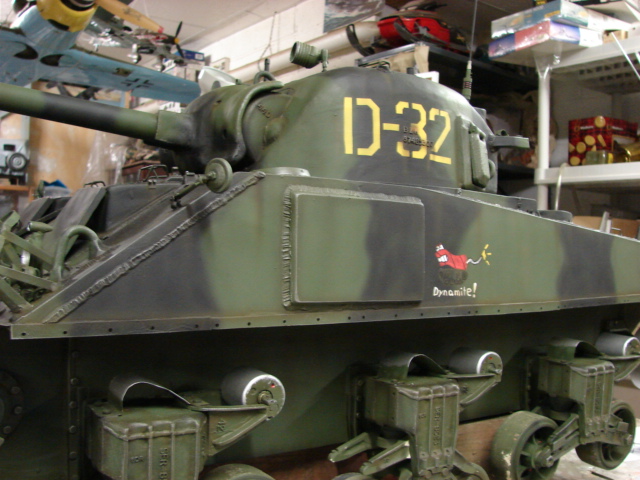
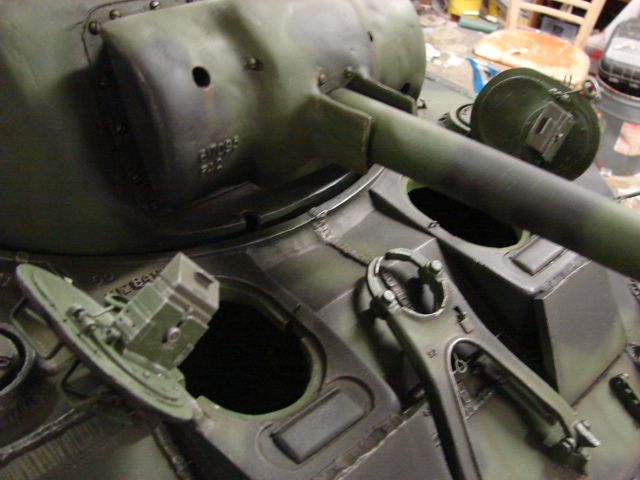
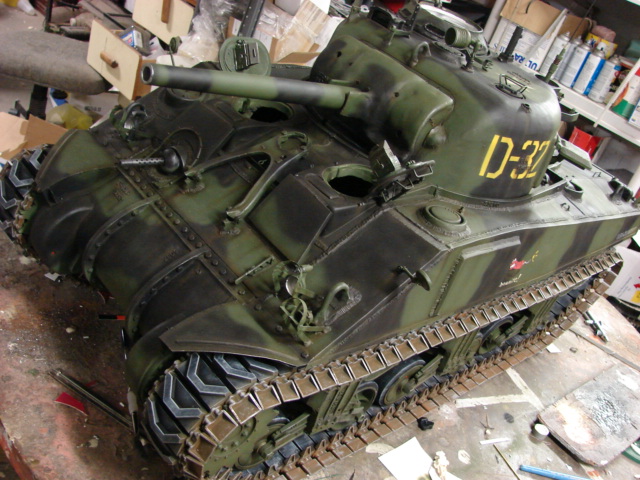
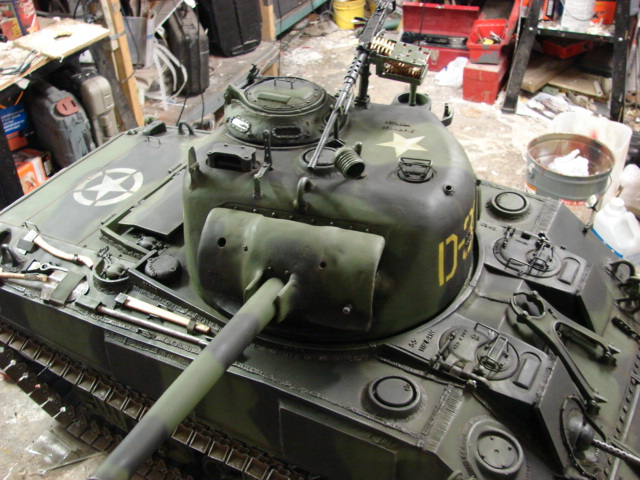
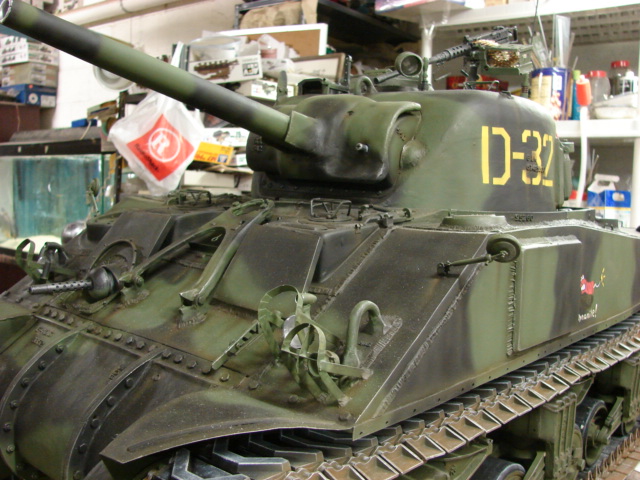
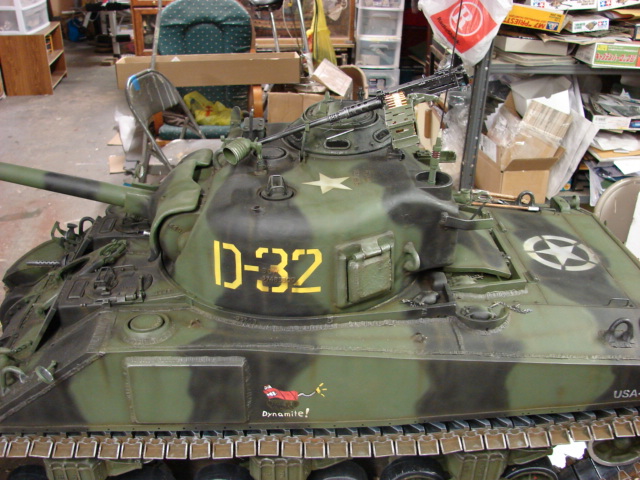
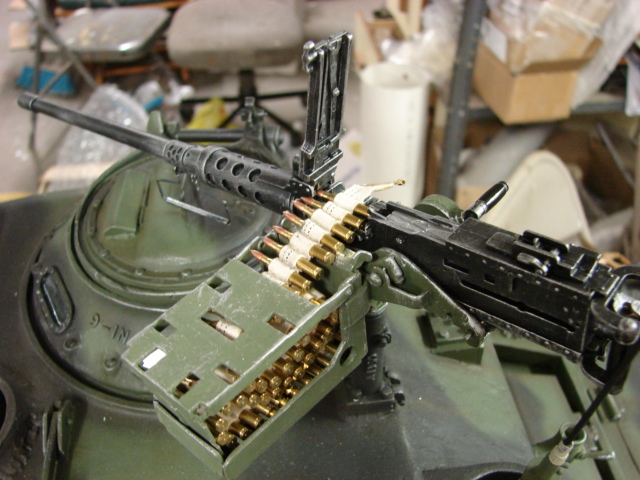
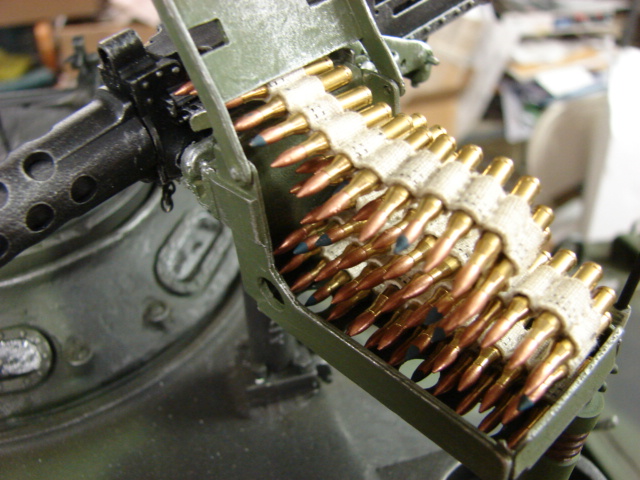
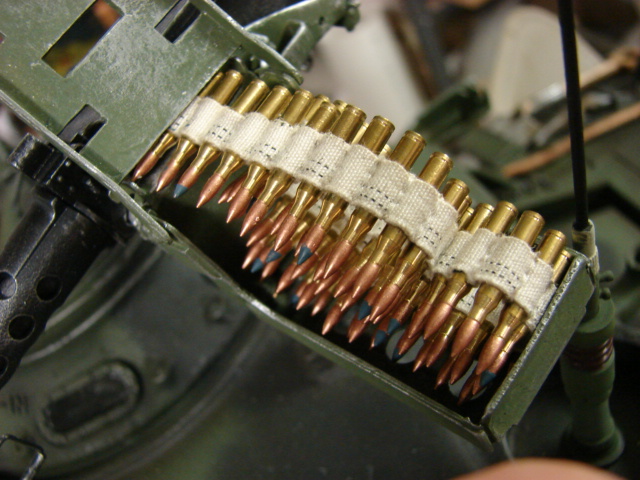
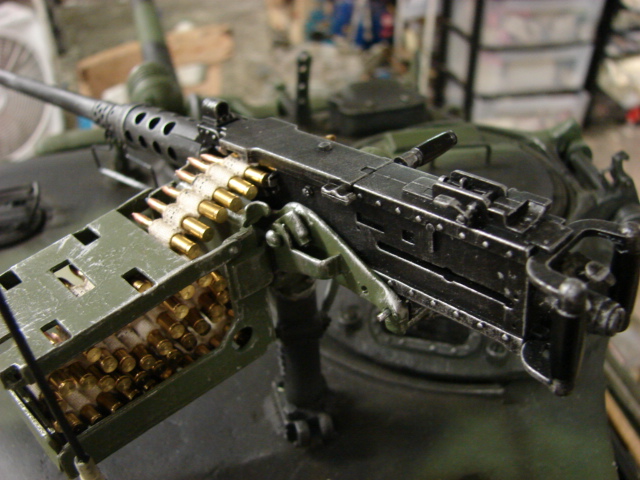
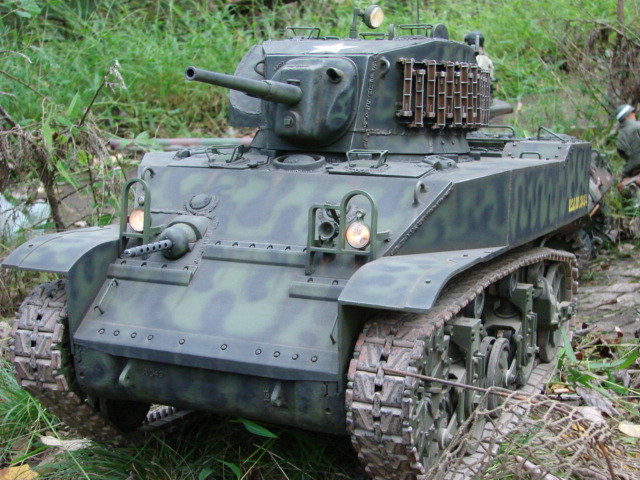
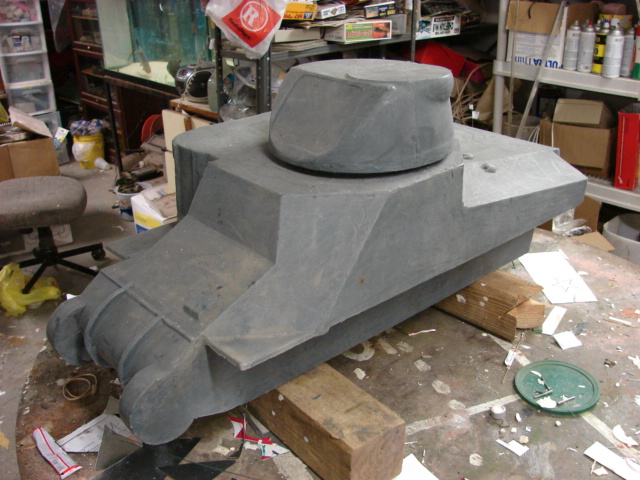
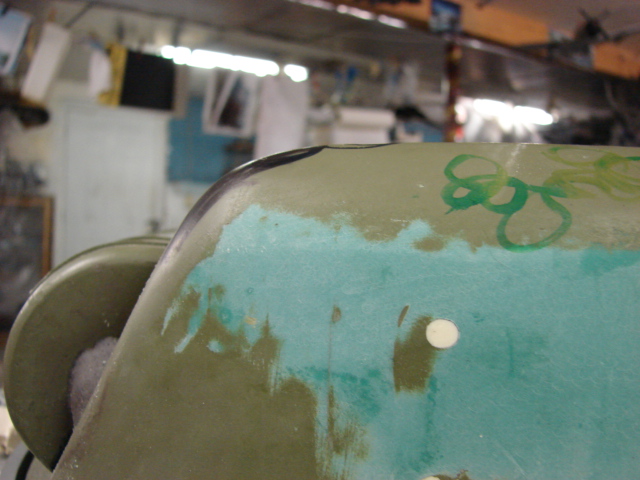
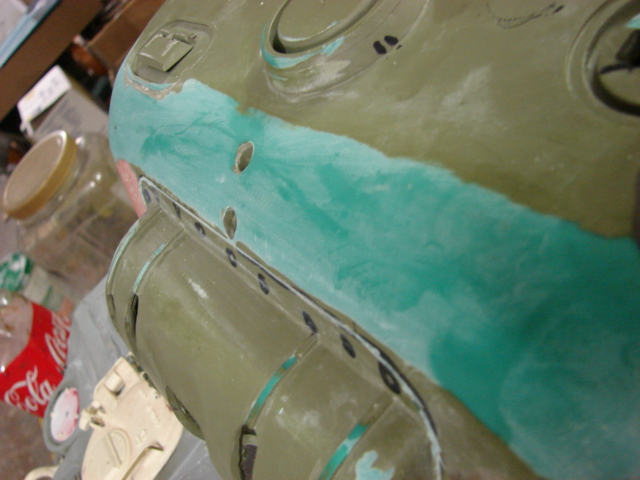
I have also started working on the tank’s turret. It has been brought to my attention that the front of the stock viper turret is too blunt and needed to be reworked.

BEFORE

AFTER

The Mantlet drum was reworked. The seams where the drum meets the turret were added along with the slotted screws. 
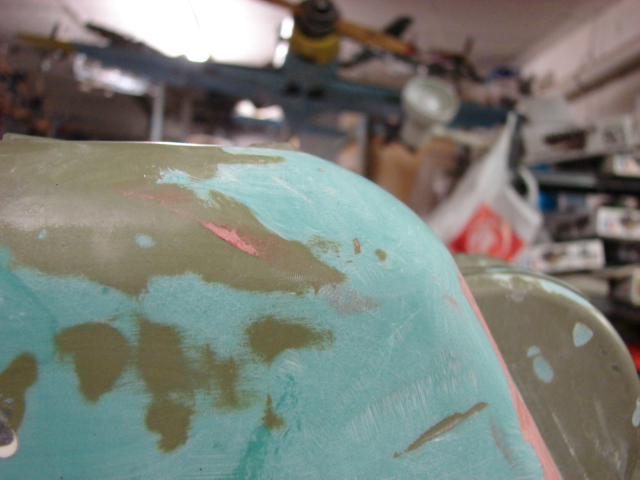
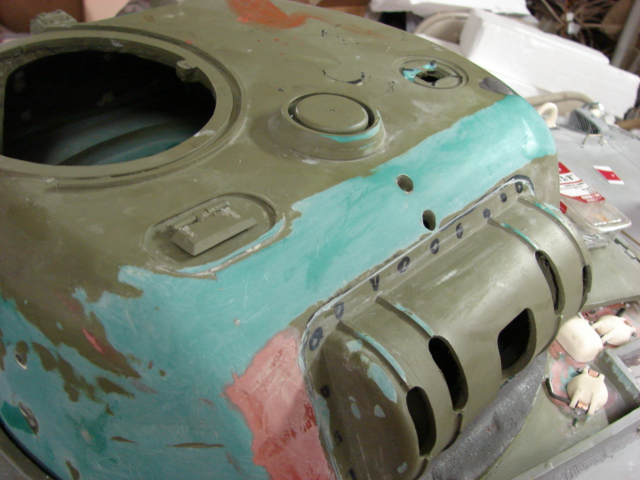
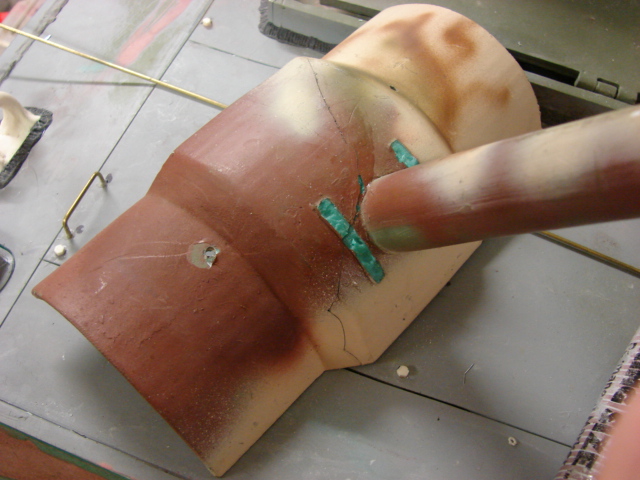
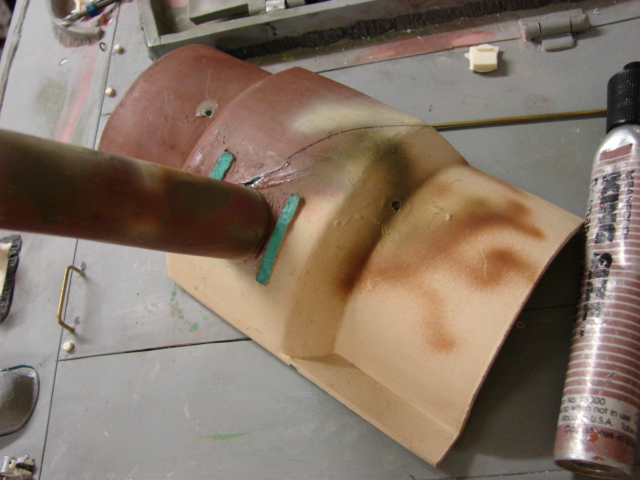
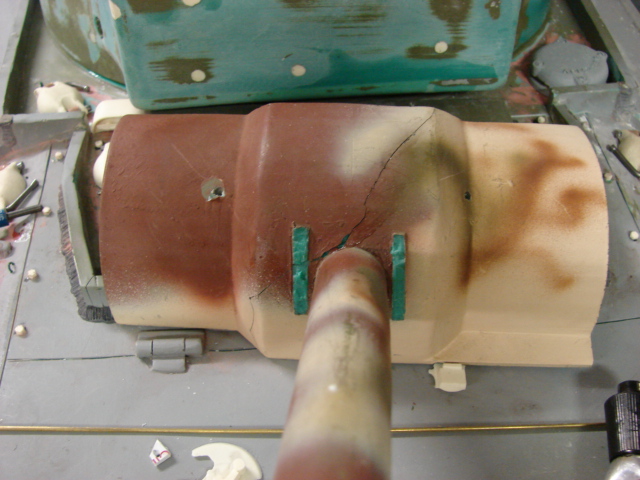
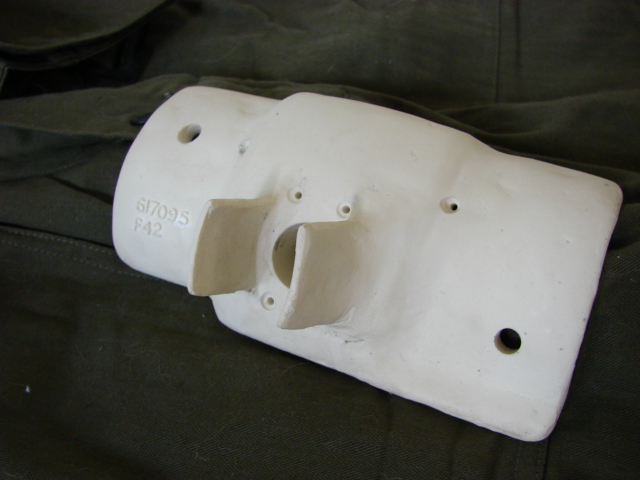
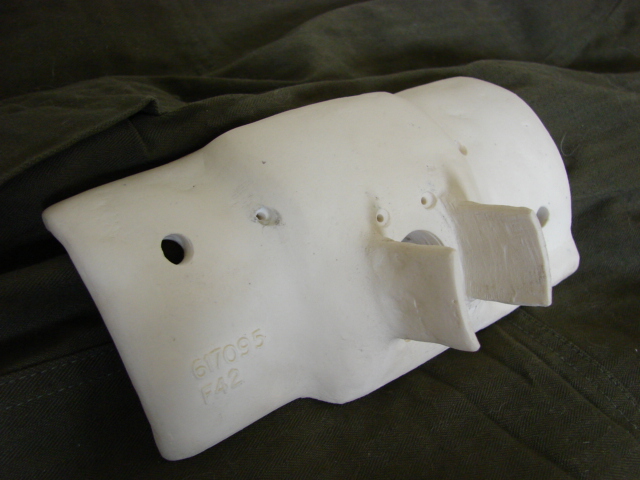
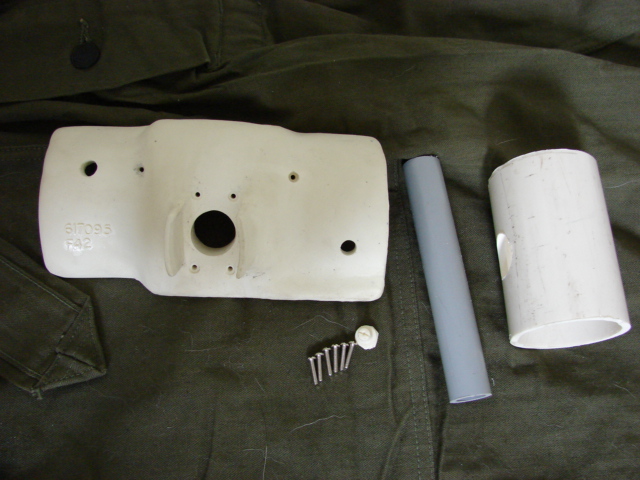
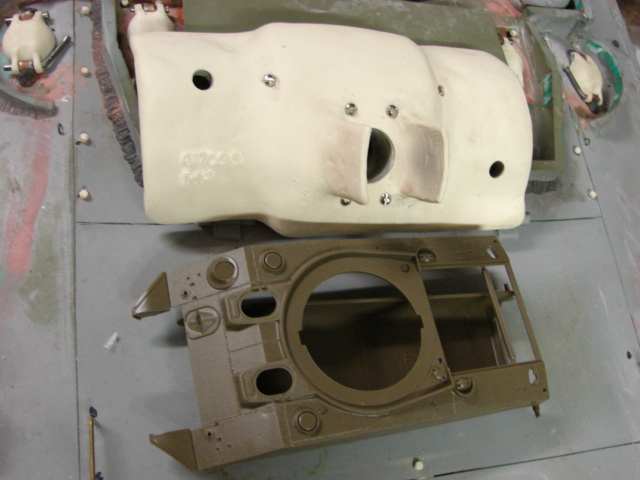
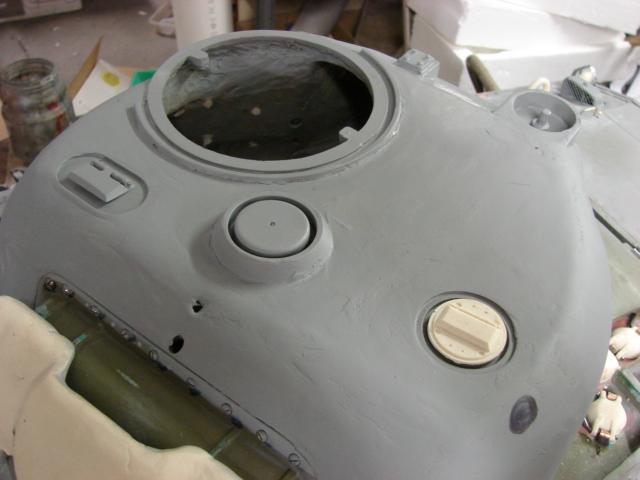
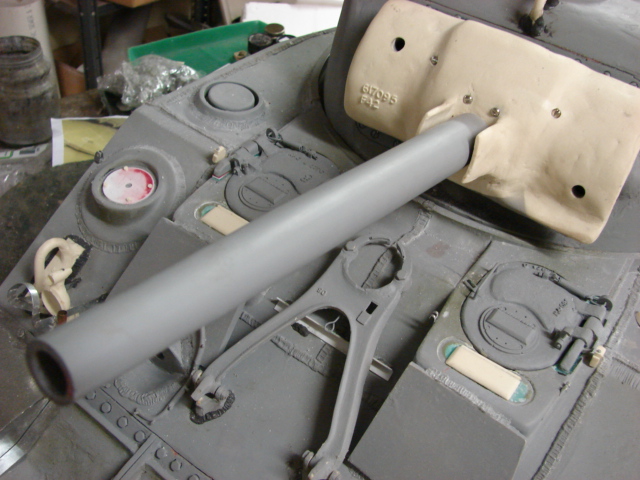
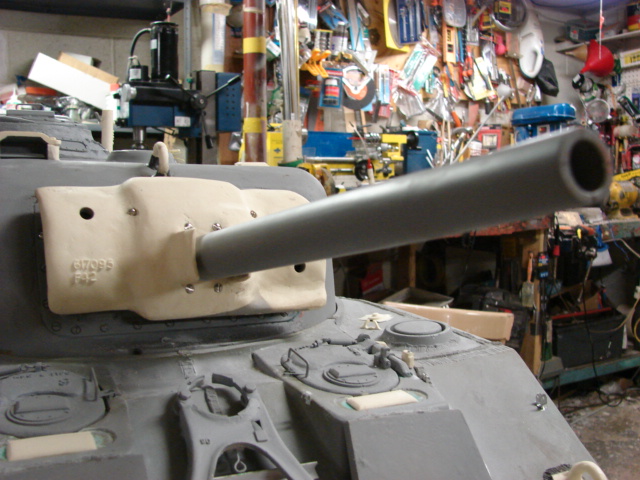
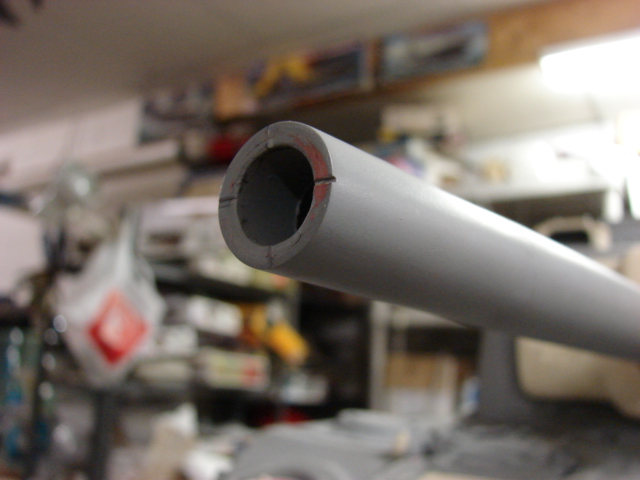
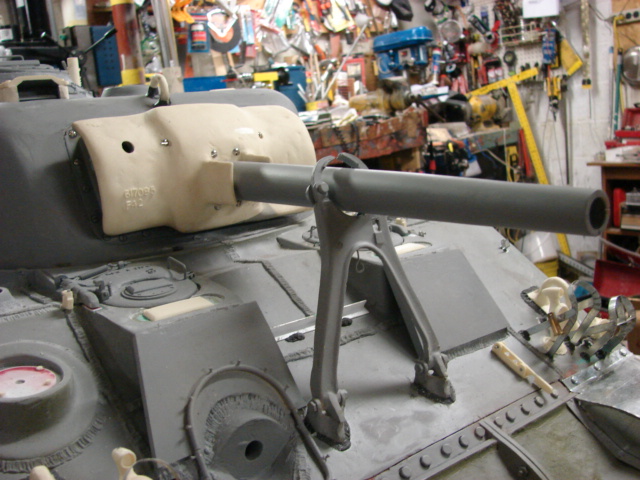
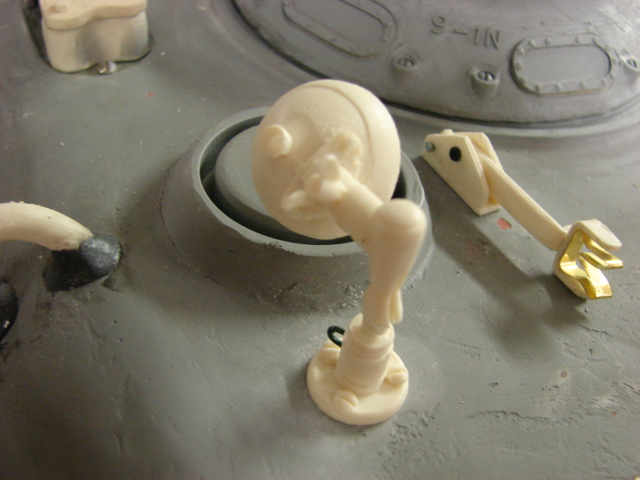
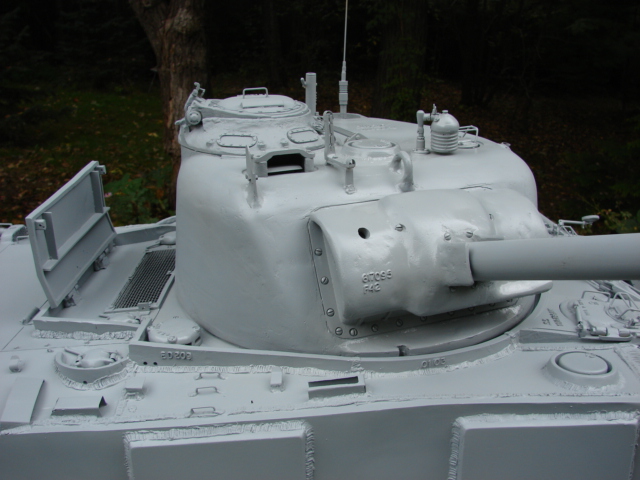
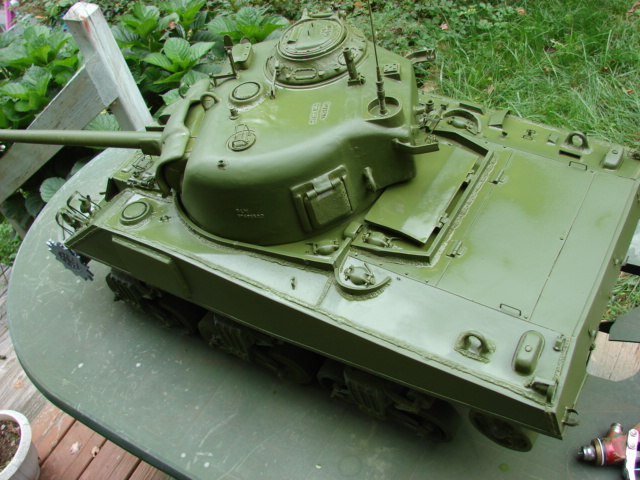
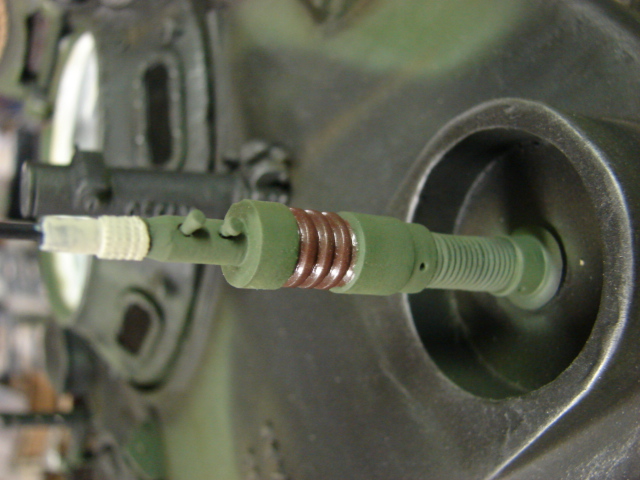
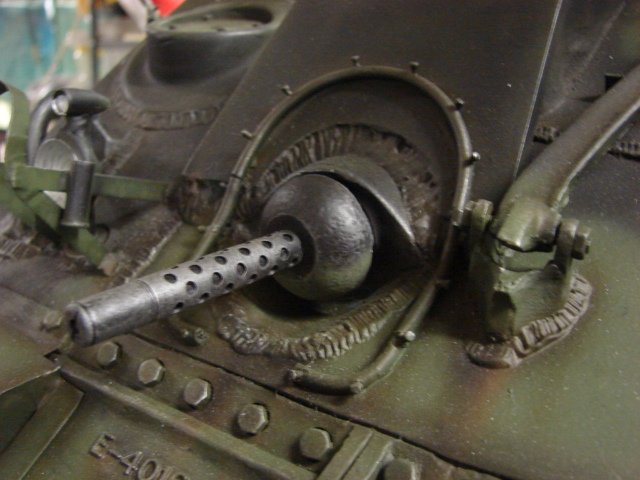
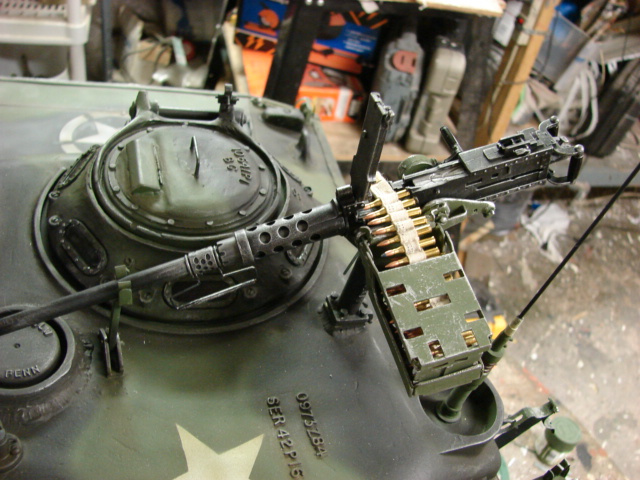
The Stock M34A1 Mantlet is too thin and the shape is not very accurate. The stock mantlet is missing the holes for the slot screws, Coax 30 MG, and Gunner’s scope. The Mantlet also has it’s 75mm gun attached. The problem that I noticed from all of the vipers thatI have seen is that the solid resin main gun is warped. This gun will not be used and a new one will be machined soon.

I made a new M34A1 Mantlet and added it to the product line. http://www.eastcoastarmory.com/ustankparts.htm

To show the scale of this model here is a size comparison of the mantlet to a 1/35th scale tamiya M4 sherman.

The stock mantlet was installed by screwing in two screws with that were attached with nylon washers. The nylon would “in theory” secure the mantlet to the tank. The problem with this method was that the barrel would be too heavy for the nylon mounts and the gun would sag. The other problem was that the resin mounts were the mantlet would attach were very week and can break. The technique that I developed replaces the nylon with two pieces of PVC pipe. The smaller PVC gets inserted onto the mantlet and the larger PVC pipe. The larger PVC simply rotates inside the mantlet drum. Extension springs could also be added to prevent barrel droop if necessary.

The tank’s turret is a smooth casting, too smooth. Casting marks were added.

I’m now working on the masters for the tank’s turret hatches. more images and progress is to follow.

Ya’ll remember what Peter Boyle’s character on “Everybody Loves Raymond” used to say all the time?

[bow][bow][bow]

Thank you for sharing this armourguy!

Svenne

Your work continue to amaze me. [:O] Hopefully one day I get to see all of your T-O-Y-S! IN one of your pictures, I see a Me-109 in the background… is it in 1/6th scale? It looked BIG!

Thanks everyone, The Plane is a 1/5th scale FW 190. The plane was bought pre built from a hobby shop over 10 years ago. The plane was built RC, but I have never flown it.

It’s been awhile since I had some progress posted. I have been working on the tank, but I was spending most of the time focusing on the retooling of the tanks copula and other parts, which are now complete.

I have completed the last of the large components. These parts have also been added to the product line. http://www.eastcoastarmory.com/ustankparts.htm

M4 Sherman VVSS Idler Wheel Hub Caps.

M4 Sherman turret Spent Shell Ejection Port.

M4 Sherman Late War Commanders Copula. I have replaced my first copula with this new advanced version. The copula is offered in two versions, one without the interior periscope detailing, the other with the interior periscope detailing. Both versions feature the interior detailing on the Copula’s hatch.

I installed many of the tank’s turret details. Including the Gunner’s scope slot screw details, Gunners scope guard box, folding 50.cal travel lock, 50.cal folding Pintle mount, and smoke grenade launcher.

I also added many of the 50.cal storage equipment to the tank’s rear turret bustle.

The tank’s new machined PVC gun barrel was installed onto the mantlet.

After adding the gun the barrel was too heavy and caused the gun to droop. to fix this I added a single extension spring to the inside of the gun permanently fixing the drooping problem.

These were the last of the big parts that needed to be patterned and molded. Now that they are complete I can steam ahead on the model with full steam to completion, The tank should be ready for paint in one week.

I have completed the last of the new and retooled parts and have added them to the product line. http://www.eastcoastarmory.com/ustankparts.htm

  1. Metal M4 VVSS Sherman front fenders. After starting this project I have recieved many requests for front replacement fenders, and I decided to add them to the product line.

  1. Early M4 sherman “shark Fin” range finder.

  1. M4 sherman / US AFV Late style range finder. This component has phased out the metal version that was previously offered on the website.

  1. Retooled US AFV Pivot able searchlight kit. This revised and retooled component is offered in two versions. The first version has a solid resin light bulb lens. The second version has a hollow search light mount, and comes with a vacume form clear plastic insert. This version can be made with a bulb or LED inside.

The tank is now almost ready for painting

The tank’s turret details have been installed and completed

On the rear of the turret, the tank’s MP-48 anntenna base was added alond with the 50.cal barrel clamp was added.

The Antenna’s tip has the knurled antenna connector added to the tip. This part will be added to the antenna that are offered on the product line with no added cost.

The 50.cal barrel clamp was scratch biult out of sheet steel. The spring loaded clamp lock is functional

Brass periscope brush guards were installed on all of the exposed periscopes.

I also re worked the tank’s spare antenna base plate, by added 5 hex bolt heads replacing the molded in round nubs.

As a side note I have seen many 1/6th shermans that have the 50.cal pintle mount mounted on this position. Many people miss identify this location for the pintle mount because both the pintle mount and the aerial mount have four holes drilled into them. This Position was never intended for the pintle mount and was only for the use to install a second aerial base. Typically most M4’s had only one radio and the antenna would be run through the large antenna well. Since the other position was not in use a plate was bolted over it.

I also added the tank’s side view mirrors. I made the mirrors fully telescoping and functional, and real mirriors were used.

The tank is now getting it’s tool posts. Once they are complete the tank will be ready for painting

Just got done going over you’re rebuild from the beginning armorguy and there are some words I could use to describe how freaking cool this is but I don’t want to get a possible suspension. So let me just reiterate what everyone else has said:

WOW!

By the way my sons GI Joe’s would like to know if you’re looking for a crew[;)].

[#ditto]

WOW! All I can say.

[tup][tup][tup]

Thanks Guys

I added the tank’s tool clamps, the tank is now complete and has been painted in it’s base coat. It is now off to the next step :smiley: .

Final Prime

Base OD

Man, this thing looks just like the real deal- my hat’s off to you on this one. [bow]

I applied the tank’s pattern and markings. All markings are hand painted. The model is ready for the next step.

Excelent! Great work armorguy. Great work on the camo.

Is “Dynamite” a custom marking or of this actual tank?

Thanks, Dynamite is my own creation. The tank is now 95% complete. All that remains is to install the tools and turret mounted M2HB 50.cal

The tank weathering was completed, the fire extinguisher box handles, and grease fittings were all painted red, the tail lights were painted along with the insulator for the MP-48 aerial base.

The mirrors were installed into their frames. As a side note, the side view mirrors were used for transport driving. These parts would be prone to damage so when in battle these would be stored in side the vehicle.

On the tank’s copula I installed a Panzerwerk periscope and periscope mount. To fit the periscope mount I had to modify the stock panzerwerk piece. To make the part fit I simply removed the base plate and installed.

The other periscopes were also painted and installed.

A panzerwerk Bow 30. cal and 30.cal barrel was added.

The tank’s tracks were also assembled and installed. The original Viper came with a set of Plastic T48 Rubber chevron tracks. The problem with these tracks was that they were very inaccurate. The track teeth were molded into the track pad, and the inner portion of the track pad had a large channel molded into them. On top of that the plastic material that they were made of was brittle. In their place I used a set of Panzerwerk ABS plastic T-48 tracks. These links are far superior to the kit supplied tracks and are worth every penny! The tracks come with the end corner Duck Bill connector.

A small angle is molded into the tooth. For added track flexibility these angles were removed.

The tracks have a nice articulation and the tank rolls very niclely.

Looks good! Almost there, I can’t wait to see it finnished. [tup]

The last of the parts were added and the tank is now finished. To quote Queen “Another one Bites the Dust!”. Over the weekend I’ll be shooting an out door dio, and make the tank’s gallery webpage. Once the gallery is complete it is off to the next one :wink:

The tank’s Tools and “funiture” were built and completed.

I have added to the product line a Set of US AFV tools. I have had these tools since I built the M10, but I never got around to adding them to the website. http://www.eastcoastarmory.com/ustankparts.htm

The tank’s gas caps were machined out of aluminum, and their retaining chains were added.

Chain was also added to the tow Hitch and the tow hitch mount.

For the tank’s AA 50.cal I used the Dragon 1/6th scale Plastic 50.cal kit. The kit is an excellent detailed 50.cal. The kit also goes together very nicely, but needed very few enhancements.

The gun has a functional bolt and charging handle, but a spring was added to make the bolt return.

The gun’s barrel has sveral notched molded into onto the ring. Due to the way the parts were molded the notches are absent on two sides of the ring. So the two notches were added to the ring.

The gun’s top ammo hatch is functional that has two molded notches. These notches are too small and the plate is held in place, but the door tends to fall out. To fix this I drilled out the notches and used a small wire brad to hold the plate on keeping it’s functionality.

STOCK


ALTERED

For the Gun Cradle, I used the Armorpax white metal kit. The Armorpax kit is also a very nice add-on. To make the cradle pivot I used two micro slot screws that were screwed into the guns pivot points.

The gun comes with a nicely detailed ammo belt, but the problem is that the ammo Belt is made out of ridged styrene, and is not flexible. DS styrene would have been a better choice for the ammo belt material. The kit also comes with a nice ammo box, but the ammo box is not for WWII. The Kit’s tripod is also excellent, but is not going to be used on this model.

For the ammo I used a DID cloth and brass ammo belt. The 50.cal shell casing were left natural brass, and bullet heads were painted copper and tracers were added to every 5th round.

I will start the next tank over the weekend and I’ll have some progress posted by early next week.

As for Dynamite, I filmed the tank’s out door diorama with a few of my other US armor. I have many more images, which I will post soon along with the tank’s gallery website. Enjoy!

I really like that sherman! And those are some great looking armor pieces!

Great build. [bow]

WOW! [tup] Damn, this is so sick! [tup] Wish I’d have your skill and dedication to build those 1/6th scale models. Now you have made me wonder how many you have built so far. I recall you have Puma & Jadtiger from your recent forums or something like that.

What tank are you planning to build next? It is always a pleasure following your process.

In my personal collection I have about 20 1/6th scale tanks with more on the drawing board. you can see my full collection here http://www.eastcoastarmory.com/battlezone.htm . As for my next tank it will be an M3 Lee. here is a sneak peek

The tank’s gallery webpage is completed, and I have all of the diorama images posted.
http://www.eastcoastarmory.com/tnt/dynamite.htm[/url]