1/48 Hasegawa Bf 109 F-4 JG 54 (Ostermann) FINISHED

Hello,

This is the first of two 1/48 Hasegawa Bf 109 subjects I will be building in tandem. I know Eduard certainly has the “definitive” F through G 109, but I still have a fondness for the old Hasegawa kit and it’s much cheaper. Besides, I still have 5 in the stash. Improvements will involve some PE belts and a touch of minor scratcbuilding. I also hope to try some of the AK weathering stuff I tried out on my tank here, but I wont get too crazy with it.

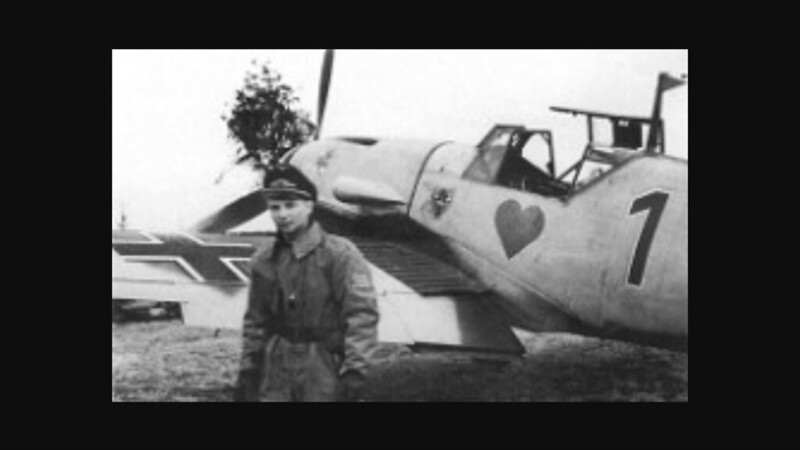
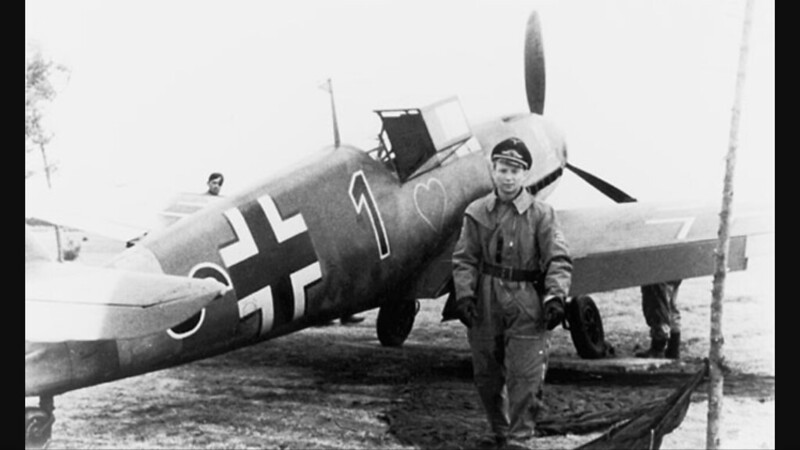
The subject will be Max Ostermann’s F-4 (top subject below) from JG 54 on the Eastern Front. Ostermann was a 102 kill ace before he was shot down and KIA by a Soviet LaGG-3 in August of 1942. I read that Ostermann was so short that he needed blocks strapped to the rudder pedals to reach them. These weren’t roomy to begin with…yikes!

I started with the cockpit. It’s weak out of the box and I usually replace it. I have discovered that once painted up this scale, it’s passible. One of my biggest beefs with Hasegawa here was their omission of the prominent starboard fuel line. I added it with fine solder and styrene.

I used Gunze RLM 66 for paint. I added an old Eduard PE set for seat belt, which goes a long way to spruce up the interior. I threw a placard on the cannon cover too.

The instrument panel was out of the box, with the addition of Airscale instrument decals. These work great.

A test fit. Not too shabby.

Both together…I’m trying to be efficient.

I closed the fuselage then one of the problem areas of the kit rears it’s ugly head…the fit of the nose pieces. These fit like crapola. I’ll get to fixing this next.

An excellent start lawdog114. I’ll be following this exciting build!

Your friend, Toshi

Great start as always, good to see your keeping busy

Nice start Joe. I built this same scheme not long ago. It’s certainly an interesting one. You may already have them but here are a couple of pics I found when doing some research…

And one of my finished build…

No doubt yours will turn out better then mine[Y] Looking forward to seeing you work your magic on this one!

I have only just realised what aircraft this is. After seeing Andy’s i got a kit in 72nd which has the same aircraft included. Going to enjoy this even more.

Oh this will be good. Winter whitewash in one side only. Awesome

Great looking pit on this one to. One thing about the 109s and 190s, just too many freaking cool looking schemes to narrow one favorite down.

Thanks! Very nice work Rooster! Thanks for sharing.

Thanks Johnny. Was this plane whitewashed only on one side, or are those just pics just taken at different times of both sides of the plane? Seems strange to me. I’ll probably go all green with a touch of whitewash.

Joe look at this overhead of his plane. Clearly see the demarcation on the fuselage of whitewash in one side

https://www.casematepublishers.com/subject-categories/aviation/modeling/messerchmitt-bf-109f.html#.Wn7oUEpOlDs

Got my popcorn ready. Looking forward to another work of art

I’ll never turn away from a good 109 WIP!

Joe, you can see in the second pic I posted the decarmation line running down the spine. I’ve also seen the panel right in front of the cockpit done in white and aluminum. I decided to go with white.

Thanks guys…one does enjoy popcorn.

Thanks Rooster. Indeed it does. I ran this info past the gentleman I’m building it for and he was surprised as well. He said he is going to send me a pic of the plane where the port side is green like the starboard. I’m guessing this picture was taken before they finished whitewashing The whole plane? Or they got sidetracked and had to scramble. Thanks for the info about the panel, I may go silver.

Joe,

I picked up an F-2 at the last show (your fav. in Kirtland haha) for a low price, and I’ve got intentions to build it this year. I’ll be following along for tips and tricks on the Hasegawa kit, as it already appears that this is not a shake and bake variety!

Thanks for sharing.

Oh yeah…my favorite show (sarcasm…lol). It’s definitely showing it’s age, but still builds up great. I just grabbed the new Tamiya Gustav which I can’t wait to get my claws in. I just need the right scheme for it. Glad to have you along Max.

Anyways, this thread will mimic my G-2 thread so I apologize ahead of time for the redundancy. I realized I was stretching myself too thin and decided to bench the Dunkirk Spitfire for a while. I want to get these 109s done first. Anyways, I got this assembled without too much issue. The engine cowls don’t fit that great, but it’s nothing major. I added the top hinge with styrene strip (which also covers a gap) then added the door behind the pilot’s head with styrene card.

I decided to try some new weathering techniques, similar to my recent Mk. V tank. I wanted to show some chipping, so after I sprayed everything flat black, I sprayed down some Alclad Aluminum then AK worn effects in the areas I intend to chip, like the nose, prop and wing roots.

I sprayed the areas supposed to be yellow then taped them off. I then used Mission Models RLM 76 underneath. I really like this paint.

Now RLM 75…

Here we have a picture of the plane before the white wash (no gear doors…weird). This is the version I want to replicate with heavy RLM 70 mottling on the fuselage.

I started with the normal splinter camo pattern, by adding RLM 74

I weathered the underside a bit with a postshade. Alot of the yellow on the underside of the cowl peeled off revealing the Alclad. I’s not the effect I was really going for but oh well, I’m going to have to live with it.

After a coat or two of Alclad Aqua Gloss, I put down the decals. I still need to add the stencils.

Again, I wasn’t thrilled with the worn effects fluid. Perhaps the Alclad was too smooth as the paint peeled right off under the taping in the silver areas. That’s fine for a Japanese plane, but this was not the effect I was going for. I won’t do this next time. I will be trying the AK enamel washes soon.

Beautiful paint work Joe! I have to second the thumbs up for Mission Model paints!

The paint looks great dog. Love the markings too. I like using salt for the sharp chip effect and hairspray for fading worn down paint.

How do these Mission Paints behave thru the AB? Are they similar in use as Tamiya acrylics? I have a hell of a time spraying MM Acryl resulting in clogging and skipping. I have tried different paint/thinner ratios and PSI’s and still have issues.

I like enamels cause they spray really well and even specially when doing fine mottling. Tamiya acrylics spray pretty much the same as enamels at least for me.

I recently tried Vallejo Air on some nose spots on my 1/32 Dora and still had some skipping here and there. I had to go back with the background color which is enamel to clean up the Vallejo overspray.

She’s a beauty!

Thanks guys…

PJ, I like them alot, particularly their RLM colors, but still prefer Gunze or Tamiya paints for everything else. Mission is a thicker paint (intentionally) and only requires a few drops of their thinner with a few drops of their poly additive. I’m not sure what the poly is for, perhaps a leveler or conditioner. The only issue I have is that you have to use their thinner as nothing else works with their paint, and the bottle is tiny and goes fast. If you go to their website it will walk you through exactly how to use their paint. I’m about to order their RLM 66 and 02 as well.