1/48 B-24H "Witchcraft" build

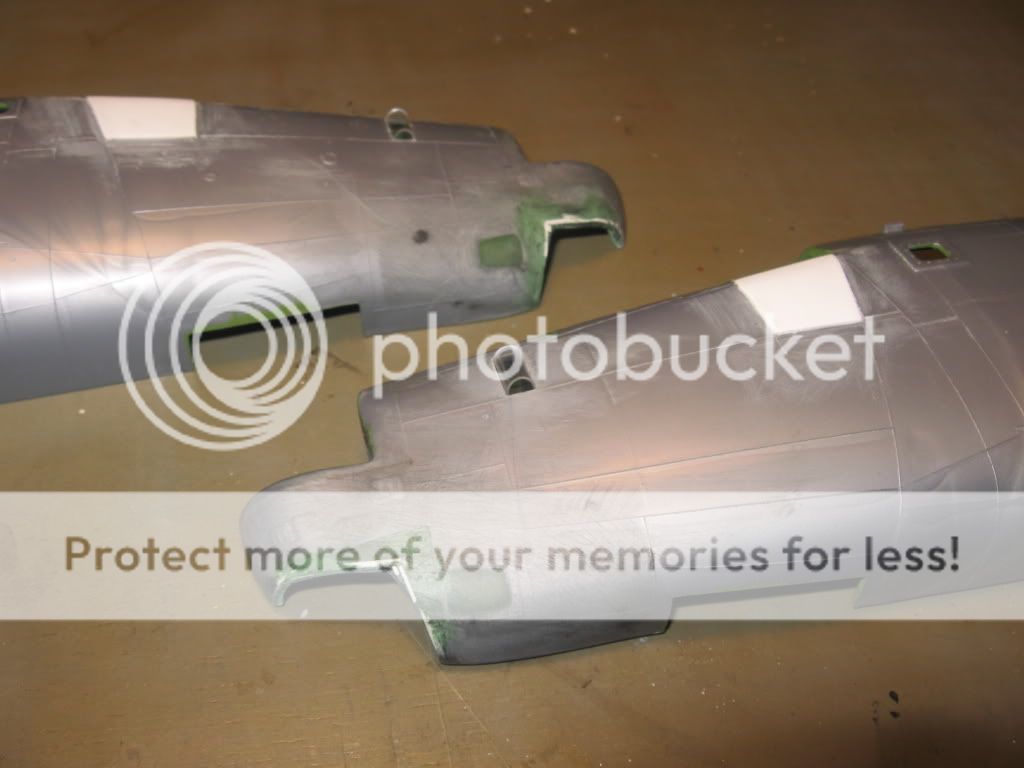
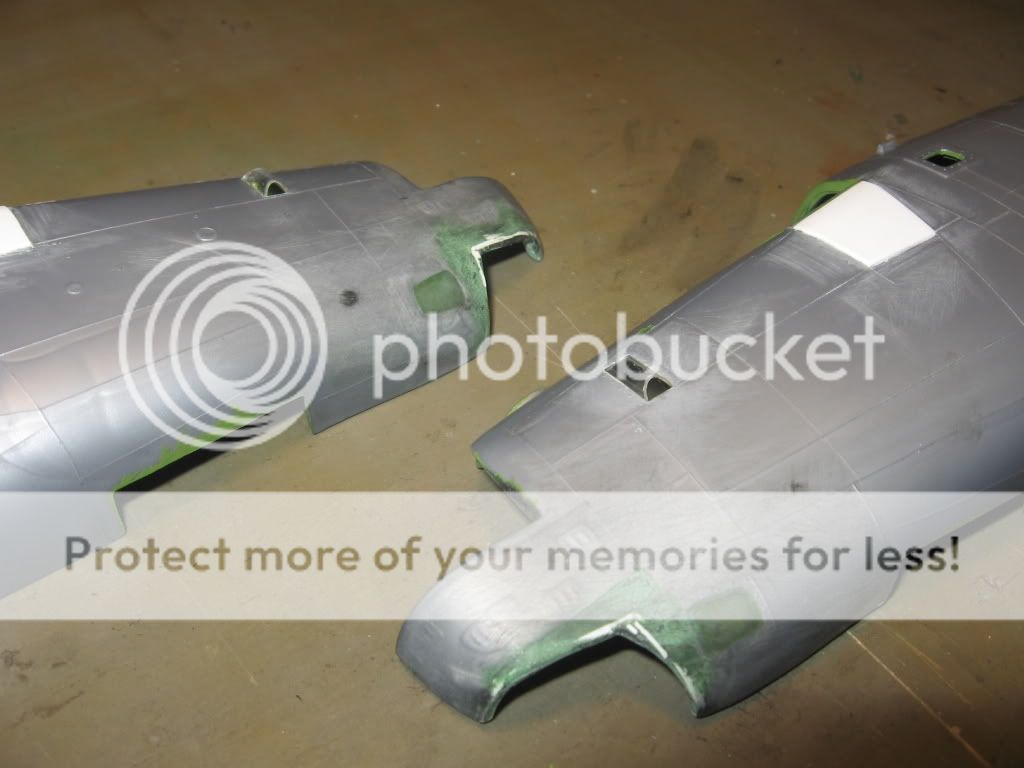
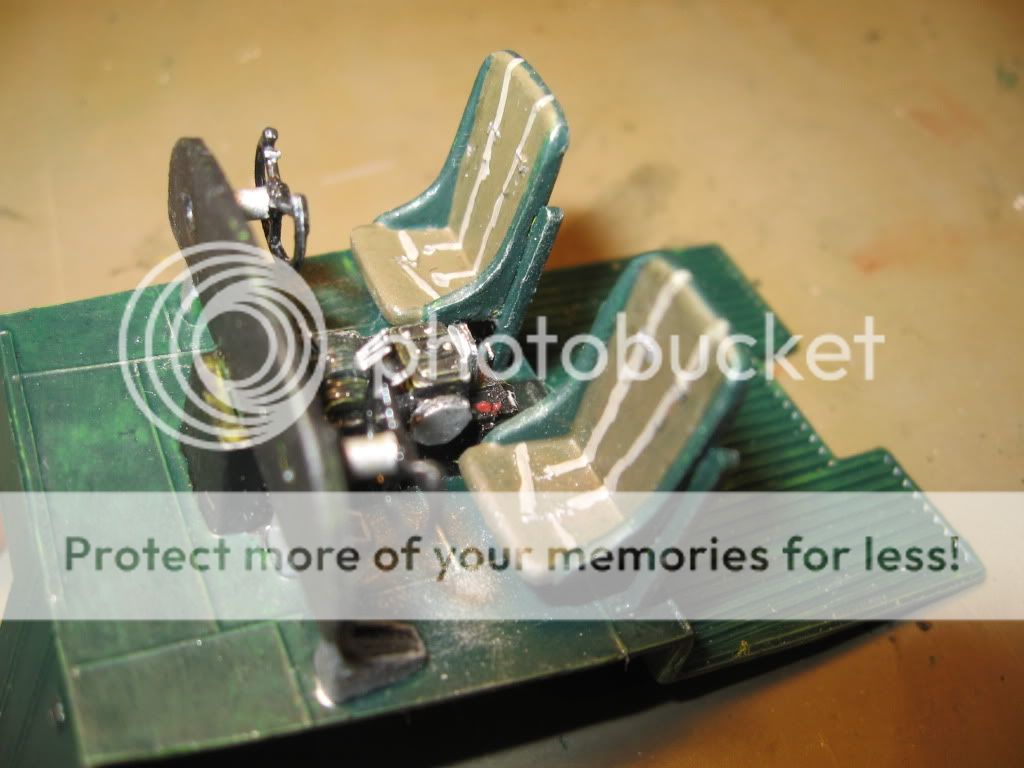
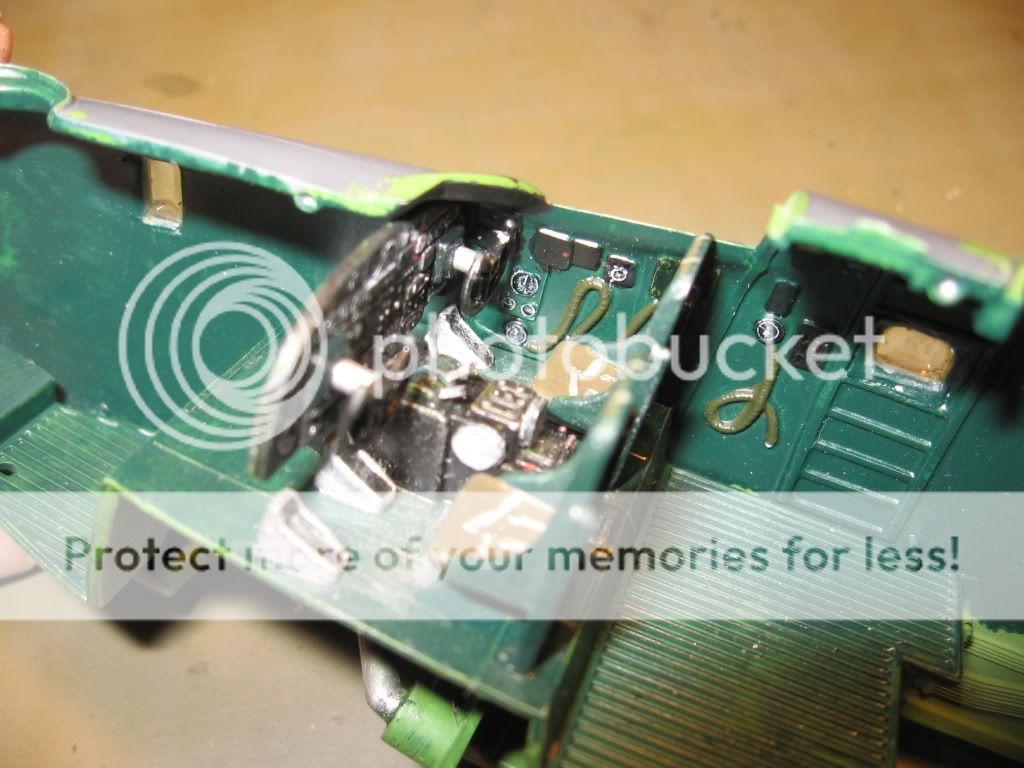
Thanks for encouranging comments everyone. Haven’t done this much conversion work since I built model street rods, chopping tops, swapping engines, and such.

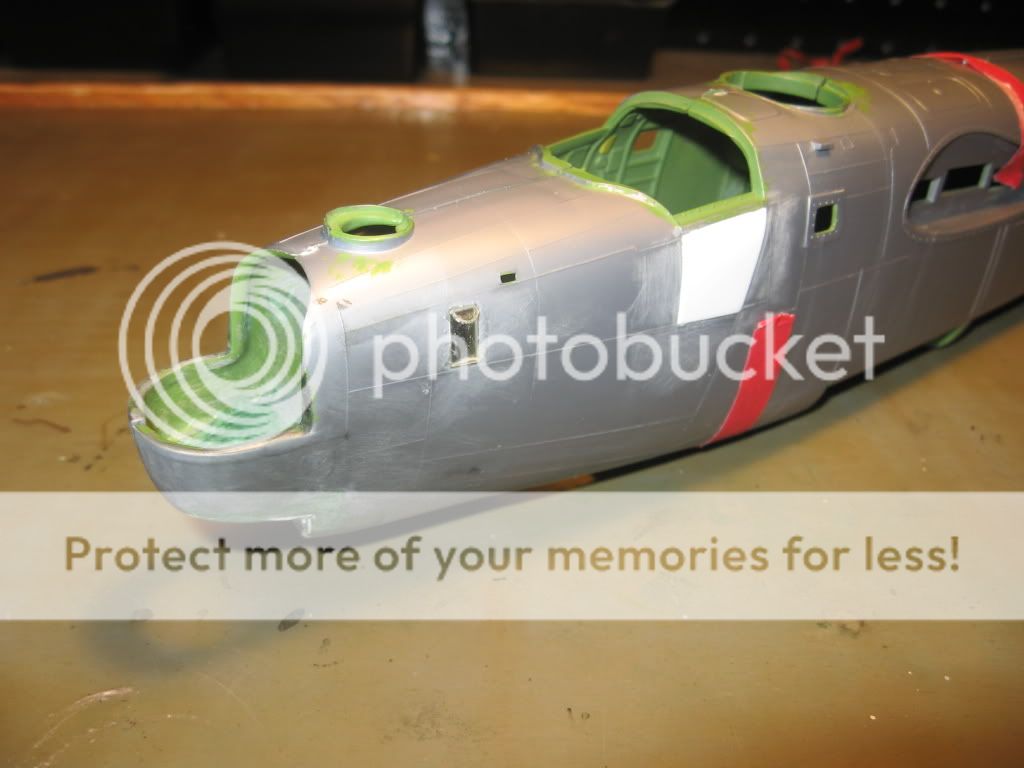
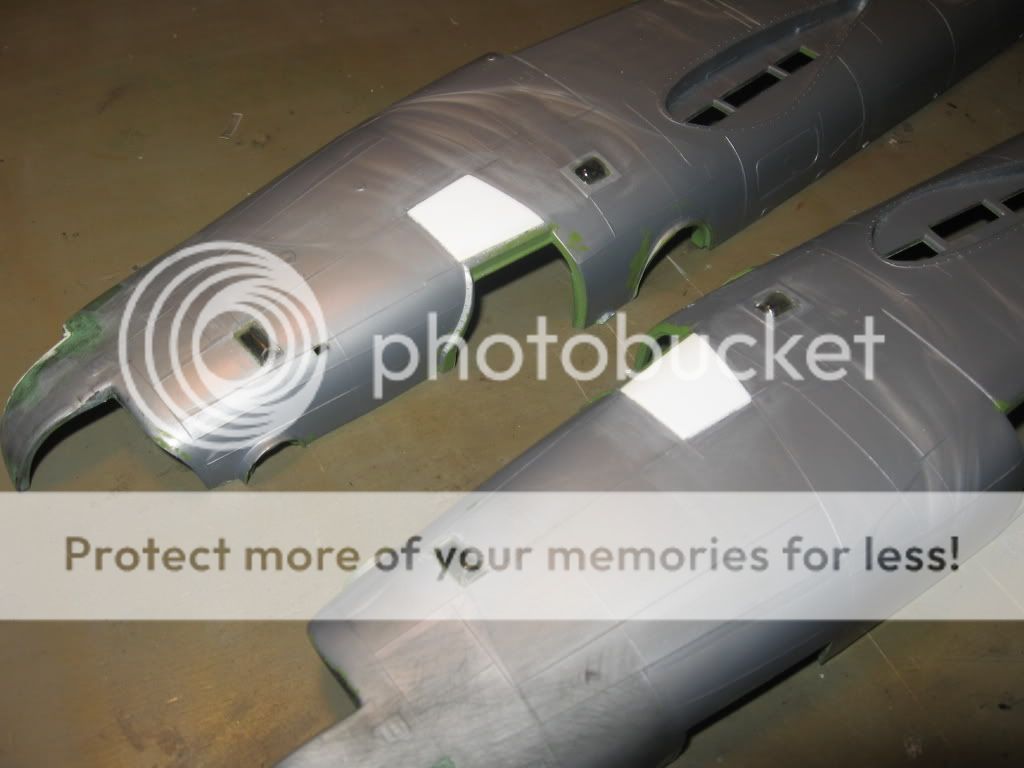
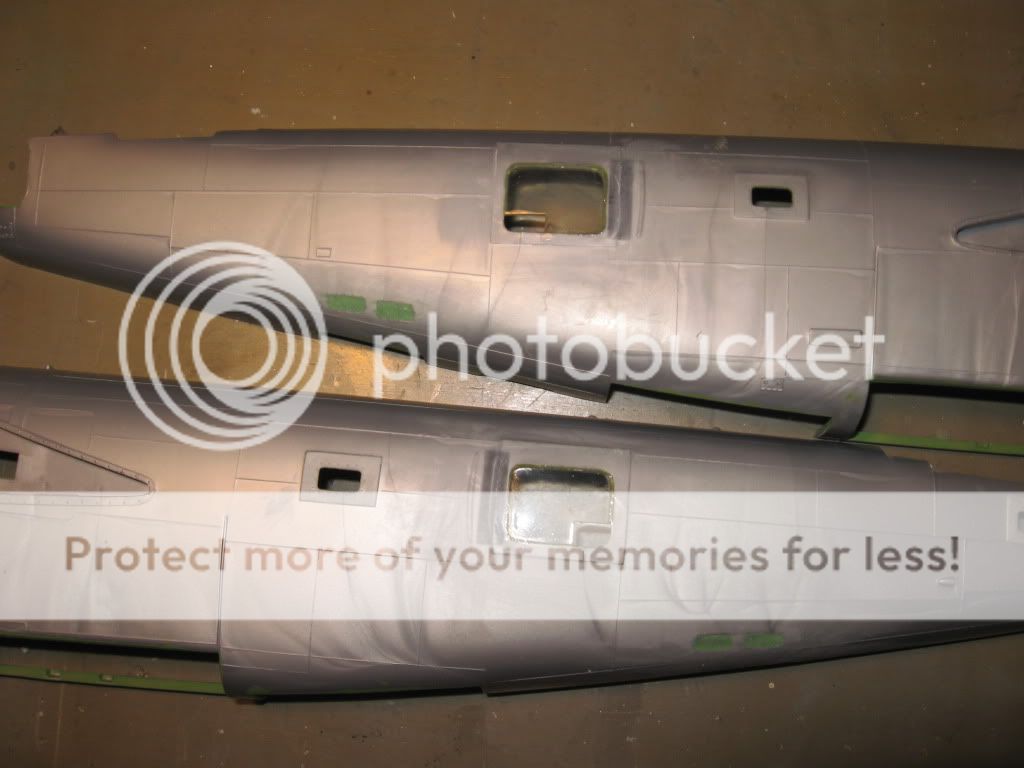
Tonight I’ve been working on the navigator windows as seen in the wartime pic.

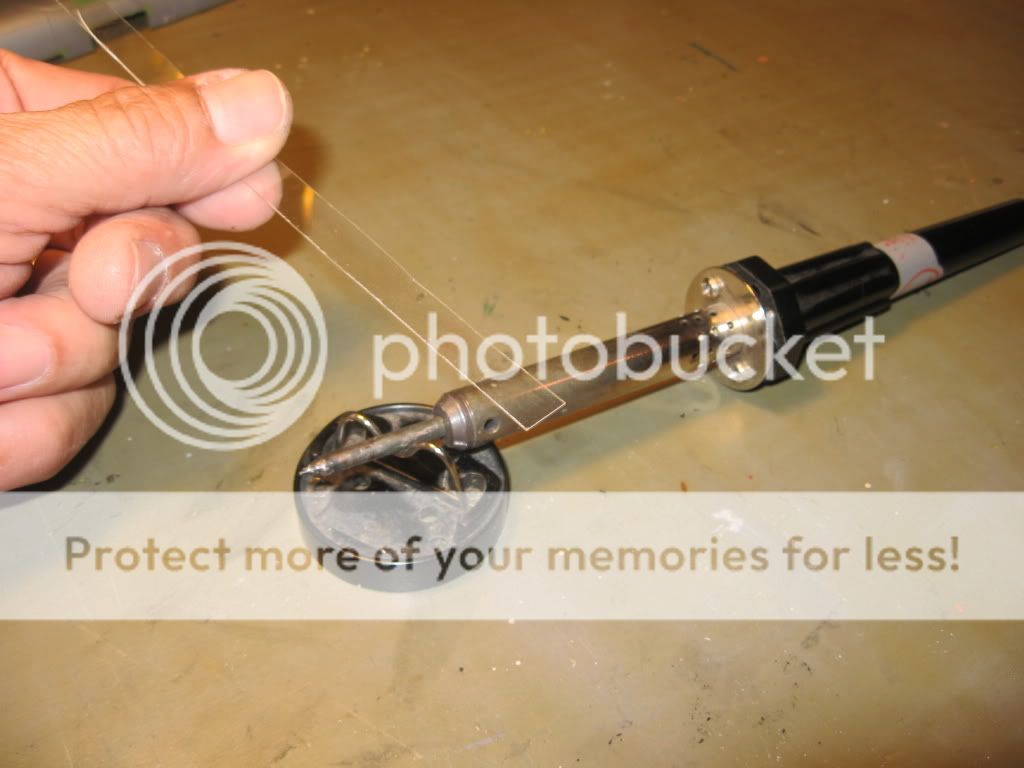
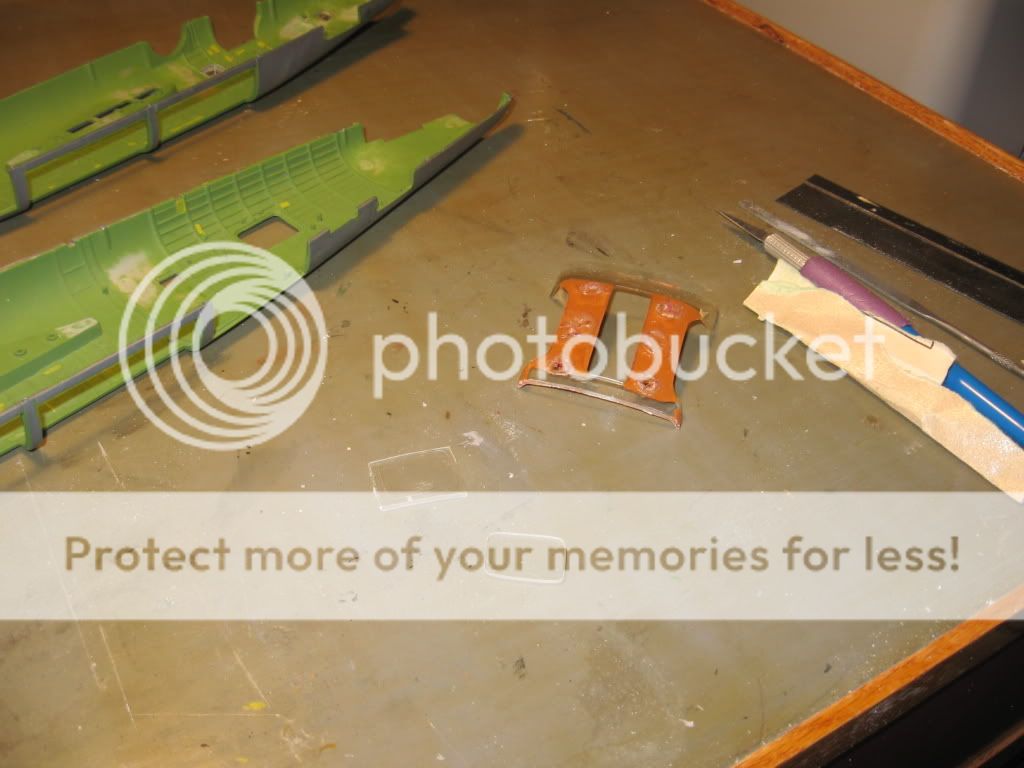
Found some clear sheet styrene while digging through parts box. Forgot I had that stuff.

Cut strips the width I wanted then, using the heat of a soldering iron to soften the strips, bent them around a paint brush handle to the radius I need. Done a few, and I’m on the right track, just need to “practice” on a few more strips. Have lots of material for that.

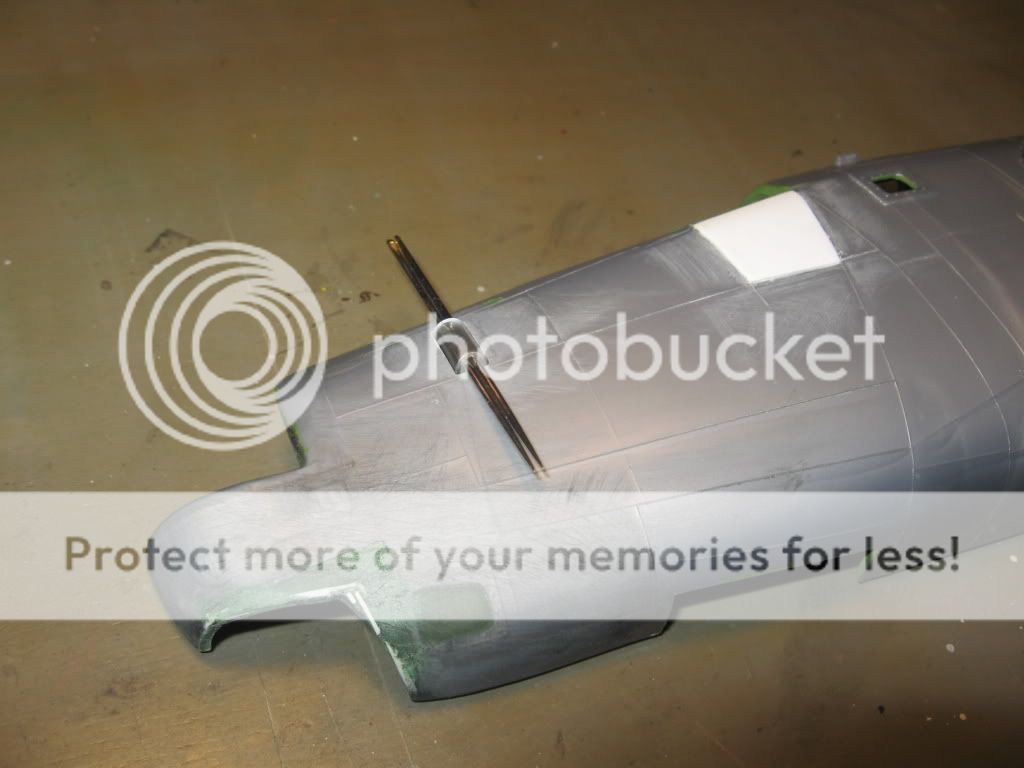
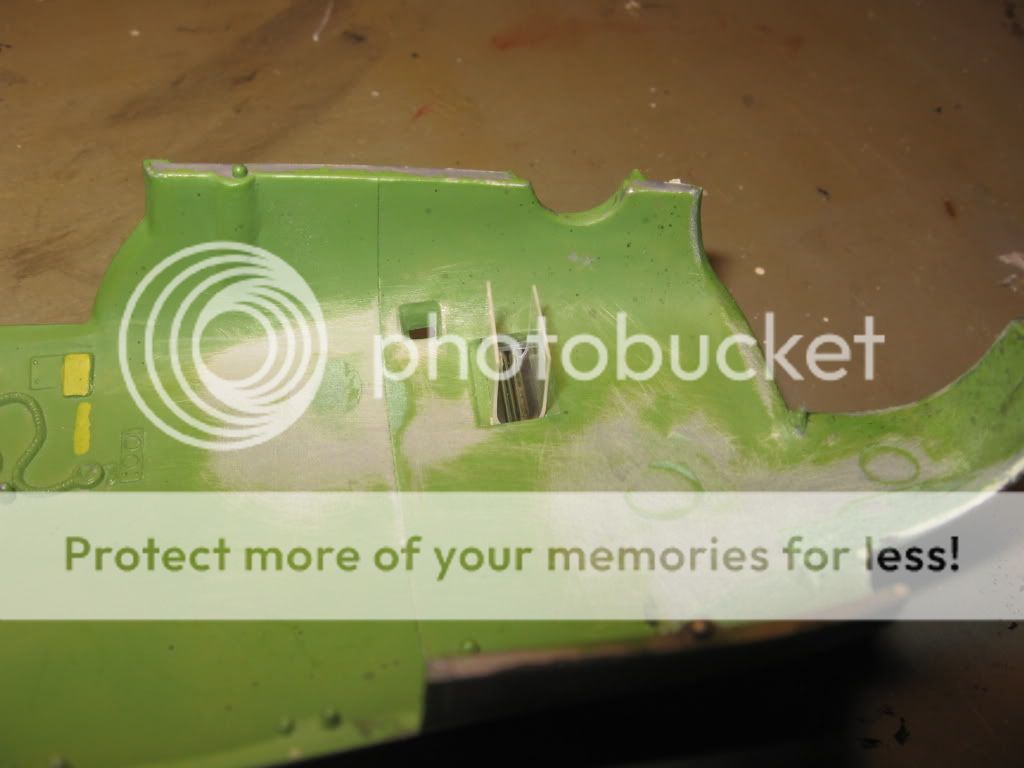
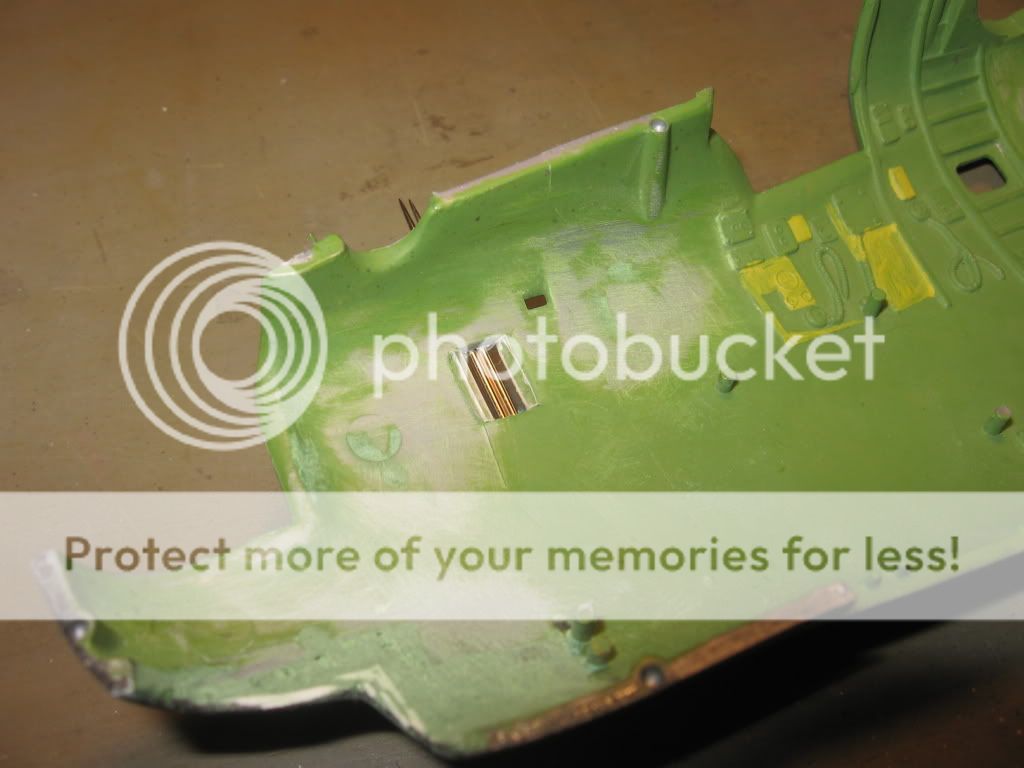
When I’m satisfied with the face of the windows, I’ll bevel the tops and bottems, then cut and attach pieces on top and bottem. There seems to be a frame at those spots so I’m not really concerned about seams showing in the clear windows.

One thing I do wonder about, in the wartime pic, there looks as if there’s a gun ball socket in the center of the nav window. What do you think? Another one of those field mods so many guys did back then? There’s one on the right side as well.

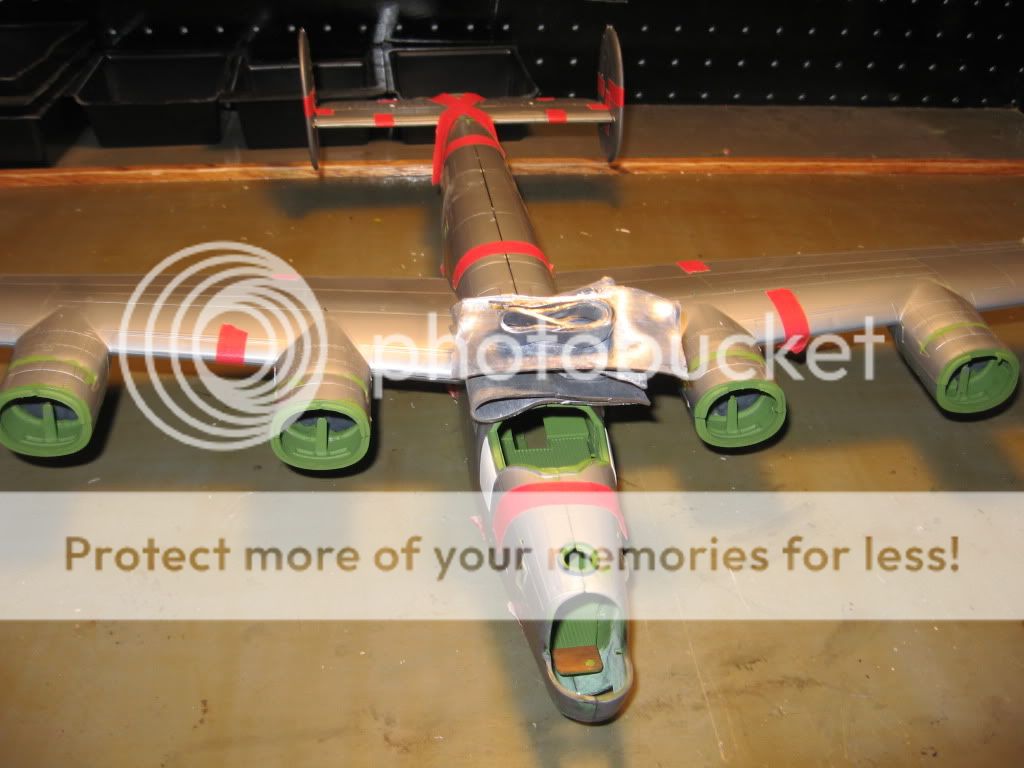
Should be posting more WIP pics tomorrow. Hopefully I’ll have the nav windows done and be working on the enclosed waist windows.

TTFN

Here are some latest WIP pics.

First are the navigator windows.

I heated strips of clear sheet plastic, wrapped around an old paint brush handle, and allowed to cool. Then (using a couple sewing needles to hold the depth) I trimed and bent over the strips on the inside. Filed down a bevel on both ends of window, then glued in place. Finished off with small pieces on tops and bottoms. Cleaned up with some 2000 grit sandpaper and a coat of Future.

BTW the spot I thought was a gun socket in the wartime photo is, on closer inspection, the face of someone in the airplane, peering out through the window.


Next up was to tackle the bubble radio compartment windows.

Carved a small wood buck to size. Clamped small squares of clear sheet over buck, then applied heat with a blow dryer. As the plastic softened, I worked the clothespins up around the plastic, pulling it down over and around the buck. After cooling, trimmed off excess plastic, glued in place, and again cleaned up with the 2000 grit and Future.

Note the “armor plate” under the cockpit, car dealer tag made from thin styrene plastic. Same stuff used to make the for sale signs you can buy at your home supply store. Not all of those tags are made of styrene , so be sure to check before using as a source of sheet stock.


Last couple photos show work on nose/tail turrets and enclosed waist windows.

The turrets I don’t need to be able to move about ,so I applied glue to the lower edges of the turret, then put the halves together. Cut bottom off of turrets so I can polish inside of dome and add some detail inside the turrets. Since the top seam through the dome is not glued , I’m going to soak turrets in Future. Hpoefully, that will minumize the seam.

Next are the waist windows, cut from an old model car rear window.

Almost done with conversion work. Yeaaaaaa! Now I can actually start building the the thing.

Interesting methods on the windows, good thinking.

Howard, that is looking great!!! Excellent work with the windows!!! I will be watching this build for sure!!! Still have one of these in my stash!!! and a B-17, B-25, B-26!!! All Monogram classics!!! Well Done!!! Looking forward to more!!!

I love the trick for the radio operator windows, and man! those look sweet! I’m gona have to remember that one! I got a lib in the stash too.

WIP pics

Waist windows done . Couldn’t find clear pic of original Witchcraft’s waist except to tell they were enclosed. So, I’m going with the decal inst. side view as reference. I plan on making gun mounts where I can install the guns in final assy. Have read that the Ford built H’s with enclosed waist had (I believe) the coffee can shaped K-2 mounts. Although I may use the kit mounts modified to my needs. At final assembly, I’ll add ‘canvas’ covers over the gun openings with tissue painted olive.

Here she is all mocked up to estimate how much weight I’ll need to keep the nose down.

Probably wont use quite all of that as I’ve figured some places closer to the nose where I can hide some weight. Using the sheet lead also will let me make things like electrical panels, etc. to disguise some more weight. Will probably still have to put some in the engine nacelles. Unfortunately, the Lib is such a tail sitter it will have some weight to the model when complete. Can’t think of any way around it. I’m less fond of putting a box or something under the tail skid. With even distribution the gear should be able to handel it.

This is just an experiment. I wanted to see how Future reacted with white Prismacolor pencil. I’m going to use the pencil to ‘drybrush’ the instrument faces and other details. Much like chalk rubbings without the paper. Also a good way to add stenciling,etc.

Appreciate the positive comments one and all. It’s been awhile since I’ve put this much into a model. I still prefer to build mostly OOB and focus more on markings and such. But, it’s nice to stretch the modelling skill mucles now and then. I’m still not going to be a rivet counter about this build. I do plan on putting enough on the inside, so when you peer into a window or hatch, it looks right. Time to get to the desk. Feels good to actually be starting to work on the inside of this kit.

She’s lookin good! That’s a great idea about disguiseing the weight too!

Howard that is coming along quite nicely!!! From what I remember bout the one my brother had th egear is fairly stout but with that much weight added to it, I’m sure any bump on th etable it’s sitting on will make it shimmy a fair bit!!! ANyways, looking great, just be weary of the legs, maybe stiffen nose gear a bit as well! [2c] worth! I had the B-17 when my brother got the B-24, was 11 yrs old!!! The landing that B-17 copped was shocking, would have never played with the -24 like that !!! LOL[8-][:D]

You were right the first time… Although it’s not a gun-socket per-se… It’s a flaregun port…

Great ideas on the window forming! Gonna save those for future reference. SOme excellent info here for certain. [tup]

I like this way of picking out raised detail. Similar to dry brushing, but a lot more control for catching the raised detail of instrument faces. Future goes over with no problem. Lightly use the side of the tip. Very easy. I’m going to get a red, yellow, and green Prismacolor pencil for applicatons where those colors would be used. Would also be useful for creating the various info stencils seen on aircraft and other things.

I’m going to tackle the inside in sections.

First up, the nose from bombbay forward. Will build and paint as OOB then add detail items and touch up along the way. Base color of cockpit is custom mix of Testors flat beret green and sea blue with a touch of insignia blue to resemble the green I’ve seen in different WWII color pics also in the nose of the Collings Lib. I’ve dug up tons of interior pics of that one.

Also from what I gather, there was so much variation as to interior color on just about all WWII warbirds, I think I,ll go with an interior color scheme similar to Collings bird. With some poetic license. I’ll paint details the proper color where I can determine the actual color, others I’ll have to make an edumacated guesstimate. As long as it looks right and adds visual interest on the inside.

Since most of the inside will be hard to see once closed up , I"m not going to super detail, but add enough to keep it from looking like an empty shell.

Although it’s not a gun-socket per-se…It’s a flaregun port…

Thanks for the info, Hans. Flaregun port, … makes sense. It can be difficult to pick out fine detail in many of those old pics and it had me puzzled. Should be easy enough to scribe the detail in my window with a sewing needle. Just a small circle should do.

Just want to add a huge thank you to every one here at the forums and FSM. I get a lot of great ideas, info, and inspiration from you all.

Great work Howard. Shes got the makings of being a show stopper for sure.

…Guy

Latest pics of my build.

Felt like the cockpit console looked a bit naked. Plus the throttle, mixture, props should be three sets of four levers, the kit only has molded for two.

Added center set of levers by first cutting a small section of sprue to fit then in half lengthways. All levers are bits of strecthed sprue . Trim wheels are plastic sheet.

Have a feeling I’ll use lots of that before this is done.

Pics of finished cockpit. Mostly detail painted kit molds but the console benefited from adding some bits of detail.


Stated work on the radio room tonight . First by making the partition between cockpit and radio radio room.

Nice cockpit! I like the way you added the extra set of controls. Great idea!

The improvement is immense with just adding those few bits!!! GREAT JOB!!![tup]

Thanks. I appreciate the encouragement. The old Monogram kits have always been some of my faves. Sure they can have thier issues, but usually gave a good sound starting point where adding those little bits of detail is often all thats needed to make a difference.

Radio compartment in progress. So far, everything made of sheet plastic, bits of sprue and strecthed sprue. Partition between cockpit and radio room I roughed out the shape using bulkhead to bombbay as pattern, then filed and sanded to fit. Added stiffeners from strips of thicker sheet plastic(another dealer tag).

Next, I started adding little details to the partition and building the radio mans table.

Having lots of fun with this build. It’s a challenge picking out from reference, what to put in, what I can leave out. Then to figure out how to make a paticular item. Pouring over reference pics over and over.

Great work I really enjoy the corrections, conversion & improvements you’re making. If you’re intrested I have a very detailed PE fret, minus turbo imppellers & a couple of sprockets from the bay doors. Mfg’d by “flightpath” its quite extensive, and as I sat on it for nine years without acquiring a lib of my own, I could donate it to your big friend to jazz it up a bit. I got to see a flying restoration in the 90,s, as it " rolled up" not 300ft before me I was struck by the whisperred whirr it produced at take off power. Barring contrails & radar, dozens of these bruisers could penatrate enemy airspace @25,000’ and be very hard to spot indeed.