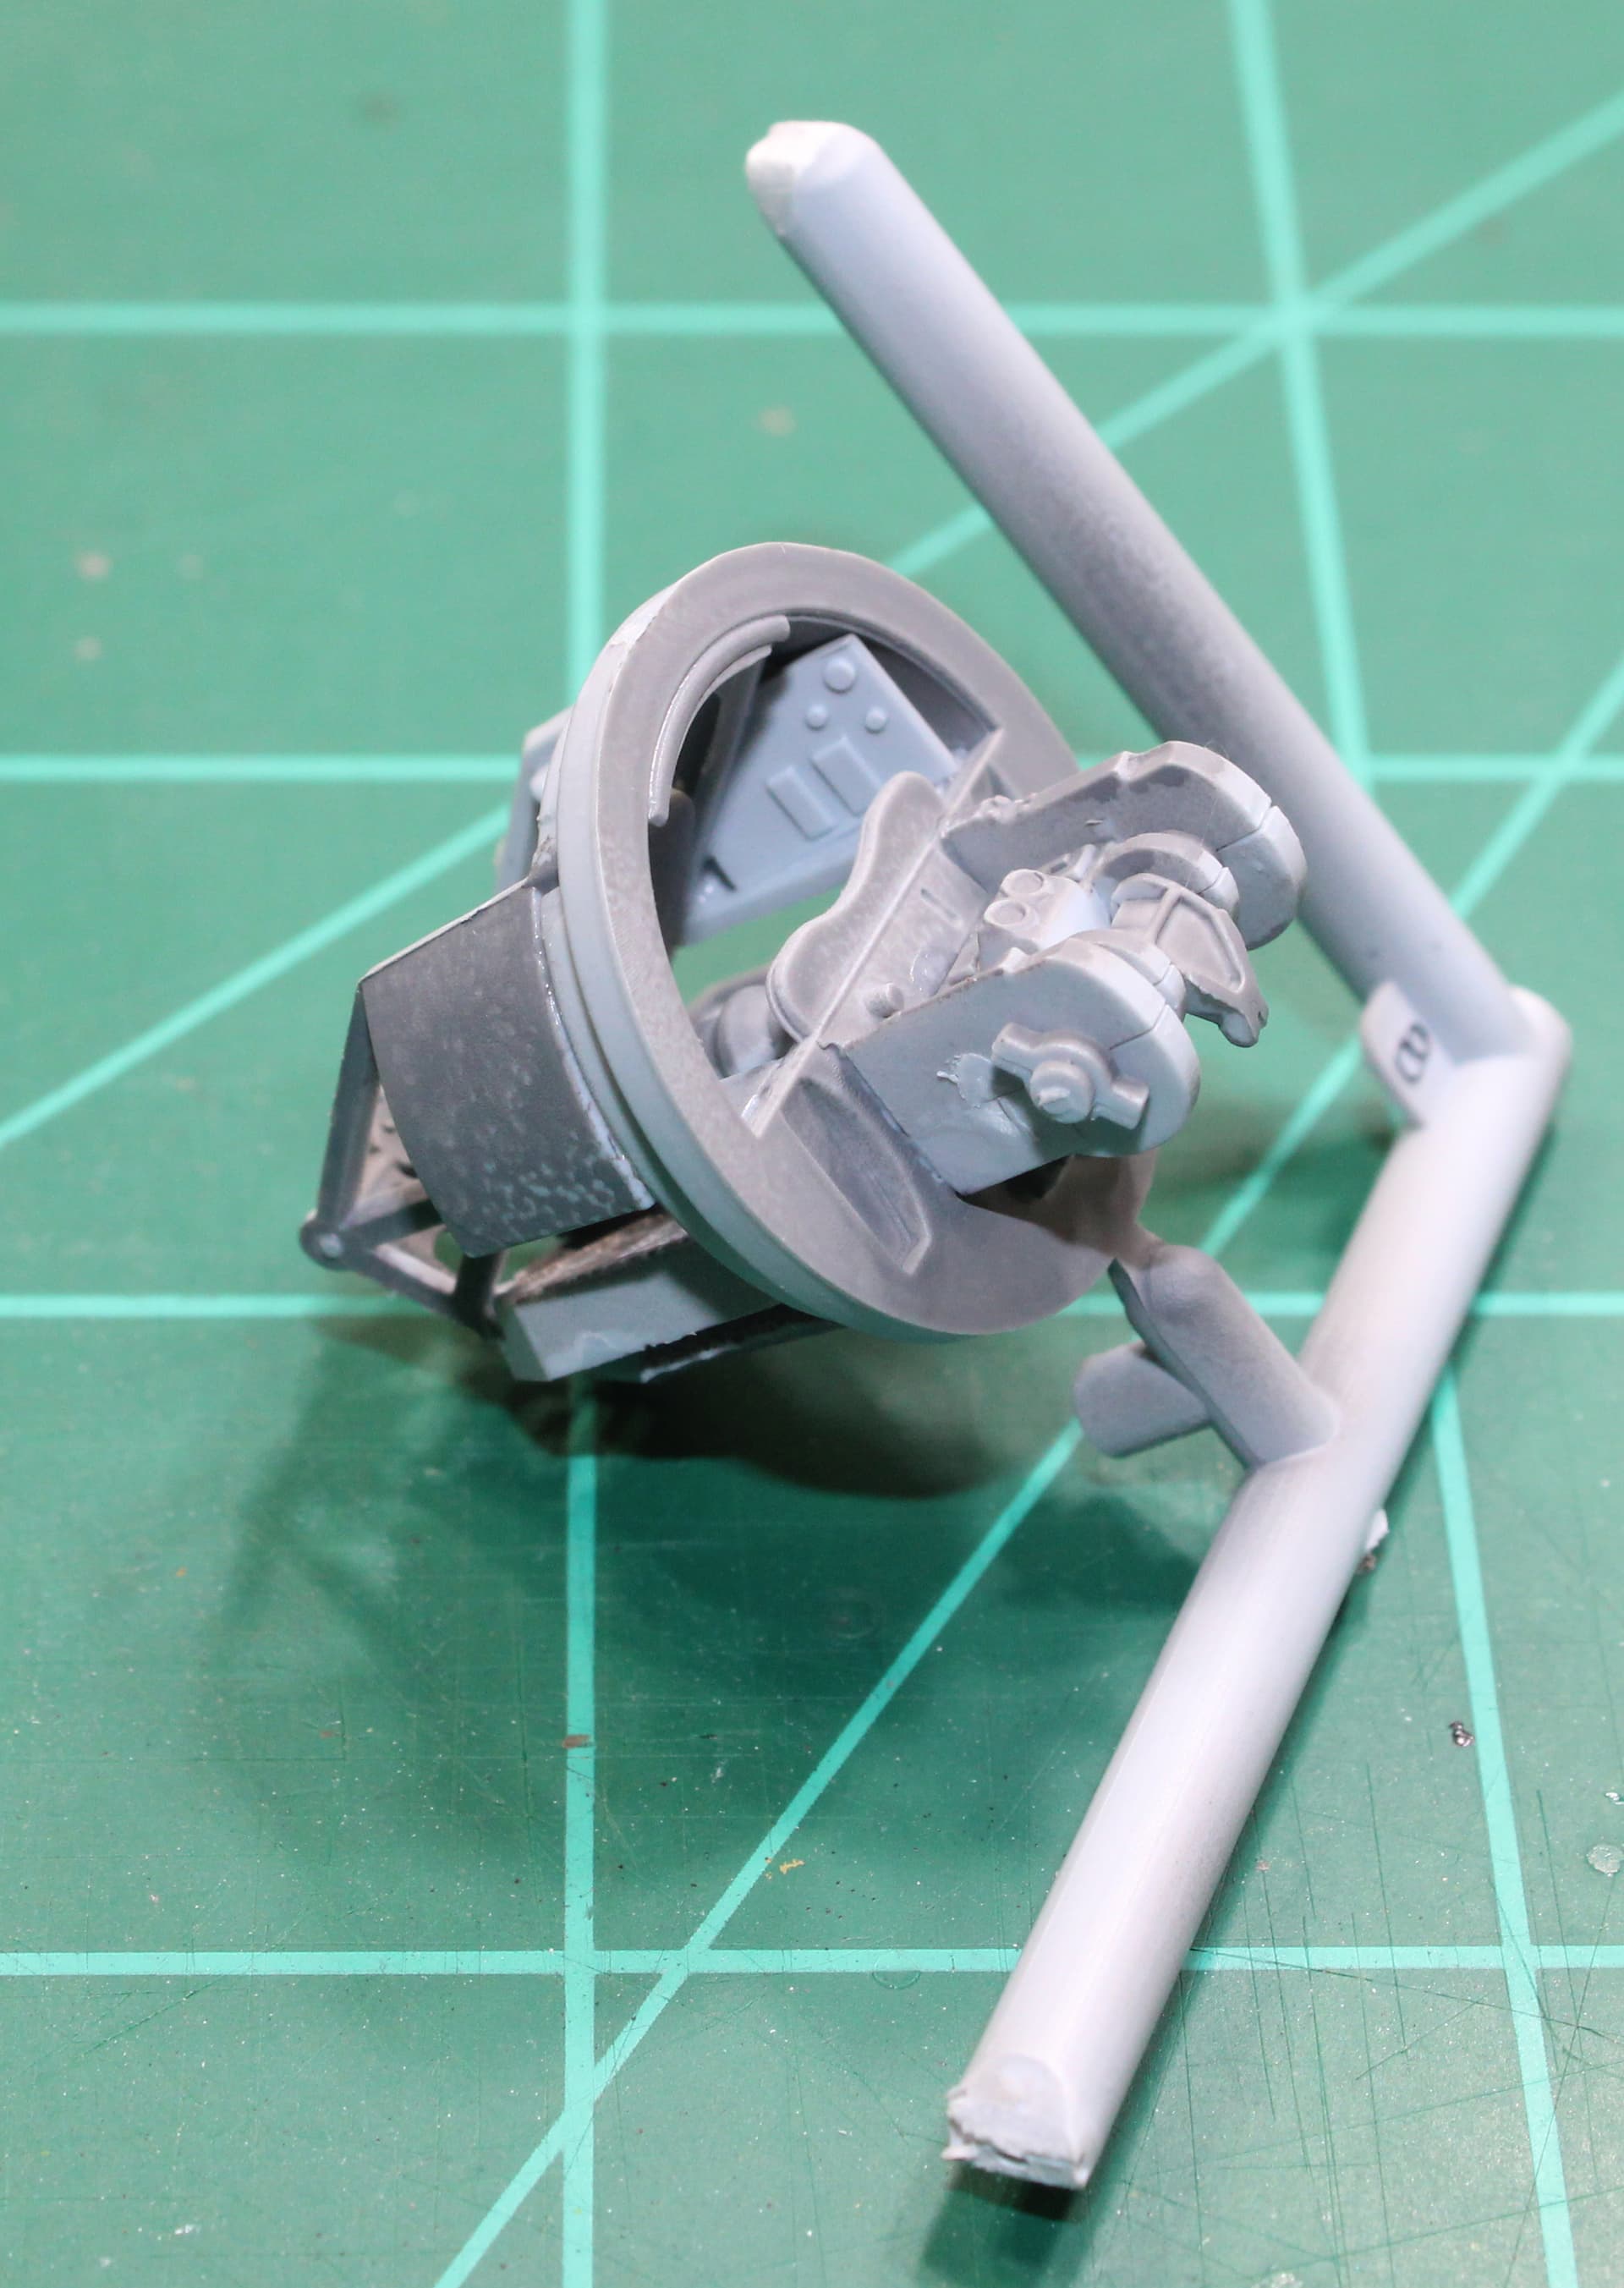
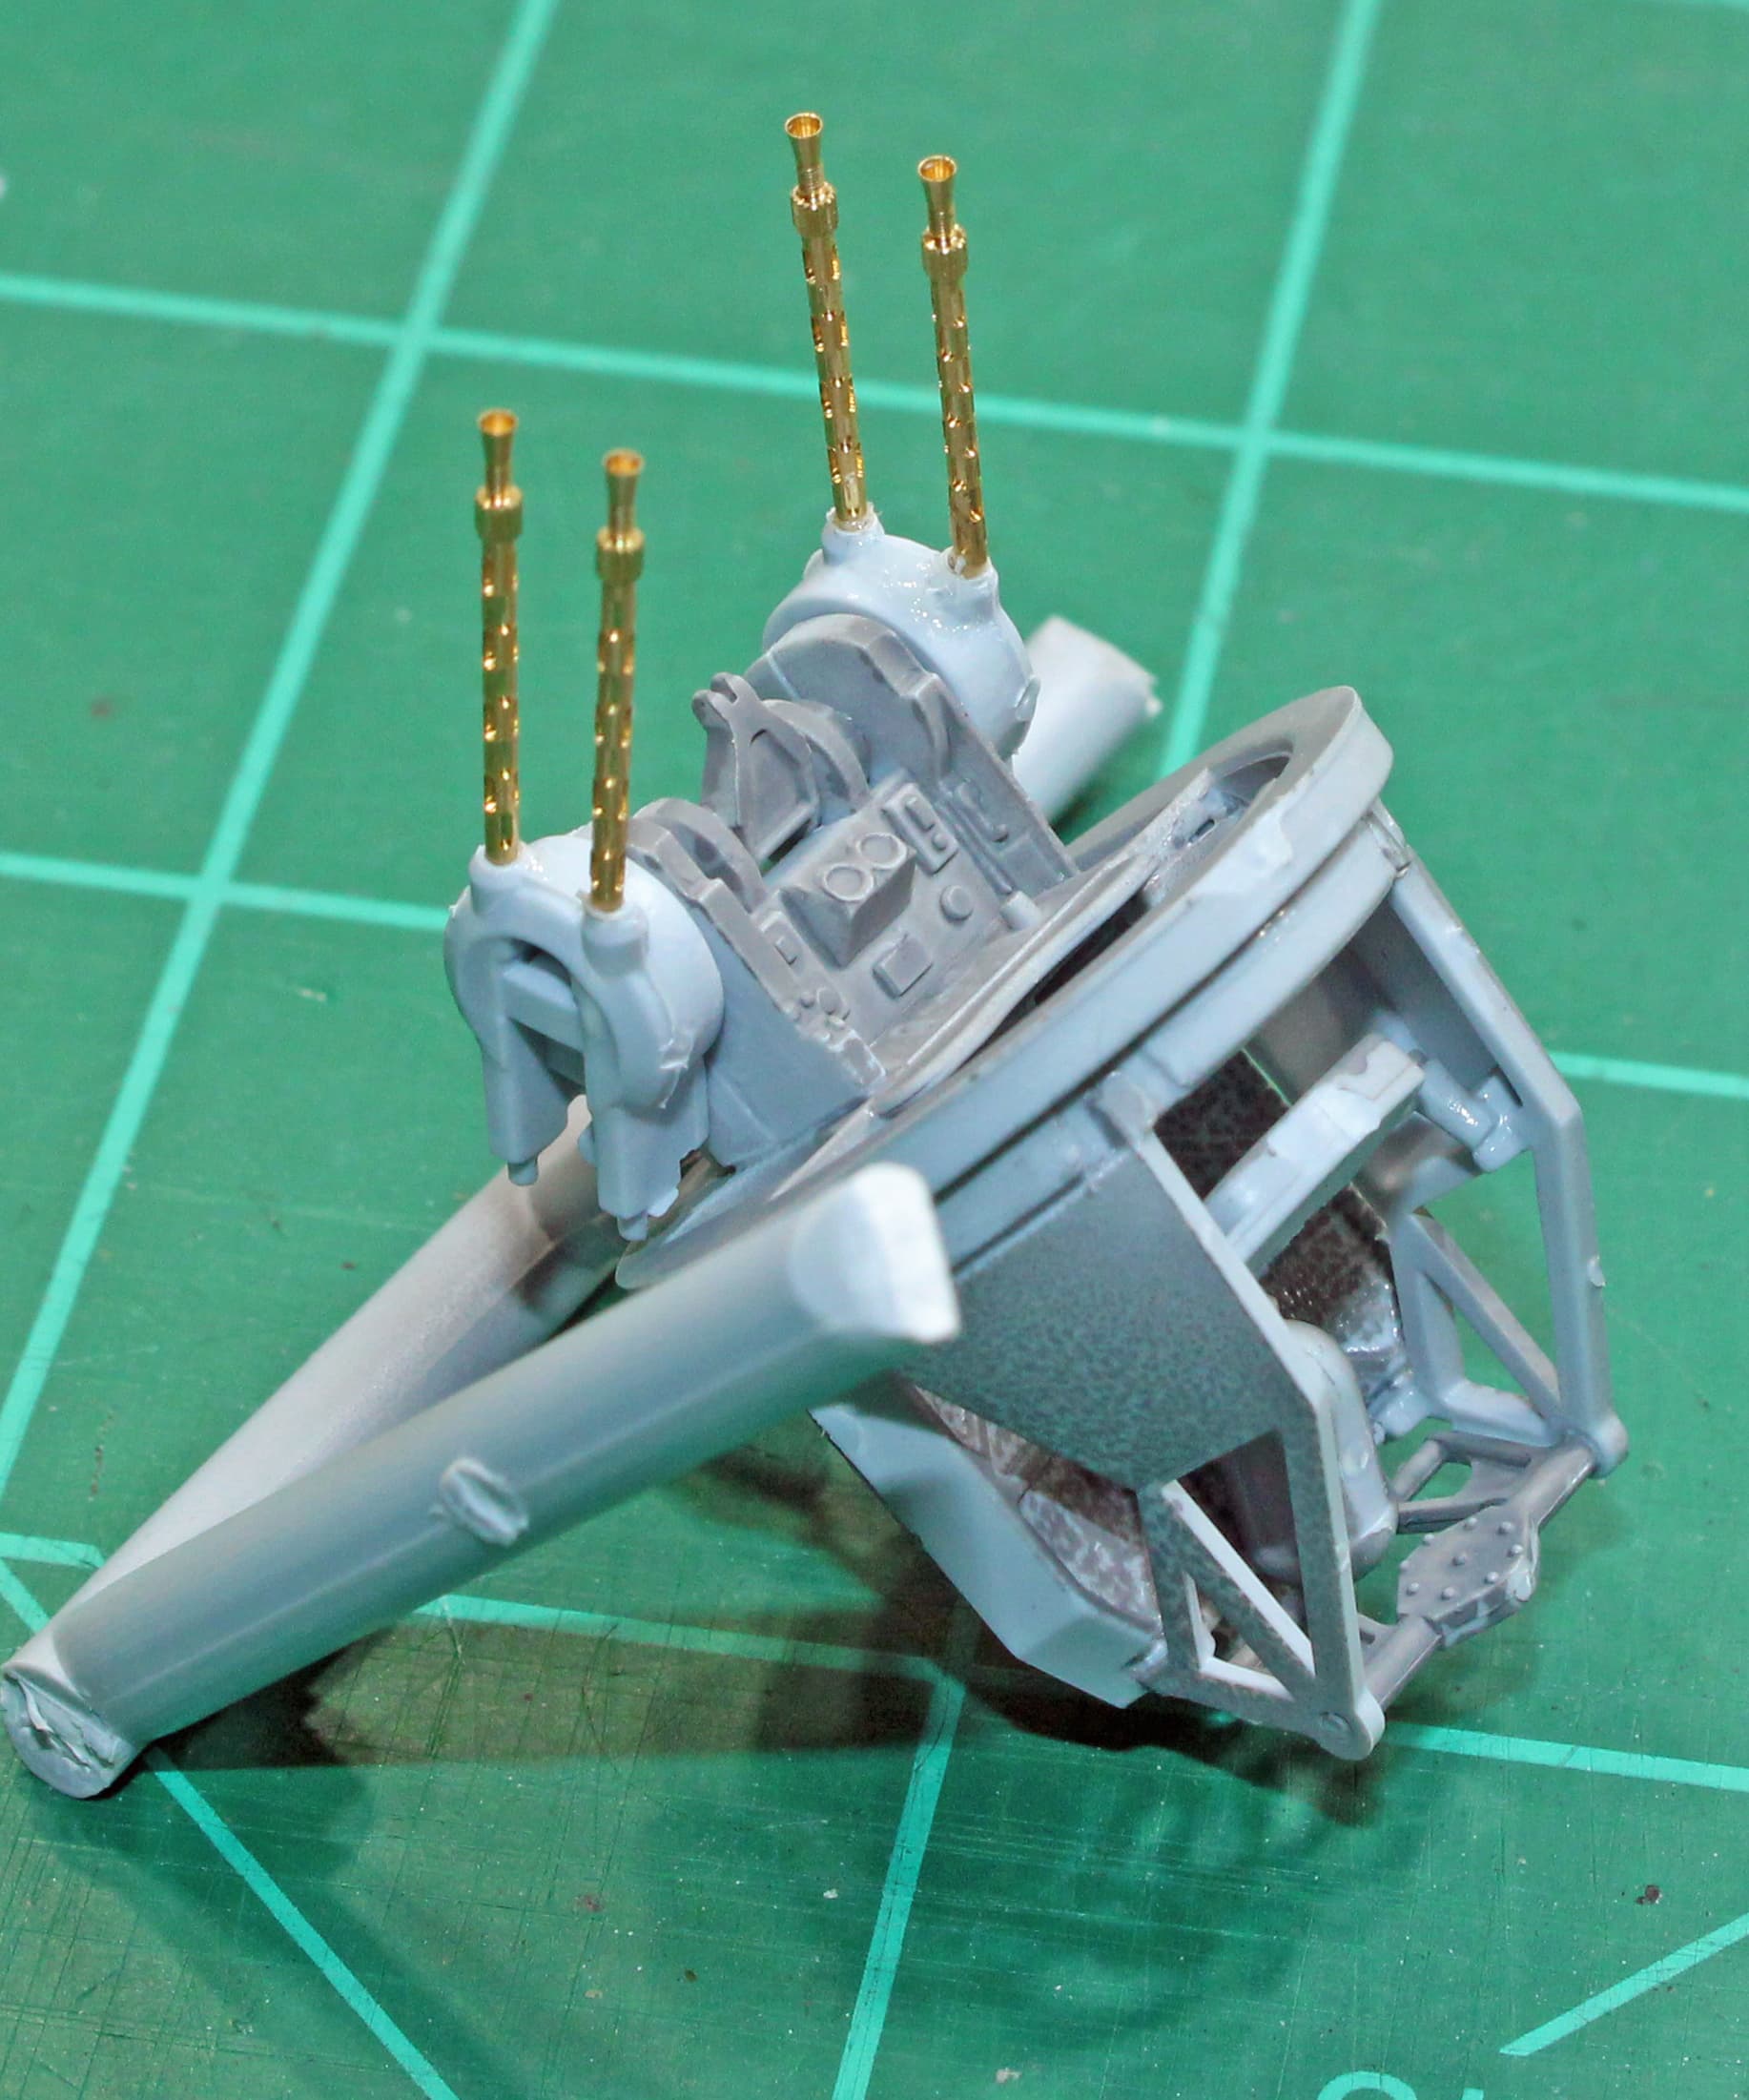
I started work on the Defiant earlier in the week by cleaning and priming all the parts. I spent a couple of days reading about other modeler’s experiences in building this kit, as just looking at it I could pretty much predict where a pain spot would be - that big turret. I found several references to that being the case, so I opted to ignore the instructions build order and started right off with the turret this afternoon.
My reasoning here is that I figure I’ll need to do a lot of test-fitting to properly install the turret into the fuselage, without the fuselage actually being glued together, to determine a best approach.
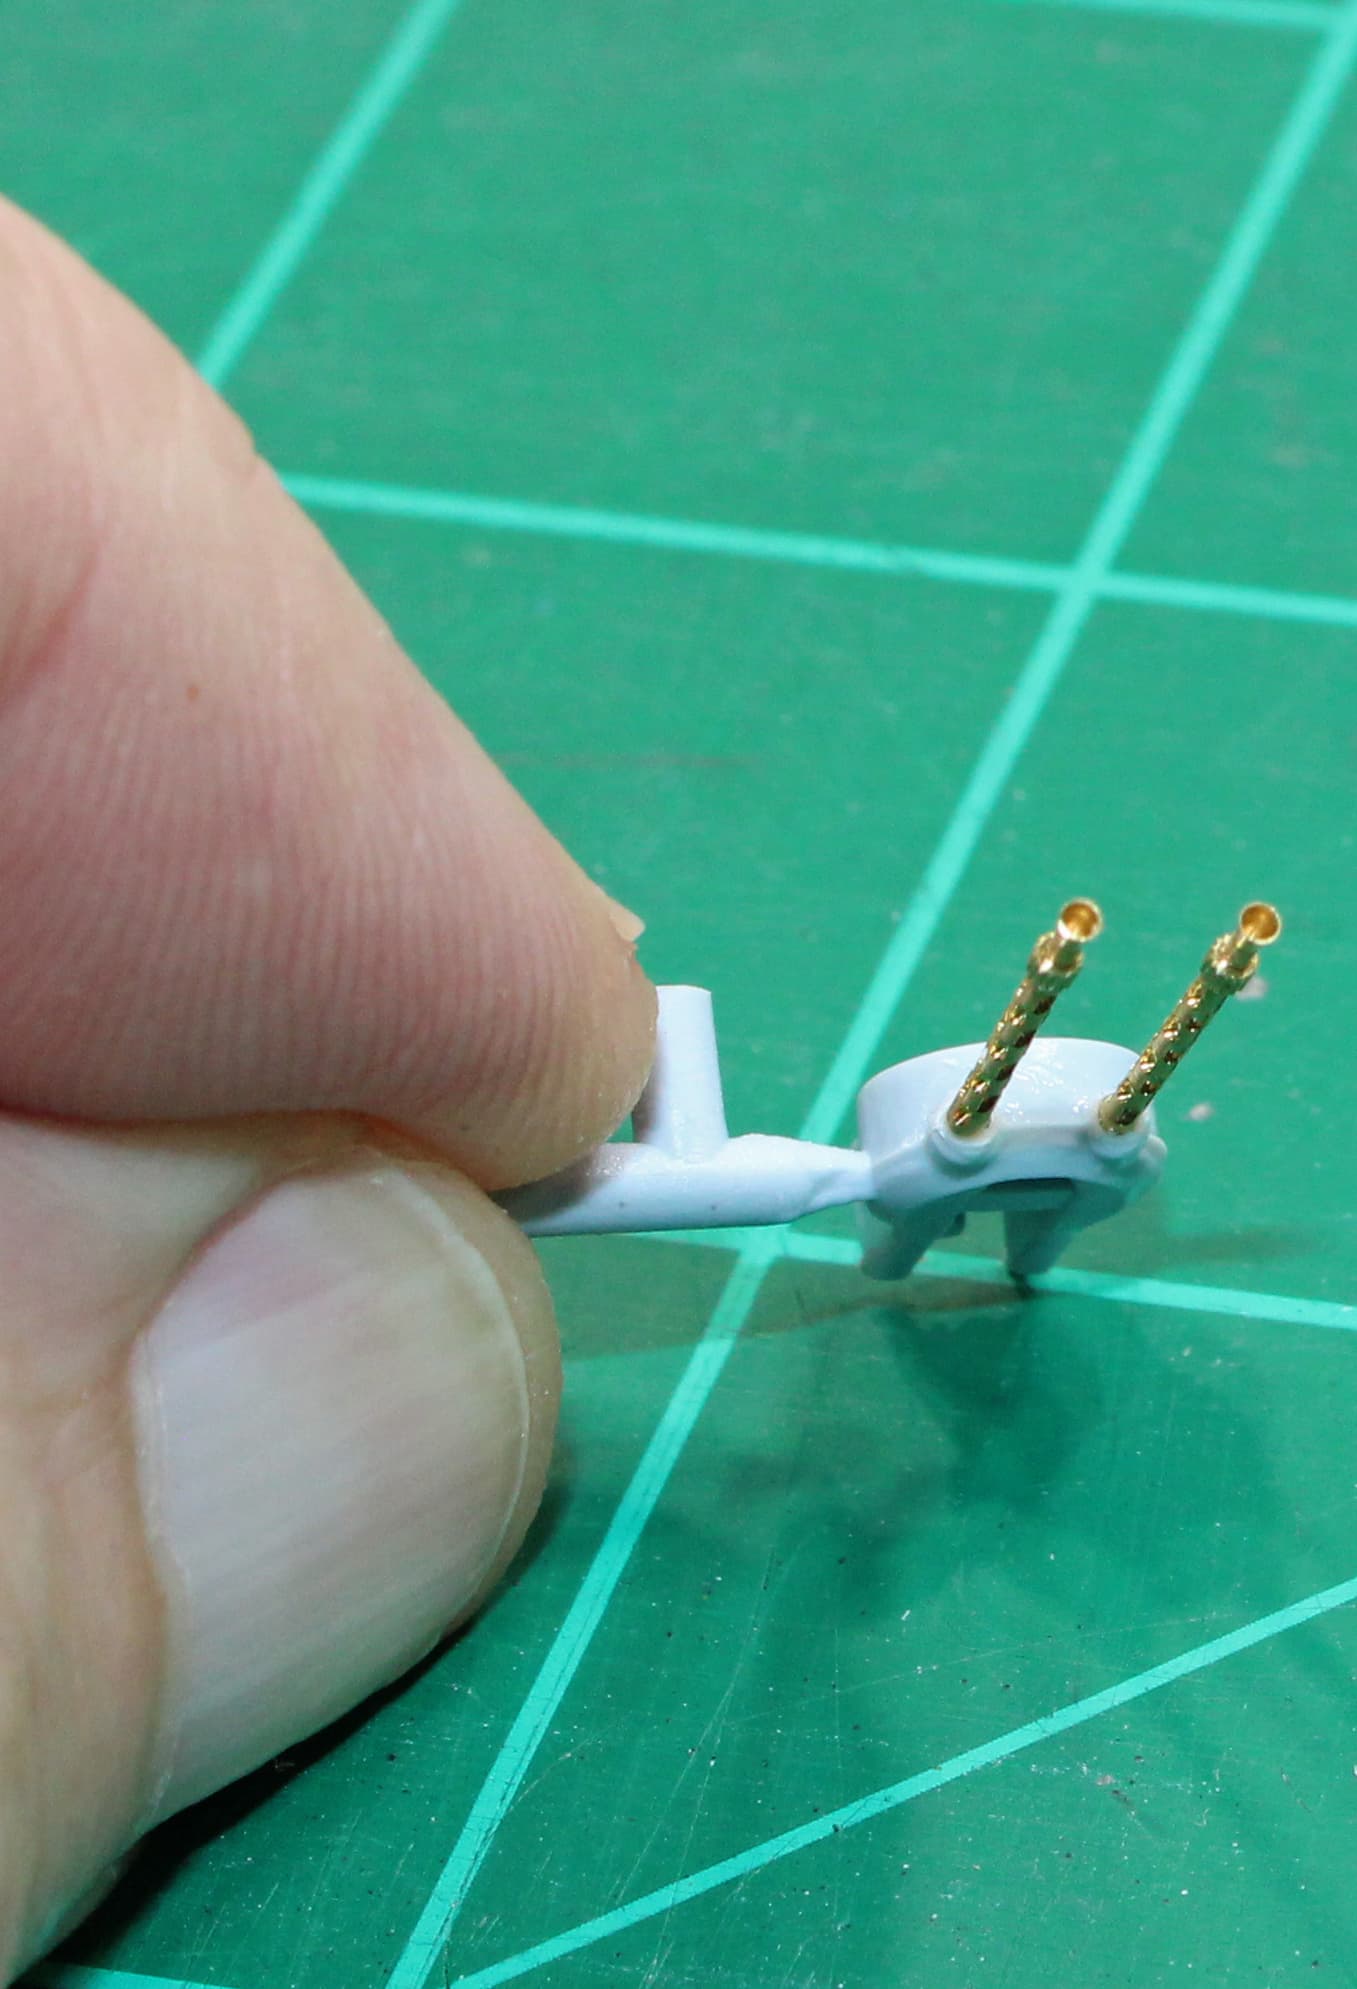
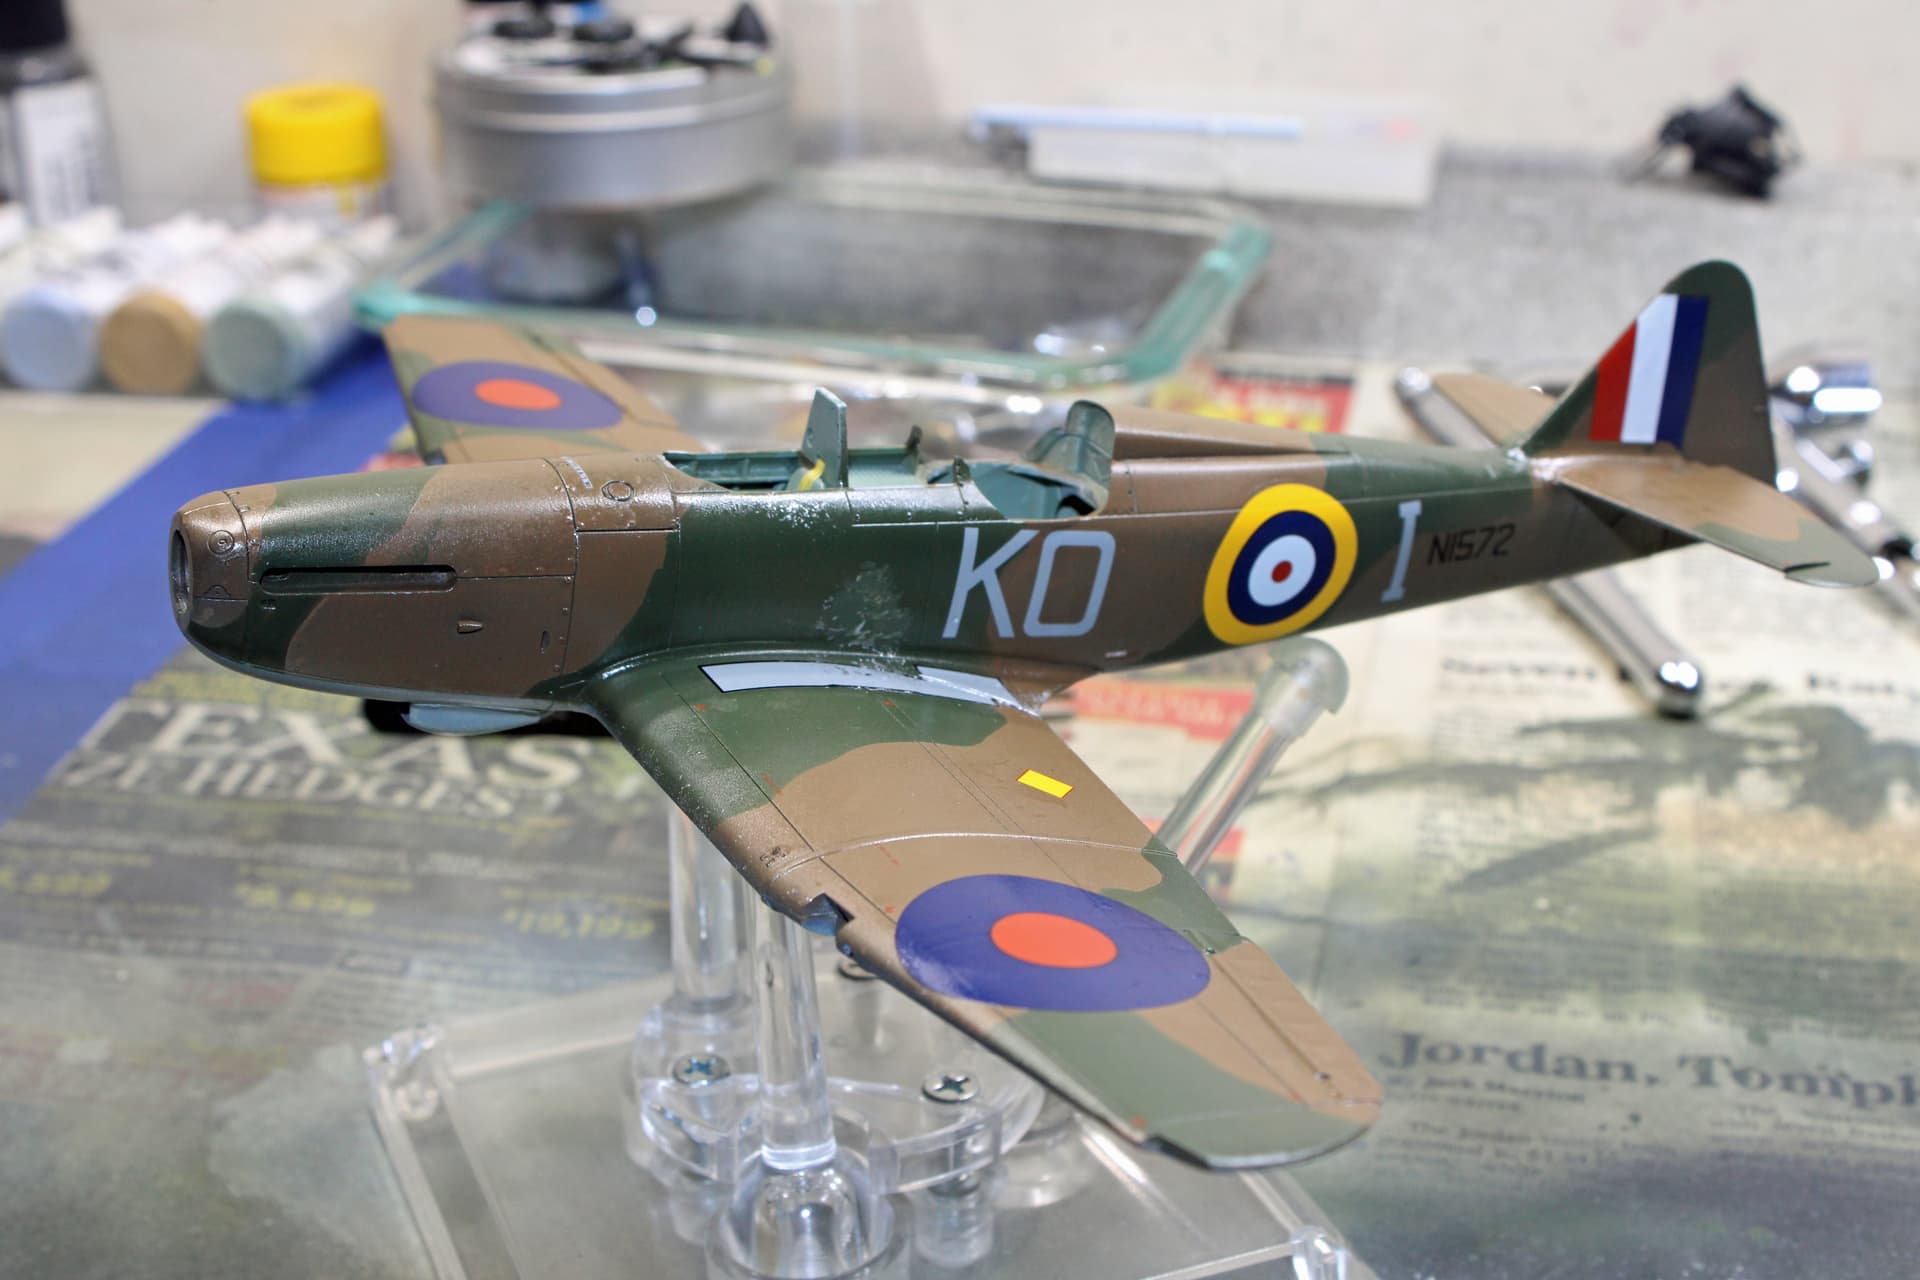
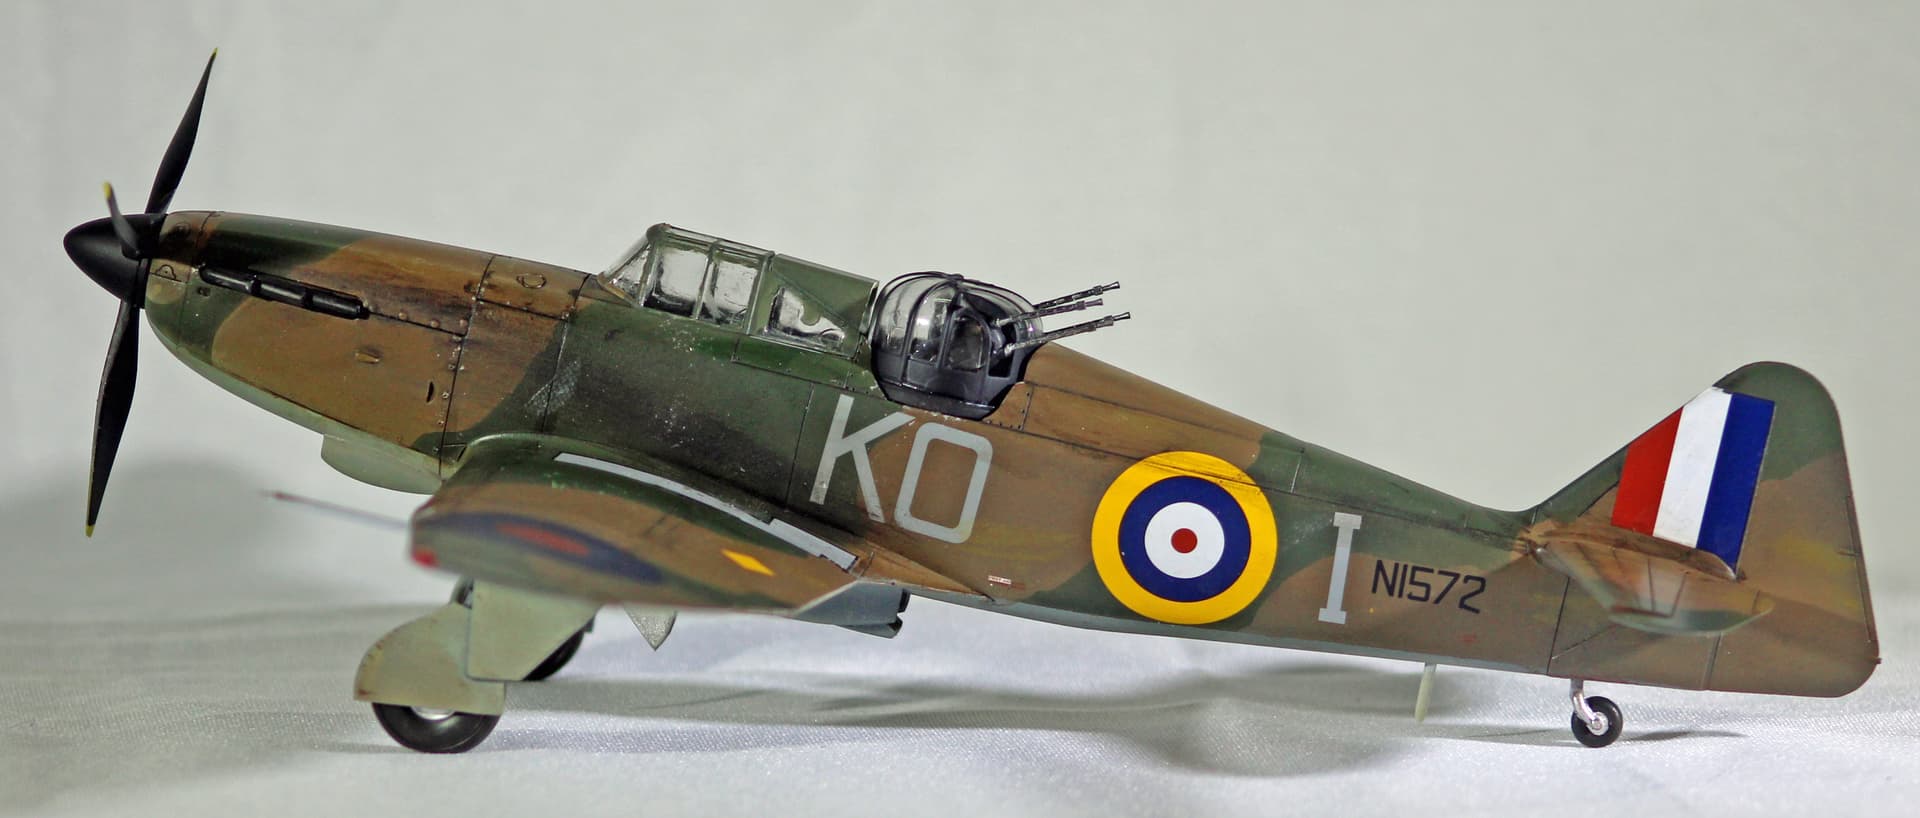
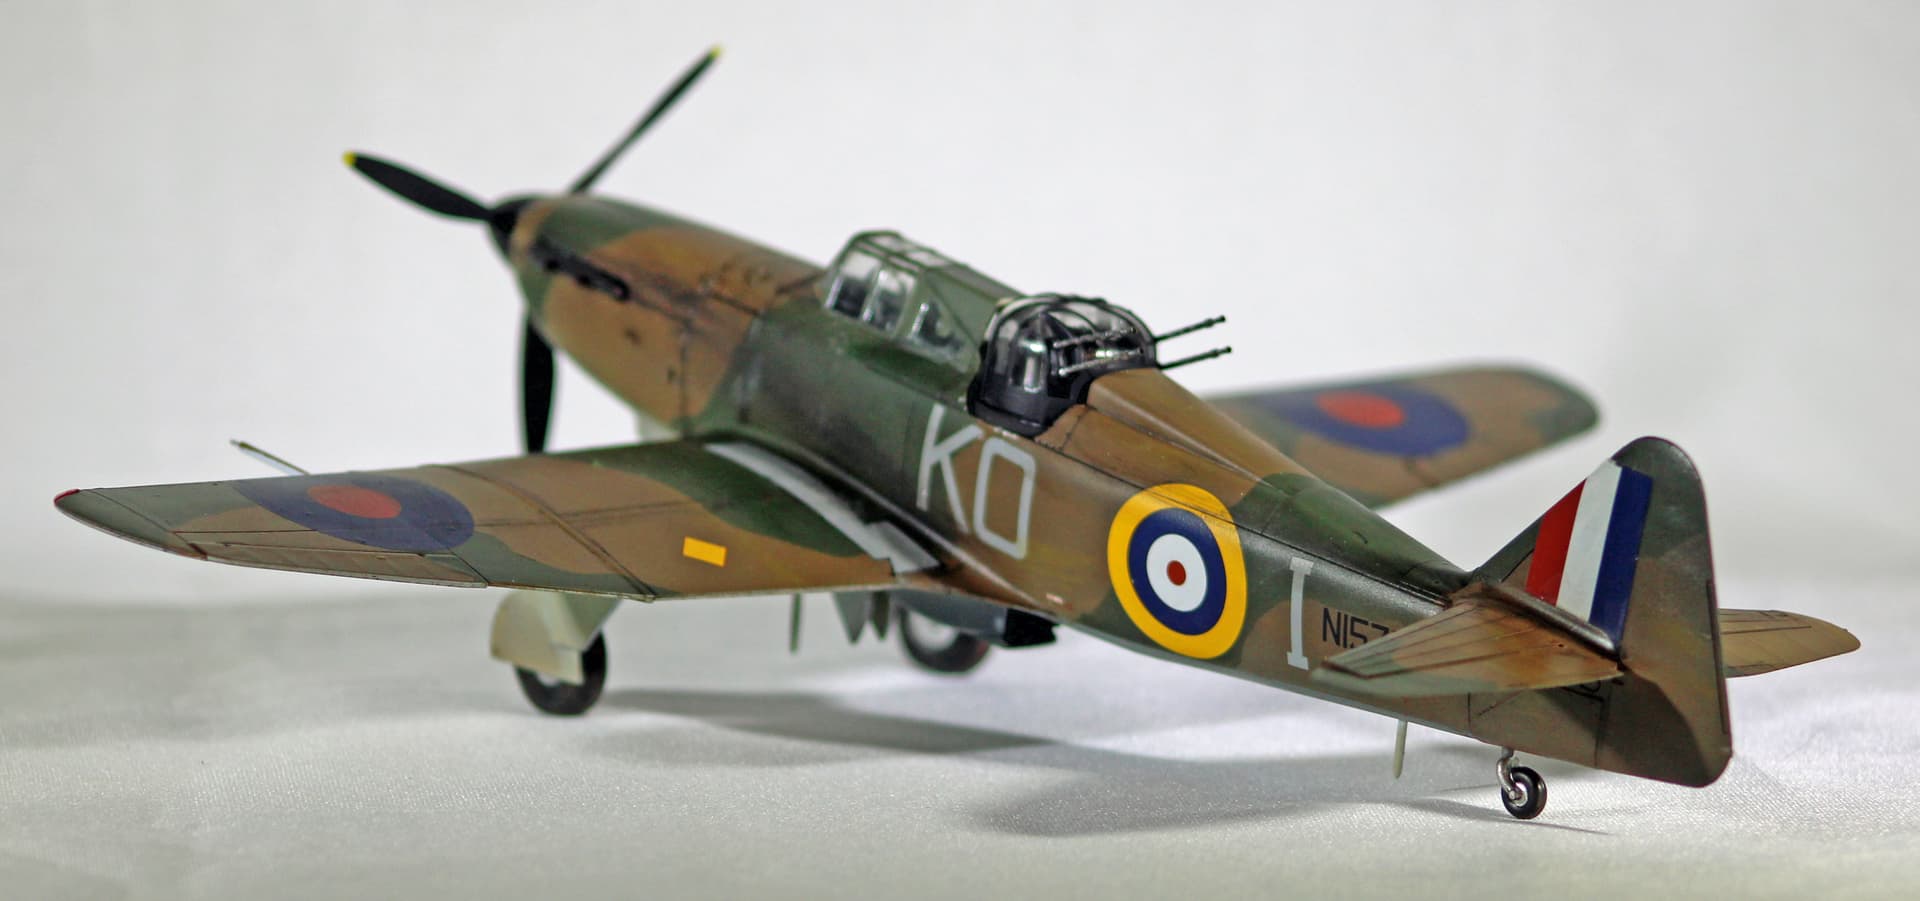
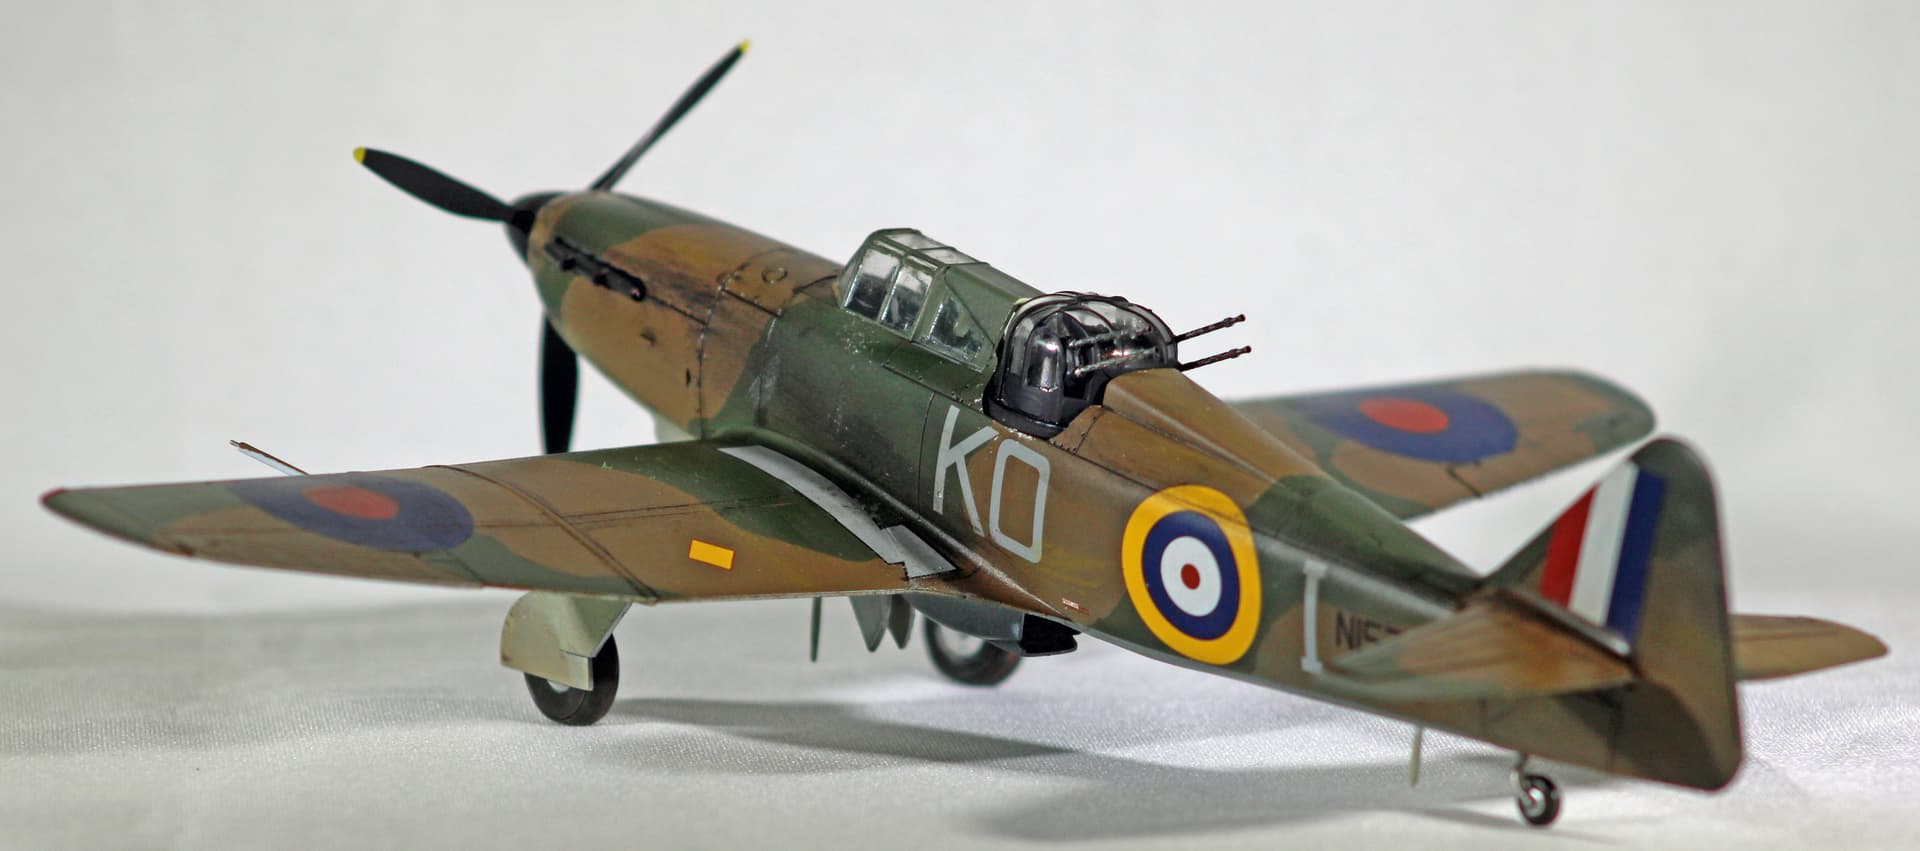
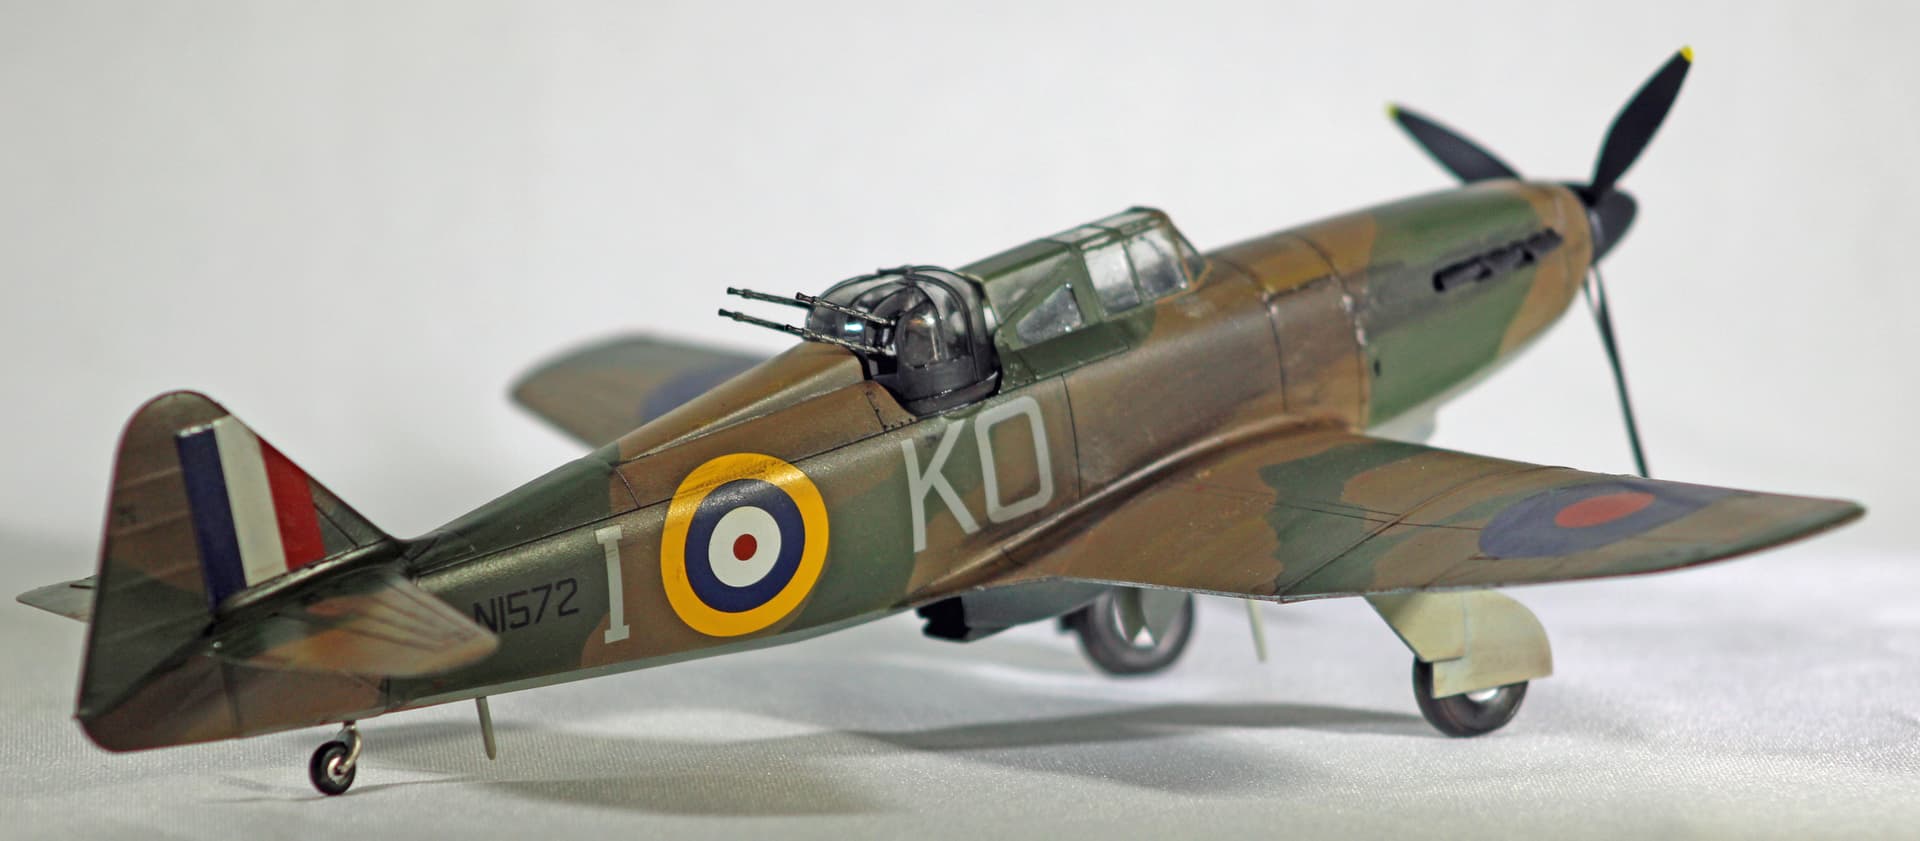
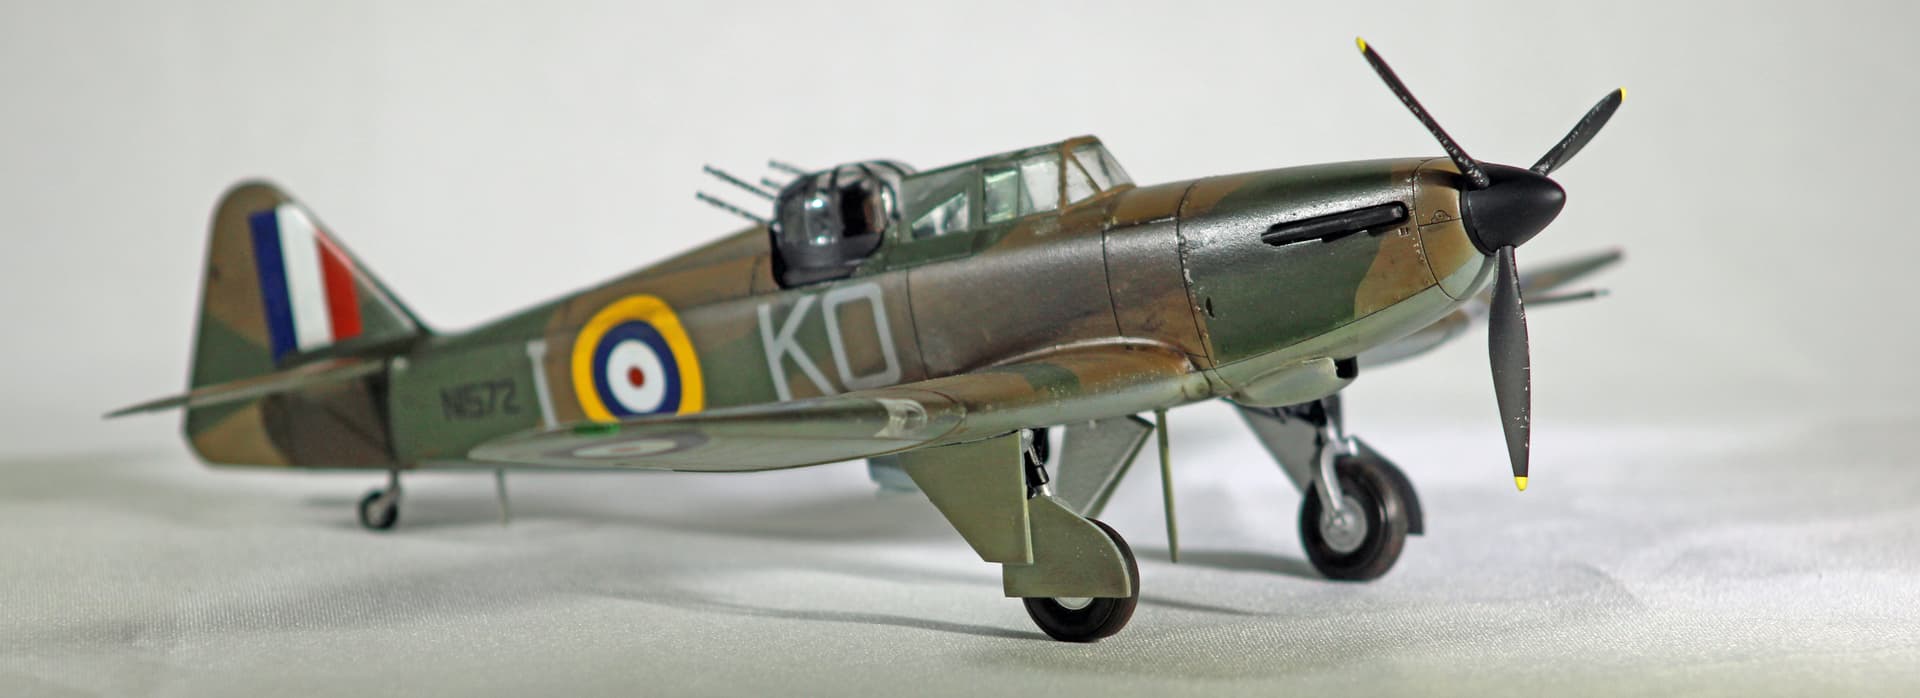
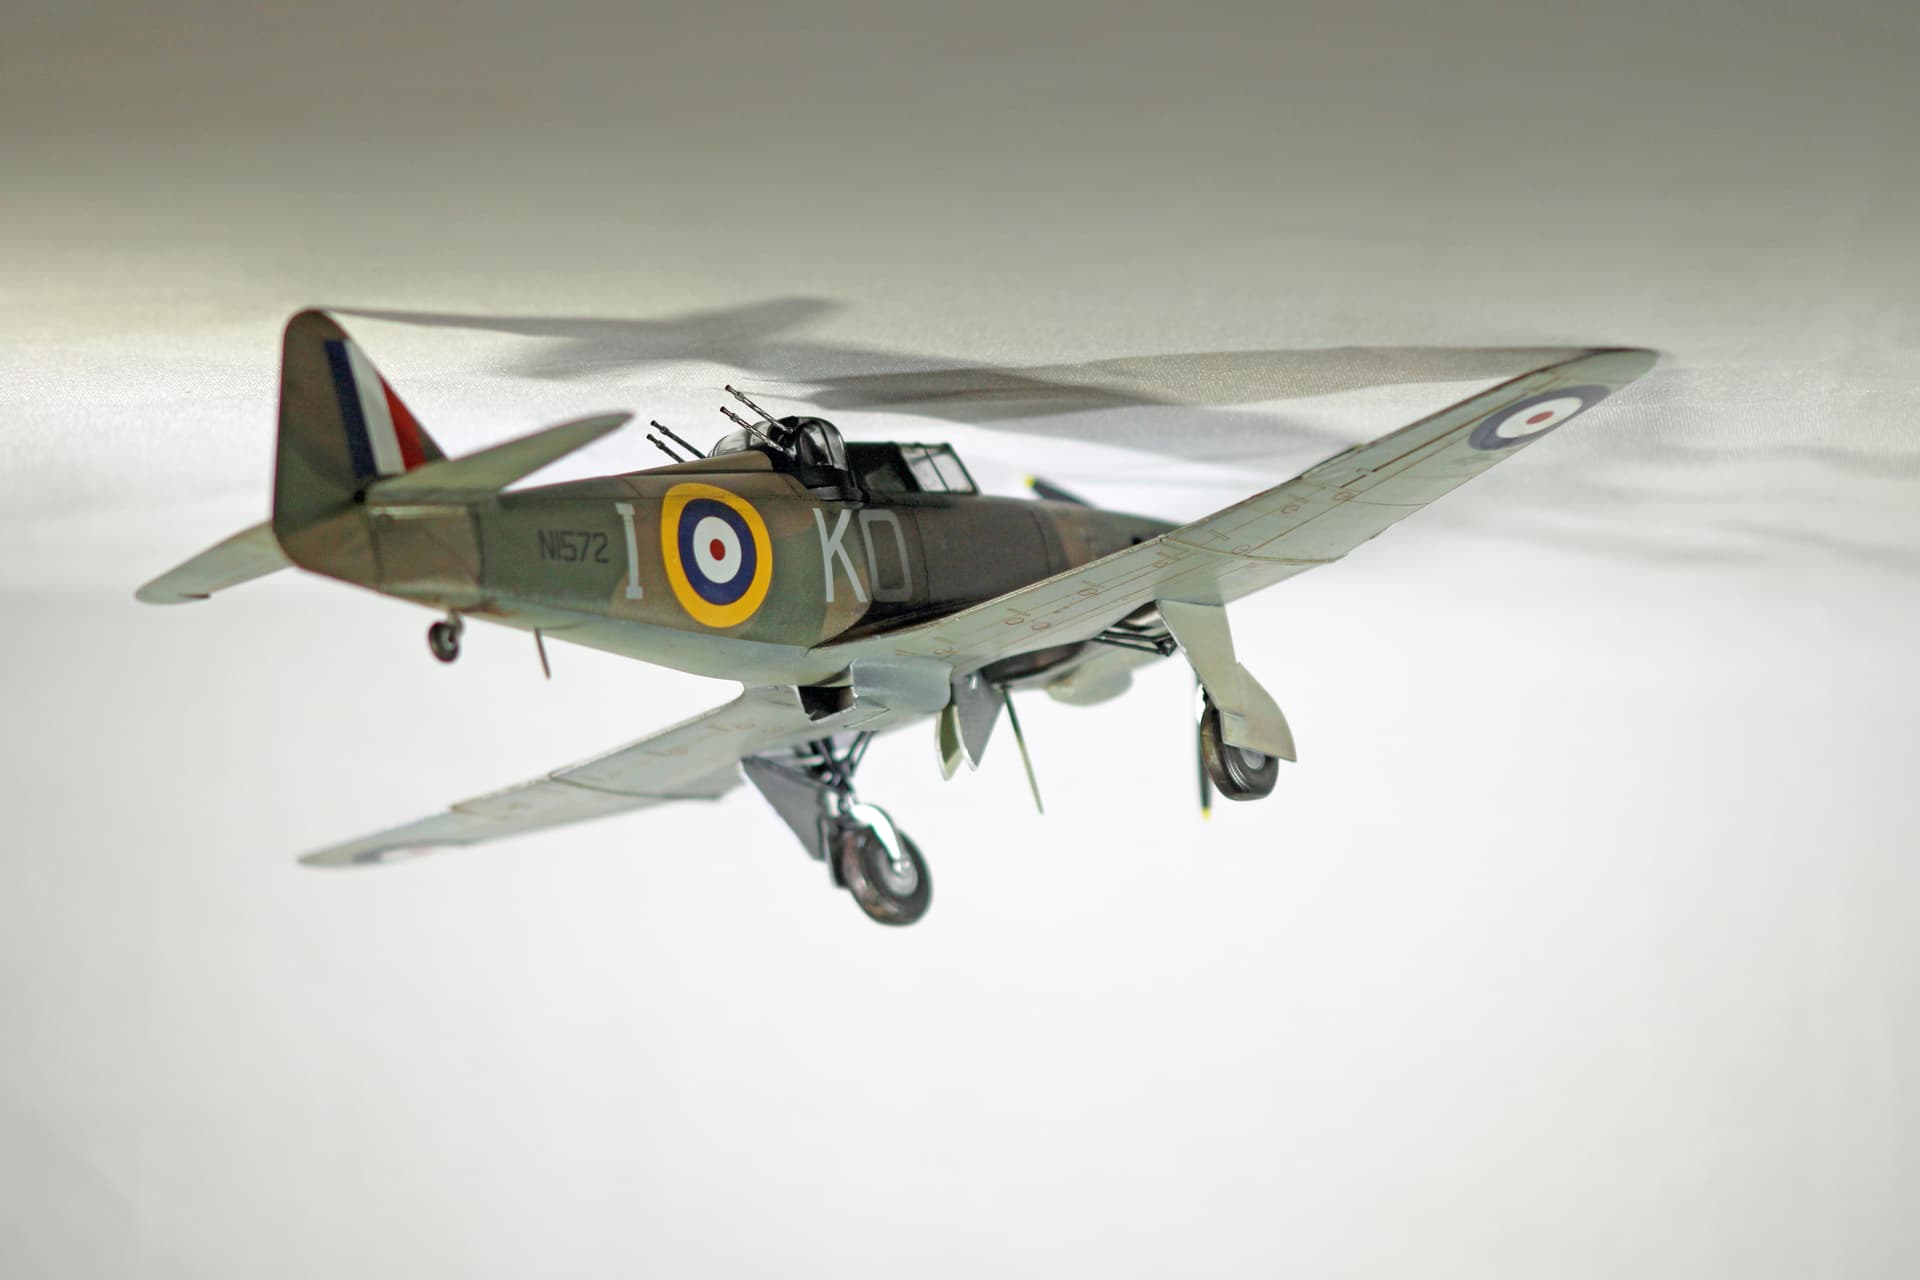
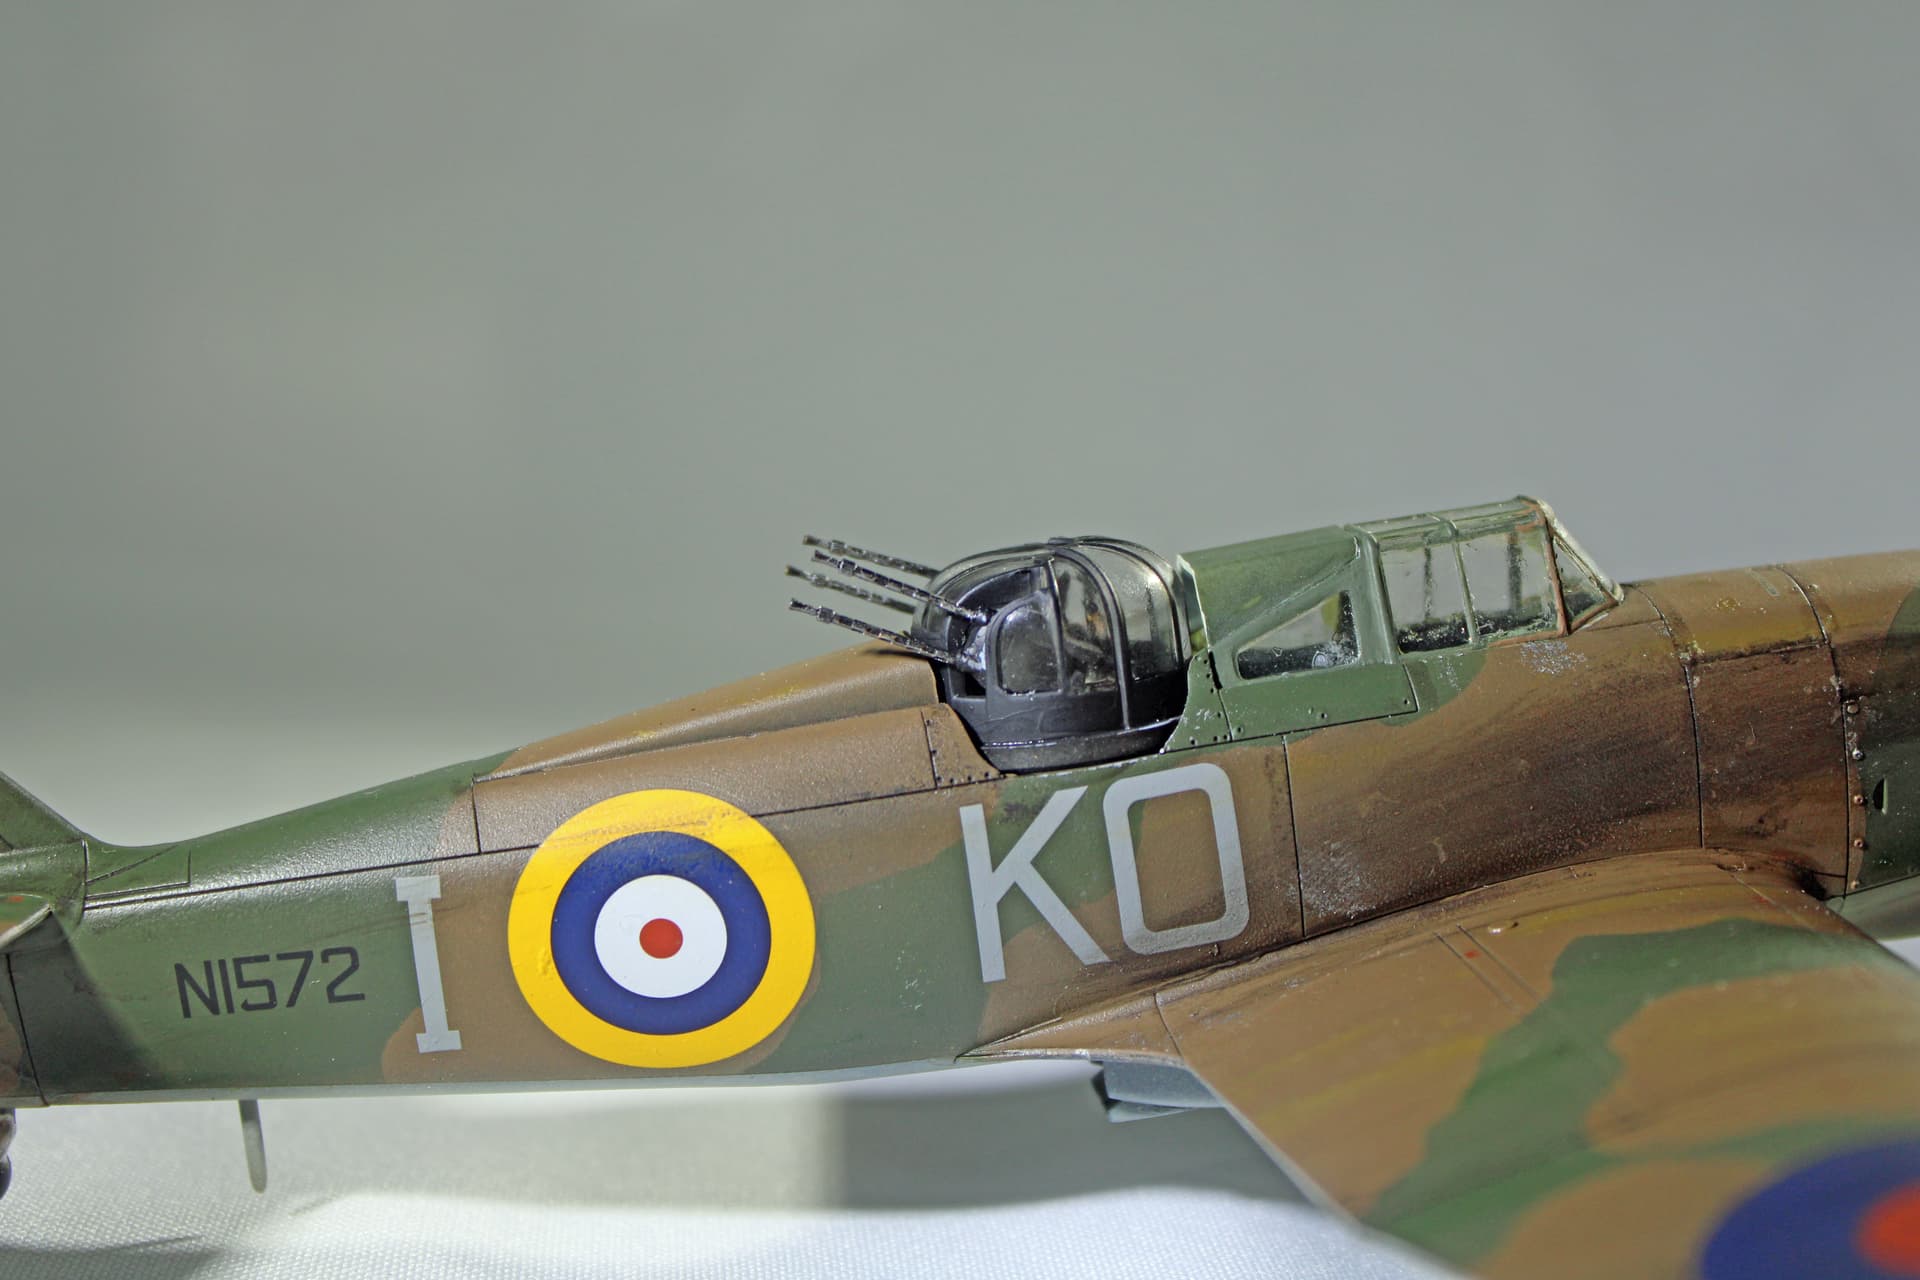
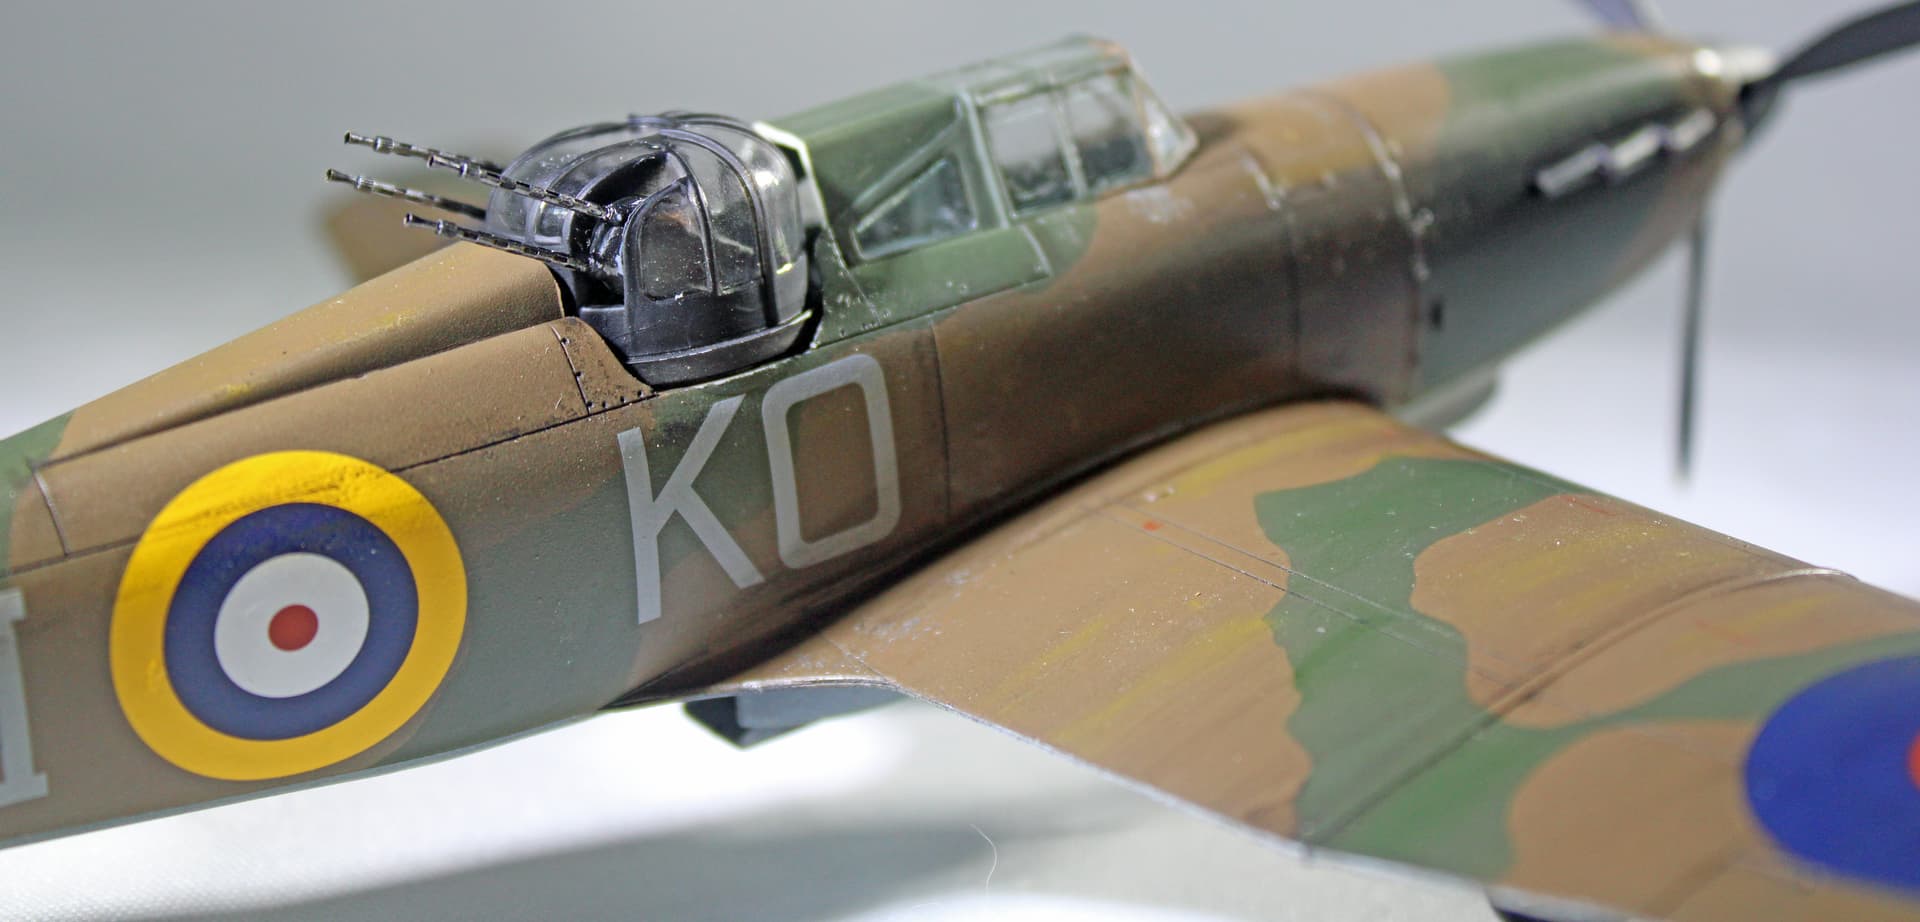
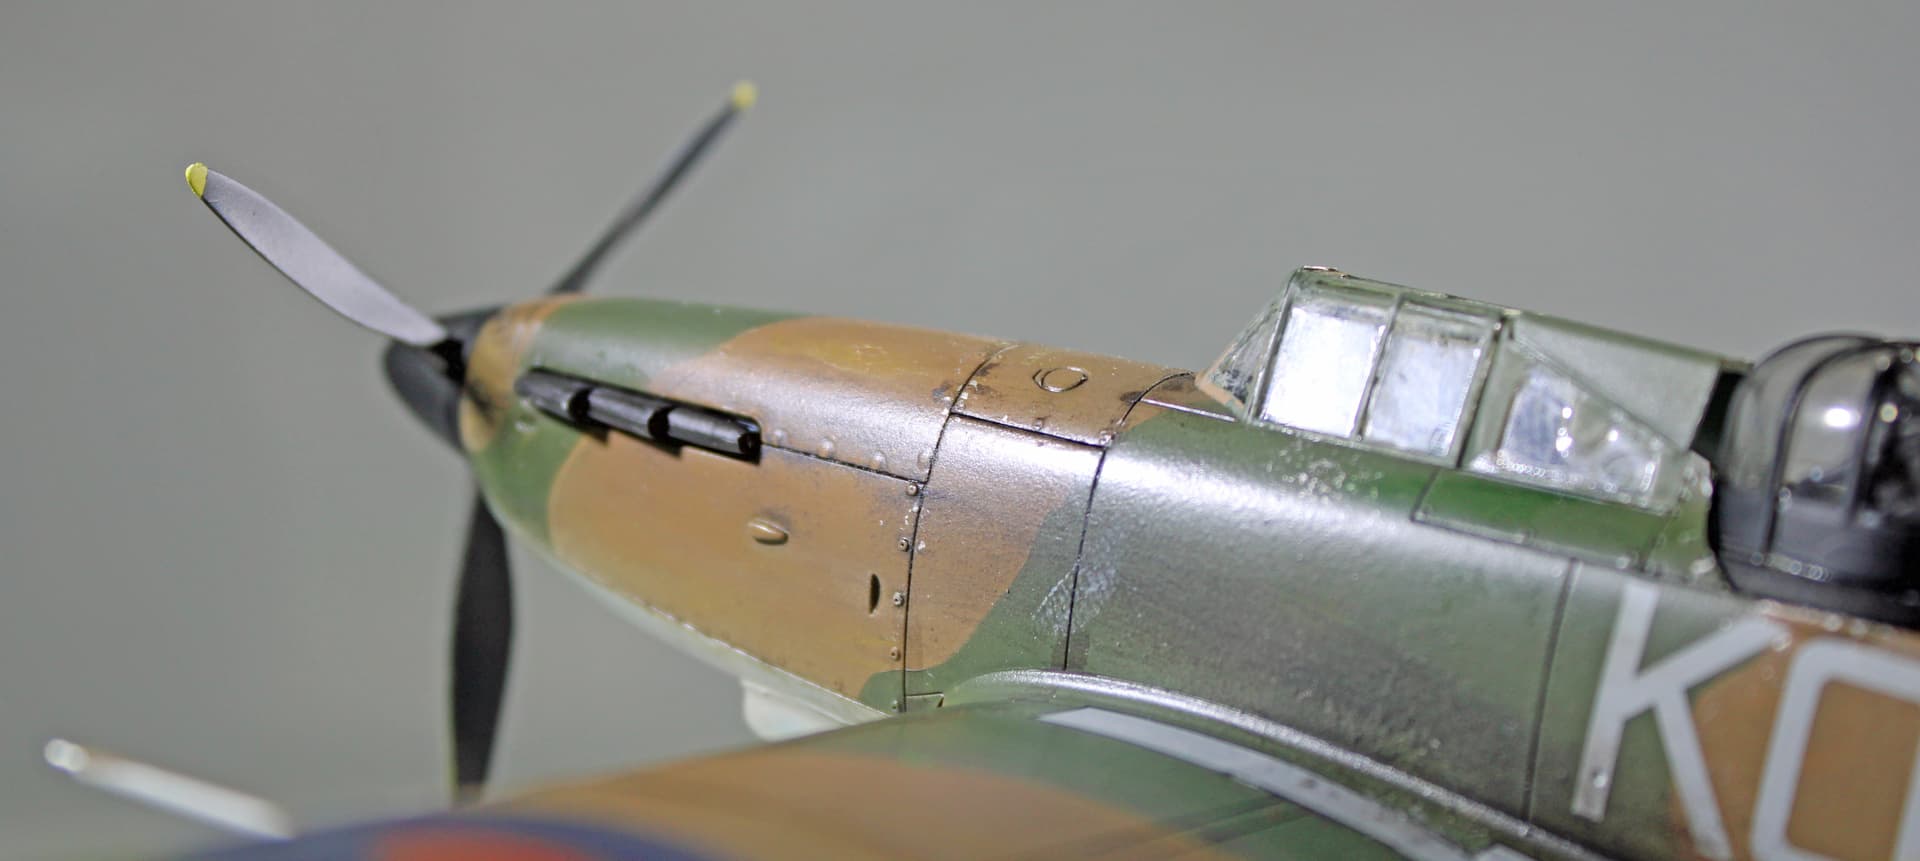
The turret is not completely OOB, as I had bought a set of Master Model PE gun barrels for RAF birds when I bought the kit. So I cut off the kit barrels, drilled out mounting holes in the remaining plastic parts, then installed the PE barrels. They look much better than the kit parts.
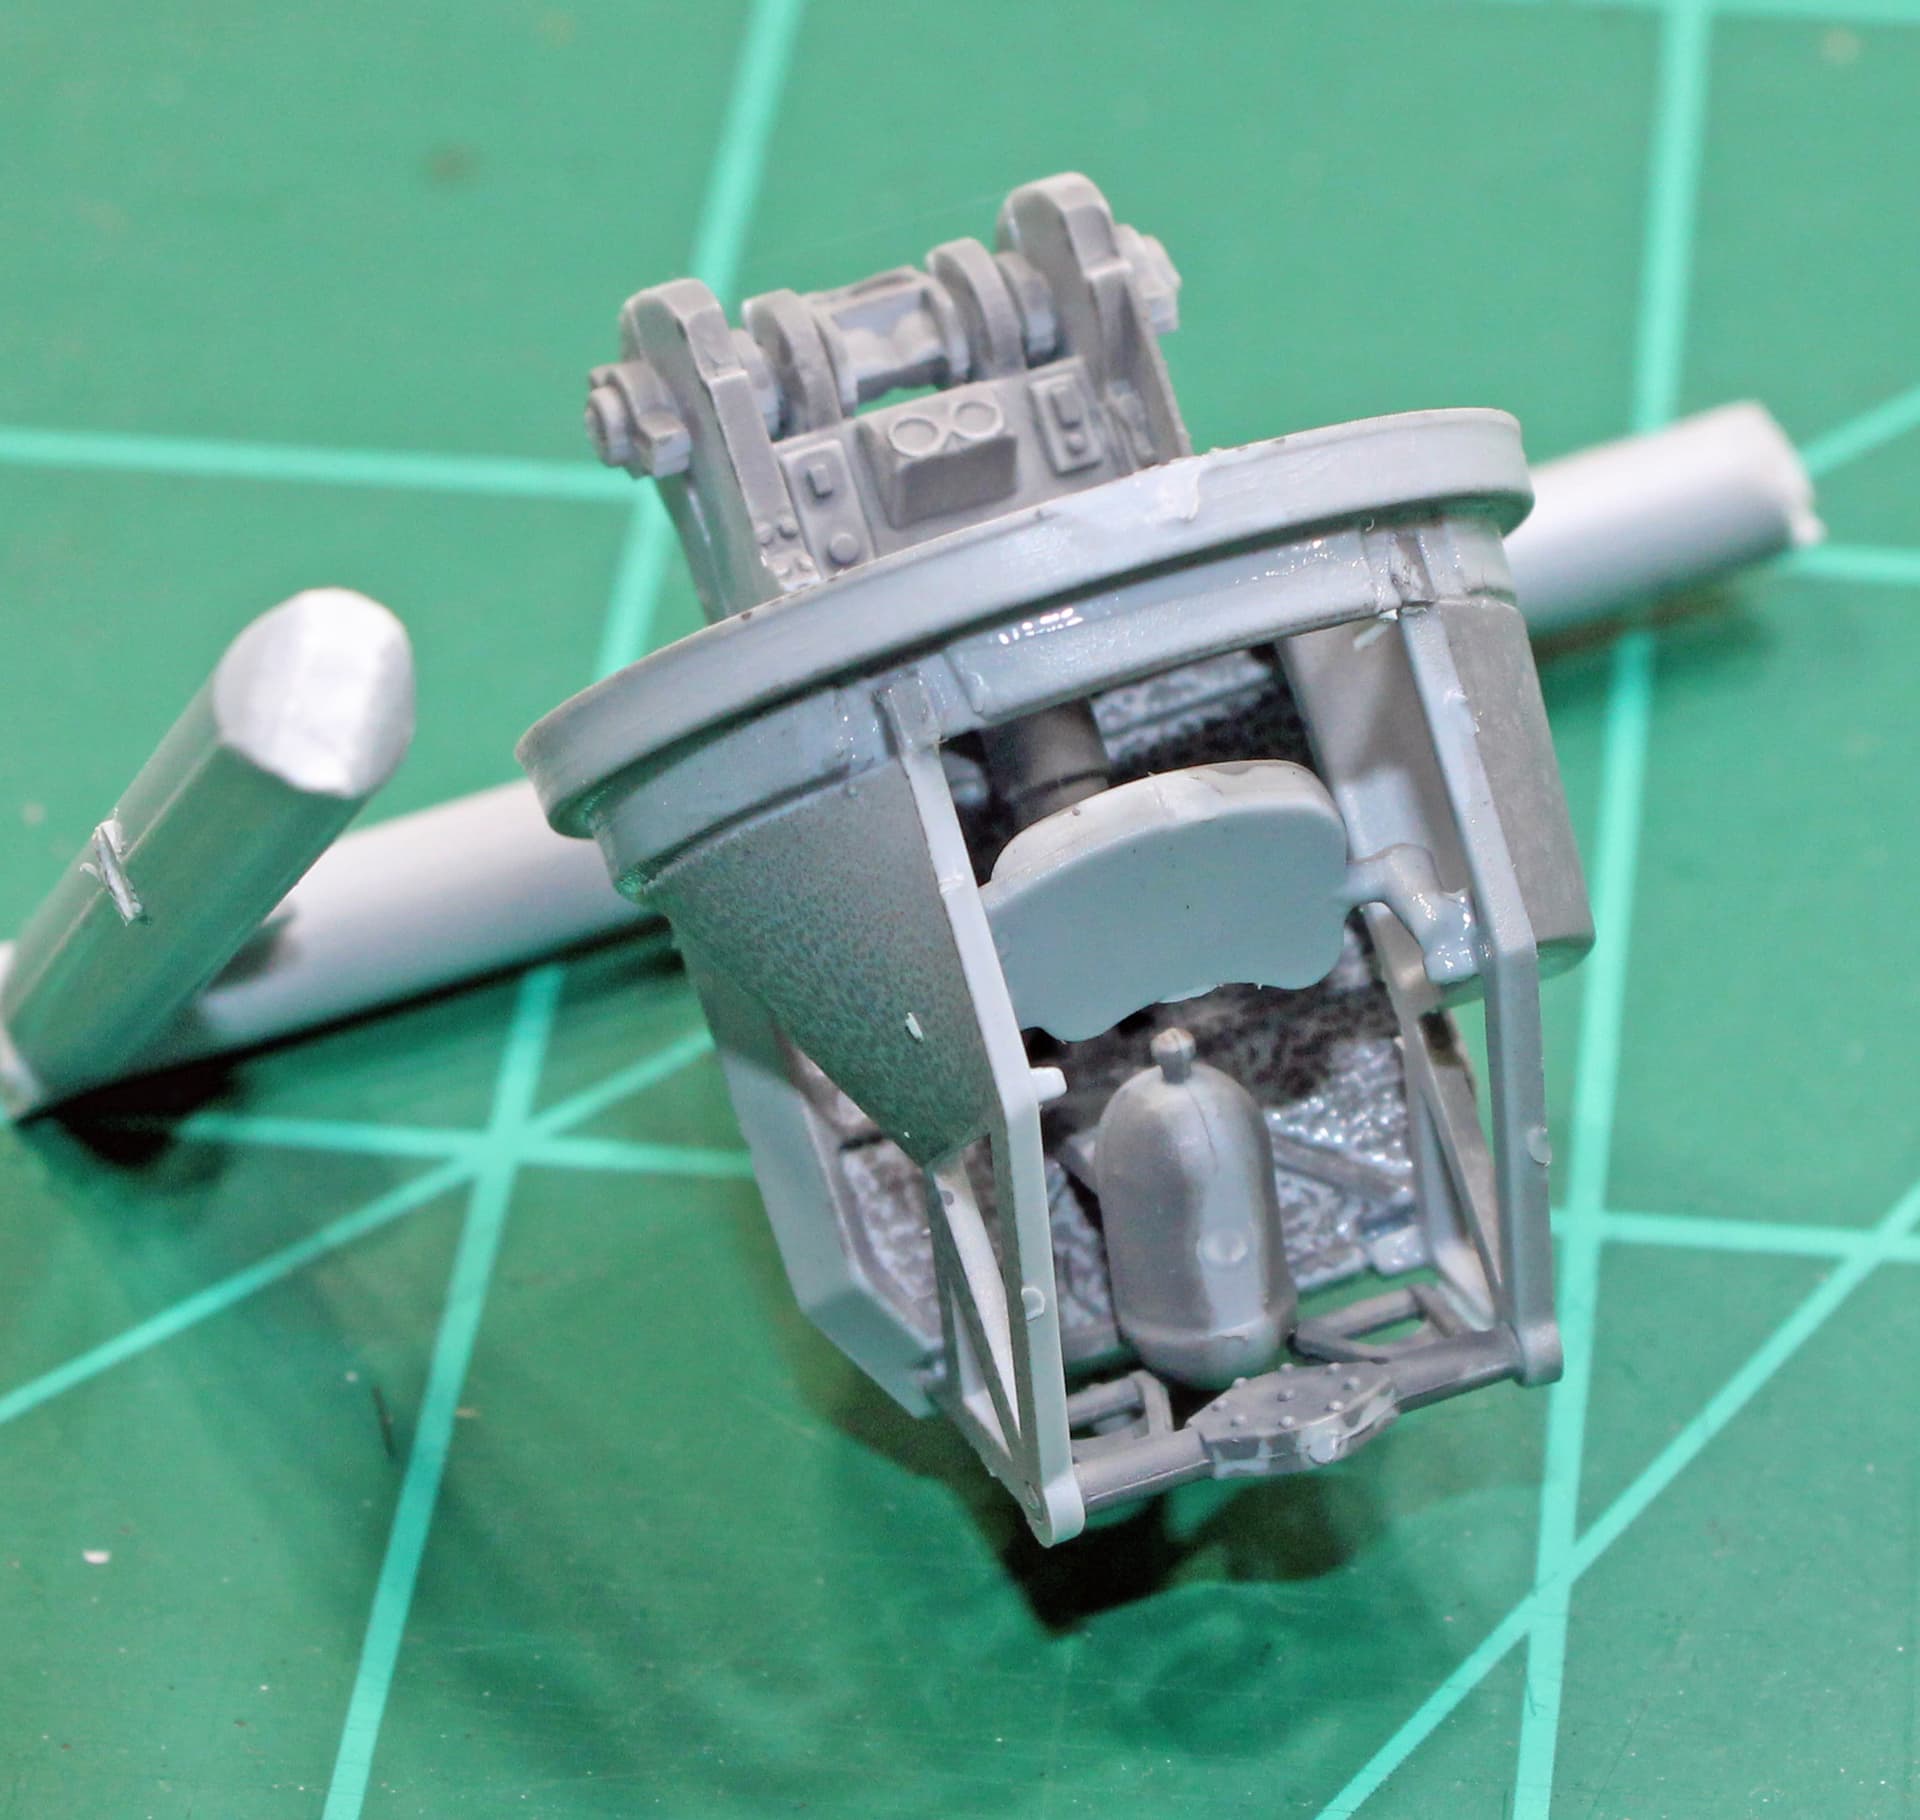
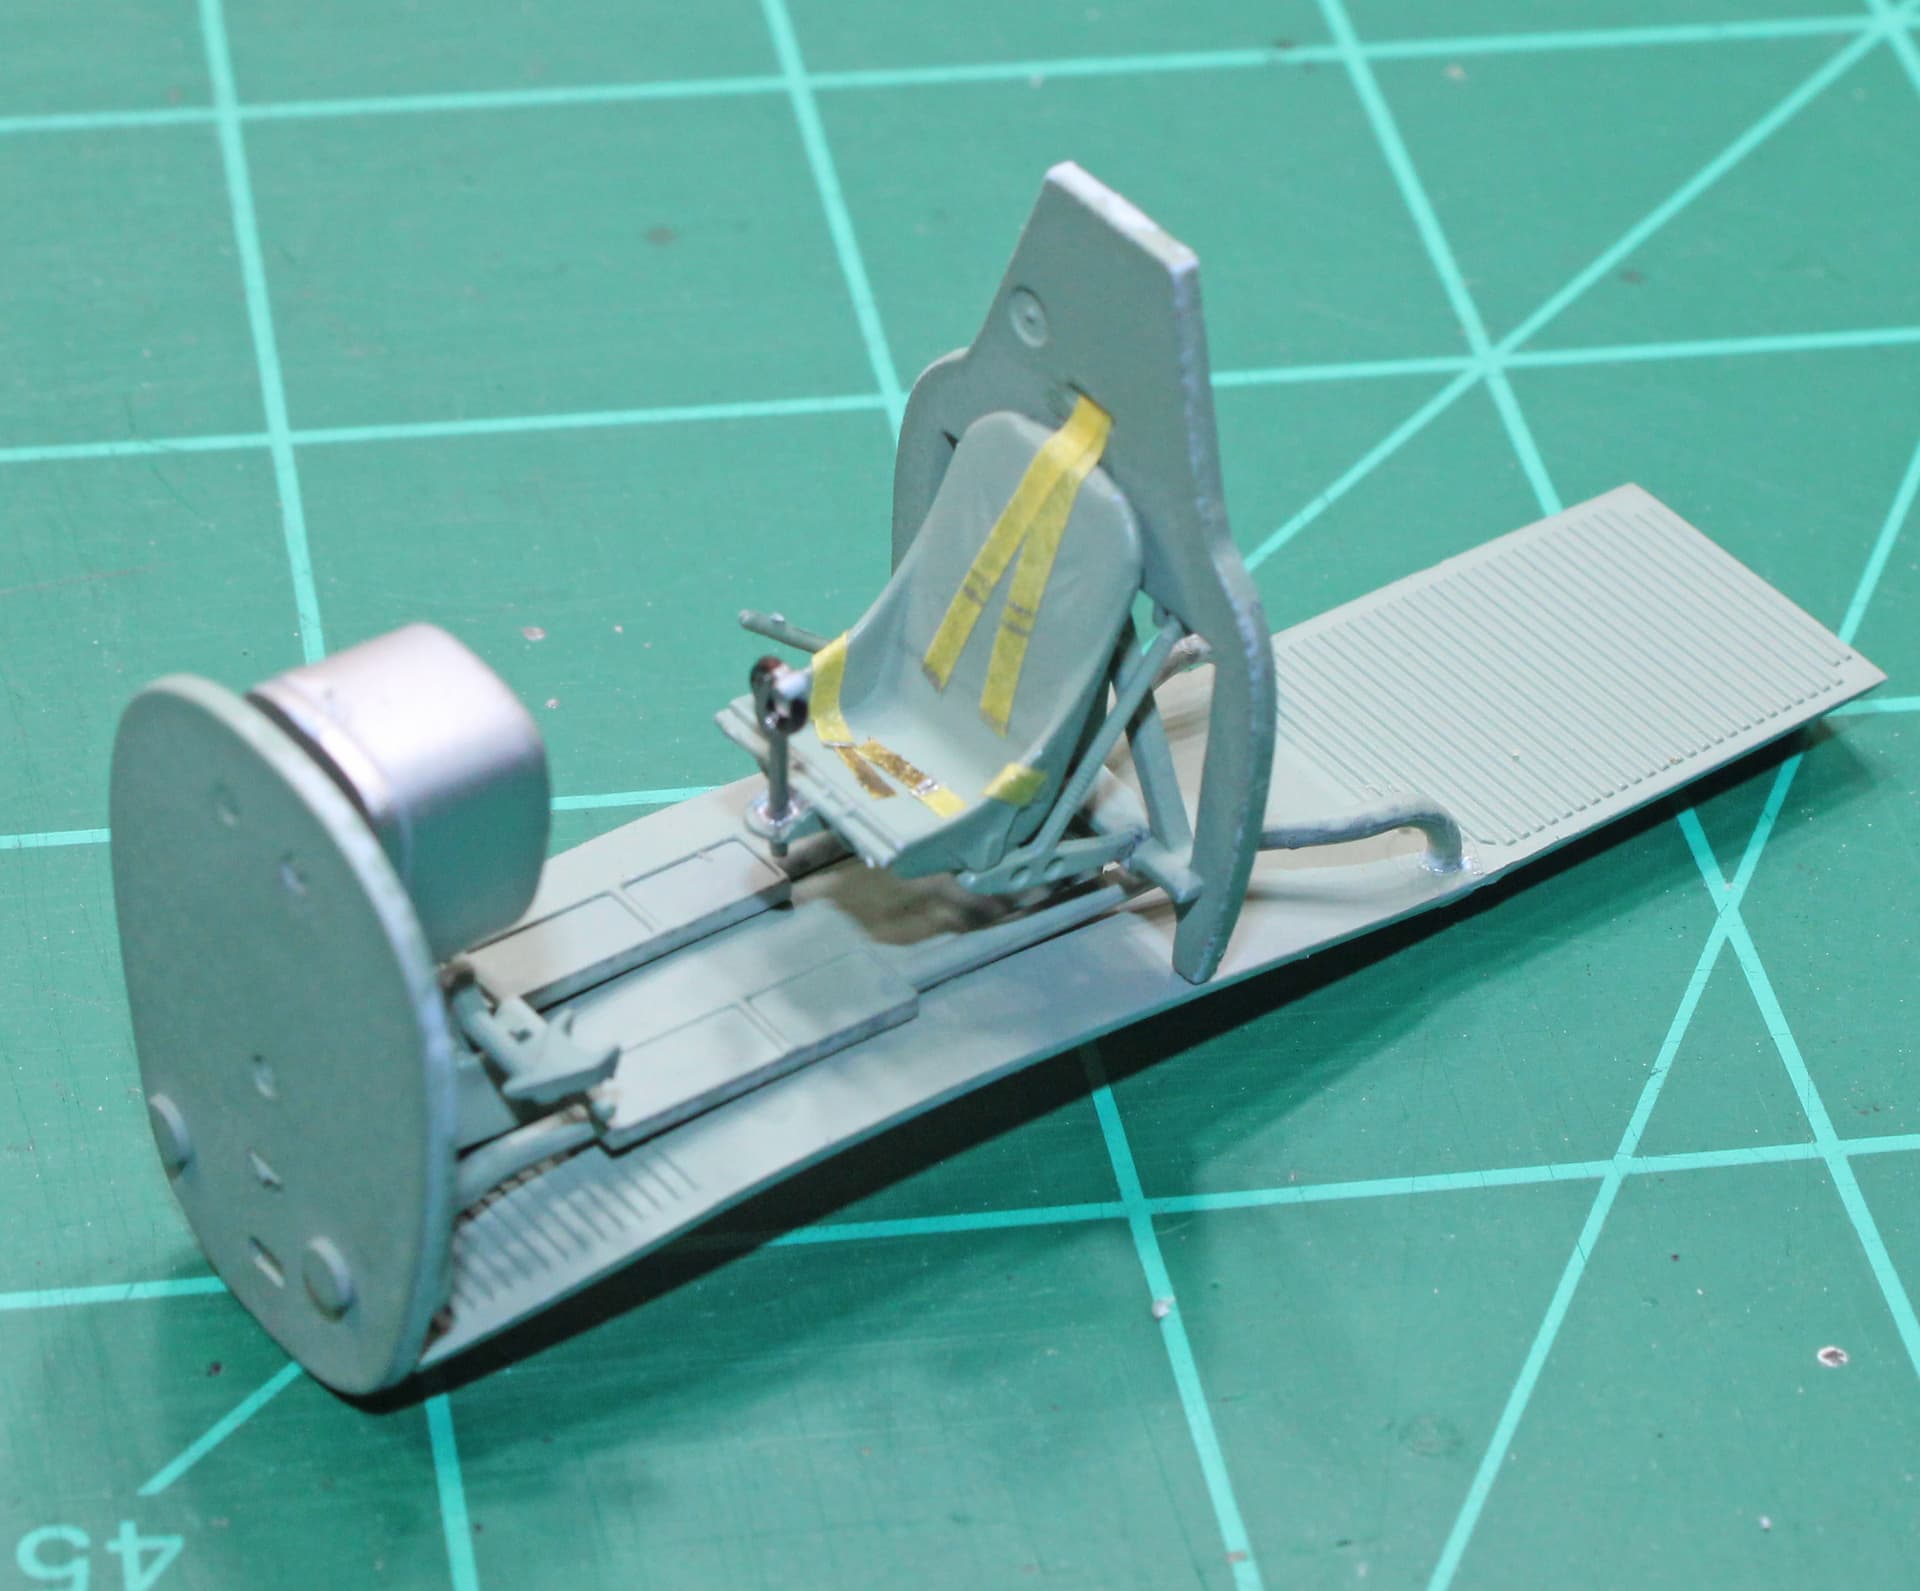
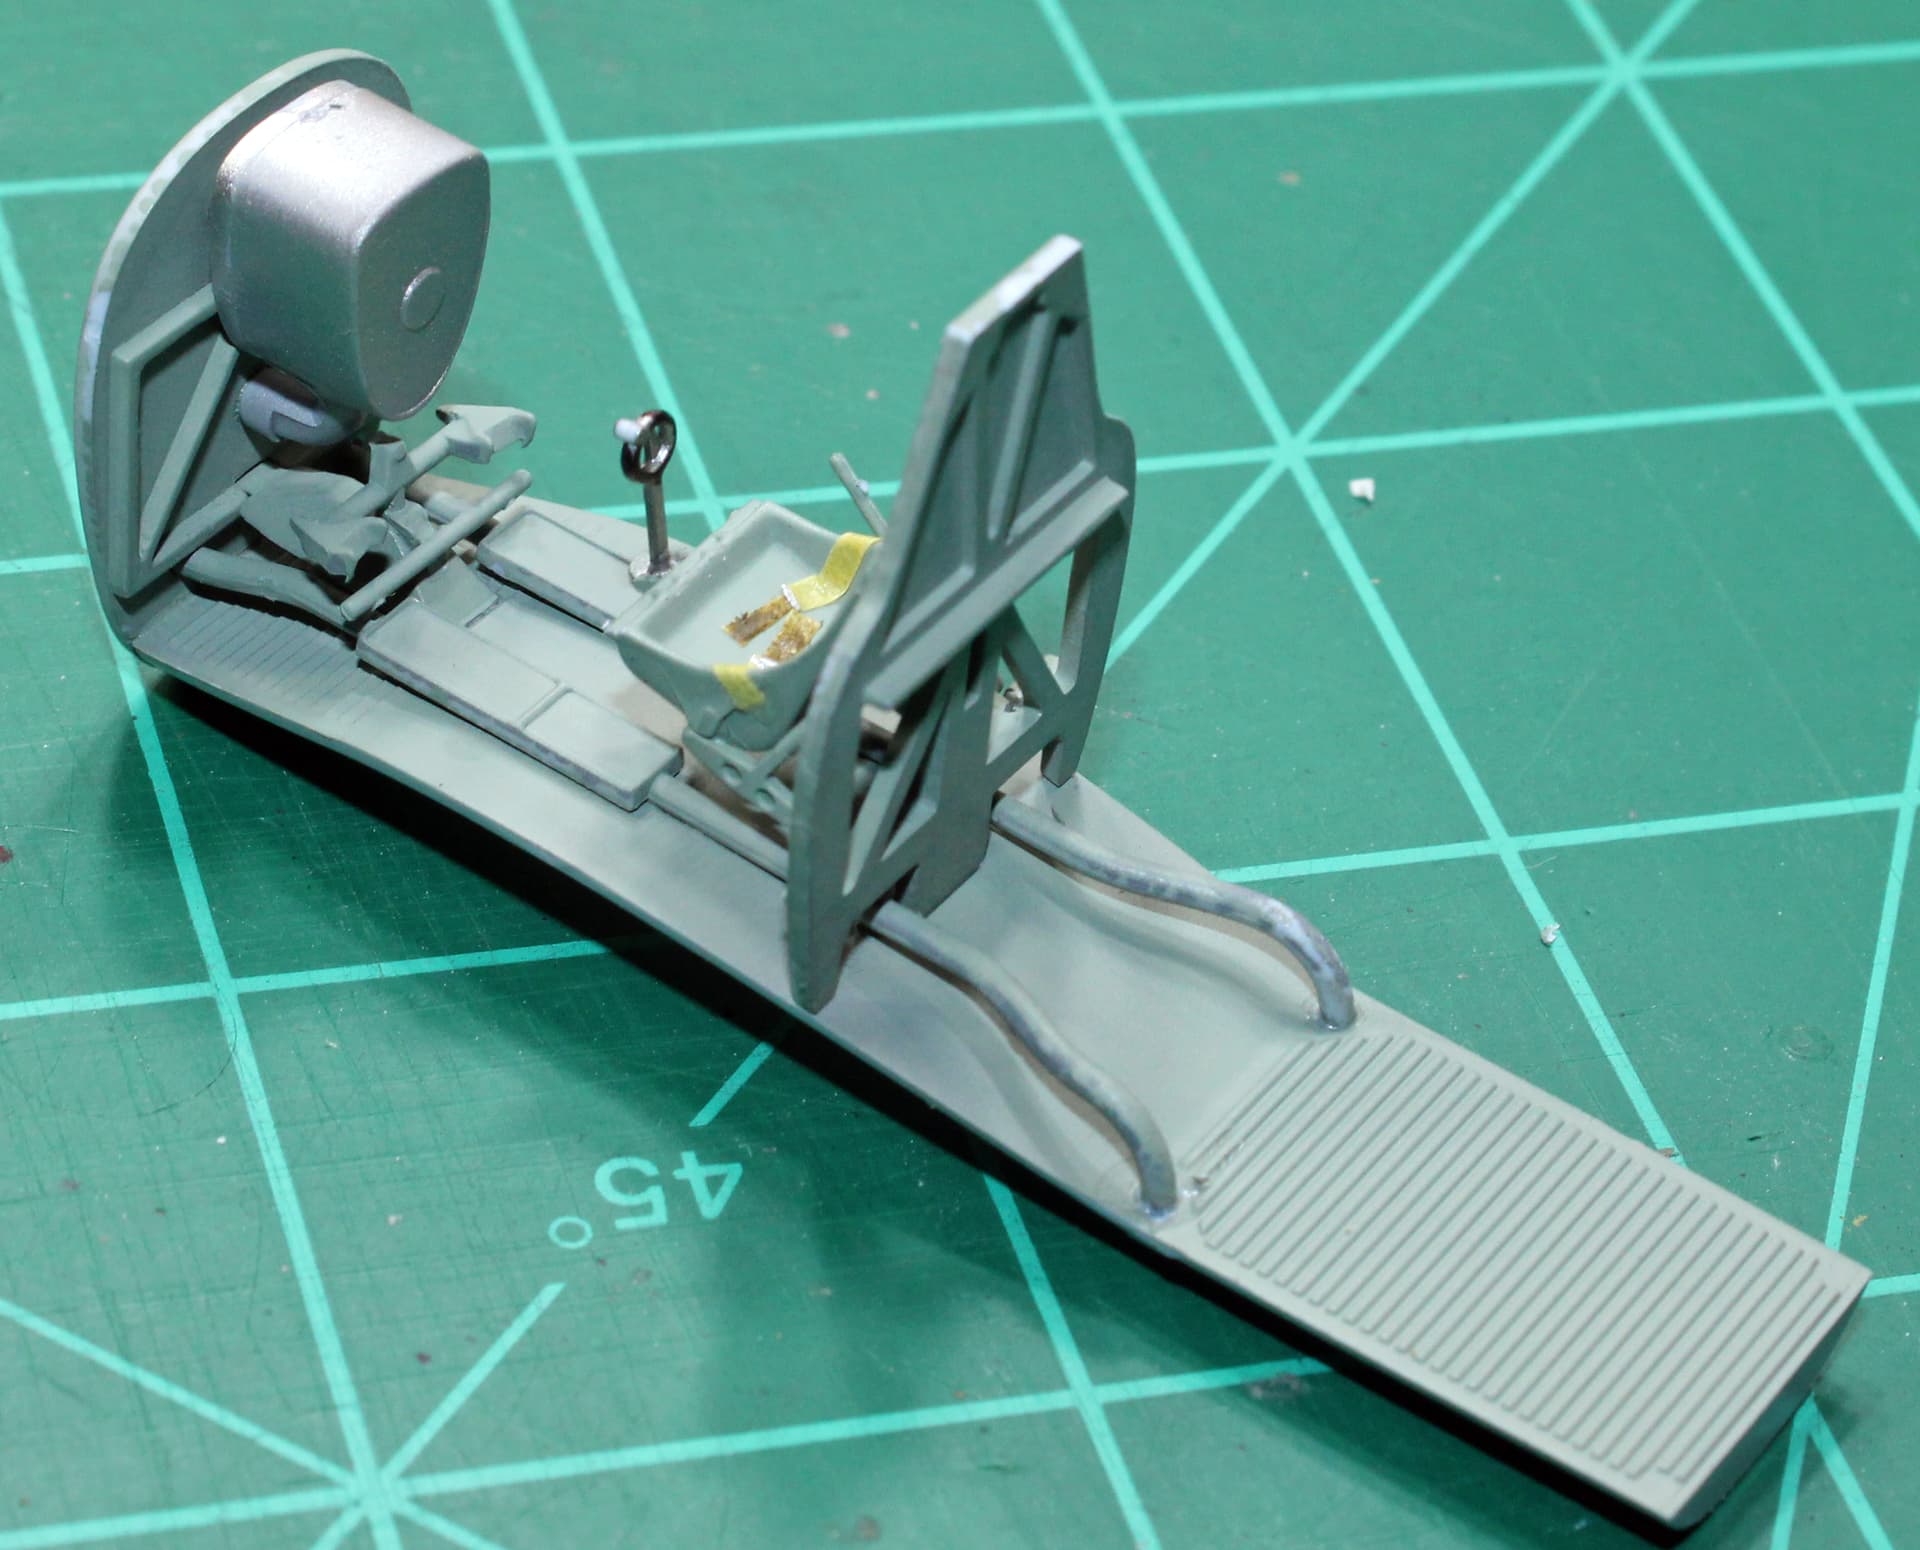
Then I spent the rest of my bench time in the cockpit. The kit does not include seat belts - why don’t more manufacturers include this part, even if a Tamiya-like decal? I didn’t want to put a lot more money into this build, so I’ve opted against adding additional PE sets or a Quinta Studios 3D decal set. But I wanted seat belts. In the past, I’ve used grocery store paper bags for the purpose, but I in one of the build reviews I read, someone used yellow Tamiya masking tape for the purpose. I opted to give that a go. Worked pretty well, they look convincing enough despite not having the hardware such as the buckles. I’ll probably build this with the canopy closed, so the belts will be visible through the glass but not it won’t necessarily be obvious that they are simple strips of tape. I did use a fine brush and some aluminum paint to put on a stripe to represent the buckles.
I glued together what I could and have let them set for the night.
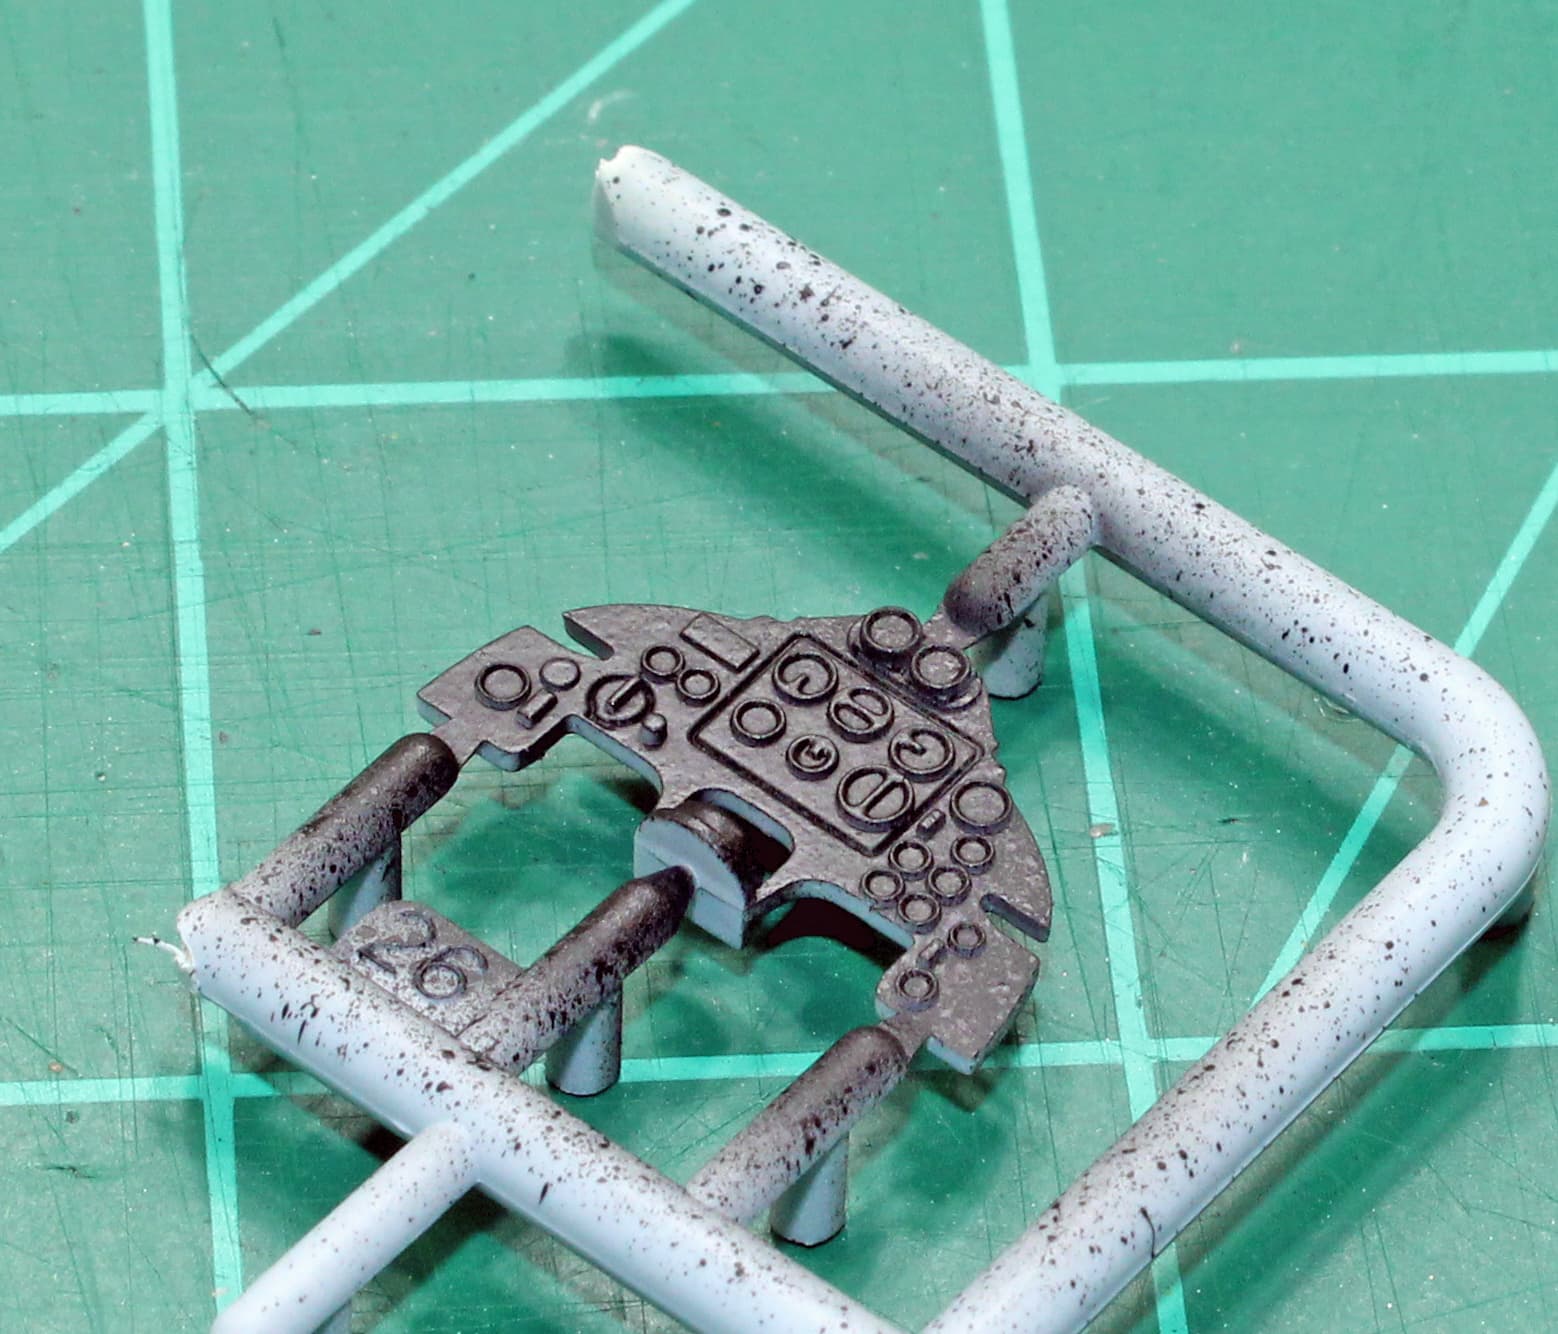
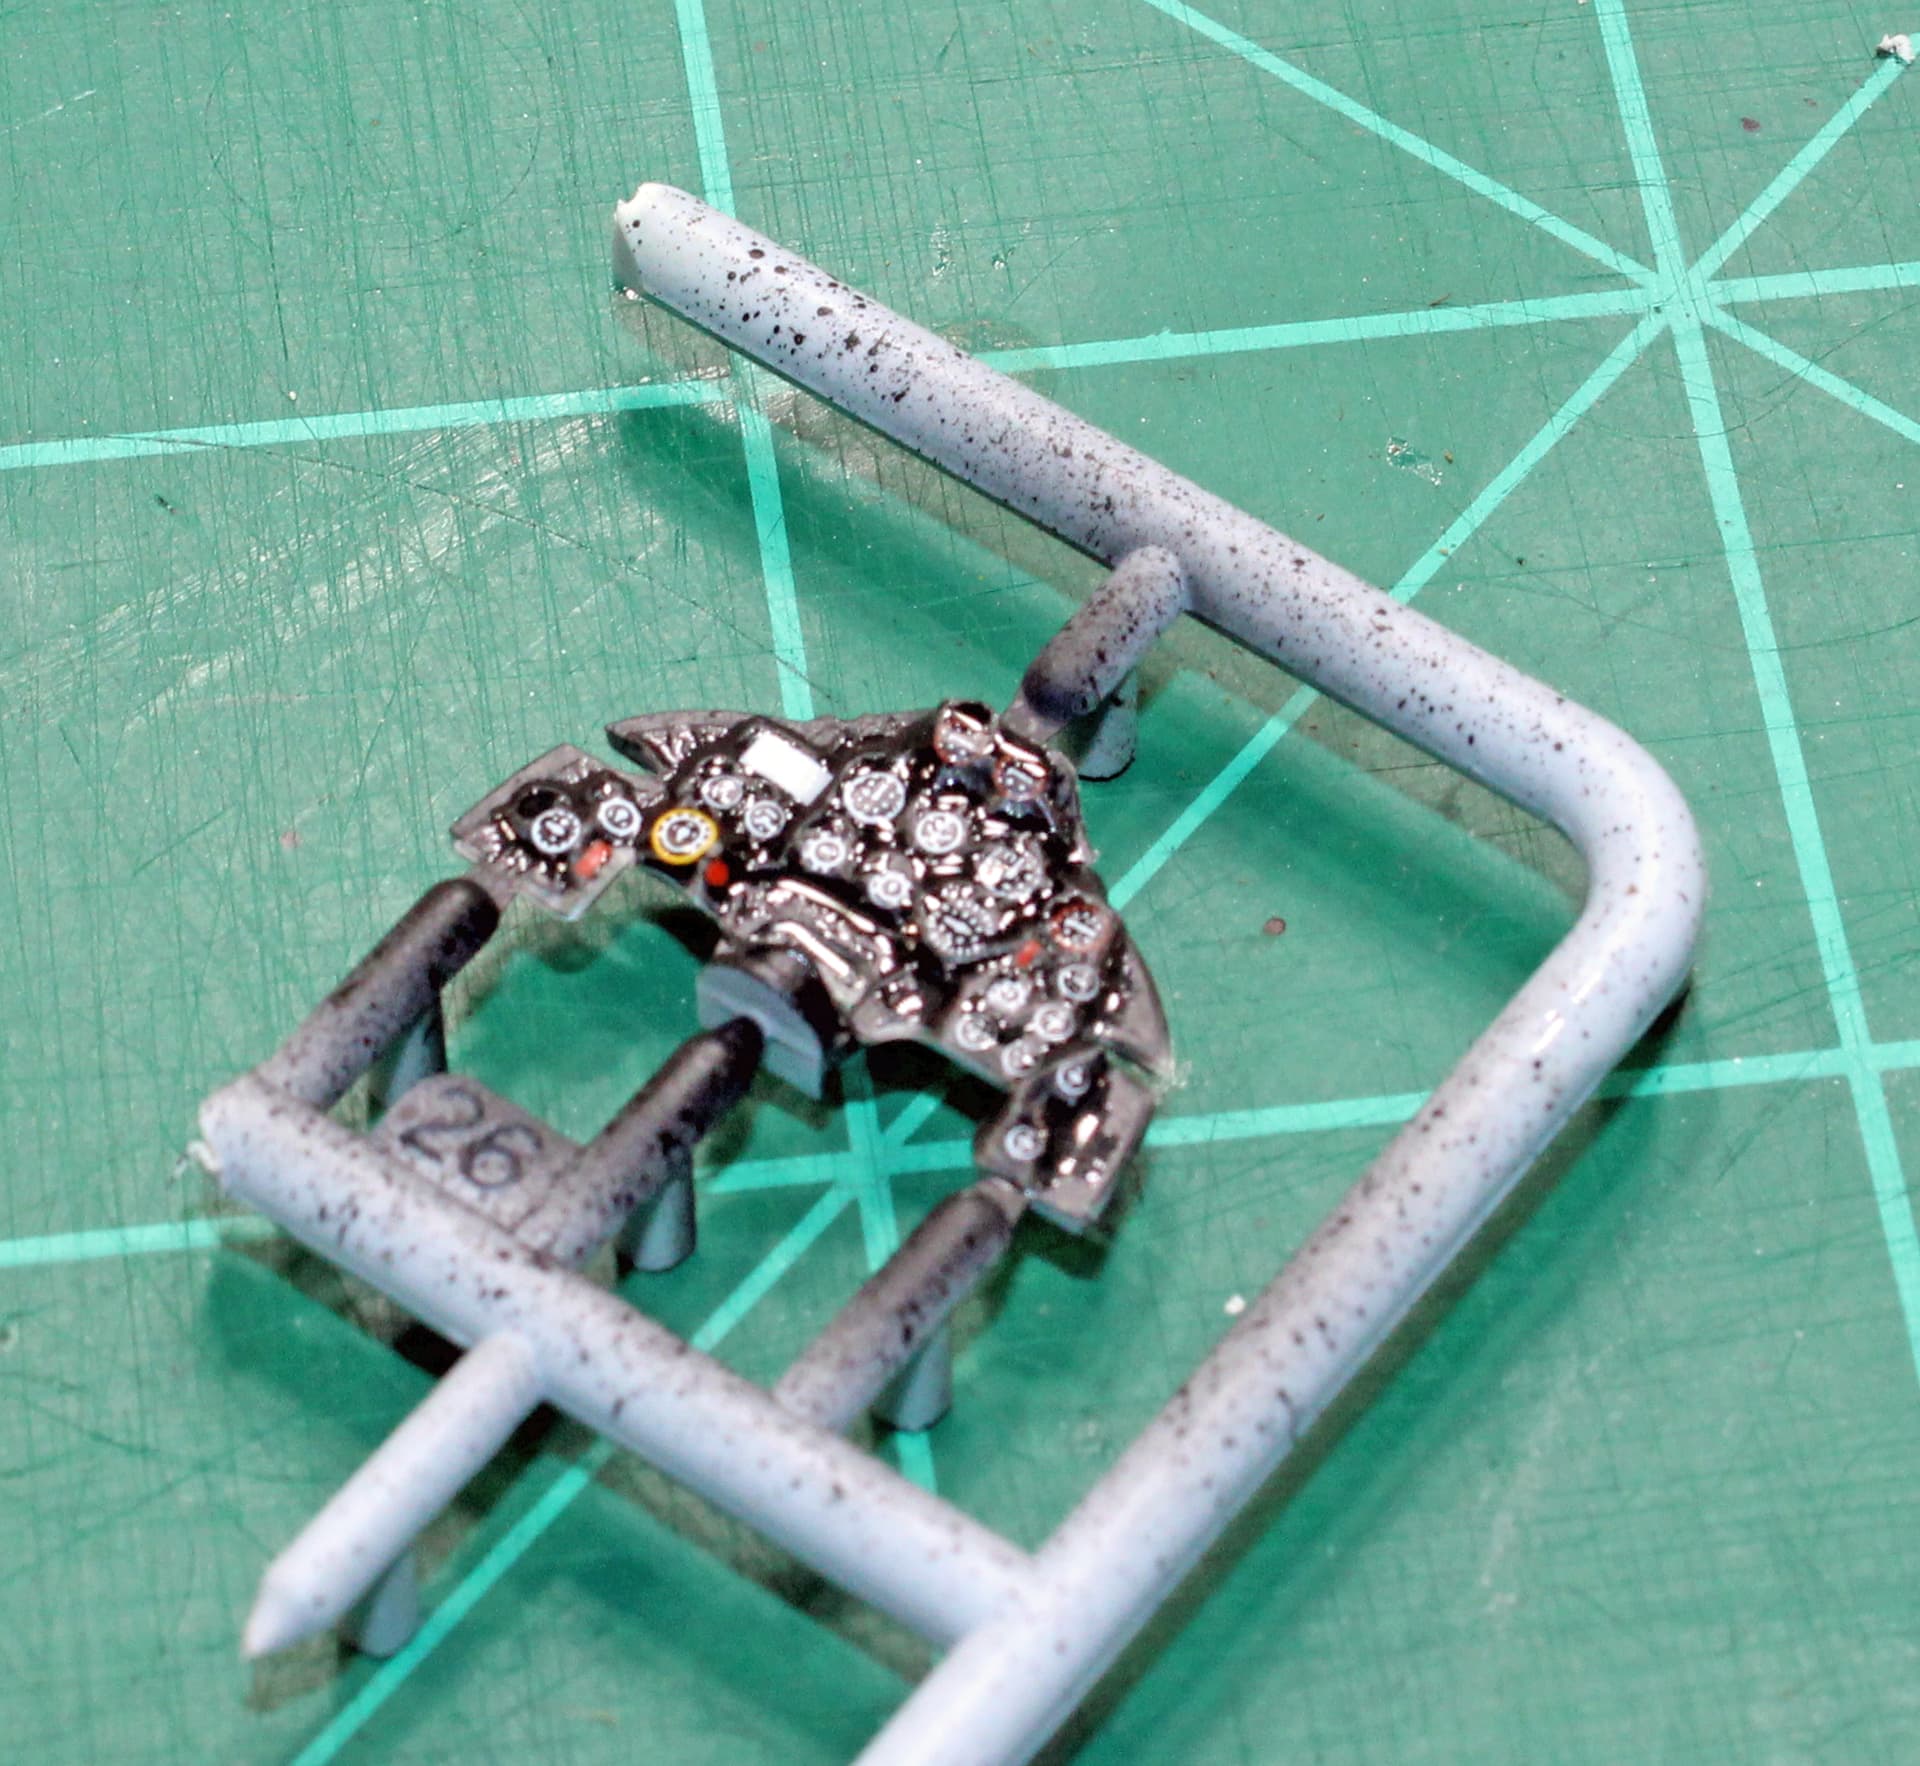
This kit doesn’t appear to be very well detailed OOB. I’m not overly familiar with the Defiant, so it could be that the kit represents the cockpit details very well, but it just seemed maybe a step above a typical 1960s Monogram kit. Although as far as I can tell, there won’t be any huge gaping openings needing to be filled with sheet styrene.
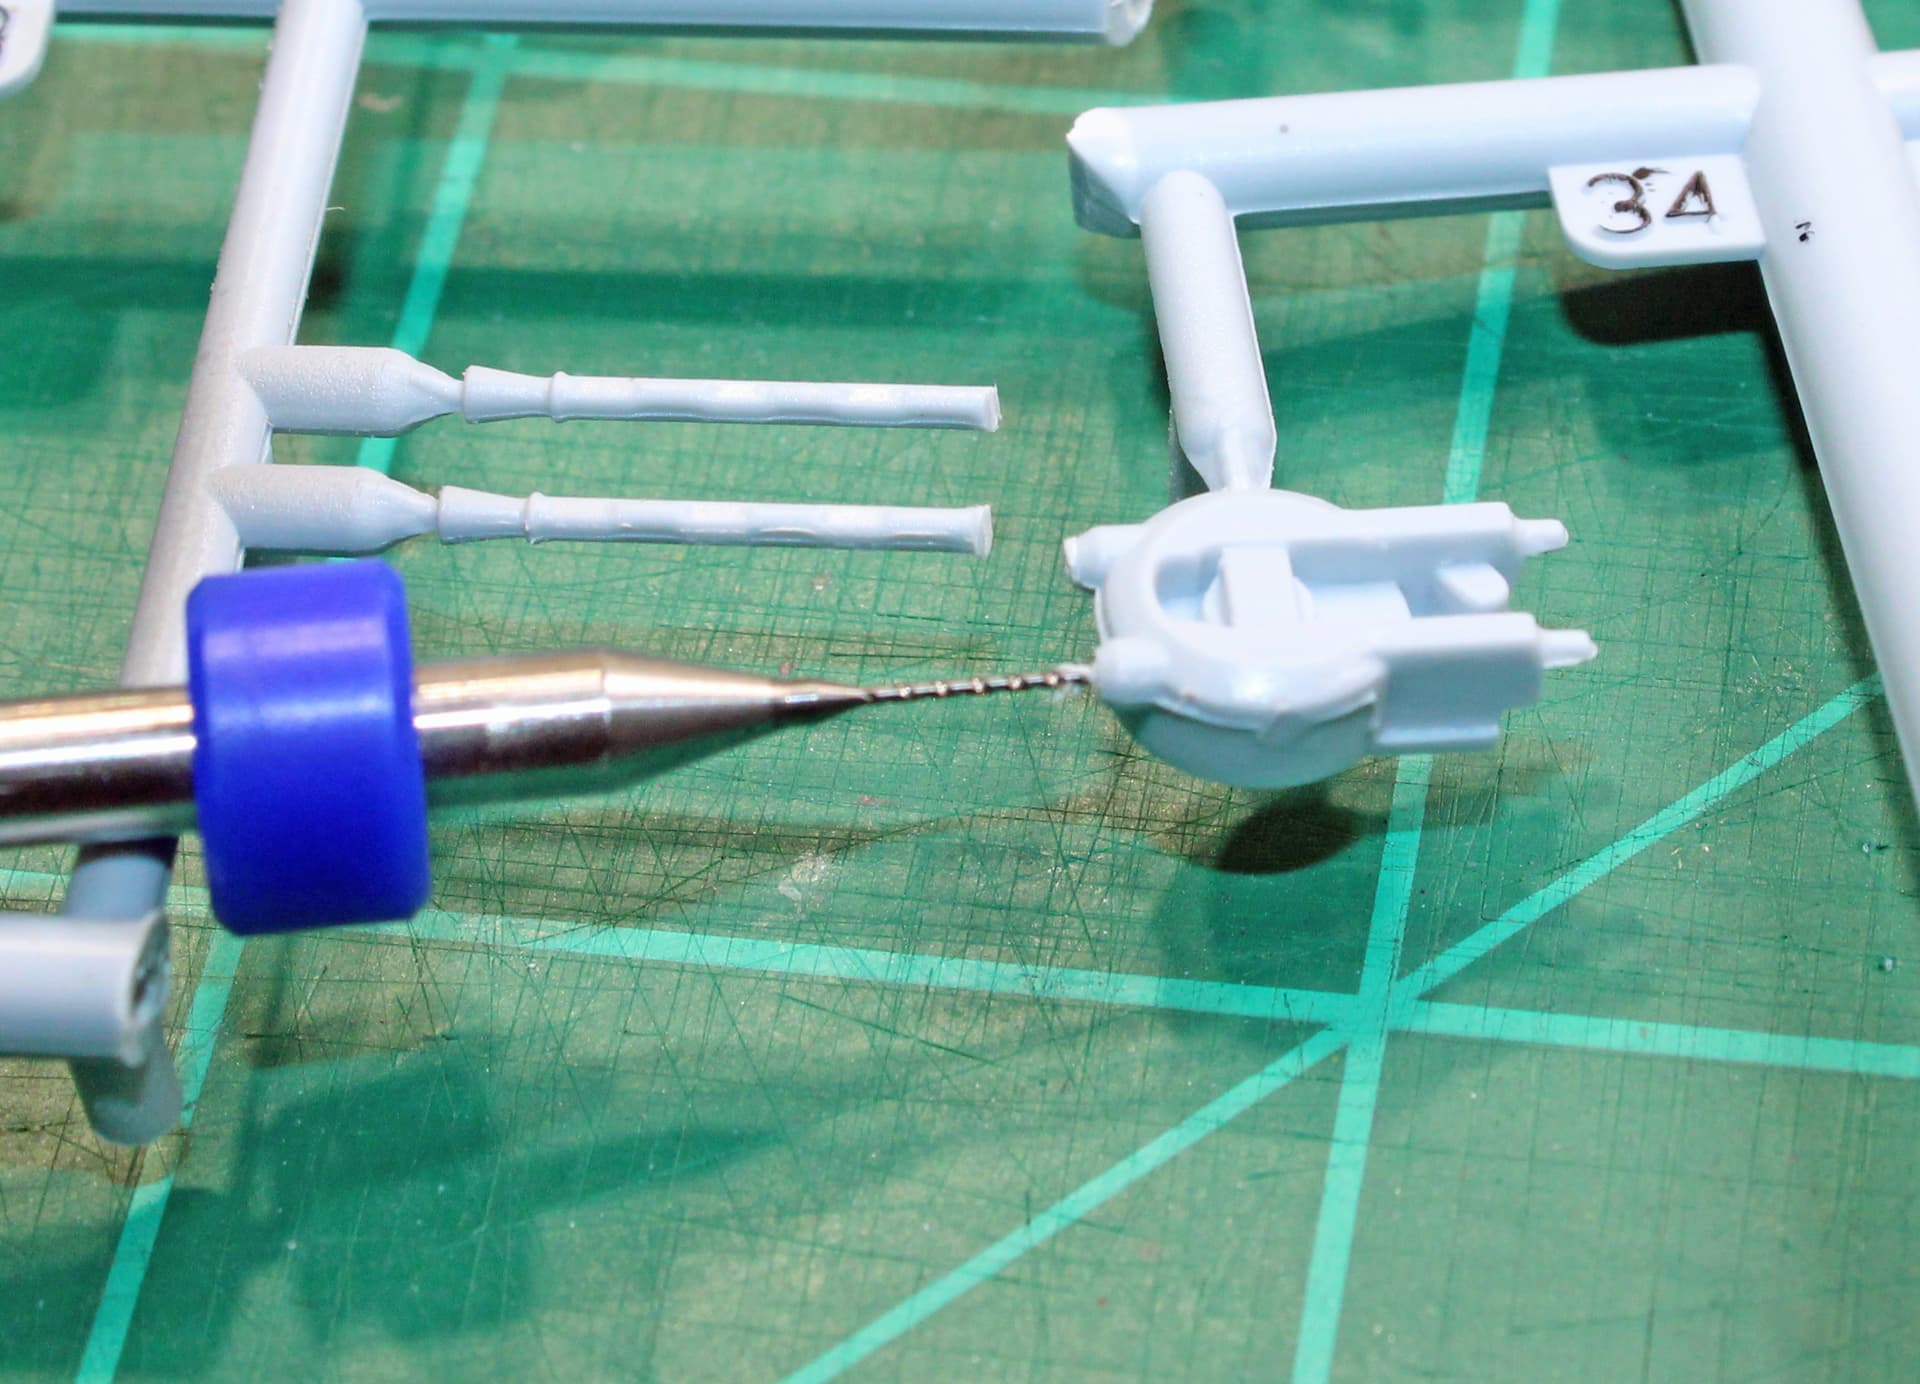
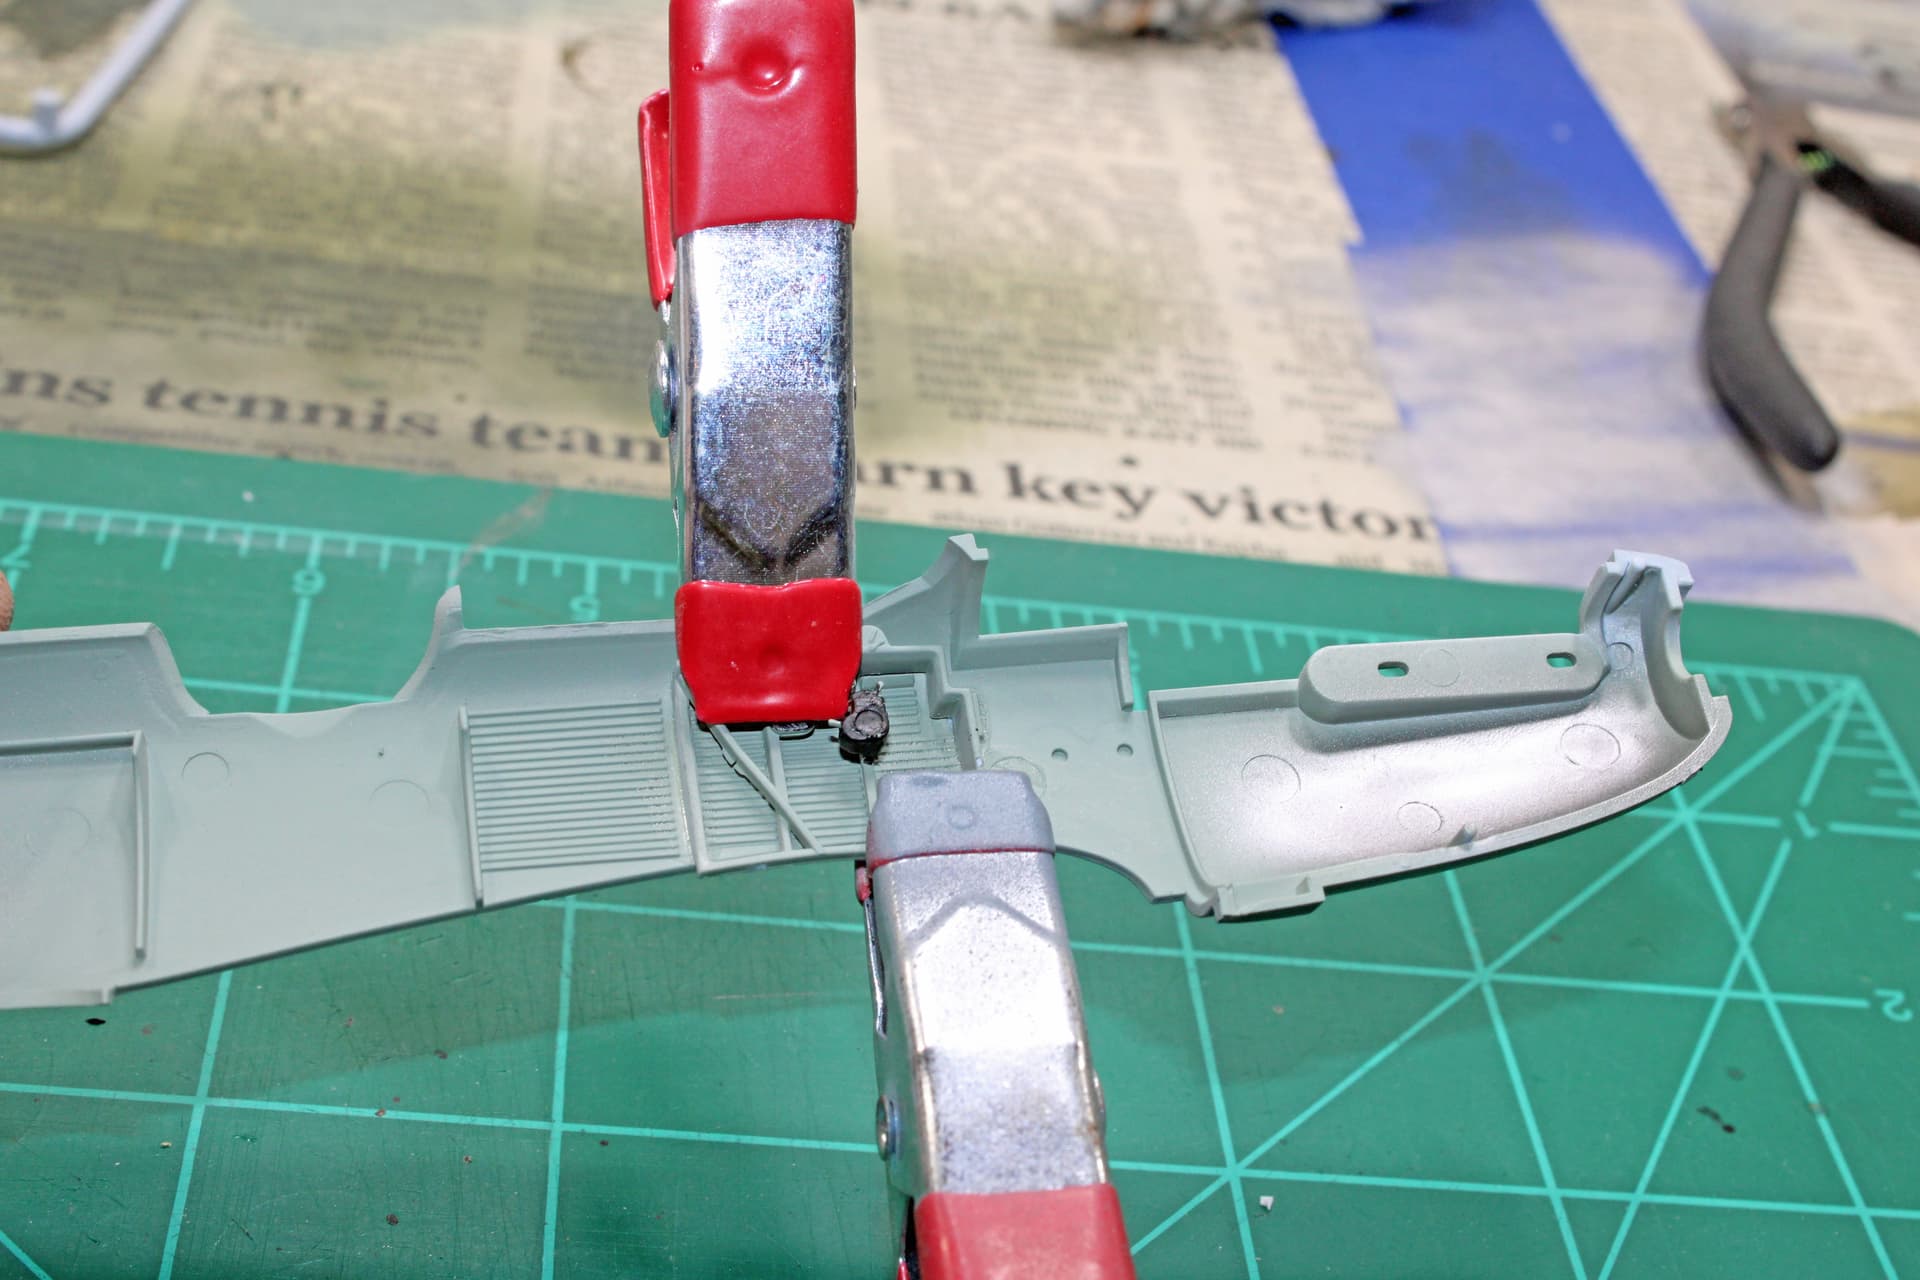
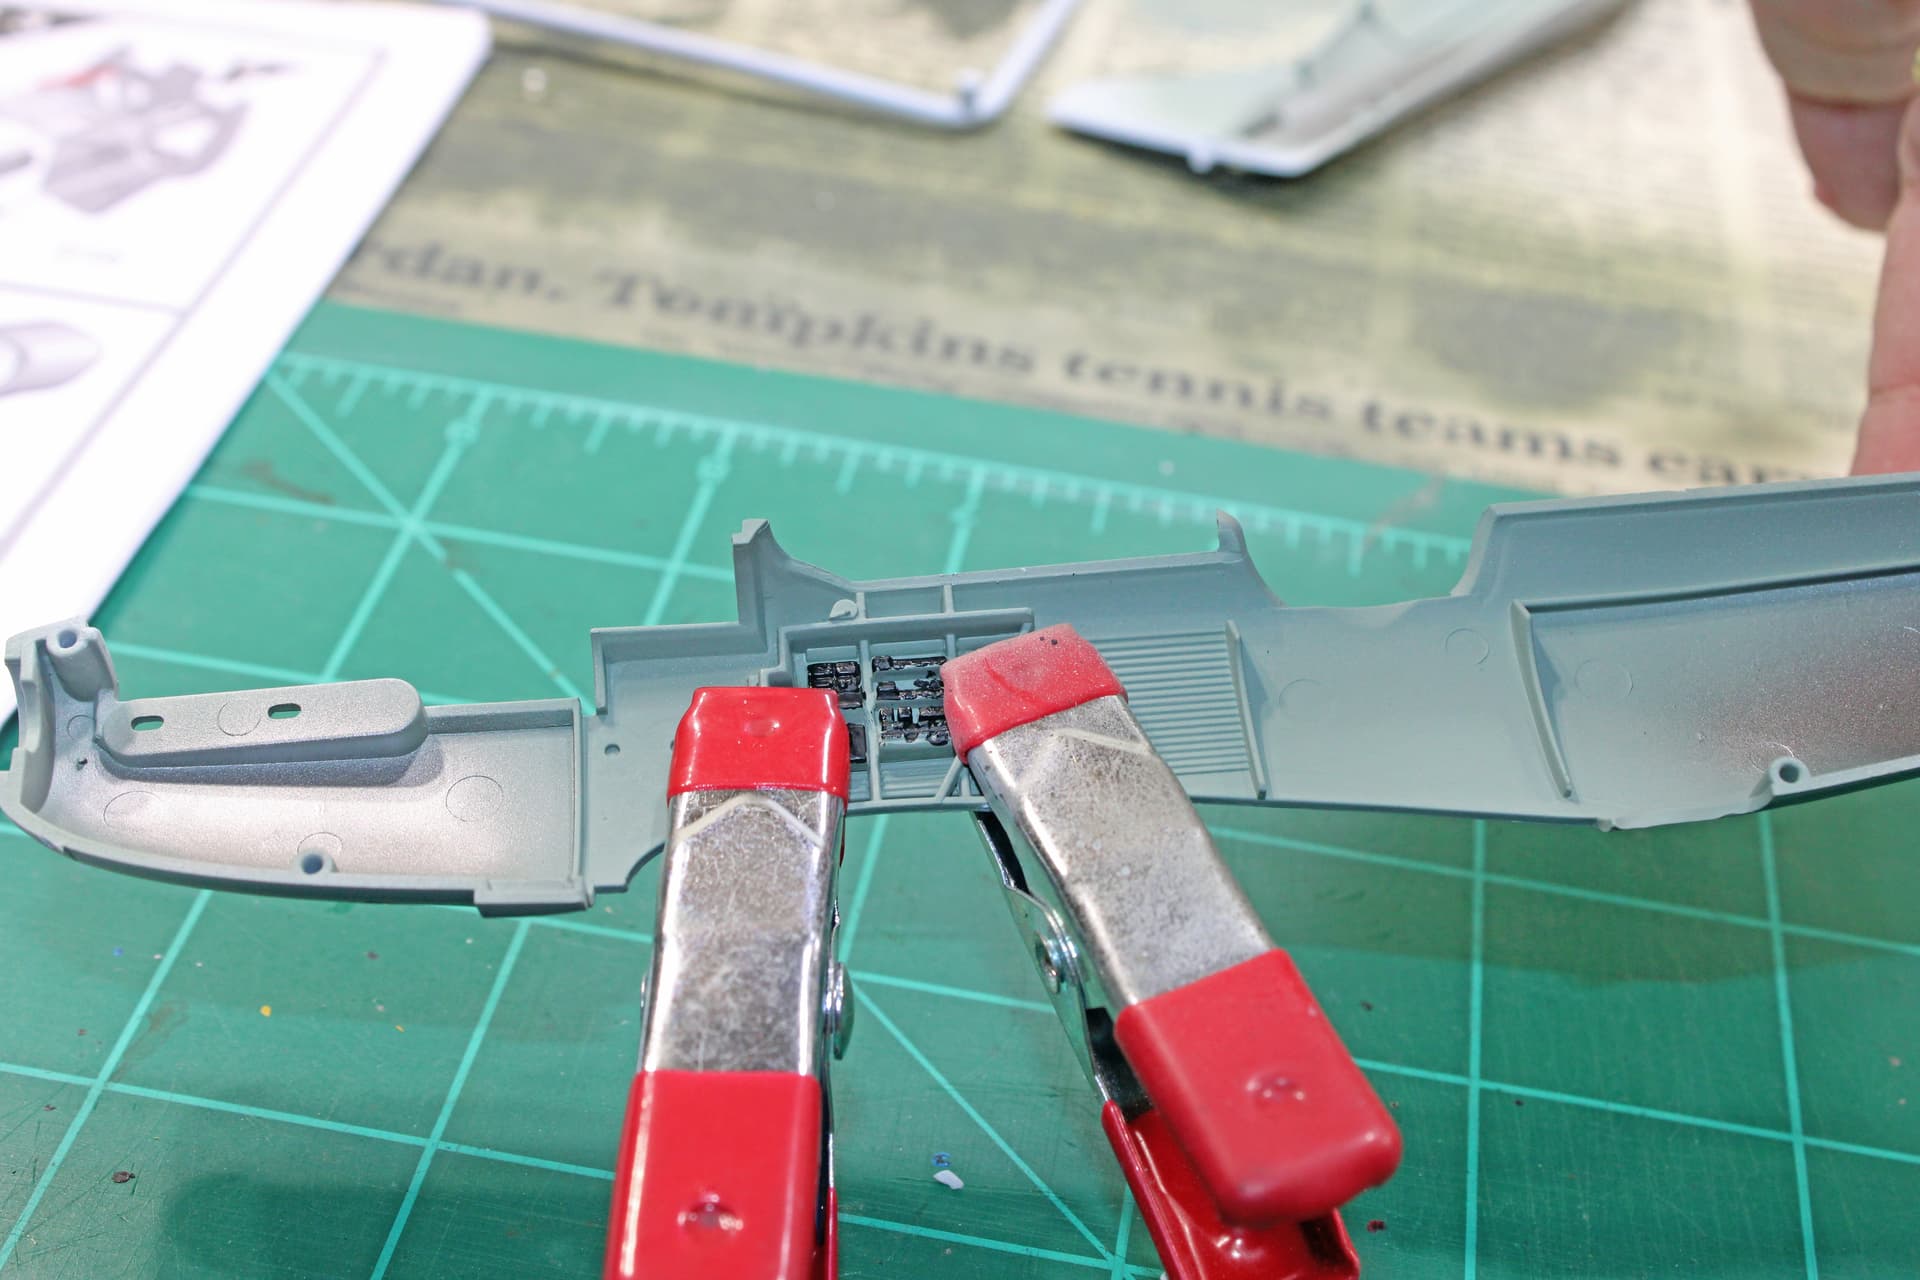
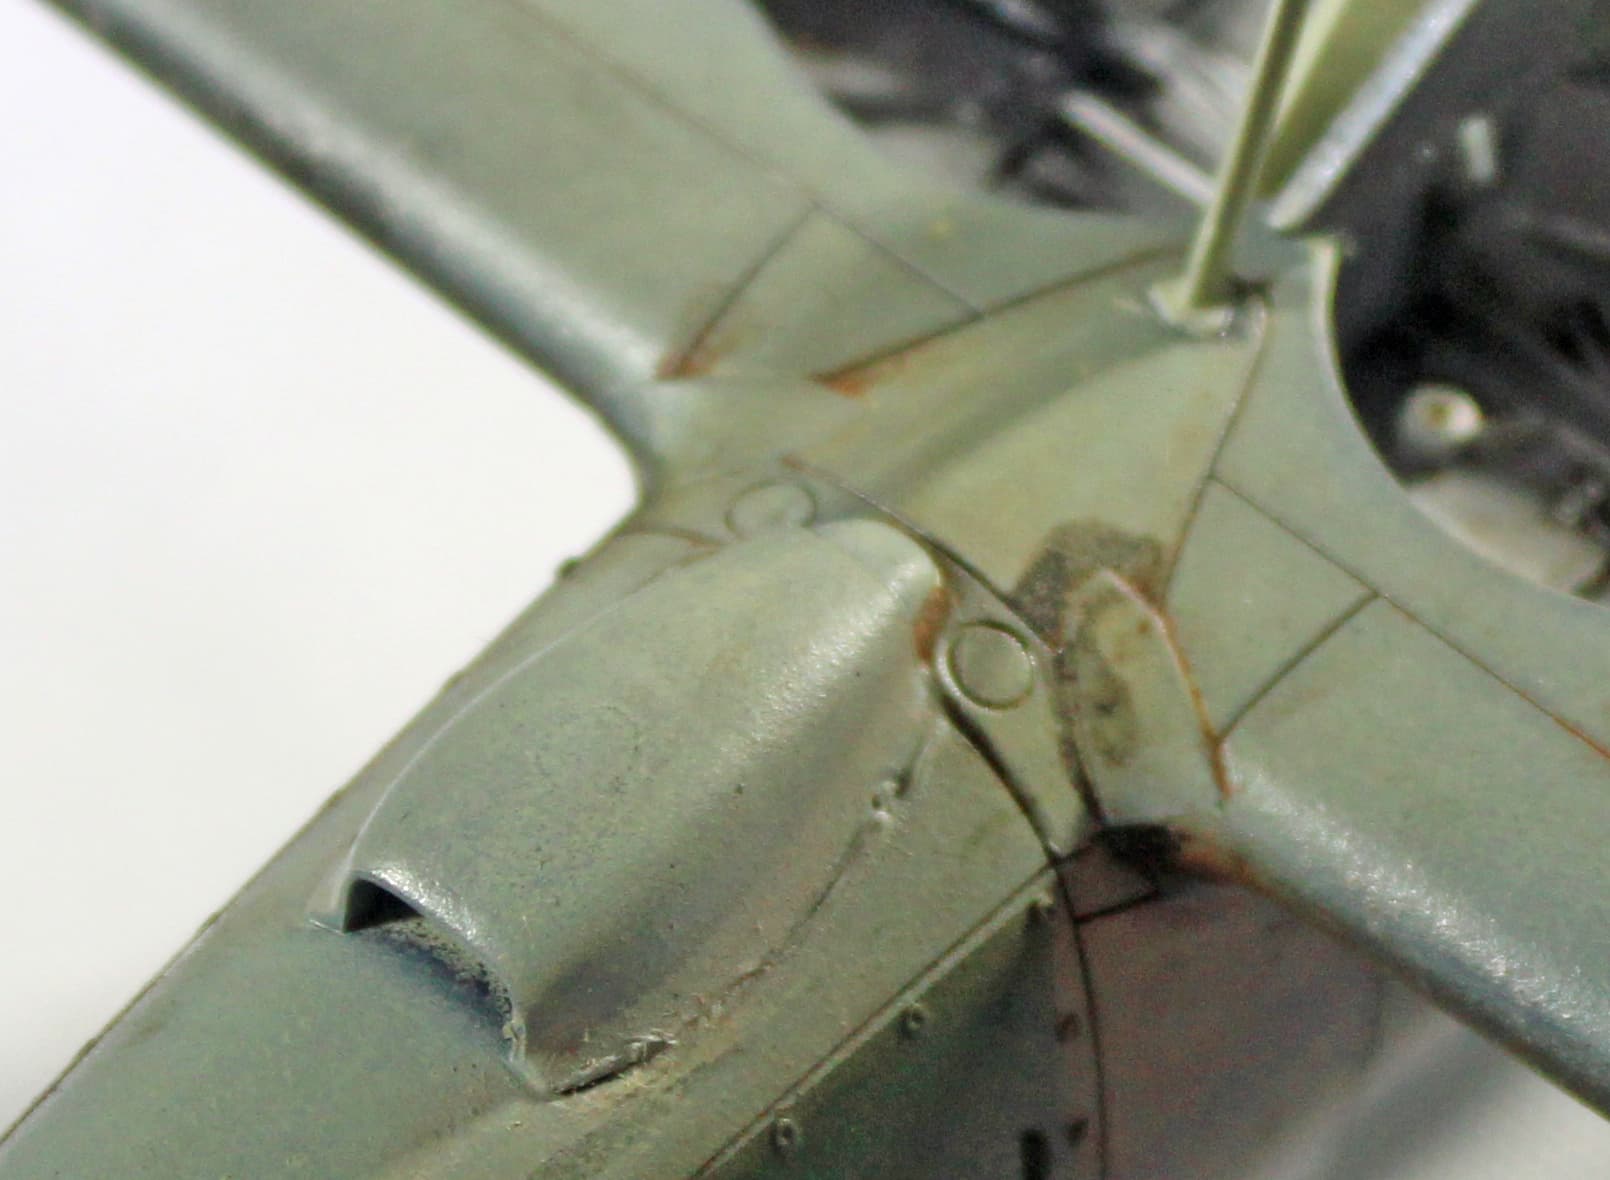
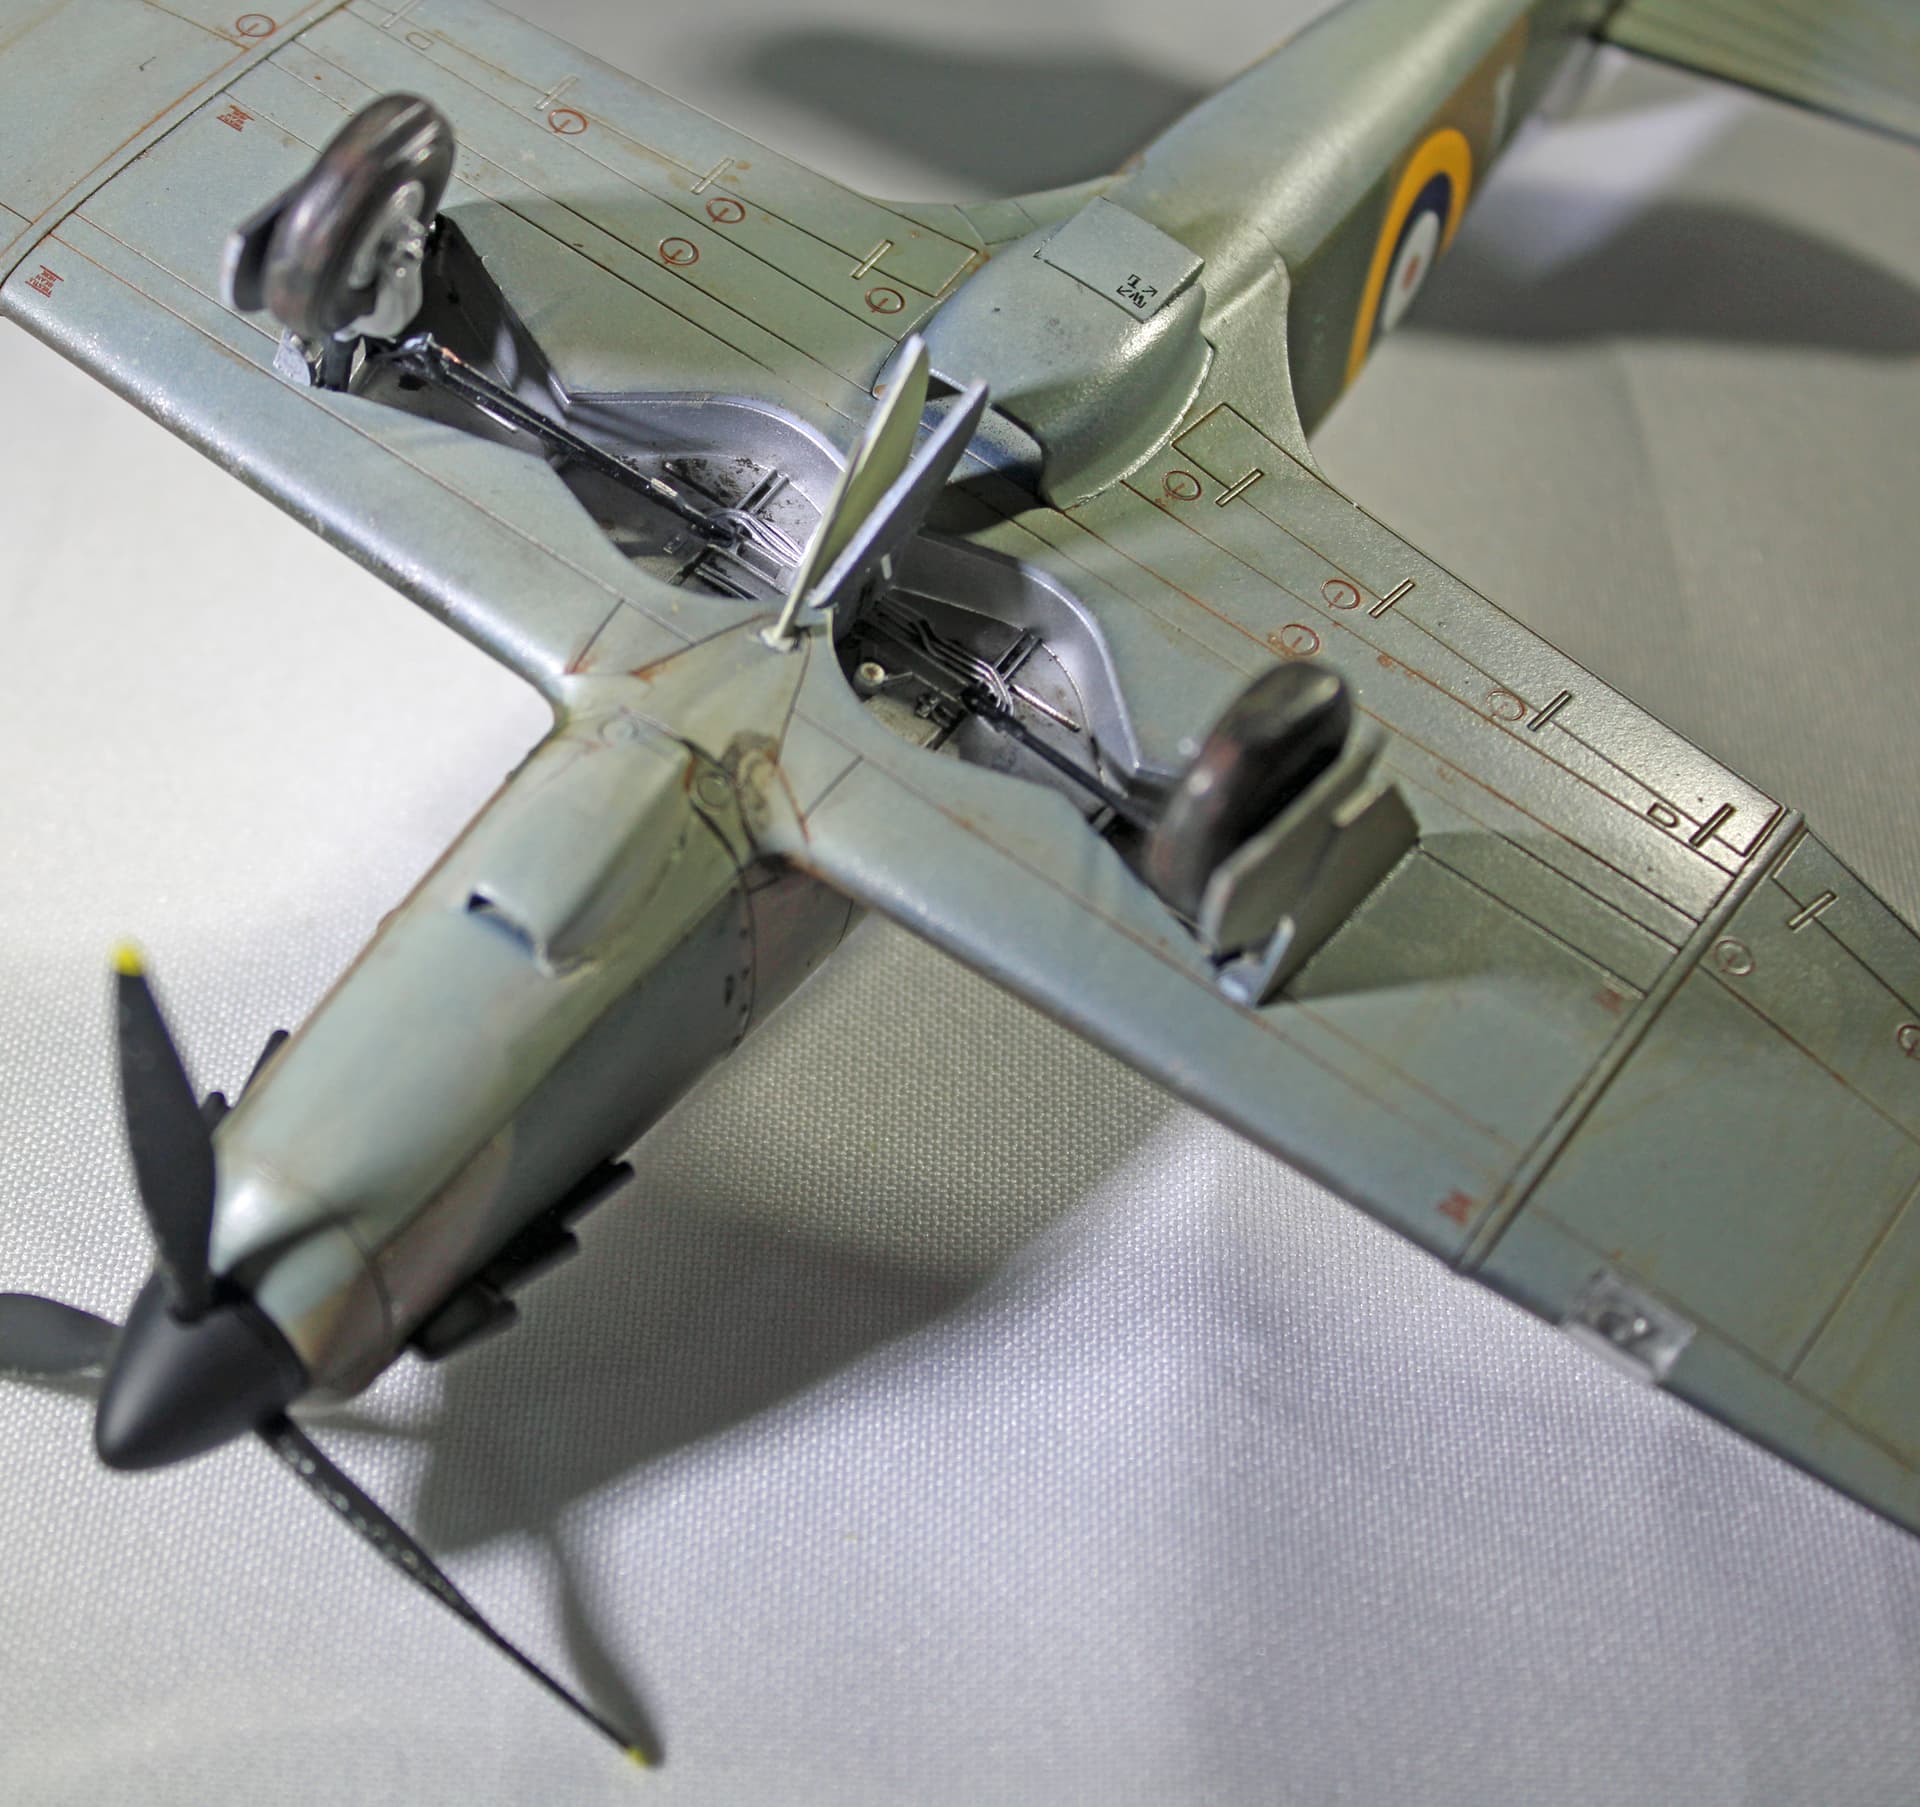
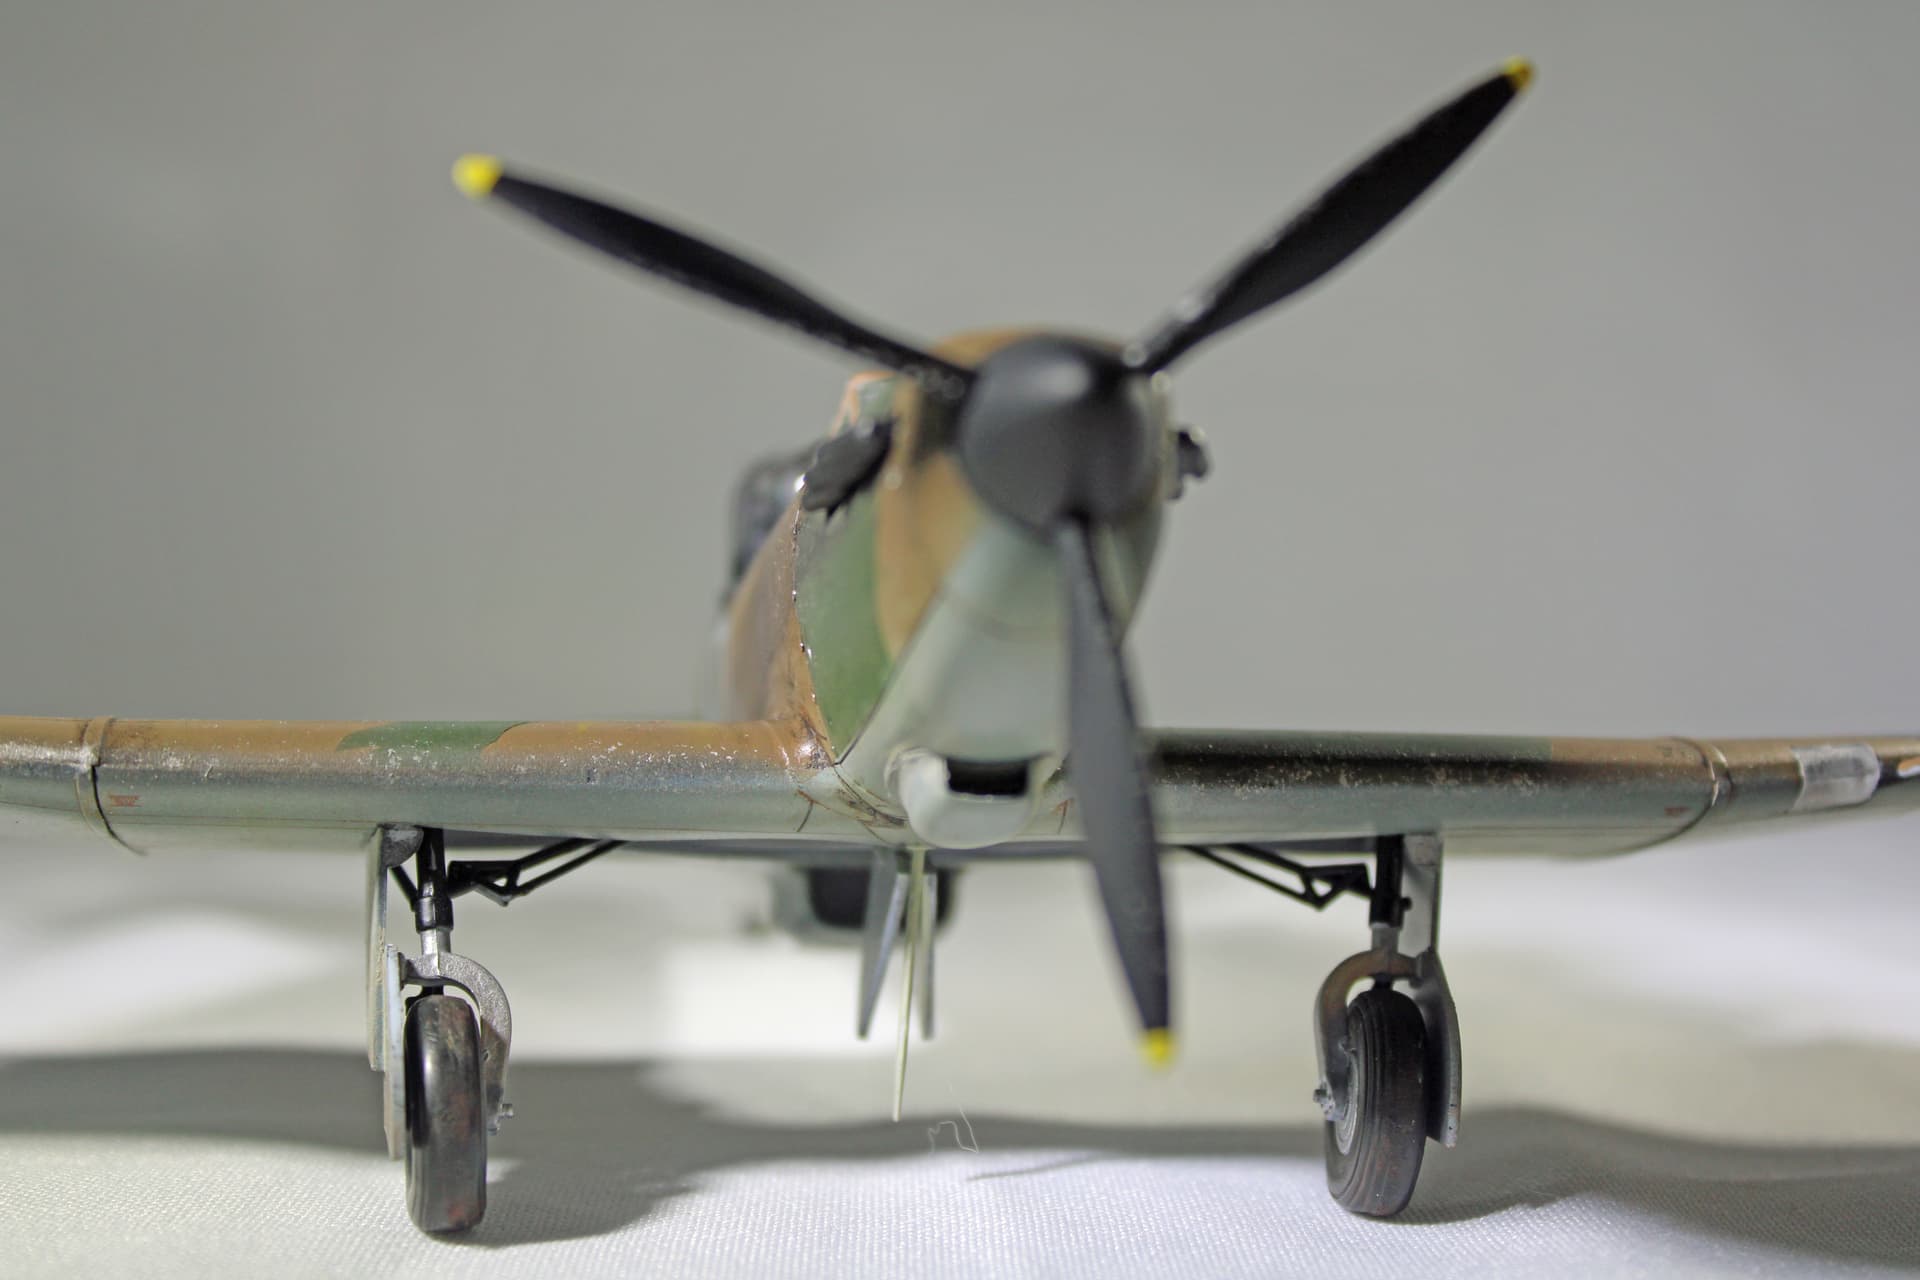
Today I built the wings and stabilizers. I did some paint work with the landing gear struts, which are flat black on the upper portions and aluminum on the lower portions. But most importantly, I assembled the remainder of the fuselage interior and, after all of that dried sufficiently, I was able to determine the turret installation process.
I can get the actual turret structure into position without any problems, but I found no way to install the turret cover after the fact. The cover must be in place before installing the turret into the fuselage. I prepped all the clear parts with a dip in Quick Shine, but decided this was a good place to stop for the day.
It’s been a few days since I was able to post my progress.
I have been fighting my airbrushes again off-and-on, but I’m winning those battles marginally since I own several. One of my two newest is essentially not spraying anything, so it will be going in for service soon. I’ll be sending a couple of others in as well. This angers me, but that’s a conversation for another time.
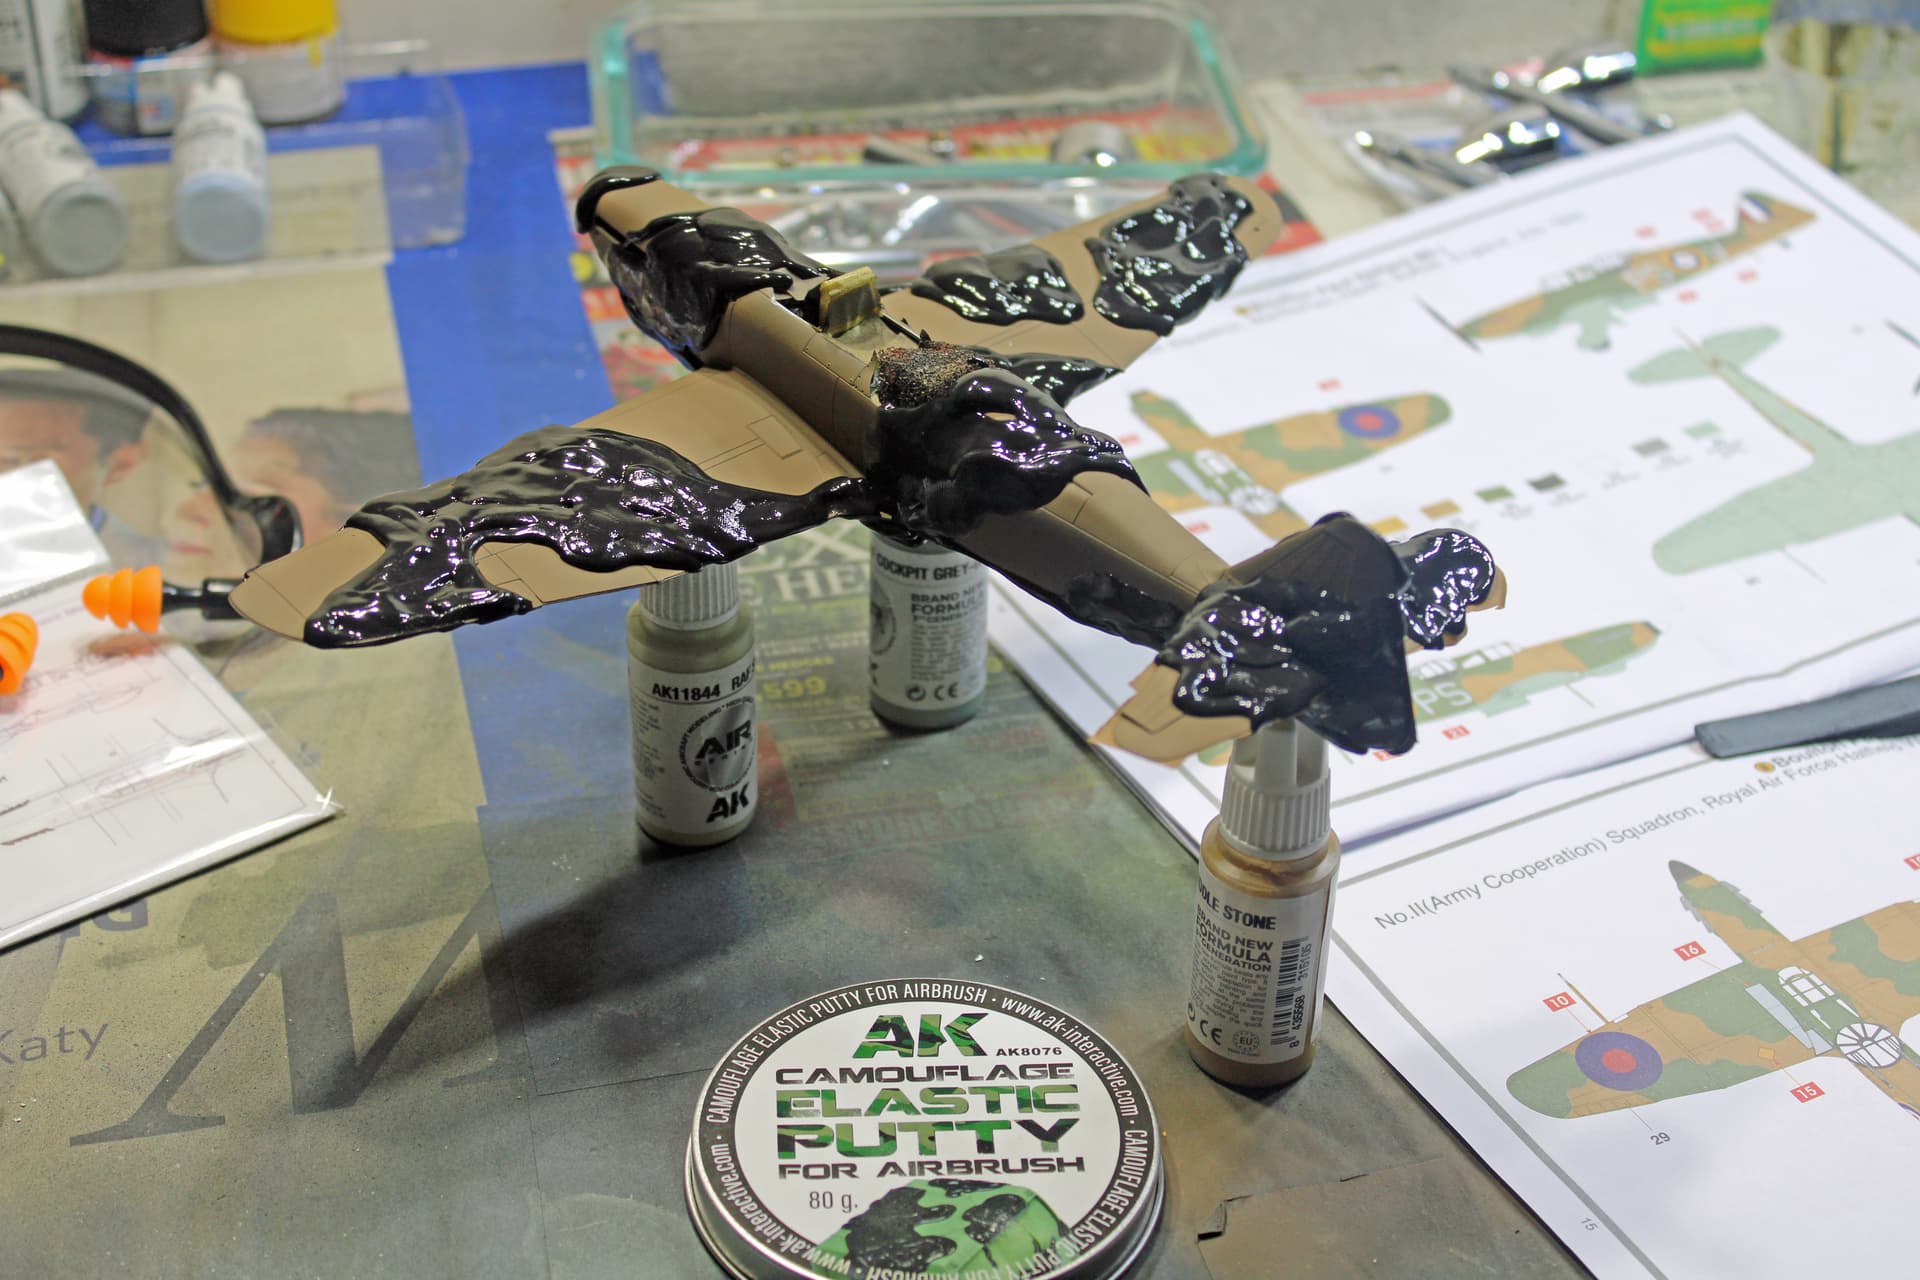
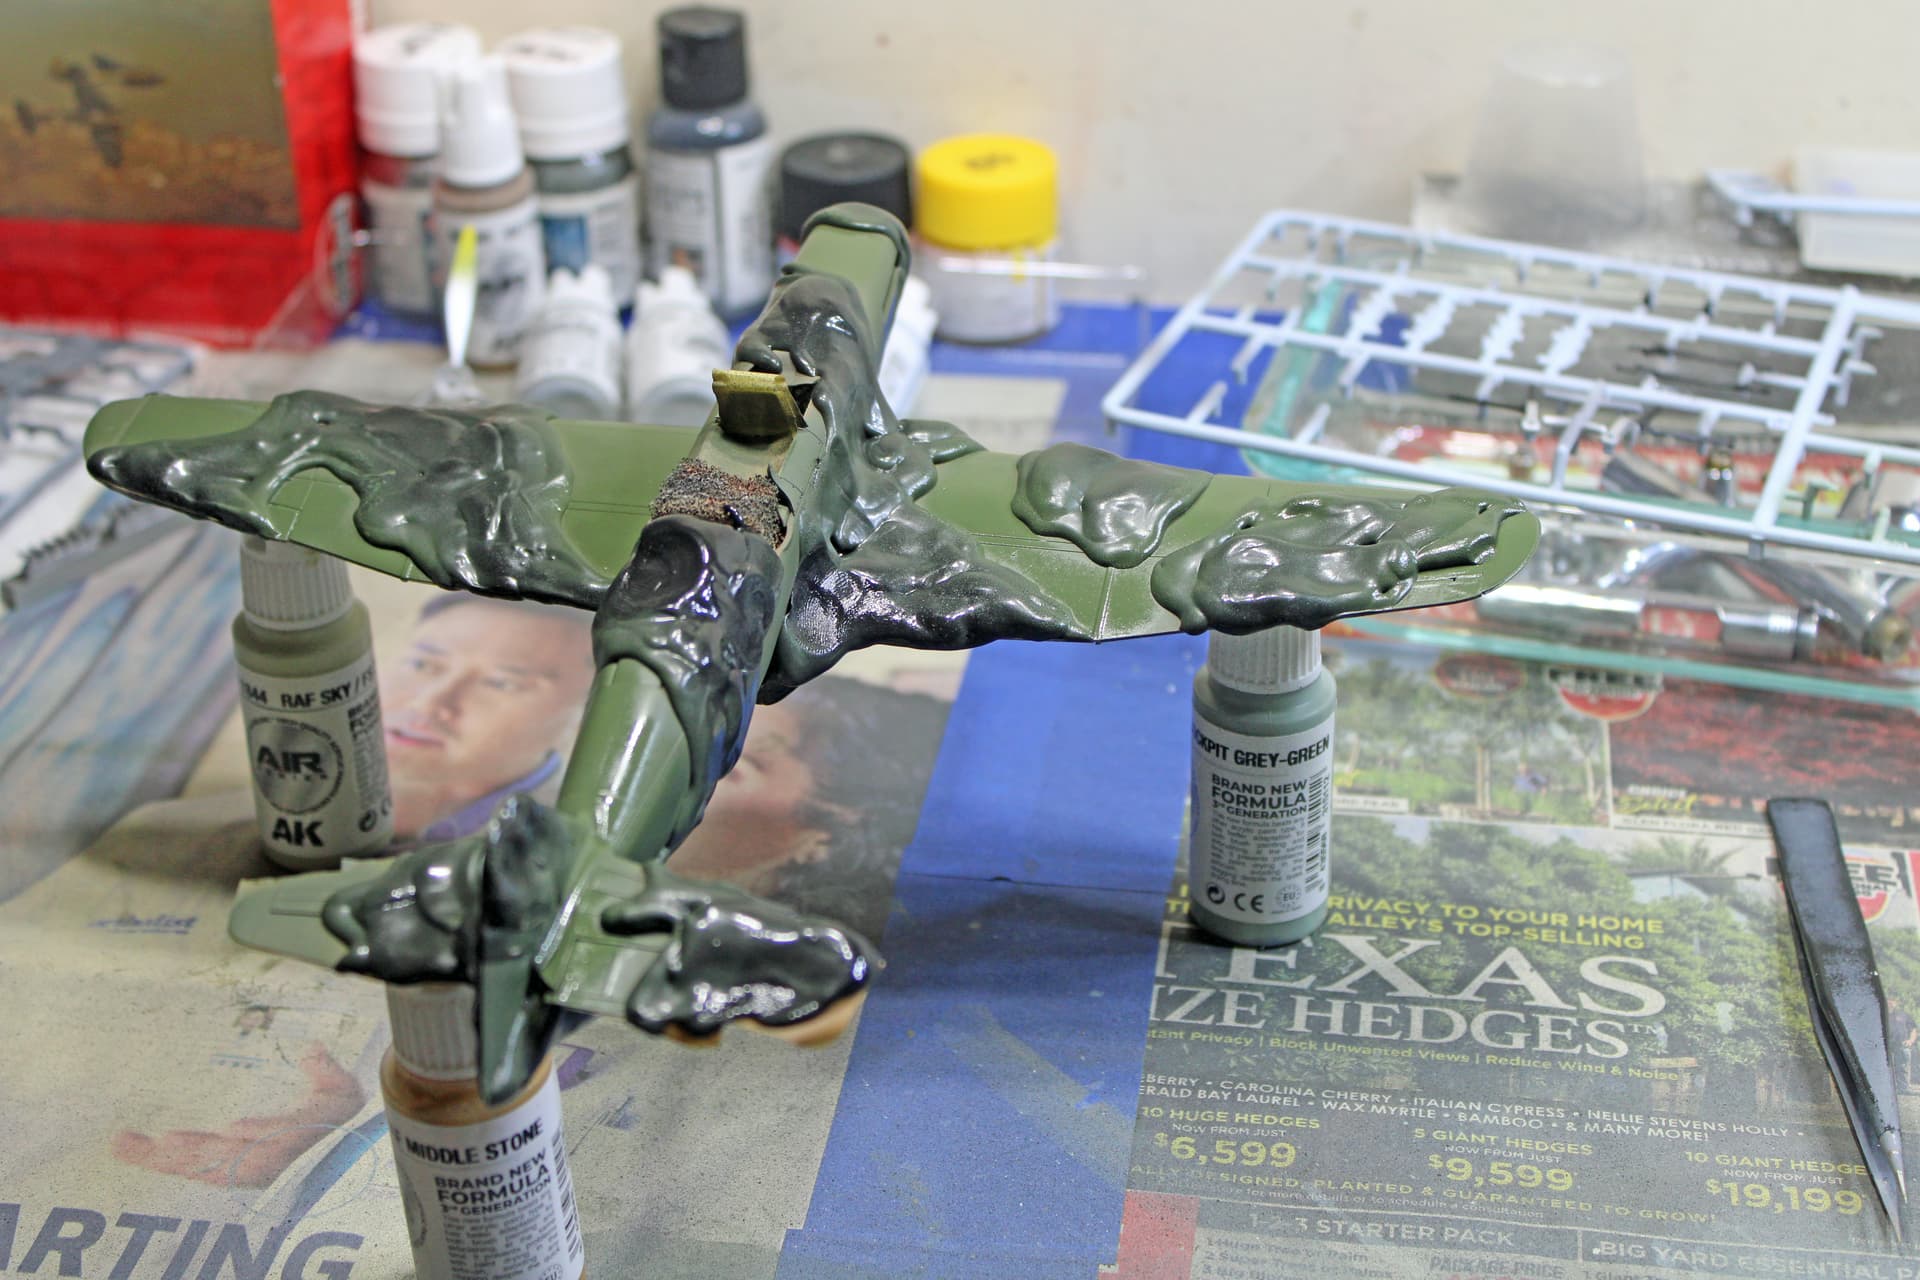
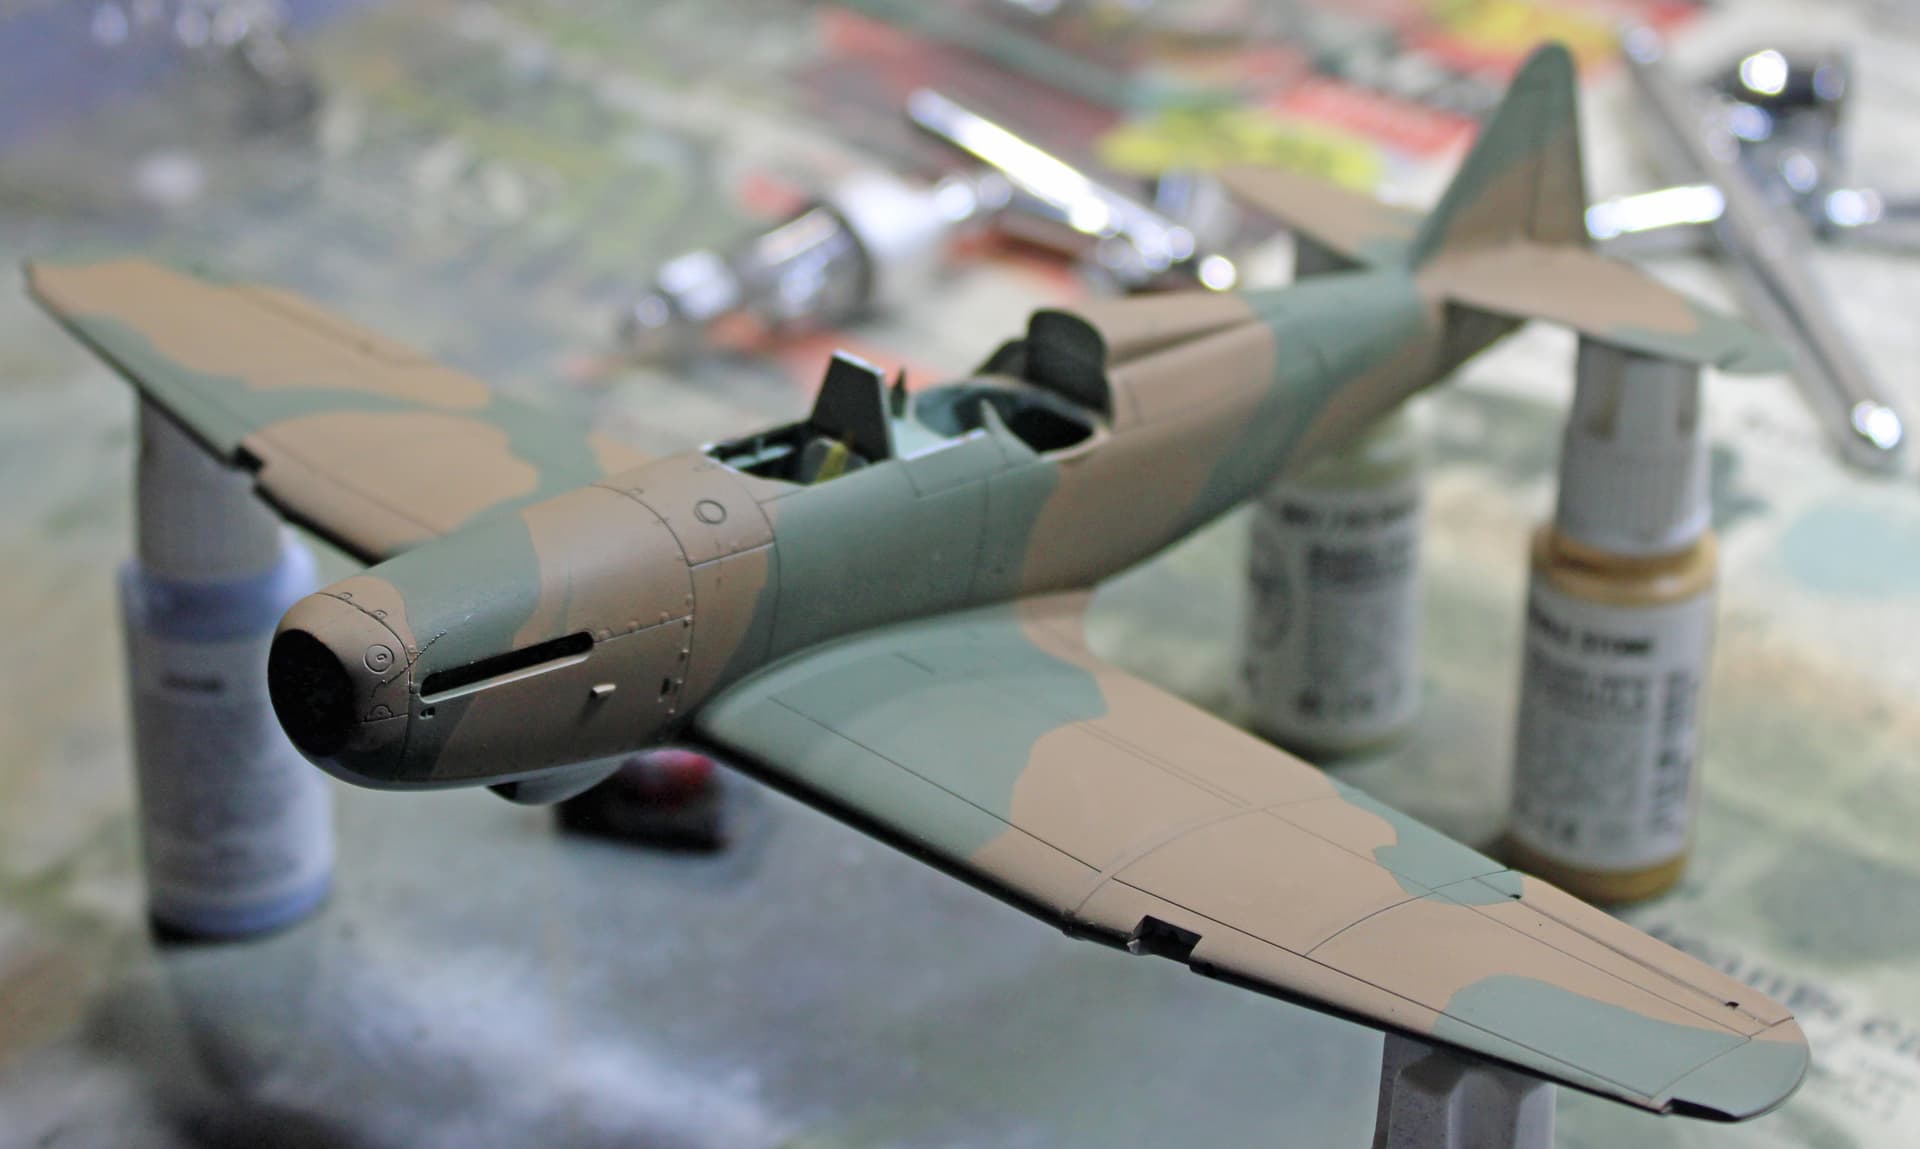
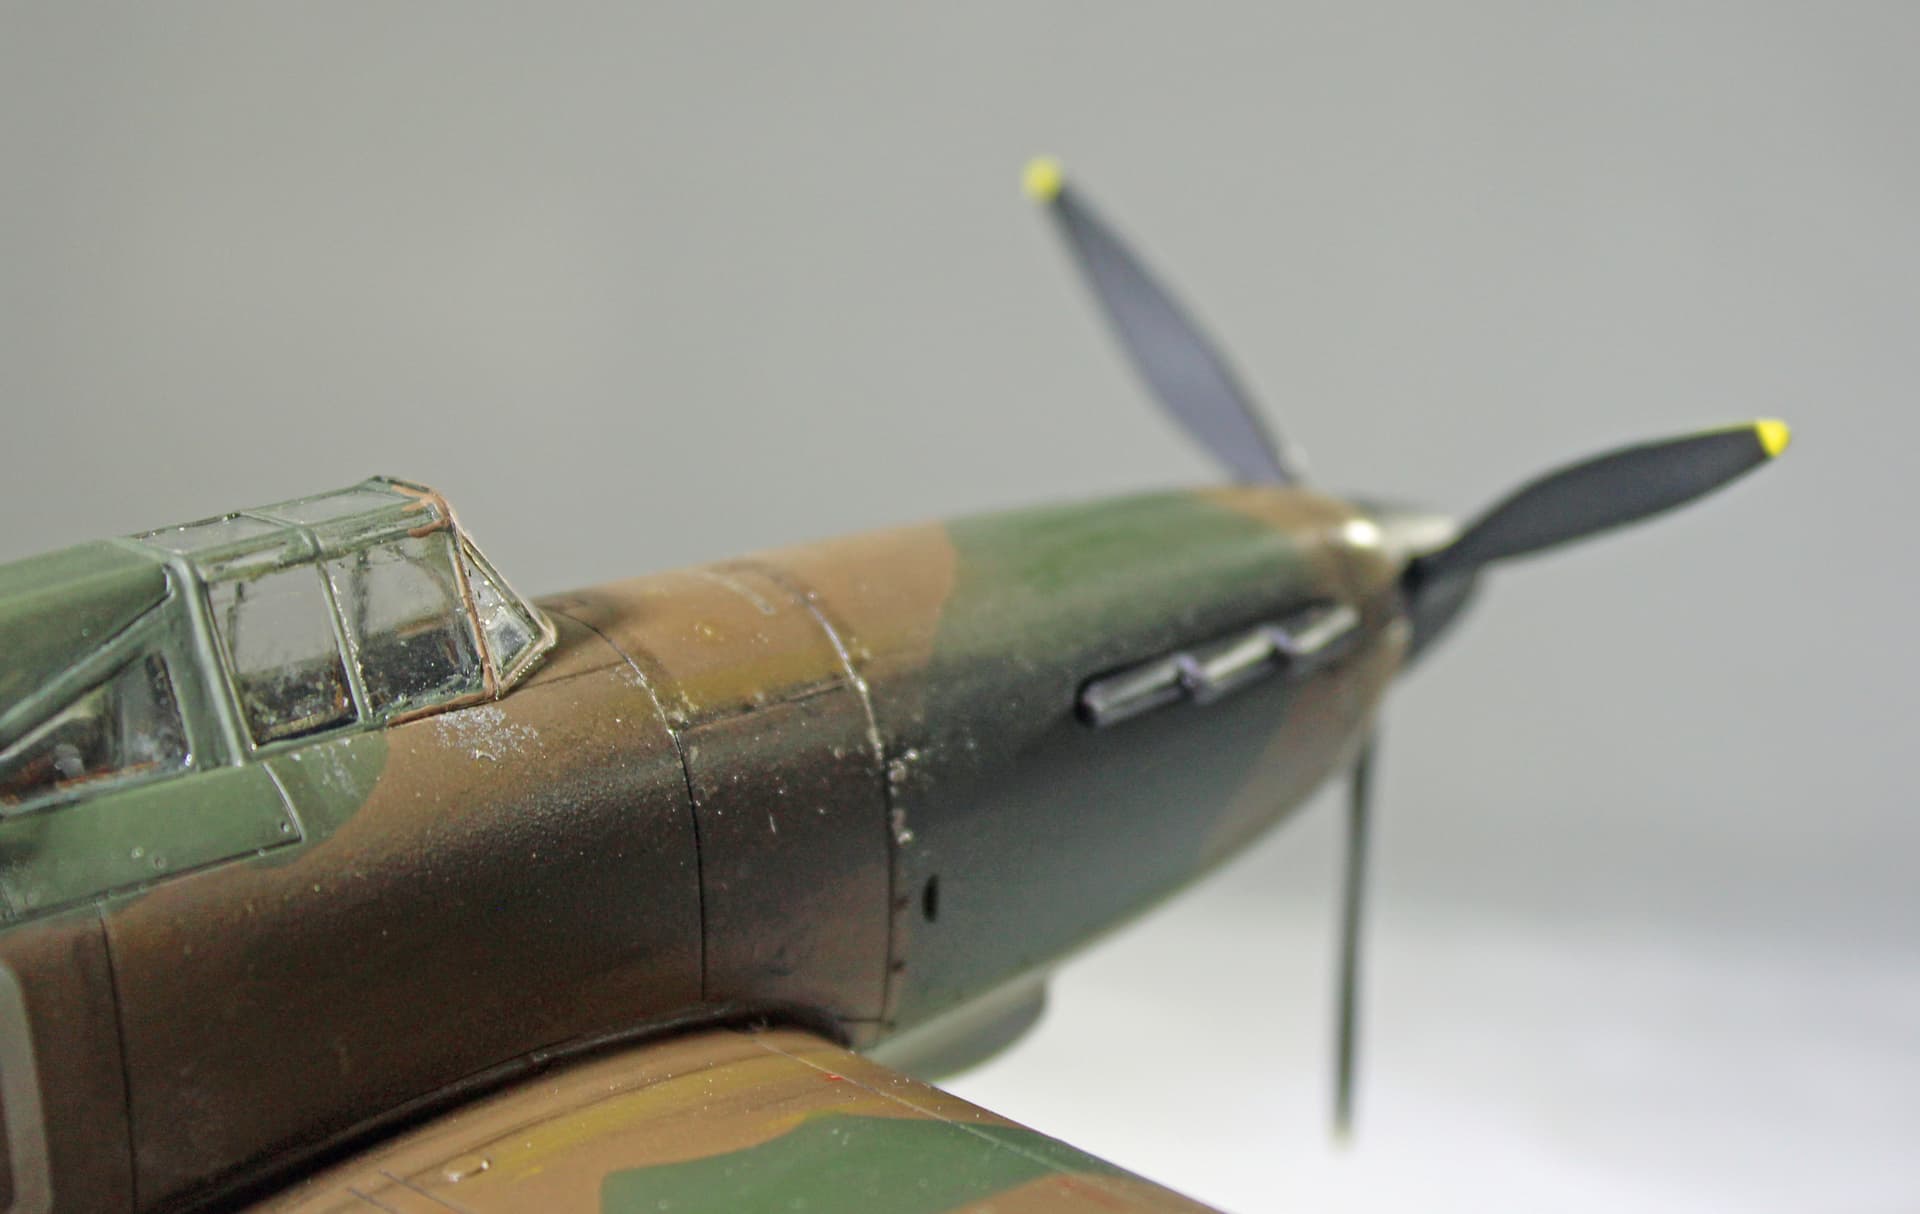
I took PTO today to get a 4-day weekend. With the wife away for her biweekly quilting club meeting, I had the entire day to spend at the bench. I was out there long enough to (a) watch Superman II and The 13th Warrior and (b) complete all of my camouflage paint work. For the first time, I used a new addition to my supplies drawer, AK Interactive Plastic Putty, to mask the Dark Earth / Dark Green pattern common on RAF aircraft during the Battle of Britain.
This stuff is essentially Silly Putty, only it is far stringier and stickier. But, there is more of it in the little tin that it comes in than you typically find in a Silly Putty egg. It worked like a charm, though.
I got crisp demarcation lines, and for the most part, I was able to get the putty to form little curves and inlets and other such patterns.
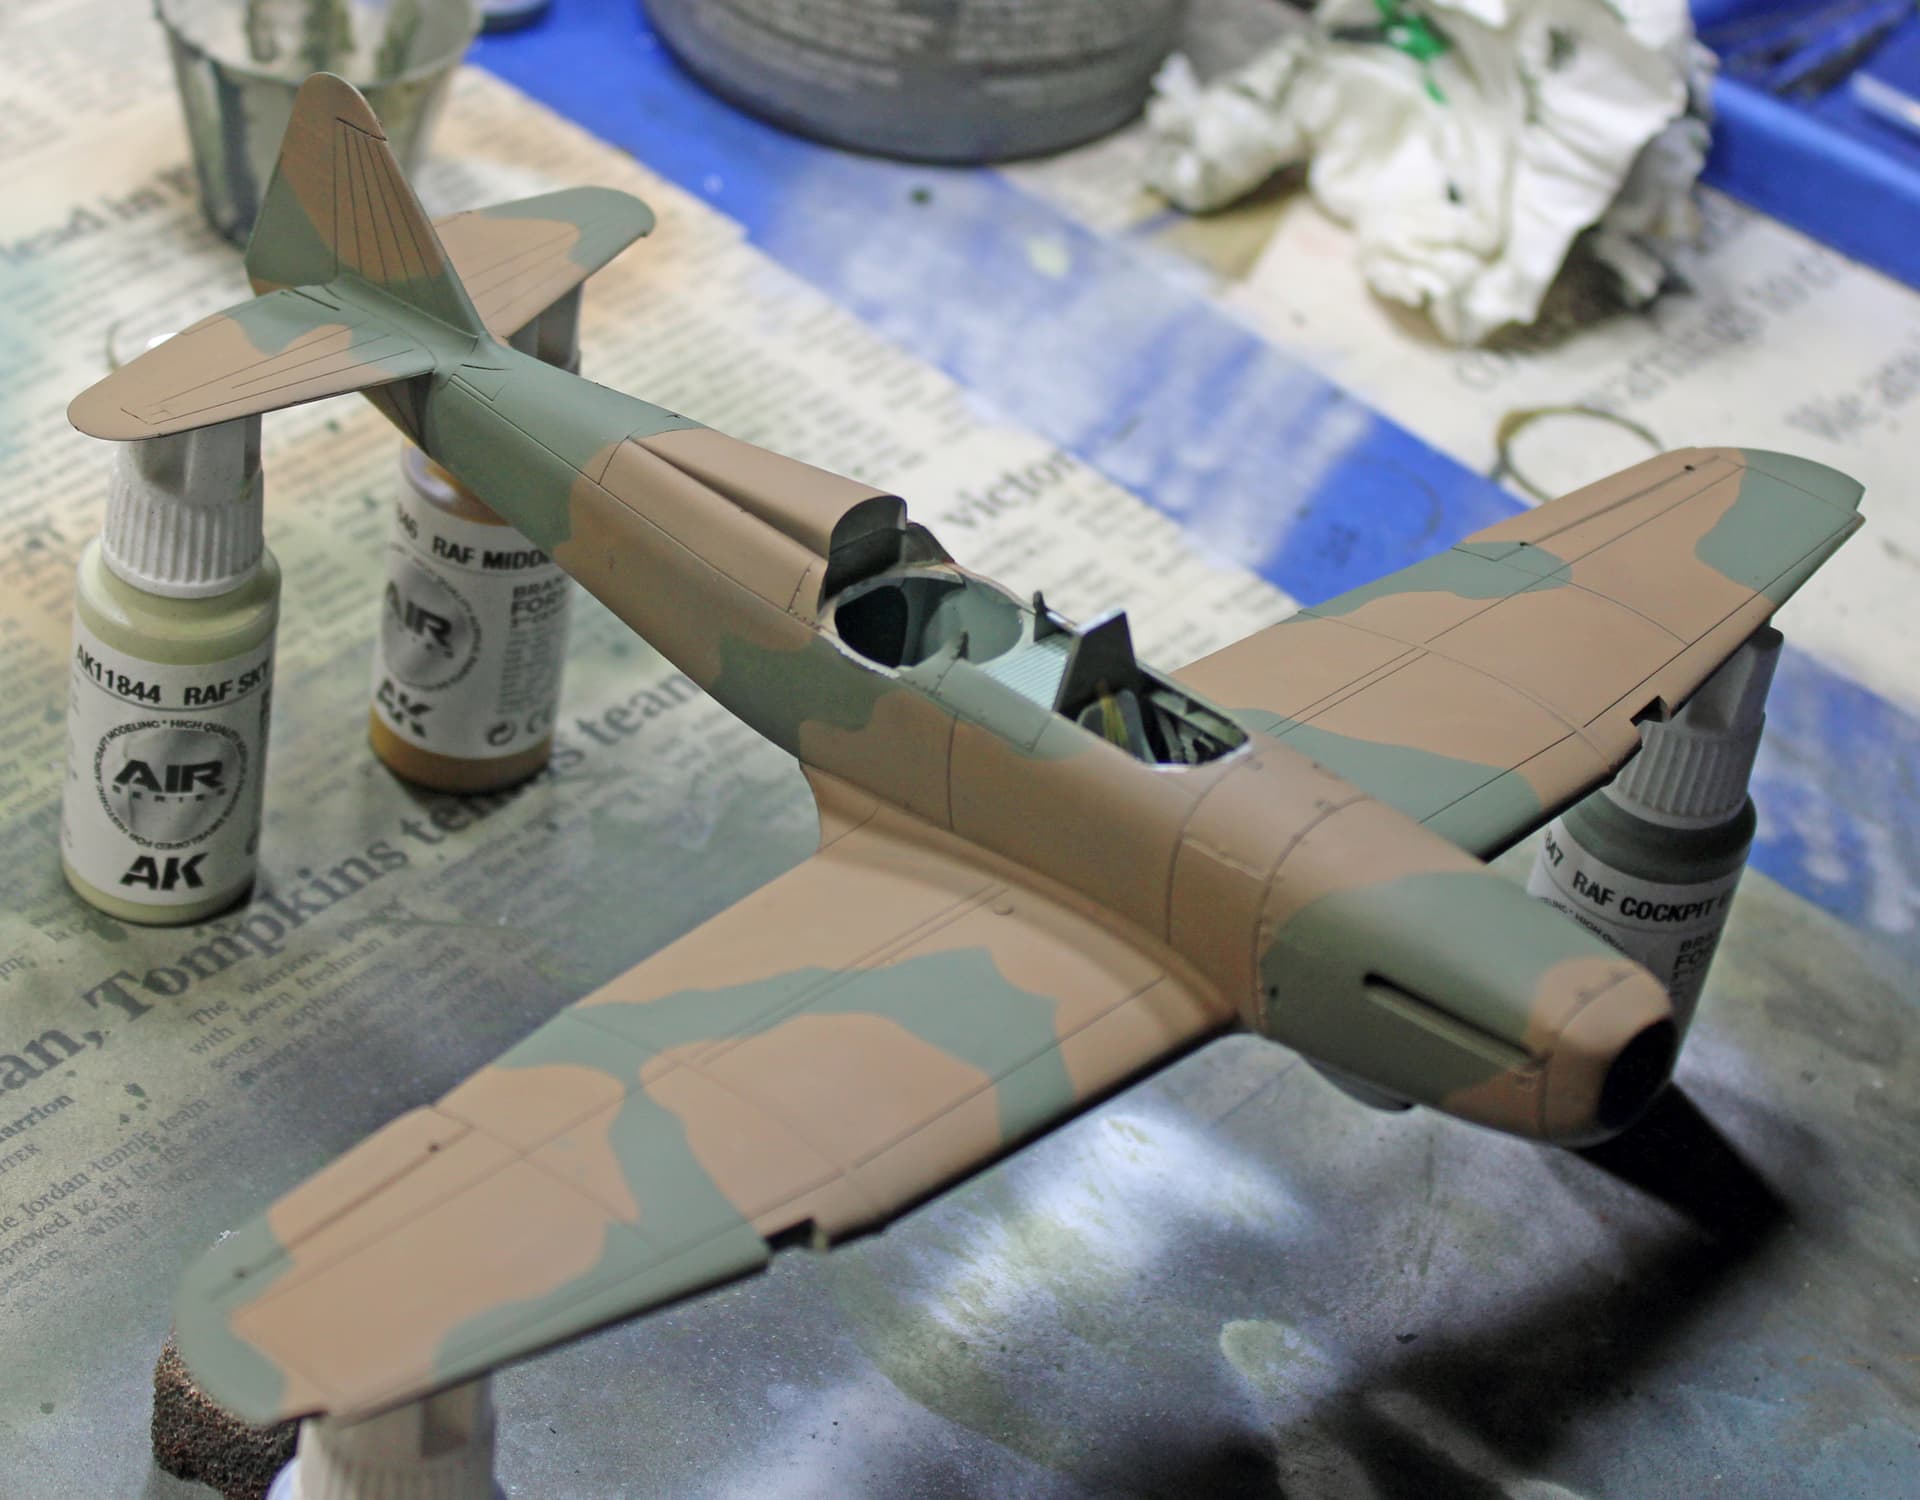
I used a Montex Mask set for the canopy framing. I am not sure what happened - was it a bad application job on my part, or was the paint too thin - but I had lots of paint on the masked panels once I removed the masks. I also noted some weird “lines” on the clear parts that caught some paint. I believe these “lines” were the result of pooling of the clear coat that I put on the parts a few days ago. Lesson re-learned for using the Quick Shine floor polish, is not ensure that I get an even coating of the stuff. Maybe the problem came about because I dipped the entire part into a cup of the stuff, whisked away pooling along the part edges, but set the parts down where gravity impacted the way the stuff dried. Next time I
I might be able to complete the Defiant this weekend.
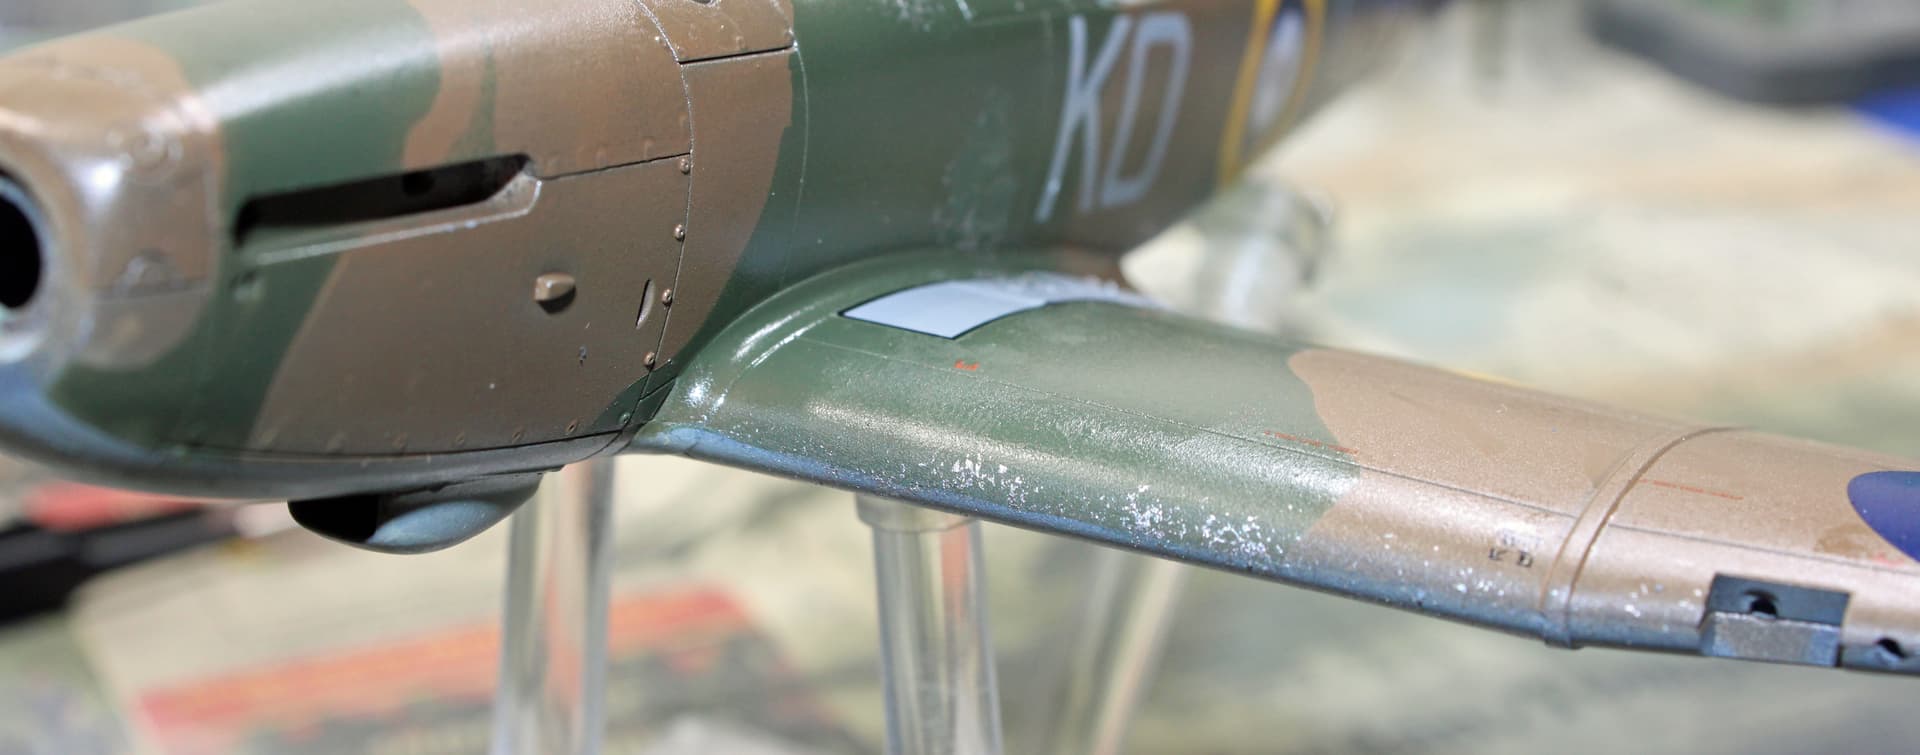
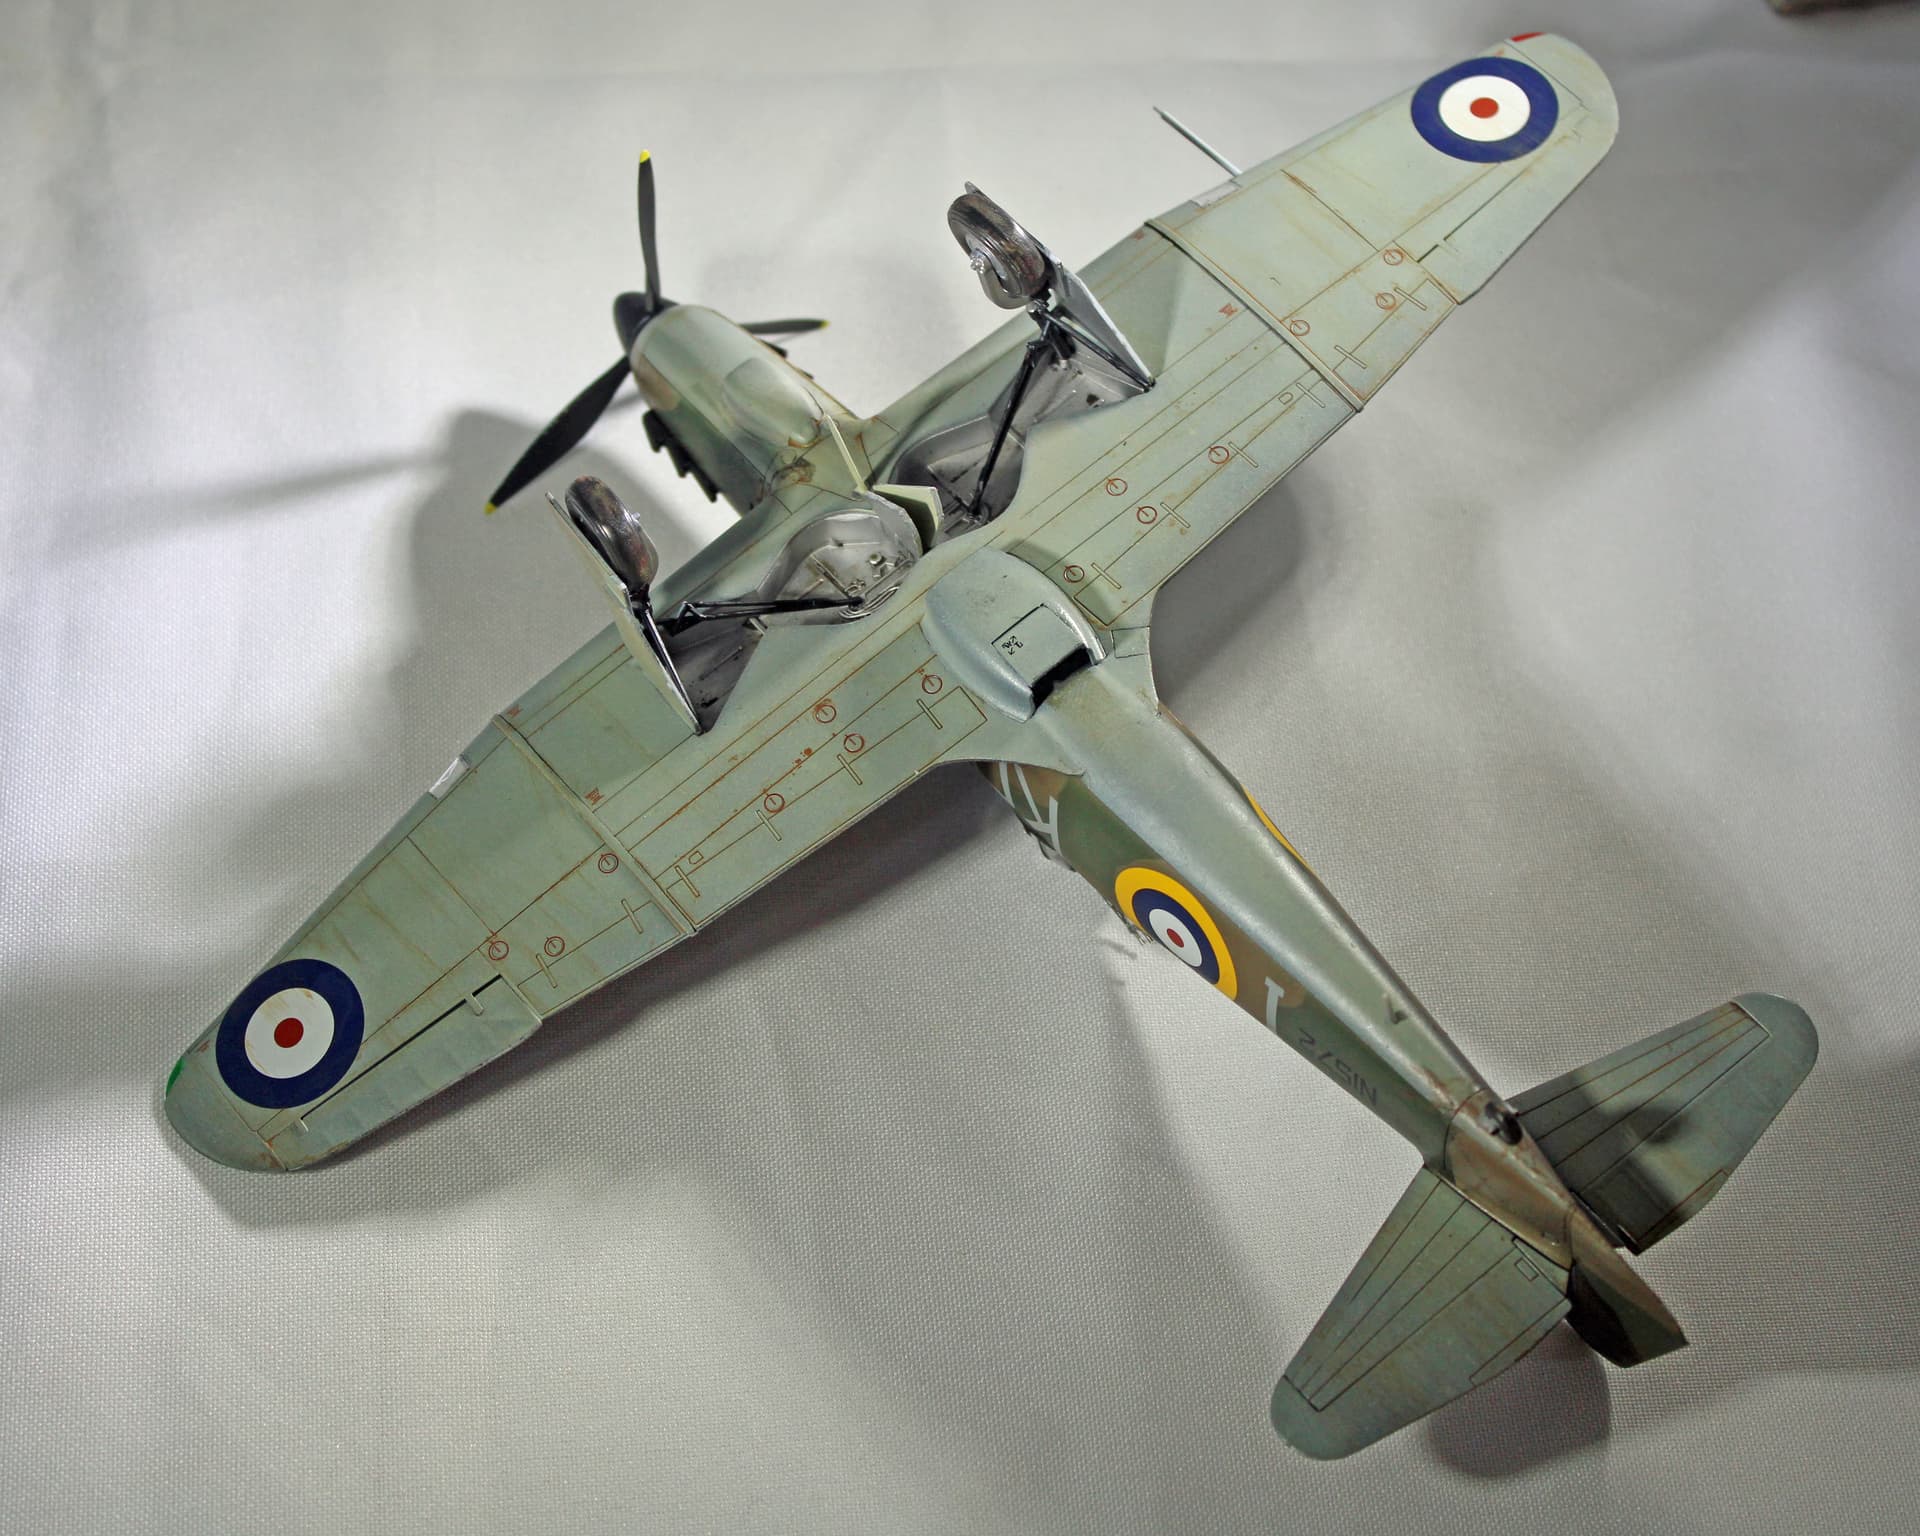
This morning I used a sponge with some mostly blotted away aluminum paint to effect chipping in high-wear areas. But then I noticed that I didn’t pay close enough attention to where I was letting that sponge contact and have a big blob of aluminum over previously good-looking RAF dark green. Ugh. Now I’ll need to mask that area to repaint - as well as a small area above the exhaust stacks for the RAF dark earth, where I can clearly see a streak of RAF dark green where it should not be.
I did the decals earlier this week and laid down a coat of Gauzy gloss clear coat. Once I get this repainting work done, I’ll do a light wash and get some exhaust stains in place based on this photograph of a flight of Defiants during the Battle of Britain:
Got the paint touched up yesterday. This morning I put down another Gauzy coat, which is currently curing while two of my airbrushes (tips and needles) soak in lacquer thinner.
This is our anniversary weekend, so the wife and I have some plans at an expensive steak house that might be derailed due to her upset stomach. Her words - don’t want to waste a perfectly great steak on this tummy. If we make it in there today, I don’t expect any further time at the bench (although I am going back out there to clean the airbrush parts).
This is a good kit of a less well known subject. There are no real gotchas in this kit once you understand that inserting the turret might be problematic. For me, it really wasn’t, but I did a lot of dry fitting to determine the best approach for my own build.
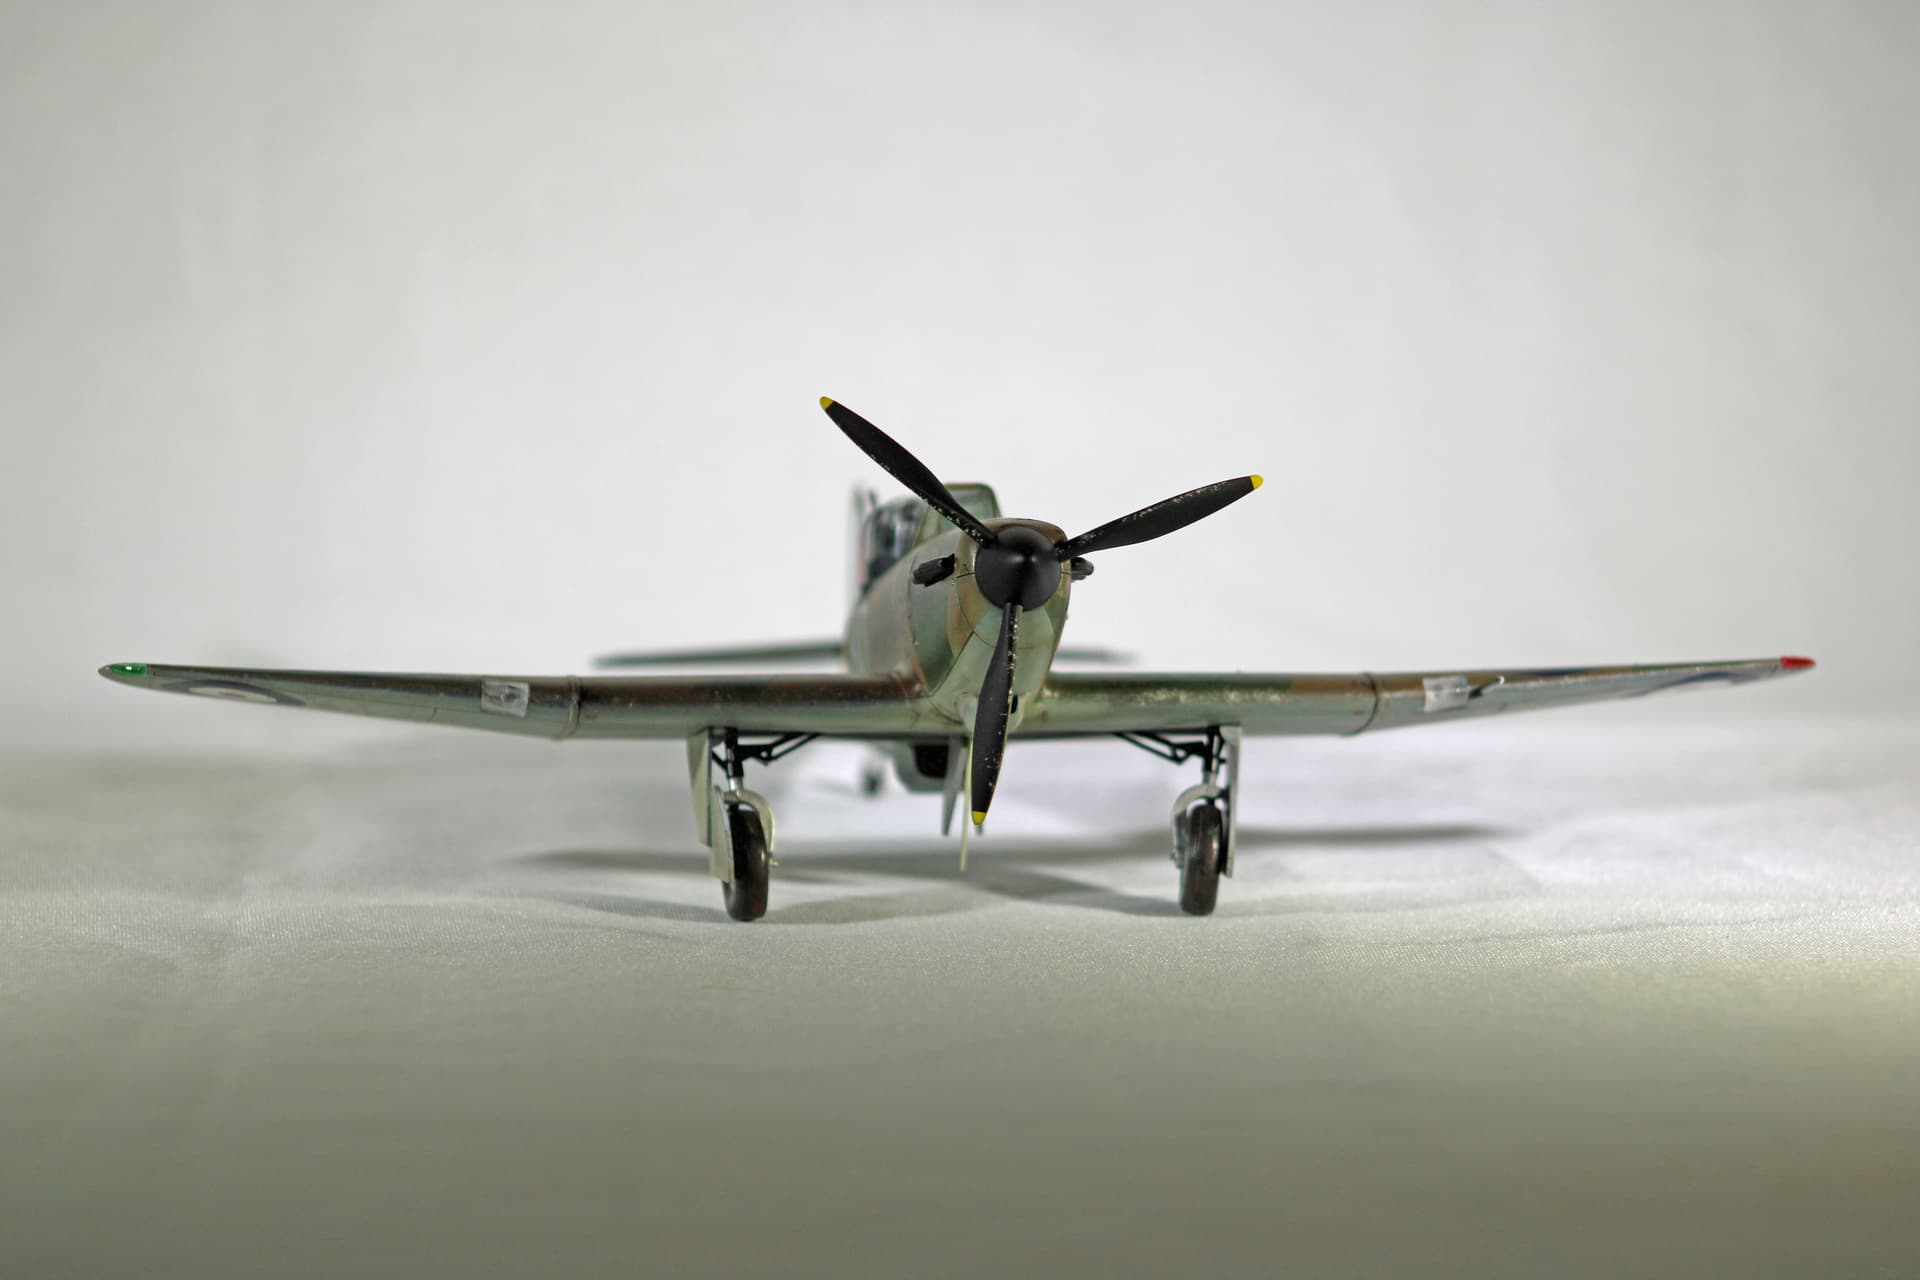
I abandoned the after-market exhaust stacks after looking more closely at all the BoB-era photos I could find of the Defiant. The kit parts were a match for every photo I found, whereas the after-market parts appear to be for a later in the war aircraft. I thought using the after-market parts would technically invalidate my build as a Battle of Britain Defiant, so this morning I prepped the kit parts with a coat of dark iron and put the resin stacks in my supplies box. I’m sure I’ll be able to use them for a late-war Spitfire or Hurricane.
I used a variety of Abteilung oils for much of the weathering, along with a couple of Flory washes and ground pastels. I am not entirely satisfied with my oil work, but it’s only the second build that I’ve used these oil paints.
Very nice job. I’m pretty fond of this plane dispite is not-so-glorious career. I did the same kit and found it to be a joy to build. I want to build my Sturmovik, Avenger, and Stuka and set all 3 together. Big rear gunner planes.
Nice job so far! I have two models of the same type from Airfix as well, but in 1/72 scale, my favorite scale for aircraft modeling since I don’t have too much space and I have many models to build. But the Boulton Paul Defiant Mk.I is one of my favorite RAF models despite not having been as successful as the Hurricane or Spitfire. Still it had its own style and flair. I own both the very old ('70s?) model as well as the completely refurbished one in that scale and one immediately recognizes the difference among the two. Not so much in size, which in both cases are equal, but especially in more refined details and interiors. As usual, also the decals coming with the model show a rather striking difference in quality although for the old one I bought some Superscale decals which in registry are more detailed and much better done. I am very curious to see how your 1/48 scale one comes out since I bet, seeing what you got thus far, must be rather more detailed than mine. Nice touch substituting the kit barrels with PE ones (they definitely look more real than the kit ones). Something I often do in my 1/35 scale tanks and artillery pieces.
I just notice your final results and i am rather impressed, great clean work! And yes, that’s how it would have looked when active. I never use oil paint for my weathering. When I do, I prefer using Tamiya weathering compounds or again, either AMMO MiG or AK Interactive products. To add more grit to it I also use, as you do, ground pastels slightly over sprayed with a little dead flat varnish, also by AMMO MiG applied with my airbrush.
Hey Steve!
Your Defiant really turned out good! Thank you for the heads up in regards to the assembly, much appreciated as I too have this kit!
Why don’t more mfgs have molded in seatbelts or at least decals? Then aftermarket companies would have nothing to do..
Seriously though, at least give us some!?
Happy Modeling,
Mike